---
title: "Activate Passkeys and Let Your Users Log in without a Password"
description: "Auth0 by Okta now supports passkeys! Here’s how you activate them so your users can enjoy passwordless login."
authors:
- name: "Joey deVilla"
url: "https://auth0.com/blog/authors/joey-devilla/"
date: "Oct 4, 2023"
category: "Identity & Security,Security,Passkeys"
tags: ["passkeys", "identity", "fido", "passwordless"]
url: "https://auth0.com/blog/activate-passkeys-let-users-log-in-without-password/"
---
# Activate Passkeys and Let Your Users Log in without a Password
## Passkeys Are Now Available in Auth0 by Okta!
Passkeys are a replacement for passwords, and they’re now a feature in Auth0! Your users can enjoy the convenience and enhanced security that passkeys provide.
If you’d like to find out more about what passkeys are, what the user experience is like, and how they work, take a look at this article on the Okta blog: [*_Adding Passkeys to Your Applications with Okta Customer Identity Cloud Powered by Auth0_*](https://www.okta.com/blog/2023/10/adding-passkeys-to-your-apps-with-okta-cic-powered-by-auth0/). It will provide you with plenty of background information about this new feature.
If you want to activate passkeys for your users, read on! You’ll be pleased that the process takes very few steps.
## Activating Passkeys
Passkeys are available as a feature on all Auth0 plans — even the free ones! This means that if you want to familiarize yourself with passkeys and their user experience, you can set up a free tenant and add passkey-enabled authentication to your applications at no cost.
### Good news for developers: you don’t have to update any code!

You don’t have to change any of your application code to support passkeys. The code that displays the Universal Login box with the email and password displays the new version with the _Continue with a passkey_ button once you enable passkeys in your tenant.
### How to activate passkeys
To enable passkeys for your users, sign into the Auth0 Dashboard, and if necessary, select a tenant.
In the left column menu, select _Authentication_ → _Database_. You will be taken to the _Database Connections_ page:

Remember that with passkeys, the authentication server stores the users’ public keys. This means that in order to enable passkeys, user information must be stored in an Auth0 database. **You cannot use a custom database if you want users to sign in with passkeys.**
Choose an existing Customer Identity Cloud database from the list or create a new one by clicking the _+ Create DB Connection_ button and then choose that database. In this example, we’ll enable passkeys on the default _Username-Password-Authentication_ database connection.
You should now be on the Settings tab of the database connection:
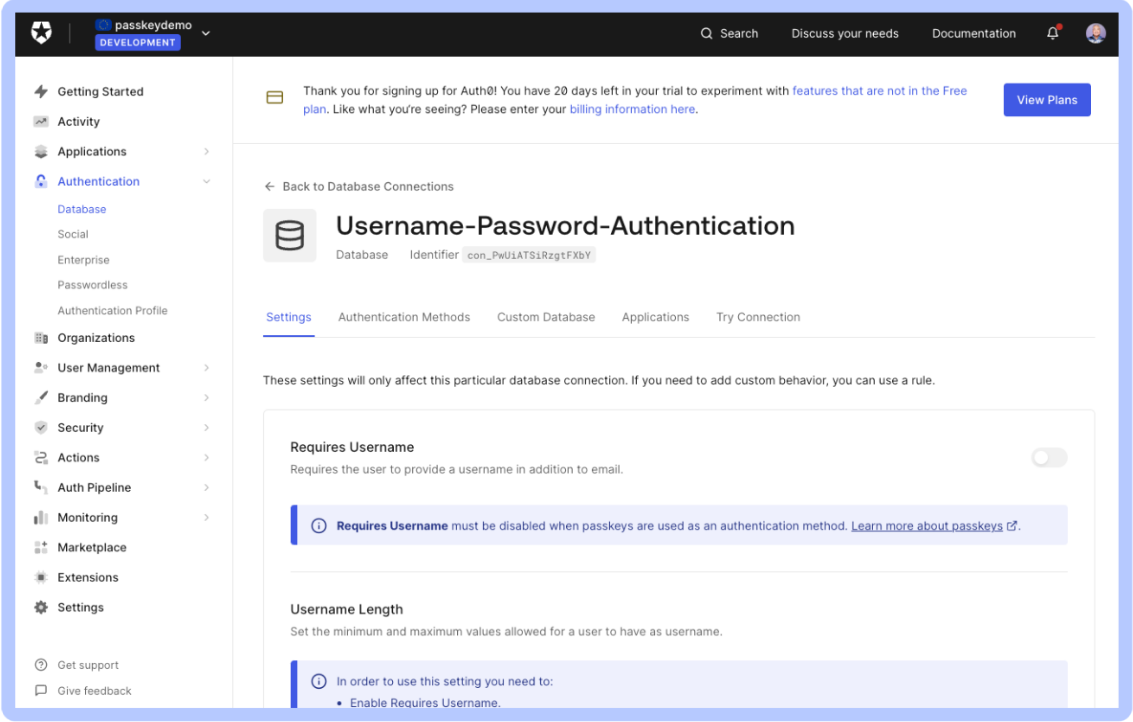
Click the _Authentication Methods_ tab. This is where you activate passkeys:
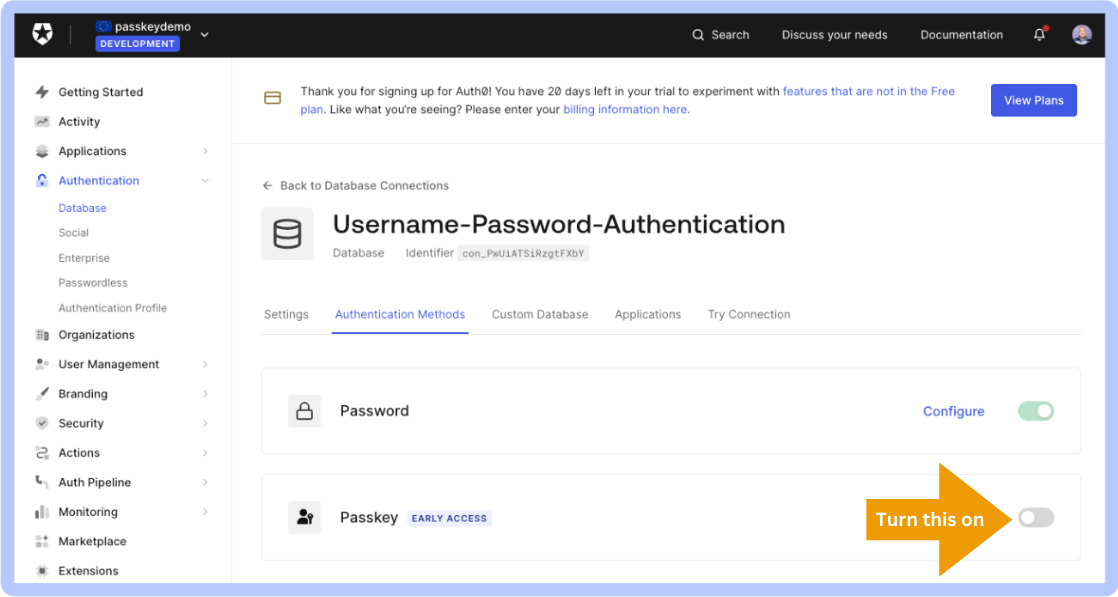
Turn on the _Passkey_ switch. This will activate passkeys for the tenant’s users.
Depending on your current database setup, you might need to change some settings before you can enable passkeys. You’ll know this is the case if you click the _Passkey_ switch and see a pop-up like this:

Click the link for any item marked _PENDING_ and make the required changes. For example, if “New Universal Login Experience must be enabled:” is _PENDING_, click that link to go to the login experience page and enable the New Universal Login.
Here are all the required configurations for passkeys:
* Enable these features:
* **Identifier First login flow.** The _Identifier First_ login flow presents the user with a screen where they enter their identifier, followed by another step where the user provides proof of their identity, such as a password or confirmation from a face or fingerprint recognition system. It differs from the _Identifier + Password_ login flow, which presents the user with a single screen to enter both their email and password.
* **New Universal Login Experience.** The New Universal Login Experience provides many improvements over the Classic Universal Login Experience, including support for the W3C/FIDO Web Authentication API, which is necessary for passkeys.
* Disable these features:
* **Custom Login Page.** Currently, the login flow for passkeys does not support custom login pages.
* **Requires username.** With passkeys, there is no need for an additional text field for the user to enter a username.
* **Use my own database.** Passkeys require a specific database setup, so only the Customer Identity Cloud database is allowed when passkeys are enabled.
Once you’ve met all the prerequisites for passkeys, you can enable them. The page should look like this:
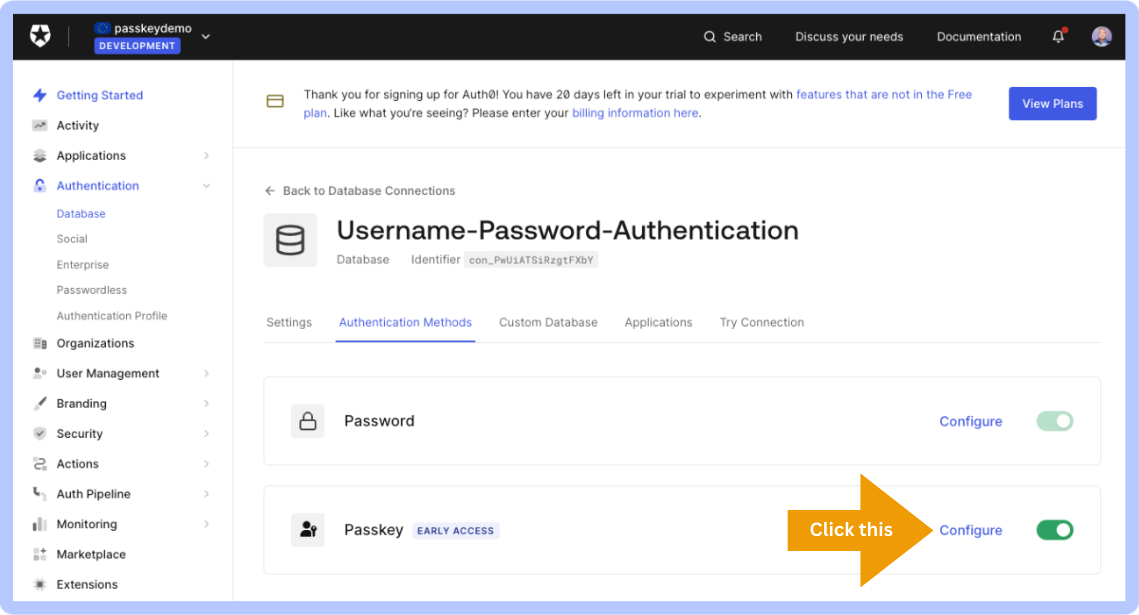
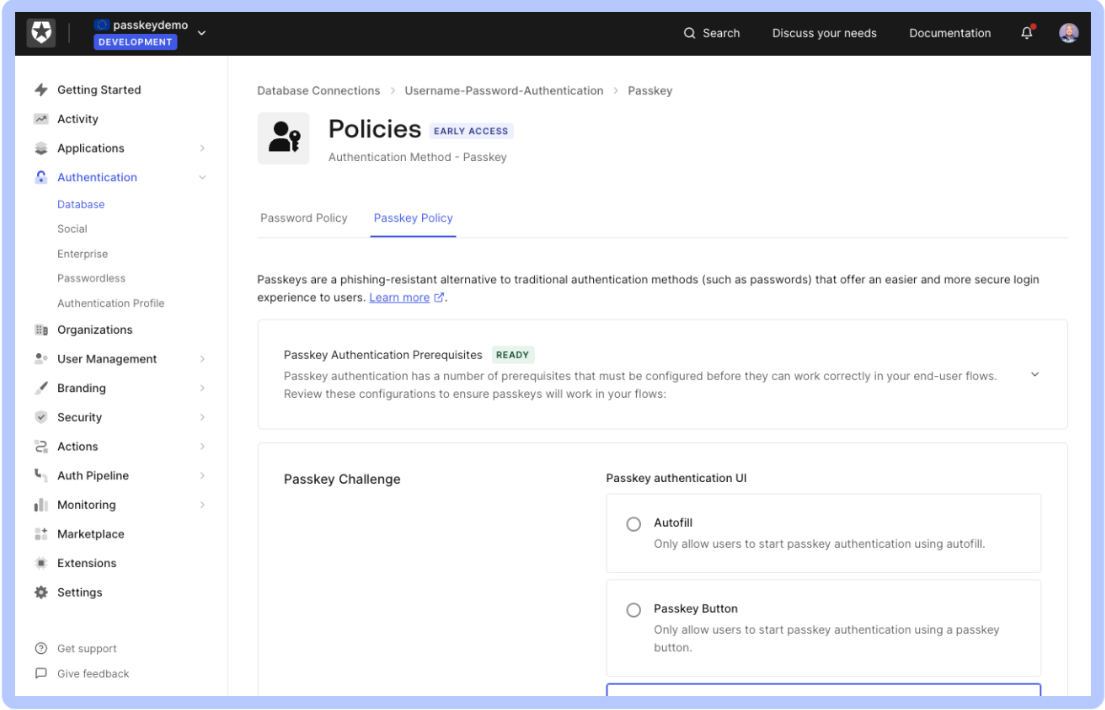
You can now configure the settings for passkeys. Do this by clicking the _Configure_ link for the _Passkey_ item. This will take you to the _Passkey Policy_ tab of the _Policies_ page for the database connection:
Let’s take a closer look at each of the settings areas on this page.
The first section is the _Passkey Challenge_ section, which defines how Universal Login presents passkey options to the user:
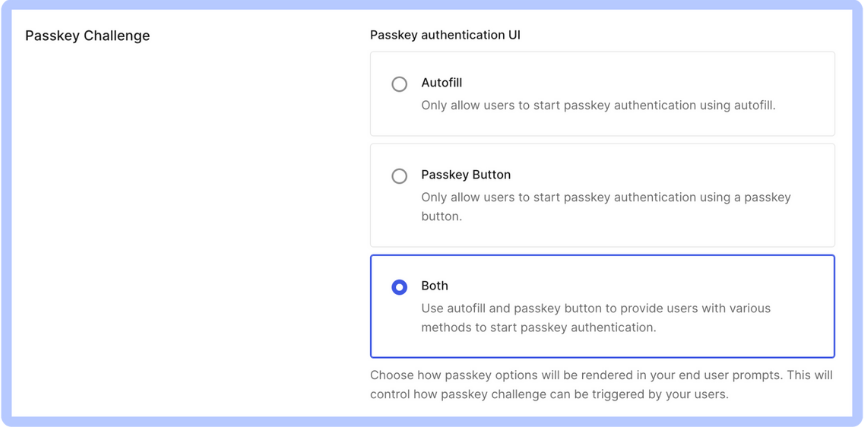
The default selection, _Both_, results in a Universal Login box that looks like this:
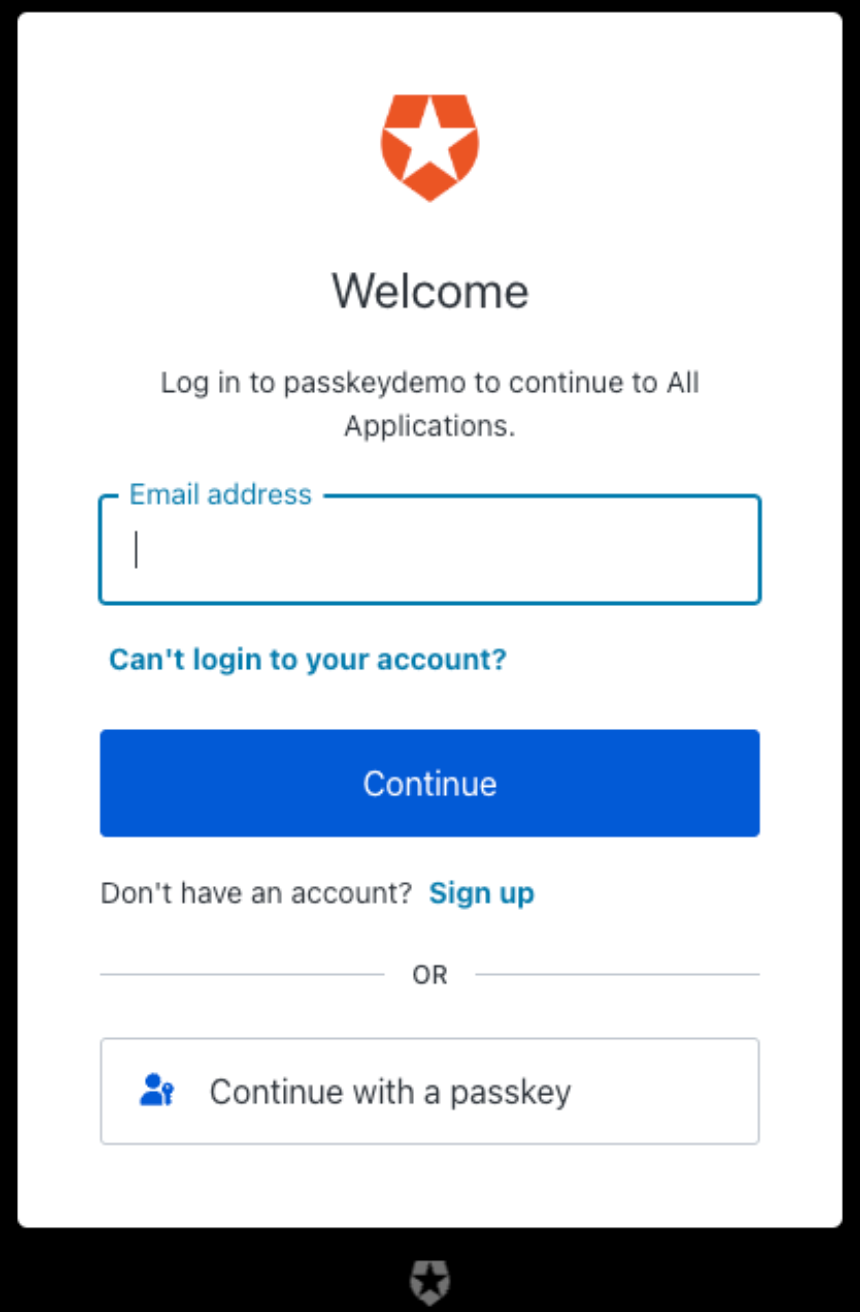
This version of the Universal Login box provides two options for logging in with a passkey. First, there’s the very obvious _Continue with a passkey_ button at the bottom, which presents a list of passkey options when pressed.
There’s also the less obvious autofill. It appears when you click on the _Email address_ field, also providing passkey options:
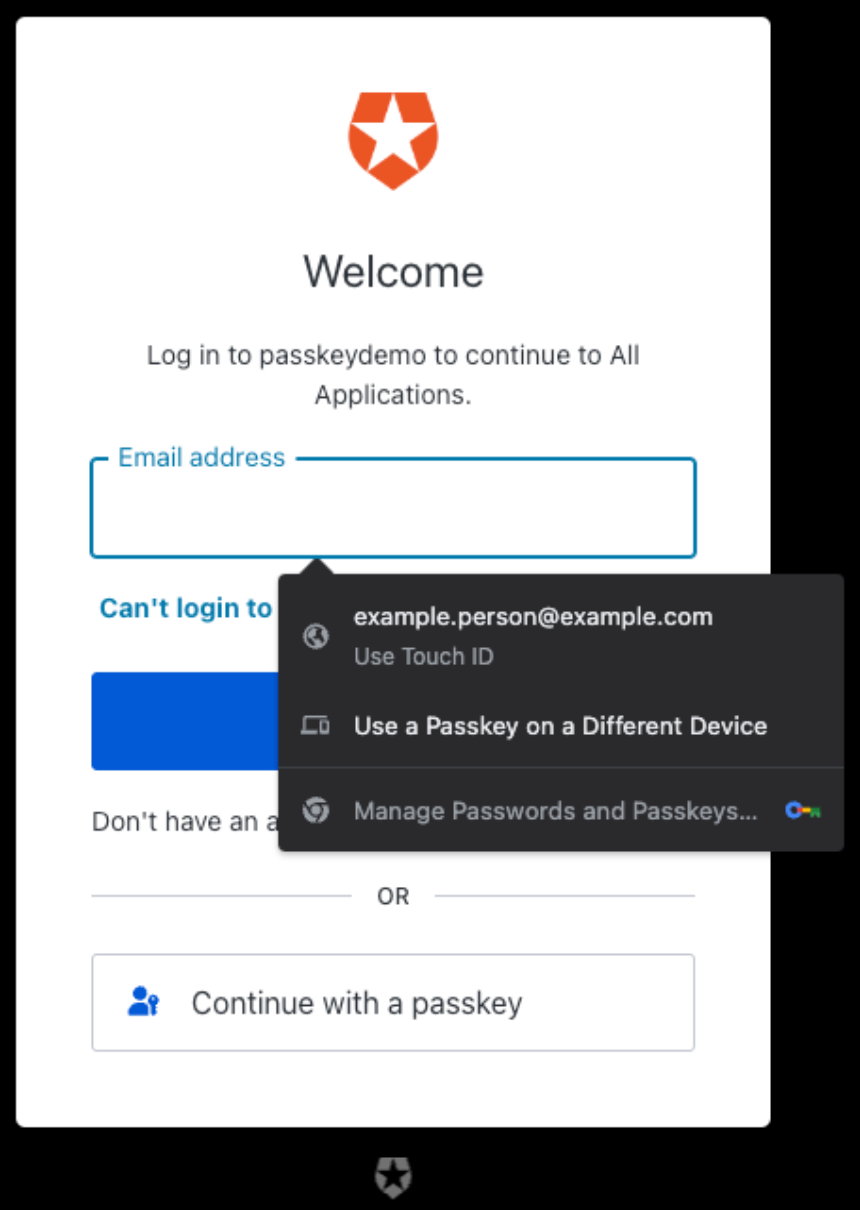
This is where the “discoverable” part of passkeys comes in. The user doesn’t have to type in their email address to log in because the browser is able to discover this information.
Since passkeys will be new to most users, we recommend providing users with as many options as possible by selecting the _Both_ option.
The next section contains the enrollment controls:
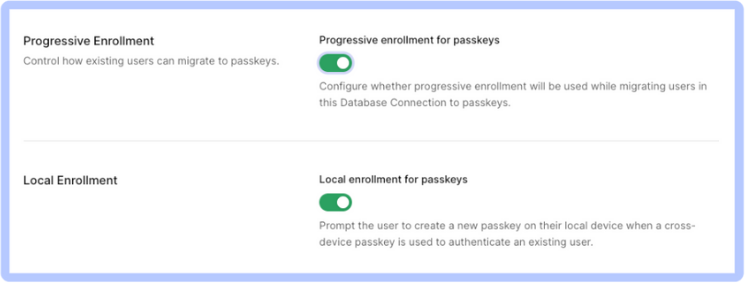
We recommend that you turn on both _Progressive Enrollment_ and _Local Enrollment_, as they make for a better user experience. This is especially true for the _Local Enrollment_ option, which lets users create a new passkey on their local device.
## Take Passkeys for a Test Run
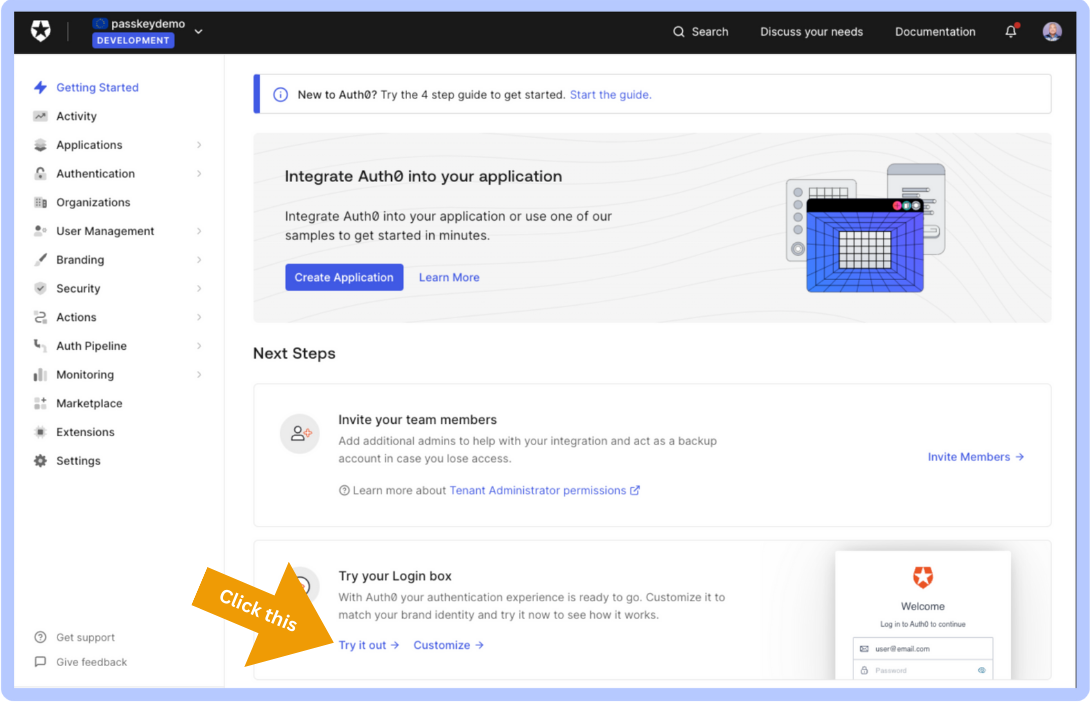
Now that you’ve enabled passkeys, it’s time to try them out. Click on _Getting Started_ in the left column menu, then click the _Try it out_ link in the _Try your Login box_ section:
You’ll see the Universal Login box:
Create a new account by clicking the login box’s _Sign up_ link. You’ll see this:
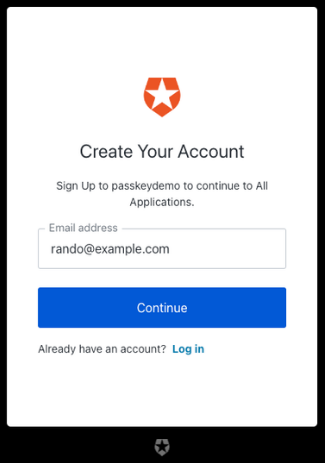
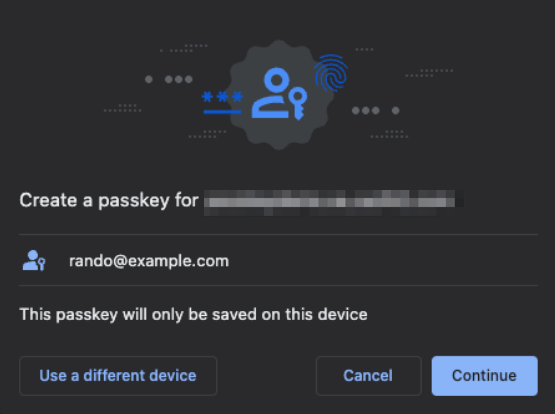
Enter an email address into the field and click the _Continue_ button. You’ll be given the option to create a passkey:
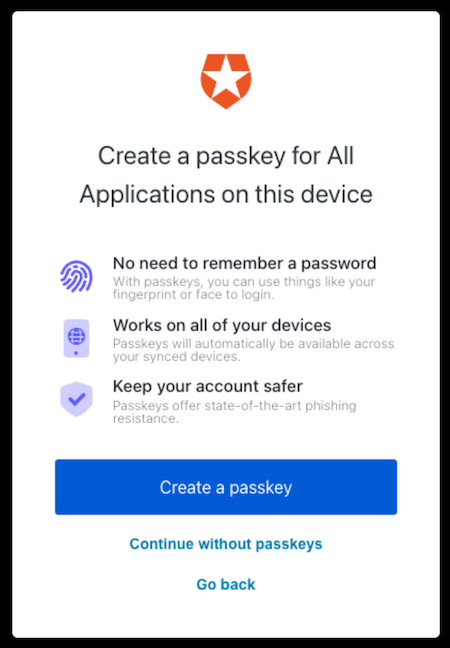
Click the _Create a passkey_ button. You’ll see this pop-up:
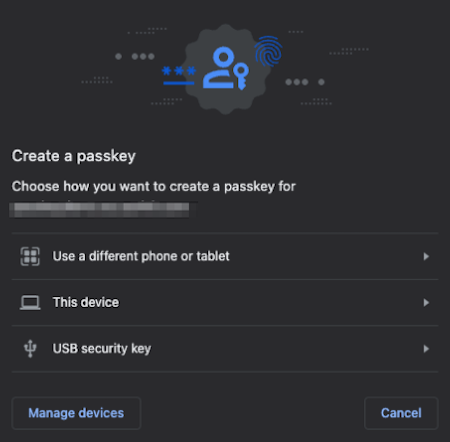
Select the _This device_ option. The pop-up will be replaced with this:
Click _Continue_ to create a passkey on your computer. You’ll then be asked to verify your identity with your computer:
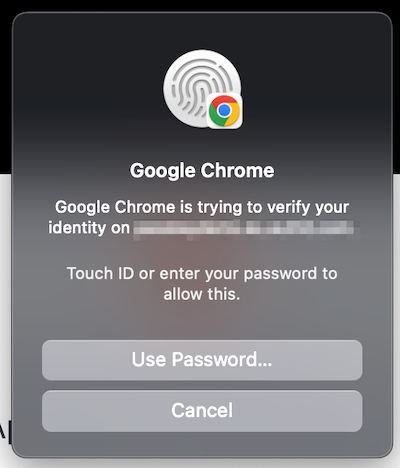
Once you’ve authenticated yourself, you’ll see this sign of success:

Congratulations! You’ve successfully enabled passkeys on your tenant!
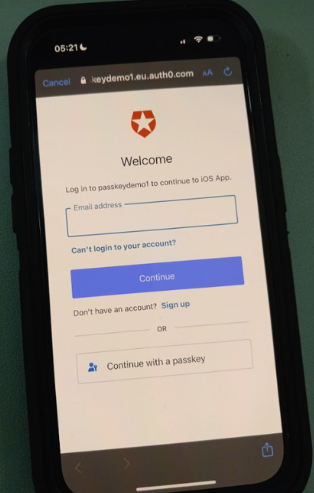
Try creating passkeys using your tenant’s applications and then logging in. Here’s one of my mobile apps authenticating against my passkey-enabled tenant:
## Conclusion
Activate passkeys now and see how you can give your users a more convenient, more secure login experience!
* If you’re new to Okta Customer Identity Cloud Powered by Auth0, sign up for a free trial account!
* If you already have an account, you’ll want to look at our [passkeys documentation](https://auth0.com/docs/authenticate/database-connections/passkeys).
* Be sure to read the companion article to this piece, [*_Adding Passkeys to Your Applications with Okta Customer Identity Cloud Powered by Auth0_*](https://www.okta.com/blog/2023/10/adding-passkeys-to-your-apps-with-okta-cic-powered-by-auth0/)!