
One of the most straightforward ways to secure your applications is to limit the IP addresses from which users can log in. This approach reduces your attack surface by allowing you to restrict access to a region, a subnet, a VPN, or even only to devices accessing your on-premises network. It may help your application meet compliance and data protection requirements.
You could build this functionality into your application, but with Auth0’s Actions, you don’t have to. Just as Auth0 saves you from the surprisingly big task of implementing authentication and authorization, Auth0 Actions can save you from doing a lot of work to customize your application’s login flow. With a few lines of JavaScript, you can ensure that users log in only from IP addresses you trust.
What are Auth0’s Actions?
Actions are serverless functions hosted by Auth0 that activate in response to specific events during authentication workflows, such as when the user logs in, signs up for an account, or updates their password. You can write your own custom Actions in Node.js (complete with support for NPM Modules) or use one of the many third-party Actions in the Auth0 Marketplace.
Once you’ve written or acquired an Action, insert it into the workflow you want to modify using a drag-and-drop editor. This system makes it simple to see what the workflow does and allows administrators who don’t code to change it without requiring developer intervention.
All you need to see how Auth0 Actions can help secure your application is an Auth0 account. If you don’t already have an account, you can sign up for a free one.
Denying Login Requests with Auth0 Actions and the Login Flow
An Action that allows only users from a set of given IP addresses or address blocks to log in relies on two key features:
- The Login flow
- The
methodapi.access.deny()
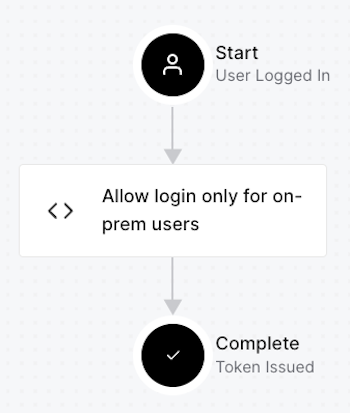
The Login flow is the authentication workflow that takes place immediately after the user logs in and before Auth0 issues an ID token. You add Actions to the Login flow to modify its behavior, as shown below:
The
api.access.deny()Here’s the syntax for calling
api.access.deny()api.access.deny(reason)
It expects a single parameter:
reasonFor more details about using Actions to allow or deny login requests, see this article: Permit or Deny Login Requests Using Auth0 Actions.
Limiting Login to Trusted IP Addresses
Let’s start with an Action that allows the user to log in if they’re doing so from a given IP address or a small number of them (maybe two or three dozen at most).
Create the Action
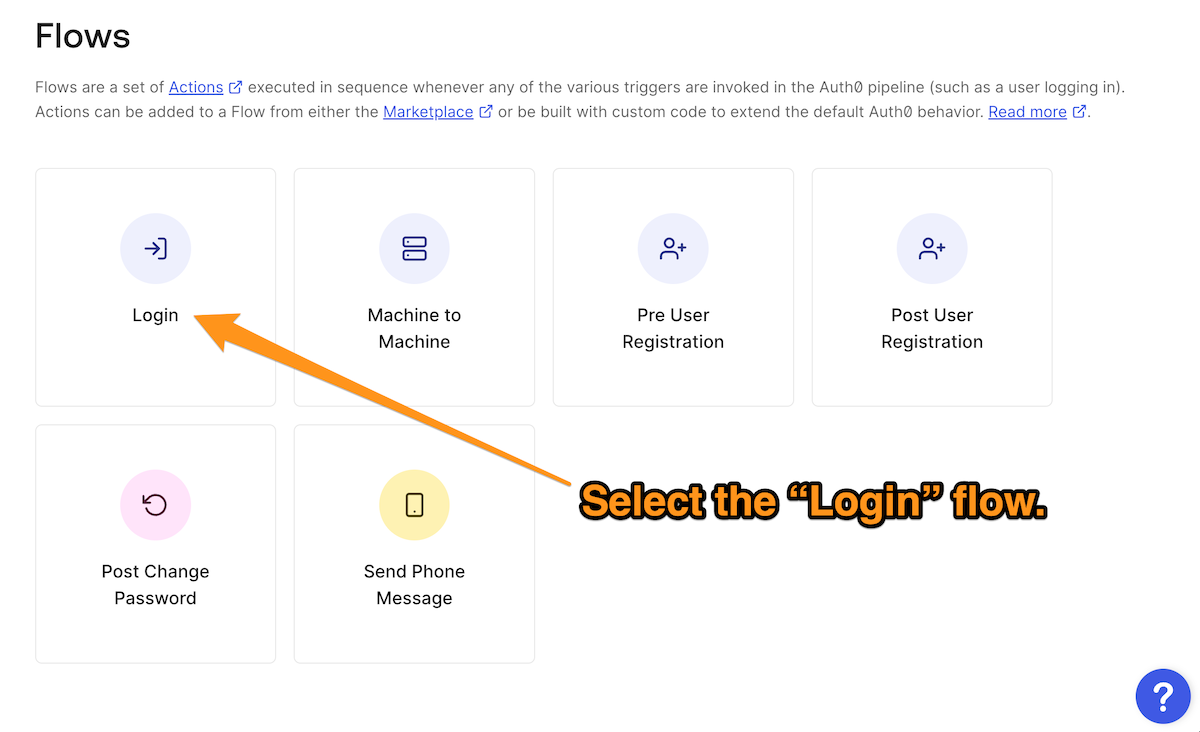
The first step is to log into the Auth0 Dashboard for your tenant and select Actions from the left sidebar menu, followed by Flows. This will take you to the Flows page, where you should select the “Login” flow:
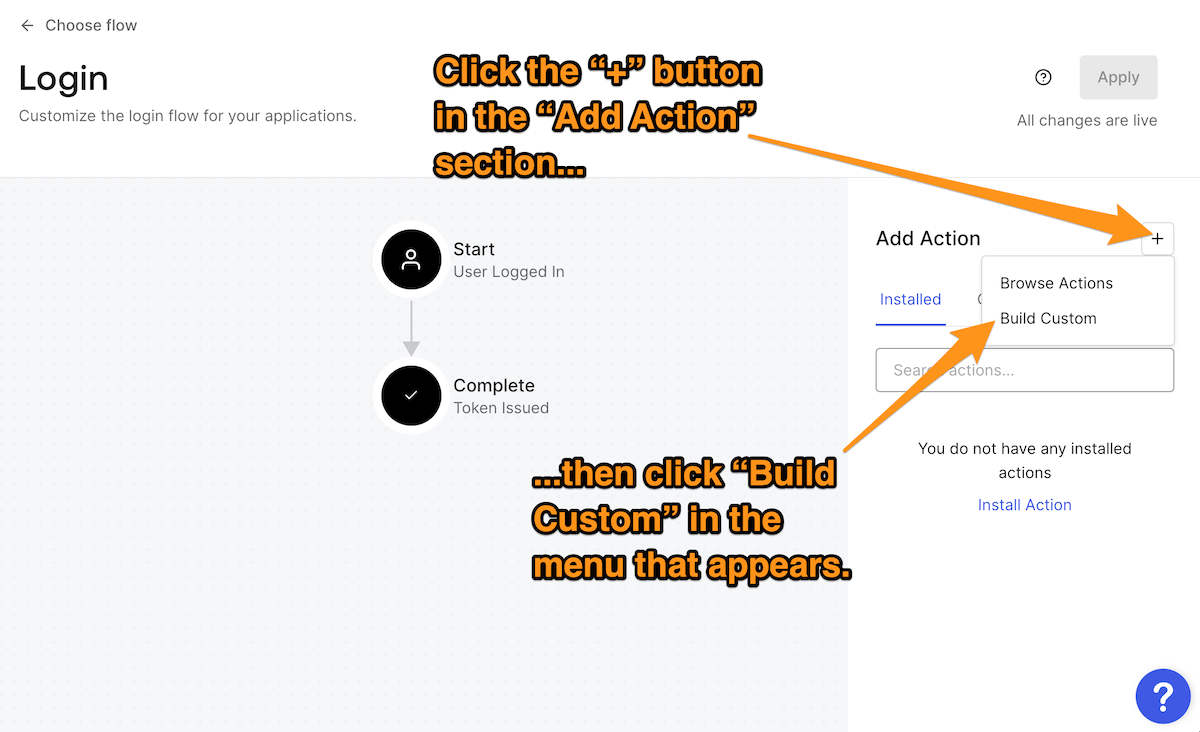
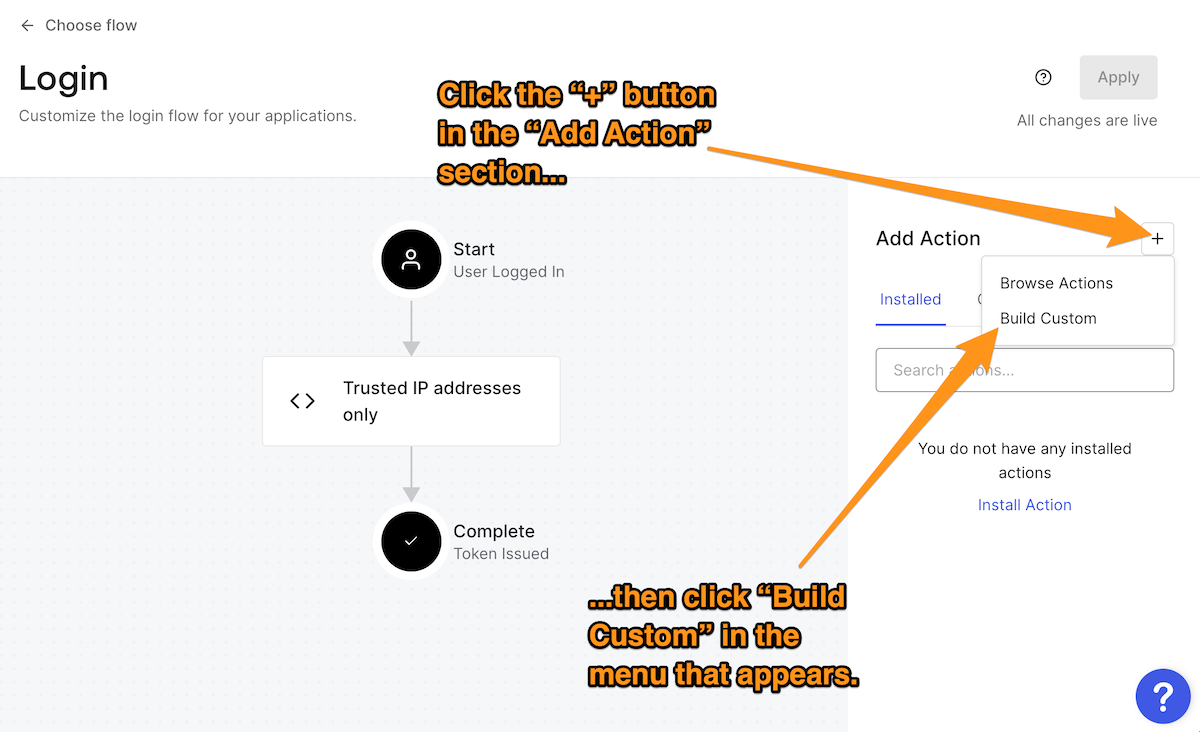
Once you’re on the Login page, create a new custom Action by clicking on the + button in the Add Action section and then selecting the Build Custom item in the menu that appears:
The Create Action dialog box will appear. Enter a name for the new Action — I used
Trusted IP addresses only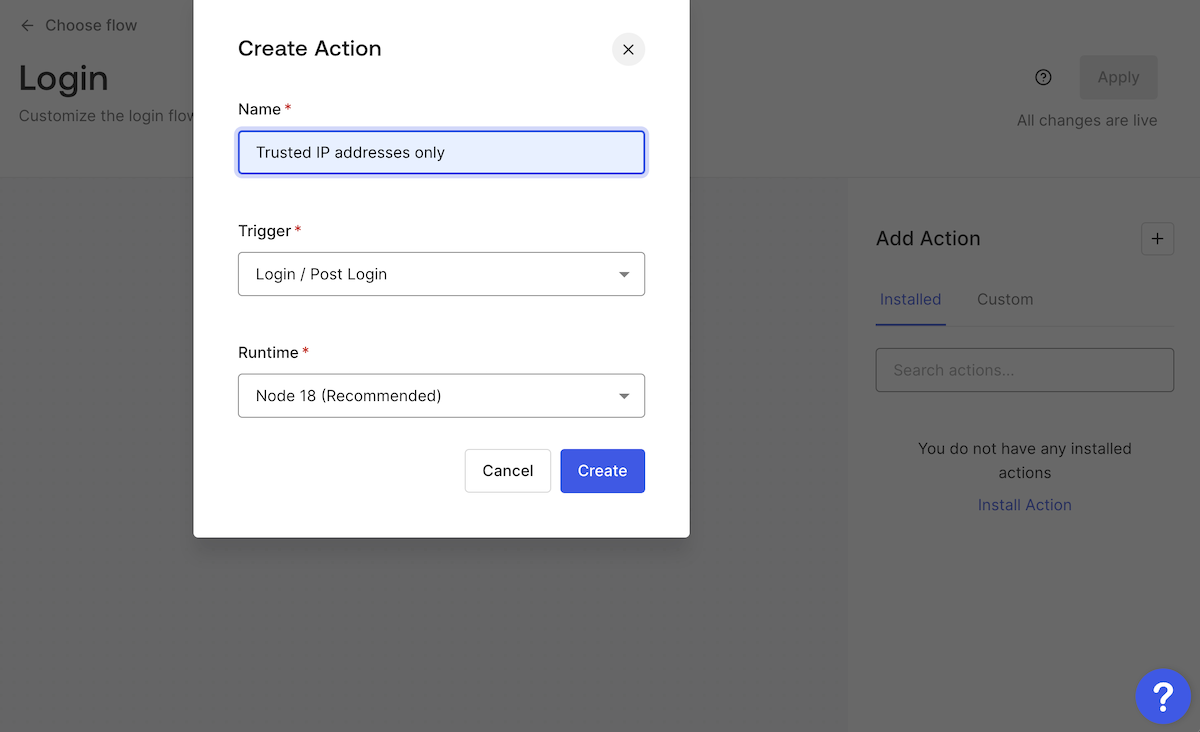
This will create a new Action, and you’ll see this code editor:
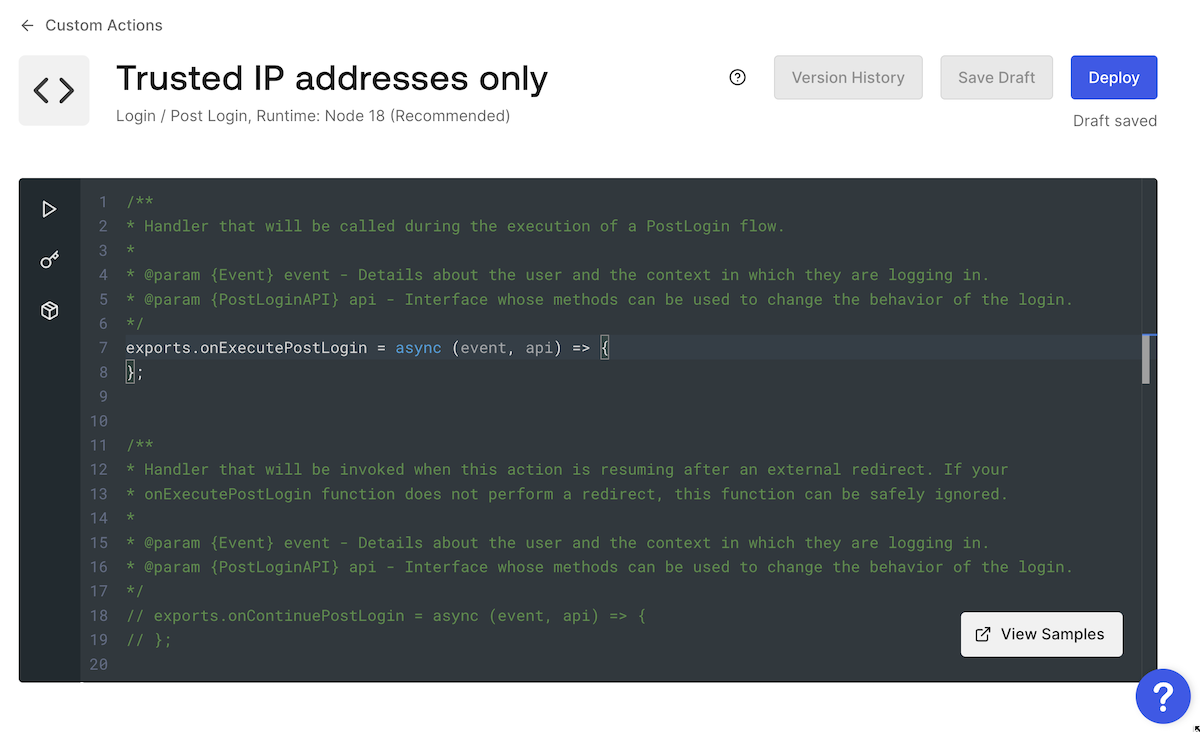
Actions can use these two JavaScript functions to affect the Login flow:
: Specifies what should happen immediately after a successful user login and before the access token is issued. This function has the following parameters:onExecutePostLogin
: Contains details about the login request, such as information about the user and the login context.event
: Contains methods to change the login’s behavior.api
: Defines what should happen when control returns to the Login Action after a redirect to another web page. It’s used only when the user returns after being redirected, which is why it’s commented out by default.onContinuePostLogin
In this example, we’re only using
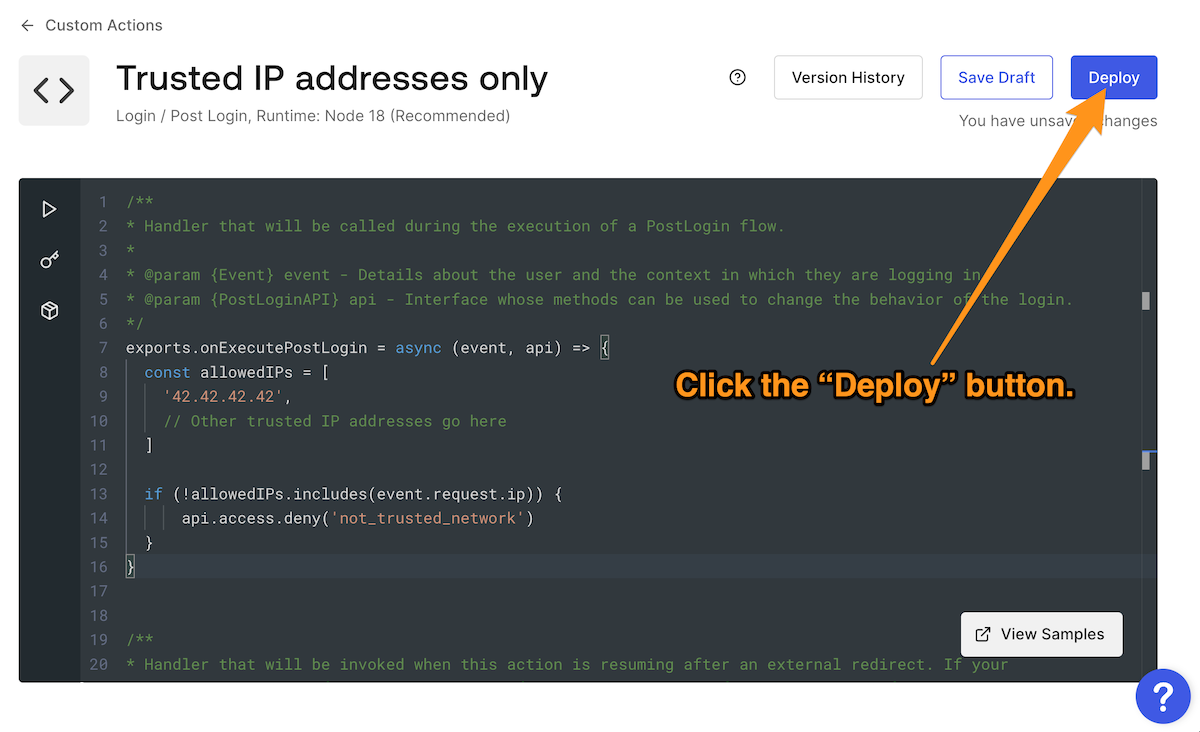
onExecutePostLoginexports.onExecutePostLogin = async (event, api) => { const allowedIPs = [ '42.42.42.42', // Replace this with your IP address // Other trusted IP addresses go here ] if (!allowedIPs.includes(event.request.ip)) { api.access.deny('Please log in from a trusted IP address.') } }
The code above declares
allowedIPsevent.request.ipallowedIPsallowedIPsReplace the placeholder IP address in
allowedIPs'42.42.42.42'After updating the code, click the Deploy button to save your changes and deploy the Action:
Add the Action to the Login flow
Now that you have created the Trusted IP addresses only Action, you can add it to the Login flow. Return to the Login flow page by selecting Actions → Flows from the left sidebar menu, and then clicking the Login button on the Flows page:
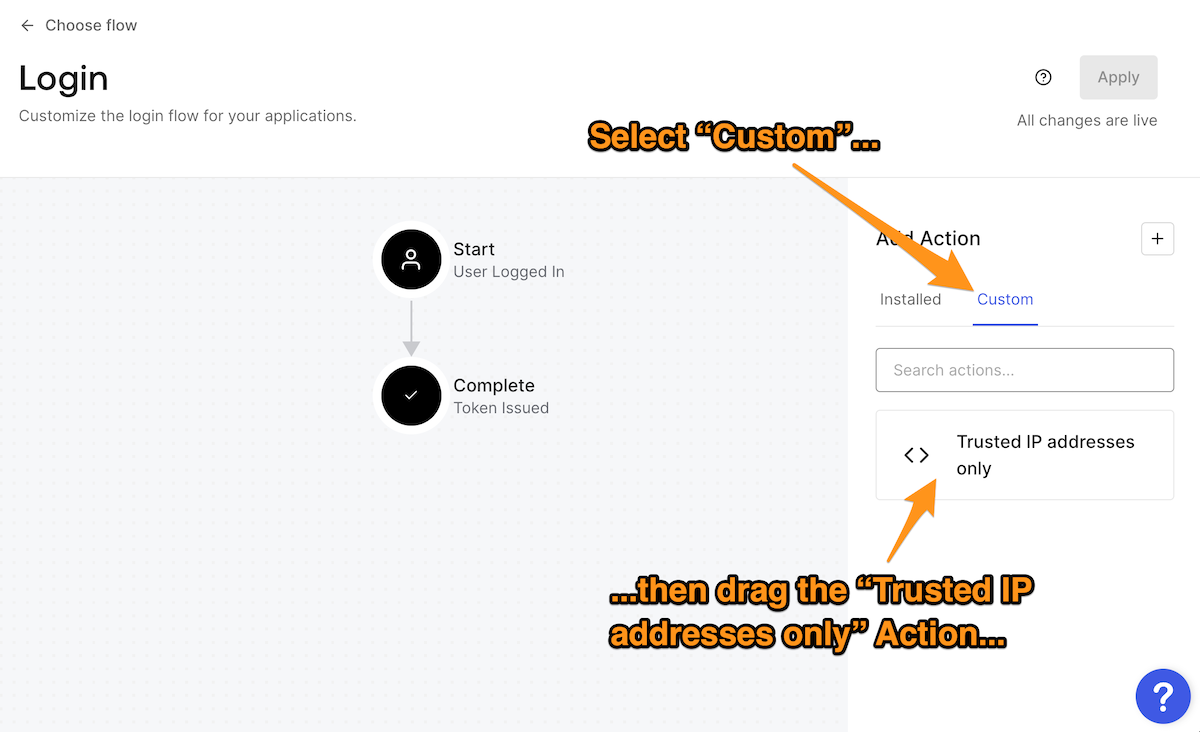
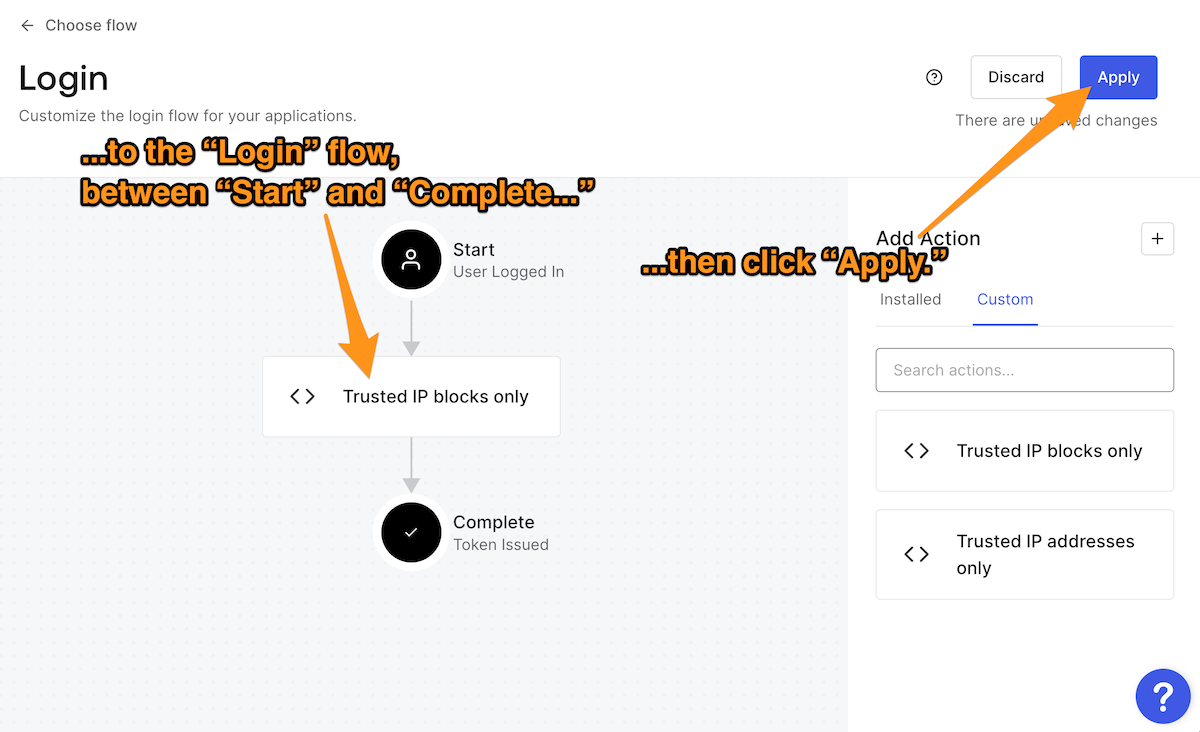
In the Add Action section on the right side of the page, click Custom. This will display the list of custom Actions that you created for the Login flow. Drag the Trusted IP addresses only Action to the Login flow diagram and drop it between Start and Complete.
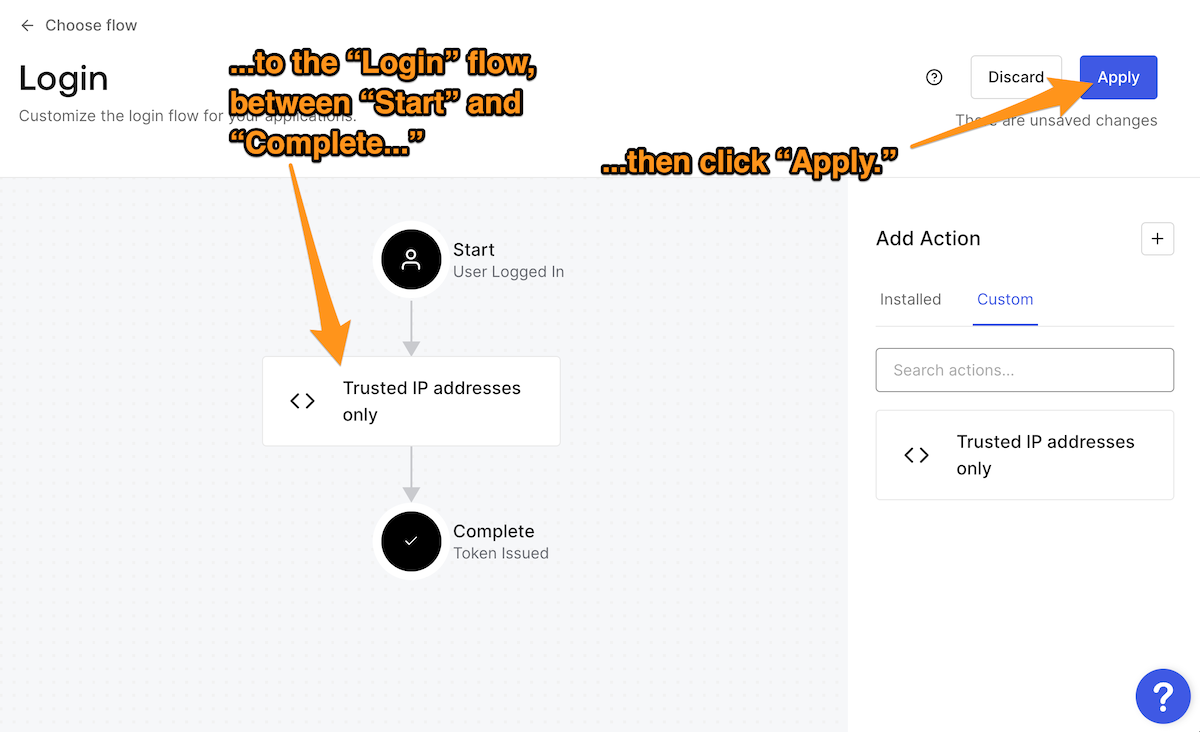
You must apply the change you just made to the Login flow before leaving the page. Do this by clicking the Apply button near the upper right corner of the page.
Test the Action
Now that the Trusted IP addresses only Action is part of the Login flow, it’s time to test it.
The quickest way to test your tenant’s Login flow is to use the login box testing facility built into the Dashboard. You’ll find it on the Getting Started page, which you access by clicking Getting Started in the left sidebar menu. About halfway down the page, you’ll see the Try your Login box section, with a link labeled Try it out. Click that link to try out your new login flow:
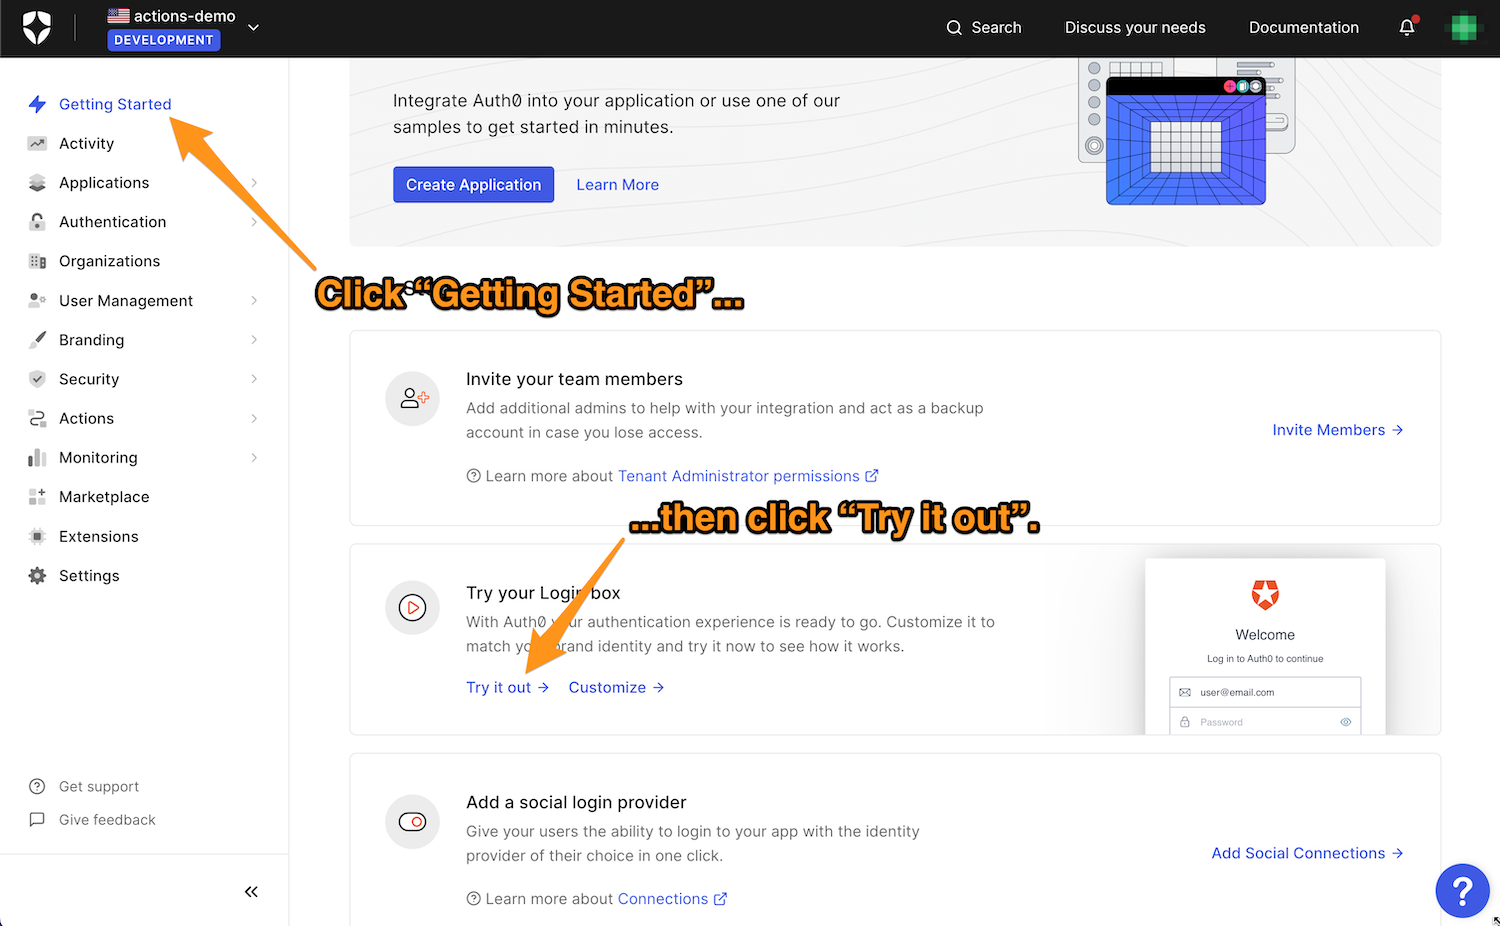
You’ll see a login box if you’re already not logged in as one of your tenant’s users; if this is the case, log in.
If the IP address of your computer is one of the IP addresses in your Action’s
allowedIPs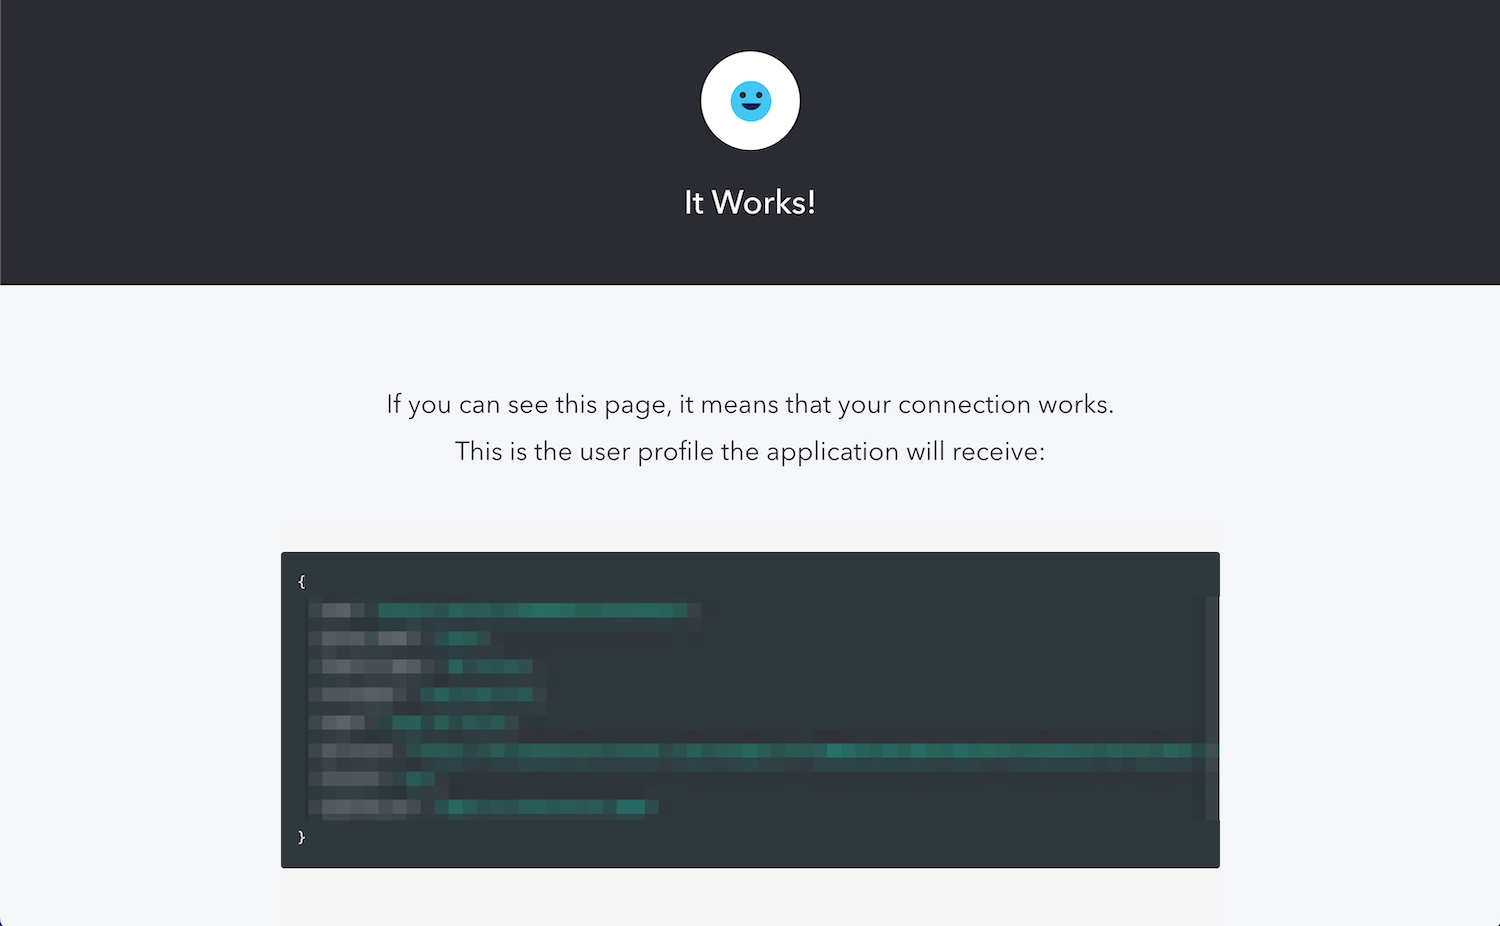
To test the case where a user is trying to log in from an IP address that isn’t trusted, edit the Action so that the
allowedIPs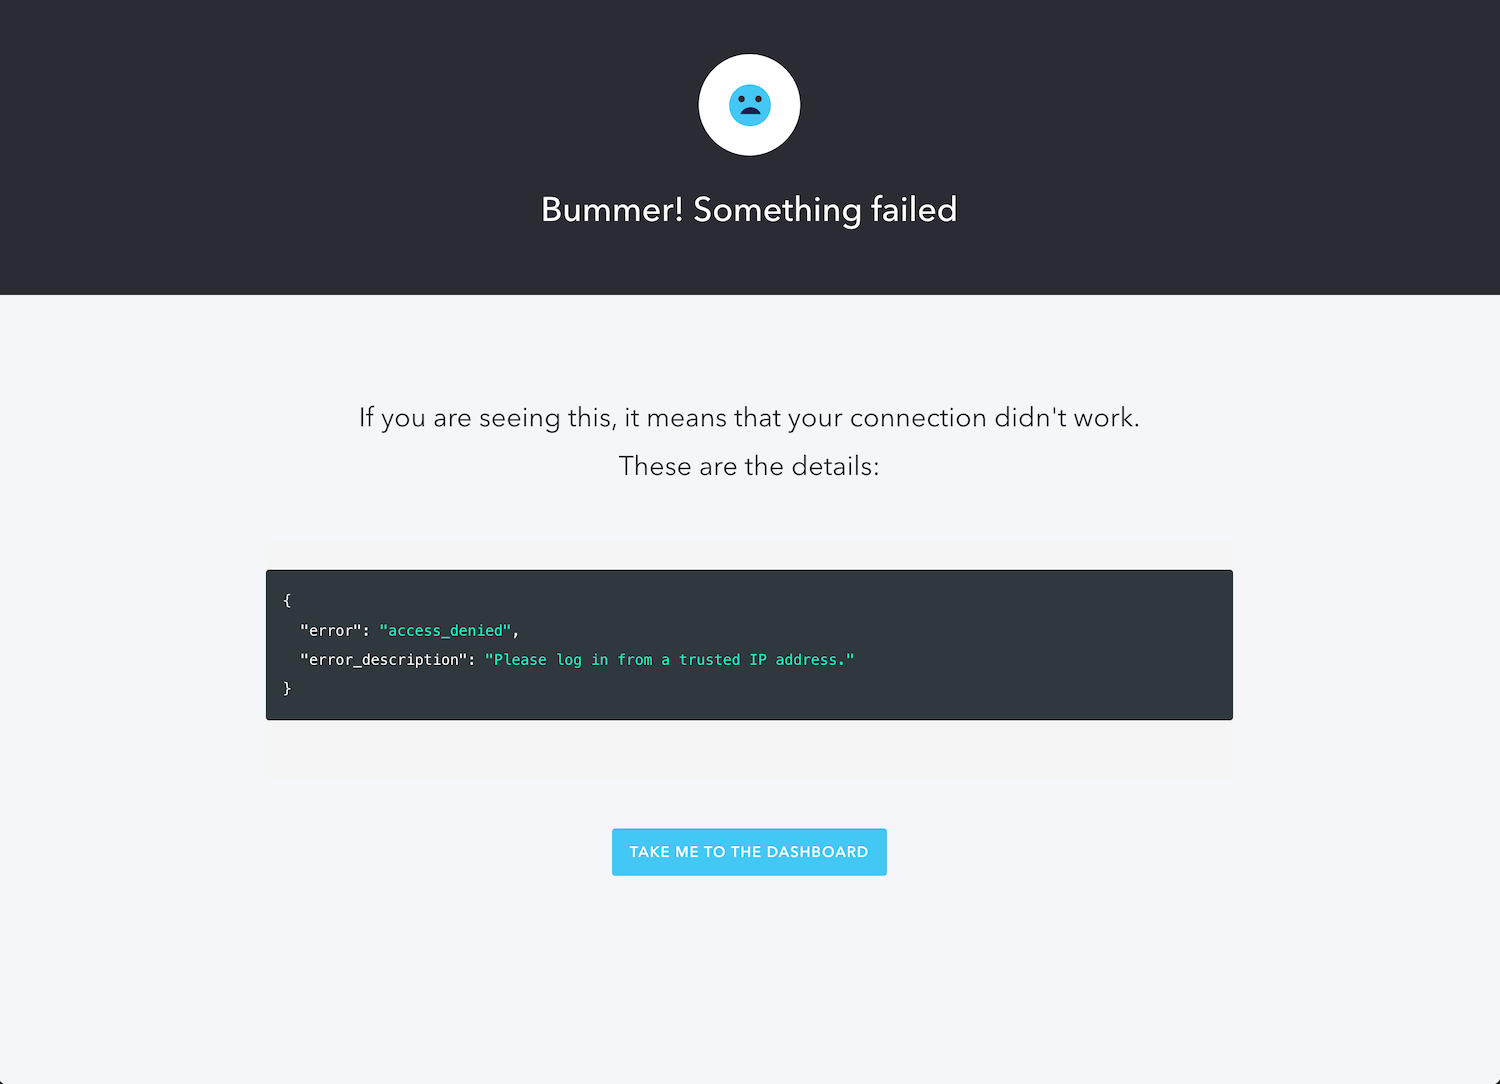
Note that the
"error_description"Please log in from a trusted IP address.api.access.deny()Limiting Login to Trusted IP Blocks
The Trusted IP addresses only action works well if you want users to log in only from a manageable number of addresses — perhaps two or three dozen at most. What if you wanted to allow logins from a larger set of addresses, such as
42.42.42.x42.42.x.y42.x.y.zxyzLet’s create an Action that determines if the user is logging in from a given IP address block.
Create the Action
Once again, in the Auth0 Dashboard for your tenant, return to the Login flow page — select Actions from the left sidebar menu, followed by Flows, and then select the “Login” flow. Create a new custom Action by clicking on the + button in the Add Action section and then selecting the Build Custom item in the menu that appears:
You’ll see the Create Action dialog box will appear. Enter a name for this Action — I used
Trusted IP blocks only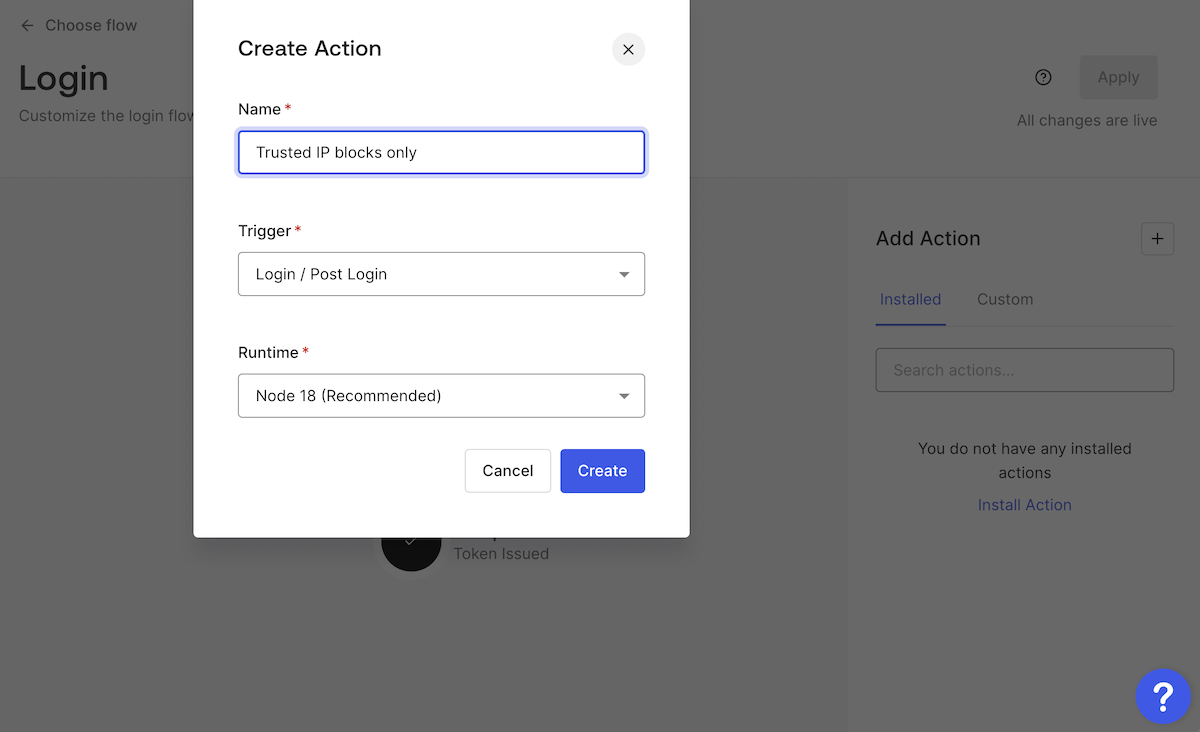
Add the netmask
dependency
netmaskThe “secret sauce” for this Action is the
NetmasknetmaskNetmaskcontains()Fortunately, you can add Node dependencies to your Actions with a couple of clicks. The first of these clicks is on the Dependencies button — it’s the “package” icon on the left side of the Action code editor:
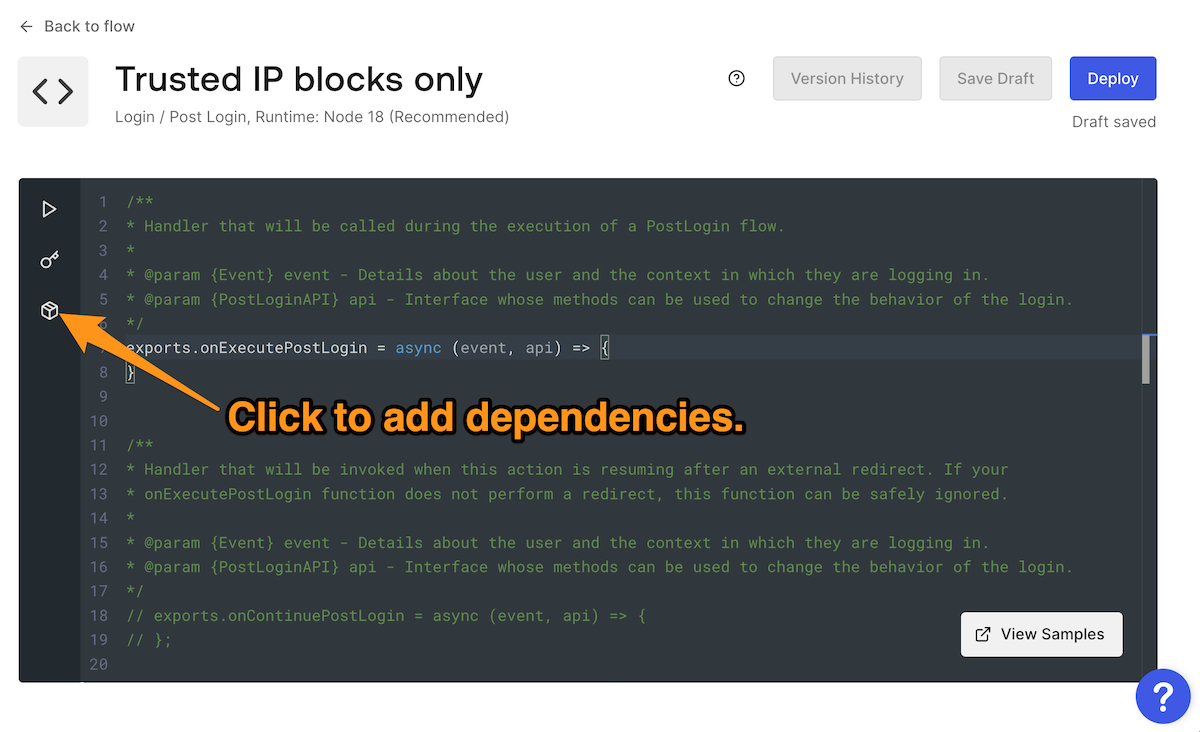
The Dependencies pane will appear on the left side of the code editor.
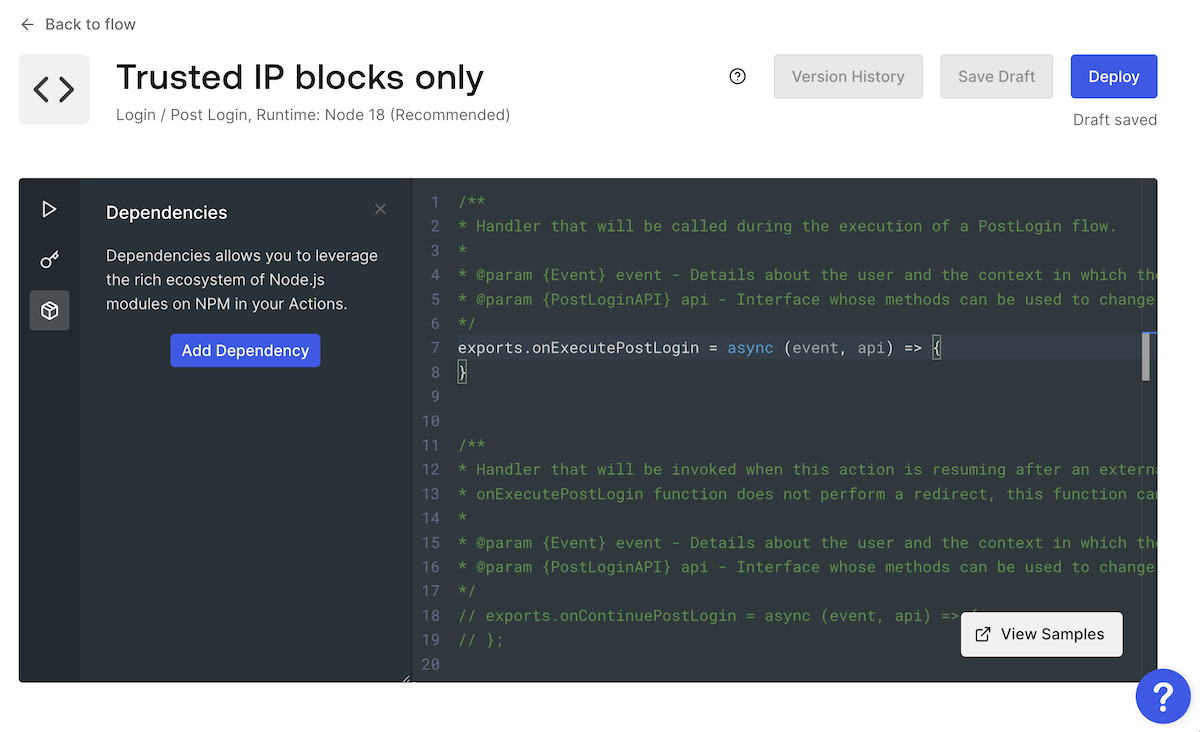
The Dependencies pane will appear on the left side of the code editor. Click the Add Dependency button:
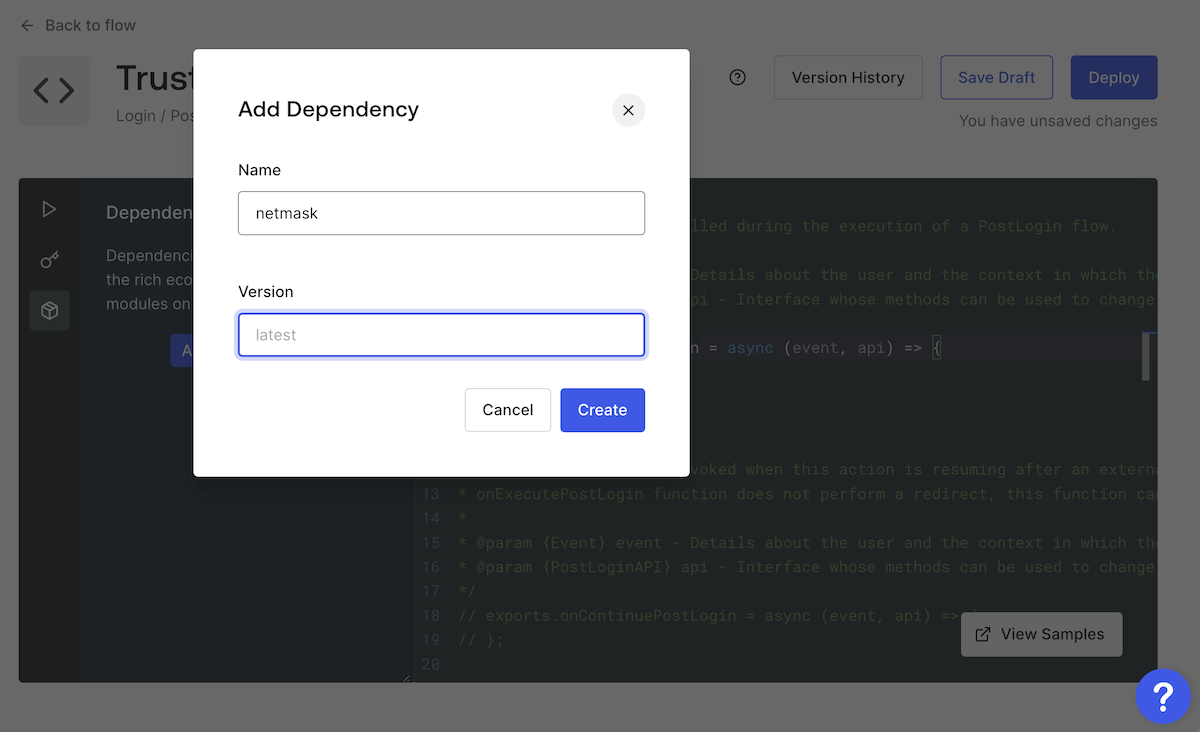
In the Add Dependency dialog box that appears, enter
netmasklatest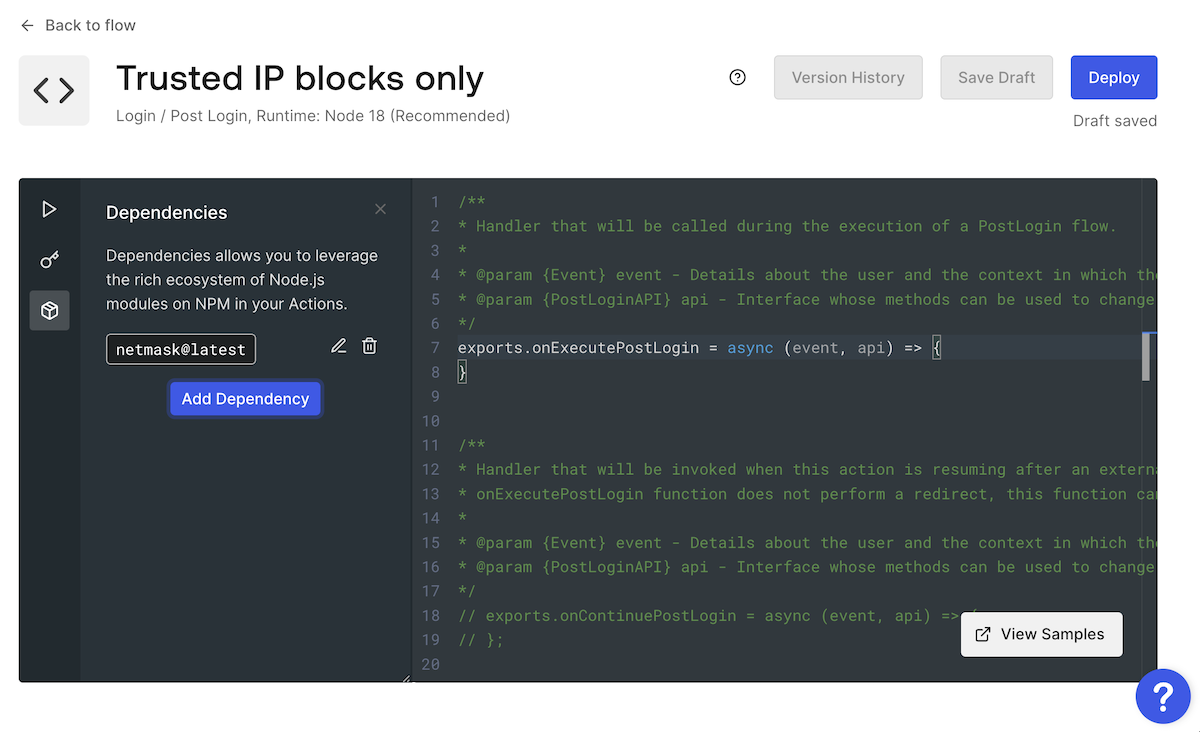
The
netmaskCode the action
In the editor, update the Action’s code to the following:
exports.onExecutePostLogin = async (event, api) => {
    const Netmask = require('netmask').Netmask
    const trustedIPBlocks = [
        new Netmask('42.42.42.0/24'), // Allows IP addresses in 42.42.42.*
        // Other trusted IP blocks go here
    ]

    for (const trustedIPBlock of trustedIPBlocks) {
        if (trustedIPBlock.contains(event.request.ip)) {
            break
        }
        api.access.deny('Please log in from a trusted IP address.')
    }
}
Just as we defined a collection of trusted IP addresses in the Trusted IP addresses only Action, we’re defining a collection of trusted blocks of IP addresses in an array named
trustedIPBlocksThe
trustedIPBlocks’42.42.42.42/24’- The part before the
character,/
, represents the IPv4 address42.42.42.42
, and42.42.42.42 - The part after the
character,/
, represents the number of24
bits in the subnet mask1
, a 32-bit number where the leftmost 24 bits are255.255.255.0
s and the remaining bits are1
s.0
The
42.42.42.42/2442.42.42.042.42.42.255Changing the number of bits in the subnet mask can expand or contract the block. For example,
42.42.42.42/1642.42.0.042.42.255.255Replace the placeholder IP block in
trustedIPBlocks'42.42.42.42/24'’{your IP address}/24’{your IP address}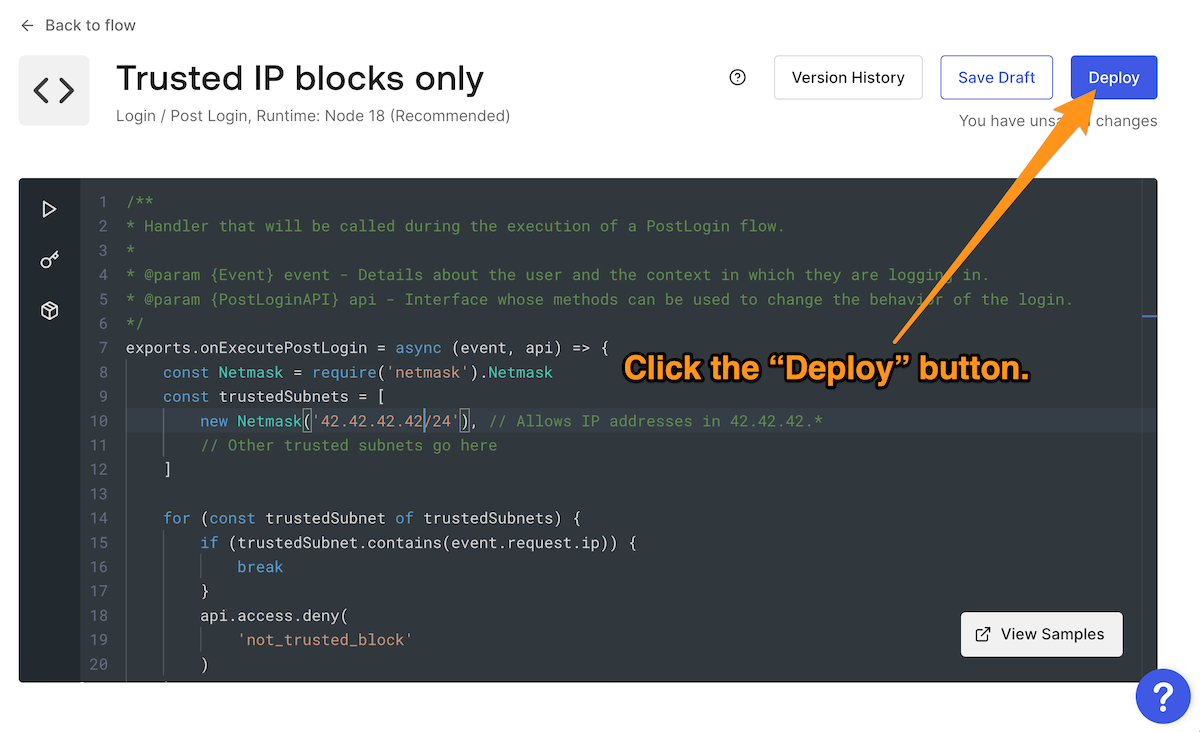
Add the Action to the Login flow
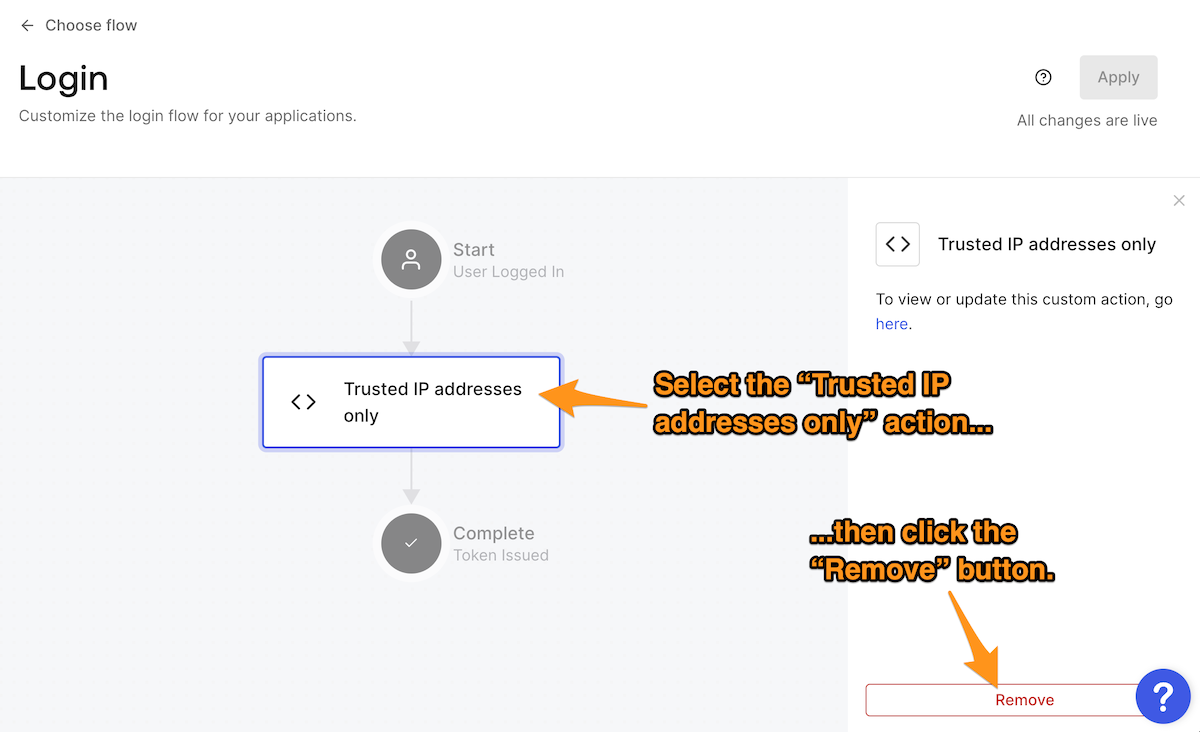
While the Trusted IP blocks only and Trusted IP addresses only Actions can coexist in the same Login flow, let’s remove the latter so we can test the former. Remove the Trusted IP addresses only Action by returning to the Login flow page, selecting the Action, and clicking the Remove button:
The Login flow should be empty. Display the list of custom Actions by clicking Custom in the Add Action section…
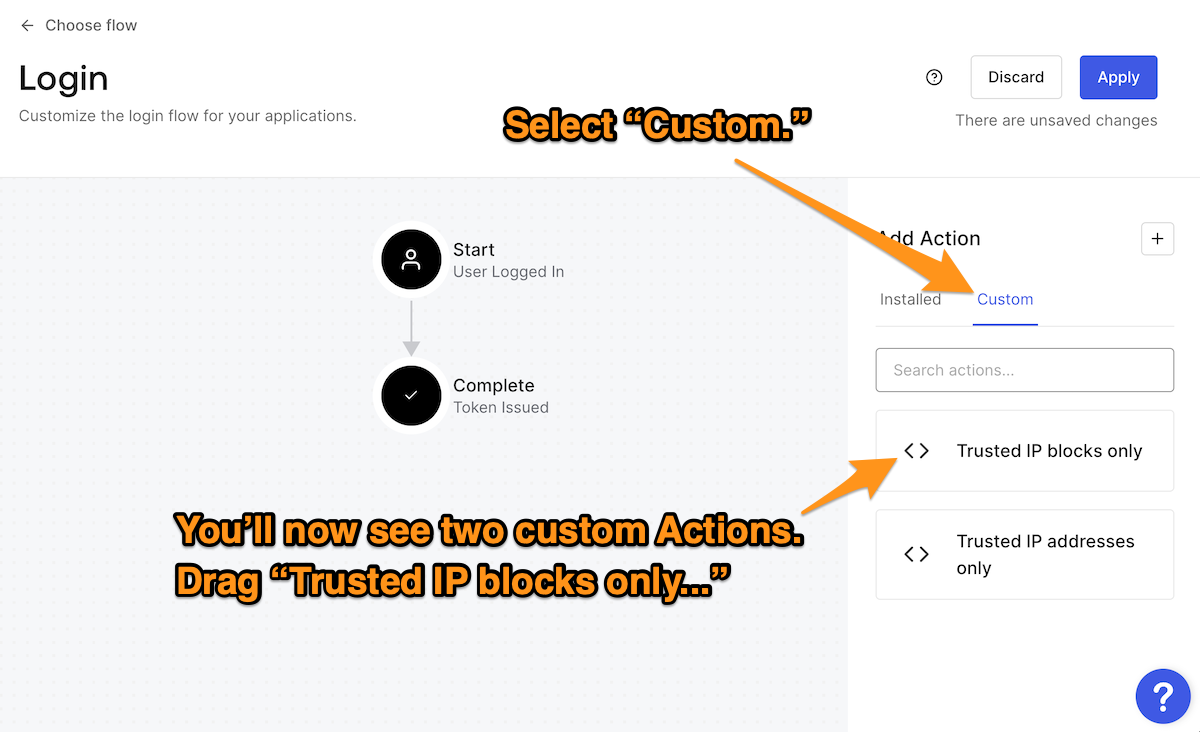
...then drag and drop the Trusted IP blocks only Action into the flow. Finalize this change by clicking the Apply button near the upper right corner of the page:
Test the Action
It’s time to test the Trusted IP blocks only Action in the same way we tested Trusted IP addresses only .
Once again, navigate to the Getting Started page and click the Try it out link. If the IP address of your computer is in one of the IP blocks defined in your Action’s
trustedIPBlocks
You should also test the case where the user is logging in from an IP address outside the trusted blocks. Edit the Action so that the
trustedIPBlocks
Note that the
"error_description"'Please log in from a trusted IP address.'api.access.deny()Summary
You have just seen a couple of examples of how you can use Auth0 Actions to enhance the security of your applications by limiting the IP addresses that users can log in from. Both examples in this article used the Login flow and the
api.access.deny()- Allowing only users from specific IP addresses to log in
- Allowing only users whose IP addresses are in specific IP blocks to log in
In building an Action to allow only users from trusted IP blocks to log in, this article covered adding Node packages as dependencies for Actions. This feature greatly expands the power and possibilities of Actions and simplifies their implementation.
This article also covered the basics of using the Auth0 Dashboard’s Try it out feature to confirm that the Actions worked as expected. Make sure you use it as you develop your own actions.
The examples provided above are a good starting point. Experiment and customize Actions to meet your needs. For example, the code above used allow lists. With only a little change, you could build Actions based on deny lists to block users from known “troublemaker” IP addresses.
Happy coding!
About the author

Joey deVilla
Senior Developer Advocate