
Auth0 provides a robust set of tools and features to enhance authentication and authorization in applications. One such feature is Auth0 Actions, which allows you to customize and extend the behavior of the Auth0 platform. This article will explore using Auth0 Actions to permit or deny login requests based on specific criteria, such as a denied and allowed list.
Prerequisites
Before diving into the implementation, there are a few prerequisites to ensure you have in place.
- Auth0 account. If you don’t have one already, you can sign up for a free Auth0 account.
- Basic JavaScript knowledge: Auth0 Actions are functions you can program using JavaScript. In this tutorial, I’ll provide you with the examples. However, to further customize them for your use case, it is important to have basic JavaScript knowledge.
Create a New Action
To begin, let's create a new Auth0 Action. Actions are serverless functions that run in a secure Auth0 environment.
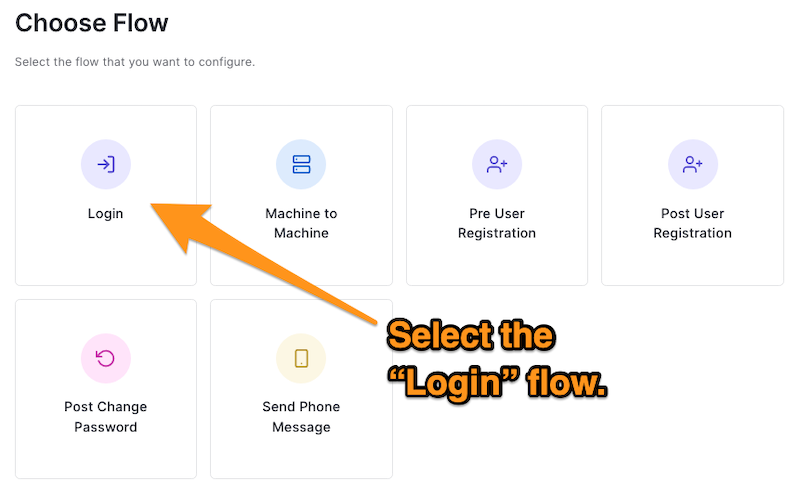
To create an Action, log into your Auth0 Dashboard, select Actions from the left sidebar menu, then select Flows. This page shows the different flows you can customize. For our use case, we’ll choose the “Login” flow.
This will take you to the “Login” flow page, where you can install, create, and add Actions to the flow.
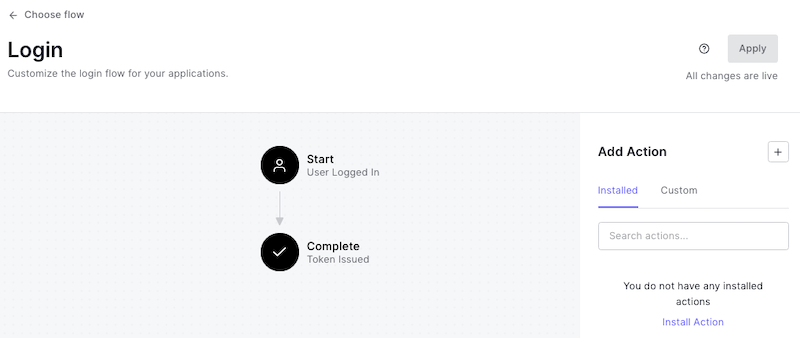
The screen has two main sections, the diagram in the center of the page shows the login flow and the Actions panel.
On the diagram, we can see the default login flow, which contains two states.
- Start: The user completed the login form and is ready to log in.
- Complete: The system issues the user’s credentials (an ID token and, if required, an access token).
You can drag and drop Actions in between these states to add custom logic to the login flow or to even deny the login request before the tokens are issued.
On the right panel, we have the Actions panel with two tabs.
- Installed: Pre-installed Actions from the Auth0 Actions Marketplace
- Custom: Actions created for this tenant
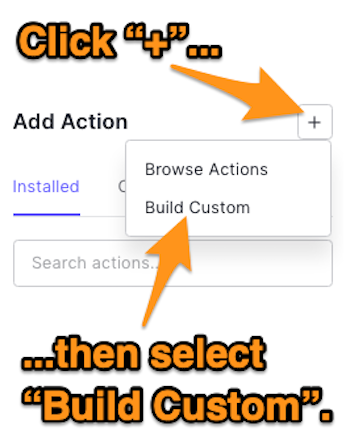
To create an Action, click the plus icon on the Actions panel and select "Build Custom".
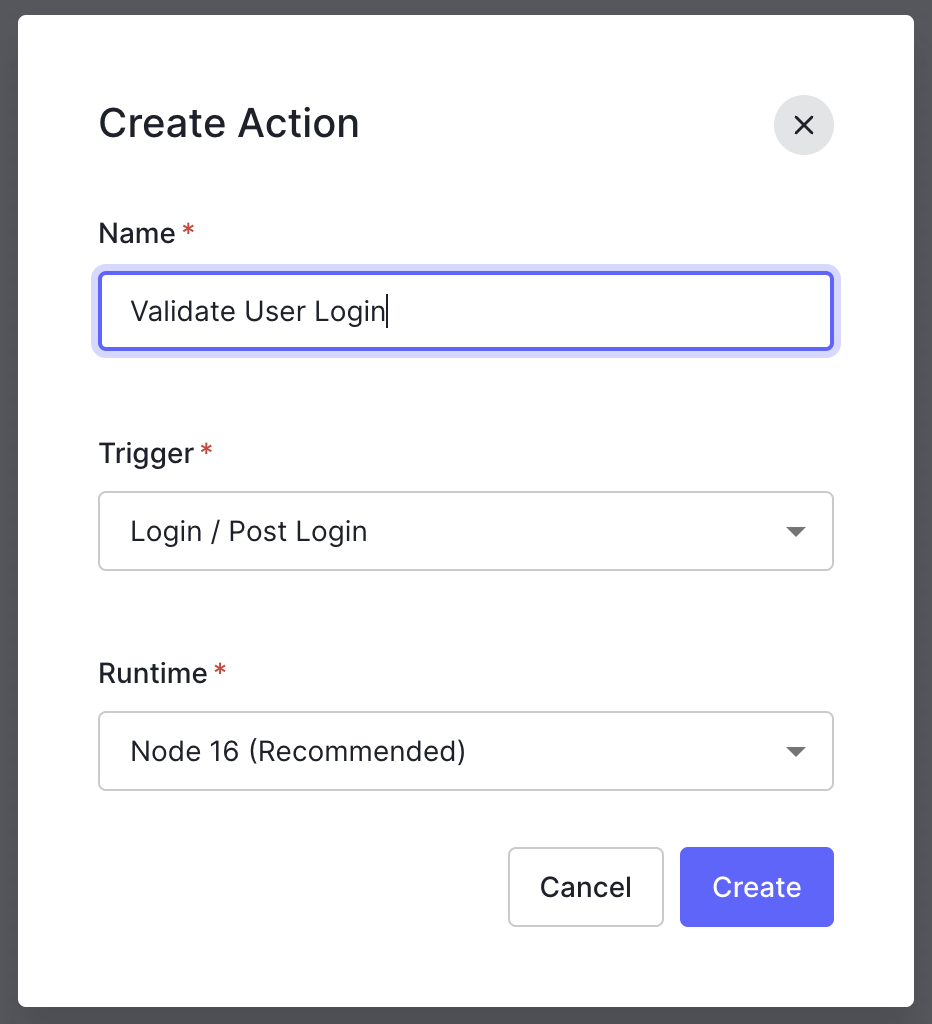
After that, a modal window will appear to enter the information for our Action: you’ll have to provide a name, and you can leave the trigger and runtime as the default values. For my Action, I’ll name it “Validate User Login”.
After clicking on "Create", you’ll be taken to the Action’s code editor, where you can write the code for your Action, install packages, test it, and more:
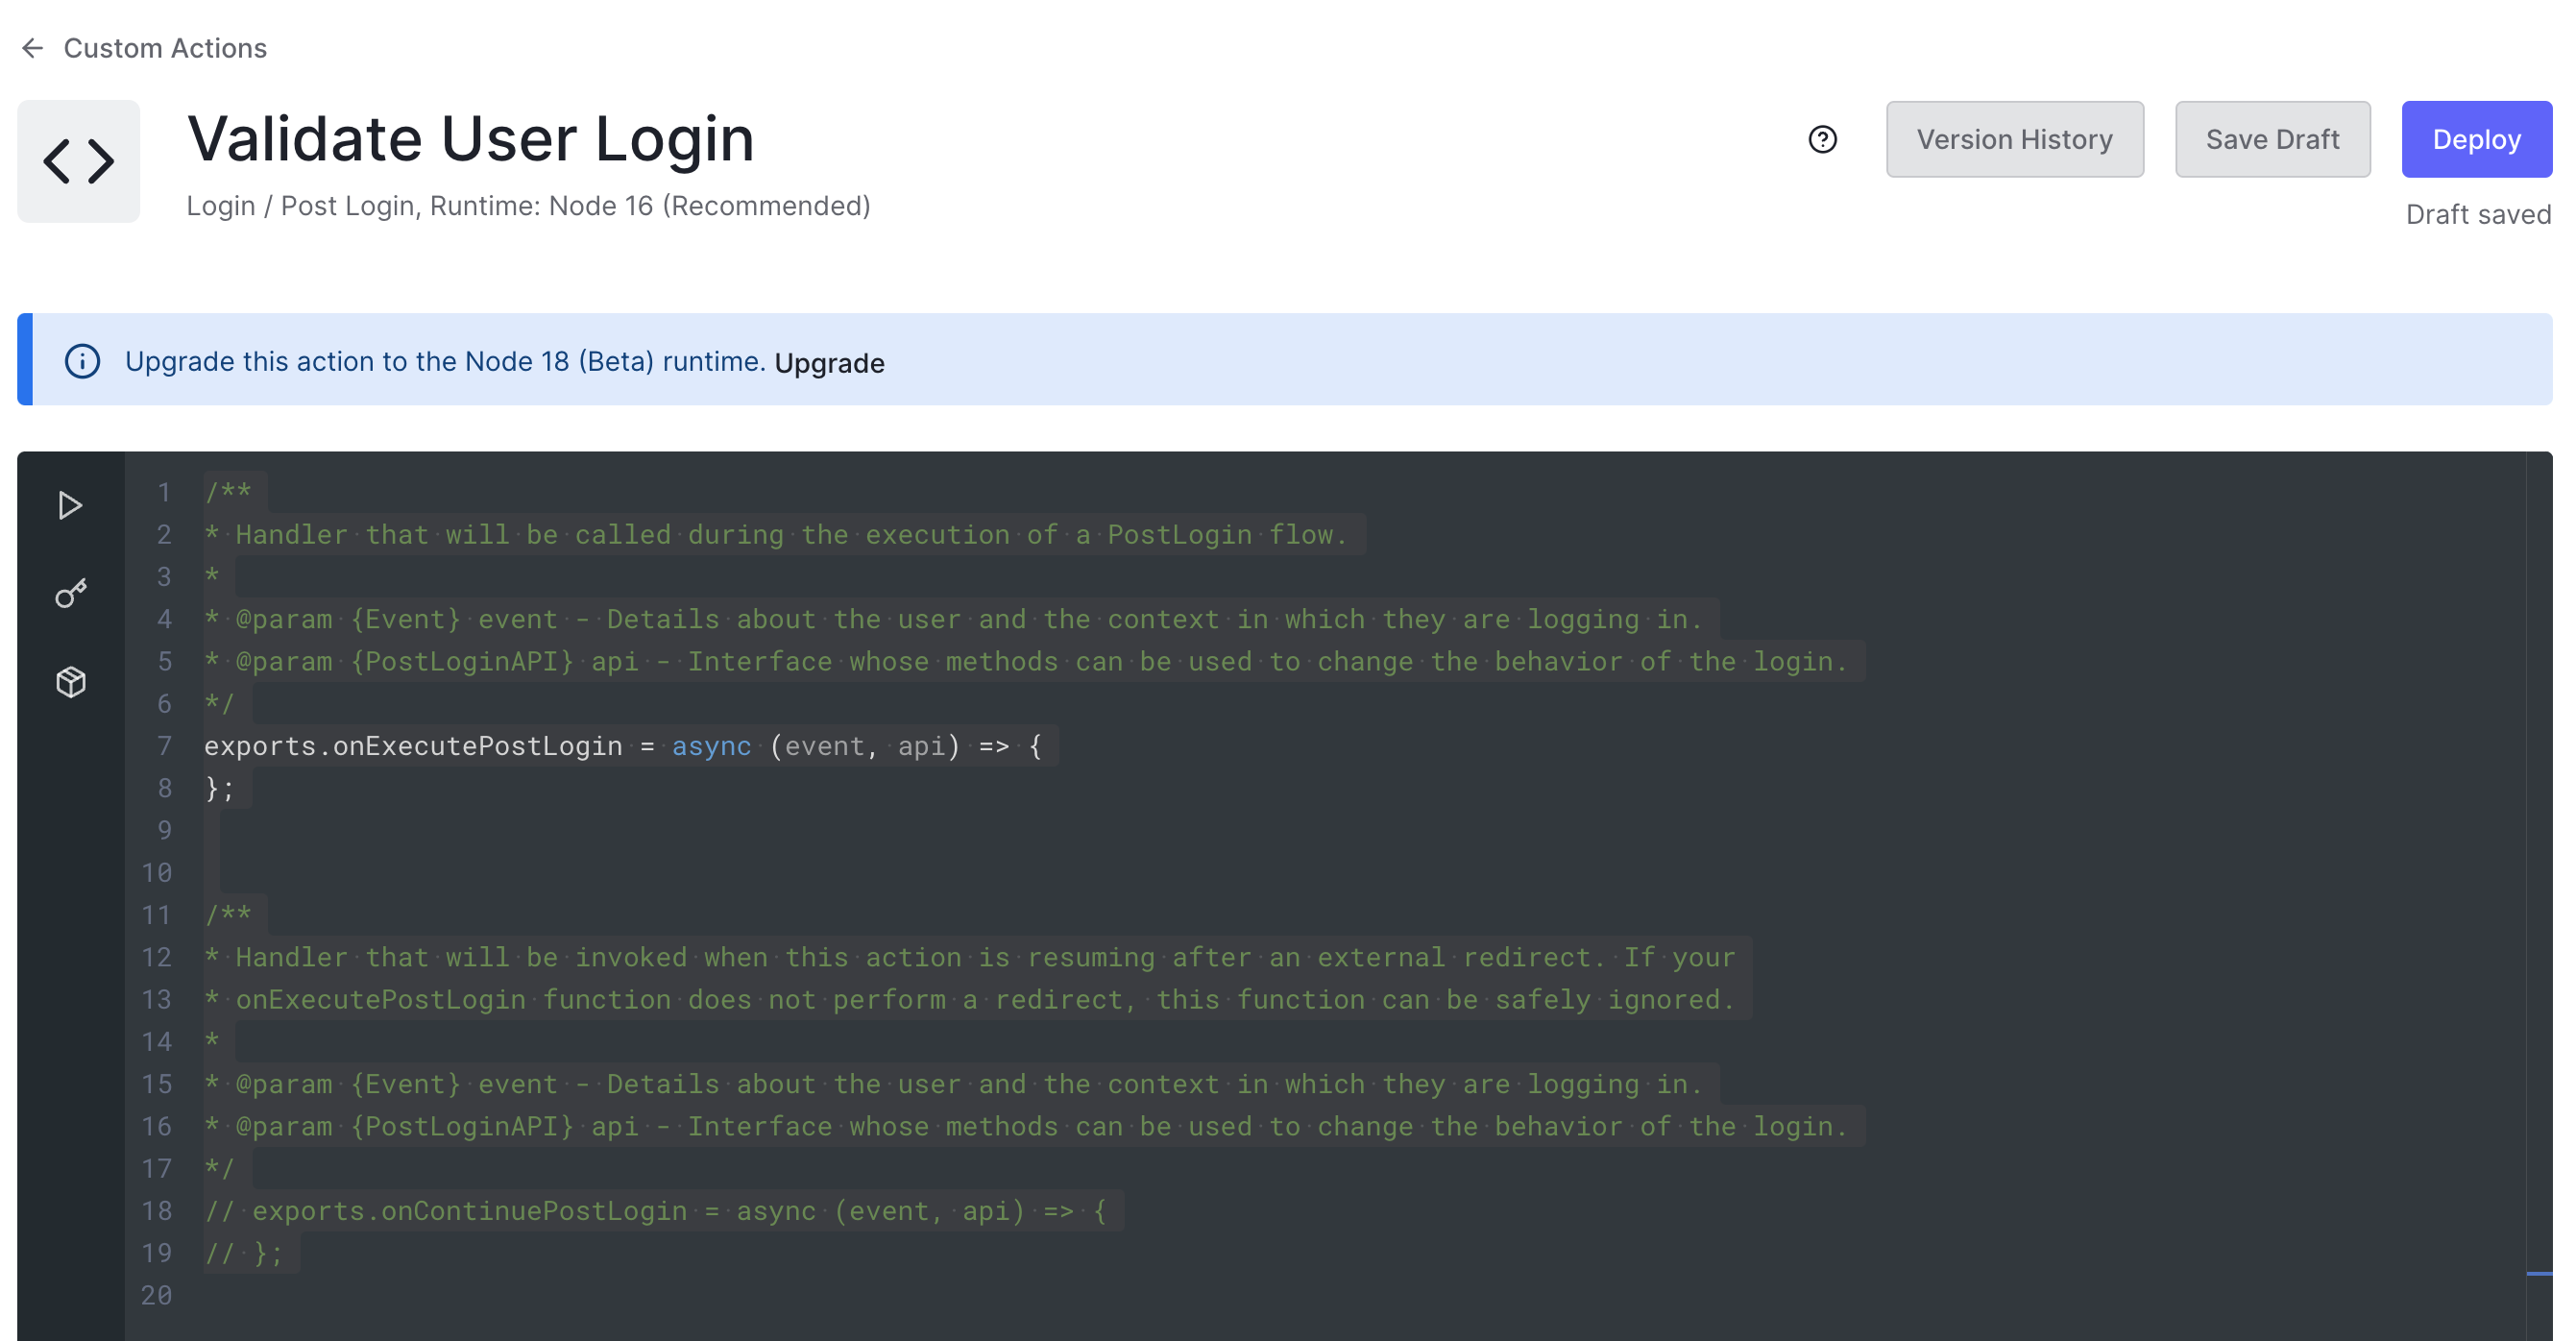
An Action can make use of two JavaScript functions to alter the Login flow:
onExecutePostLogin: defines what should happen immediately after the user provides login credentials that Auth0 verified. This method receives two parameters,eventandapi.event: contains details about the login request, such as the user and the context.api: contains methods to manipulate the login’s behavior.
onContinuePostLogin: defines what should happen when control returns to the Login Action after a redirect to another web page. It’s used only when the user returns after being redirected, which is why it’s commented out by default.
For this tutorial, we’ll focus on the onExecutePostLogin method.
Working with a Deny List
A deny list is a common way to block specific users or IP addresses from logging in. To implement a deny list using Auth0 Actions, you can leverage the context available to the Action's code through the event parameter. The event object contains information about the incoming authentication request, such as user details and IP address. By accessing this object, you can compare the values against your deny list and take appropriate action just as denying the authentication request.
Before we start writing the code for our deny list, we need to know how to cancel the user’s login request. For that, we make use of the api parameter as follows:
api.access.deny('reason');
With a single line of code, we can deny the login request. The deny method expects a single parameter reason, which is a human-readable explanation for the rejection.
Now, let’s start updating our function to support a deny list:
// Array containing the email addresses that are blocked from logging on.
const denyList = ['myemail@example.com']

exports.onExecutePostLogin = async (event, api) => {
  if (denyList.find(email => email === event.user.email)) {
    api.access.deny("Your email address is blocked from logging in to our systems.");
  }
};
In this simple function, we have a hardcoded list of email addresses that are forbidden from logging in to our system, and the onExecutePostLogin simply looks if the user’s email address on the login event is in the list. If so, it denies the user’s access.
Once you add the code to the Action’s editor, it’s time for testing, and the best way to do it while in development mode is with the test panel.
You can access the test panel by clicking the play button on the editor’s sidebar, as shown below:
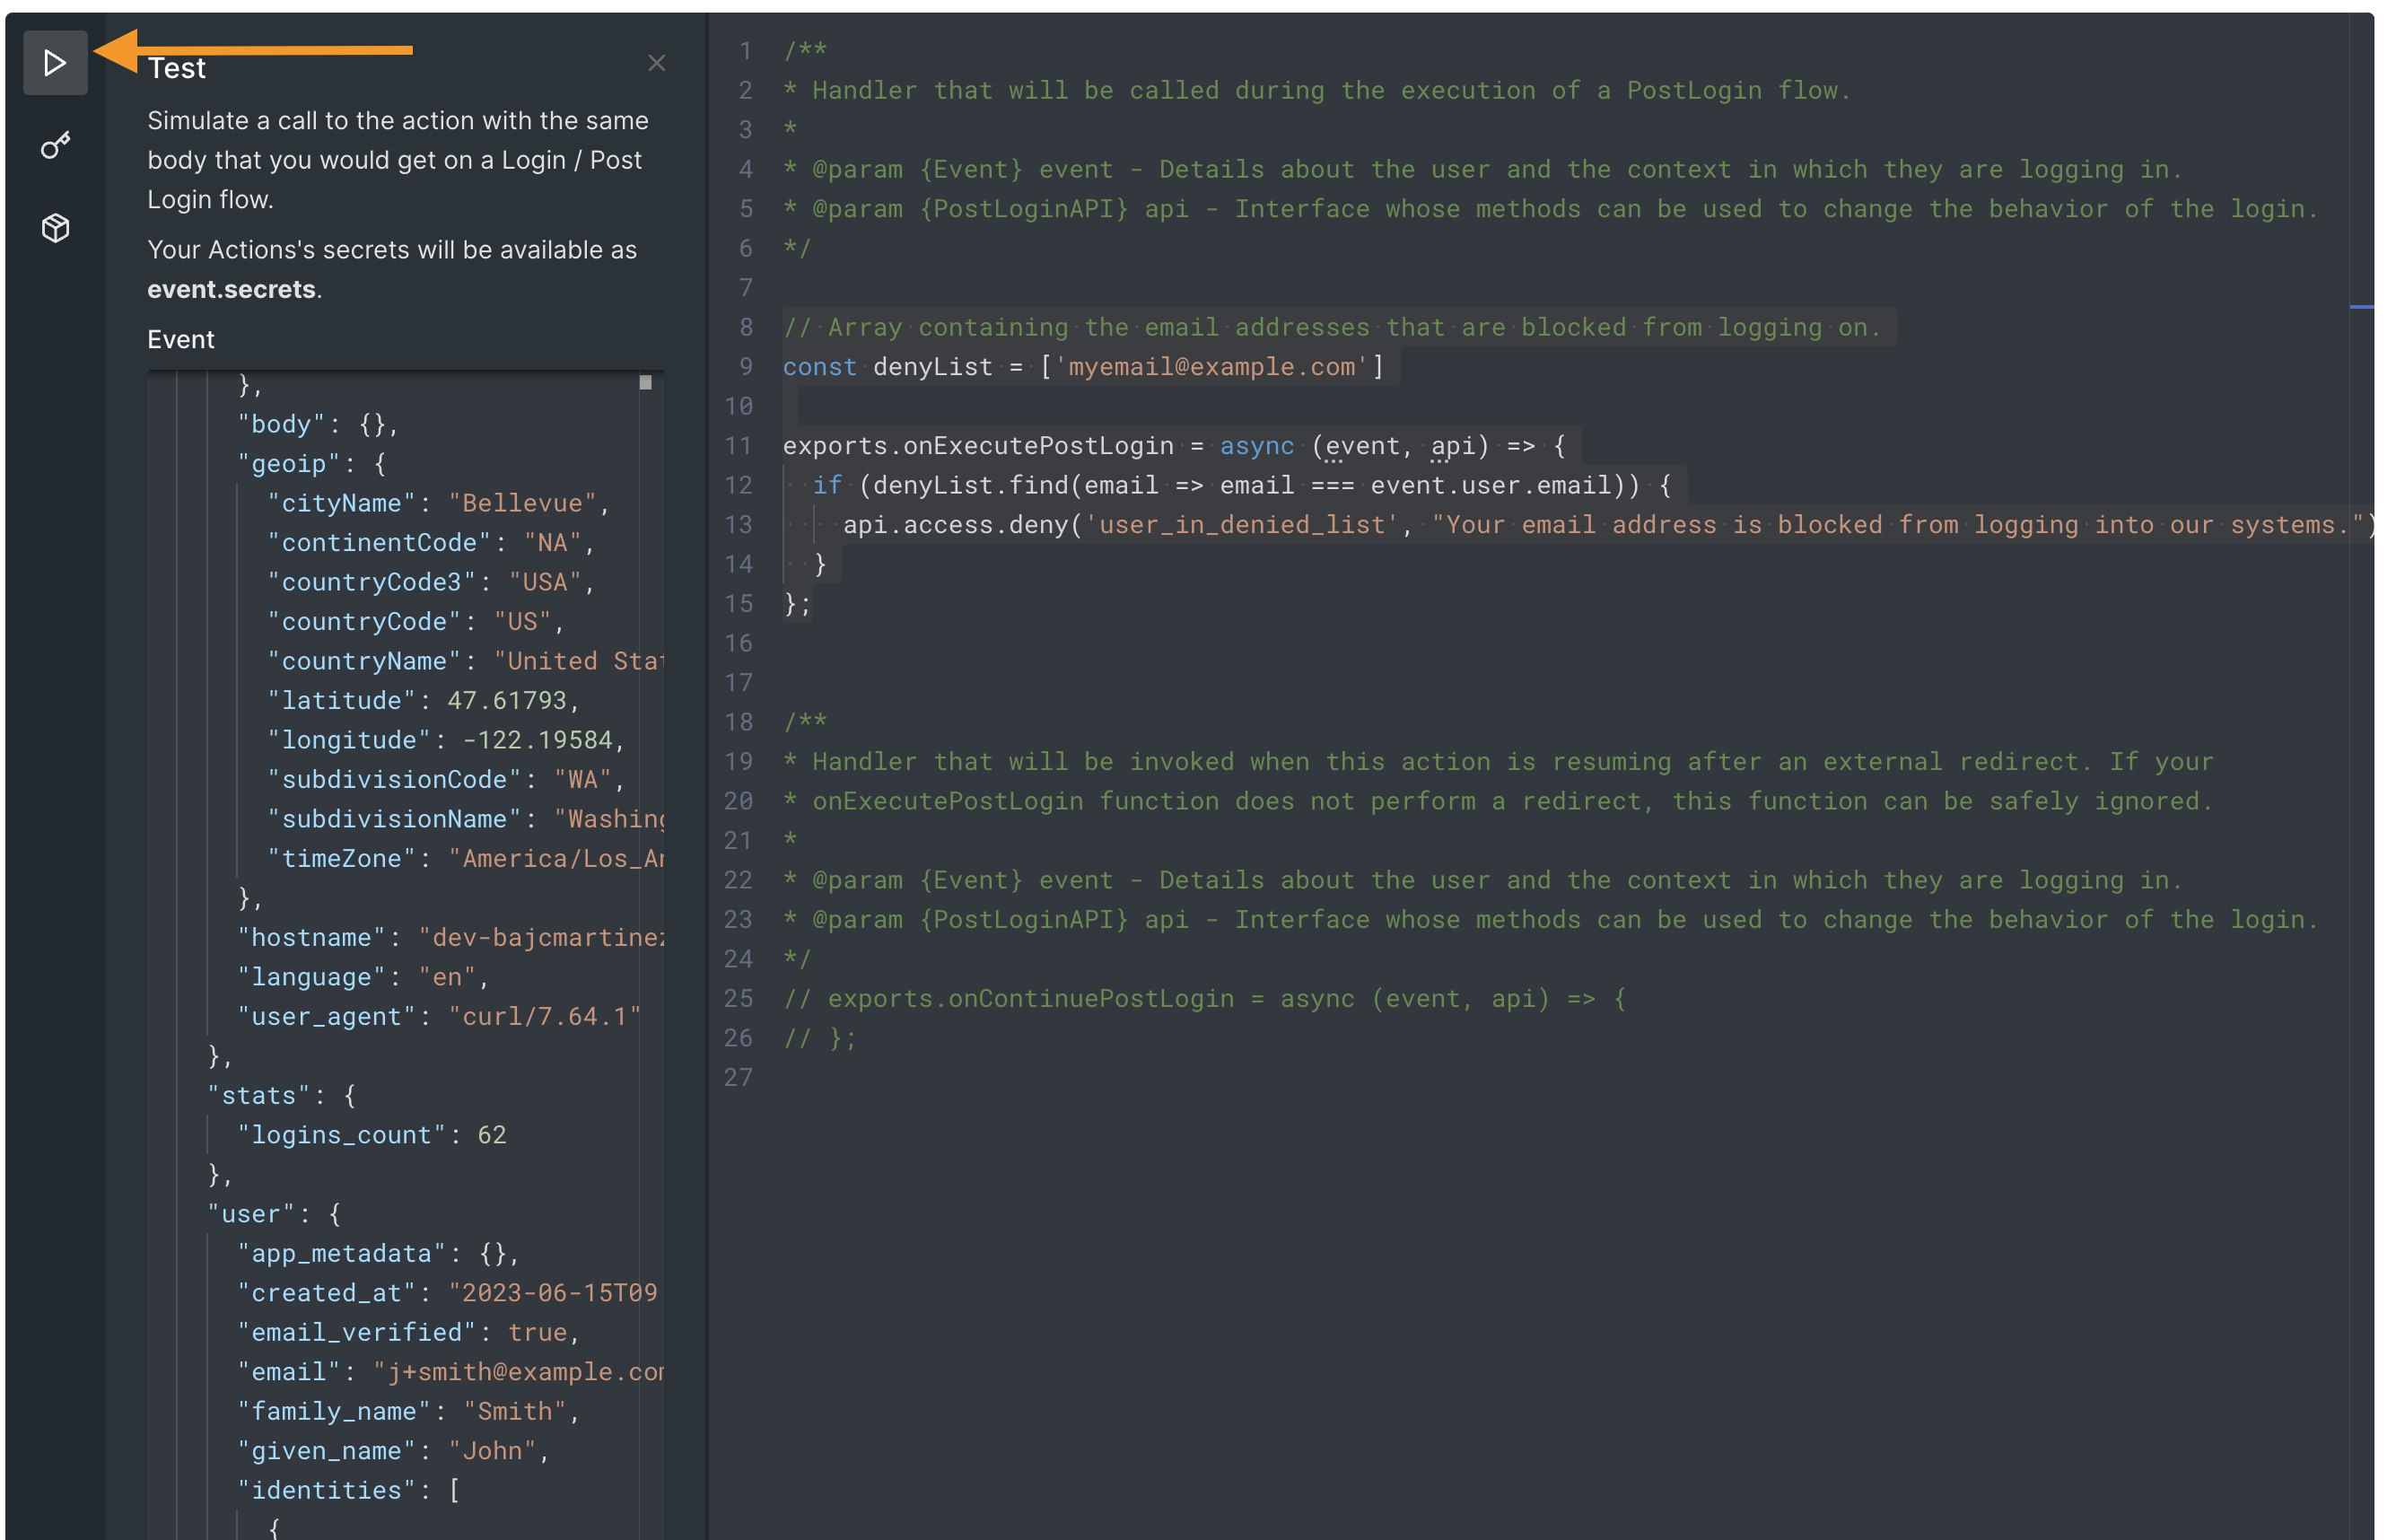
Once you expand the panel, you can customize a test event object to your needs; for example, you can look for the user object, which contains all user properties such as given_name, but more importantly for our use case, email.
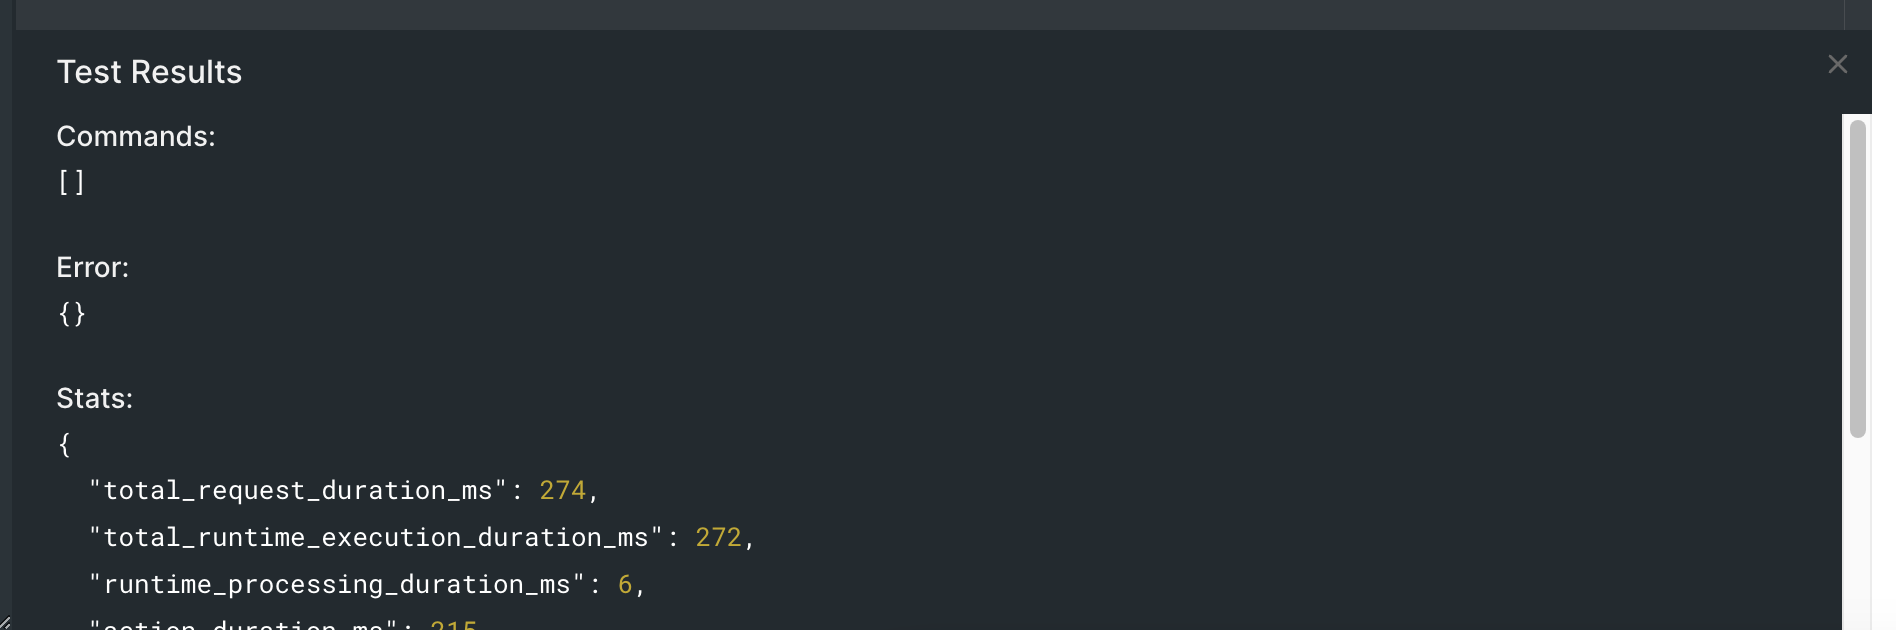
By clicking the "Run" button at the bottom of the test panel, Auth0 will execute the Action on the given data and output the test results on the test result window. If the given user is not part of our denied list, you’ll see the following test output:
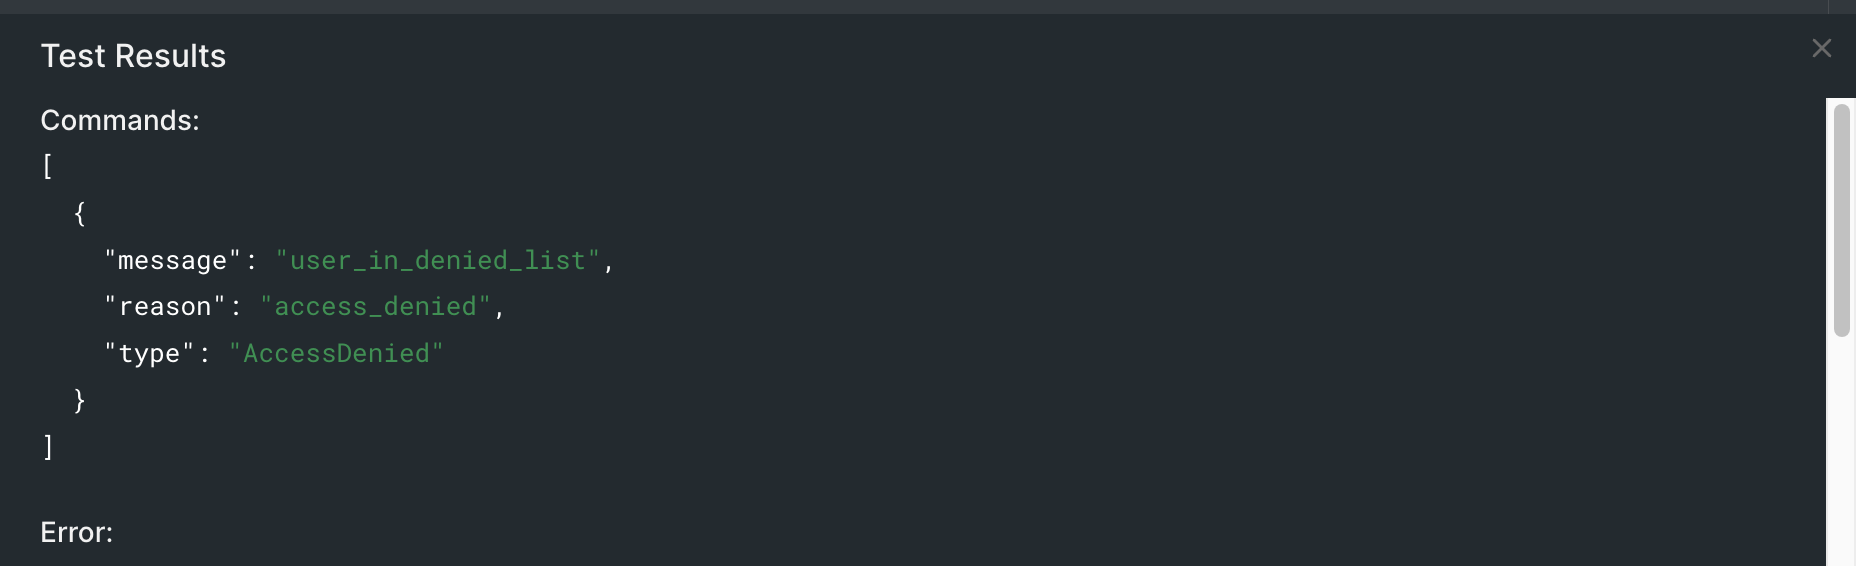
On the contrary, if you update the event JSON to include one of the denied user email addresses, you’ll receive the following test output:
Finally, once you complete your testing, you can deploy the function so it is available to add to the login flow.
Working with an Allow List
On the other hand, an allow list specifies the users or IP addresses that are explicitly permitted to log in. Like working with a deny list, you can access the necessary information using the event object. Compare the values against your allow list and proceed with the login flow only if the user or IP address is found on the list. Otherwise, you can deny access by rejecting the authentication request.
Similarly to the deny list, the allow list will use the deny method to reject all requests except those from users in the allow list.
Here is the new code:
// Array containing the email addresses that are allowed to log in.
const allowList = ['myemail@example.com', 'j+smith@example.com']

exports.onExecutePostLogin = async (event, api) => {
  if (!allowList.find(email => email === event.user.email)) {
    api.access.deny("Your email address is not authorized to log into our systems.");
  }
};
Running the tests, as previously explained, should give similar results following the corresponding logic.
Delegate List to an API
If you have many entries in your denied or allowed list, storing and managing the list in an external system, such as a database or an API, might be more practical. With Auth0 Actions, you can delegate the list retrieval and verification to an external API. Within your Action's code, make the necessary API calls to verify the user's status and subsequently reject or allow the authentication request.
For this exercise, we'll assume that you already have an API endpoint that, given a user's email address, will return if the user is authorized to access. Here is an example of what such an API could look like:
curl https://myaccessapi.com/users/is_authorized?email=myemail@example.com
{
  is_authorized: false
}
Given this simple example, let’s update our code:
const axios = require('axios');

exports.onExecutePostLogin = async (event, api) => {
  const auth_result = await axios.get(`https://myaccessapi.com/users/is_authorized?email=${event.user.email}`)
  if (!auth_result.is_authorized) {
    api.access.deny("Your email address is blocked from logging in to our systems.");
  }
};
Note that for calling an API, we are using the axios library, which is already available in your Actions environment. If you need access to other dependencies, you can simply add npm dependencies as part of your Actions bundle. You can learn more about dependencies on Actions on the official documentation.
Attach an Auth0 Action to the Login Flow
After coding and testing your Actions, it’s time to deploy and use them as part of the login flow. Once you are ok with your testing results, you can hit the Deploy button on the top right corner of the screen. This will take the existing code and settings and generate a function snapshot you can use in your login flow.
If you ever need to change the code on the function, all changes will automatically be saved as a new draft, and if you want the changes to become effective, you’ll have to deploy your latest version once again.
Once your code is deployed, it doesn’t mean it is actively used as part of your login flow. To check for that, please refer back to the login flow screen, where the login diagram is shown. If you don’t see your Action as part of the diagram, it means that, even if your Action is deployed, it has not yet been activated. To activate the Action as part of the flow, click on the “Custom” tab on the Actions panel, locate your Action by name, and simply drag and drop the box over the login diagram between the "Start" and "Complete" steps. After that, you can apply changes using the “Apply” button on the top right corner of the screen.
Summary
This article explored how to leverage Auth0 Actions to permit or deny login requests. By using a deny list or an allow list, you can enhance the security of your application and control access based on specific criteria. We also discussed delegating the list management to an external API, providing scalability and flexibility. With Auth0 Actions, you have the power to customize the login flow and add an additional layer of security to your application.
The examples I provided throughout the article are a good starting point. However, you can further customize them to meet your needs. For instance, you could use allow/deny lists by domains instead of emails or by IP addresses, country, day and time, etc.
Always thoroughly test your implementation and consider any potential edge cases specific to your application's requirements. By using Auth0 Actions effectively, you can ensure a robust and secure authentication experience for your users.
Thanks for reading!
About the author

Juan Cruz Martinez
Staff Developer Advocate