


TL;DR: In this tutorial, we'll cover how to build a slim clone of the popular Rotten Tomatoes app. GraphQL, the query language for APIs created by Facebook will play a role in building the backend for this app and we'll use React and Apollo. The completed code is available in the rotten-tomatoes repo.
We want to build an application that displays a list of movies with the appropriate poster, title and user ratings. Everyone should be able to see the ratings of these movies, but only the reviewers can add movies and ratings. We'll assume there is a poll of user votes where the reviewers just get the ratings in form of percentages and add to the platform.
We'll make use of GraphQL to build the data schema for the application. In fact, we don't need to worry about spinning up our own backend with a custom database and configuring the APIs. We'll make use of Graphcool. Graphcool gives developers a production-ready GraphQL backend to build better apps faster.
Brief Introduction to GraphQL
GraphQL is a query language for APIs created by Facebook that offers declarative data fetching in the client and is already used by companies such as Coursera and GitHub.
A GraphQL server exposes a schema that describes its API including queries to fetch data and mutations, to modify data.
This allows clients to specify their data requirements with queries and send it to one GraphQL endpoint, instead of collecting information from multiple endpoints as is typical with REST. While queries are a very easy and quick way for clients to get exactly the data they need in one request, the GraphQL server has to parse and validate the query, check which fields are included and return the underlying data from the database.
The type-safe schema unlocks new possibilities for tooling, as demonstrated by GraphQL which is maintained by Facebook. Check out how GitHub employs GraphQL for its API.
Building Rotten Tomatoes Schema
Let's build out the schema for our application.
The Schema for our application will look like this:
type User {
  id: ID! @isUnique
  email: String! @isUnique
  name: String!
  movies: [Movie!]! @relation(name: "MovieReviewer")
  createdAt: DateTime!
  updatedAt: DateTime!
}

type Movie {
  id: ID! @isUnique
  description: String!
  imageUrl: String!
  avgRating: Int!
  reviewer: User @relation(name: "MovieReviewer")
  updatedAt: DateTime!
  createdAt: DateTime!
}
We have the User and the Movie types. The User in our case is a movie reviewer that consists of the field above for more information on the individual.
In our app, a reviewer will be able to upload new movies with a description, rating and movie image cover. With our GraphQL schema, if we want to retrieve all movies, we will do something like this:
query {
 allMovies {
    id
    description
    imageUrl
    avgRating
 }
}
This query will return a response from the GraphQL Server (Graphcool) like this:
{
  "data": {
    "allMovies": [
      {
        "id": "cj4jacx4qjdj10189hinqsies",
        "description": "Box Bunny",
        "imageUrl": "https://pmcvariety.files.wordpress.com/2017/03/baywatch-reboot.jpg",
        "avgRating": 75
      },
      {
        "id": "cj4jba3g8jyyj01896bugy9qy",
        "description": "Nice one",
        "imageUrl": "https://resizing.flixster.com/PTWb8cveEQtMkpDSq3ypCZBuGoU=/300x300/v1.bjsxNTE4NzE4O2o7MTczODc7MTIwMDszMDAwOzIwMDA",
        "avgRating": 0
      },
      {
        "id": "cj4jeiadylp6d0121muaunls7",
        "description": "Wonder Man",
        "imageUrl": "http://t1.gstatic.com/images?q=tbn:ANd9GcQcCAOmt-FsRsR8GebIzI67qSvdQ2JLYDRLxeAcbH-541fzqq1H",
        "avgRating": 60
      },
      {
        "id": "cj4jeiuvgm33101425xpeqmpq",
        "description": "Wonder Man",
        "imageUrl": "http://t1.gstatic.com/images?q=tbn:ANd9GcQcCAOmt-FsRsR8GebIzI67qSvdQ2JLYDRLxeAcbH-541fzqq1H",
        "avgRating": 93
      }
    ]
  }
}
Without much ado, let's go ahead and build our application.
Use Graphcool
Graphcool is a serverless GraphQL backend that enables mobile and web developers to build production ready apps faster. You don't have spin up your own GraphQL server or think of spinning up a separate database.
Go ahead and install graphcool:
npm install -g graphcoolThen, run the following command:
graphcool initIt will create a project.graphcool file that contains a default Schema. Go ahead and edit the schema to be like this:
....
....

type User implements Node {
  id: ID! @isUnique
  email: String! @isUnique
  name: String!
  movies: [Movie!]! @relation(name: "MovieReviewer")
  createdAt: DateTime!
  updatedAt: DateTime!
}

type Movie implements Node {
  id: ID! @isUnique
  description: String!
  imageUrl: String!
  avgRating: Int!
  reviewer: User @relation(name: "MovieReviewer")
  updatedAt: DateTime!
  createdAt: DateTime!
}

type File implements Node {
  id: ID! @isUnique
  createdAt: DateTime!
  updatedAt: DateTime!
  contentType: String!
  name: String!
  secret: String! @isUnique
  size: Int!
  url: String! @isUnique
}
Run graphcool push from your terminal to update the schema on your Graphcool backend. You can go to the Playground on Graphcool to try out GraphQL queries for your newly created Schema.
Build The Frontend
We'll use ReactJS to build the frontend. Go ahead and flesh out a new app.
If you dont have the CRA tool, go ahead and install it globally:
npm install -g create-react-appAfter installing globally, go ahead and scaffold a new ReactJS app like so:
create-react-app rottentomatoesNote: We have a custom React script that comes bundled with Auth0 authentication. So you can use create-react-app to boostrap an app with authentication support like this
create-react-app my-app --scripts-version auth0-react-scripts
Then open http://localhost:3000 to see your app.
Note: create-react-app automatically invokes Yarn for installation. If you don't have Yarn installed, it falls back to use npm.
Build the Nav Component
The Nav.js file is our Nav component. Go ahead and add code to it like so:
import React, { Component } from 'react';
import { Link } from 'react-router';
import '../App.css';

class Nav extends Component {

  render() {
    return (
      <nav className="navbar navbar-default">
        <div className="navbar-header">
          <Link className="navbar-brand" to="/">Rotten Tomatoes</Link>
        </div>
        <ul className="nav navbar-nav">
          <li>
            <Link to="/">All Movie Ratings</Link>
          </li>
          <li>
           <Link to="/create">Add New Movies</Link>
          </li>
        </ul>
        <ul className="nav navbar-nav navbar-right">
          <li><button className="btn btn-info log">Log In</button></li>
          <li><button className="btn btn-danger log">Log out </button></li>
        </ul>
      </nav>
    );
  }
}

export default Nav;
Note: Open up your terminal and install react-router like so: npm install react-router@3.0.0 --save. At the time of this writing, react-router is in 4.0 alpha, so you can explore its features.
Build the DisplayMovie and CreateMovie Component
The DisplayMovie component will be responsible for displaying the details of each movie. Create a components/DisplayMovie.js file and the following code:
import React from 'react'
import '../App.css';
class DisplayMovie extends React.Component {
render () {
return (
<div className='pa3 bg-black-05 ma3'>
<div
style={{
backgroundImage: `url(${this.props.movie.imageUrl})`,
backgroundSize: 'cover',
paddingBottom: '100%',
}}
/>
<div>
<div className='movie'>
<h3><span className='movie-title'>Movie Title: </span> {this.props.movie.description} </h3>
<h2><span className='movie-title'>Rating: </span> { this.props.movie.avgRating }% </h2>
</div>
</div>
</div>
)
}
}
export default DisplayMovieIn the code above, you can see how we access the properties of the movie schema in form of props. You'll get to know how it works that way soon.
The CreateMovie component will be responsible for adding new movies to our platform. So go ahead and create a components/CreateMovie.js file. Add the following code to it:
import React from 'react'
import { withRouter } from 'react-router'
import { graphql } from 'react-apollo'
import gql from 'graphql-tag'
import Nav from './Nav';

class CreateMovie extends React.Component {

  state = {
    description: '',
    imageUrl: '',
    avgRating: 0,
  }

  render () {
    return (
      <div>
        <Nav />
        <h3 className="text-center"> Add Rotten Movie Ratings!</h3>
        <hr/>
        <div className='w-100 pa4 flex justify-center'>

          <div style={{ maxWidth: 400 }} className=''>

            <label> Movie Title: </label>
            <input
              className='w-100 pa3 mv2'
              value={this.state.description}
              placeholder='Title of the movie'
              onChange={(e) => this.setState({description: e.target.value})}
            />
            <label> Movie Cover Image: </label>
            <input
              className='w-100 pa3 mv2'
              value={this.state.imageUrl}
              placeholder='Image Url'
              onChange={(e) => this.setState({imageUrl: e.target.value})}
            />
            <label> Movie Rating as decided by Popular votes: </label>
            <input
              className='w-100 pa3 mv2'
              value={this.state.avgRating}
              type="number"
              placeholder='Average Rating'
              onChange={(e) => this.setState({avgRating: parseInt(e.target.value)})}
            />

            {this.state.imageUrl &&
              <img src={this.state.imageUrl} role='presentation' className='w-100 mv3' />
            }
            {this.state.description && this.state.imageUrl &&
              <button className='btn btn-info btn-lg' onClick={this.handleMovie}>Add New Movie</button>
            }
          </div>
        </div>
      </div>
    )
  }

  handleMovie = () => {
    const {description, imageUrl, avgRating} = this.state
    this.props.addMovie({ description, imageUrl, avgRating })
      .then(() => {
        this.props.router.push('/')
    })
  }
}

const addMutation = gql`
  mutation addMovie($description: String!, $imageUrl: String!, $avgRating: Int!) {
    createMovie(description: $description, imageUrl: $imageUrl, avgRating: $avgRating) {
      id
      description
      imageUrl
      avgRating
    }
  }
`

export default graphql(addMutation, {
  props: ({ ownProps, mutate }) => ({
    addMovie: ({ description, imageUrl, avgRating }) =>
      mutate({
        variables: { description, imageUrl, avgRating },
      })
  })
})(withRouter(CreateMovie))
In the code above, we have new buddies. The graphql-tag and react-apollo packages. Apollo is a GraphQL client. Install these new packages like so:
npm install graphql-tag react-apollo apollo-clientNote: I added one more package for us to install via the terminal. The Apollo Client. I'll explain what it does later on in the article.
graphql-tagprovides functionality for parsing the JavaScript template literals that will contain our GraphQL queries and mutations.react-apolloimplements React-specific bindings for Apolloapollo-clientis one of the most popular GraphQL clients available. It makes interacting with a GraphQL backend seamless. It comes bundled with features like caching, query batching, and realtime updates via subscriptions.
const addMutation = gql`
  mutation addMovie($description: String!, $imageUrl: String!, $avgRating: Int!) {
    createMovie(description: $description, imageUrl: $imageUrl, avgRating: $avgRating) {
      id
      description
      imageUrl
      avgRating
    }
  }
`
This code above represents a new mutation with gql.
export default graphql(addMutation, {
  props: ({ ownProps, mutate }) => ({
    addMovie: ({ description, imageUrl, avgRating }) =>
      mutate({
        variables: { description, imageUrl, avgRating },
      })
  })
})(withRouter(CreateMovie))
This code above injects the addMovie function to the props of our CreateMovie component and makes it possible for a create operation query to happen on the backend with the values of the movie description, imageUrl and avgRating. Adding mutations to React components is similar to adding queries, but instead of injected data, functions are injected for each mutation. It's that simple!
Build the ListMovie Component
The ListMovie component will be responsible for displaying the list of movies on the landing page. Create a components/ListMovie.js file and the following code:
import React from 'react'
import DisplayMovie from './DisplayMovie'
import { graphql } from 'react-apollo'
import gql from 'graphql-tag'
import Nav from './Nav';

class ListMovie extends React.Component {

  render () {

    if (this.props.data.loading) {
      return (<div>Loading</div>)
    }

    return (
      <div>
        <Nav />
        <h3 className="text-center"> Latest Rotten Movie Ratings!</h3>
        <hr/>
        <div className="col-sm-12">
          {this.props.data.allMovies.map((movie, index) => (
            <div className="col-sm-4" key={index}>
              <DisplayMovie key={movie.id} movie={movie} refresh={() => this.props.data.refetch()} />
            </div>
          ))}
        </div>
      </div>
    )
  }
}

const FeedQuery = gql`query allMovies {
  allMovies(orderBy: createdAt_DESC) {
    id
    description
    imageUrl
    avgRating
  }
}`

export default graphql(FeedQuery)(ListMovie)
This component above is responsible for displaying the list of movies on the landing page.
This query fetches all the movies from Graphcool and orders them.
const FeedQuery = gql`query allMovies {
  allMovies(orderBy: createdAt_DESC) {
    id
    description
    imageUrl
    avgRating
  }
}`
Set up Apollo Client and Routing
Open up src/index.js and modify the code to be like so:
import React from 'react';
import ReactDOM from 'react-dom';
import ListMovie from './components/ListMovie'
import CreateMovie from './components/CreateMovie'
import { Router, Route, browserHistory } from 'react-router'
import ApolloClient, { createNetworkInterface } from 'apollo-client'
import { ApolloProvider } from 'react-apollo'
import 'tachyons'
import './index.css';
import registerServiceWorker from './registerServiceWorker';
import { requireAuth } from './utils/AuthService';


const networkInterface = createNetworkInterface({
  uri: 'https://api.graph.cool/simple/v1/cj4j8xezmtdvv0130l95q2gkk'
})

// For Authentication
networkInterface.use([{
  applyMiddleware (req, next) {
    if (!req.options.headers) {
      req.options.headers = {}
    }
    // get the authentication token from local storage if it exists
    if (localStorage.getItem('id_token')) {
      req.options.headers.authorization = `Bearer ${localStorage.getItem('id_token')}`
    }
    next()
  },
}])

const client = new ApolloClient({
  networkInterface
})

ReactDOM.render((
  <ApolloProvider client={client}>
    <Router history={browserHistory}>
      <Route path='/' component={ListMovie} />
      <Route path='/create' component={CreateMovie} />
    </Router>
  </ApolloProvider>
  ), document.getElementById('root'));
registerServiceWorker();
Let's take a good look at the code above. It's very important to understand what is happening here. The call to our GraphQL backend is made possible here.
const networkInterface = createNetworkInterface({
  uri: 'https://api.graph.cool/simple/v1/cj4j8xezmtdvv0130l95q2gkk'
})
Replace the uri with your Graphcool endpoint. A network interface is created and passed to the Apollo Client. Now, the ApolloProvider is wrapping our Router to ensure that all child components can access the functionality from Apollo Client to send queries and perform mutations.
// For Authentication
networkInterface.use([{
  applyMiddleware (req, next) {
    if (!req.options.headers) {
      req.options.headers = {}
    }
    // get the authentication token from local storage if it exists
    if (localStorage.getItem('id_token')) {
      req.options.headers.authorization = `Bearer ${localStorage.getItem('id_token')}`
    }
    next()
  },
}])
The code above is for authentication purposes. This ensures that only an authenticated person can perform a certain operation. We'll go into more details in the authentication section.
One more thing. We need to reference bootstrap for styling. Add the link to bootstrap in public/index.html file.
...
<link href="https://maxcdn.bootstrapcdn.com/bootstrap/3.3.7/css/bootstrap.min.css" rel="stylesheet">
...
Modify the src/App.css file to contain the code here.
Now, run your app. There should be nothing on the landing page because you haven't added any movies. Head over to the /create URL and add a new movie.

Add a few movies. Now your landing page should look like this:
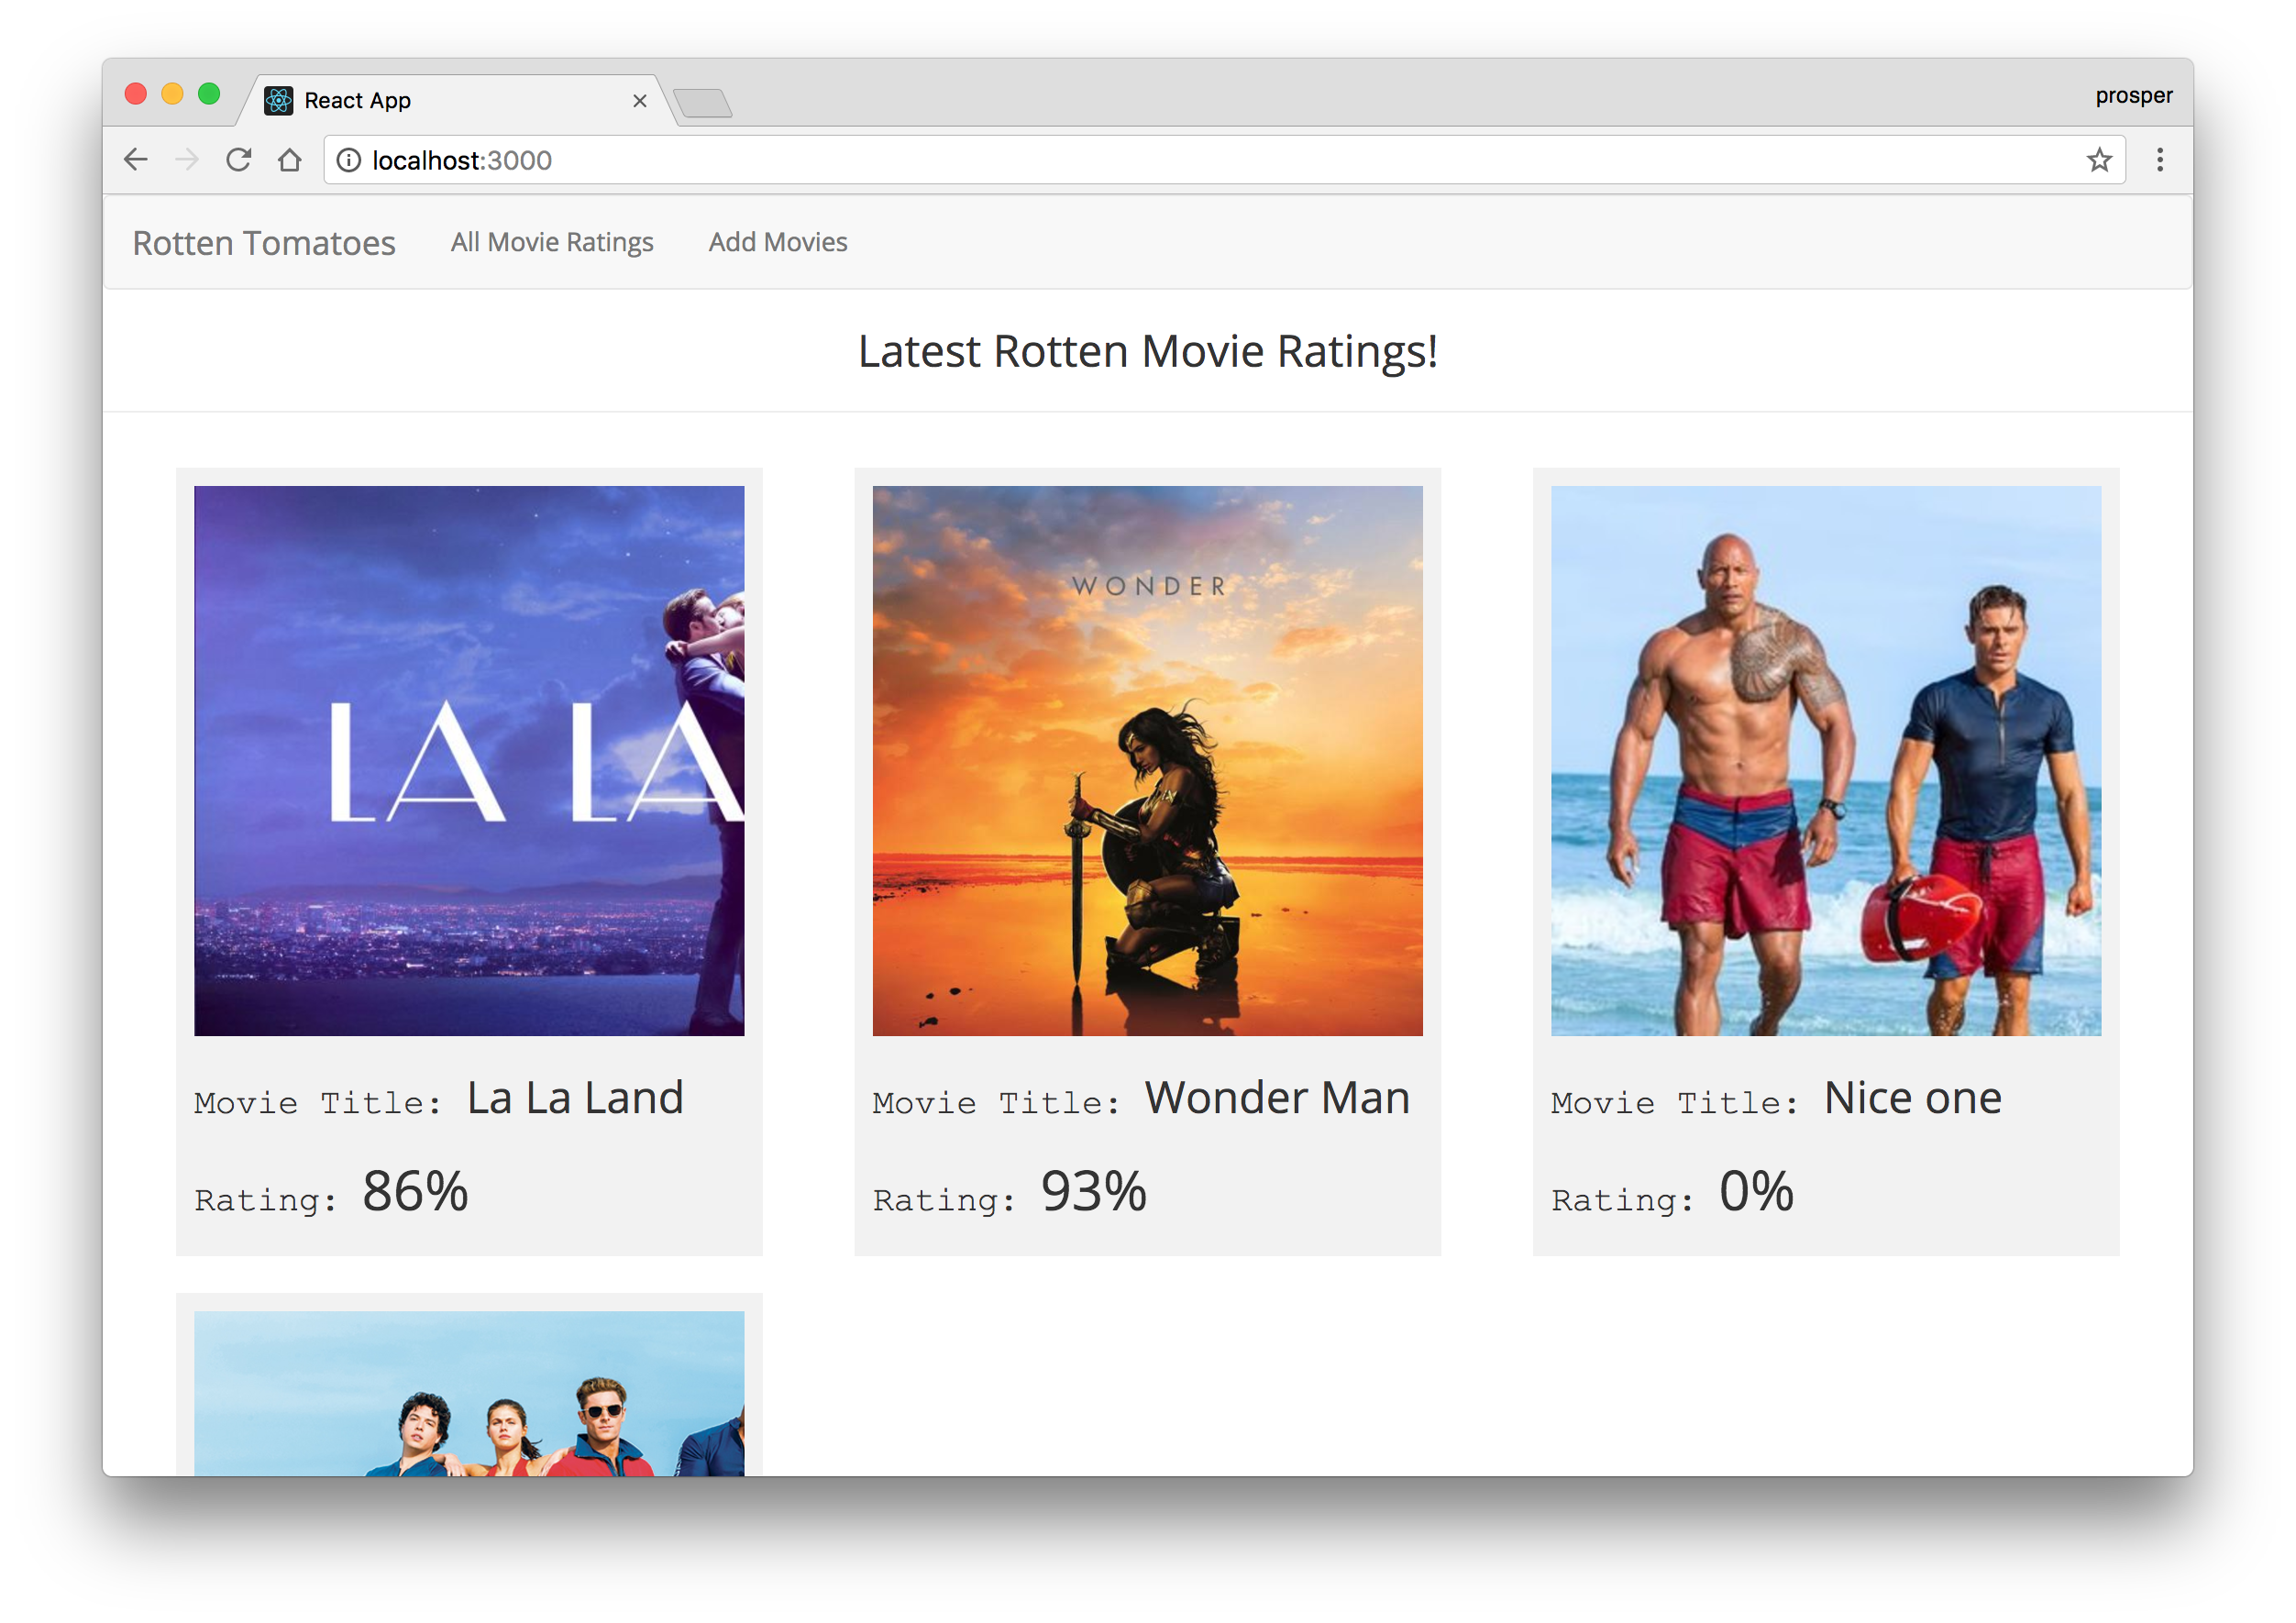
Awesome! Right now, everyone can view and create movies. Next, let's make sure only authenticated users can add movies.
Add Authentication to Your App
Auth0 allows us to issue JSON Web Tokens (JWTs). If you don't already have an Auth0 account, sign up for a free one now.
Login to your Auth0 management dashboard and create a new client. Change the Client Type to Regular Web Application and Token Endpoint Authentication Method to Basic. Scroll down to Advanced Settings > OAuth, ensure the JsonWebToken Signature Algorithm is set to HS256.
Create the Auth Service
We'll create an authentication service to handle everything about authentication in our app. Go ahead and create an AuthService.js file inside the utils directory.
Before we add code, you need to install jwt-decode and auth0-js node packages like so:
npm install jwt-decode auth0-js --saveOpen up the AuthService.js file and add code to it like so:
import decode from 'jwt-decode';
import { browserHistory } from 'react-router';
import auth0 from 'auth0-js';
const ID_TOKEN_KEY = 'id_token';

const CLIENT_ID = '{AUTH0_CLIENT_ID}';
const CLIENT_DOMAIN = 'AUTH0_DOMAIN';
const REDIRECT = 'YOUR_CALLBACK_URL';
const SCOPE = 'openid email profile';
const AUDIENCE = 'https://<AUTH0_DOMAIN>/userinfo';

var auth = new auth0.WebAuth({
  clientID: CLIENT_ID,
  domain: CLIENT_DOMAIN
});

export function login() {
  auth.authorize({
    responseType: 'id_token',
    redirectUri: REDIRECT,
    audience: AUDIENCE,
    scope: SCOPE
  });
}

export function logout() {
  clearIdToken();
  clearProfile();
  browserHistory.push('/');
}

export function requireAuth(nextState, replace) {
  if (!isLoggedIn()) {
    replace({pathname: '/'});
  }
}

export function getIdToken() {
  return localStorage.getItem(ID_TOKEN_KEY);
}

function clearIdToken() {
  localStorage.removeItem(ID_TOKEN_KEY);
}

function clearProfile() {
  localStorage.removeItem('profile');
  localStorage.removeItem('userId');
}

// Helper function that will allow us to extract the id_token
export function getAndStoreParameters() {
  auth.parseHash(window.location.hash, function(err, authResult) {
    if (err) {
      return console.log(err);
    }

    setIdToken(authResult.idToken);
  });
}

export function getEmail() {
  return getProfile().email;
}

export function getName() {
  return getProfile().nickname;
}

// Get and store id_token in local storage
function setIdToken(idToken) {
  localStorage.setItem(ID_TOKEN_KEY, idToken);
}

export function isLoggedIn() {
  const idToken = getIdToken();
  return !!idToken && !isTokenExpired(idToken);
}

export function getProfile() {
  const token = decode(getIdToken());
  return token;
}

function getTokenExpirationDate(encodedToken) {
  const token = decode(encodedToken);
  if (!token.exp) { return null; }

  const date = new Date(0);
  date.setUTCSeconds(token.exp);

  return date;
}

function isTokenExpired(token) {
  const expirationDate = getTokenExpirationDate(token);
  return expirationDate < new Date();
}
In the code above, we are using an hosted version of Auth0 in the login method and passed in our credentials.
The auth0 package calls the Auth0's authorize endpoint. With all the details we passed to the method, our client app will be validated and authorized to perform authentication. You can learn more about the specific values that can be passed to the authorize method here.
The parameters that you do not have yet are the {AUTH0_CLIENT_ID} and the {YOUR_CALLBACK_URL}. Copy the CLIENT ID of your newly created client on the Auth0 dashboard and replace it with the value of AUTH0_CLIENT_ID in the variable CLIENT_ID. Replace your callback url with http://localhost:3000/callback. Don't forget to add that to the Allowed Callback URLs and http://localhost:3000 to the Allowed Origins (CORS).
Ensure you also replace the value of <AUTH0_DOMAIN> in const AUDIENCE = 'https://<AUTH0_DOMAIN>/userinfo'; to your auth0 domain.
We also checked whether the token has expired via the getTokenExpirationDate and isTokenExpired methods. The isLoggedIn method returns true or false based on the presence and validity of a user id_token.
Finally, we implemented a middleware, the requireAuth method. We'll use this method to protect the /special route from being accessed for non-loggedIn users.
Let's go update the Nav component to hide/show the login and logout buttons based on the user's authentication status.
Now, your Nav component should look like this:
import React, { Component } from 'react';
import { Link } from 'react-router';
import { login, logout, isLoggedIn } from '../utils/AuthService';
import '../App.css';

class Nav extends Component {

  render() {
    return (
      <nav className="navbar navbar-default">
        <div className="navbar-header">
          <Link className="navbar-brand" to="/">Rotten Tomatoes</Link>
        </div>
        <ul className="nav navbar-nav">
          <li>
            <Link to="/">All Movie Ratings</Link>

          </li>
          <li>
            {
              ( isLoggedIn() ) ? <Link to="/create">Add Movies</Link> :  ''
            }
          </li>
        </ul>
        <ul className="nav navbar-nav navbar-right">
          <li>
            {
             (isLoggedIn()) ? ( <button className="btn btn-danger log" onClick={() => logout()}>Log out </button> ) : ( <button className="btn btn-info log" onClick={() => login()}>Log In</button> )
            }
          </li>
        </ul>
      </nav>
    );
  }
}

export default Nav;
We imported login, logout and isLoggedIn functions from the AuthService. Then, we attached the login() and logout() functions to the login and logout buttons respectively.
We also hid the /create link by checking the authentication status of the user via the isLoggedIn() function.
Add A Callback Component
We will create a new component and call it Callback.js. This component will be activated when the localhost:3000/callback route is called and it will process the redirect from Auth0 and ensure we received the right data back after a successful authentication. The component will store the id_token.
Callback.js
import { Component } from 'react';
import { withRouter } from 'react-router'
import { getAndStoreParameters, getIdToken, getEmail, getName } from '../utils/AuthService';
import { graphql } from 'react-apollo'
import gql from 'graphql-tag'

class Callback extends Component {

  componentDidMount() {
    getAndStoreParameters();
    this.createUser();
  }

  createUser = () => {
    const variables = {
      idToken: getIdToken(),
      email: getEmail(),
      name: getName()
    }

    this.props.createUser({ variables })
      .then((response) => {
          console.log("Response from create user", response);
          localStorage.setItem('userId', response.data.createUser.id);
          this.props.router.replace('/')
      }).catch((e) => {
        console.error("Error of life ", e)
        this.props.router.replace('/')
      })
  }

  render() {
    return null;
  }
}

const createUser = gql`
  mutation ($idToken: String!, $name: String!, $email: String!){
    createUser(authProvider: {auth0: {idToken: $idToken}}, name: $name, email: $email) {
      id
    }
  }
`

const userQuery = gql`
  query {
    user {
      id
    }
  }
`

export default graphql(createUser, {name: 'createUser'})(
  graphql(userQuery, { options: { fetchPolicy: 'network-only' }})(withRouter(Callback))
)
Once a user is authenticated, Auth0 will redirect back to our application and call the /callback route. Auth0 will also append the id_token to this request, and our Callback component will make sure to properly process and store the token in localStorage. If all is well, meaning we received an id_token, we will be redirected back to the / page and will be in a logged-in state.
Add some values to Auth0 Dashboard
Just before you try to log in or sign up, head over to your Auth0 dashboard and add http://localhost:3000/callback to the Allowed Callback URLs and http://localhost:3000 to Allowed Origins (CORS).
Secure The Special Route
We need to ensure that no one can go to the browser and just type /create to access the movie route.
Open up index.js and add an onEnter prop with a value of requireAuth to the /create route like so:
....
....
ReactDOM.render((
  <ApolloProvider client={client}>
    <Router history={browserHistory}>
      <Route path='/' component={ListMovie} />
      <Route path='/create' component={CreateMovie} onEnter={requireAuth} />
      <Route path="/callback" component={Callback} />
    </Router>
  </ApolloProvider>
  ), document.getElementById('root'));
registerServiceWorker();
index.js
Go ahead and login.
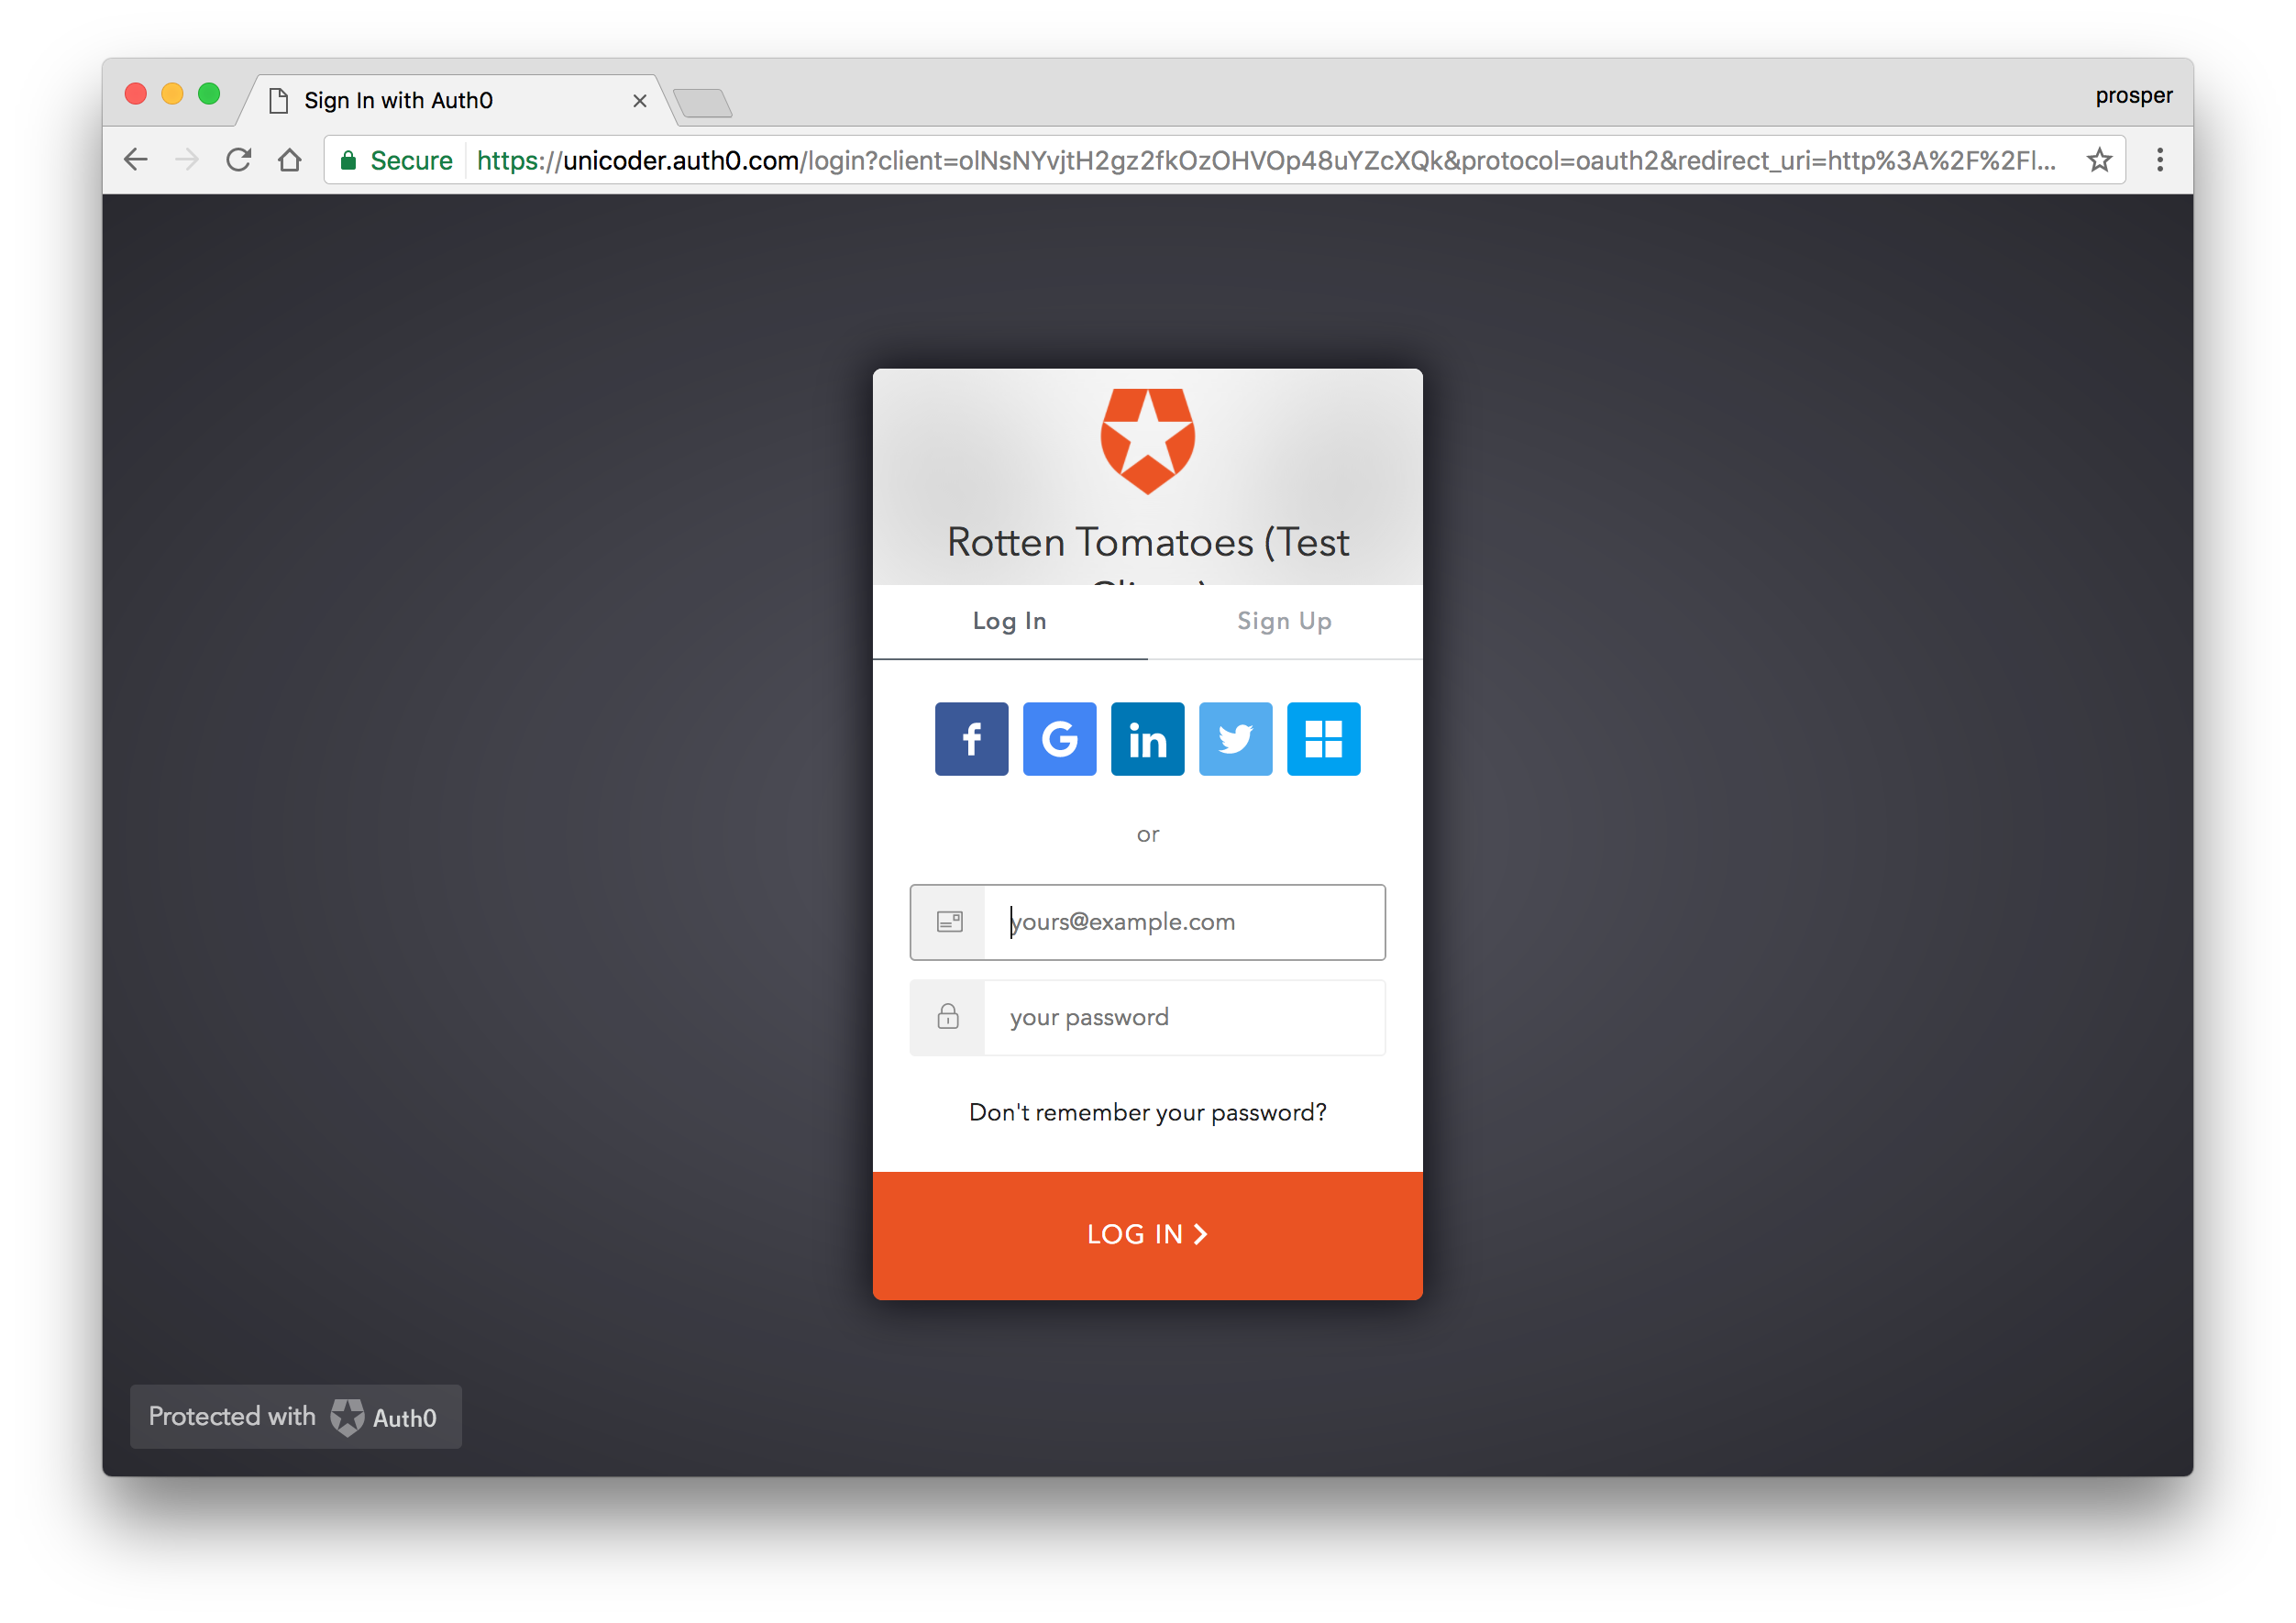
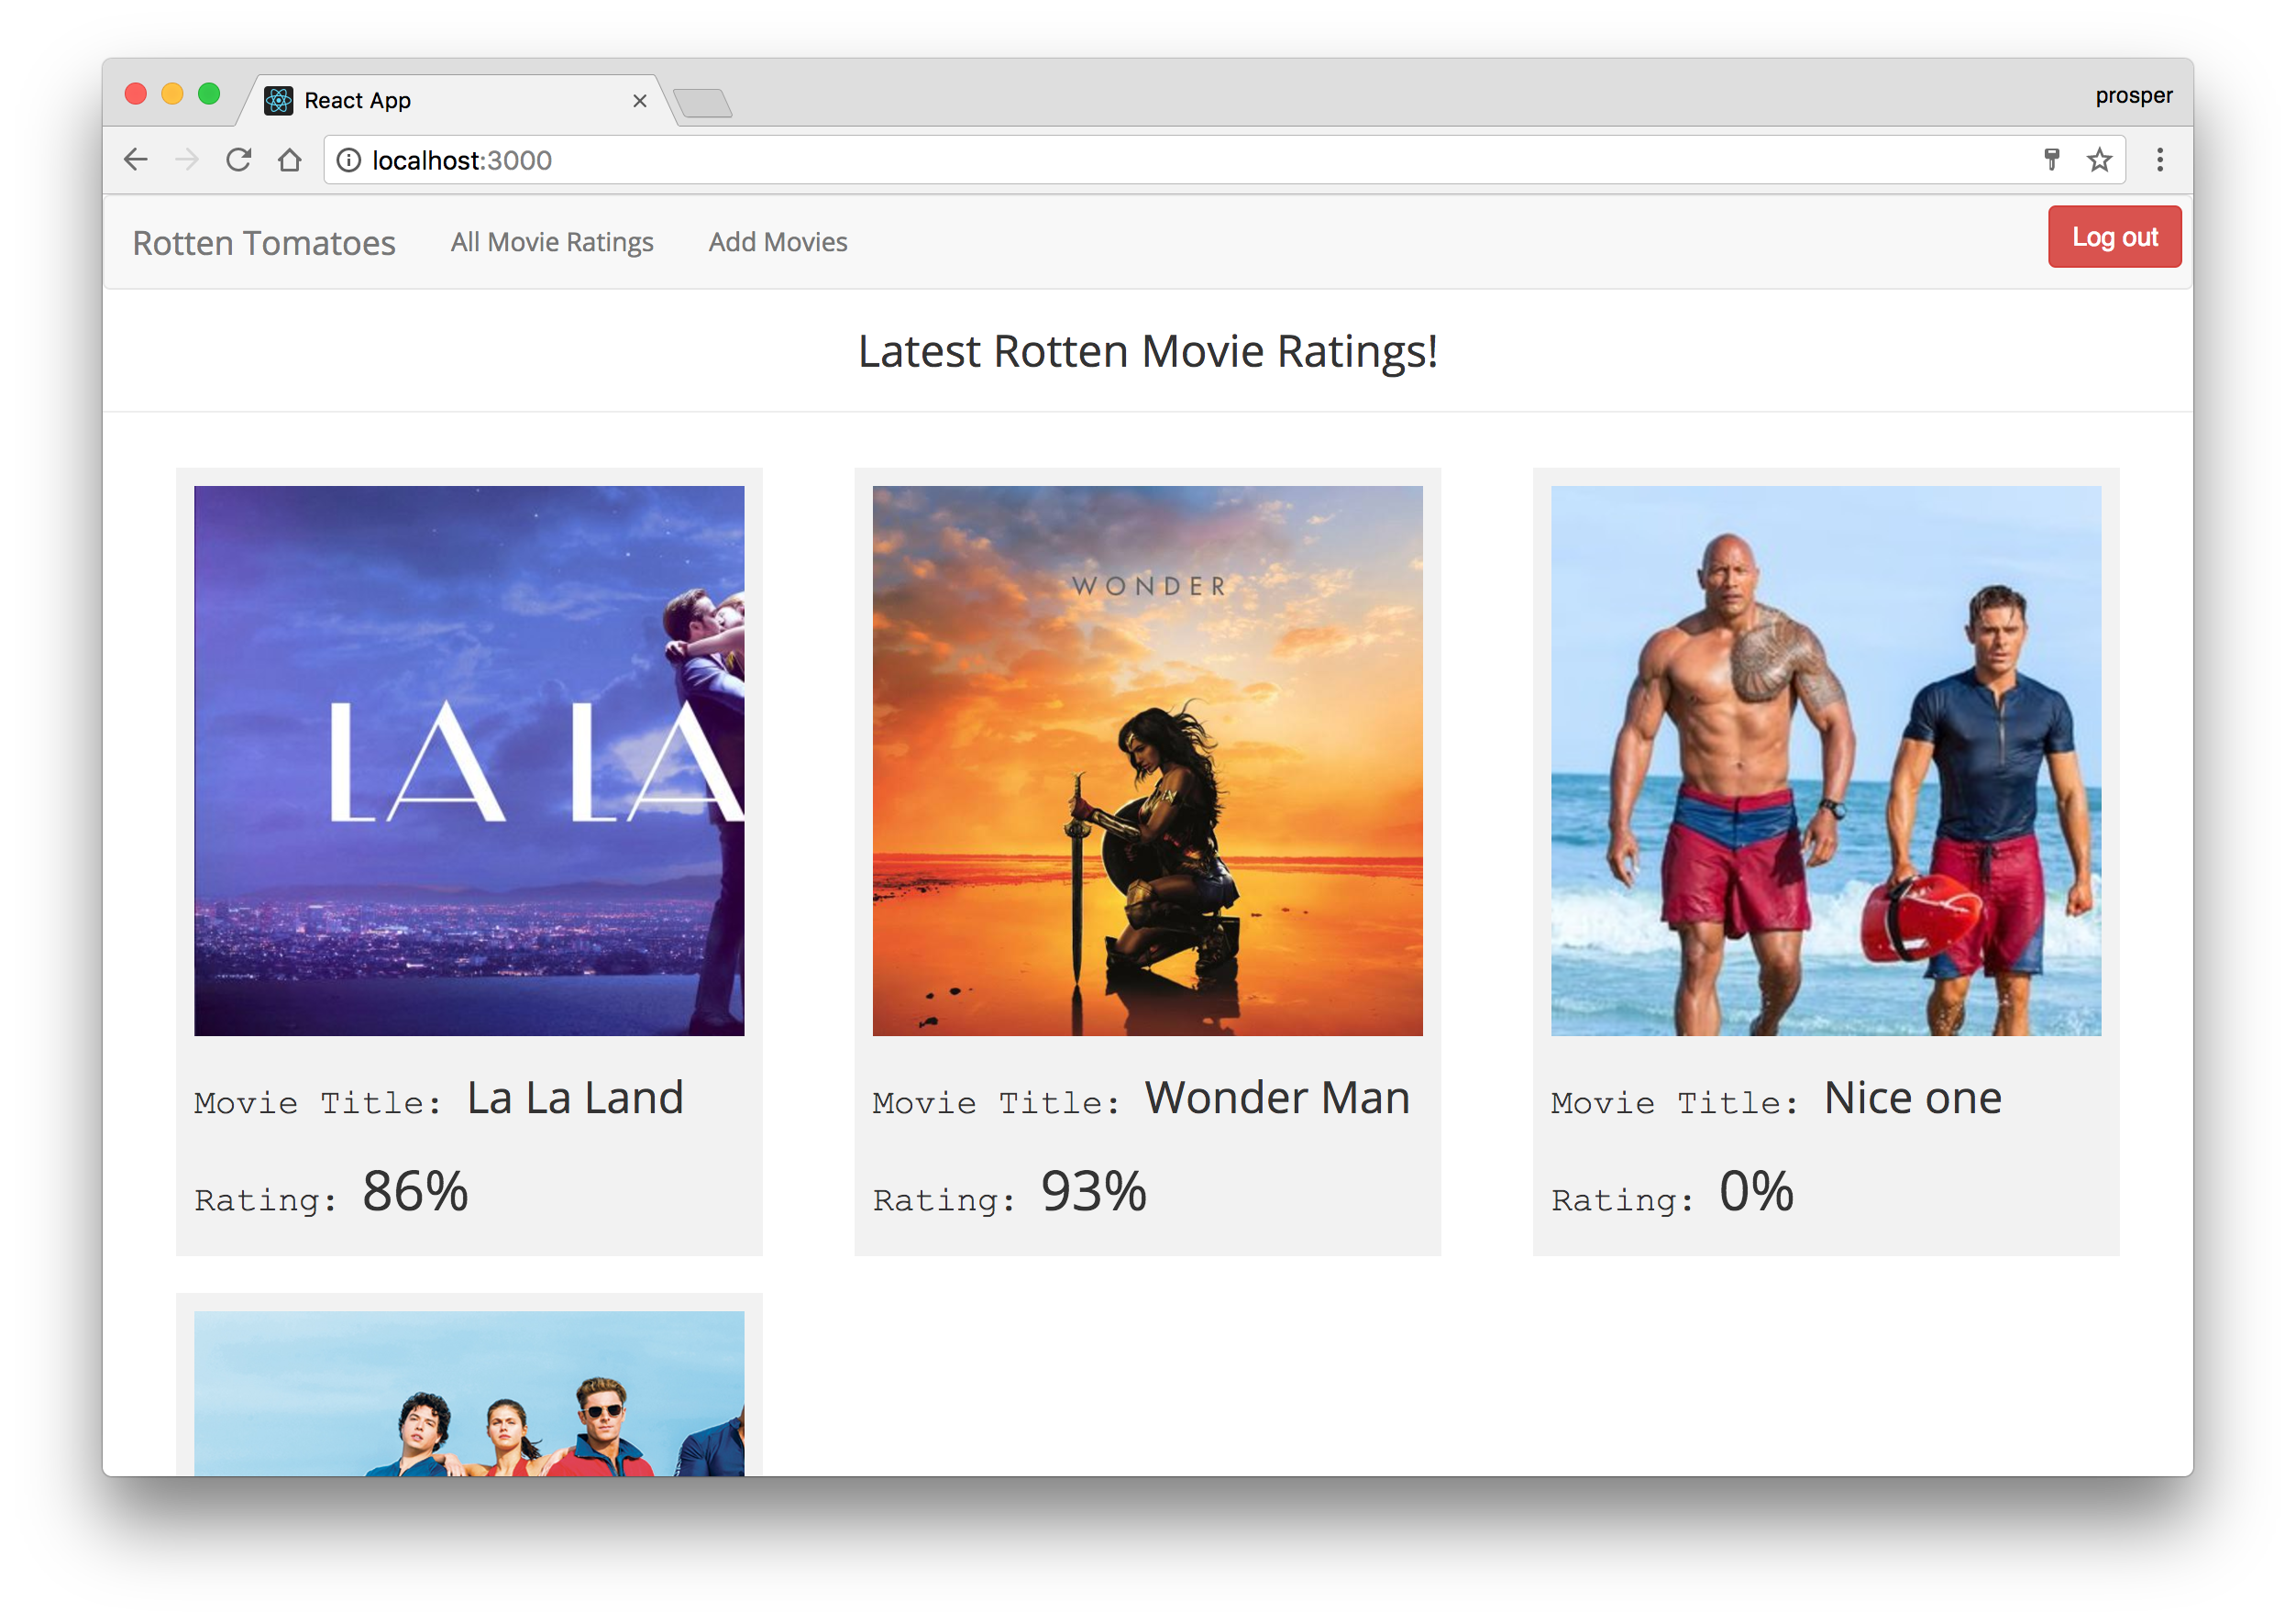
Now you are logged in. Perfect!
We have successfully handled authentication on the frontend, but something is missing. Our GraphQL endpoints are not secured. Anybody can get access to our endpoints and make fetch queries and mutations.
Secure GraphQL endpoints
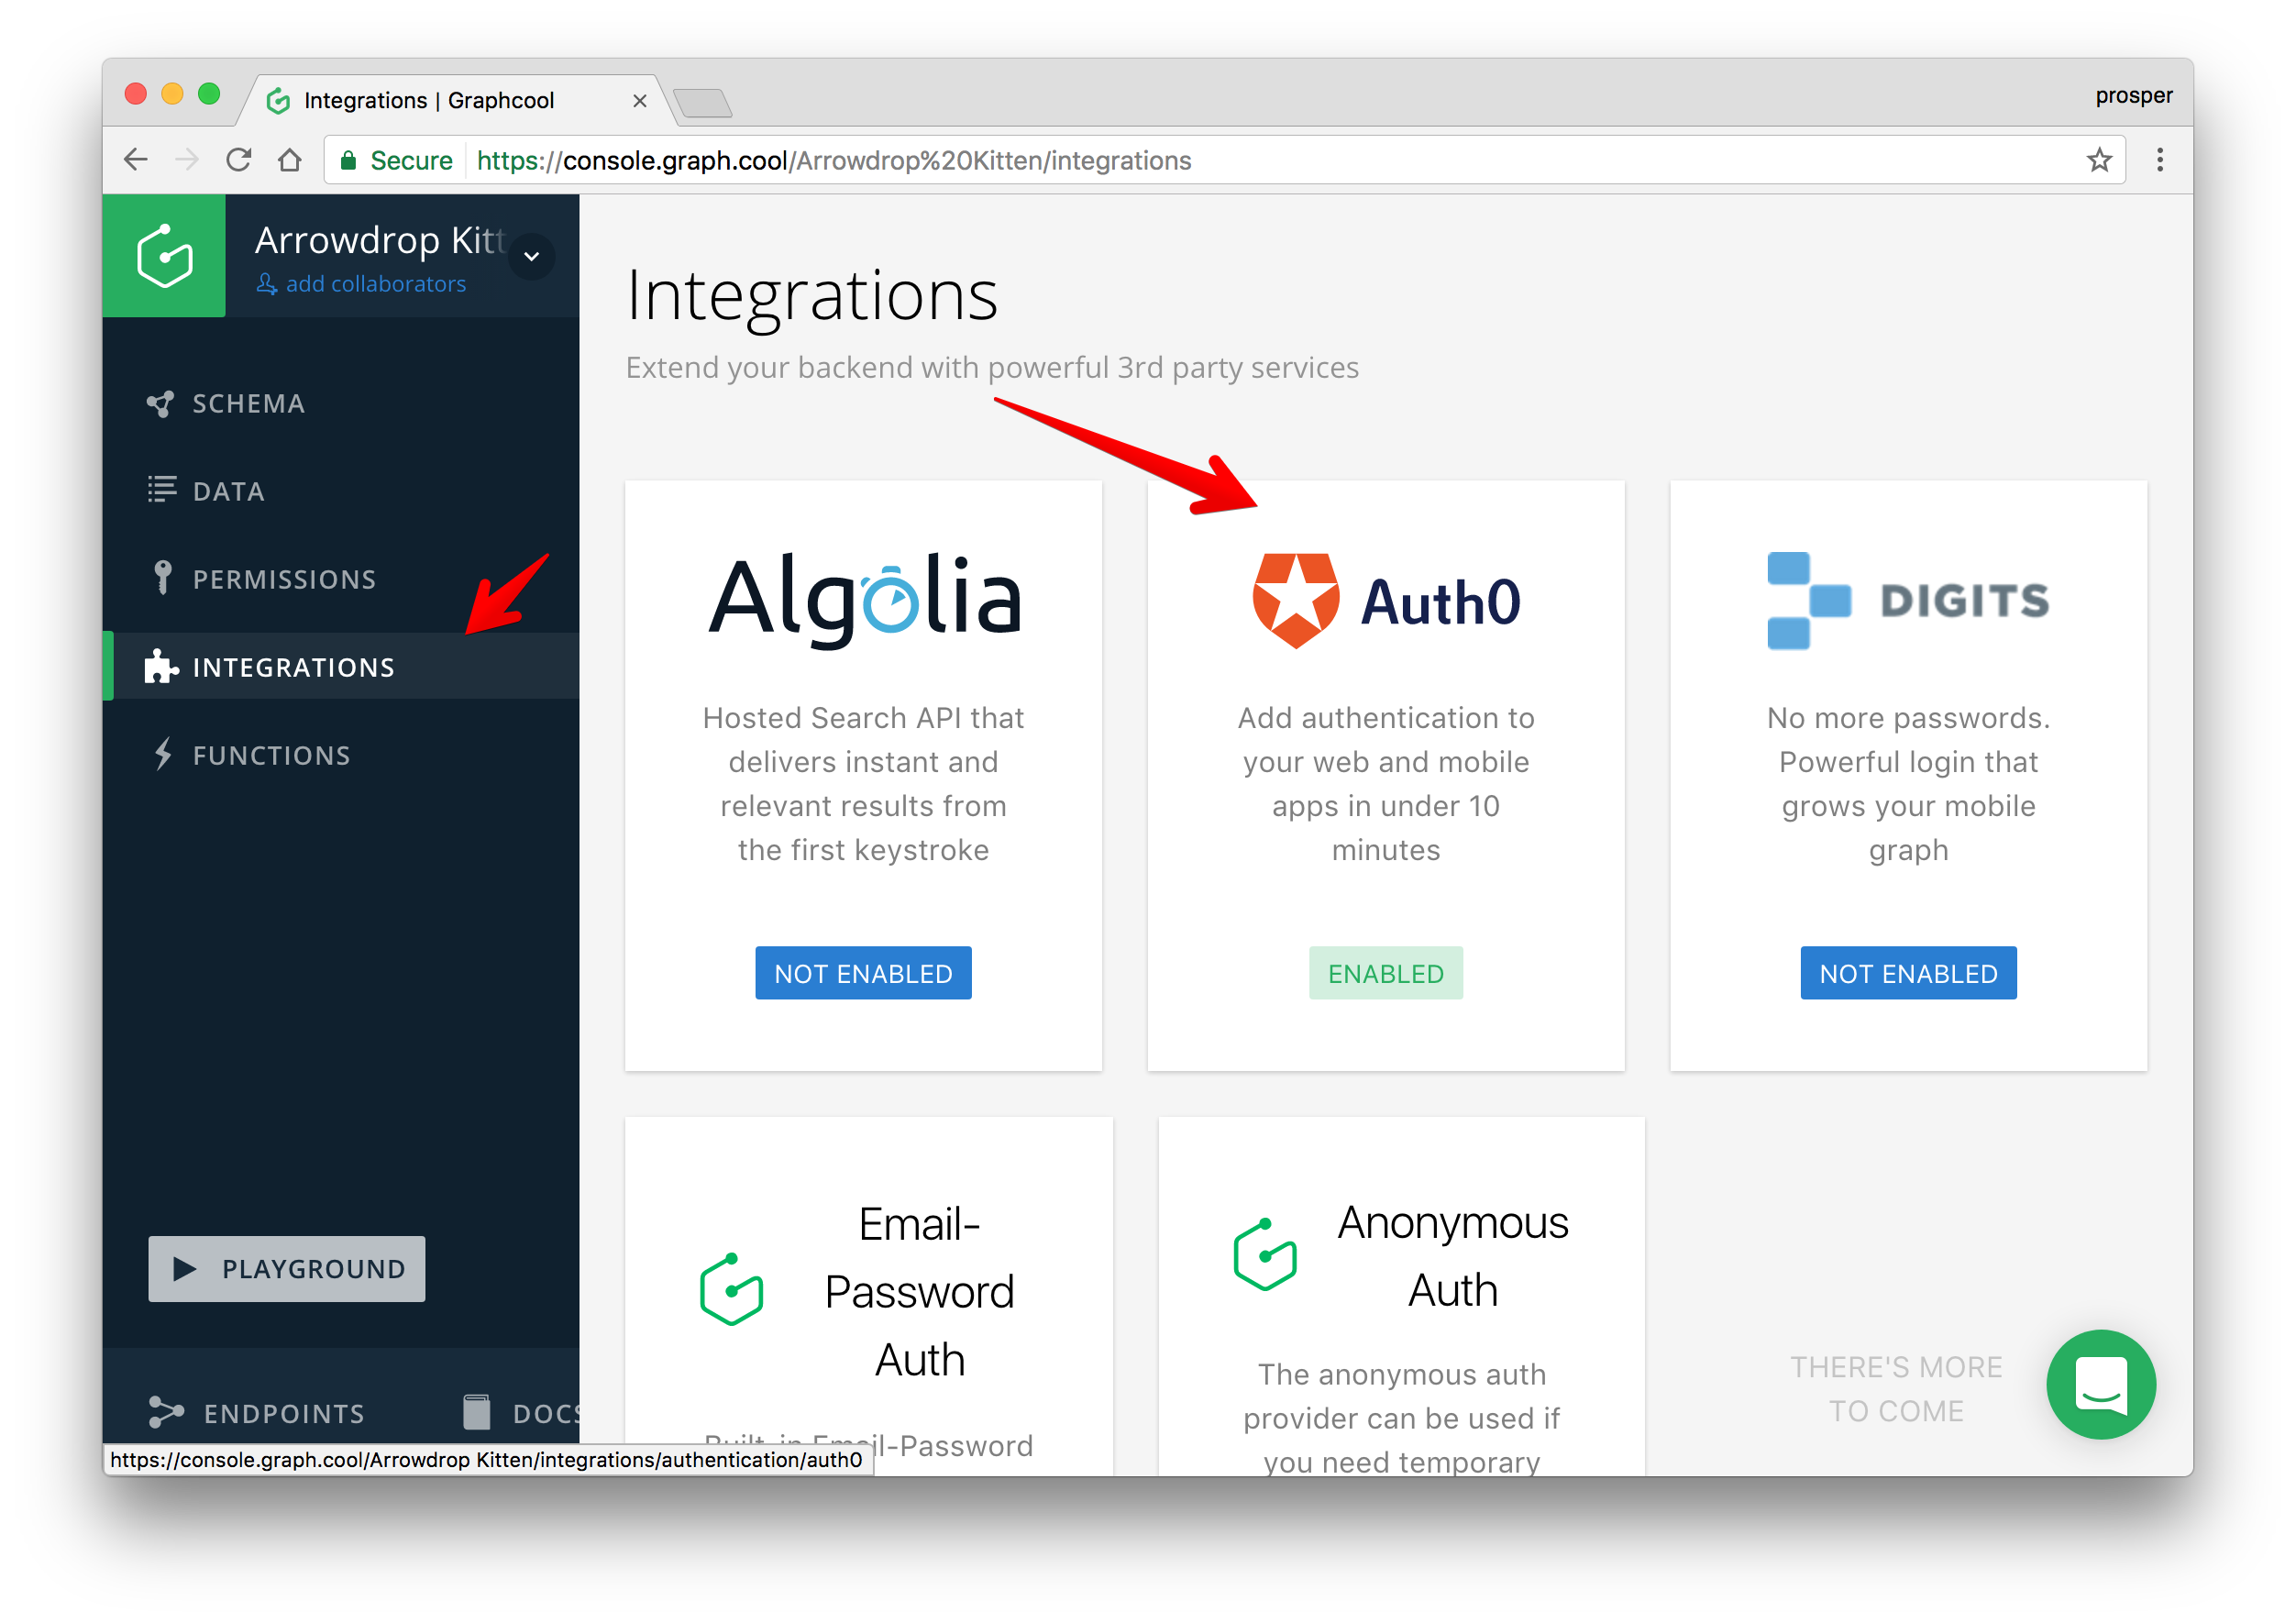
Head over to Graphcool. Thankfully, it ships with Permission systems and Auth0. Click on the User System as shown below. Also, click on the Configure Auth Provider highlighted below:

Click on Integrations and enable Auth0
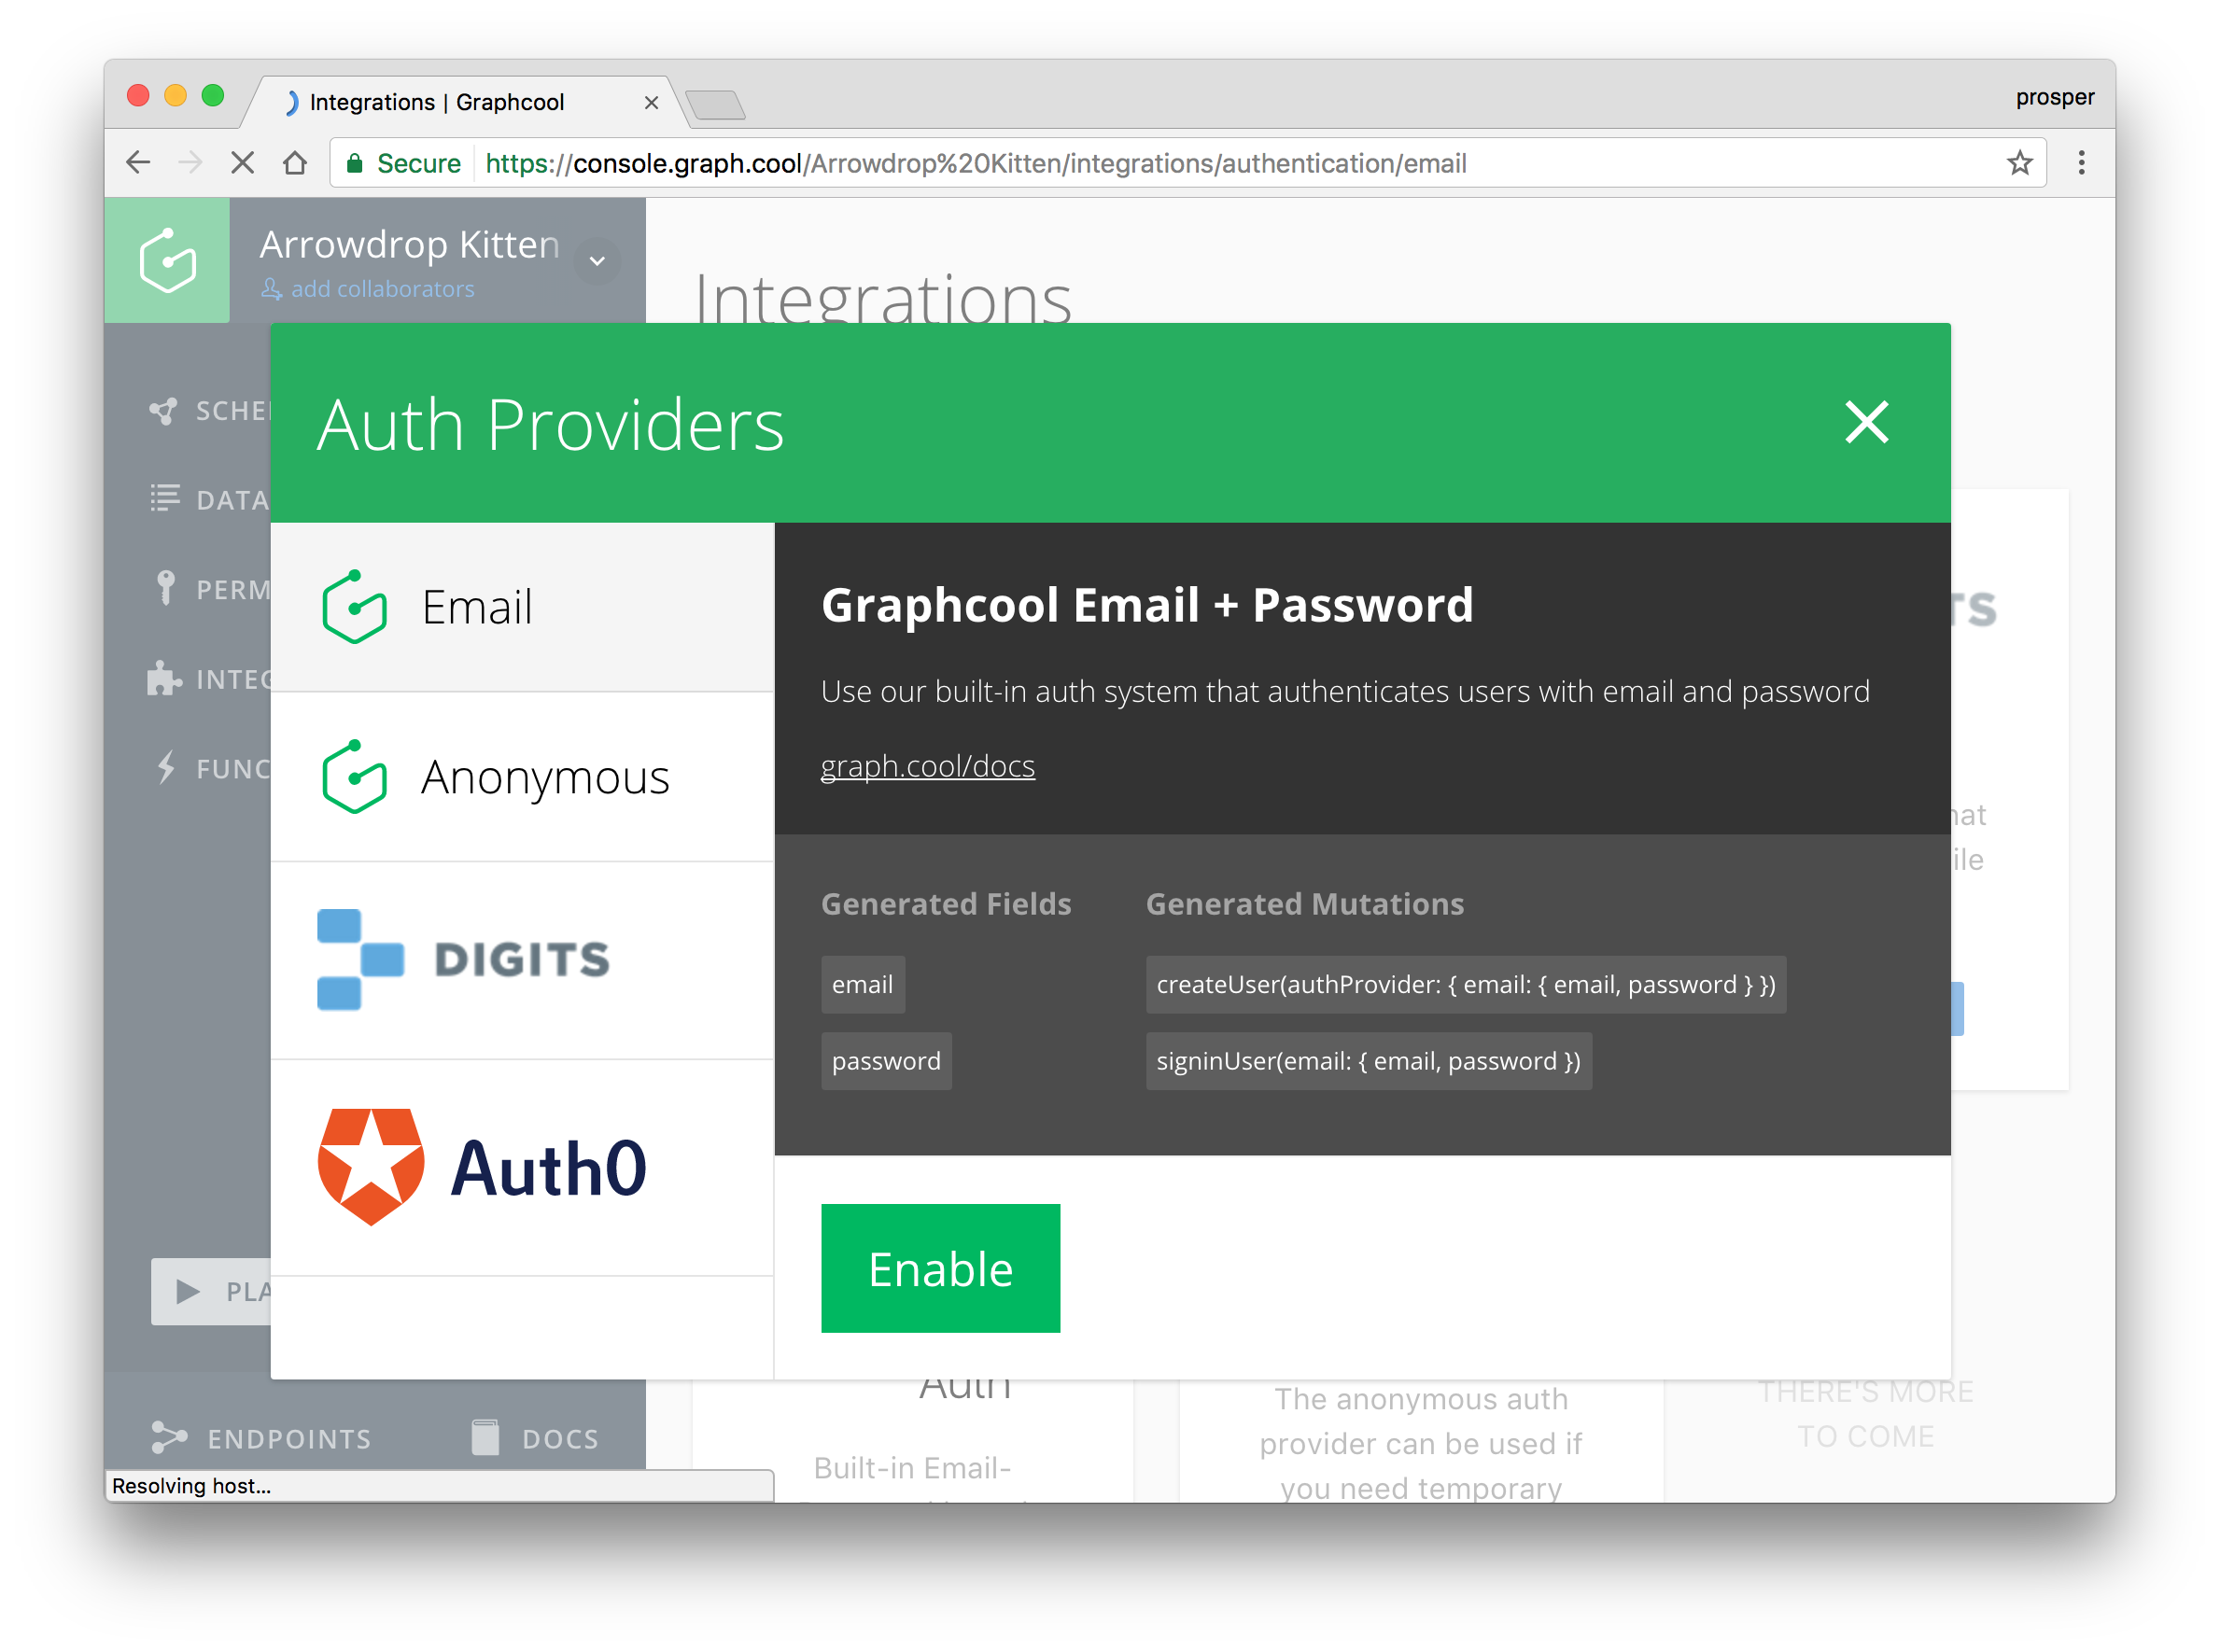
Copy your Auth0 Client Credentials and paste it here.

After you are done correctly configuring and integrating Auth0, try to sign up a new user.
A new user will be created in your graphcool dashboard. Remember our createUser mutation? Yes, it creates a new user in the graphcool backend.
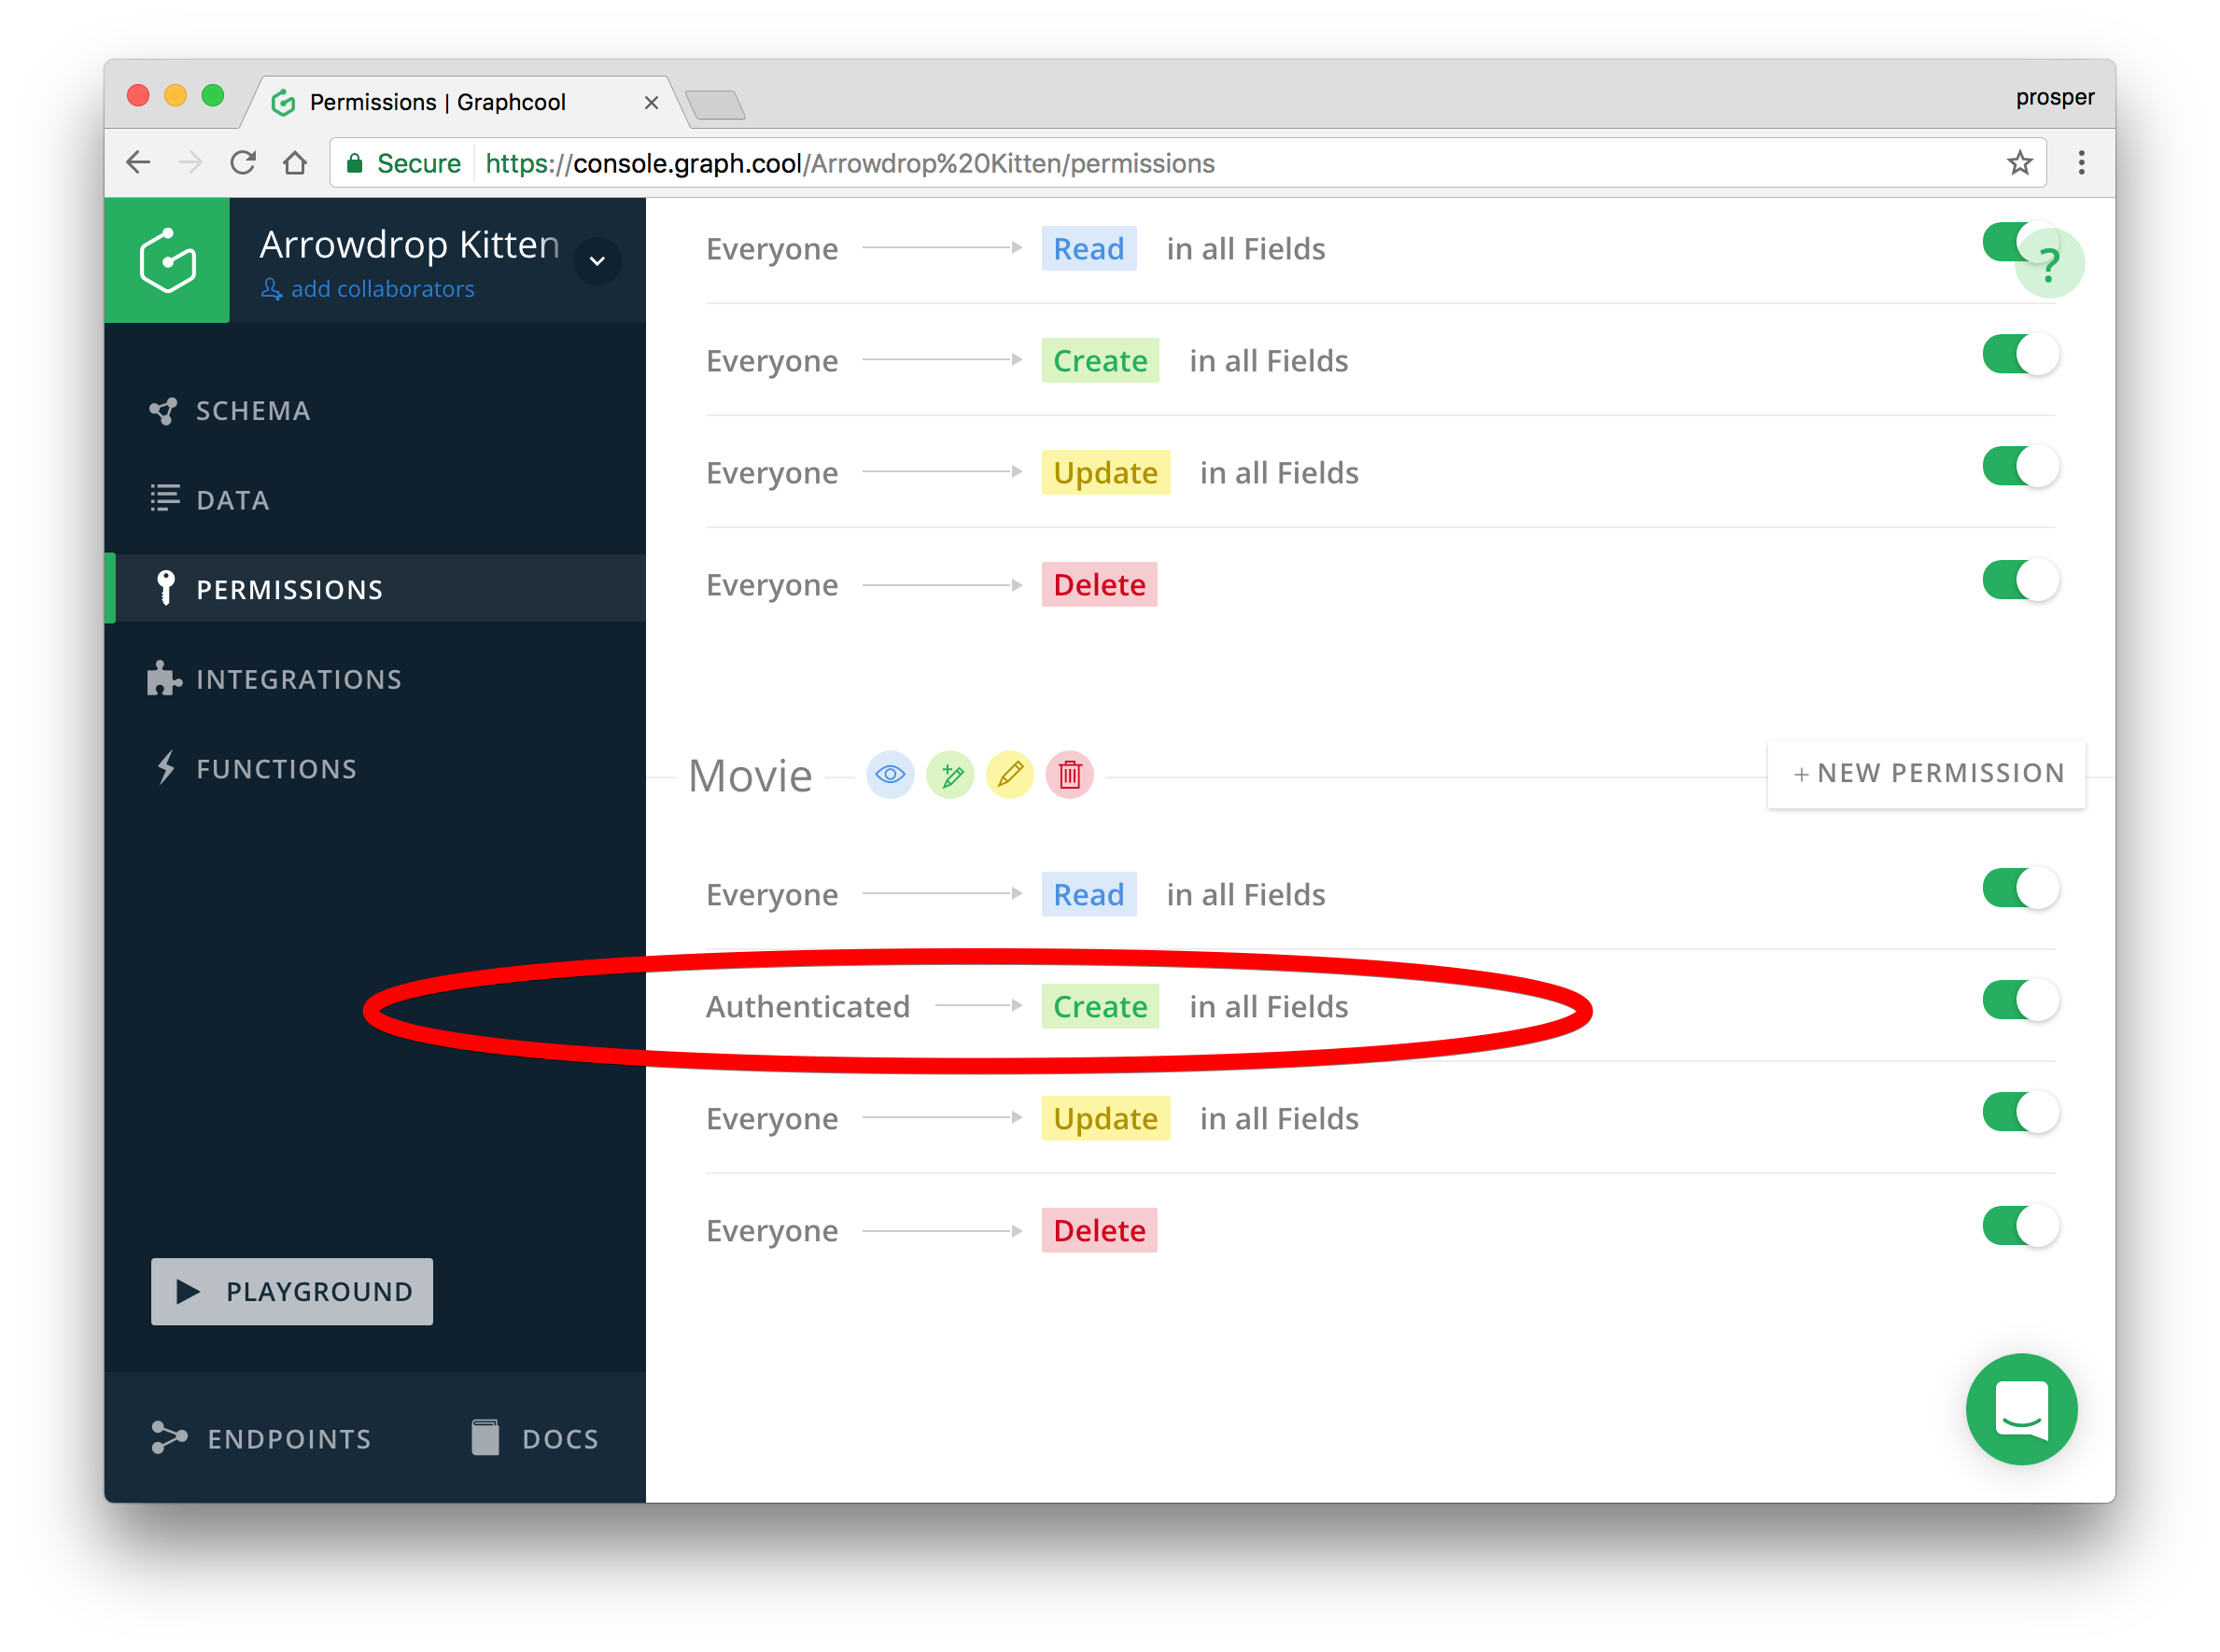
Now, head back to graphcool and click on Permissions. We need to restrict permission on the type of user that can perform certain operations.
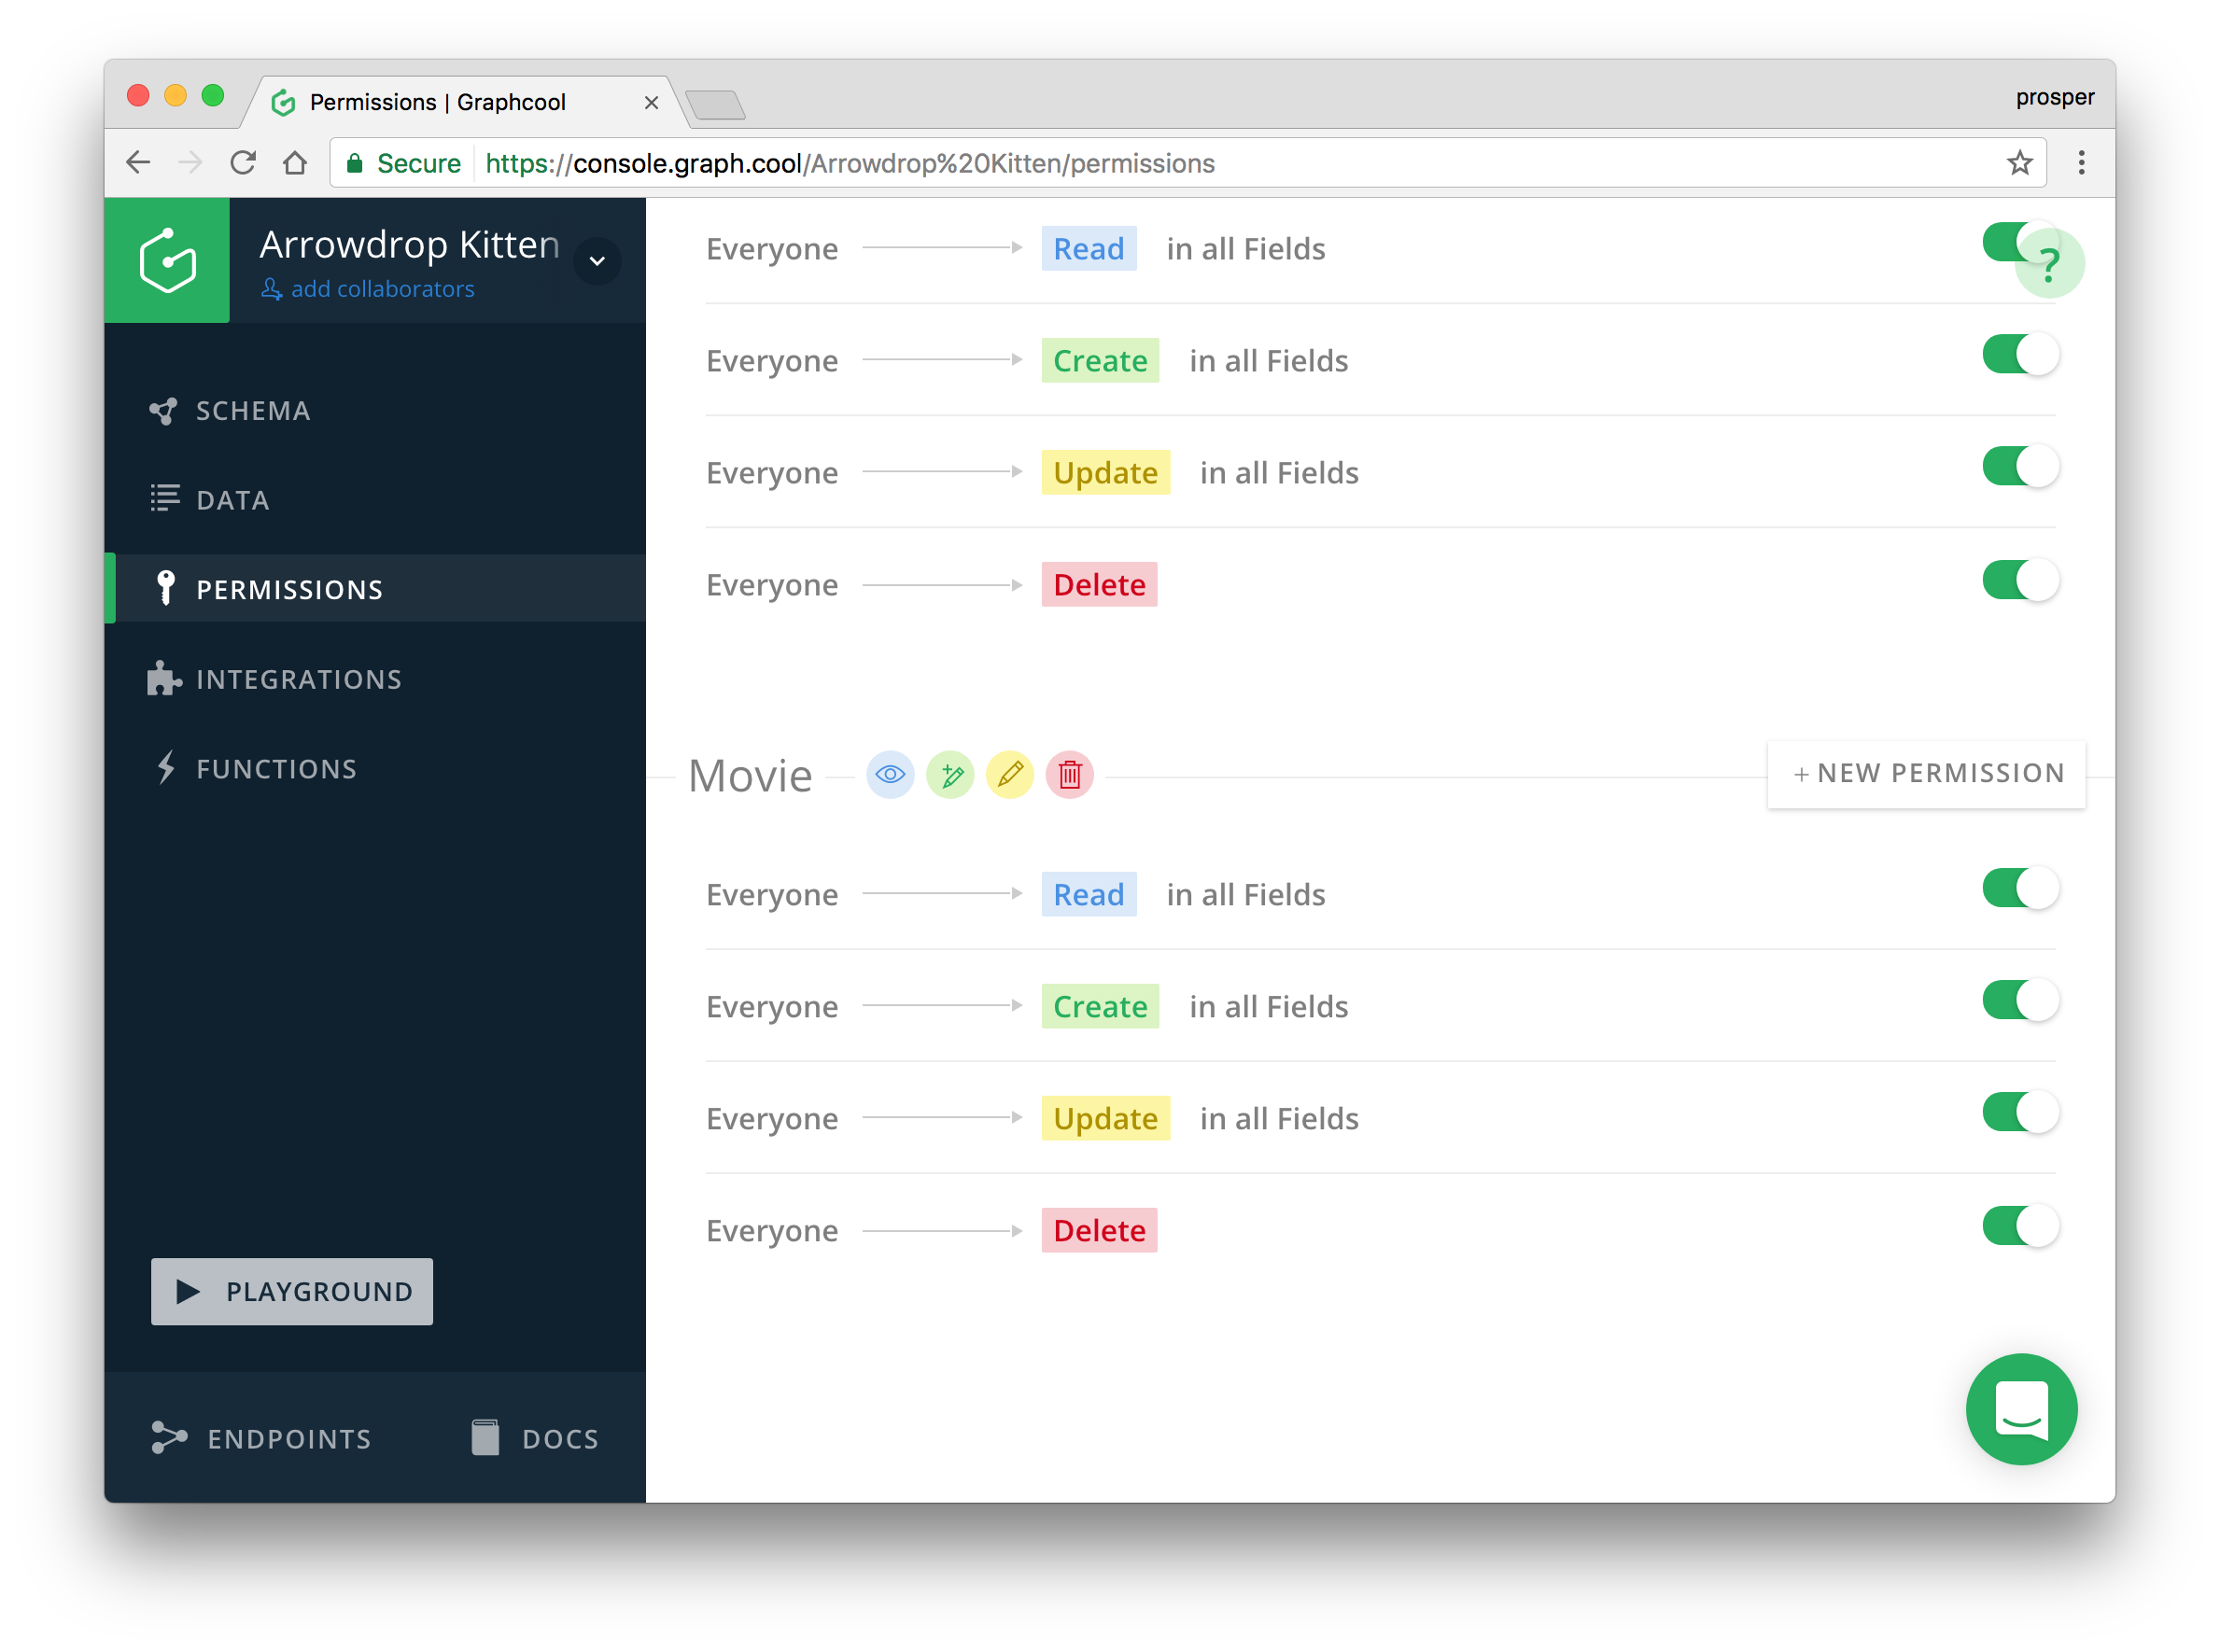
Right now, everyone can create movies. Let's change that to ensure only authenticated users can!
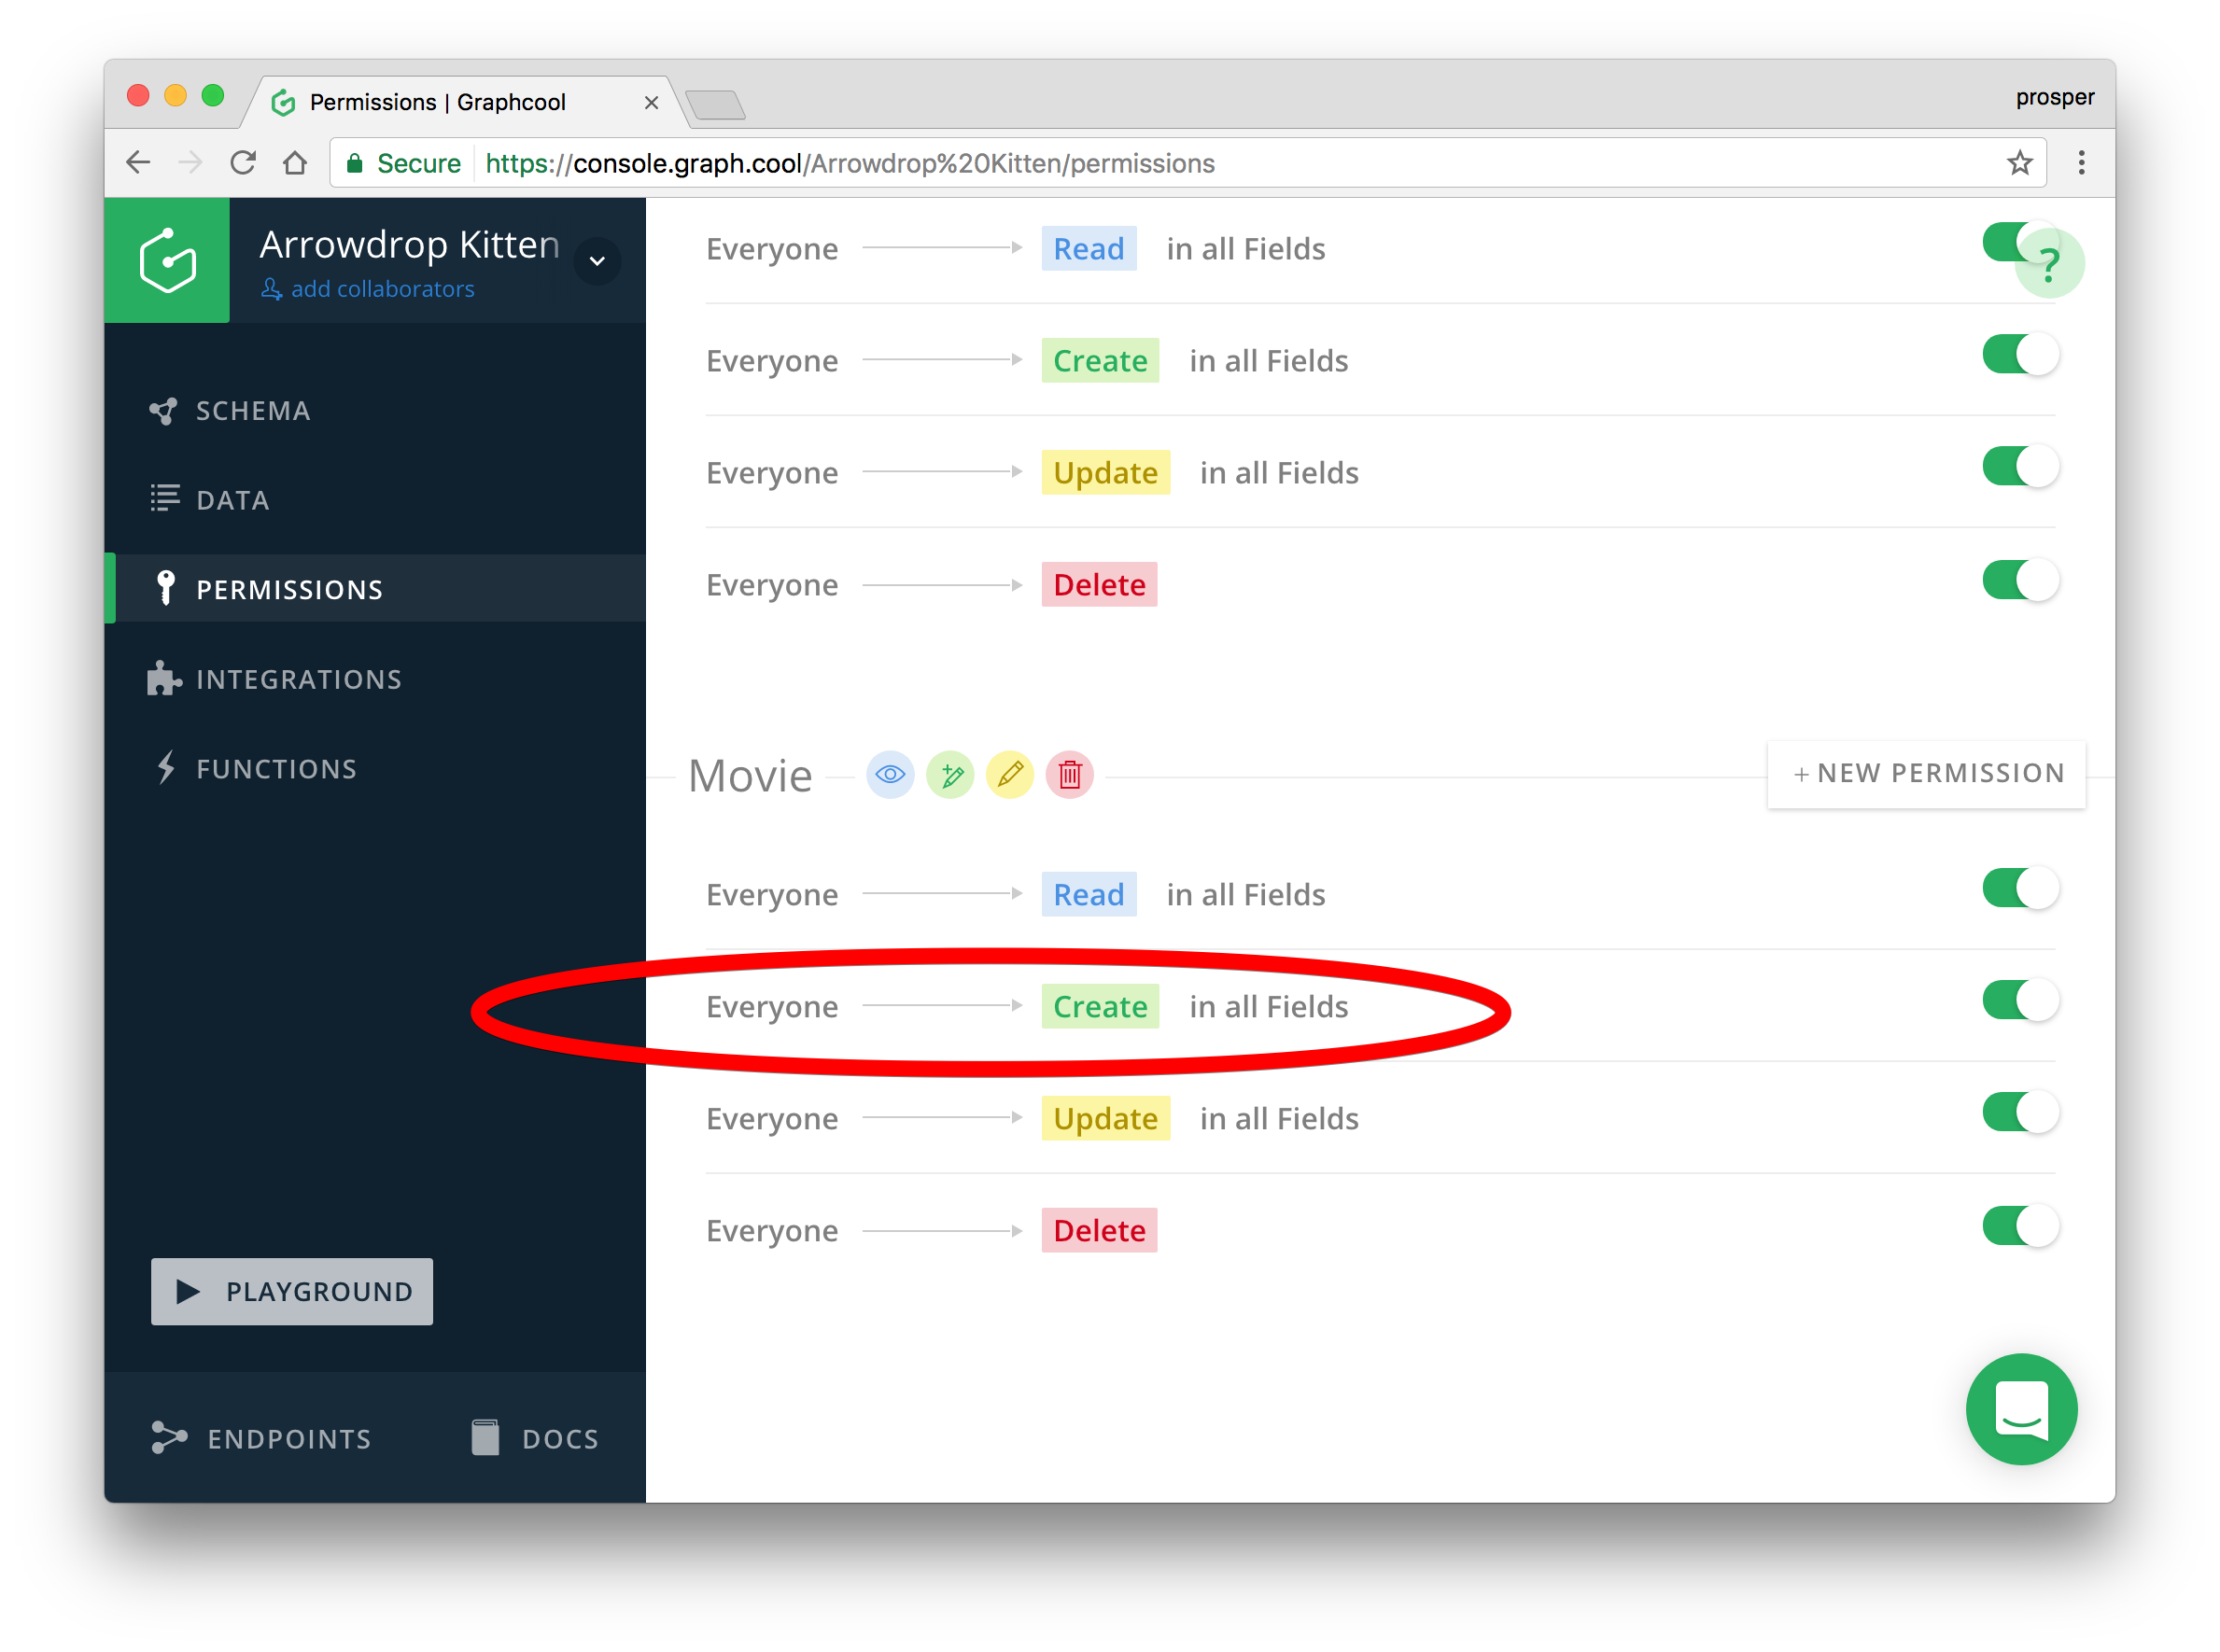
Click on the Everyone field and update it to make sure only Authenticated users can create.
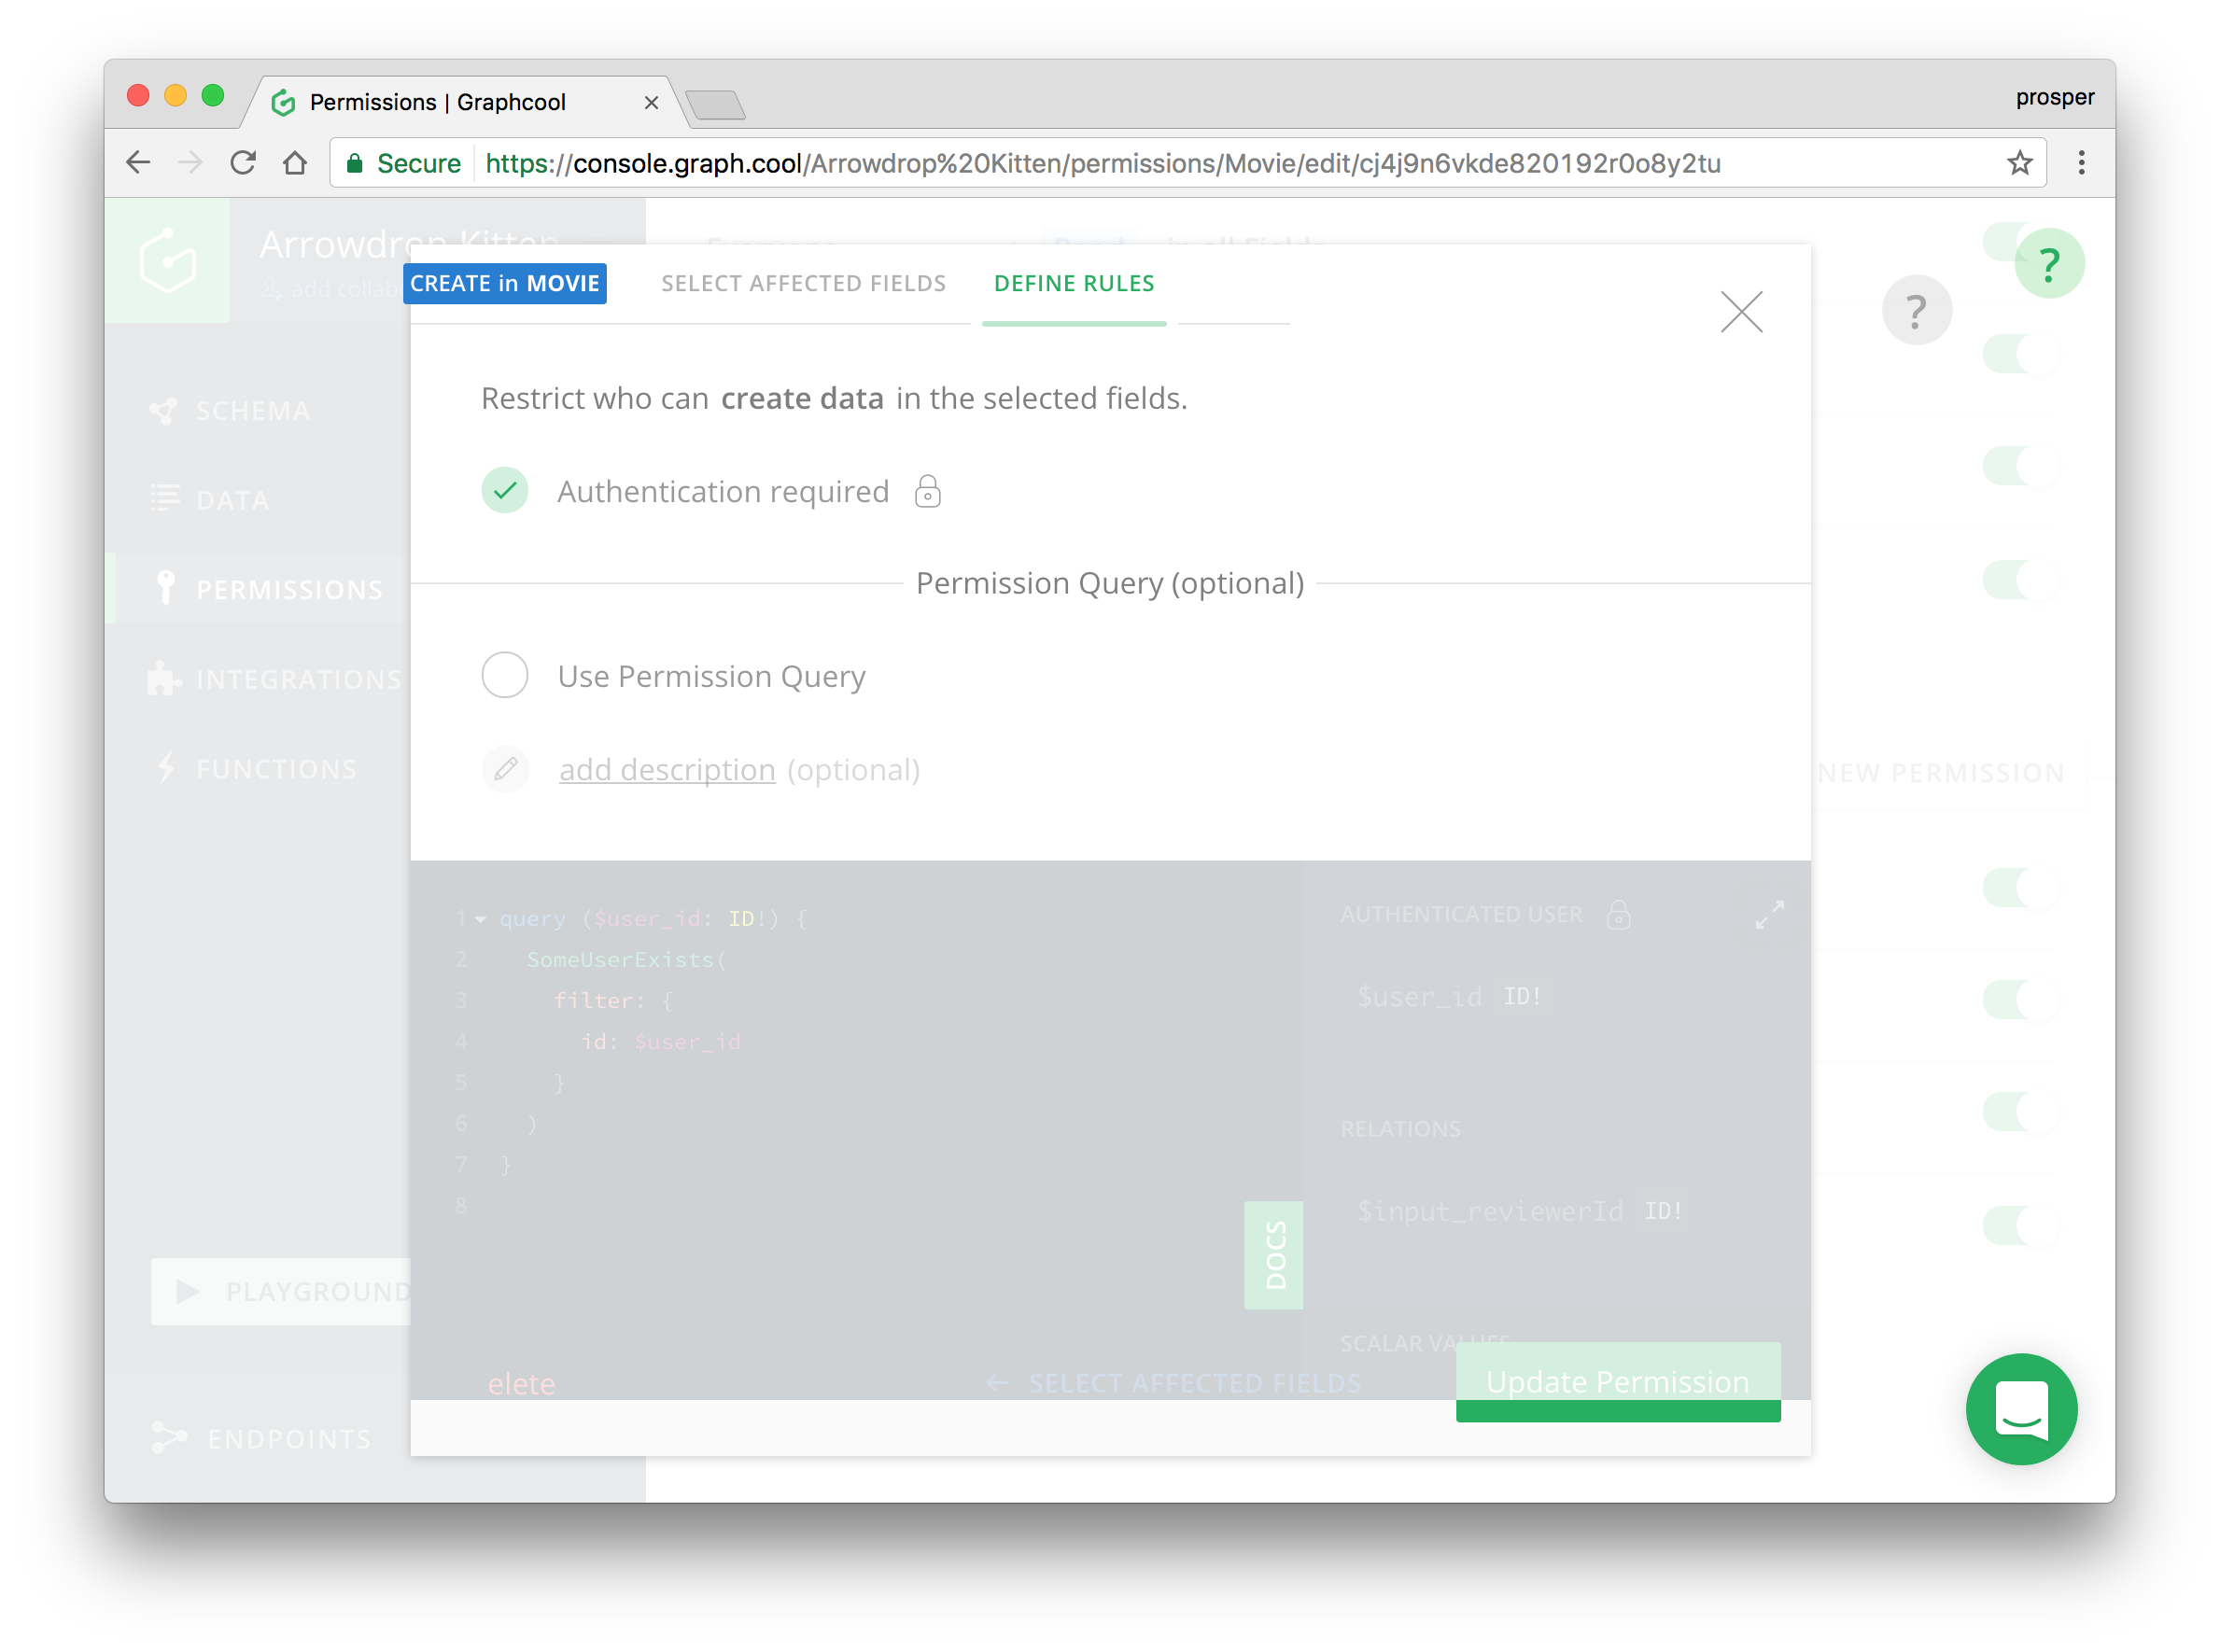
Now, if a user isn't authenticated, he or she can't create movies.
Head back to your app. Open up src/index.js file and remove the onEnter hook for the /create route.
Now, run your app and try to create a movie. Aha! Something went wrong, it doesn't work. Check your console.
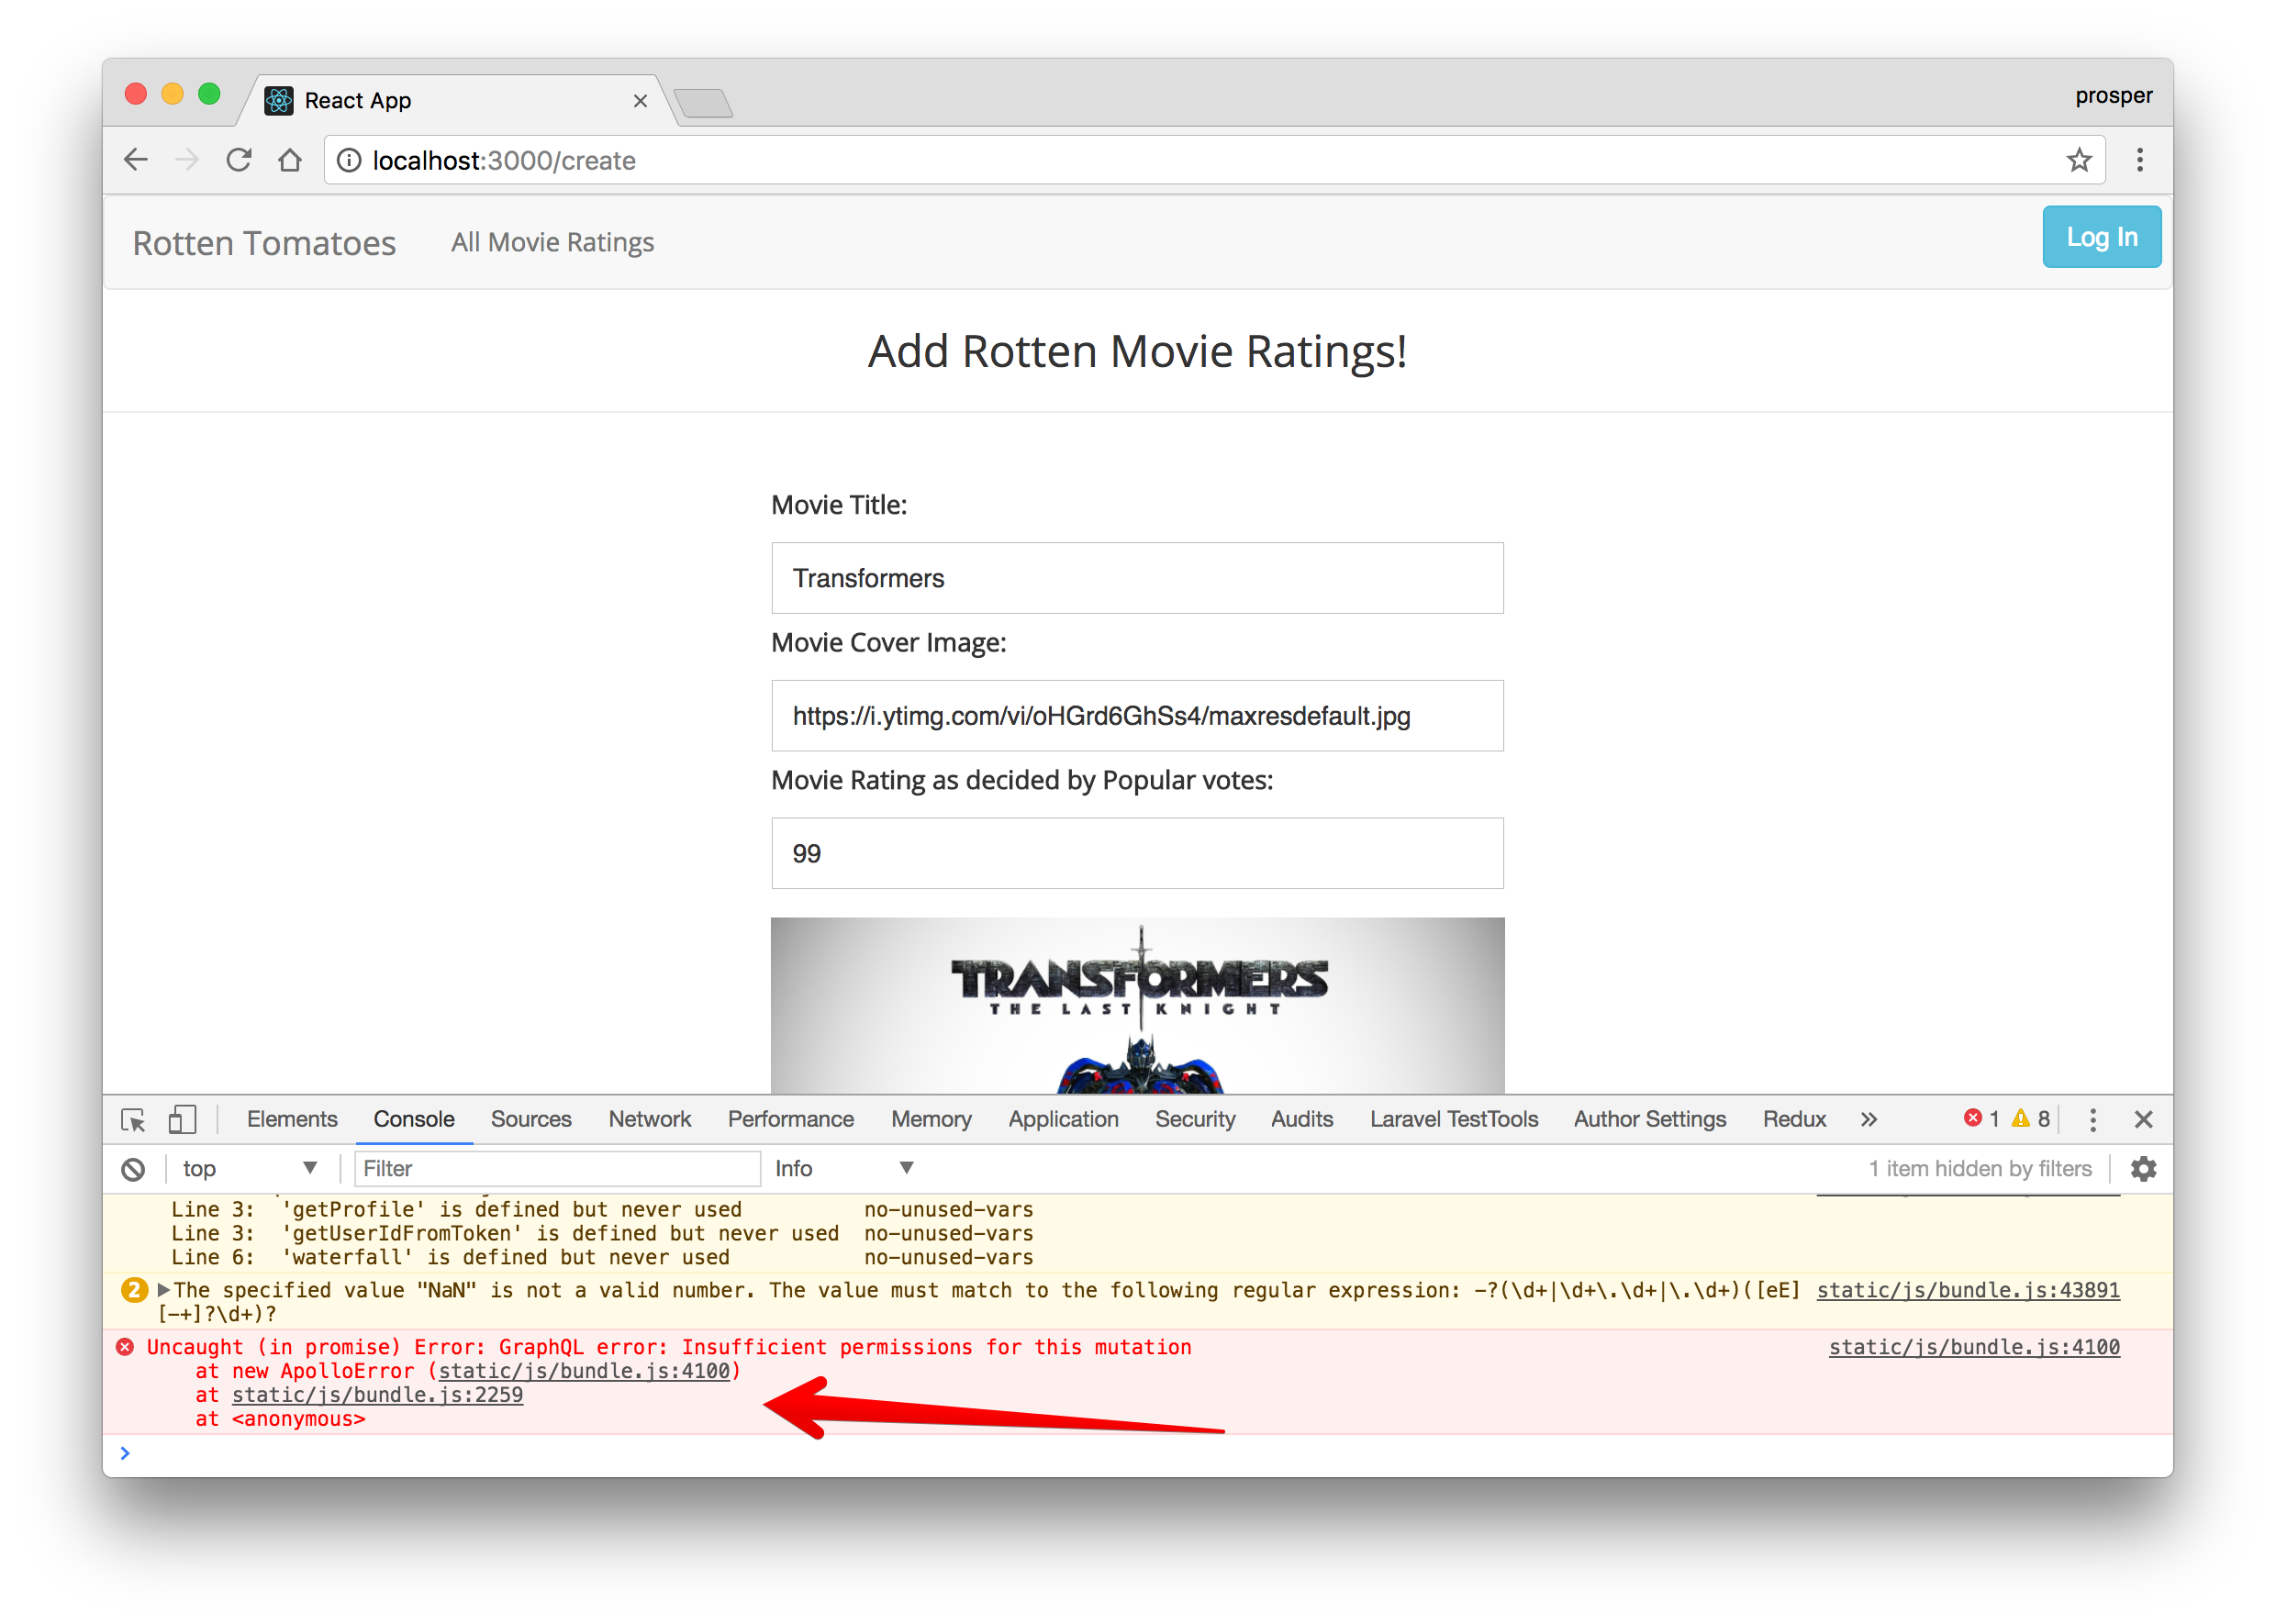
GraphQL has now made it impossible for just any user to create a movie. You have to be authenticated to have the privilege. Let's fix that.
Open the createMovie.js file and update it to send the userId of the logged-in user while creating a new movie:
...
state = {
    description: '',
    imageUrl: '',
    avgRating: 0,
    reviewer: localStorage.getItem('userId')
}
...
...
handleMovie = () => {
    const {description, imageUrl, avgRating, reviewer } = this.state
    this.props.addMovie({ description, imageUrl, avgRating, reviewer })
      .then(() => {
        this.props.router.push('/')
    })
}

const addMutation = gql`
  mutation addMovie($description: String!, $imageUrl: String!, $avgRating: Int!, $reviewer: ID!) {
    createMovie(description: $description, imageUrl: $imageUrl, avgRating: $avgRating, reviewerId: $reviewer) {
      id
      description
      imageUrl
      avgRating
    }
  }
`

export default graphql(addMutation, {
  props: ({ ownProps, mutate }) => ({
    addMovie: ({ description, imageUrl, avgRating, reviewer }) =>
      mutate({
        variables: { description, imageUrl, avgRating, reviewer },
      })
  })
})(withRouter(CreateMovie))
Now, try to create a movie again. You'll discover that you can create a movie successfully without any issues.
Conclusion
In this tutorial, we covered how easy it is to build a product with a backend like Graphcool and add authentication to it easily using Auth0.
In addition, Auth0 can help secure your apps with more than just username-password authentication. It provides features like multifactor auth, anomaly detection, enterprise federation, single sign on (SSO), and more. Sign up today so you can focus on building features unique to your app.


