---
title: "Build an Admin Dashboard with Express and Vue: Adding User Authorization"
description: "Learn how to use the Auth0 Management API to build an admin dashboard with Express and Vue"
authors:
- name: "Holly Guevara"
url: "https://auth0.com/blog/authors/holly-guevara/"
date: "Nov 16, 2020"
category: "Developers,Product,Management API"
tags: ["vuejs", "express", "nodejs", "management-api", "authorization"]
url: "https://auth0.com/blog/build-an-admin-dashboard-with-express-and-vue-adding-user-authorization/"
---
# Build an Admin Dashboard with Express and Vue: Adding User Authorization
*TL;DR: To protect Express API endpoints in an admin dashboard, create a manage:users permission in the Auth0 dashboard and install express-jwt-authz to check access tokens for that scope. Enable RBAC settings in Auth0, then require the permission on the /users and /users/:id/delete routes. Pass the access token from Vue when making requests to restrict access to authorized admins only.*
Starting from this chapter?
**Setting up**
Clone the application starter repo and check out the `creating-the-frontend` branch:
``` bash
git clone git@github.com:auth0-blog/express-vue-management-api.git --branch creating-the-frontend
```
Install the dependencies for both the client and server:
``` bash
cd server
npm install
cd ../client
npm install
```
**Configure Auth0**
Follow the Auth0 Configuration directions in the [project README of the starter Vue and Express application](https://github.com/auth0-blog/vue-express-auth#configuring-auth0).
**Configure Management API**
In the [Auth0 dashboard](https://manage.auth0.com/dashboard), click on "APIs" in the left menu and then select "Auth0 Management API". From there, select "Machine to Machine Applications" and find the "Vue Express API" you just created. Click the switch next to it so that it says "Authorized".
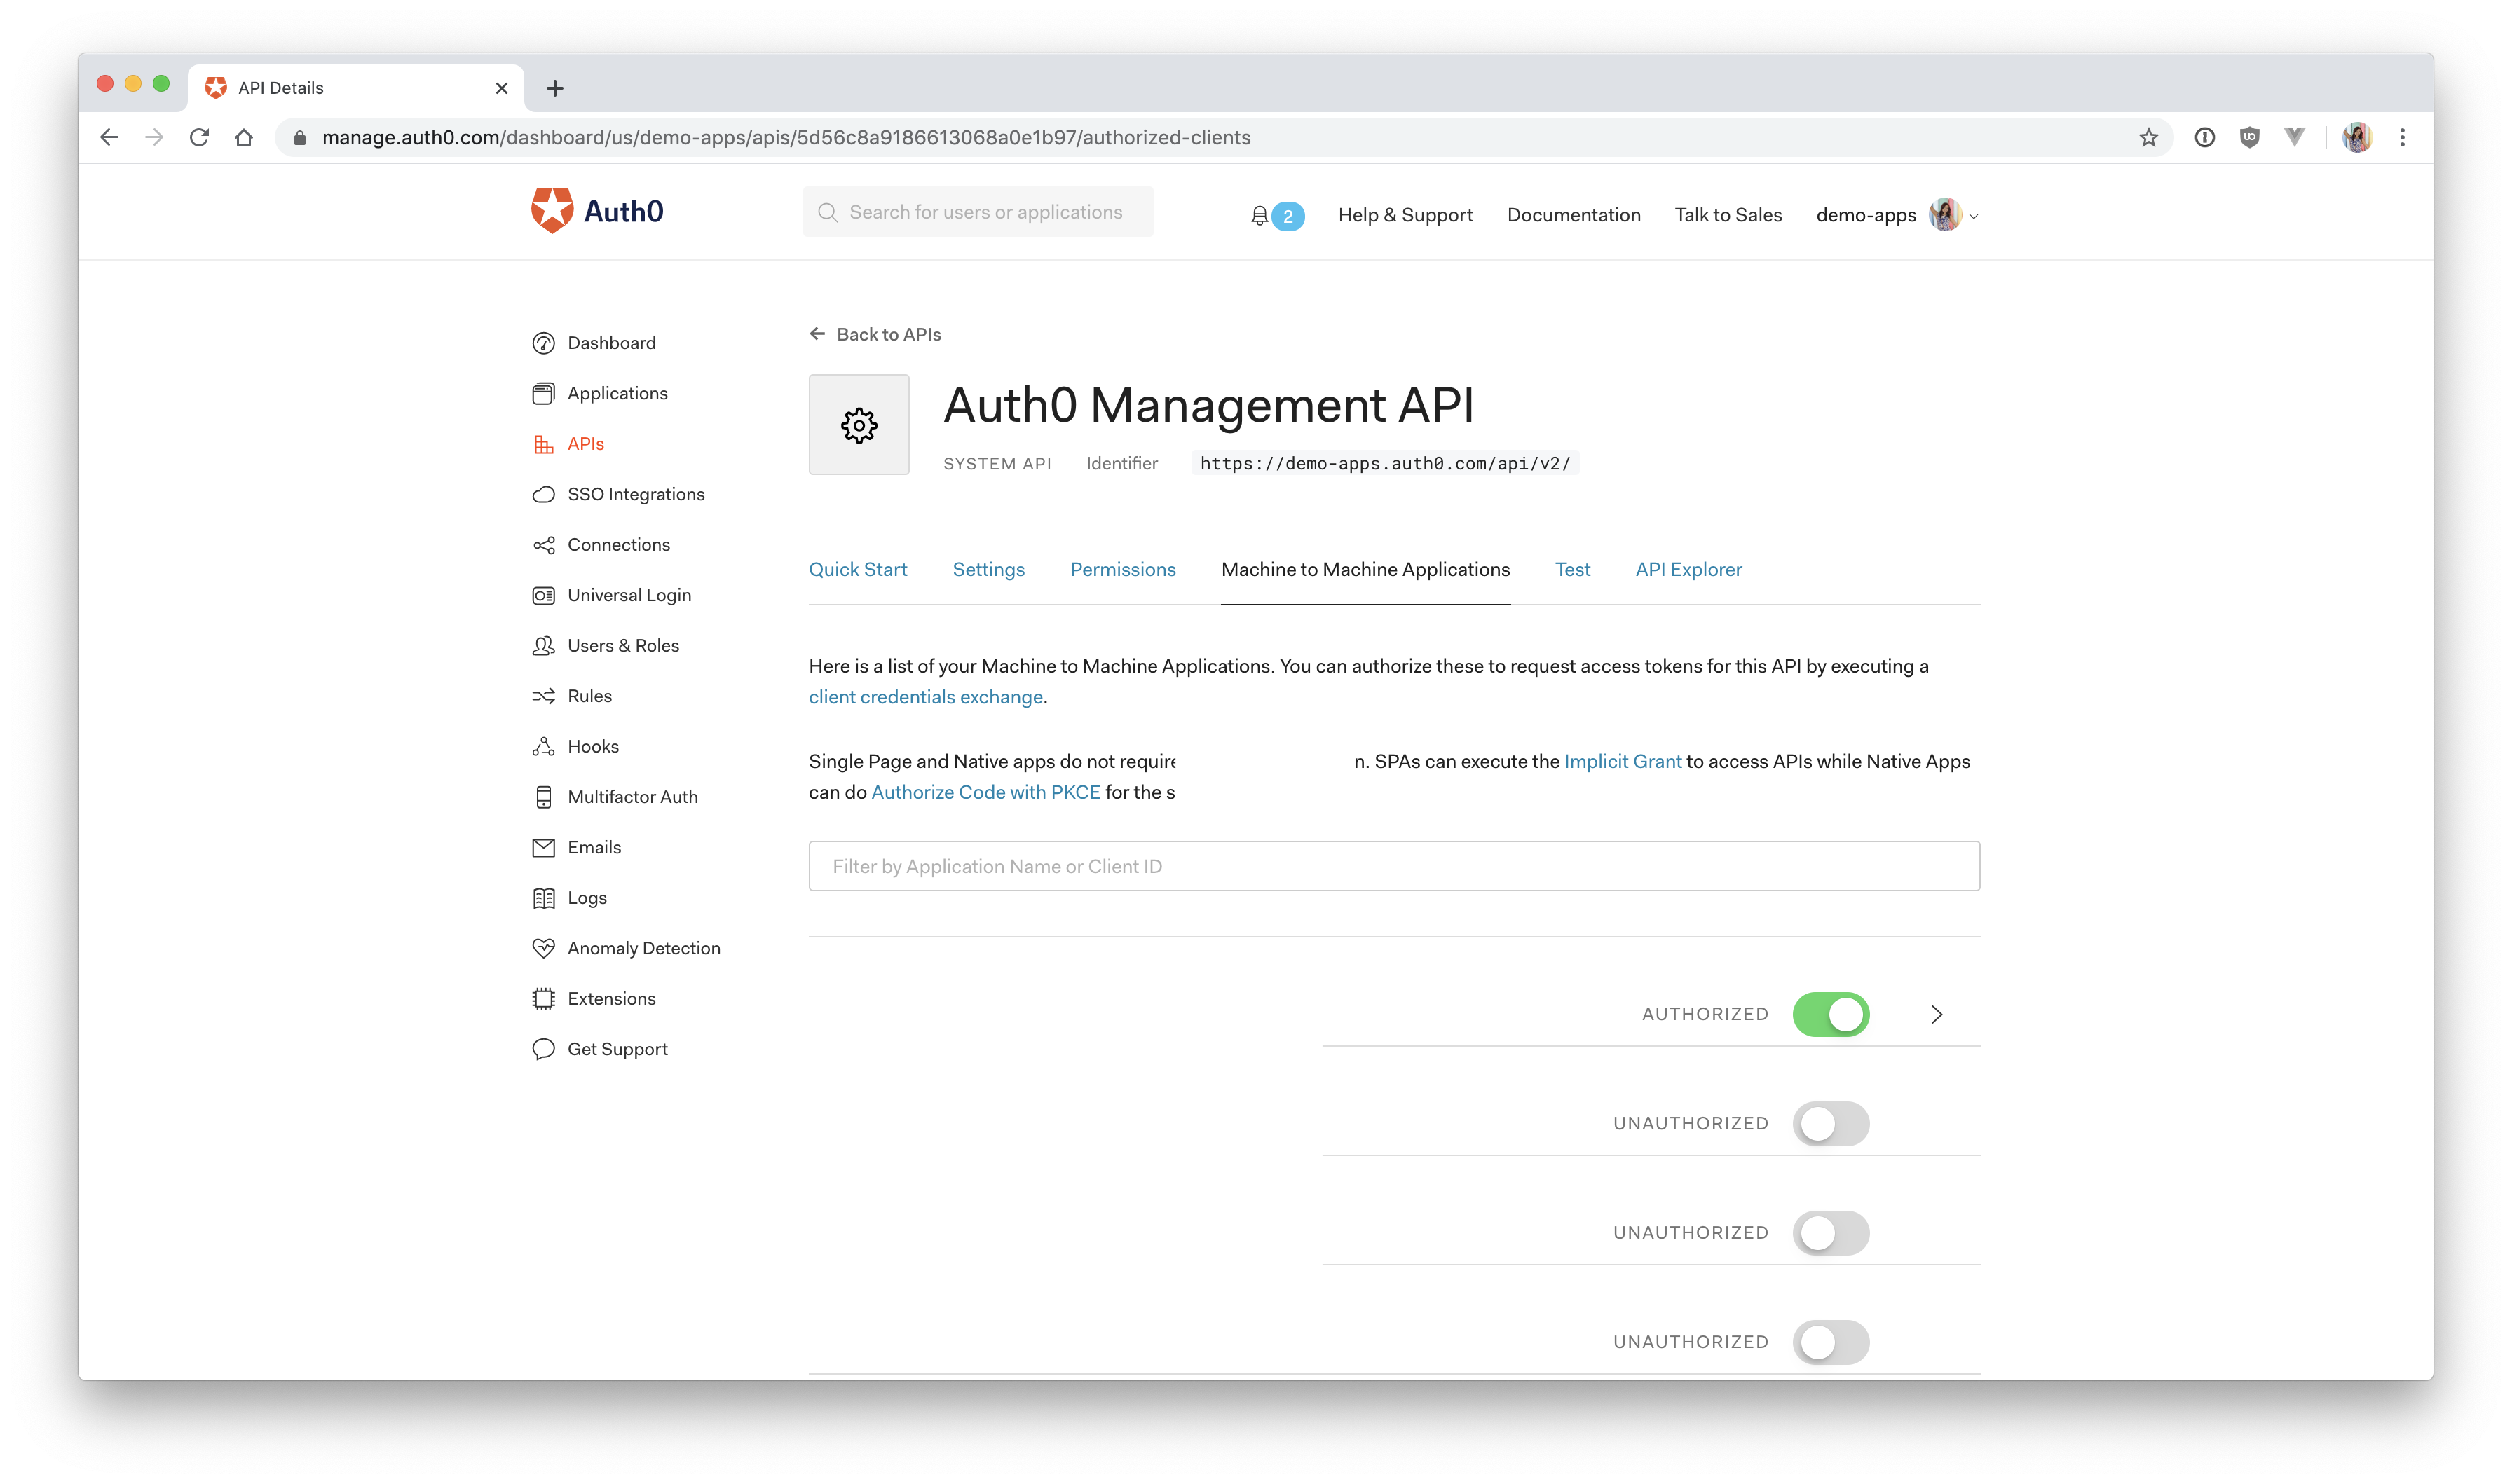
Next, add permissions to the application. Click on the down arrow V next to the authorized switch. Select `read:users`, `delete:users`, and `read:user_idp_tokens` and then click "Update".
Create the `.env` file in the root of the `server` directory:
``` js
AUTH0_DOMAIN = your-domain.auth0.com
AUTH0_AUDIENCE = https://your-api-audience.com
CLIENT_ID = yourclientid
CLIENT_SECRET = yourclientsecret
```
To find your values, go to the [Auth0 dashboard](https://manage.auth0.com/dashboard) and click:
"APIs" > "Auth0 Management API" > "Test"
Select the Express API from the dropdown then click "Node.JS". You'll find the values for `CLIENT_ID` AND `CLIENT_SECRET` in the resulting code.
`AUTH0_DOMAIN` and `AUTHO_AUDIENCE` can be found by clicking on "APIs" and then selecting the Vue Express API. Then click on "Quick Start" and select "Node.js". You'll see a value for audience, which you can paste directly into AUTH0_AUDIENCE and then another value for issuer. Copy this and paste it into AUTH0_DOMAIN, but leave off the `https://` and the trailing `/` at the end.
**Test it**
Start the Vue app:
``` bash
cd client
npm run serve
```
Start the Express app:
``` bash
cd server
npm start
```
Navigate to [http://localhost:8000/users](http://localhost:8000/users) to see an array all of your users from the Express `/users` endpoint.
View the dashboard at: [http://localhost:8080/dashboard](http://localhost:8080/dashboard)
> Note: Don't click the Delete Me button yet!
## Require Admin Role to Access User Information
It's fantastic not to be required to go to your Auth0 management dashboard to manage the users that have signed up for your application. However, there's still a big problem here. Currently, **everyone** can see that list of users. You actually don't even need to be logged in to see them. Go ahead and open [`http://localhost:8080/dashboard`](http://localhost:8080/dashboard) in an incognito window to see for yourself.
The Express `getUsers()` and `deleteUser()` functions only run if there is a valid Management API access token issued from the Authorization server. The **Express Application itself has been authorized in the Auth0 dashboard and can always prove itself to the Management API using the client credentials in the `.env` file**. So as long as that exists and the access isn't revoked from the Auth0 dashboard side, the Express application can always get a valid access token and retrieve the requested Management API data.
This is really no different than if you had **an API that reached out to your own database** for some confidential data. If you wanted to grab a list of users from your MySQL database for your administrators to see in their dashboard, you'd maybe create an `admin` role with a `manage:users` permission. Then you'd require that in order to access those endpoints that pull user data, the user must have that `admin` role with the correct permission. That's exactly what you're going to do here to protect the two Express endpoints that you created.
That's the long explanation for *why* you need to secure your Express API, but *how* do you do this?
Here are the general steps you need to follow, and then in the next section, you'll see how to execute them.
**Steps for Adding Authorization to your API**
- Create an Express API `manage:users` permission in the Auth0 dashboard
- Install the Express authorization package, `express-jwt-authz`
- Require the authorization package in your Express application
- Protect the `/users` and `/users/:id/delete` routes by requiring an access token
- Pass the access token when making the request on the Vue side
- Check the access token for the `manage:users` scope
- Enable RBAC settings in the Auth0 dashboard
## Create the Express API Permission
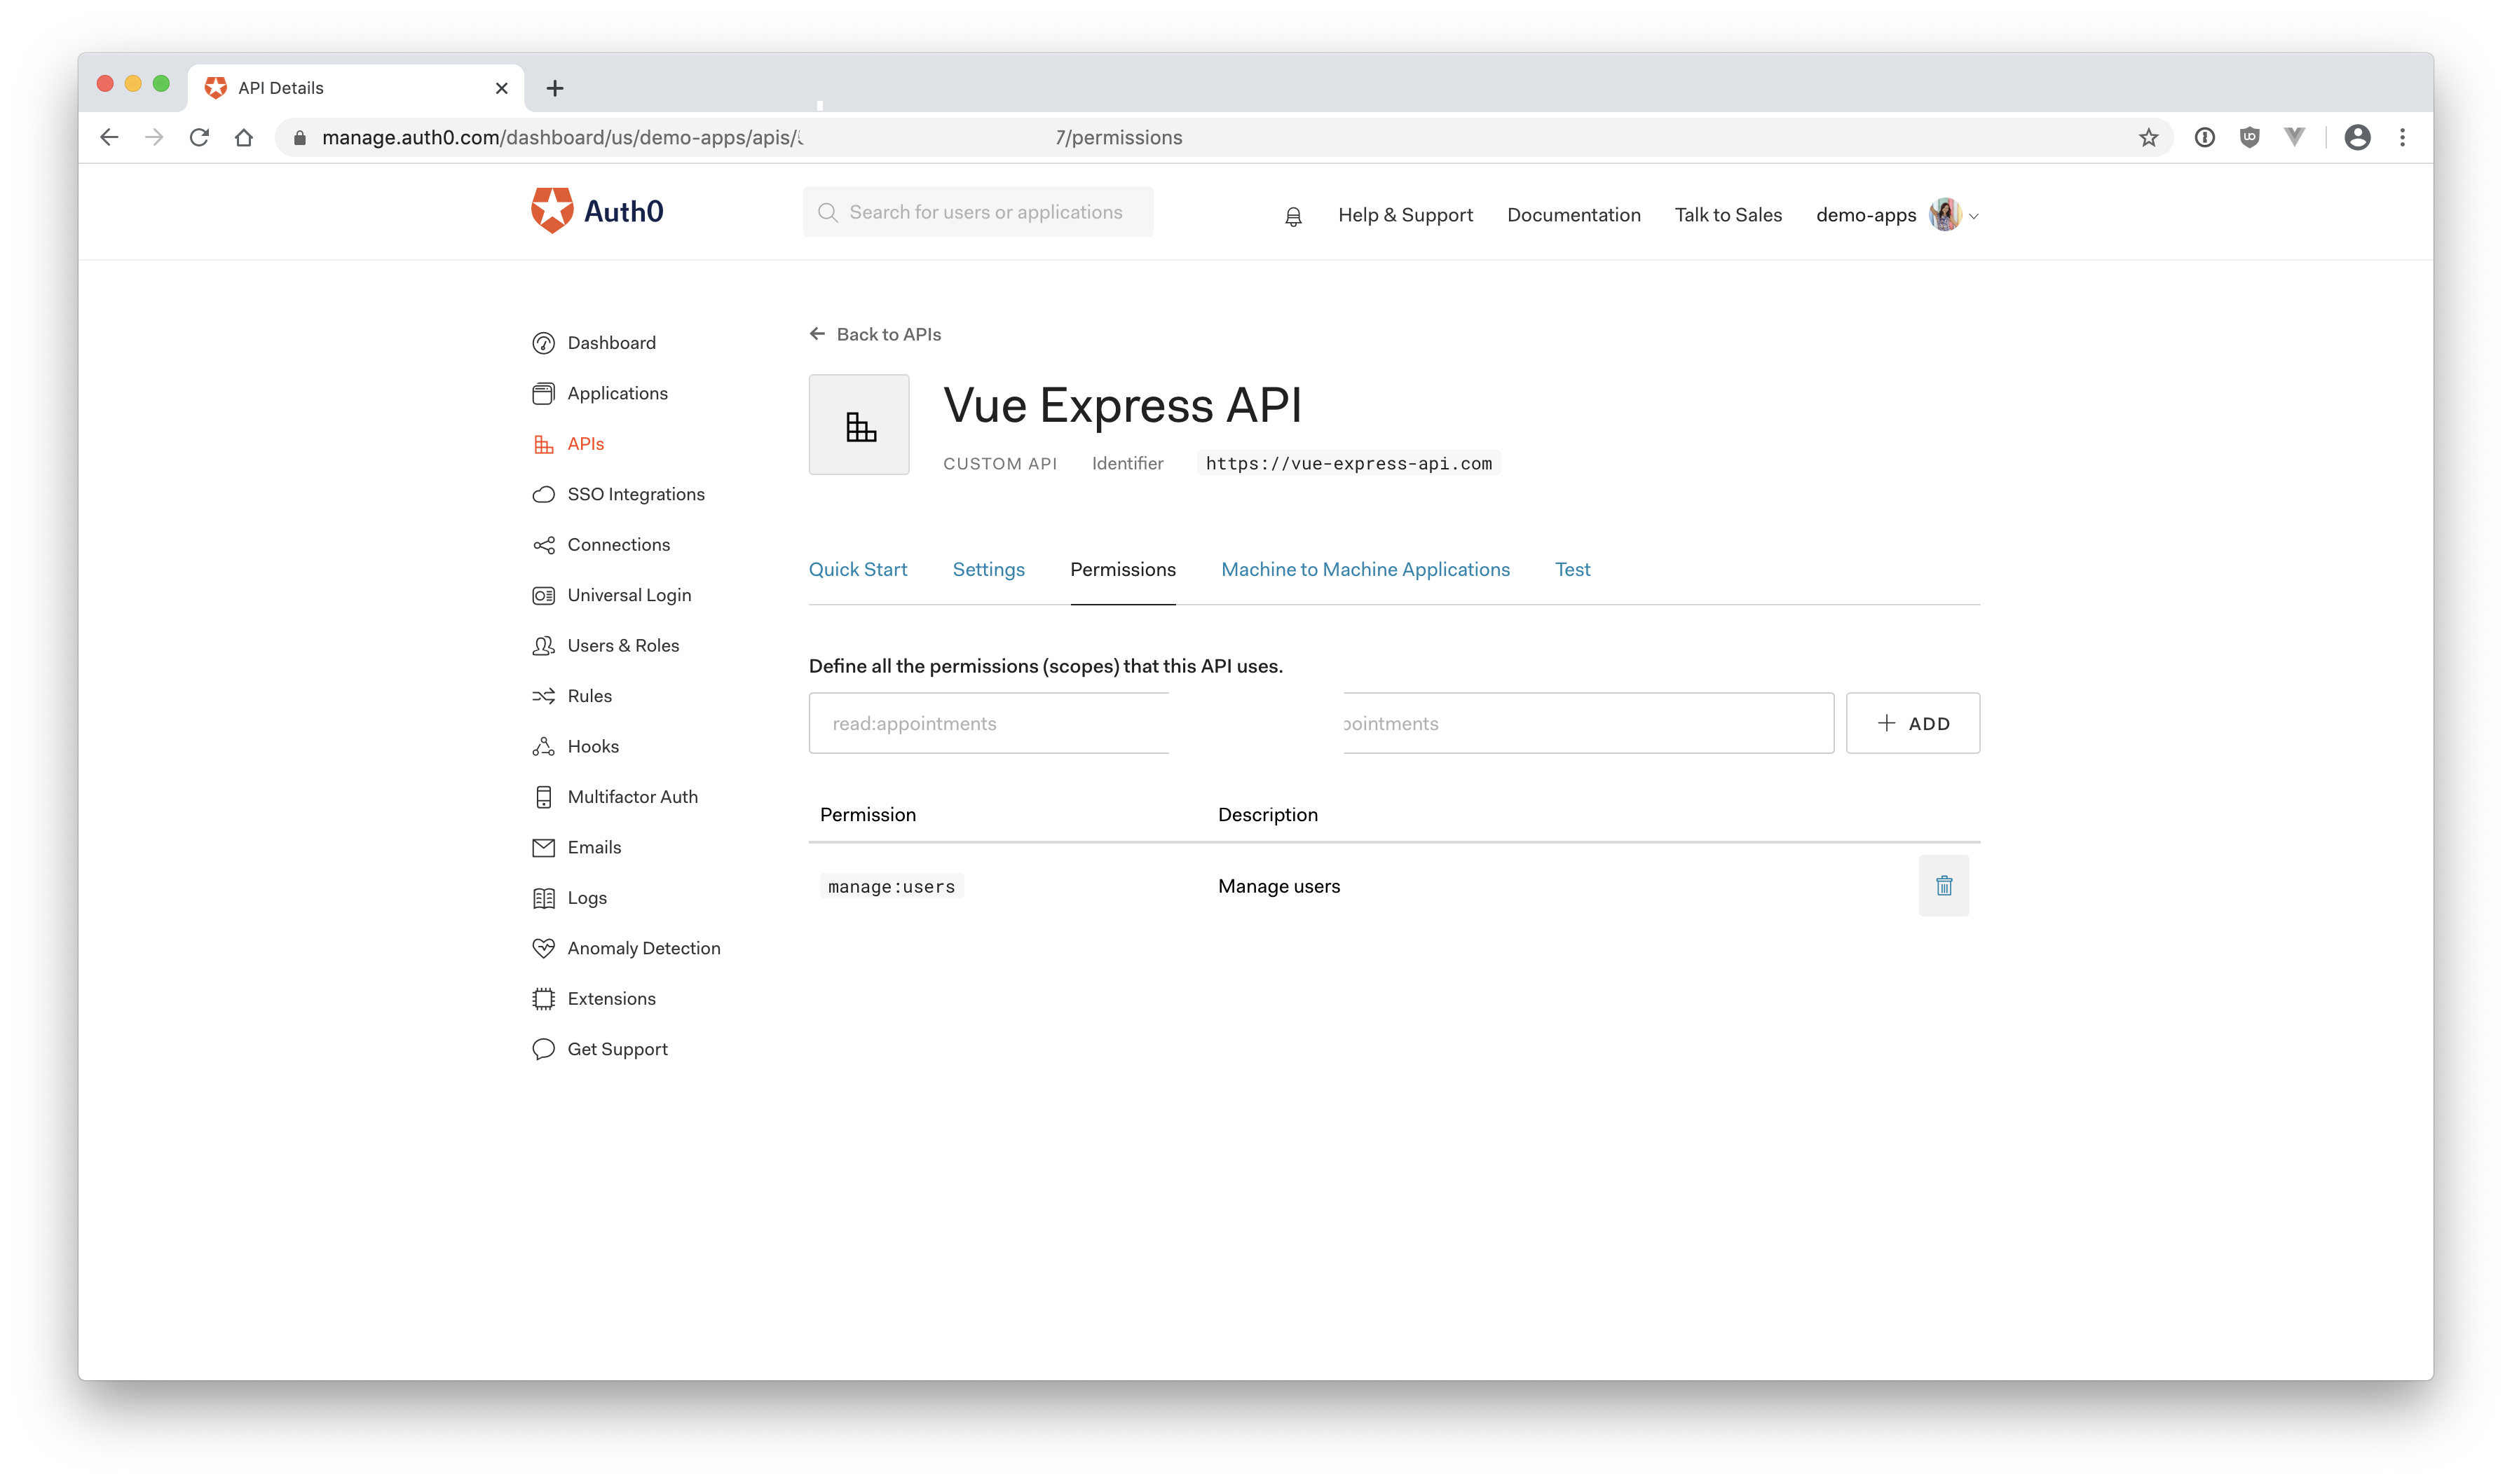
First, head back to the [Auth0 dashboard](https://manage.auth0.com/dashboard) and find your Vue Express API under "**APIs**".
Click on "**Permissions**" and create a new permission called `manage:users`. For the description, you can just write "Manage users" or be as descriptive as you'd like. Make sure you click "**Add**" to save it.
## Integrate into the Express Application
Next, in the `server` directory, install the [express-jwt-authz](https://github.com/auth0/express-jwt-authz) package. This is required to check if the access token contains the required scopes/permissions, which in this case, will be `manage:users`.
``` bash
npm install express-jwt-authz
```
Require this new package at the top of the Express application in `server/server.js` where the rest of the `require` methods are.
``` js
// server/server.js
// other require methods
const jwtAuthz = require('express-jwt-authz'); // 👈 new code
// This should already exist in your application if you cloned it from GitHub
// Authentication middleware to verify access token against Auth0 JSON Web Key Set
const checkJwt = jwt({
// Provide a signing key based on the key identifier in the header and the signing keys provided by your Auth0 JWKS endpoint.
secret: jwksRsa.expressJwtSecret({
cache: true,
rateLimit: true,
jwksRequestsPerMinute: 5,
jwksUri: `https://${authConfig.domain}/.well-known/jwks.json`
}),
// Validate the audience (Identifier) and the issuer (Domain).
audience: authConfig.audience,
issuer: `https://${authConfig.domain}/`,
algorithms: ["RS256"]
});
```
Next, take a look at the `checkJwt` middleware. This should already exist from when you cloned the starter application. This middleware is responsible for checking if the JWT that the client provides is valid.
> On a side note, if you're interested in learning about JSON Web Tokens, click the link below and we'll email you our in-depth **JWT Handbook** for free!
## Protect the Express Endpoint
Now it's time to secure the `/users` endpoint. In `server.js`, find the two routes you created and add the `checkJWT` middleware to them:
``` js
app.get('/users', checkJwt, (req, res) => {
managementAPI
.getUsers()
.then(function(users) {
res.send(users);
})
.catch(function(err) {
res.send(err);
});
});
app.get('/users/:id/delete', checkJwt, (req, res) => {
managementAPI
.deleteUser({ id: req.params.id })
.then(response => {
res.send('User deleted!');
})
.catch(function(err) {
res.send(err);
});
});
```
Now a user has to be signed in to make requests to these two endpoints. However, **this isn't enough**. You still need to check if the user has the **required permissions** to access the endpoints.
## Check for Appropriate Permissions
This is where the `express-jwt-authz` package comes into play. You can use this package to check that the `manage:users` permission exists in the access token. You'll create a new middleware, `checkPermissions`, that will run before those two routes.
By default, the `express-jwt-authz` package checks the `scope` claim for the permission. You can, however, [pass in an option called `customScopeKey`](https://github.com/auth0/express-jwt-authz#options), which tells it to look in `user.permissions` to match the required permission.
Define the new middleware, `checkPermissions`, right underneath `checkJwt`. For the first parameter, you'll pass in an array of the permission(s) you want to check for, which in this case is `manage:users`. The second parameter will be the `customScopeKey` option mentioned above. Then you'll add this middleware to the two routes you want to protect:
``` js
// ..
// const checkJwt = jwt({...});
const checkPermissions = jwtAuthz([ 'manage:users' ], { customScopeKey: 'permissions' });
// let events = [...];
app.get('/users', checkJwt, checkPermissions, (req, res) => {
managementAPI
.getUsers()
.then(function(users) {
res.send(users);
})
.catch(function(err) {
res.send(err);
});
});
app.get('/users/:id/delete', checkJwt, checkPermissions, (req, res) => {
managementAPI
.deleteUser({ id: req.params.id })
.then(response => {
res.send('User deleted!');
})
.catch(function(err) {
res.send(err);
});
});
```
Now, the Vue client will be required to present a valid access token with the `manage:users` permission on behalf of the user before these routes will run. This wasn't required before, so the Vue `UserService` isn't currently **passing a token in the header** when it makes a request to the Express endpoints. Go ahead and fix that now.
## Add Access Token to the Request
Back on the client side, open up `client/src/views/Dashboard.vue` and scroll down to the `getUserData()` method. In the [Vue Login](https://auth0.com/blog/beginner-vuejs-tutorial-with-user-login/) article, you added a Vue authentication wrapper (provided by Auth0), which integrates Auth0 login into your Vue application. This plugin wrapper can be accessed from inside Vue components to check if a user is signed in.
Since the user's access token is required to make a request to the Express API, you need to grab the token, if it exists, and pass it to the UserService where the Express API call is made.
Modify your `getUserData()` and `deleteUser()` methods like so:
``` js
async getUserData() {
// Get the access token from the auth wrapper
const accessToken = await this.$auth.getTokenSilently(); // 👈 NEW
// Pass the access token to the getUsers service
UserService.getUsers(accessToken) // 👈 NEW
.then(
(users => {
this.$set(this, "users", users);
}).bind(this)
);
},
async deleteUser(deleteId) {
// Get the access token from the auth wrapper
const accessToken = await this.$auth.getTokenSilently(); // 👈 NEW
// Pass the access token to the getUsers service
UserService.deleteUser(accessToken, deleteId) // 👈 NEW
.then(
(response => {
this.message = response;
this.getUserData(); // get refreshed users
})
);
}
```
Next, you need to pass this token along with the request in the UserService. Open up `client/src/services/UserService.js` and modify the `getUsers` method to add a header object to the request. This Authorization header will send the access token to the Express API. If the token is valid, the Express API will send back the data. Repeat this on the `deleteUser()` method.
``` js
async getUsers(accessToken) {
let res = await axios.get("http://localhost:8000/users", {
headers: {
Authorization: `Bearer ${accessToken}`
}
});
console.log(res.data);
return res.data;
},
async deleteUser(accessToken, id) {
let res = await axios.get(`http://localhost:8000/users/${id}/delete`, {
headers: {
Authorization: `Bearer ${accessToken}`
}
});
return res.data;
}
```
Now, if you go back to the Vue dashboard, [`http://localhost:8080/dashboard`](http://localhost:8080/dashboard), you should just see a blank page if you're not signed in and/or you don't have the proper permissions.
There's one more thing you can do from a UI perspective to prevent that blank page where the data didn't load because you were unauthorized.
Open up `client/src/router/index.js` and modify the `/dashboard` route like so:
``` js
{
path: '/dashboard',
name: 'dashboard',
component: () => import('../views/Dashboard.vue'),
beforeEnter: authGuard // 👈 NEW
},
```
The [`beforeEnter` Vue route option](https://router.vuejs.org/api/#router-construction-options) allows you to run some code before the route can be accessed. In this case, you'll be running the Auth0 provided `authGuard`, which checks if the user has an access token. If they don't, they'll be redirected to the login page.
Keep in mind that this is just for UI purposes to prevent that blank page and let the user know that if they want to access it, they should sign in first. If you were still serving the data to the frontend without the backend access check, the user could just click "View Source" on the page and easily find the data. That's why it's extremely important to **always protect the data from the backend**, as you've done already.
If you haven't signed up yet, go ahead and do that now.
## Create an Admin User
The next problem is that you don't have the required permission to view this page. You can automatically assign permissions to a user from the [Auth0 dashboard](https://manage.auth0.com/dashboard/) by creating a role and then assigning permissions to that role.
Once you're in the dashboard, click on "**Users & Roles**" and then select "**Roles**". Click on the red "**+ Create Role**" button. For name, type "vue-dash-admin" and for description "Vue dashboard admin" and then click "**Create**". Now click on the newly created role, and you'll see a "**Permissions**" tab. Click on that and then press the blue "**Add Permissions**" button. Select your Express API from the dropdown, and then check the `manage:users` permission.
Click "**Assign Permissions**", and you should see your Vue Express API in the dropdown. Select this, check the `manage:users` permission, and click "**Save**". Now any user that receives the "vue-dash-admin" role will also be granted the `manage:users` permission.
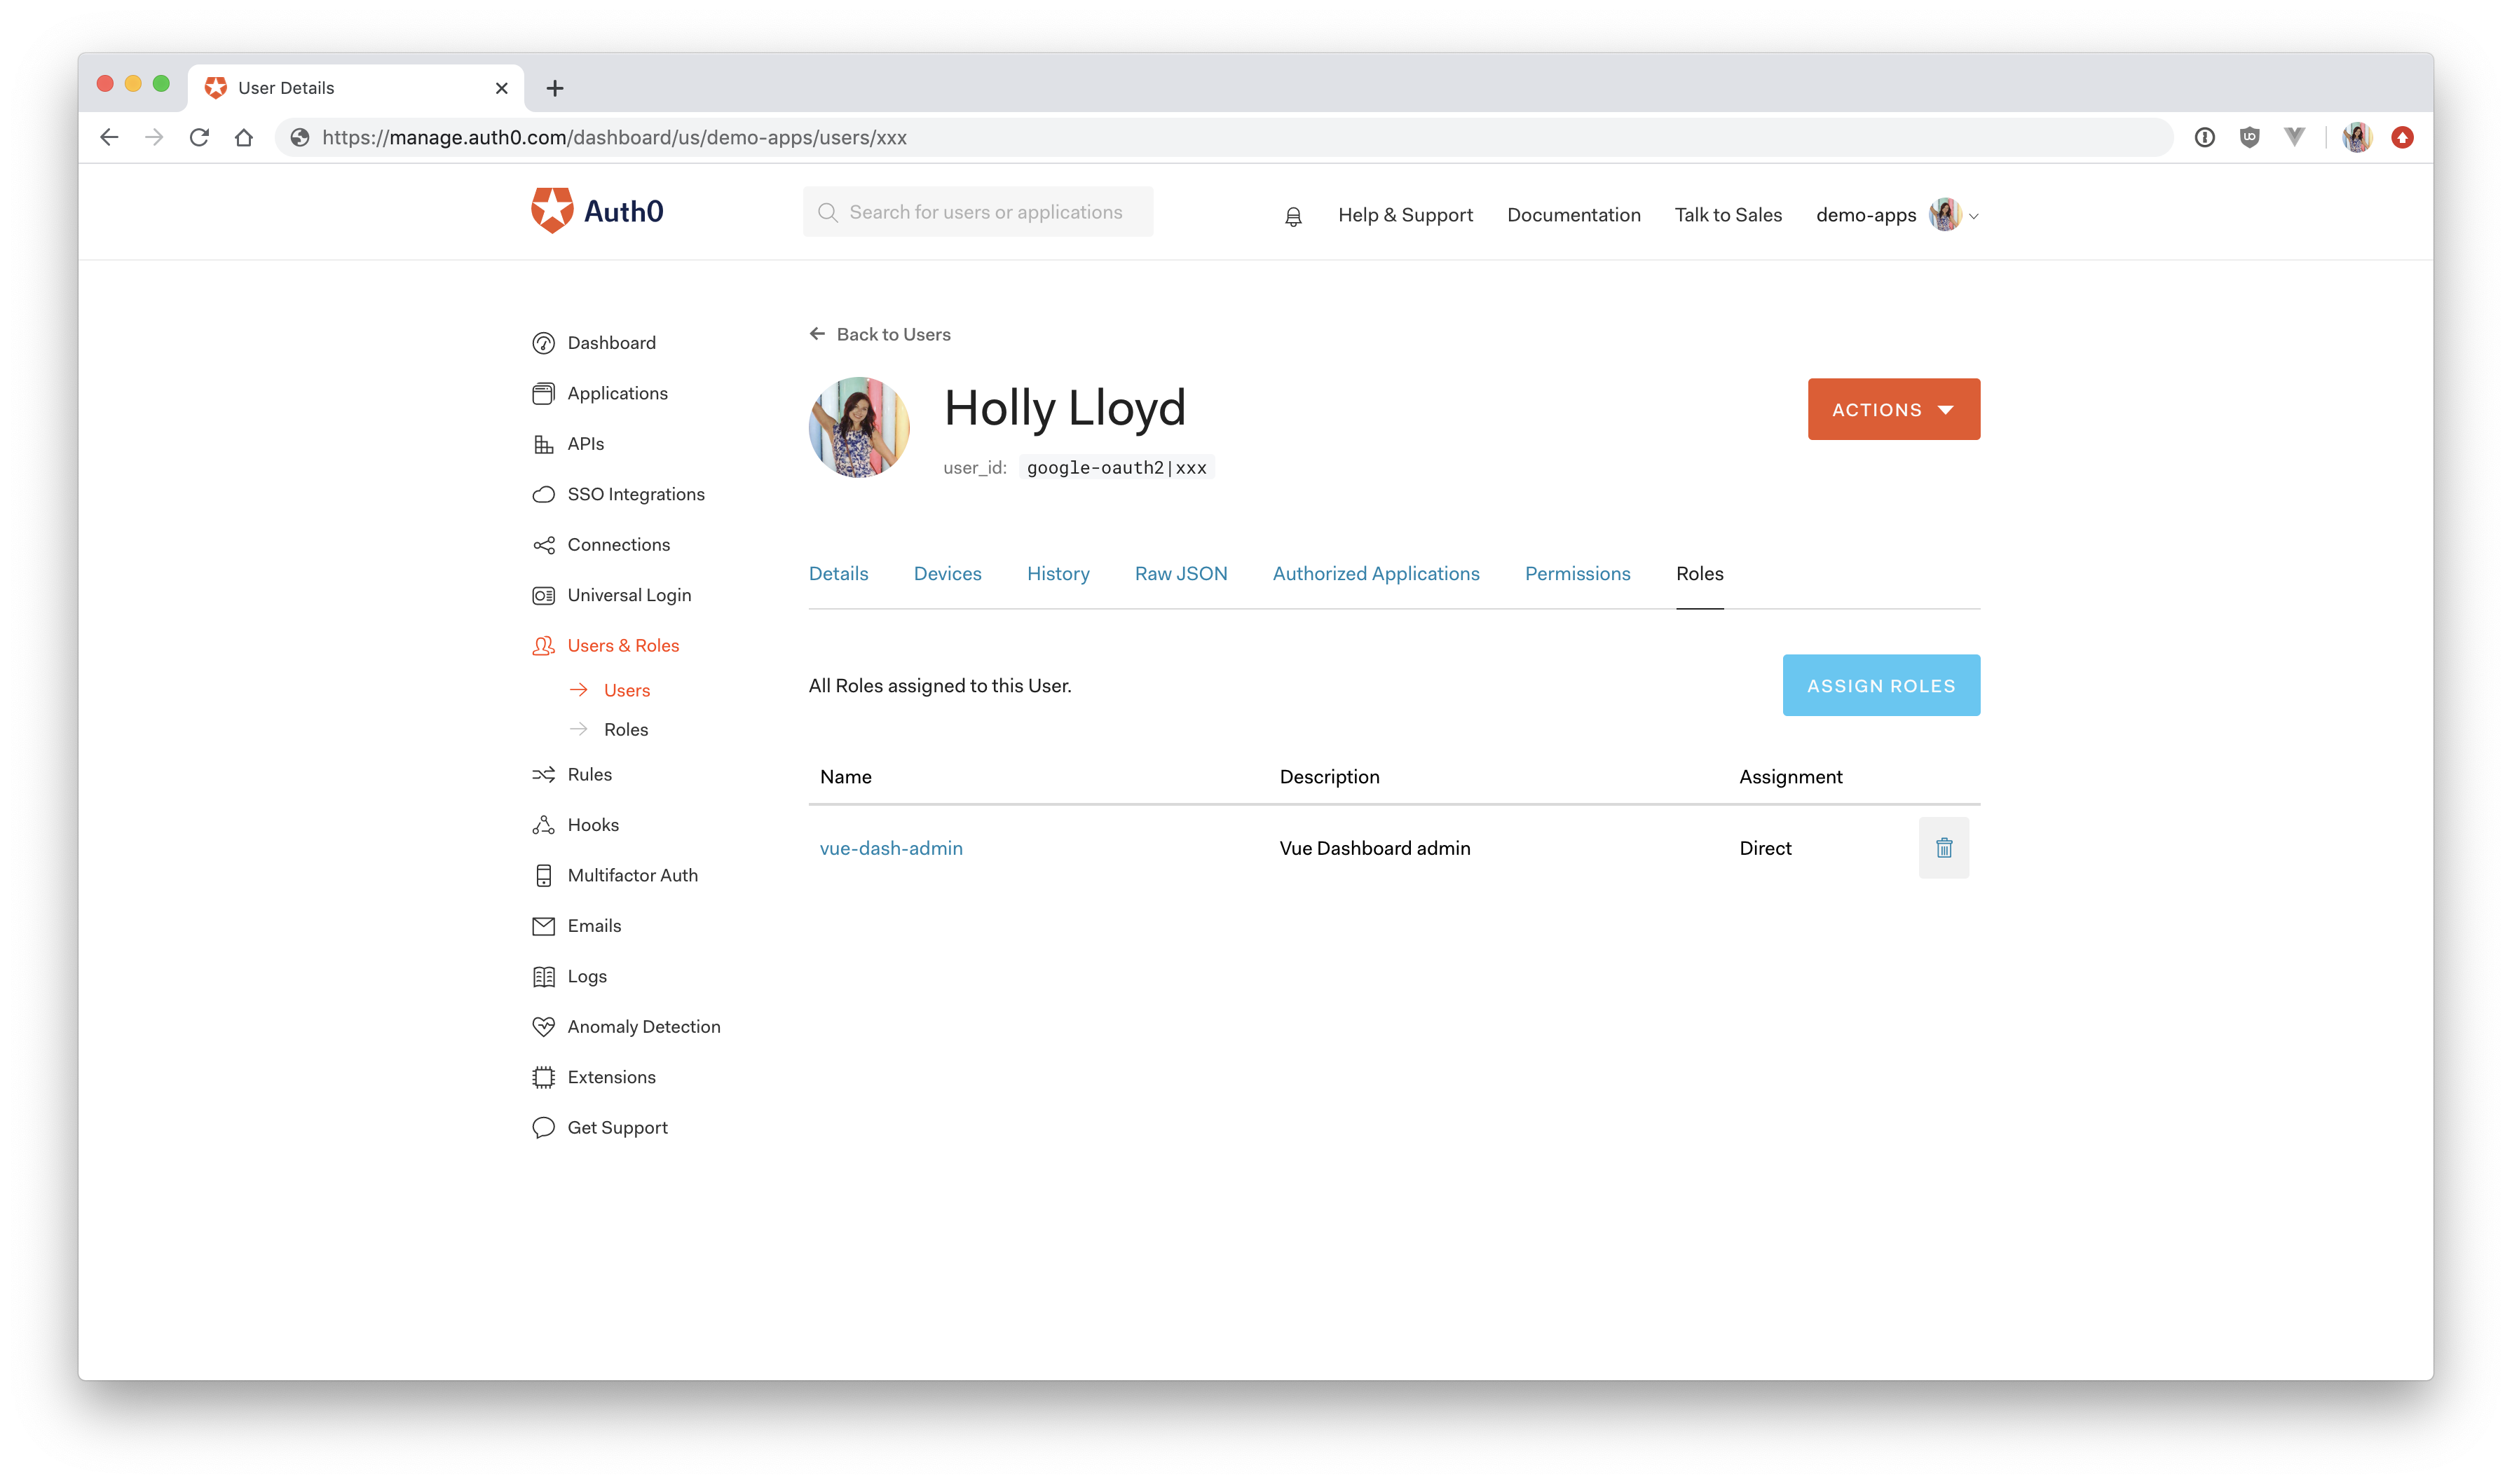
Go back to the "**Users**" page and find the user account that you used to sign into the Vue Express application. Click on it, and you'll see a "**Roles**" tab. Click on "**Assign Roles**" and then select the new `vue-dash-admin` role you just created and press "**Assign**".
## Enable RBAC Settings
Finally, go back to the Vue Express API page in the Auth0 dashboard and click on "**Settings**". Then scroll down to where it says "**RBAC Settings**". Click the switches next to "**Enable RBAC**" and "**Add Permissions in the Access Token**", and then click "**Save**".
This will tell Auth0 that the **API is expecting these permissions in the access token** for certain authorized users.
## Test it out
Now, go back to your Vue dashboard, [`http://localhost:8080/dashboard`](http://localhost:8080/dashboard), and sign out. Sign back in with the user you assigned the `manage:users` permission to so that you get a fresh token. You should now be able to see your list of users again!
If you're curious, the access token contains this user information:
``` js
user:
{
iss: 'https://demo-apps.auth0.com/',
sub: 'google-oauth2|xxx',
aud:
[ 'https://vue-express-api.com',
'https://demo-apps.auth0.com/userinfo' ],
iat: 1579881686,
exp: 1579968086,
azp: 'xxxxxx', // authorized party id
scope: 'openid profile email',
permissions: [ 'manage:users' ]
}
```
As you can see, the access token holds the `manage:users` permission, which tells your Express API that the user is authorized to make a request to the `/users` endpoint. If you'd like to see your own access token, add `console.log(req.user)` inside `app.get('users')` in `server/server.js`, as shown below:
``` js
// server/server.js
// ...
app.get('/users', checkJwt, checkPermissions, (req, res) => {
managementAPI
.getUsers()
.then(function(users) {
console.log(req.user); // 👈 NEW
res.send(users);
})
.catch(function(err) {
console.log(err);
});
});
```
Open your console and refresh the dashboard page and you'll see the contents of your access token.
To test out the delete button, make sure you **first create a test user** so that you don't delete your own account. You can create a new user in the [Auth0 dashboard](https://manage.auth0.com/dashboard) under "Users & Roles".
## Summary
And that's it! 🙌
As you can see, **almost anything you can do in the Auth0 dashboard, you can also do with the Management API**.
You covered a lot here, so congratulations if you made it through! Just to recap, here's what you learned:
- Set up Auth0 authentication in a Vue and Express app
- Authorize your Express app to use the Auth0 Management API
- Learn how to get a Management API token from Auth0
- Learn about client credentials grant
- Make a request to the Auth0 Management API
- Protect your Express endpoints
- Authorize your Vue client to make a request to your Express API
- Add roles and permissions to users
- Display data in your Vue app
- Delete users from your Vue dashboard
Now that you've gotten through the tough part, **getting a Management API token**, feel free to look through the [Auth0 Node Management Client documentation here](https://auth0.github.io/node-auth0/module-management.ManagementClient.html) and see if you can expand your Vue Express dashboard to perform more operations on users, such as updating and creating.
Don't forget to **add the proper permissions** to your application in the Auth0 dashboard if you decide to extend it! You can find the [Auth0 Management API docs here](https://auth0.com/docs/api/management/v2) in case you want to query the endpoints directly. Let me know if you need any guidance in the comments below, and thanks for reading!