---
title: "Call a Protected API from a .NET MAUI App"
description: "Learn how to call a protected API from your .NET MAUI application."
authors:
- name: "Andrea Chiarelli"
url: "https://auth0.com/blog/authors/andrea-chiarelli/"
date: "Oct 21, 2022"
category: "Developers,Tutorial,.NET"
tags: ["dotnet", "maui", "desktop", "native", "mobile"]
url: "https://auth0.com/blog/call-protected-api-from-dotnet-maui-application/"
---
# Call a Protected API from a .NET MAUI App
One of the most common activities a native application does after user authentication is calling an API. Also, if the application authenticates its users, the API it calls is most likely protected from unauthorized access. Let’s see how to make requests to a protected API with your .NET MAUI application.
## Prerequisites
Before starting, make sure you have installed everything you need to run the sample project that goes with this article on your machine. In particular, you need [the latest .NET 8.0 SDK](https://dotnet.microsoft.com/en-us/download/dotnet/8.0) and the additional components that depend on your development and target platforms. Please, refer to [this document](https://docs.microsoft.com/en-us/dotnet/maui/get-started/first-app) to learn more and set up your development environment.
This article uses the [.NET CLI](https://learn.microsoft.com/en-us/dotnet/core/tools/) to build and run the sample projects, but you can use Visual Studio if you prefer.
## The Sample Application
This article will show you how to call a protected API from a .NET MAUI application by guiding you in the process of modifying an existing app. You can download this application and the sample ASP.NET Core Web API by running the following command in a terminal window:
```bash
git clone --branch starting-point --single-branch https://github.com/auth0-blog/dotnet-maui-auth0-call-api.git
```
This command will create a `dotnet-maui-auth0-call-api` folder and will download two .NET projects there. You will find these projects in two subfolders: `dotnet-maui-auth0-app` and `api_aspnet-core_csharp_hello-world`.
The `dotnet-maui-auth0-app` folder contains a basic .NET MAUI application that authenticates users using Auth0. To learn more about the details of building this application, check out [this blog post, which explains how to add authentication to a .NET MAUI application](https://auth0.com/blog/add-authentication-to-dotnet-maui-apps-with-auth0).
The `api_aspnet-core_csharp_hello-world` folder contains a simple ASP.NET Core Web API with some endpoints protected using Auth0. This Web API project is a code sample from the [Auth0 Developer Resources](https://developer.auth0.com/resources). Check out [this page to learn more about this ASP.NET Core project](https://developer.auth0.com/resources/code-samples/api/aspnet-core-csharp/basic-authorization).
Throughout this article, you will modify the .NET MAUI application to include a button to call a protected API implemented in the ASP.NET Core Web API project.
## Register with Auth0
As the first step, let's register and configure both the .NET MAUI application and the Web API with Auth0. You need an Auth0 account. If you don't have it yet, you can sign up for a free one.
### Configure the .NET MAUI application
Once in the Auth0 dashboard, move to the [Applications section](https://manage.auth0.com/#/applications) and follow these steps:
1. Click on *Create Application*.
2. Provide a friendly name for your application (for example, *MAUI App*) and choose *Native* as the application type.
3. Finally, click the *Create* button.
These steps make Auth0 aware of your .NET MAUI application. After creating the application, move to the *Settings* tab and take note of your Auth0 domain and client ID. You will use them shortly.
Then, in the same form, scroll down to the *Application URIs* section and assign the value `myapp://callback/` to both the *Allowed Callback URLs* and the *Allowed Logout URLs* fields.
The first value tells Auth0 which URL to call back after the user authenticates. The second value tells Auth0 which URL the user should be redirected to after their logout. Even if your .NET MAUI is not a web application, it can catch this URI.
Click the *Save Changes* button to apply them.
Now, go to the `dotnet-maui-auth0-app` folder and open the `MauiProgram.cs` file. In this file, look for the code highlighted in the following code snippet:
```csharp
//dotnet-maui-auth0-app/MauiProgram.cs
using Microsoft.Extensions.Logging;
using Auth0.OidcClient;
namespace MauiAuth0App;
public static class MauiProgram
{
public static MauiApp CreateMauiApp()
{
// ...existing code...
builder.Services.AddSingleton(new Auth0Client(new()
{
Domain = "",
ClientId = "",
RedirectUri = "myapp://callback/",
PostLogoutRedirectUri = "myapp://callback/",
Scope = "openid profile email"
}));
return builder.Build();
}
}
```
Replace the placeholders `` and `` with the respective values taken from the Auth0 dashboard.
### Configure the ASP.NET Core Web API
Now, let's go back to the Auth0 dashboard. Navigate to the [API section](https://manage.auth0.com/#/apis) and click the *Create API* button. In the form that will be showing, provide a friendly name for your API (for example, *Demo API*) and a unique identifier in the URI format (for example, `https://demo-api.com`). Keep RS256 as the signing algorithm and click the *Create* button.
After the API registration on the Auth0 side, let's configure it on your machine. Go to the `api_aspnet-core_csharp_hello-world/HelloworldApplication` folder and open the `appsettings.json` file. Its content will look like the following:
```json
//api_aspnet-core_csharp_hello-world/HelloworldApplication/appsettings.json
{
"Logging": {
"LogLevel": {
"Default": "Information",
"Microsoft": "Warning",
"Microsoft.Hosting.Lifetime": "Information"
}
},
"AllowedHosts": "*",
"Urls": "http://localhost:6060;https://localhost:6061",
"Auth0": {
"Domain": "{DOMAIN}",
"Audience": "{API_IDENTIFIER}"
}
}
```
Replace the `{DOMAIN}` placeholder with your Auth0 domain, the same domain you got for the MAUI application, and the `{API_IDENTIFIER}` placeholder with the value you provided as a unique identifier of your API (`https://demo-api.com`, if you kept the value suggested above).
### Run the applications
It's time to verify if everything works as expected.
In the `api_aspnet-core_csharp_hello-world/HelloworldApplication` folder, run the following command:
```bash
dotnet run
```
After a few seconds, the ASP.NET Core application should be running and listening to the `https://localhost:6061` address. You can check that everything works as expected by running the following command in a terminal window:
```bash
curl https://localhost:6061/api/messages/protected
```
You should get the following response:
```bash
{"Message":"You are not authorized!"}
```
You receive this message because the `/api/messages/protected` endpoint is protected and expects a valid [access token](https://auth0.com/docs/secure/tokens/access-tokens) in your HTTP request.
Now, go to the `dotnet-maui-auth0-app` folder and run your .NET MAUI application by using Visual Studio (currently mandatory for Windows) or one of the following commands, depending on the respective target platform:
```bash
# macOS target platform
dotnet build -t:Run -f net8.0-maccatalyst
# Android target platform
dotnet build -t:Run -f net8.0-android
# iOS target platform
dotnet build -t:Run -f net8.0-ios
```
After a few seconds, you should get the following screen:

Click the *Log in* button, sign in or sign up to the application and enter the home screen, which should appear like the following:
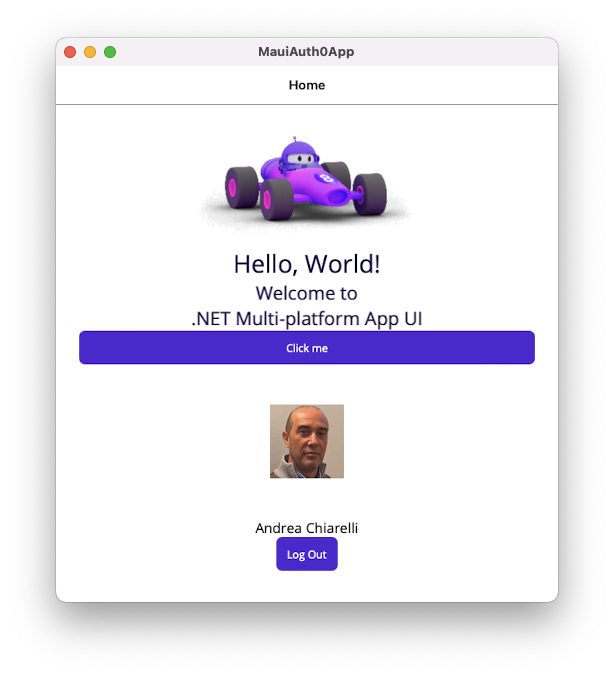
If everything works as expected, you are ready to make the .NET MAUI application call the `api/messages/protected` endpoint of the Web API.
## Get the Access Token
To call a protected API, your .NET MAUI application needs to make a request by including a valid access token in the `Authorization` header. So, the first step is to request an access token from Auth0 that enables the application to call the ASP.NET Core Web API you registered earlier. To identify that API, you use the audience (also known as API identifier) `https://demo-api.com`. Let's put this into action!
### Request the access token
Getting an access token is quite easy. All you have to do is to send the `audience` extra parameter while logging in. For this purpose, open the `MainPage.xaml.cs` file and locate the `OnLoginClicked()` method. Change its body as shown in the following code:
```csharp
//dotnet-maui-auth0-app/MainPage.xaml.cs
using Auth0.OidcClient;
namespace MauiAuth0App;
public partial class MainPage : ContentPage
{
int count = 0;
private readonly Auth0Client auth0Client;
private string accessToken; //👈 new code
//...existing code...
private async void OnLoginClicked(object sender, EventArgs e)
{
//👇 changed code
var loginResult = await auth0Client.LoginAsync(new { audience = ""});
//☝️ changed code
if (!loginResult.IsError)
{
UsernameLbl.Text = loginResult.User.Identity.Name;
UserPictureImg.Source = loginResult.User
.Claims.FirstOrDefault(c => c.Type == "picture")?.Value;
LoginView.IsVisible = false;
HomeView.IsVisible = true;
//👇 new code
accessToken = loginResult.AccessToken;
//☝️ new code
}
else
{
await DisplayAlert("Error", loginResult.ErrorDescription, "OK");
}
}
//...existing code...
}
```
You declared a private variable `accessToken`. Then you called the `auth0Client.LoginAsync()` method with the audience extra parameter. Replace the `` placeholder with the actual API identifier, that is, `https://demo-api.com` if you kept the original suggestion. Finally, you assigned the value of the `AccessToken` property received in the response from Auth0 to the `accessToken` variable.
That's all! Now, when you log in to the application, the Auth0 client will request an access token for that audience and you'll get it in the `accessToken` variable.
## Call the Protected Web API
So far, you have managed to get an access token to call the ASP.NET Core Web API that is running on your machine. Now, you need to make the actual call.
For this purpose, you will add a button on the home screen of the .NET MAUI app. When the user clicks that button, an HTTP request to the `api/messages/protected` endpoint will be sent with the proper access token, and the response message will be shown.
### Add a button to call the API
Open the `MainPage.xaml` file and add the markup highlighted below:
```xml
```
You added the markup that creates a button right above the logout button. This button invokes the `OnApiCallClicked()` method that you will create in a moment.
### Call the protected endpoint
The actual call to the API endpoint is triggered when the user clicks the "Call API" button. Let's implement the associated `OnApiCallClicked()` method.
Open the `MainPage.xaml.cs` file and add that method as shown here:
```csharp
//dotnet-maui-auth0-app/MainPage.xaml.cs
using Auth0.OidcClient;
using System.Net.Http.Headers; //👈 new code
namespace MauiAuth0App;
public partial class MainPage : ContentPage
{
//...existing code...
//👇 new code
private async void OnApiCallClicked(object sender, EventArgs e)
{
using (var httpClient = new HttpClient())
{
string ApiUrl = "https://localhost:6061/api/messages/protected";
httpClient.DefaultRequestHeaders.Authorization
= new AuthenticationHeaderValue("Bearer", accessToken);
try
{
HttpResponseMessage response = await httpClient.GetAsync(ApiUrl);
{
string content = await response.Content.ReadAsStringAsync();
await DisplayAlert("Info", content, "OK");
}
}
catch (Exception ex)
{
await DisplayAlert("Error", ex.Message, "OK");
}
}
}
//☝️ new code
}
```
You added a reference to the `System.Net.Http.Headers` namespace, which allows you to work with HTTP headers. The `OnApiCallClicked()` method creates an instance of the `HttpClient` class and calls the API endpoint with the access token as the `Authorization` header's value with the `Bearer` scheme. The response received from the API is shown through an alert window. If everything goes as expected, you should see the following message:
```json
{
"message": "The API successfully validated your access token."
}
```
### Test the MAUI application
Let's see if everything works as expected.
> ⚠️ If your .NET MAUI application is targeted for an Android emulator or an iOS simulator, you need to do extra configuration work to allow it to call a Web API running locally. Please, check out [this document](https://learn.microsoft.com/en-us/dotnet/maui/data-cloud/local-web-services) to learn more.
Make sure the ASP.NET Core Web API is up and running on your machine. Then, run the modified .NET MAUI application using Visual Studio or one of the commands shown earlier. Once the application starts and you log in, you should see a screen similar to the following:
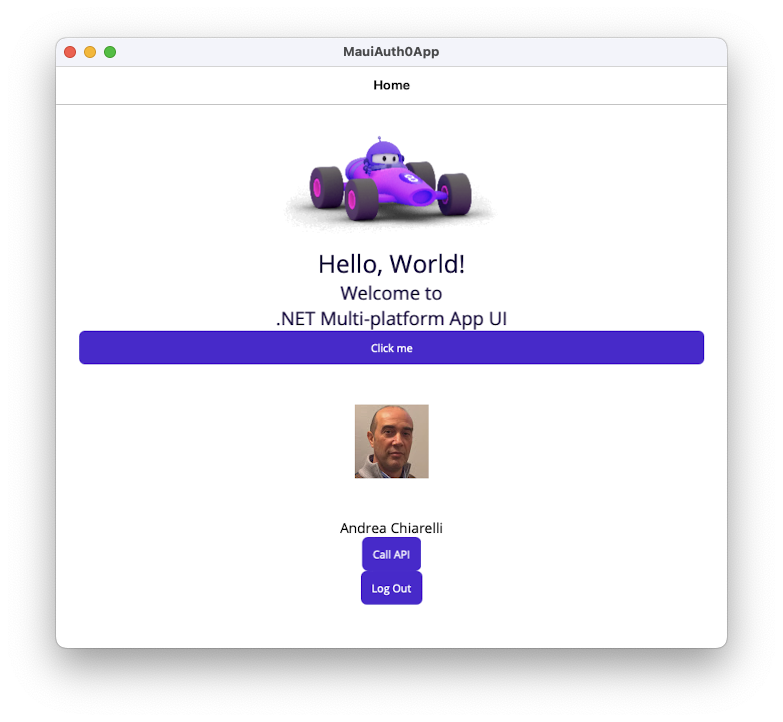
Notice the "Call API" button below the user's name. Click that button and you should get the expected message as shown here:
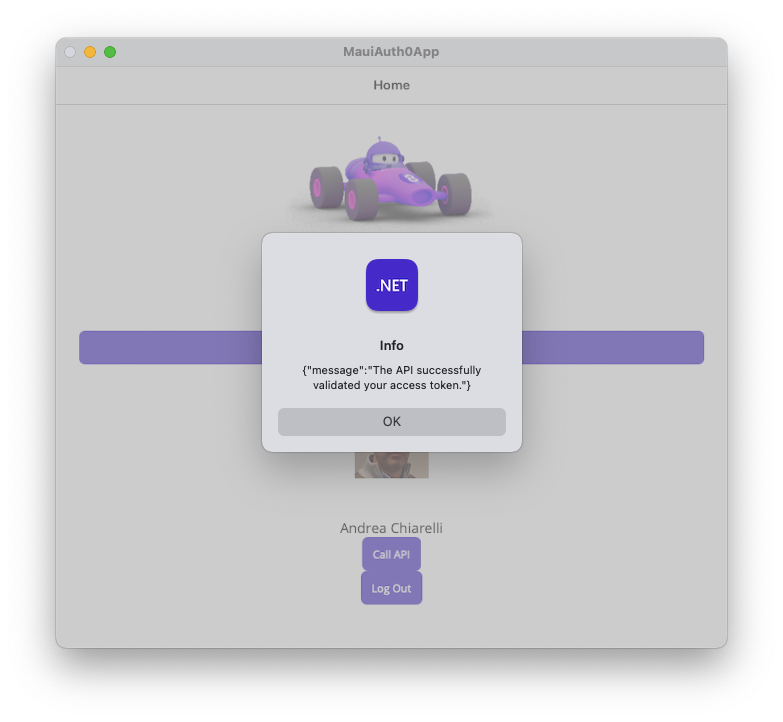
Well done! You managed to call the protected API!
While you get the expected result, this may not be the best approach to calling an API. Keep reading the next section to understand why and what you can do to fix the issue.
## Best Practices to Call an API
The `HttpClient` class allows you to call an API easily, as you learned in the previous section. Unfortunately, this is not always the best approach to call an API, regardless it is protected or not. Much depends on the specific needs of your application, of course. For example, if your application makes very few requests to an API, maybe this approach can work. However, if your application calls the API frequently, you may need to refactor that code to overcome a few issues.
### What's wrong with `HttpClient`?
If you create an `HttpClient` class instance each time you call the API, you may run into a well-known issue: [the socket exhaustion problem](https://docs.microsoft.com/en-us/dotnet/architecture/microservices/implement-resilient-applications/use-httpclientfactory-to-implement-resilient-http-requests#issues-with-the-original-httpclient-class-available-in-net). Briefly, when an `HttpClient` instance gets disposed of, the underlying socket is not immediately released. If your application calls the API very frequently, this can create a situation where it has no more available sockets. See [this article](https://www.aspnetmonsters.com/2016/08/2016-08-27-httpclientwrong/) for a detailed explanation.
Actually, the `HttpClient` class is intended to be instantiated once and reused within the application. You may be tempted to use the [Singleton Pattern](https://en.wikipedia.org/wiki/Singleton_pattern) to solve the socket exhaustion problem. It works, but you can potentially run into a new type of problem in case your application stays running for a long time: your application [may miss DNS changes](https://github.com/dotnet/runtime/issues/18348).
All these considerations depend on the nature of your application's interaction with the API, of course. However, [Microsoft's best practices](https://learn.microsoft.com/en-us/dotnet/architecture/microservices/implement-resilient-applications/use-httpclientfactory-to-implement-resilient-http-requests#benefits-of-using-ihttpclientfactory) suggest using `IHttpClientFactory` to overcome these issues.
Let's see how to refactor the current application code to use `IHttpClientFactory`.
### Add a token holder
As the first step, you must make the access token globally available to the application. Currently the access token is stored in a private variable within the `MainPage` class. Since you will work with a few new classes and the dependency injection system, the access token needs to be accessible in different parts of the application.
Go to the root folder of your MAUI app and create the `TokenHolder.cs` file with the following content:
```csharp
//dotnet-maui-auth0-app/TokenHolder.cs
namespace MauiAuth0App;
public static class TokenHolder
{
public static string AccessToken { get; set; }
}
```
As you can see, this just defines the static class `TokenHolder` with one property, `AccessToken`.
Let's replace the existing private variable with this new class. Open the `MainPage.xaml.cs` file and apply the following changes:
```csharp
//dotnet-maui-auth0-app/MainPage.xaml.cs
using Auth0.OidcClient;
using System.Net.Http.Headers;
namespace MauiAuth0App;
public partial class MainPage : ContentPage
{
int count = 0;
private readonly Auth0Client auth0Client;
//private string accessToken; //👈 removed code
//...existing code...
private async void OnLoginClicked(object sender, EventArgs e)
{
var loginResult = await auth0Client.LoginAsync(new { audience = ""});
if (!loginResult.IsError)
{
UsernameLbl.Text = loginResult.User.Identity.Name;
UserPictureImg.Source = loginResult.User
.Claims.FirstOrDefault(c => c.Type == "picture")?.Value;
LoginView.IsVisible = false;
HomeView.IsVisible = true;
//accessToken = loginResult.AccessToken; //👈 removed code
TokenHolder.AccessToken = loginResult.AccessToken; //👈 new code
}
else
{
await DisplayAlert("Error", loginResult.ErrorDescription, "OK");
}
}
//...existing code...
}
```
You removed the declaration of the `accessToken` private variable and replaced its assignment with the assignment of the access token to the `AccessToken` property of the `TokenHolder` static class.
### Add an authorization message handler
Now you need to define a component that injects the access token into each HTTP request to the API. You can do it through a custom message handler. A message handler is a component that can manipulate HTTP messages before they are sent to the client.
So, still in the root folder of your MAUI app, create a `TokenHandler.cs` file with the following content:
```csharp
//dotnet-maui-auth0-app/TokenHandler.cs
using System.Net.Http.Headers;
namespace MauiAuth0App;
public class TokenHandler : DelegatingHandler
{
protected override async Task SendAsync(HttpRequestMessage request, CancellationToken cancellationToken)
{
request.Headers.Authorization =
new AuthenticationHeaderValue("Bearer", TokenHolder.AccessToken);
return await base.SendAsync(request, cancellationToken);
}
}
```
The `TokenHandler` class inherits from the `DelegatingHandler` class. Its overriding method `SendAsync()` just adds the `Authorization` header with the current access token value before sending the HTTP request.
### Configure the dependency injection system
With the message handler just defined, you can now configure the dependency system to support customized `HttpClient` instances.
First, install the required package to support IHttpClientFactory by running this command in the MAUI app's root folder:
```shell
dotnet add package Microsoft.Extensions.Http
```
Then, edit the `MauiProgram.cs` file and add the code highlighted here:
```csharp
//dotnet-maui-auth0-app/MauiProgram.cs
using Microsoft.Extensions.Logging;
using Auth0.OidcClient;
using Microsoft.Extensions.Http; //👈 new code
namespace MauiAuth0App;
public static class MauiProgram
{
public static MauiApp CreateMauiApp()
{
//...existing code...
//👇 new code
builder.Services.AddSingleton();
builder.Services.AddHttpClient("DemoAPI",
client => client.BaseAddress = new Uri("https://localhost:6061")
).AddHttpMessageHandler();
builder.Services.AddTransient(
sp => sp.GetRequiredService().CreateClient("DemoAPI")
);
//☝️ new code
return builder.Build();
}
}
```
You added a reference to the `Microsoft.Extensions.Http` namespace. Then, you added the `TokenHandler` class as a singleton service. Also, you defined a named `HttpClient` instance (`"DemoAPI"`) with the API base address to use when making an HTTP request and attached the `TokenHandler` class as the message handler.
Finally, you created the actual `HttpClient` instance through the `CreateClient()` method of the `IHttpClientFactory` service implementation.
> Check out [this article to learn more about the .NET dependency injection system](https://auth0.com/blog/dependency-injection-in-dotnet-core/).
### Call the protected API
Everything is ready to make the actual API call with the new infrastructure. Open the `MainPage.xaml.cs` file and make the changes highlighted below:
```csharp
//dotnet-maui-auth0-app/MainPage.xaml.cs
using Auth0.OidcClient;
using System.Net.Http.Headers;
namespace MauiAuth0App;
public partial class MainPage : ContentPage
{
int count = 0;
private readonly Auth0Client auth0Client;
private HttpClient _httpClient; //👈 new code
//👇 changed code
public MainPage(Auth0Client client, HttpClient httpClient)
{
InitializeComponent();
auth0Client = client;
_httpClient = httpClient; //👈 new code
#if WINDOWS
auth0Client.Browser = new WebViewBrowserAuthenticator(WebViewInstance);
#endif
}
//...existing code...
private async void OnApiCallClicked(object sender, EventArgs e)
{
//👇 changed code
try
{
HttpResponseMessage response = await _httpClient.GetAsync("api/messages/protected");
{
string content = await response.Content.ReadAsStringAsync();
await DisplayAlert("Info", content, "OK");
}
}
catch (Exception ex)
{
await DisplayAlert("Error", ex.Message, "OK");
}
//☝️ changed code
}
}
```
You declared the `_httpClient` private variable. You added the `httpClient` parameter to the `MainPage()` method so that the dependency injection system will provide an `HttpClient` instance. You assigned the `HttpClient` instance received from the dependency injection system to the private `_httpClient` variable.
Finally, you replaced the body of `OnApiCallClicked()` method with some new code. This new code uses the `_httpClient` variable to make the HTTP request to the API. Notice that now you are just specifying the endpoint's relative path and not adding any access token. All this stuff is managed by the message handler and the `HttpClient` named instance.
You are ready to test this new version of your .NET MAUI application. If everything is working correctly, you should get the same experience as before, but you know that now your API calls are much more robust.
## Summary
By reaching the end of this article, I guess you have learned a lot.
You started by downloading a .NET MAUI application and an ASP.NET Core Web API and registering them with Auth0. You learned how to pass the audience parameter to Auth0 to get an access token for a specific API and how to use the access token to call the protected API endpoint through `HttpClient`.
You also learned that this basic solution has drawbacks in some situations. So, you refactored the code to leverage the `IHttpClientFactory` interface and centralized the `HttpClient` instance creation and the access token addition.
You can download the final code built throughout the article from this [GitHub repository](https://github.com/auth0-blog/dotnet-maui-auth0-call-api).