


TL;DR: We can write statically typed, functional SPAs on the front end with Elm. Elm's compiler prevents runtime errors and compiles to JavaScript, making it an excellent choice for clean, speedy development. In part one of this tutorial, learn how to write your first Elm app and request data from an API. In part two, we'll add authentication using JSON Web Tokens. The full code is available at this GitHub repository.
All JavaScript app developers are likely familiar with this scenario: we implement logic, deploy our code, and then in QA (or worse, production) we encounter a runtime error! Maybe it was something we forgot to write a test for, or it's an obscure edge case we didn't foresee. Either way, when it comes to business logic in production code, we often spend post-launch with the vague threat of errors hanging over our heads.
Enter Elm: a functional front-end programming language that compiles to JavaScript, making it great for web applications that run in the browser. Elm's compiler presents us with friendly error messages before runtime, thereby eliminating runtime errors.
Why Elm?
Elm's creator Evan Czaplicki positions Elm with several strong concepts, but we'll touch on two in particular: gradual learning and usage-driven design. Gradual learning is the idea that we can be productive with the language before diving deep. As we use Elm, we are able to gradually learn via development and build up our skillset, but we are not hampered in the beginner stage by a high barrier to entry. Usage-driven design emphasizes starting with the minimum viable solution and iteratively building on it, but Evan points out that it's best to keep it simple, and the minimum viable solution is often enough by itself.
If we head over to the Elm site, we're greeted with an attractive featureset highlighting "No runtime exceptions", "Blazing fast rendering", and "Smooth JavaScript interop". But what does this boil down to when writing real code? Let's take a look.
Building an Elm Web App
In the first half of this two-part tutorial, we're going to build a small Elm application that will call an API to retrieve random Chuck Norris quotes. In doing so, we'll learn Elm basics like how to compose an app with a view and a model, how to update application state, and how to implement common real-world requirements like HTTP. In part two of the tutorial, we'll add the ability to register, log in, and access protected quotes with JSON Web Tokens.
If you're familiar with JavaScript but new to Elm the language might look a little strange at first--but once we start building, we'll learn how the Elm Architecture, types, and clean syntax can really streamline development. This tutorial is structured to help JavaScript developers get started with Elm without assuming previous experience with other functional or strongly typed languages.
Setup and Installation
The full source code for our finished app can be cloned on GitHub here.
We're going to use Gulp to build and serve our application locally and NodeJS to serve our API and install dependencies through the Node Package Manager (npm). If you don't already have Node and Gulp installed, please visit their respective websites and follow instructions for download and installation.
Note: Webpack is an alternative to Gulp. If you're interested in trying a customizable webpack build in the future for larger Elm projects, check out elm-webpack-loader.
We also need the API. Clone the NodeJS JWT Authentication sample API repository and follow the README to get it running.
Installing and Configuring Elm App
To install Elm globally, run the following command:
npm install -g elmOnce Elm is successfully installed, we need to set up our project's configuration. This is done with an elm-package.json file:
// elm-package.json

{
    "version": "1.0.0",
    "summary": "Build an App in Elm with JWT Authentication and an API",
    "repository": "https://github.com/auth0-blog/elm-with-jwt-api.git",
    "license": "MIT",
    "source-directories": [
        "src",
        "dist"
    ],
    "exposed-modules": [],
    "dependencies": {
        "elm-lang/core": "5.1.1 <= v < 6.0.0",
        "elm-lang/html": "2.0.0 <= v < 3.0.0",
        "elm-lang/http": "1.0.0 <= v < 2.0.0",
        "rgrempel/elm-http-decorators": "2.0.0 <= v < 3.0.0"
    },
    "elm-version": "0.18.0 <= v < 0.19.0"
}
We'll be using Elm v0.18 in this tutorial. The elm-version here is restricted to minor point releases of 0.18.
Now that we've declared our Elm dependencies, we can install them:
elm package installOnce everything has installed, an /elm-stuff folder will live at the root of your project. This folder contains all of the Elm dependencies we specified in our elm-package.json file.
Build Tools
Now we have Node, Gulp, Elm, and the API installed. Let's set up our build configuration. Create and populate a package.json file, which should live at our project's root:
// package.json

...
  "dependencies": {},
  "devDependencies": {
    "gulp": "^3.9.0",
    "gulp-connect": "^4.0.0",
    "gulp-elm": "^0.6.1",
    "gulp-plumber": "^1.1.0",
    "gulp-util": "^3.0.7"
  }
...
Once the package.json file is in place, install the Node dependencies:
npm installNext, create a gulpfile.js file:
// gulpfile.js

var gulp = require('gulp');
var elm = require('gulp-elm');
var gutil = require('gulp-util');
var plumber = require('gulp-plumber');
var connect = require('gulp-connect');

// File paths
var paths = {
  dest: 'dist',
  elm: 'src/*.elm',
  static: 'src/*.{html,css}'
};

// Init Elm
gulp.task('elm-init', elm.init);

// Compile Elm to HTML
gulp.task('elm', ['elm-init'], function(){
    return gulp.src(paths.elm)
        .pipe(plumber())
        .pipe(elm())
        .pipe(gulp.dest(paths.dest));
});

// Move static assets to dist
gulp.task('static', function() {
    return gulp.src(paths.static)
        .pipe(plumber())
        .pipe(gulp.dest(paths.dest));
});

// Watch for changes and compile
gulp.task('watch', function() {
    gulp.watch(paths.elm, ['elm']);
    gulp.watch(paths.static, ['static']);
});

// Local server
gulp.task('connect', function() {
    connect.server({
        root: 'dist',
        port: 3000
    });
});

// Main gulp tasks
gulp.task('build', ['elm', 'static']);
gulp.task('default', ['connect', 'build', 'watch']);
The default gulp task will compile Elm, watch and copy files to a /dist folder, and run a local server where we can view our application at http://localhost:3000.
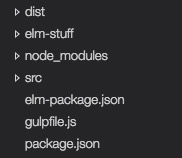
Our development files should be located in a /src folder. Please create the /dist and /src folders at the root of the project. Our file structure now looks like this:
Syntax Highlighting
There's one more thing we should do before we start writing Elm, and that is to grab a plugin for our code editor to provide syntax highlighting and inline compile error messaging. There are plugins available for many popular editors. I like to use VS Code with vscode-elm, but you can download a plugin for your editor of choice here. With syntax highlighting installed, we're ready to begin coding our Elm app.
Chuck Norris Quoter App
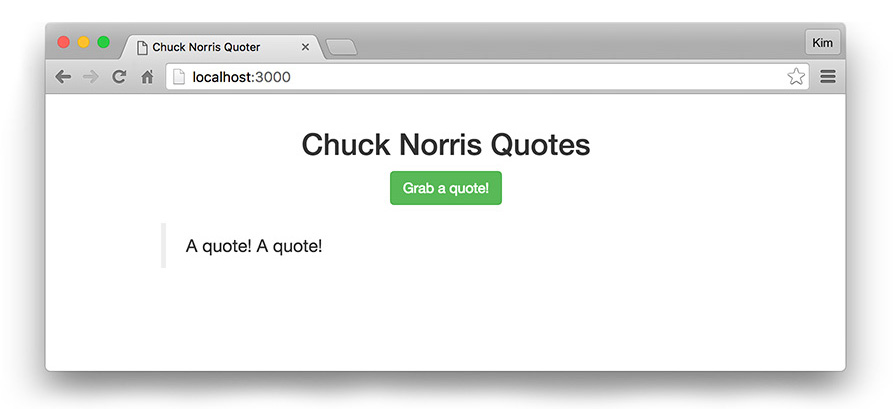
We're going to build an app that does more than echo "Hello world". We're going to connect to an API to request and display data and in part two, we'll add registration, login, and make authenticated requests--but we'll start simple. First we'll display a button that appends a string to our model each time it's clicked.
Once we've got things running, our app should look like this:
Let's fire up our Gulp task. This will start a local server and begin watching for file changes:
gulpNote: Since Gulp is compiling Elm for us, if we have compile errors they will show up in the command prompt / terminal window. If you have one of the Elm plugins installed in your editor, they should also show up inline in your code.
HTML
We'll start by creating a basic index.html file:
<!-- src/index.html -->
<!DOCTYPE html>
<html>
    <head>
        <meta charset="utf-8">
        <title>Chuck Norris Quoter</title>
        <script src="Main.js"></script>
        <link rel="stylesheet" href="https://maxcdn.bootstrapcdn.com/bootstrap/3.3.7/css/bootstrap.min.css">
        <link rel="stylesheet" href="styles.css">
    </head>
    <body>
    </body>
    <script>
        var app = Elm.Main.fullscreen();
    </script>
</html>
We're loading a JavaScript file called Main.js. Elm compiles to JavaScript and this is the file that will be built from our compiled Elm code.
We'll also load the Bootstrap CSS and a local styles.css file for a few helper overrides.
Finally we'll use JS to tell Elm to load our application. The Elm module we're going to export is called Main (from Main.js).
CSS
Next, let's create the styles.css file:
/* src/styles.css */

.container {
    margin: 1em auto;
    max-width: 600px;
}
blockquote {
    margin: 1em 0;
}
.jumbotron {
    margin: 2em auto;
    max-width: 400px;
}
.jumbotron h2 {
    margin-top: 0;
}
.jumbotron .help-block {
    font-size: 14px;
}
Introduction to Elm
We're ready to start writing Elm. Create a file in the /src folder called Main.elm. The full code for this step is available in the source repository on GitHub:
src/Main.elm - Step 1: Introduction to Elm
Our file structure should now look like this:

If you're already familiar with Elm you can skip ahead. If Elm is brand new to you, keep reading: we'll introduce The Elm Architecture and Elm's language syntax by thoroughly breaking down this code. Make sure you have a good grasp of this section before moving on; the next sections will assume an understanding of the syntax and concepts.
import Html exposing (..)
import Html.Events exposing (..)
import Html.Attributes exposing (..)
At the top of our app file, we need to import dependencies. We expose the Html package to the application for use. Because we'll be writing a view function, we will expose Html.Events and Html.Attributes to use click and input events, IDs, classes, and other element attributes.
Everything we're going to write is part of The Elm Architecture. In brief, this refers to the basic pattern of Elm application logic. It consists of Model (application state), Update (way to update the application state), and View (render the application state as HTML). You can read more about The Elm Architecture in Elm's guide.
main : Program Never Model Msg
main =
    Html.program
        { init = init
        , update = update
        , subscriptions = \_ -> Sub.none
        , view = view
        }
main : Program Never Model Msg is a type annotation. This annotation says "main has type Program and should Never expect a flags argument". If this doesn't make a ton of sense yet, hang tight—we'll be covering more type annotations throughout our app.
Every Elm project defines main as a program. There are a few program candidates, including beginnerProgram, program, and programWithFlags. Initially, we'll use main = Html.program.
Next we'll start our app with a record that references an init function, an update function, and a view function. We'll create these functions shortly.
subscriptions may look strange at first. Subscriptions listen for external input and we won't be using any in the Chuck Norris Quoter so we don't need a named function here. Elm does not have a concept of null or undefined and it's expecting functions as values in this record. This is an anonymous function that declares there are no subscriptions.
Here's a breakdown of the syntax. \ begins an anonymous function. A backslash is used because it resembles a lambda (λ). _ represents an argument that is discarded. -> signifies the body of the function. subscriptions = \_ -> ... in JS might look like either of these:
// JS
subscriptions = function() { ... }

subscriptions = function(anyArg) {
    // do nothing with anyArg
}
(What would an anonymous function requiring an argument look like? Answer: \x -> ...)
Next up are the model type alias and the init function:
{-
    MODEL
    * Model type
    * Initialize model with empty values
-}

type alias Model =
    { quote : String
    }

init : (Model, Cmd Msg)
init =
    ( Model "", Cmd.none )
The first block is a multi-line comment. A single-line comment is represented like this:
-- Single-line commentA type alias is a definition for use in type annotations. In future type annotations, we can now say Something : Model and Model would be replaced by the contents of the type alias.
We expect a record with a property of quote that has a string value. We've mentioned records a few times, so we'll expand on them briefly: records look similar to objects in JavaScript. However, records in Elm are immutable: they hold labeled data but do not have inheritance or methods. Elm's functional paradigm uses persistent data structures so "updating the model" returns a new model with only the changed data copied.
Now we've come to the init function that we referenced in our main program. The type annotation for init means "init returns a tuple containing record defined in Model type alias and a command for an effect with an update message". That's a mouthful--and we'll be encountering additional type annotations that look similar but have more context, so they'll be easier to understand. What we should take away from this type annotation is that we're returning a tuple (an ordered list of values of potentially varying types). So for now, let's concentrate on the init function.
Functions in Elm are defined with a name followed by a space and any arguments (separated by spaces), an =, and the body of the function indented on a newline. There are no parentheses, braces, function or return keywords. This might feel sparse at first but hopefully you'll find the clean syntax speeds development.
Returning a tuple is the easiest way to get multiple results from a function. The first element in the tuple declares the initial values of the Model record. Strings are denoted with double quotes, so we're defining { quote = "" } on initialization. The second element is Cmd.none because we're not sending a command (yet!).
{-
    UPDATE
    * Messages
    * Update case
-}


type Msg = GetQuote

update : Msg -> Model -> (Model, Cmd Msg)

update msg model =
    case msg of
        GetQuote ->
            ( { model | quote = model.quote ++ "A quote! " }, Cmd.none )
The next vital piece of the Elm Architecture is update. There are a few new things here.
First we have type Msg = GetQuote: this is a union type. Union types provide a way to represent types that have unusual structures (they aren't String, Bool, Int, etc). This says type Msg could be any of the following values. Right now we only have GetQuote but we'll add more later.
Now that we have a union type definition, we need a function that will handle this using a case expression. We're calling this function update because its purpose is to update the application state via the model.
The update function has a type annotation that says "update takes a message as an argument and a model argument and returns a tuple containing a model and a command for an effect with an update message".
This is the first time we've seen -> in a type annotation. A series of items separated by -> represent argument types until the last one, which is the return type. The reason we don't use a different notation to indicate the return has to do with currying. In a nutshell, currying means if you don't pass all the arguments to a function, another function will be returned that accepts whatever arguments are still needed. You can learn more about currying elsewhere.
The update function accepts two arguments: a message and a model. If the msg is GetQuote, we'll return a tuple that updates the quote to append "A quote! " to the existing value. The second element in the tuple is currently Cmd.none. Later, we'll change this to execute the command to get a random quote from the API. The case expression models possible user interactions.
The syntax for updating properties of a record is:
{ recordName | property = updatedValue, property2 = updatedValue2 }Elm uses = to set values. Colons : are reserved for type definitions. A : means "has type" so if we were to use them here, we would get a compiler error.
We now have the logic in place for our application. How will we display the UI? We need to render a view:
{-
    VIEW
-}


view : Model -> Html Msg
view model =
    div [ class "container" ] [
        h2 [ class "text-center" ] [ text "Chuck Norris Quotes" ]
        , p [ class "text-center" ] [
            button [ class "btn btn-success", onClick GetQuote ] [ text "Grab a quote!" ]
        ]
        -- Blockquote with quote
        , blockquote [] [
            p [] [text model.quote]
        ]
    ]
The type annotation for the view function reads, "view takes model as an argument and returns HTML with a message". We've seen Msg a few places and now we've defined its union type. A command Cmd is a request for an effect to take place outside of Elm. A message Msg is a function that notifies the update method that a command was completed. The view needs to return HTML with the message outcome to display the updated UI.
The view function describes the rendered view based on the model. The code for view resembles HTML but is actually composed of functions that correspond to virtual DOM nodes and pass lists as arguments. When the model is updated, the view function executes again. The previous virtual DOM is diffed against the next and the minimal set of updates necessary are run.
The structure of the functions somewhat resembles HTML, so it's pretty intuitive to write. The first list argument passed to each node function contains attribute functions with arguments. The second list contains the contents of the element. For example:
button [ class "btn btn-success", onClick GetQuote ] [ text "Grab a quote!" ]This button's first argument is the attribute list. The first item in that list is the class function accepting the string of classes. The second item is an onClick function with GetQuote. The next list argument is the contents of the button. We'll give the text function an argument of "Grab a quote!".
Last, we want to display the quote text. We'll do this with a blockquote and p, passing model.quote to the paragraph's text function.
We now have all the pieces in place for the first phase of our app! We can view it at http://localhost:3000. Try clicking the "Grab a quote!" button a few times.
Note: If the app didn't compile, Elm provides compiler errors for humans in the console and in your editor if you're using an Elm plugin. Elm will not compile if there are errors! This is to avoid runtime exceptions.
That was a lot of detail, but now we're set on basic syntax and structure. We'll move on to build the features of our Chuck Norris Quoter app.
Calling the API
Now we're ready to fill in some of the blanks we left earlier. In several places we claimed in our type annotations that a command Cmd should be returned, but we returned Cmd.none instead. Now we'll replace those with the missing command.
When this step is done, our application should look like this:
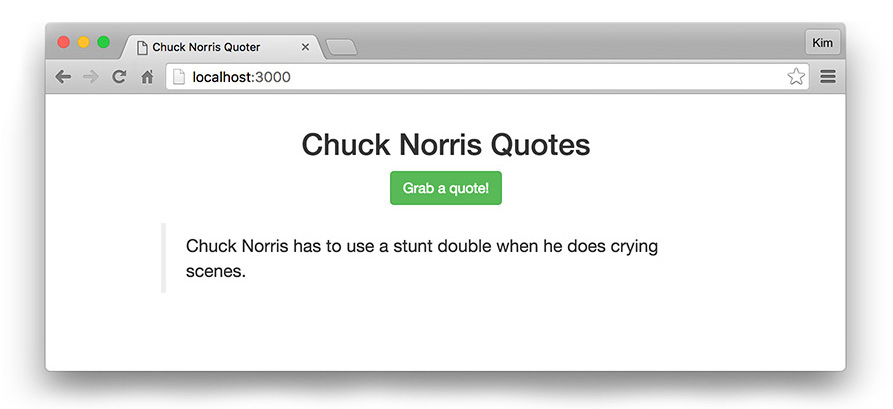
Clicking the button will call the API to get and display random Chuck Norris quotes. Make sure you have the API running at http://localhost:3001 so it's accessible to our app.
Once we're successfully getting quotes, our source code will look like this:
src/Main.elm - Step 2: Calling an API
The first thing we need to do is import the dependency necessary for making HTTP requests:
import HttpWe'll need Http to make requests and handle responses.
Next we'll update our init function:
init : (Model, Cmd Msg)
init =
    ( Model "", fetchRandomQuoteCmd )
Now instead of Cmd.none we have a command called fetchRandomQuoteCmd. A command is a way to tell Elm to do some effect (like HTTP). We're commanding the application to fetch a random quote from the API on initialization. We'll define the fetchRandomQuoteCmd function shortly.
{-
   UPDATE
   * API routes
   * GET
   * Messages
   * Update case
-}
-- API request URLs


api : String
api =
    "http://localhost:3001/"


randomQuoteUrl : String
randomQuoteUrl =
    api ++ "api/random-quote"


-- GET a random quote (unauthenticated)


fetchRandomQuote : Http.Request String
fetchRandomQuote =
    Http.getString randomQuoteUrl


fetchRandomQuoteCmd : Cmd Msg
fetchRandomQuoteCmd =
    Http.send FetchRandomQuoteCompleted fetchRandomQuote


fetchRandomQuoteCompleted : Model -> Result Http.Error String -> ( Model, Cmd Msg )
fetchRandomQuoteCompleted model result =
    case result of
        Ok newQuote ->
            ( { model | quote = newQuote }, Cmd.none )

        Err _ ->
            ( model, Cmd.none )
We've added some code to our update section. First we'll store the API routes.
The Chuck Norris API returns unauthenticated random quotes as strings, not JSON. Let's create a function called fetchRandomQuote. We can use the Http.getString method to make the HTTP request with the API route as an argument.
HTTP is something that happens outside of Elm. A command is needed to request the effect and a message is needed to notify the update that the effect was completed and to deliver its results.
We'll do this in fetchRandomQuoteCmd. This function's type annotation declares that it returns a command with a message. Http.send is a command that sends a request.
We then need to respond to the completed request with a message that handles successes and errors: FetchRandomQuoteCompleted. If the request returns Ok, we'll set the quote in the model with the string that is returned. In the case of an error (Err), we aren't going to do anything special. For the sake of brevity, we'll handle API errors when we get to authentication but not for getting unauthenticated quotes. Since we're discarding this argument, we can pass a discarded argument _. This will return a tuple that sends the model in its current state and no command. You may want to handle errors here on your own after completing the provided code.
Let's add FetchRandomQuoteCompleted to our messages and update:
-- Messages


type Msg
    = GetQuote
    | FetchRandomQuoteCompleted (Result Http.Error String)


-- Update

update : Msg -> Model -> ( Model, Cmd Msg )
update msg model =
    case msg of
        GetQuote ->
            ( model, fetchRandomQuoteCmd )

        FetchRandomQuoteCompleted result ->
            fetchRandomQuoteCompleted model result
We add these two new messages to the Msg union type and annotate the types of their arguments. FetchRandomQuoteCompleted accepts a result with an Http.Error or the new Chuck Norris quote string from the API. These are the possible fail / success results of the HTTP request.
Next we add this case to the update function and declare what we want returned in the (Model, Cmd Msg) tuple. We also need to update the GetQuote tuple to fetch a quote from the API. We'll change GetQuote to return the current model and issue the command to fetch a random quote, fetchRandomQuoteCmd.
FetchRandomQuoteCompleted's argument is the response result. We use this to update the model in our Ok case.
It's important to remember that the update function's type is Msg -> Model -> (Model, Cmd Msg). This means that all branches of the case statement must return the same type. If any branch does not return a tuple with a model and a command, a compiler error will occur.
Nothing changes in the view. We altered the GetQuote onClick function logic, but everything that we've written in the HTML works fine with our updated code. This concludes our basic API integration for the first half of this tutorial. Try it out! In part two, we'll tackle adding users and authentication.
Aside: Reading Compiler Type Errors
If you've been following along and writing your own code, you may have encountered Elm's compiler errors. Though they are very readable, type mismatch messages can sometimes seem ambiguous.
Here's a small breakdown of some things you may see:
String -> aA lowercase variable a means "anything could go here". The above means "takes a string as an argument and returns anything".
[1, 2, 3] has a type of List number: a list that only contains numbers. [] is type List a: Elm infers that this is a list that could contain anything.
Elm always infers types. If we've declared type definitions, Elm checks its inferences against our definitions. We'll define types upfront in most places in our app. It's best practice to define the types at the top-level at a minimum. If Elm finds a type mismatch, it will tell us what type it has inferred. Resolving type mismatches can be one of the larger challenges to developers coming from a loosely typed language like JS (without Typescript), so it's worth spending time getting comfortable with this.
Recap and Next Steps
We've covered installing and using the Elm language and learned how to create our first app. We've also integrated with an external API through HTTP. You should now be familiar with Elm's basic syntax, type annotation, and compiler errors. If you'd like, take a little more time to familiarize with Elm's documentation. The Elm FAQ is another great resource from the Elm developer community. In the second half of this tutorial: Creating your First Elm App - Part 2, we'll take a deeper dive into authenticating our Chuck Norris Quoter app using an access token.


