


Did you know that you can customize some of the features Auth0 provides? You can do it with Actions. Are you looking for an example? Let me show you how to customize the user experience when they register with an application.
Auth0 and User Registration
Using Auth0 to secure your application offers a lot of simplification right from the user's initial visual impression: the login page. The Auth0 Universal Login page not only relieves you of the burden of authenticating users but also of the task of managing their self-registration. In fact, in the default configuration, if the user doesn't have an account to access your application, they have the opportunity to register themselves through the Sign up link highlighted in the following picture:
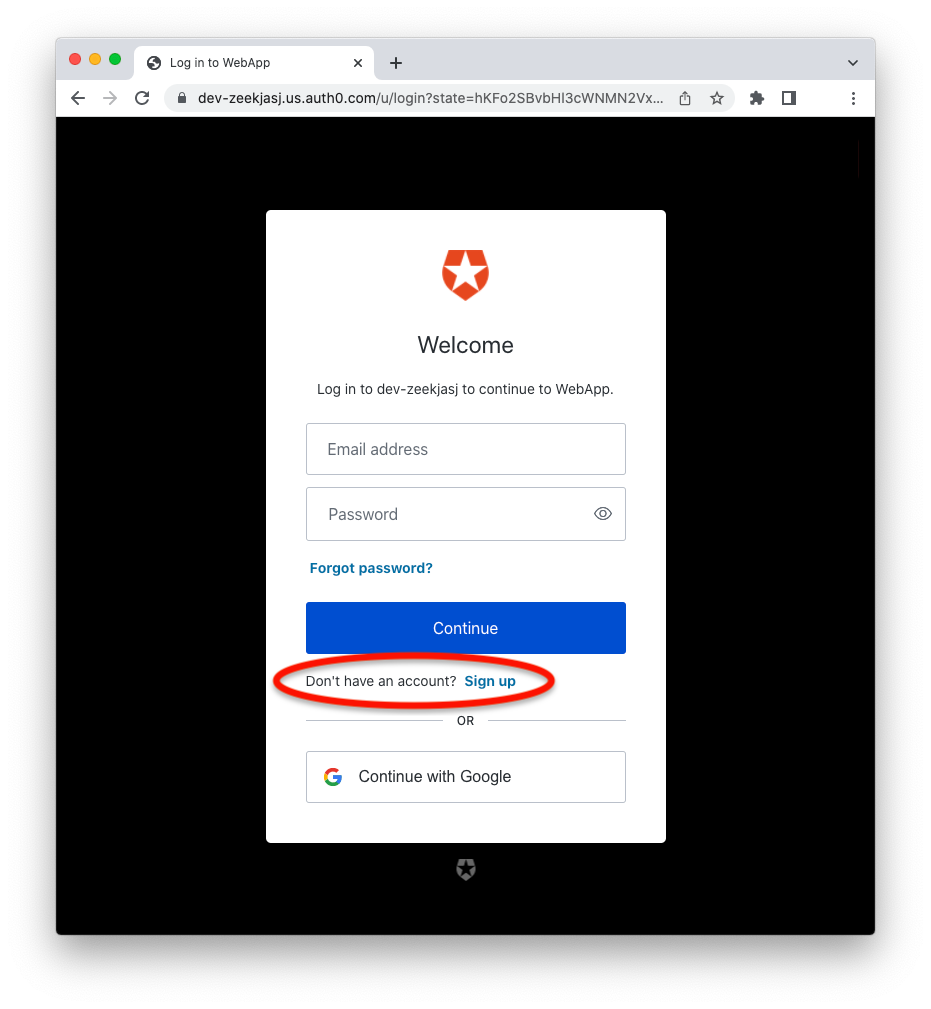
Following that link, the user can provide an email address and a password to start the registration and authentication process in no time.
All this happens without any intervention on your side. It's all-inclusive!
Customize the User Registration Experience
That's pretty fine, but maybe you are wondering how to customize the user registration experience, for example, by sending a custom welcome email message. Say you want to thank the user for registering and make them aware of the terms and conditions for using the application. This is what you are going to learn right in this article!
You will learn that you can extend Auth0 standard flows and customize them for your needs. In particular, you will use Auth0 Actions to send your welcome email message after the user signs up for your application.
Let's start!
The Sample Application
For this purpose, you will use a sample application that will let you experience the proposed solution firsthand.
The sample application you are going to use in this article is built with C# and requires .NET installed on your machine. However, the user registration customization you are going to implement is independent of your application's specific programming language and framework.
To get that sample application, clone it from GitHub with the following command:
git clone https://github.com/auth0-blog/acme-aspnet-mvc.gitAfter you download the application, follow the instructions in the README file to configure it in order to use Auth0. Of course, you need an Auth0 account. If you don't have it, you can get one for free.
If you want to learn more about how the sample application was built, you can check out this blog post.
After configuring the sample application, you can run it with the following command:
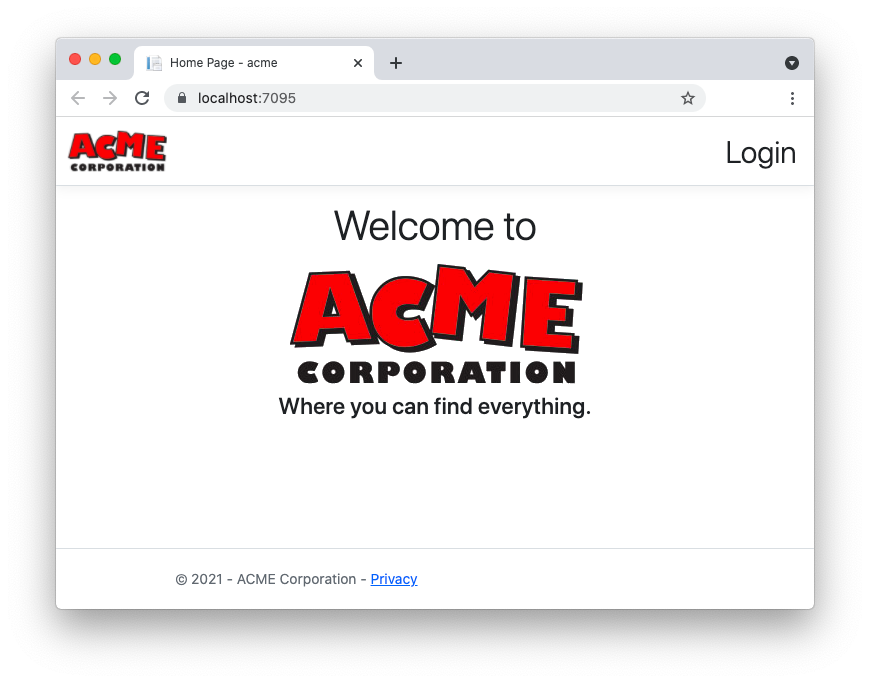
dotnet runPointing your browser to the https://localhost:7095/ address, you should get the following page:
What Are Auth0 Actions?
As said, you are going to use Auth0 Actions to customize the user registration process.
Auth0 Actions are JavaScript functions running in a Node.js environment executed when specific events happen in some internal Auth0 flows.
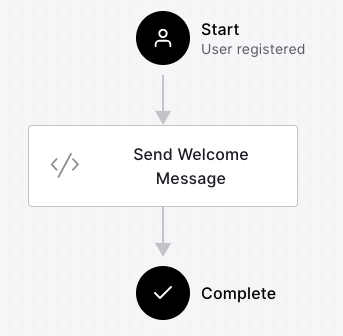
For example, you can run one or more Auth0 Actions when a user authenticates or change their password. You can run them before or after the user registers or when you send an SMS to your provider for multi-factor authentication. You can see Actions as event handlers that run when a specific Auth0 event fires. For example, in our specific case, you want to handle the event that fires right after the user registers with Auth0. When this event happens, you want to run your code to send a customized welcome email message. You can imagine this event handling as shown by the following picture:
To implement this behavior, you are going to use the Auth0 Dashboard, which provides you with an editor, a test environment, an integrated deployment environment, and a versioning tool.
You can check out these blog posts for a quick introduction to Auth0 Actions and how they compare with the deprecated Rules and Hooks.
Implement the Email Sender Action
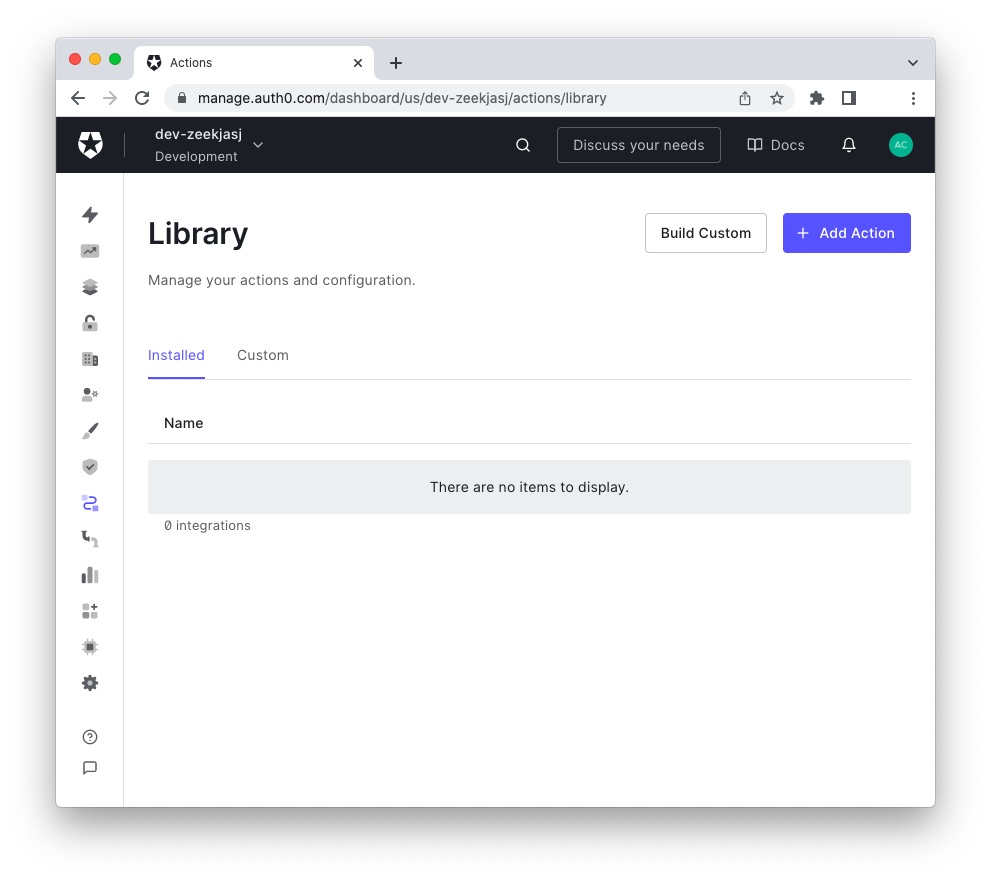
Let's start implementing our customization. Go to your Auth0 Dashboard and select Library under the Actions item from the left side menu. You will access a page where all your Actions are located. If you have never created any Actions, the page will appear as in this picture:
You can create your own Action or install a third-party Action from the Auth0 Marketplace. In the first case, you will start by clicking the Build Custom button, and the resulting Action will be listed in the Custom tab. In the second case, you will start by clicking the + Add Action button, selecting one of the ready-to-use available Actions, and the new Action will be listed in the Installed tab.
Create a new Action
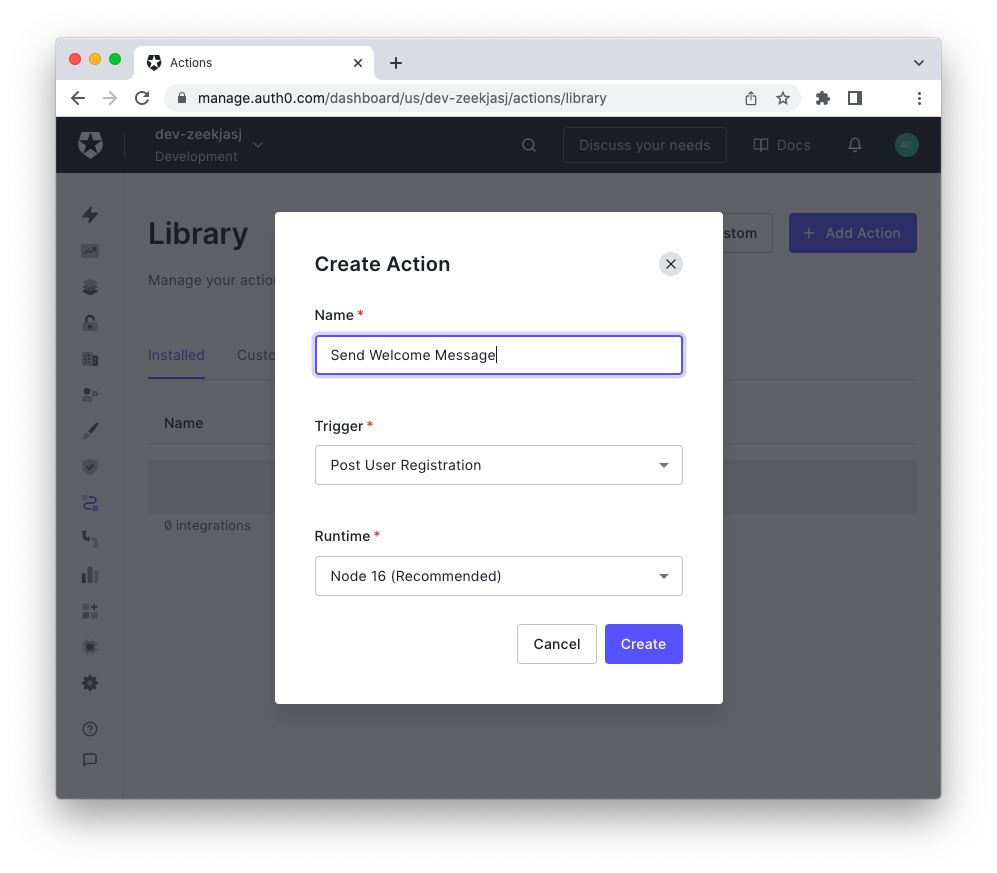
For the current project, you will build a custom Action. So, click the Build Custom button and fill the pop-up form. You should provide a friendly name for the Action and select the trigger that will run it, i.e., the event you are going to handle with this Action. For our project, you should select the Post User Registration trigger, as shown below:
Once you click the Create button, you enter the Action editor, where you find the following code:
exports.onExecutePostUserRegistration = async (event) => {
};
This is the JavaScript function that will be executed after the user registers with your application. This function will be exported in the Node.js environment running on the Auth0 side.
As you can see, the function has an event parameter, which provides some information about the current running environment. For example, it allows you to access the current user's data, the current request, the tenant, etc. For more details about the Post User Registration event object, check out the documentation.
To go straight to the solution, replace the current code in the Action editor with the following:
const axios = require("axios");

exports.onExecutePostUserRegistration = async (event) => {
  try {
    axios.post('https://api.sendgrid.com/v3/mail/send',
      {
        personalizations: [{
          to: [{ email: event.user.email }]
        }],
        from: { email: 'no-reply@acme-demo-corporation.com' },
        subject: 'Welcome to ACME Corporation website',
        content: [{
          type: 'text/html',
          value: `Hello ${event.user.name},<br>
          Welcome to our website!<br>
          As an ACME user, you can take advantage of our catalog and services.
          Please, take a look at our <a href="https://acme-demo-corporation.com/terms-and-conditions">terms and conditions</a>.<br>
          <br>
          Kind regards,<br>
          ACME Corporation<br>`
        }]
      },
      {
        headers: {
          'Authorization': 'Bearer ' + event.secrets.SENDGRID_API_KEY
        }
      }
    );
  } catch (err) {
    console.log(`Error sending email to ${event.user.email}:`, err.message)
  }
};
This code uses Axios as the HTTP client that makes requests to the SendGrid API to send your welcome email message.
The Action implemented in this example uses SendGrid to send emails. Of course, you can adapt the code to use your favorite email provider.
Basically, the Action's code sends an HTTP POST message to SendGrid's mail/send endpoint with some data that define the email. To learn more about the specific SendGrid API, check out the official documentation.
Configure your Action
Looking at the Action's code, there are a couple of things you should pay attention to:
- You get the user's email and name by accessing
event.user.emailandevent.user.name, respectively. - You use the
event.secrets.SENDGRID_API_KEYproperty to access the API key required by SendGrid to authorize your requests.
While the user's data are automatically provided by Auth0 through the event parameter, you need to manually configure the SendGrid API key as a secret. For this purpose, click the key icon on the left side of the Action editor and then click the Add Secret button in the sliding panel that opens. You should get a pop-up window similar to the following:

Fill the form with SENDGRID_API_KEY in the Key field and your SendGrid API key in the Value field.
To complete the Action configuration, you need to make the Axios library available to the Node.js environment. So, click the cube icon on the left side of the Action editor and then click the Add Module button in the sliding panel that opens. This time you should see a pop-up window like the following:
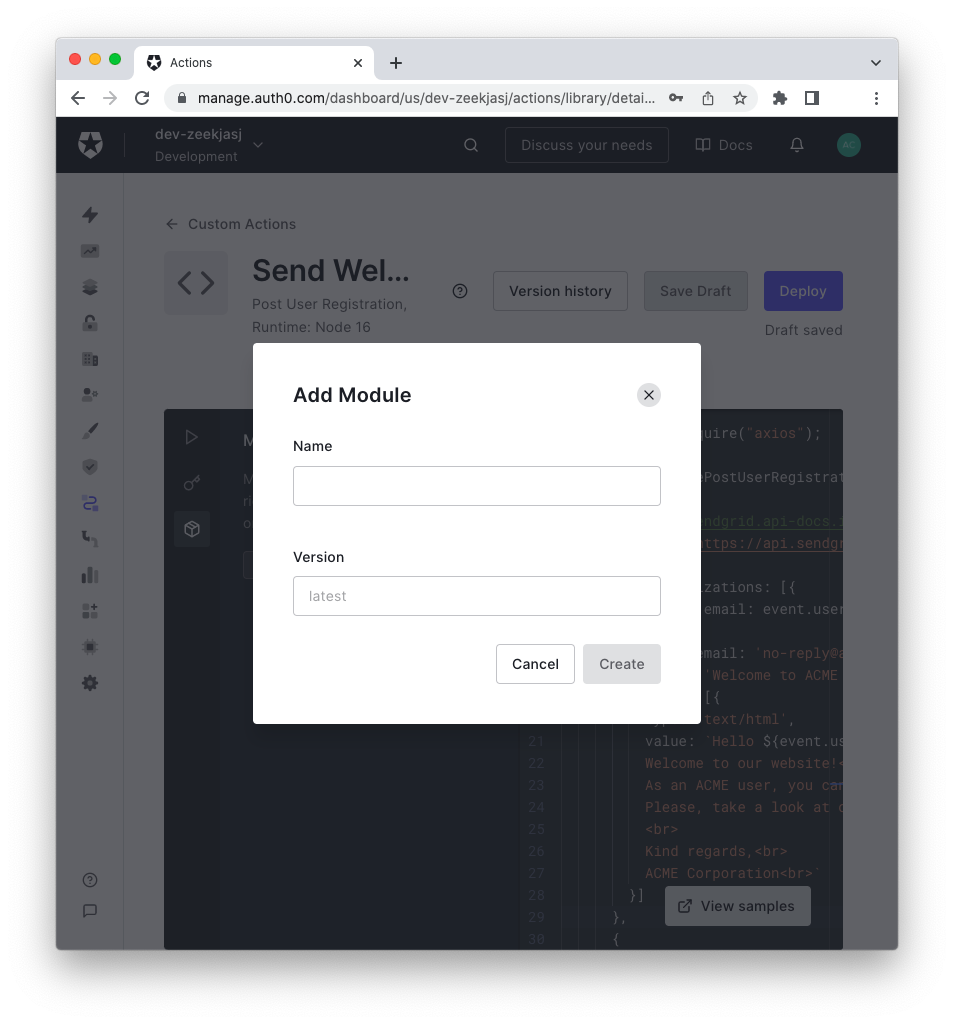
Fill the form with the axios string in the Name field. Unless you want to install a specific version of the library, you don't need to specify anything else.
Save your current work by clicking the Save Draft button.
Test your Action
Now your Action is ready to run. However, before putting it into production, it is appropriate to do some tests and make sure that everything works as expected.
Click the triangle icon on the left side of the Action editor. A panel opens with an event instance as shown in the following picture:
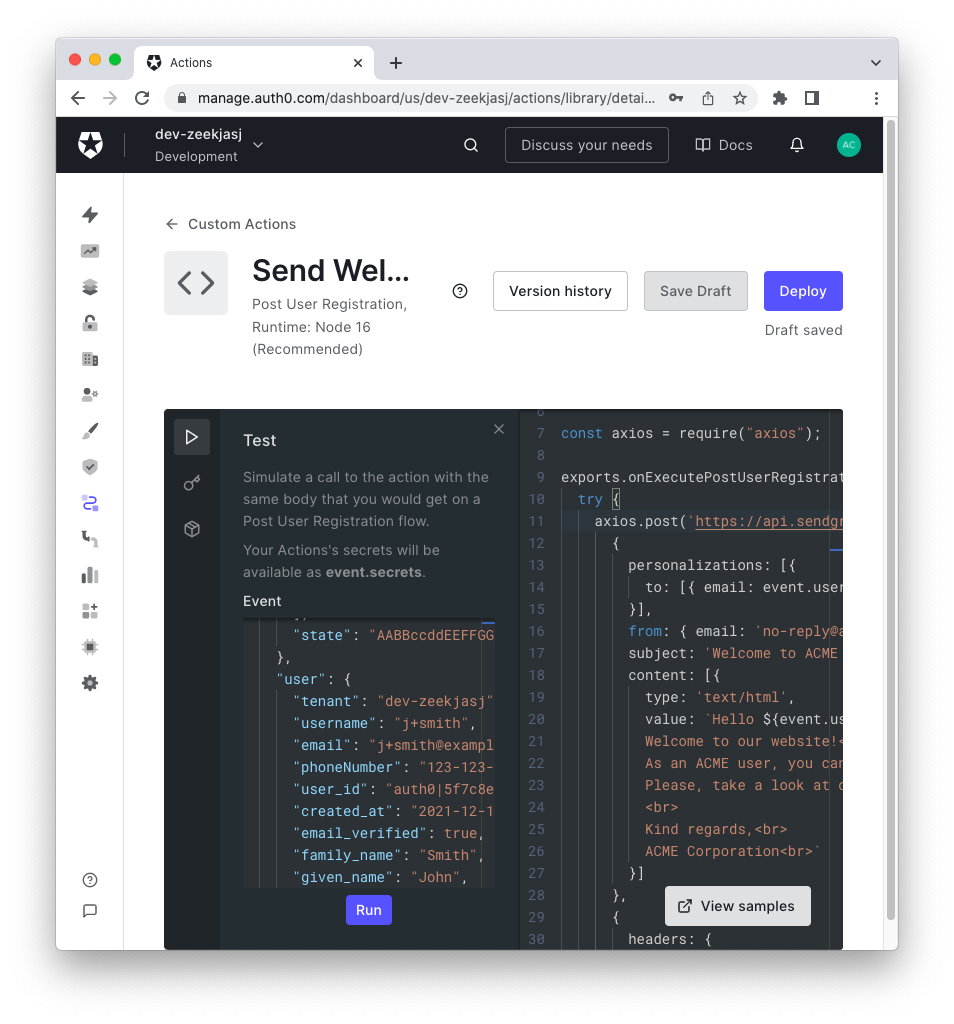
This event object is the argument that will be passed to your Action when you click the Run button at the bottom of the test panel. Before running the test, you have the opportunity to modify that event object. For example, you can detect the user object within the event and change its email property with your personal email address. This way, by running the test, you can receive the email sent by the Action and verify that it works.
So, change the user's email address in the event object and click the Run button. If everything works as it should, you should see a window at the bottom right, as this picture shows:
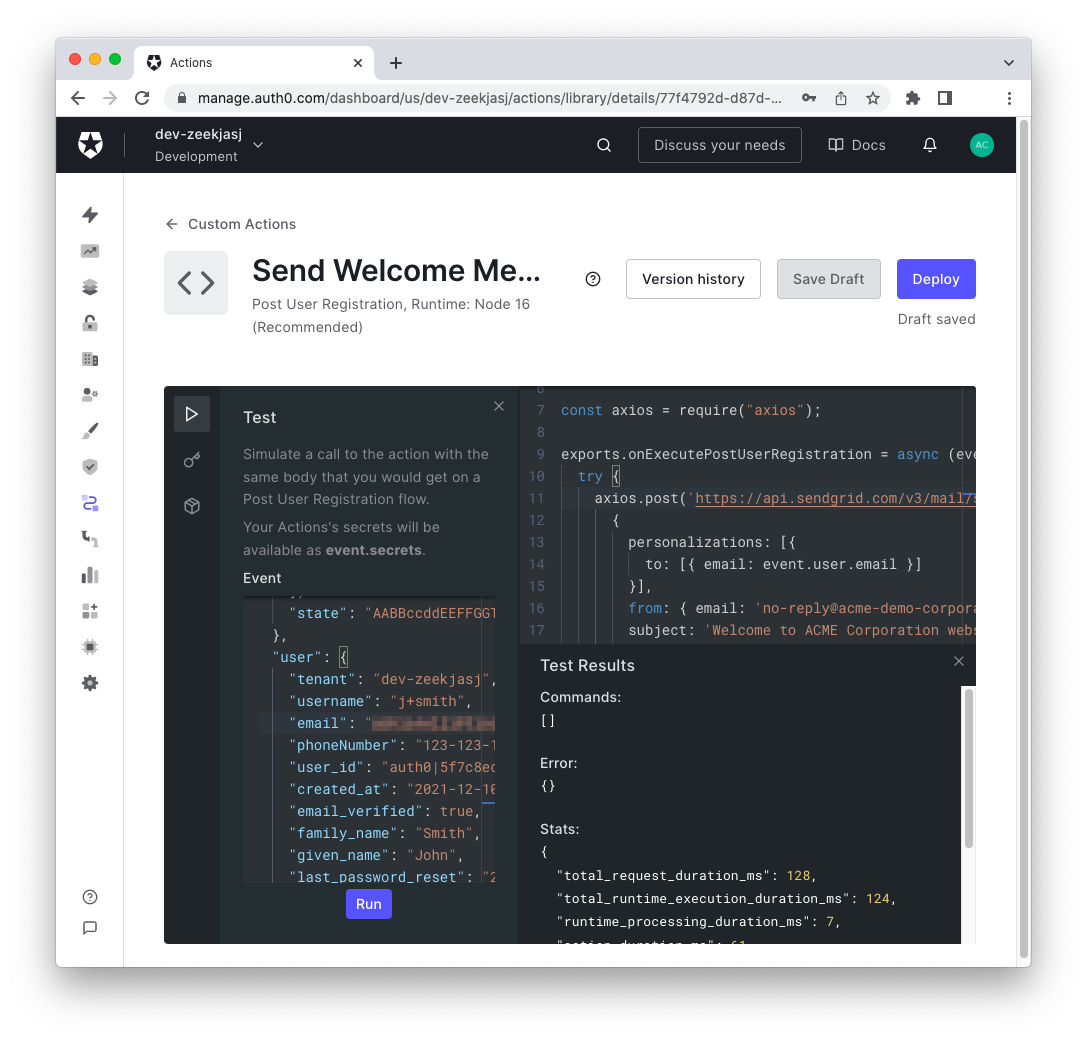
This new window gives you some feedback on test execution. Of course, your test is successful if you receive the expected email in your mailbox.
Deploy your Action
So far, your Action lives just in your development environment. You can't still use it in production. To make it available to your Auth0 production environment, you need to deploy it. That is easily achievable by clicking the Deploy button above the Action editor.
Separating the development and production environments is crucial, especially when you already have a working Action in production and need to apply some changes. You can apply your changes to the Action and test them in the editor without worrying about breaking the production environment. When you are confident with the changes, you can deploy the new version of the Action to update it in production.
Also, the Action editor keeps track of the various versions of your Action. You can see them by clicking the Version history button. You will see the list of your current and previous versions as in the following picture:
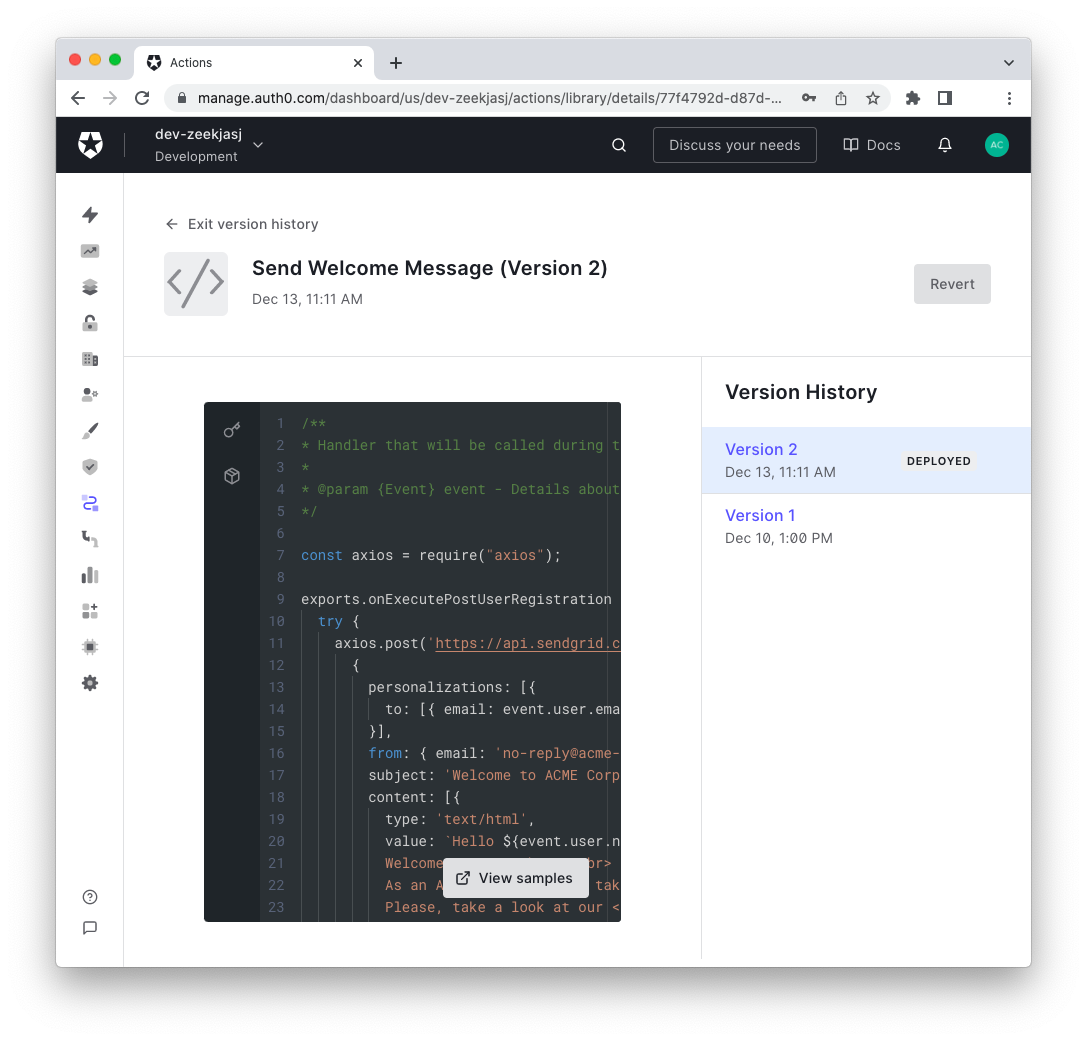
Through this list, you can inspect the Action's previous versions, and, if needed, you can revert the current version with one of them.
Add your Action to the Post User Registration Flow
Once deployed, your Action will be available in the Custom tab of the Action's Library page of the Auth0 Dashboard. The next step to achieve the goal stated at the beginning of this article is to make the just-created Action run right after the user registers with your app.
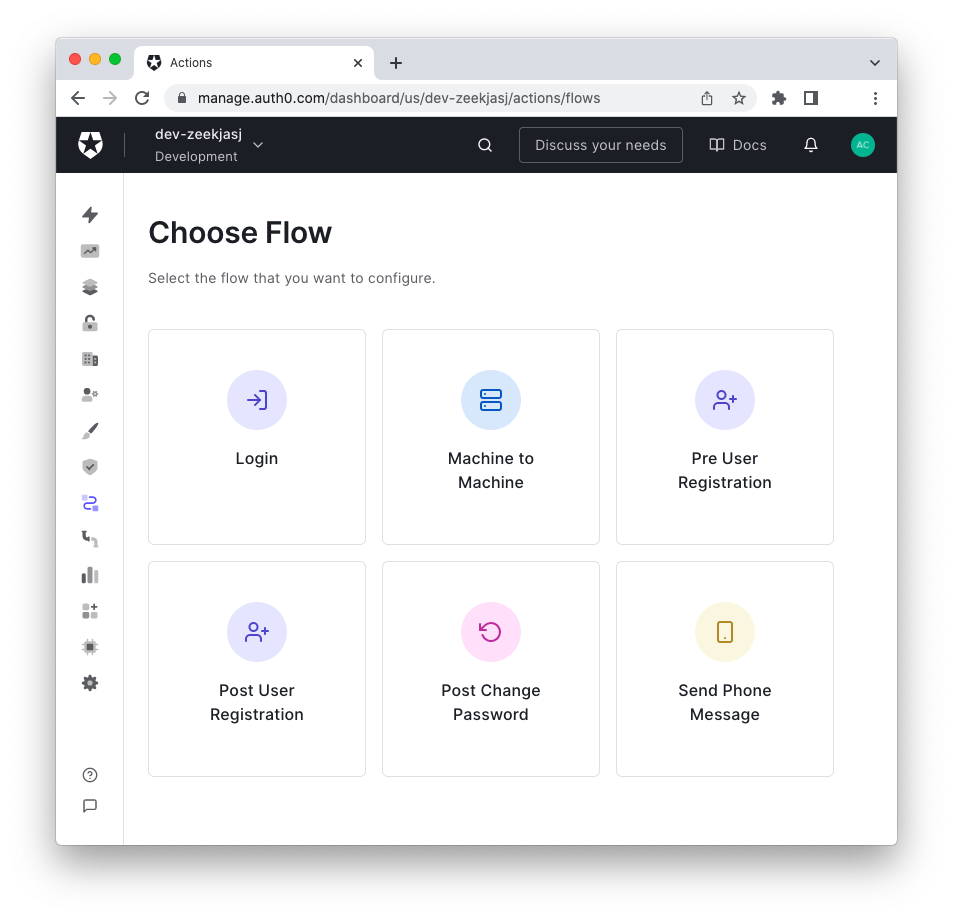
For this purpose, select Flows under the Actions item from the left side menu of the Auth0 Dashboard. You will see a page showing the possible flows you can configure:
For your goal, you will choose the Post User Registration flow. You will enter the flow editor, which provides you with a visual diagram of the flow, as in the following picture:
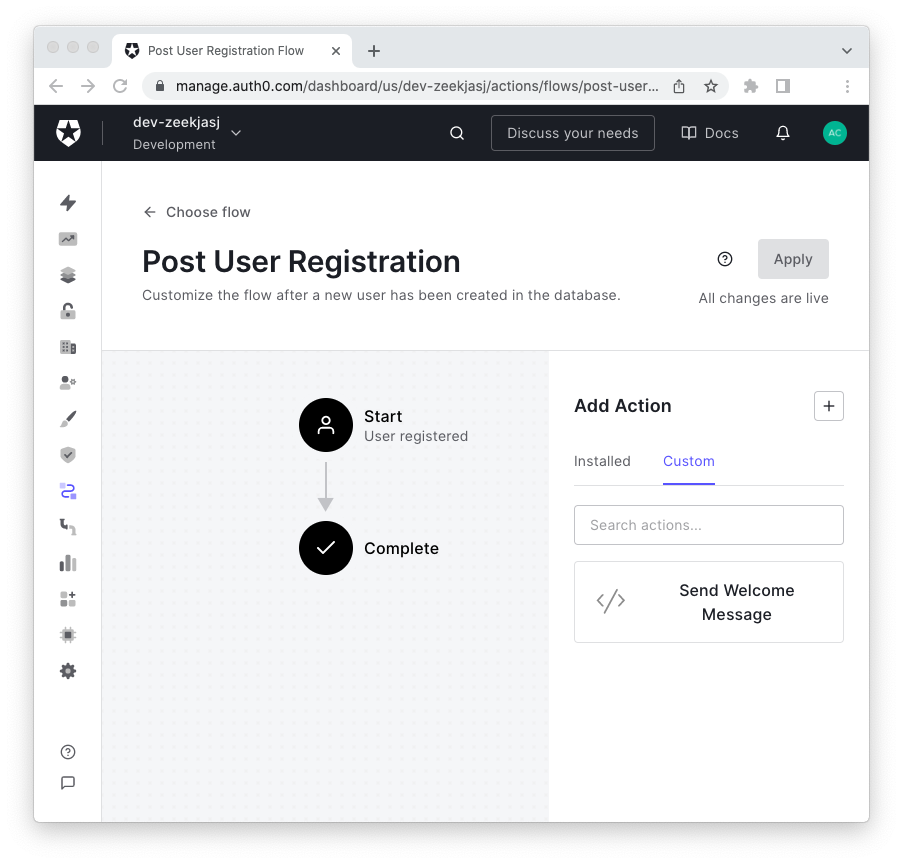
On the right side of the editor, you have the list of the available Actions. As with the Library page, you have the Actions classified as Installed and Custom. You will find your Send Welcome Message Action in the Custom tab. All you need to do at this point is to drag the Send Welcome Message box from the right side of the editor and drop it in the middle of the flow diagram, between the Start and the Complete node. Your final result will look like the following picture:
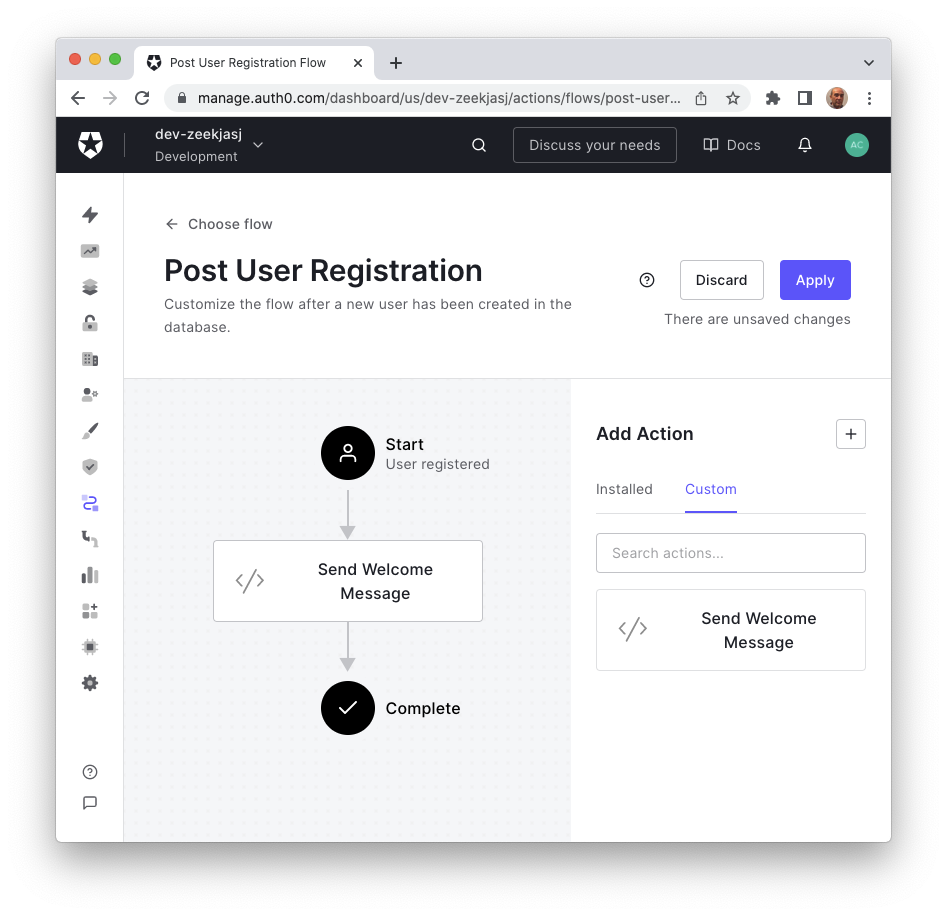
Keep in mind that, in general, you can add as many Actions as you need to an Auth0 Flow.
The New User Registration at Work
Now, everything is ready. Move back to your sample application, click the Login link on the upper right corner of the page, and click the Sign up link in the Auth0 Universal Login page:
Create a new user by providing an email and a password. After a minute, you should receive the welcome email message you created in the Send Welcome Message Action.
That's all! Now you have the basic knowledge to create your own Auth0 Actions to customize the various Auth0 flows.
Recap
At the end of this article, I'm sure you learned a lot of things. You learned what Actions are and how to create them to customize your user experience with their registration process. Although this article focused on a specific example of Action, you learned features that are valid for Auth0 Actions in general. For example, you learned how to manage dependencies and store secrets for an Action, test it and deploy it into production, check the Action's version history and possibly revert to a previous version, and add an Action to an Auth0 flow.
By using Auth0 Actions, you will be able to customize the default Auth0 behavior to fulfill your specific needs.


