


TL;DR: In this article, you will learn how to build a real-time, collaborative note editor application that enables multiple users to work on the same document simultaneously. To create this app, you will use tools like Node.js, Express, Pusher, and Auth0. If needed, you can find the code of the final app in this GitHub repository.
"Building real-time, collaborative apps is easy with the right tools."
Tweet This

What Will you Build?
As you can guess by the title of the article, you are going to build a real-time, web editor that enables different users to work on the same document from different places collaboratively. That is, you and one or more friends (for example) will be able to type and edit the same document at the same time. Just like if you were editing a Google Docs word but built by yourself. How cool is that?
Anyway, to build this web application, you will use tools like:
- Node.js: a runtime engine based on Chrome's V8 processor that enables you to use the JavaScript programming language on your computer and on servers (i.e., outside web browsers).
- Express: a fast and minimalist web framework for Node.js.
- Pusher: a hosted service that helps you build real-time apps with less code.
- Auth0: a universal authentication & authorization platform for web, mobile, and legacy applications.
Will you have to pay for these services and tools? No, you won't. Node.js and Express are open-source projects that you can use for free to build whatever you want to build. Pusher and Auth0 do have paid tiers where you can use advanced features to build better apps, but they also include some cool free tiers. You will be able to build amazing apps in no time with these services without paying a dime for quite a while. Unless your app becomes too popular, but that's hardly a problem, right?
Pre-Requisites
To follow this article along, you will need some basic knowledge of JavaScript and related technologies like HTML and CSS. Also, you will need to have installed in your machine Node.js and NPM. If you don't have, you can go to the official download page of Node.js and follow the instructions there. NPM comes bundled into Node.js.
After installing Node.js and NPM, open a terminal and issue the following commands to guarantee you have everything set up:
node -v
# output will be similar to v9.11.1

npm -v
# output will be similar to 5.6.0
What is Pusher?
Pusher is a hosted service that makes it very easy to add real-time functionality to a web or mobile application. This service provides libraries that help to seamlessly build chat applications, real-time charts, collaborative editors, etc. You can find more information about Pusher and the features it provides on their website.
In this article, you will use a feature provided by Pusher called TextSync to build your application. Basically, TextSync provides the functionality that enables users to work on a document in real-time with others. Besides that, it will also handle authorization and a few other things you will see as you build your application.
Scaffolding your Project
First, you will have to create a directory for your application. So, on a terminal, move to the directory where you like to save your work and run the following commands:
# create a directory for your project
mkdir collaborative-real-time-editor

# move into it
cd collaborative-real-time-editor
The app that you will build won't be complex. As such, the directory structure of this app will be fairly simple as well:
+ assets
 - app.js
 - main.css
+ views
 - editor.pug
 - index.pug
 - layout.pug
+ package.json
+ server.js
+ variables.env
The assets directory will contain all your stylesheets (CSS rules) and front-end JavaScript code. The views directory will contain all your front-end views (HTML code). The server.js file will contain the server-side code to run your app. The variables.env file will hold some global environment variables (some keys that you will need to run your app). And the .pug files are your HTML files. As you go on, you will see how these files fit into your application.
Note: If you don't know why you are going to use
.pugfiles, don't worry. Pug is a template engine for Node.js that facilitates the process of writing HTML files. Using Pug is really easy, as you will see.
Next, you can use NPM to initialize your directory as a Node.js project by running:
# from your project's directory
npm init -y
Installing Dependencies
With the directory properly initiated, you will have to install the necessary packages that will help you build certain parts of your application. To do so, run the commands below in your terminal:
npm install body-parser dotenv express express-session passport passport-auth0 pug textsync-server-nodeThe following is a rundown of what some of the packages will help you achieve:
- You will use the
passportandpassport-auth0packages to implement user authentication with Auth0. - You will use
textsync-server-nodeto handle the Pusher TextSync authorization. - You will use
dotenvto load environment variables from thevariables.envfile into Node.js'sprocess.envobject. - You will use
pugfor your server-side templates.
Don't worry if all these don't make that much sense now. As you go through the article, you will learn how to use them.
Setting Up a Pusher TextSync Account
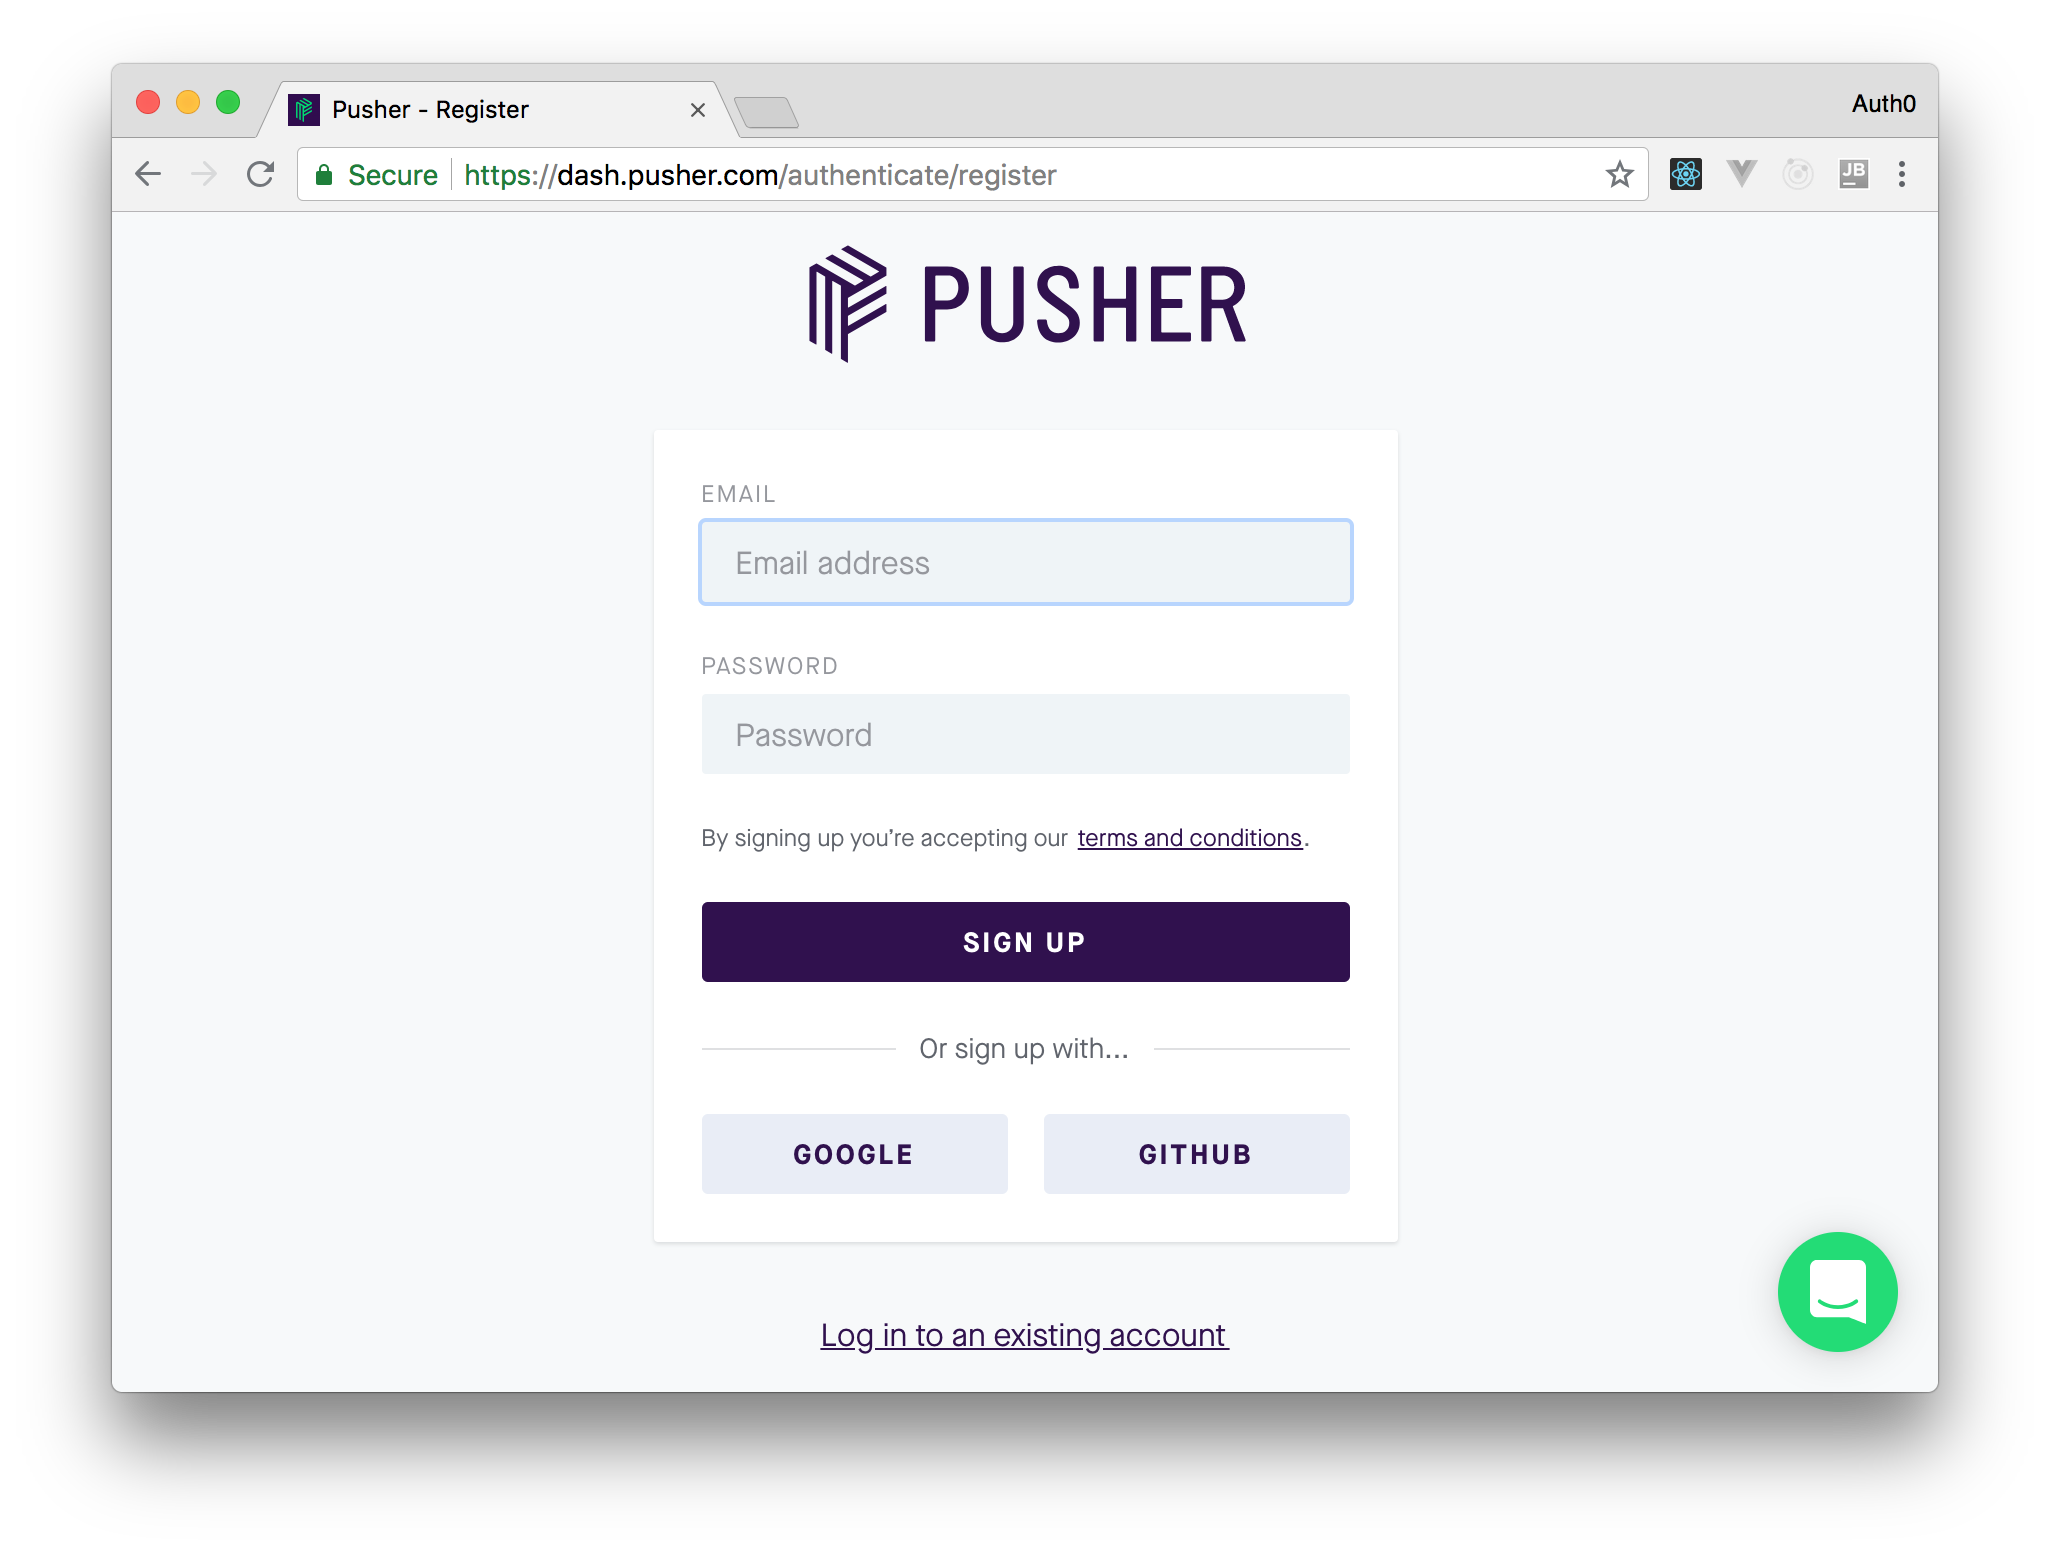
As mentioned earlier, you will use a feature from Pusher called TextSync to support the real-time characteristics of your application. As such, you will need a Pusher account to keep building your app. So, head to TextSync's webpage and sign up for a new account.
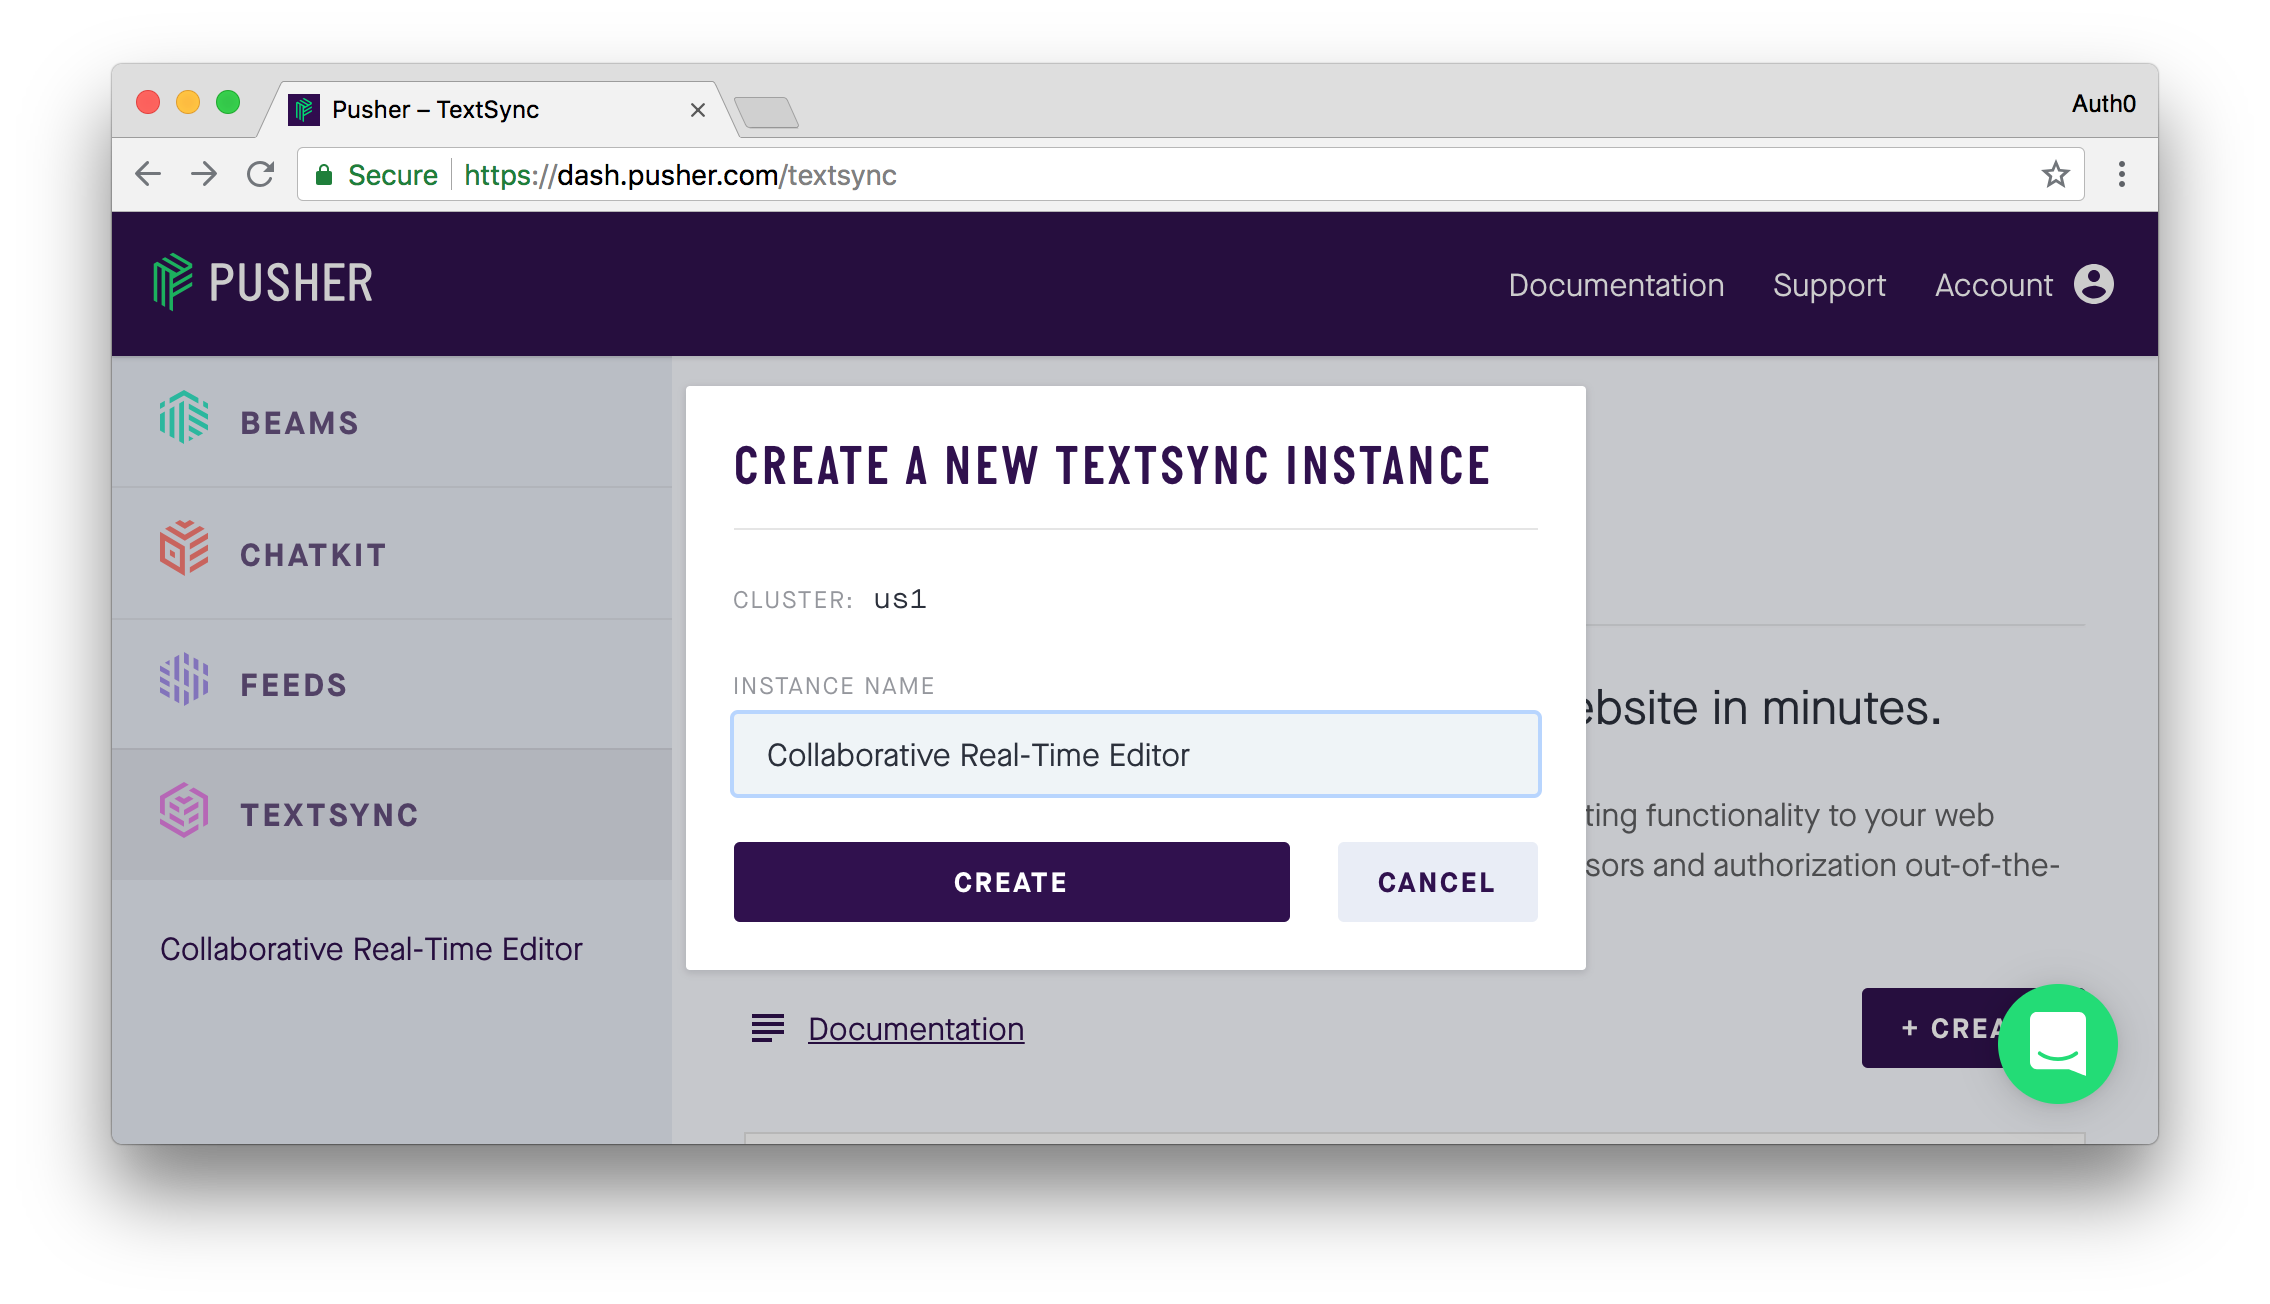
After signing up, you can head to the TextSync section of your new Pusher account and hit the Create button. Hitting this button will make Pusher show a dialog where it will ask you for a name for your new TextSync instance. In this dialog, you can input something like "Collaborative Real-Time Editor" and hit the Create button.
Pusher will take less than a second to create the new instance for you and, after doing so, will redirect you to a page where it will show some instructions on how you can use this instance. Although these instructions are useful, right now, you are not interested in them. What you are interested in is the box called Credentials in this page. This box will have two keys that you will have to use soon: Instance Locator and Secret Key. So, before heading back to your code, find this box and leave the page open.

Setting up Views with Pug
Next up, you will create your server-side templates with Pug. Pug provides a lot of features that you won't explore in this article. So, if you need more information about these features, you can find them here.
Having that in mind, the first thing you will have to do is to create the views directory in your project root, and create a file called layout.pug inside it. After that, insert the following code into this file:
doctype html
html(lang="en")
  head
    meta(charset="UTF-8")
    meta(name="viewport" content="width=device-width, initial-scale=1.0")
    meta(http-equiv="X-UA-Compatible" content="ie=edge")
    link(rel="stylesheet" href="/main.css")
    title Real Time Editor
  body.main
    block content
This is what a Pug file looks like. If this is not clear enough, here it goes a better explanation of what Pug does with this file.
Pug facilitates writing HTML files by enabling you to structure your documents in a way-less-verbose syntax. In this case specifically, Pug will:
- transform
doctype htmlinto a<!DOCTYPE html>element; - transform
html(lang="en")into<html lang="en"></html>; - transform
headinto<head></head>and, because it is indented belowhtml, it will add into the<html></html>; - transform every single child element of
head(i.e.,meta,link, andtitle) and add into it; - and transform
body.maininto<body class="main"></body>and insert inside<html></html>.
Well, you get the idea, right? Anyway, to better illustrate, here it goes the output of the file above:
<!DOCTYPE html>
<html lang="en">
<head>
    <meta charset="UTF-8">
    <meta name="viewport" content="width=device-width, initial-scale=1.0">
    <meta http-equiv="X-UA-Compatible" content="ie=edge">
    <link rel="stylesheet" href="/css/main.css">
    <title>Real Time Editor</title>
</head>
<body class="main"></body>
</html>
Very easy isn't it? But wait! What about the block content. Well, this is easy too, this is a placeholder for the real content. This placeholder is called Template Inheritance by Pug. In their own words:
Pug supports template inheritance. Template inheritance works via the
blockandextendskeywords. In a template, a block is simply a "block" of Pug that a child template may replace. - Pug's Template Inheritance
Creating your Pug Views
Now that you have your Pug template, you will create your Pug views and a file to style them. For starters, you can create a file that contains a form that will be used to create a new document and an editing session. So, create a new file called index.pug inside the views directory and add the following code into it:
extends layout

block content
  nav.login_nav
    button.login_button= user.displayName
  form(action="/note" method="POST")
    input(type="text" name="title" placeholder="TITLE OF NEW NOTE")
    input(type="hidden" name="slug")
    button(class="create_note") CREATE

  script.
    var slug = Math.random().toString(36).slice(2);
    document.querySelector('input[name="slug"]').value = slug
Note: Have you seen the
extends layoutline in this file? This is telling Pug that this view is using (or extending) thelayout.pugtemplate you created before. Also,block contentin this file is telling Pug that the children of this element will go inside theblock contentelement of the template.
What is important in the index.pug file is that it contains a variable called slug that holds a random, alphanumeric string. When the form created by this view is submitted, the slug is sent to the server-side. Then, in your server, you will use it to create a unique link (URL) that other users will refer to when they join an ongoing session. This may not be very clear now but, soon enough, you will get the idea.
As you can see, the goal of the index.pug file is to create a view where users can start new editing sessions (so they can share with their friends). Now, you have to create the view that is going to show the editor itself. As such, create a new file called editor.pug inside the views directory and insert the following code into it:
extends layout

block content
  .sidebar
    h3 Collaborators
    .active_users
      ul
  .main_content
    #text_editor
  script(type="text/javascript").
    var user = "#{user.displayName}";
  script(type="text/javascript" src="https://static.pusherplatform.com/textsync/us1/textsync.js")
  script(type="text/javascript" src="/app.js")
In this case, you are defining that the editor.pug file will use two scripts:
textsync.js: A JavaScript file provided by Pusher so you can easily use its TextSync feature.app.js: A file that you will create soon to control the logic of this view.
Besides these scripts, your new view is defining two sections:
- A
divelement with thesidebarclass: This is where users will see who else is online with them. - A
divelement with themain_contentclass: This is where you will add the editor (i.e., in the#text_editorelement).
Lastly, your view is defining a JavaScript library called user that will get the name of the logged in user (user.displayName). While working on your server code, you will fill the #{user.displayName} placeholder with the name of the user returned by Auth0.
With this file in place, you can create a file which will contain the CSS rules to style your application. So, create a file called main.css inside a new directory called assets (create this one in the project root, alongside with views) and insert this code into it:
* {
  box-sizing: border-box;
  margin: 0;
  padding: 0;
  font-family: sans-serif;
  font-weight: 300;
  font-size: .95rem
}

h3 {
  font-size: 1.5rem;
  color:white;
  text-align: center;
  margin-bottom: 3px;
}

nav {
  height:8vh;
  flex-basis:100%;
  background: linear-gradient(325deg, rgb(39, 107, 130) 0px, rgb(49, 84, 129) 100%);
}

button {
  cursor: pointer;
  border-radius:5px;
  color: white;
}

form {
  display:flex;
  margin:20px;
  padding:20px;
  justify-content: center;
  flex-basis:100%;
}

form input {
  width: 50%;
  border-width: 0 0 1px 0;
  padding: 10px;
  border-color: rgb(39, 107, 130);
  margin-right:20px;
}

.main {
  display:flex;
  flex-wrap:wrap;
}

.sidebar {
  display:flex;
  flex-direction: column;
  padding:10px;
  flex-basis:17%;
  height: 100vh;
  align-content: center;
  background: linear-gradient(325deg, rgb(39, 107, 130) 0px, rgb(49, 84, 129) 100%);
}

.active_users li {
  list-style-type: none;
  background: white;
  border-radius: 5px;
  padding: 10px;
  margin: 10px;
}

.main_content {
  padding: 30px;
  flex-basis: 83%;
  display: flex;
  justify-content: center;
  flex-wrap: wrap;
}

#text_editor {
  margin: 10px 0 40px 0;
  height: 80vh;
  flex-basis: 100%;
}

.login_nav {
  display:flex;
  justify-content:center;
}

.login_button {
  width: 6rem;
  height:2rem;
  border: 1px;
  background: red;
  align-self: center;
}

.create_note {
  width: 6rem;
  border: 1px solid white;
  background: linear-gradient(325deg, rgb(39, 107, 130) 0px, rgb(49, 84, 129) 100%);
}
For the views of your app, this is what you need. Next, you will create the JavaScript code to control the editor view.
Integrating your App with TextSync
To integrate your view with TextSync, you will create a file called app.js inside the assets directory and add this code:
const textSyncInstance = new TextSync({
  instanceLocator: "YOUR PUSHER INSTANCE LOCATOR"
});

//Creates an instance of the TextSync editor
const editor = textSyncInstance.createEditor({
  docId: document.URL.slice(document.URL.lastIndexOf("/") + 1),
  element: "#text_editor",
  authEndpoint: "http://localhost:3000/textsync/tokens",
  userName: user,
  cursorLabelsAlwaysOn: true,

  onCollaboratorsJoined: users => {
    const activeUsers = document.querySelector(".active_users ul");
    users.forEach(value => {
      activeUsers.insertAdjacentHTML(
        "beforeend",
        `<li id='${value.siteId}'>${value.name}</li>`
      );
    });
  },

  onCollaboratorsLeft: users => {
    const activeUsers = document.querySelectorAll(".active_users ul li");
    users.forEach(value => {
      activeUsers.forEach(element => {
        if (element.id === value.siteId) element.remove();
      });
    });
  }
});
Note: In the code above, you will have to replace the value passed to the
instanceLocatorproperty with the one you have in your Pusher dashboard. The call to theTextSyncfunction will use this value to connect and interact with the TextSync instance you created on Pusher.
As you can see in the file above, you are calling textSyncInstance.createEditor to create the real-time, collaborative editor. Also, there are a few other things that you are passing to this function that you should know about:
docId: This is the ID of the document that will be loaded into the editor on creation. Previously, you created aslugwhich you used to create a unique URL. The functiondocument.URL.slice(document.URL.lastIndexOf("/") + 1)gets the part of the URL after the last slash (e.g., from the URLlocalhost:3000/note/yajdzfr2w78, it extractsyajdzfr2w78) and that gets loaded as thedocIdinto the editor on creation. This is important because thedocIdenables other users to join the same editing session. Essentially, all TextSync editors with the samedocIdbelong to the same editing session.element: This is the DOM element that will contain the text editor. This may be either a CSS selector or a reference to the element object.authEndpoint: This is the URL of the endpoint on your server where the TextSync library can obtain authorization tokens. You will see exactly how this works later on.
There are also optional configuration arguments you use in your application:
userName: The name of the current user to be displayed to other collaborators working in the same editing session.onCollaboratorsJoined: This function is called whenever a user joins this editing session. You will use this function to add the new user to the list of active users and update the UI accordingly.onCollaboratorsLeft: This function is called whenever a user leaves the editing session. You will use this function to remove a user from the list of active users and update the UI accordingly.
For a broader list of the configuration properties, visit the official TextSync docs.
Implementing your Express App
In this section, you will focus on the server side of your application. First, you will create a file called variables.env to hold your environment variables. Add this file in the project root and then add two variables to it:
INSTANCE_LOCATOR=<YOUR_INSTANCE_LOCATOR>
KEY=<YOUR_SECRET_KEY>
Note: You will have to replace
<YOUR_INSTANCE_LOCATOR>and<YOUR_SECRET_KEY>with the values that Pusher presented for your TextSync instance.
After that, you will have to create a file called server.js in the project root. This file will contain your server's code. As the file will be a bit long, you will go through it step by step for easier comprehension.
First, your file will import the packages you installed previously, and it will create an Express server:
const path = require('path');

const bodyParser = require('body-parser');
const express = require('express');
const session = require('express-session');
const passport = require('passport');
const Auth0Strategy = require('passport-auth0');
const TextSync = require('textsync-server-node');

// Load the enviromental variables into process.env
require('dotenv').config({ path: 'variables.env' });

const app = express();
app.set('view engine', 'pug');
Note how, after requiring all the libraries you installed, you make Node.js load the properties from the variables.env file. You will use these variables soon. Also, note that you make your Express instance (i.e., app) use (or understand) the Pug view engine. With that in place, you make an Express app be able to serve Pug views.
Now, you will make your Express app use some middleware:
// ... the code above ...

// allow access from a different origin
app.use((req, res, next) => {
  res.header('Access-Control-Allow-Origin', '*');
  res.header('Access-Control-Allow-Headers', 'Content-Type, Authorization');
  next();
});

// configuring some middleware
app.use(express.static(path.join(__dirname, 'assets')));
app.use(bodyParser.urlencoded({extended: false}));
app.use(bodyParser.json());

// you make use of sessions to keep track of logged in users
app.use(session({
  secret: '--ENTER CUSTOM SESSION SECRET--',
  resave: false,
  saveUninitialized: false
}));
As you can see, first, you configure your server to tell browsers that it accepts AJAX requests from any (*) origins. After that, you are configuring three middleware in your server:
express.static: This middleware makes your Express app serve files under theassetsdirectory as static files (i.e., it makes your Express app simply return their values without any modification when requested).bodyParser.urlencoded: This makes your Express app parseurlencodedbodies.bodyParser.json: This makes your Express app parse JSON bodies.session: This middleware makes your Express app provide a session to your users (for a production-ready app, you will want to change the value passed tosecret).
After configuring this file, you will add some routes to your server:
// ... the code above ...

function loggedIn(req, res, next) {
  req.session.user ? next() : res.redirect('/login');
}

app.get('/', loggedIn, (req, res) => {
  res.render('index', {user: req.session.user})
});

app.post('/note', loggedIn, (req, res) => {
  const slug = req.body.slug;
  res.redirect(`/note/${slug}`);
});

app.get('/note/:slug', loggedIn, (req, res) => {
  res.render('editor', {user: req.session.user})
});
In this case, the first thing you are doing is defining a custom middleware that will check if incoming requests have an active session. If they don't, you redirect them to the /login route. After that, you are defining three routes:
/: This route makes your server render theindex.pugfile (res.render('index', ...)) with the logged in user (req.session.user). As you remember, theindex.pugfile is a view that renders a form so users can create new editing sessions./note: When the form inindex.pugis submitted, a POST request is made to this route, which sends along theslug. This route retrieves this value fromreq.body.slugand uses it to create a new, unique route. The user is then redirected to this new route./note/:slug: This is the new route created and also where the collaboration takes place. The:slugin this route represents the unique slug defined previously. This route is unique to each editing session, and anyone invited to join a particular session does so through this route.
TextSync User Authorization
Remember that, while configuring the TextSync editor, you added a property called authEndpoint to handle TextSync authorization? What this means is that any user that intends to join an editing session must be authorized through this endpoint. But how?
When a user tries to join an editing session, a POST request is made to this endpoint. The server (yours) then responds with a secure token describing the rights and permissions that the user has in relation to the document they are trying to access. The TextSync library then sends this token along when making a request to the TextSync server (Pusher's) and, if all goes well, the user is allowed to access the document with the appropriate rights and permissions exclusive to that user.
With that in mind, what you have to do next is to implement, in your Express server, an endpoint that will decide whether users are allowed or not to join a session. To do so, add the following code at the bottom of the server.js file:
// ... the code above ...

const textSync = new TextSync({
  instanceLocator: process.env.INSTANCE_LOCATOR,
  key: process.env.KEY
});

app.post('/textsync/tokens', (req, res) => {
  // certain users can be restricted to either READ or WRITE access on the document
  // to keep this demo simple, all users are granted READ and WRITE access to the document
  const permissionsFn = () => {
    return Promise.resolve([
      TextSync.Permissions.READ,
      TextSync.Permissions.WRITE
    ]);
  };

  // set authentication token to expire in 20 minutes
  const options = { tokenExpiry: 60 * 20 };

  textSync.authorizeDocument(req.body, permissionsFn, options)
    .then(token => {
      res.json(token);
    });
});
As you can see, the first change you made to your server is related to creating a textSync object with your environment keys. This is the object that you will use to communicate with your TextSync instance at Pusher. After that, you defined the /textsync/tokens endpoint so your frontend app can issue the POST requests, as previously configured.
What is interesting about this endpoint is that it defines a function called permissionsFn to define what type of access users will have. For the sake of simplicity, you defined that all users will have the READ and WRITE permissions. However, if you are going to keep enhancing your app after you finish this article, you will probably want to add some logic in this specific function to be more restrictive somehow.
Lastly, you made the new endpoint call authorizeDocument to generate a new token to your user so the can join the editing session. This token is then sent back as a response to the POST request submitted by the frontend app.
Handling Authentication
So far, you haven't actually secured your application. In the previous section, you did add an endpoint that handles authorization, but authentication is something different. Authenticating users means recognizing them, authorizing users means allowing them to do stuff. So, in other words, what you did so far is to simply add an endpoint that allows any visitor to join any editing session in your app.
As such, now, you will have to handle authentication and, for that, you will use Auth0.
Setting Up an Auth0 Account
For starter, you will have to sign up for a free Auth0 account. After signing up, you will head to the Applications section on your dashboard and hit the Create Application button. After clicking on this button, Auth0 will show you a dialog where it will ask you for two things:
- The Name of your application: Here, you can add any descriptive name. For example: "Collaborative Real-Time Editor".
- The Application Type: For this, you will have to choose Regular Web Applications.
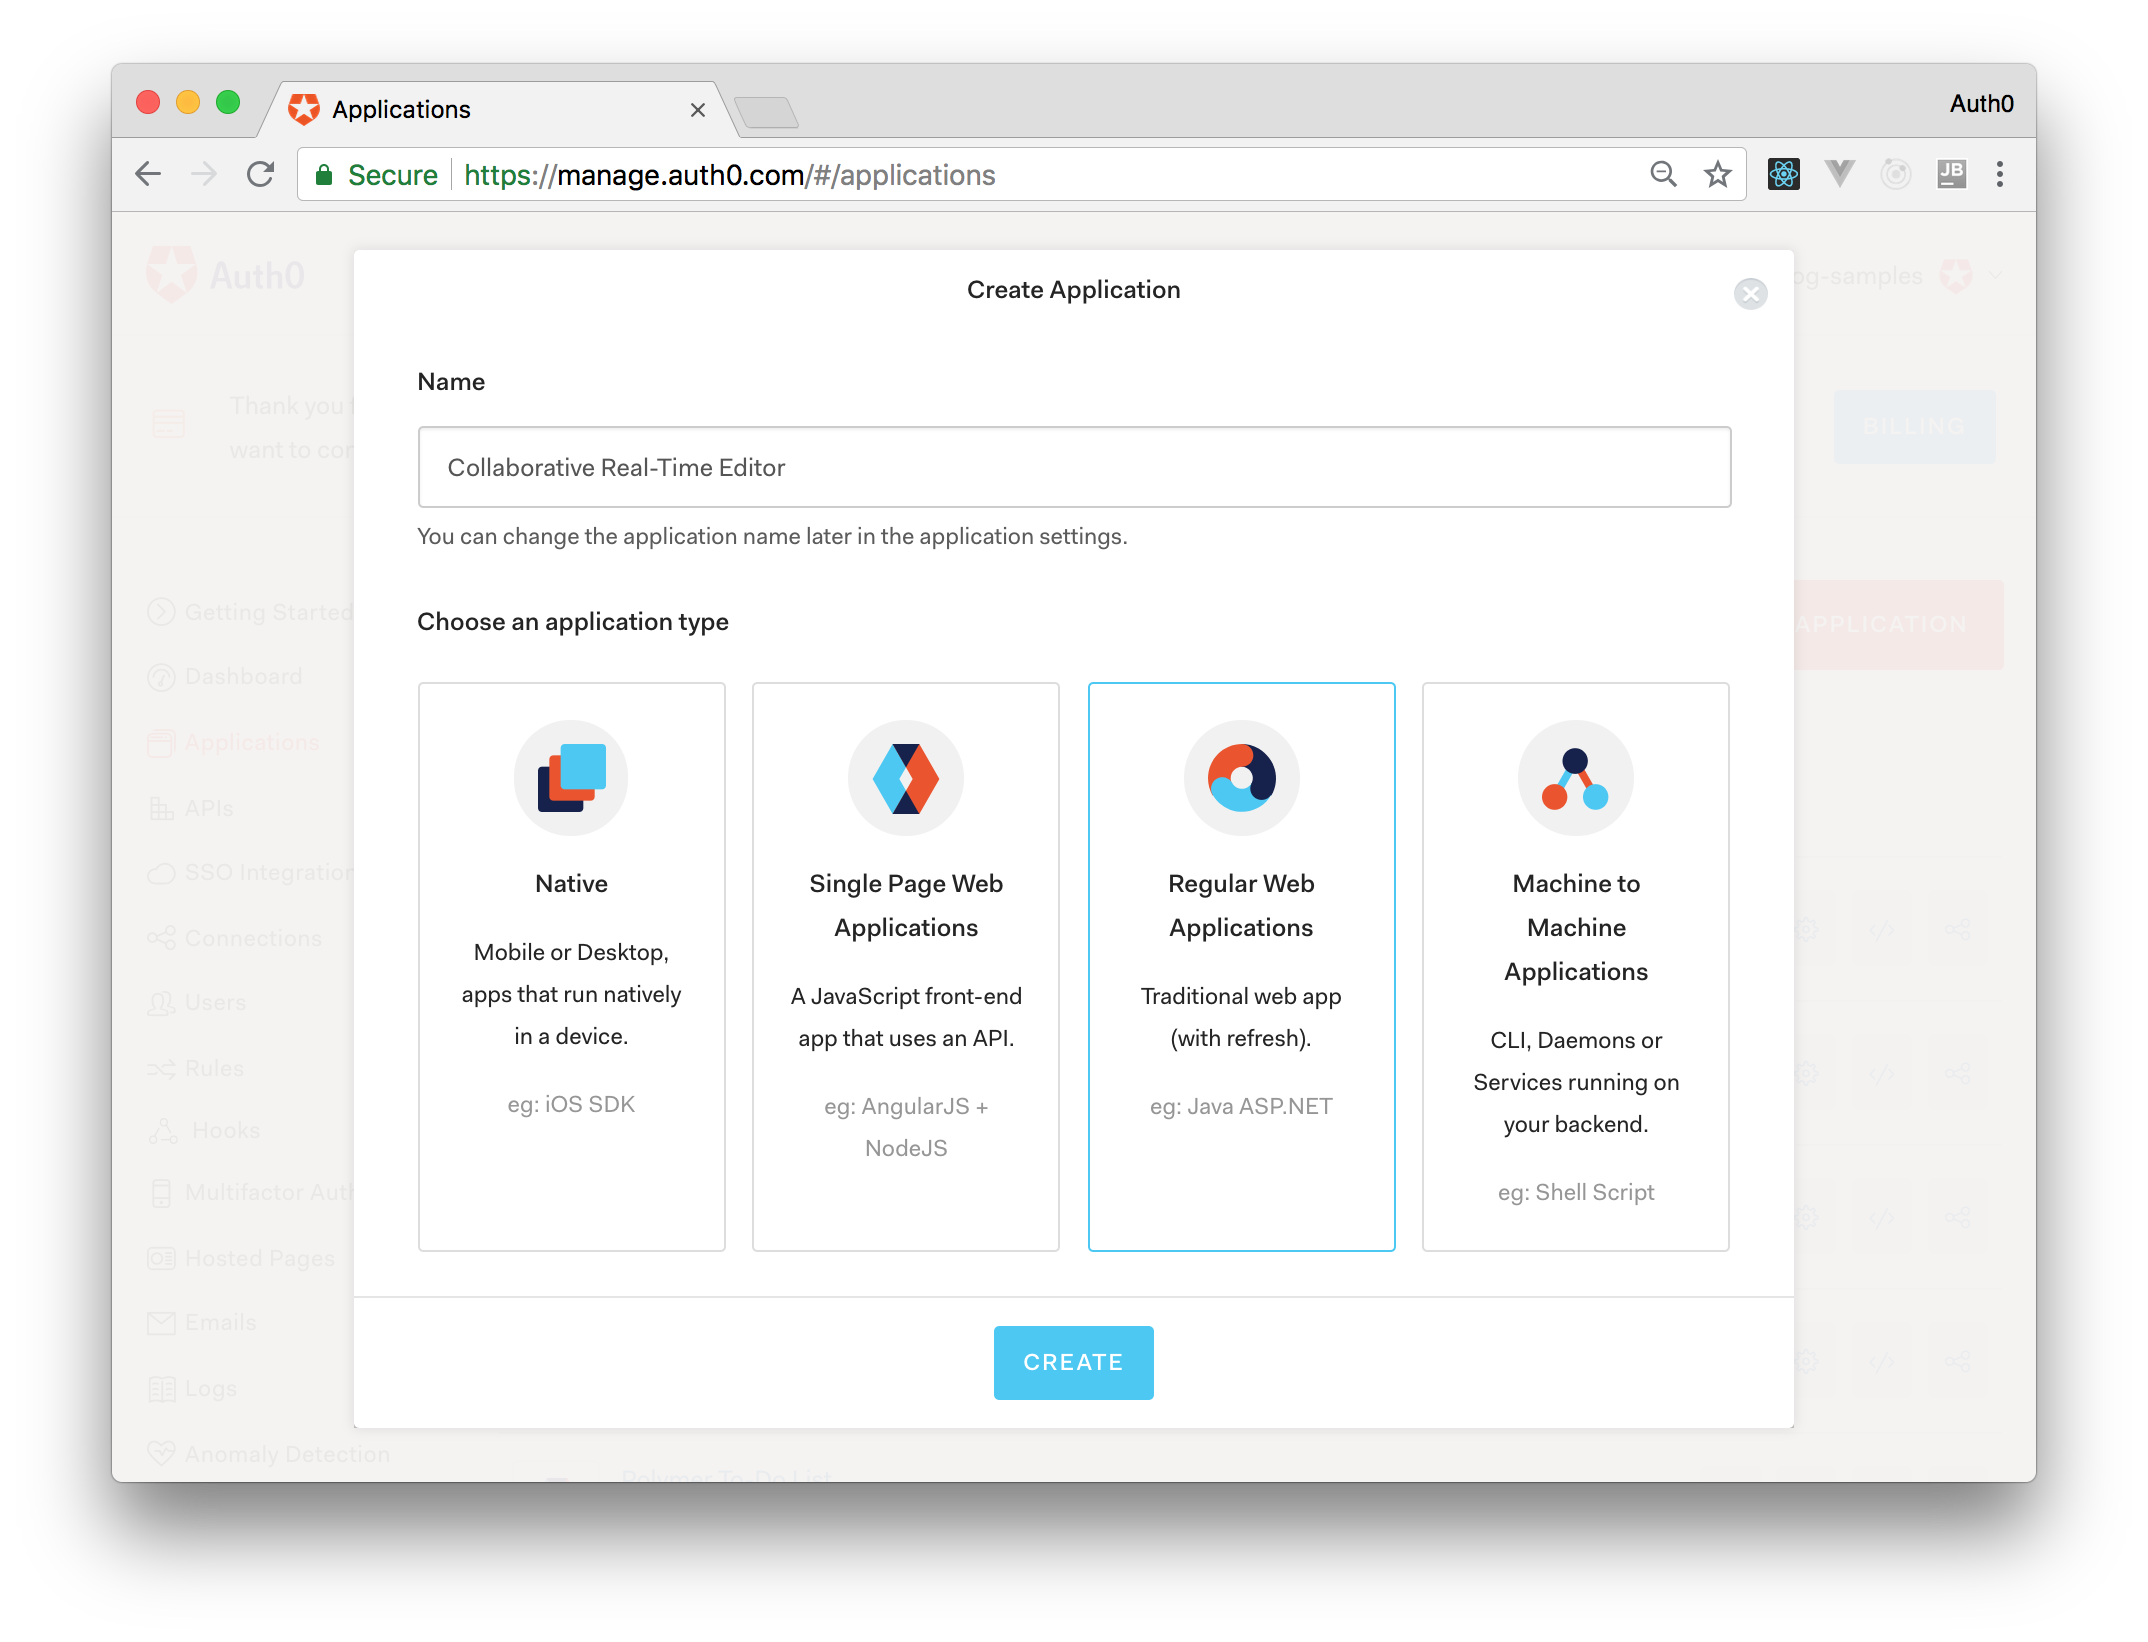
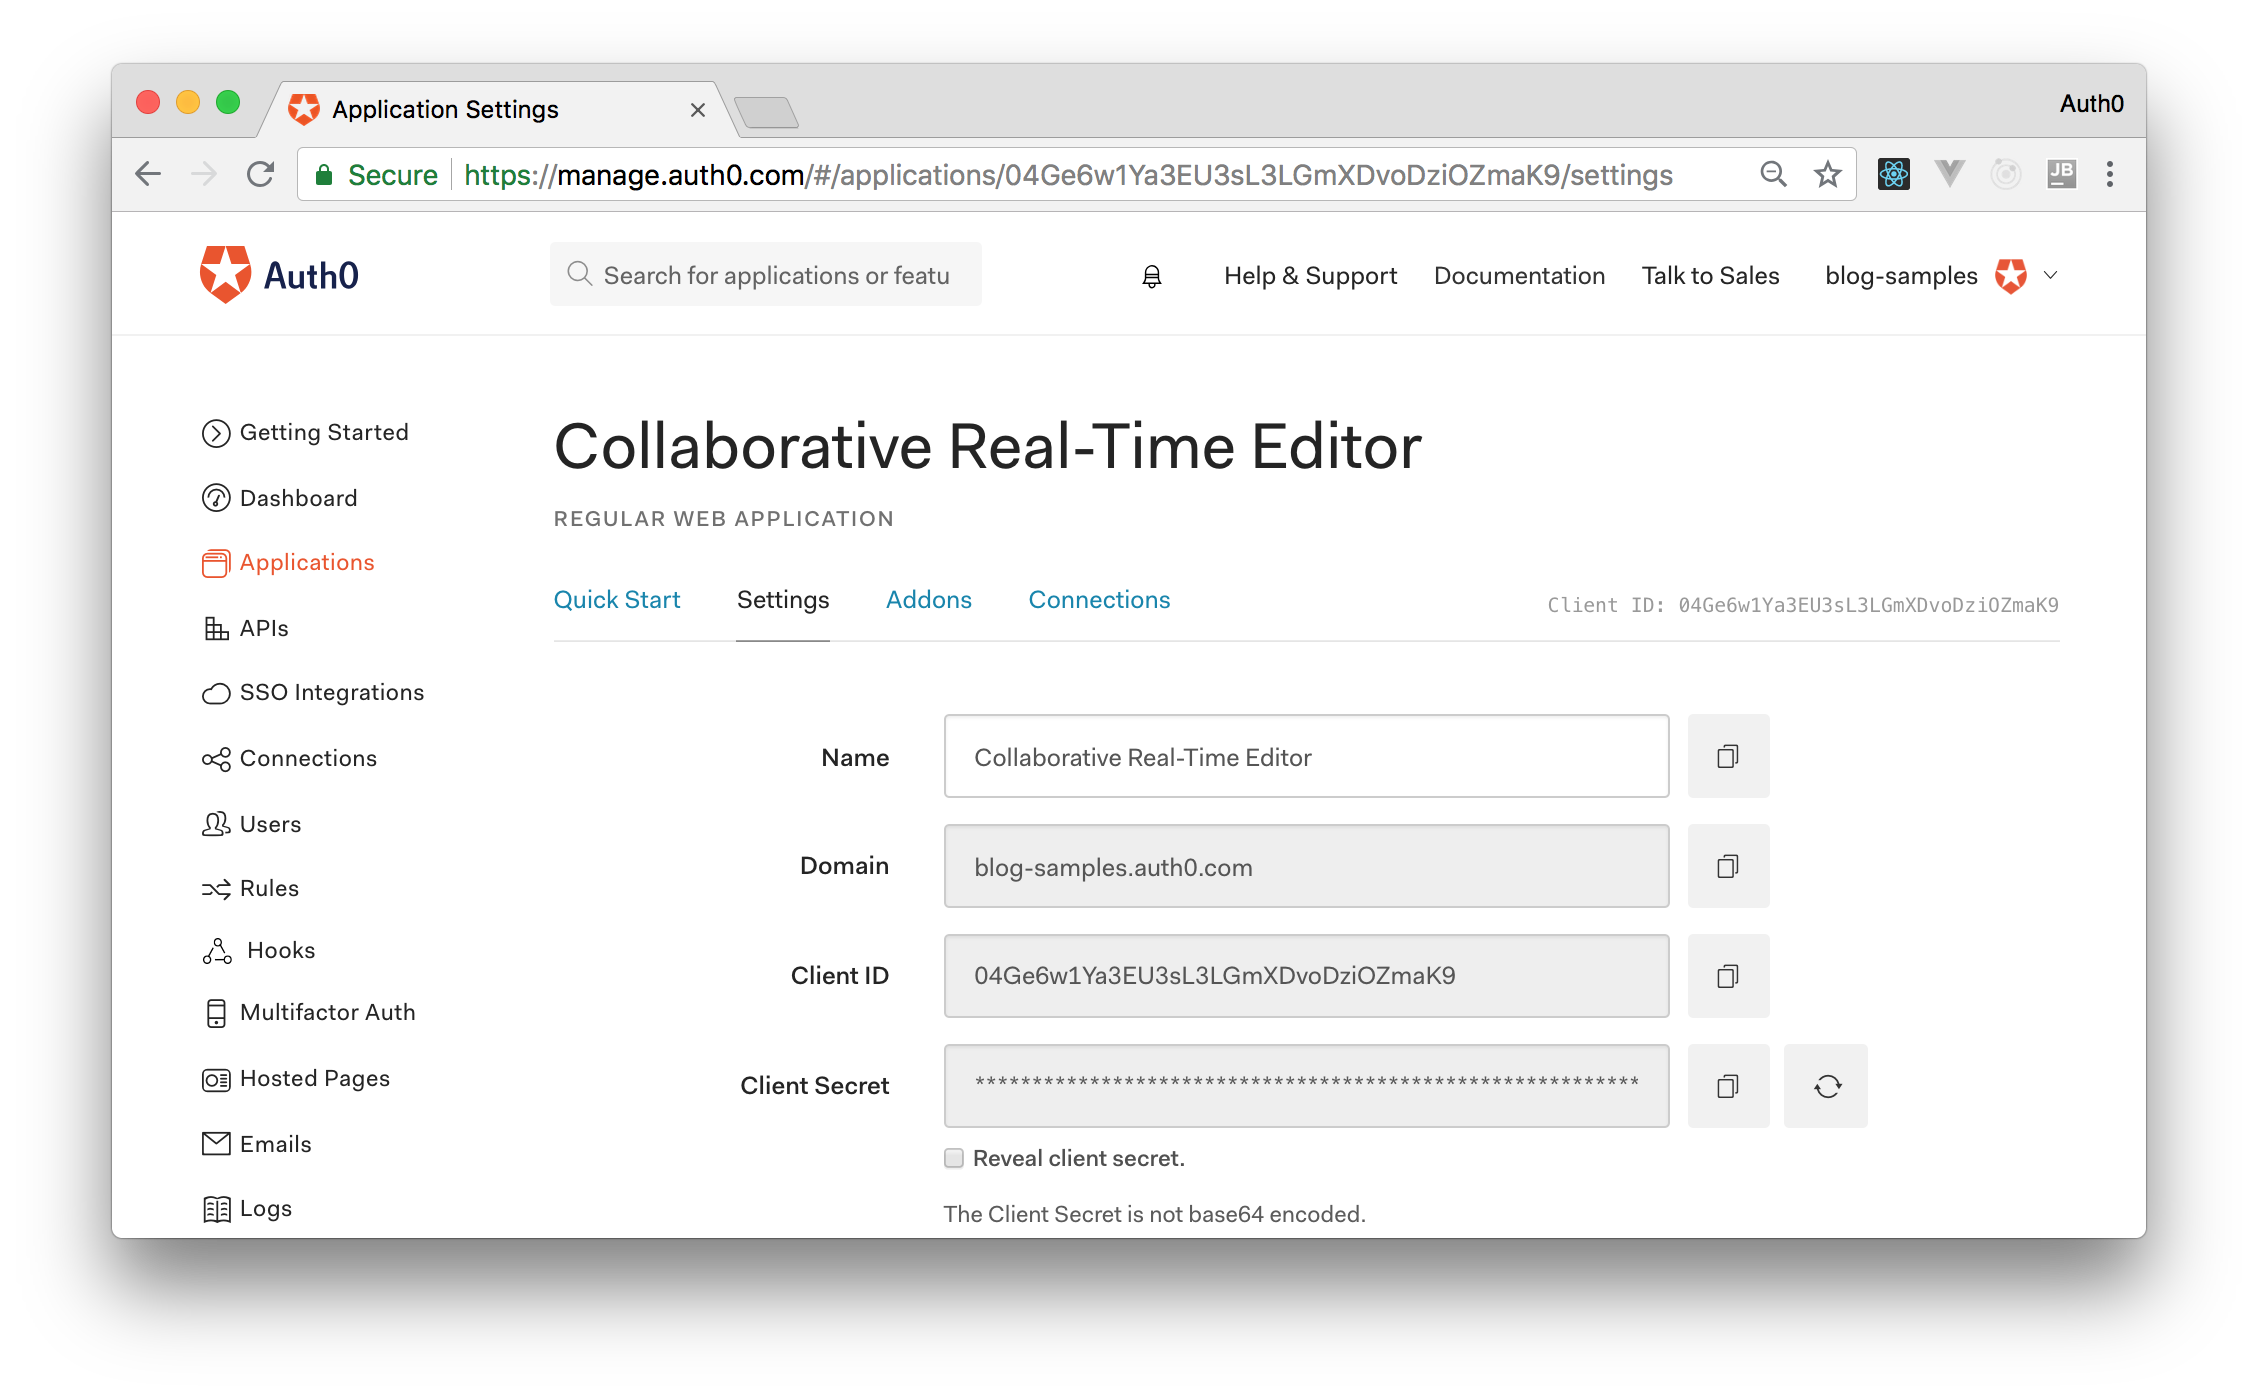
After informing these values to Auth0, you can hit the Create button. Clicking on it will make Auth0 redirect you to the Quick Start section of your new application. From there, you can head to the Settings tab, where you will configure your app.
Now that you are on the Settings tab, search for a field called Allowed Callback URLs. In this field, add http://localhost:3000/callback. In case you are wondering, what this field does is to add an extra layer of security by telling Auth0 that the only URL allowed to be called back after authentication is the ones you input there. When releasing your app to the world, you will have to change from localhost to your public domain. But that is not the case here.
Then, after adding this URL into the field mentioned, you can hit the Save Changes button. With that in place, open your variables.env file and update it as follows:
AUTH0_CLIENT_ID=<YOUR-CLIENT-ID>
AUTH0_DOMAIN=<YOUR-DOMAIN>
AUTH0_CLIENT_SECRET=<YOUR-CLIENT-SECRET>
Note: You will have to replace
<YOUR-CLIENT-ID>,<YOUR-DOMAIN>, and<YOUR-CLIENT-SECRET>with the values that Auth0 shows for the application you created there. That is, you will have to replace these placeholders with Client ID, Domain, and Client Secret respectively.
Setting Up Auth0 in your Code
To integrate your backend server with Auth, you will use Passport.js and the passport-auth0 library. As you already installed both, you can focus on the code. So, in your server.js file, add the following code:
// ... the code above ...

// this middleware is required to initialize passport
app.use(passport.initialize());

// as you use sessions in your server this middleware is required
app.use(passport.session());

// middleware that serializes the user into the session
passport.serializeUser((user, done) => {
  done(null, user);
});

// middleware that deserializes user's info
passport.deserializeUser((user, done) => {
  done(null, user);
});

// passport middleware that initializes the Auth0 strategy
passport.use(new Auth0Strategy({
  domain: process.env.AUTH0_DOMAIN,
  clientID: process.env.AUTH0_CLIENT_ID,
  clientSecret: process.env.AUTH0_CLIENT_SECRET,
  callbackURL: 'http://localhost:3000/callback'
}, (accessToken, refreshToken, extraParams, profile, done) => {
// profile contains the information of the user
  return done(null, profile);
}));

app.get('/login', passport.authenticate('auth0', {
  //The scope parameter determines the user information the server sends
  scope: 'openid profile',
}));

app.get('/callback', passport.authenticate('auth0'), (req, res) => {
  req.session.user = req.user;
  res.redirect('/');
});

//Listen to connections on port 3000
app.listen(process.env.PORT || 3000, () => {
  console.log("Server listening on port 3000.");
});
As you can see by the comments, the first two lines configure passport middleware in your app. After that, you define two functions to serialize and deserialize user instances to and from the session. Then, you configure Auth0 and Passport together by calling Auth0Strategy and passing your environment variables to it. With that in place, you add two new endpoints:
/login: When users hit this endpoint, your server will redirect them to the Auth0 Login Page, so they can log in./callback: After these users authenticate on Auth0, they get redirected to this endpoint (i.e., tohttp://localhost:3000/callback). So, in this endpoint, you finish the integration with Auth0 by passing the request through Passport (passport.authenticate) and by setting the user session (req.session.user).
Lastly, you start your Express server by making it listen to port 3000.
Testing our app
That's it. With these last changes to server.js, your app is ready for prime time. So, back in your terminal, issue this command:
node serverThen, open http://localhost:3000/ in a web browser. There, you will see that you get redirected to Auth0 so you can log in and, after logging in, you will see a screen where you can start an editing session.
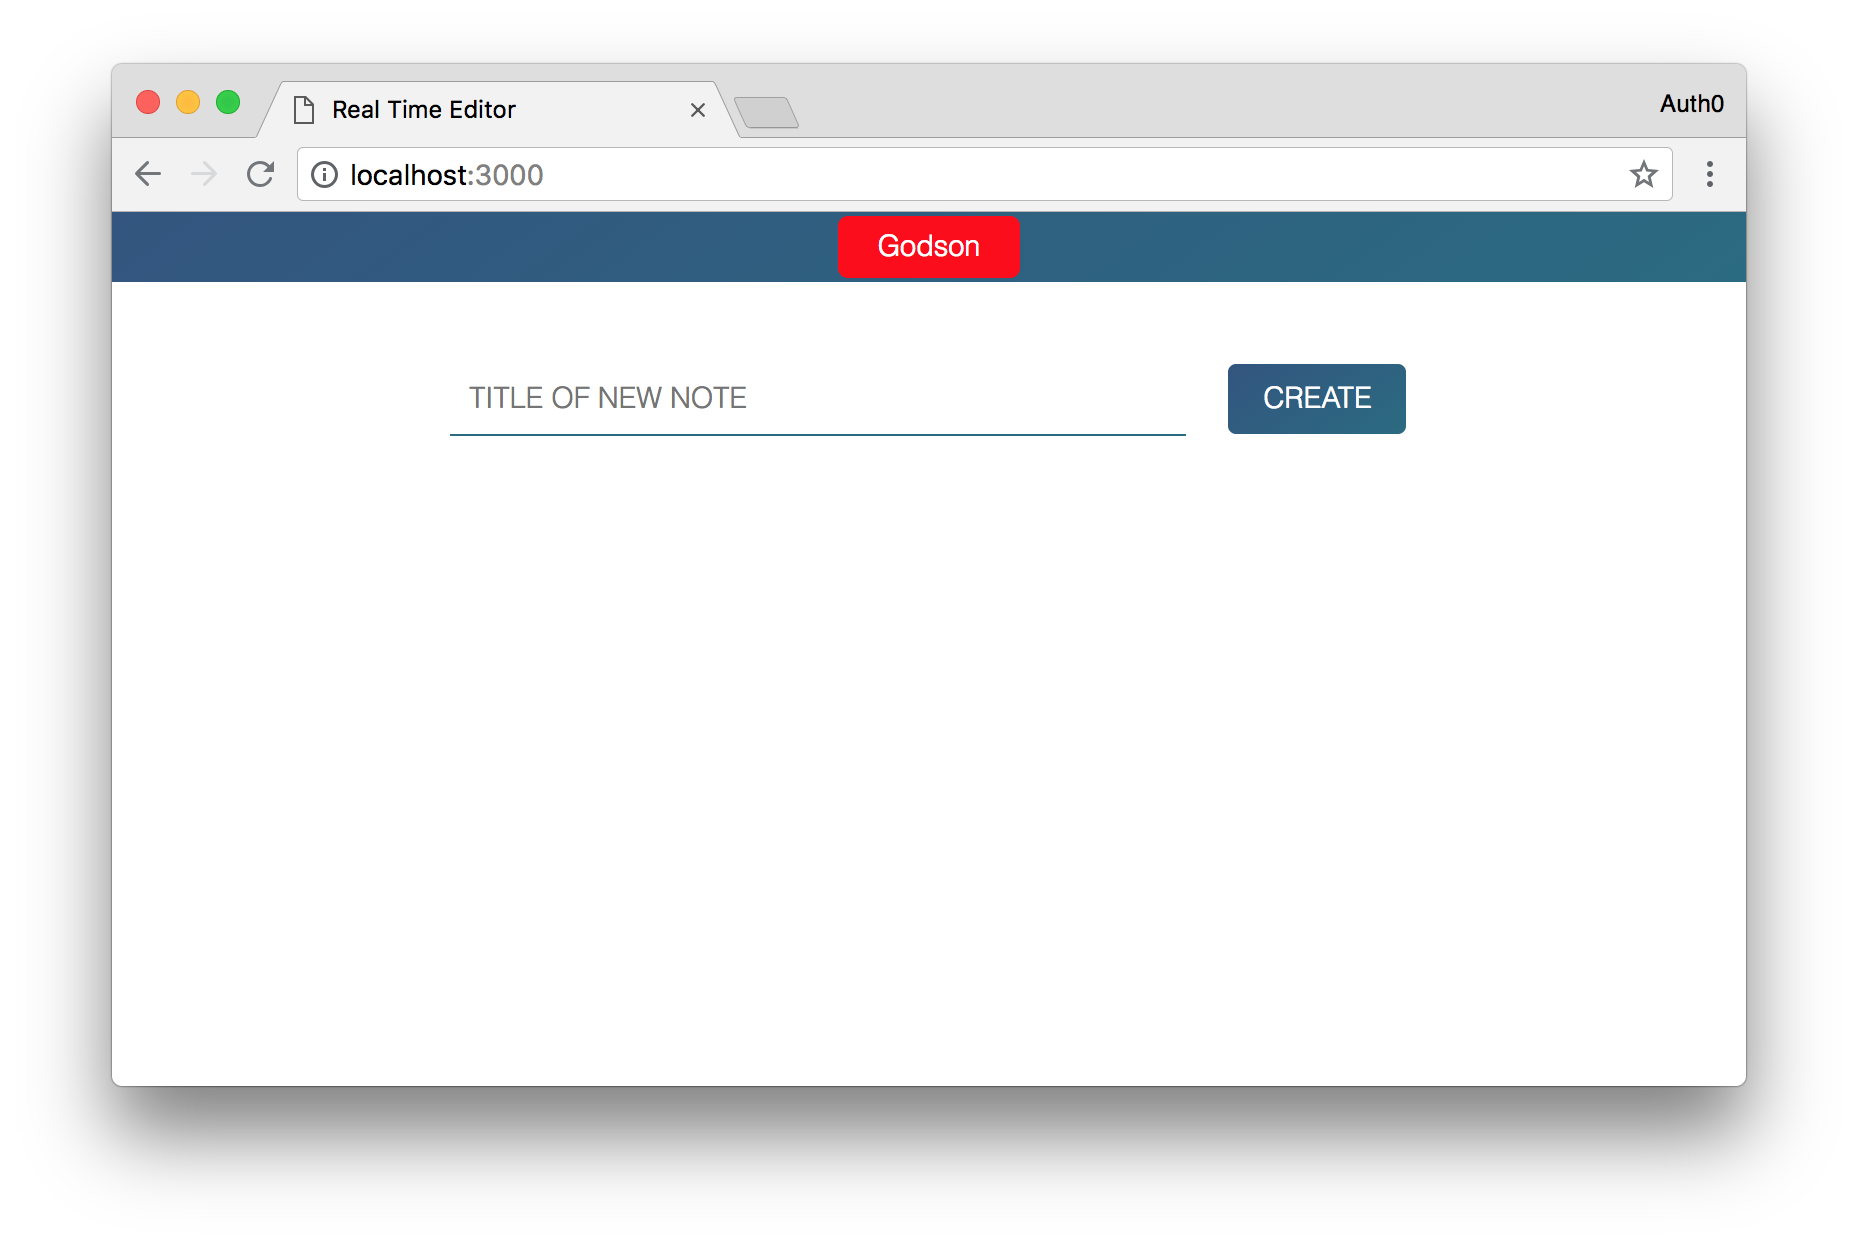
Now, if you a define a title for your editing session and hit the create button, you will be redirected to the screen where you can start editing the new document.
Wondering how the collaborative editing works? Copy the unique URL you got and open on another browser. Then, after authenticating, paste the URL again (this time you will have an active session) and you will be able to see that two users are on the current editing session. Cool, isn't it?
"I just built real-time, collaborative web editor. So awesome and so easy!"
Tweet This
Conclusion
In this article, you learned how to create a collaborative, real-time editor where different users can work on the same document at the same time. To do so, you used tools like Node.js, Express, Pusher, and Auth0. Although the example is simple and it does not persist the edited content on databases, it was enough to give you a pretty solid foundation to build production-ready and secure applications that have real-time capabilities.
What do you think? Did you enjoy using this tools? Let me know in the comments box below!


