---
title: "Developing a Secure API with NestJS: Getting Started"
description: "Learn how to use NestJS, a Node.js framework powered by TypeScript, to build a secure API."
authors:
- name: "Dan Arias"
url: "https://auth0.com/blog/authors/dan-arias/"
date: "Sep 1, 2020"
category: "Developers,Deep Dive,Nest"
tags: ["typescript", "angular", "nest", "auth0", "full-stack", "frontend", "backend"]
url: "https://auth0.com/blog/developing-a-secure-api-with-nestjs-getting-started/"
---
# Developing a Secure API with NestJS: Getting Started
We tested this tutorial using NestJS v7.0.0, Node.js v10.16.3, and npm v6.9.0.
NestJS is known as an architecture framework for Node.js, but what is an "architecture framework"? Is this yet another buzzword? Nope! It's legit.
NestJS may feel like the [Laravel](https://auth0.com/blog/build-a-laravel-6-app-with-authentication/) or [Rails](https://auth0.com/blog/ruby-on-rails-killer-workflow-with-docker-part-1/) of the Node.js world as it favors convention over configuration. It offers you _opinionated_ guidelines and code conventions. So, instead of worrying about naming or organizing files and folders, you can focus on building features for your product.
On its mission to remove the guesswork out of API development, NestJS offers first-class support for [TypeScript](https://auth0.com/blog/typescript-practical-introduction/) to add static type-checking to your projects. Your API code becomes self-documented: you'll know if a method expects a `string`, a ` number`, a `Cat`, or a [`TwitterHotTake`](https://twitter.com/auth0/status/1123248195369353218).
Today, you'll learn how to build a secure API with [NestJS](https://docs.nestjs.com/) and create your _own opinion_ on the framework.
## What You Will Build
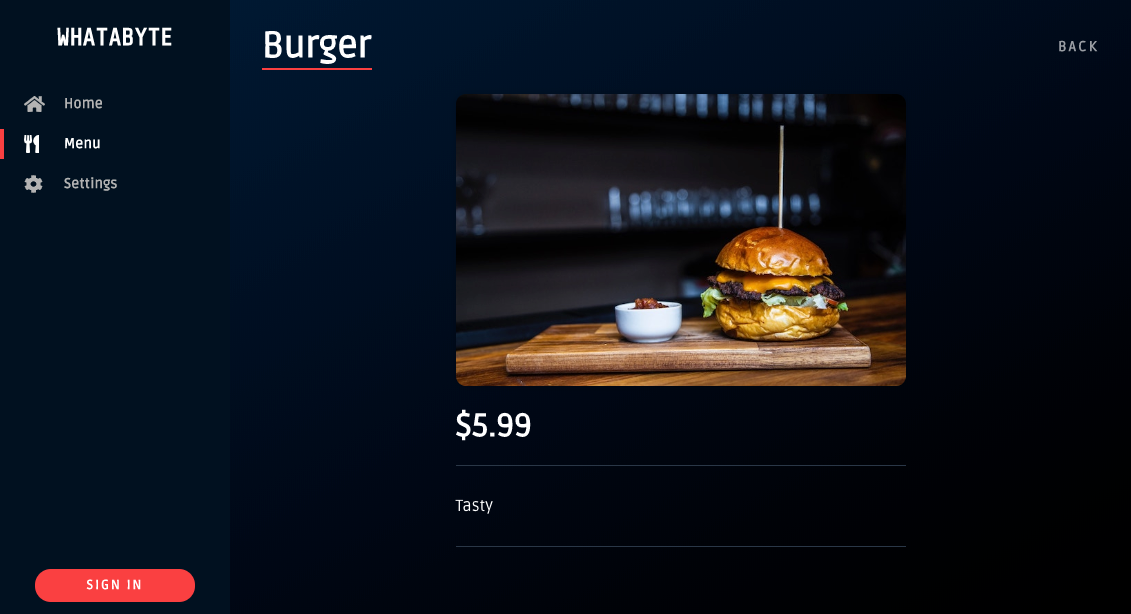
Your goal is to create and secure a feature-complete API, which lets clients perform data operations on a mock restaurant menu. To test, consume, and even try to hack your API, you'll use a demo client called ["WHATABYTE Dashboard"](https://dashboard-v1.whatabyte.app/).
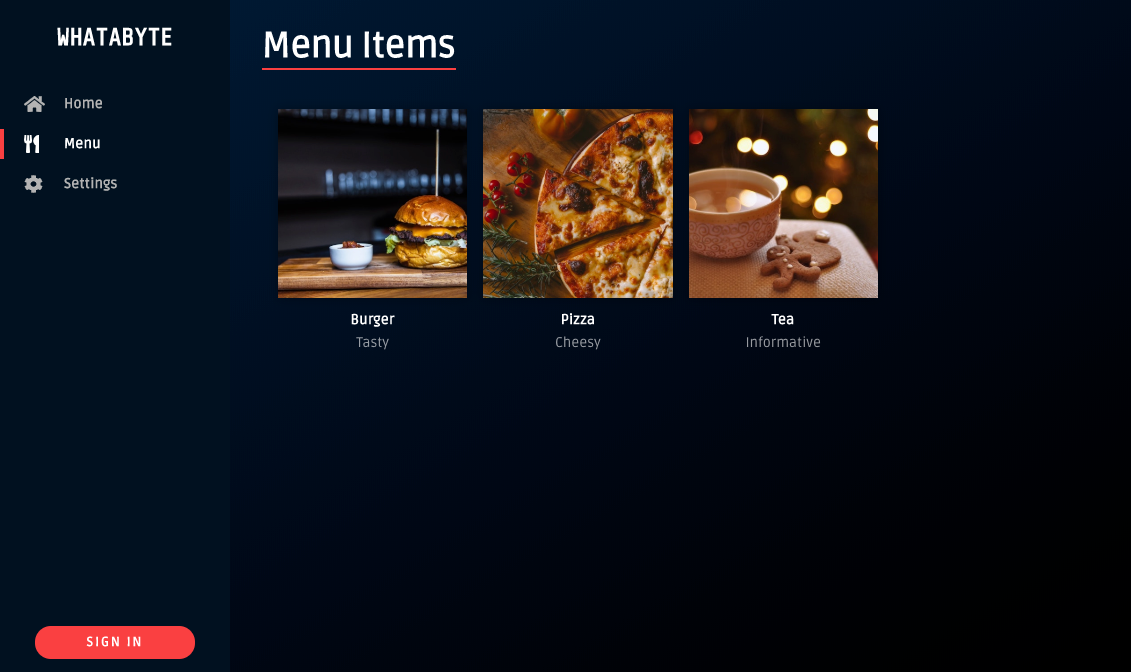
> This dashboard is inspired by the [sleek web player from Spotify](https://open.spotify.com/search).
We tested this tutorial using Node.js `v10.16.3` and NPM `v6.9.0`. If you need to install any of them, follow the [instructions provided by the Node.js Foundation for your operating system](https://nodejs.org/en/download/).
For **simplicity**, you'll store data in-memory and not in an external database.
For **security**, you'll limit API access by following these business rules:
- Anyone can read data.
- Only users with a `menu-admin` role are authorized to write data: create, update, or delete menu items.
## Get Started with NestJS
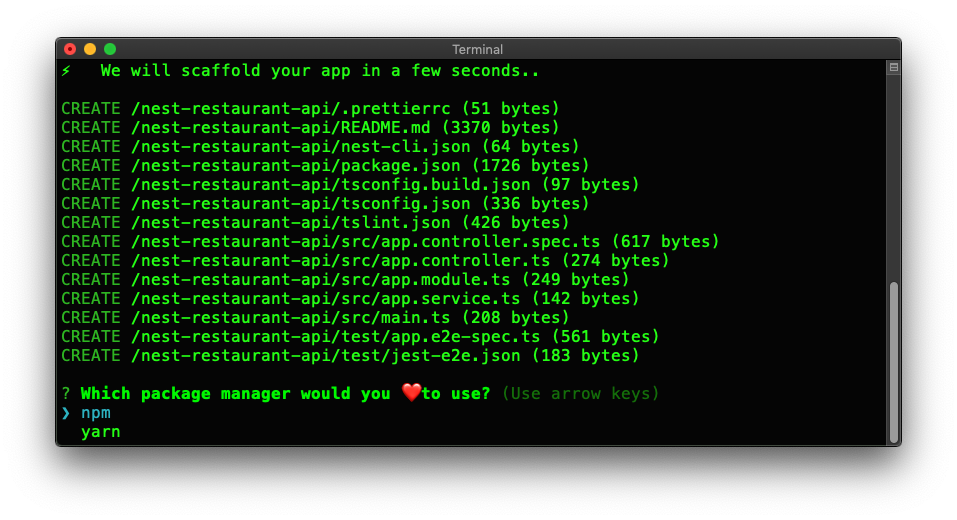
NestJS offers a powerful CLI tool to build your application. To generate a new project, use `npx` to run the NestJS CLI without installing it globally in your system:
``` bash
npx @nestjs/cli new nest-restaurant-api
```
> The `npx` command is available with `npm v5.2.0` and higher.
The CLI asks you to choose a package manager, `npm` or `yarn`, and proceeds to install project dependencies using your selection. To follow this tutorial, choose `npm`.
Once the installation is complete, you get a directory called `nest-restaurant-api`. Navigate to this directory:
``` bash
# move into the project directory
cd nest-restaurant-api
```
## Clean Up the NestJS Starter
For simplicity, you won't be writing any tests in this tutorial. However, it would be best if you wrote robust tests for any production-ready application. As such, delete the `test` directory and the `src/app.controller.spec.ts` file from your project:
``` bash
rm -rf test/
rm src/app.controller.spec.ts
```
> Refer to the [NestJS Testing documentation](https://docs.nestjs.com/fundamentals/testing) for details on how to perform automated tests.
After that, delete the files defining `AppController` and `AppService`:
``` bash
rm src/app.controller.ts src/app.service.ts
```
Deleting these files breaks `AppModule` as it depends on `AppController` and `AppService`. To fix that, open the project in your preferred IDE and update `src/app.module.ts` as follows:
``` typescript
// src/app.module.ts
import { Module } from '@nestjs/common';
@Module({
imports: [],
controllers: [],
providers: [],
})
export class AppModule {}
```
## Use Environmental Variables
`src/main.ts` is the entry point of your application. However, this file uses a hard-coded port number to listen for incoming requests, `3000`, making your application less adaptable to different development and production environments.
To fix that, you can store environmental variables locally in a `.env` file and use a package like [`dotenv`](https://www.npmjs.com/package/dotenv) to load them into the global variable `process.env`.
To start, install `dotenv` in your project:
``` bash
npm i dotenv
```
Then, create this hidden file under the root project directory:
``` bash
touch .env
```
Open `.env` and populate it with the following data:
``` bash
PORT=7000
```
To attach data from `.env` into `process.env`, you need to call the `dotenv.config()` method at the top of each module that needs that data. As such, update `src/main.ts` to replace the hard-coded port number with `process.env.PORT` as follows:
``` typescript
// src/main.ts
import { NestFactory } from '@nestjs/core';
import { AppModule } from './app.module';
import * as dotenv from 'dotenv';
dotenv.config();
async function bootstrap() {
const app = await NestFactory.create(AppModule);
await app.listen(process.env.PORT);
}
bootstrap();
```
Now when your application runs, it listens for requests on whatever the value of `process.env.PORT` may be — `7000` in this case.
> ⚠️ Caution: `.env` may eventually contain sensitive information, such as API keys or secrets. Add it to `.gitignore` before committing code to version control.