

Welcome!
In this four-part tutorial, you’ll take a Flutter app and enhance it with Auth0. You’ll start by adding basic username/password authentication to it, followed by social logins, and then enable real-time support chat that makes use of authorization.
By the end of this tutorial, you’ll have built a fairly complex Flutter app that you can use as the basis for your own creations, and you will also have covered a lot of Auth0’s features.
Before we begin, let’s get our terminology straight...
Authentication vs. authorization
Authentication and authorization are two key security components in applications, whether they are mobile apps, web apps, or machine-to-machine connections. Many people are confused by these terms, so here are some simple definitions:
- Authentication deals with the question "Who are you?". You’ll implement it in this section with the help of an authentication protocol called OpenID Connect, or “OIDC” for short.
- Authorization answers the question "What are you allowed to do?". You’ll implement it in a later section with the help of an authorization protocol called OAuth 2.0, or “OAuth2” for short.
Adding Authentication to a Flutter App
In this section, you’ll learn how to secure a Flutter app with Auth0. You’ll take a production-ready Flutter app and add a login screen and logout functionality to it, and you’ll do it with only a fraction of the effort required to implement login and logout yourself!
You’ll be able to follow this tutorial a little more smoothly if you know the basics of Flutter, but it's not a hard requirement. If you have experience with any modern web framework, you’ll probably be able to understand the code and learn Flutter and Dart (Flutter’s programming language) as you go.
What you’ll learn and build
While you could create a new Flutter project and implement everything you will learn in this tutorial, adding authentication to an existing production-ready app is pretty common. I’ll provide a production-ready app, MJ Coffee, which you’ll secure by adding authentication.
In later sections, you’ll enable authentication through a social identity provider, such as Google or Apple. You’ll then work on authorization by adding roles and permissions to limit app functionalities based on each user’s permissions and roles.
I’ll explain more about what this tutorial will cover in this video overview.
I will provide the source code for both the “starter” and “final” versions of the application. I strongly recommend that you use the “starter” version and follow the tutorial step by step in order to better understand the application and your additions to it.
Additionally, I have recorded videos that support this tutorial. You’ll find them on my Youtube channel playlist.
Look for the 🛠 emoji if you’d like to skim through the content while focusing on the build and execution steps.
Set Up the Initial App
Prerequisites
Before getting started, you need to have the following installed on your machine:
- Flutter SDK version 2.0 or later. I used version 2.2 for building my application.
- If you want to build the app for iOS, you’ll need the following:
- Xcode 11 or later.
- Ruby 2.6.0 or later. This is required for the next iOS requirement, which is...
- CocoaPods 1.10.0 or later.
- A basic understanding of null safety. If you’ve used Kotlin’s or Swift’s optional types, you should be fine; if not, please read Null safety in Flutter.
- The IDE or an editor of your choice. I recommend:
- Android Studio, or
- IntelliJ, or
- Visual Studio Code (which I will use in this series).
- Dart and Flutter plugins for your IDE.
- A cup of tea or coffee.
Get the project, configure it, and run it
🛠 Open the repository for the MJ Coffee app and download the source from the main branch. This contains a fully functioning app that is ready for you to add Auth0 authentication/authorization and chat.
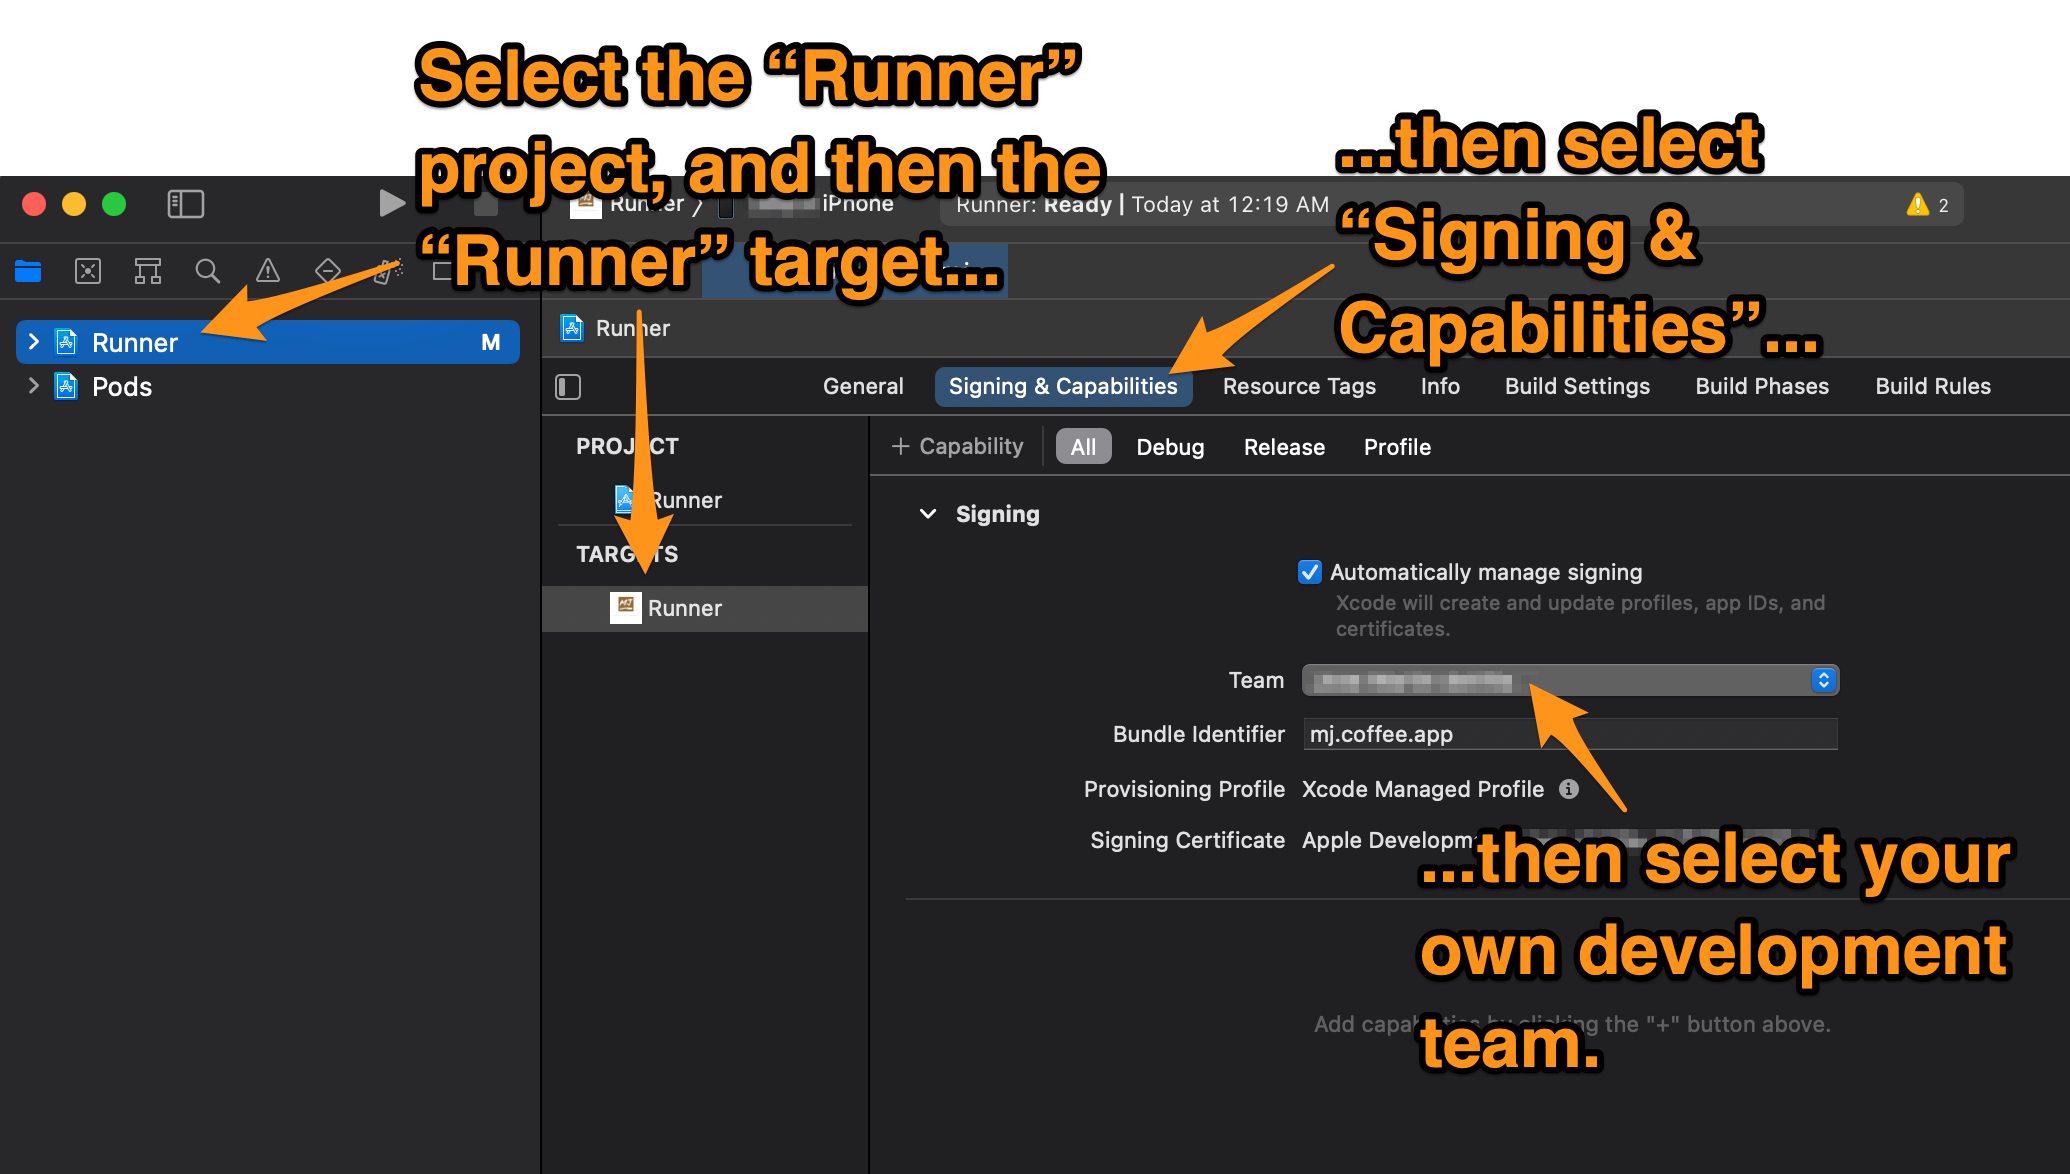
🛠 If you want to build the app for iOS, you’ll need to specify your own development team for the build process. Open the /ios/Runner.xcworkspace/ file with Xcode, select the Runner project, then the Runner target, open the Signing & Capabilities tab, and select your team in the Team drop-down menu:
🛠 Confirm that the app works by running it. Open a command-line interface, navigate to the project’s root directory, and enter flutter run.
Flutter will compile the project and run it on any mobile device connected to your computer or any mobile device emulator running on it. If it can’t find any of those, it will run a mobile device emulation in a browser window.
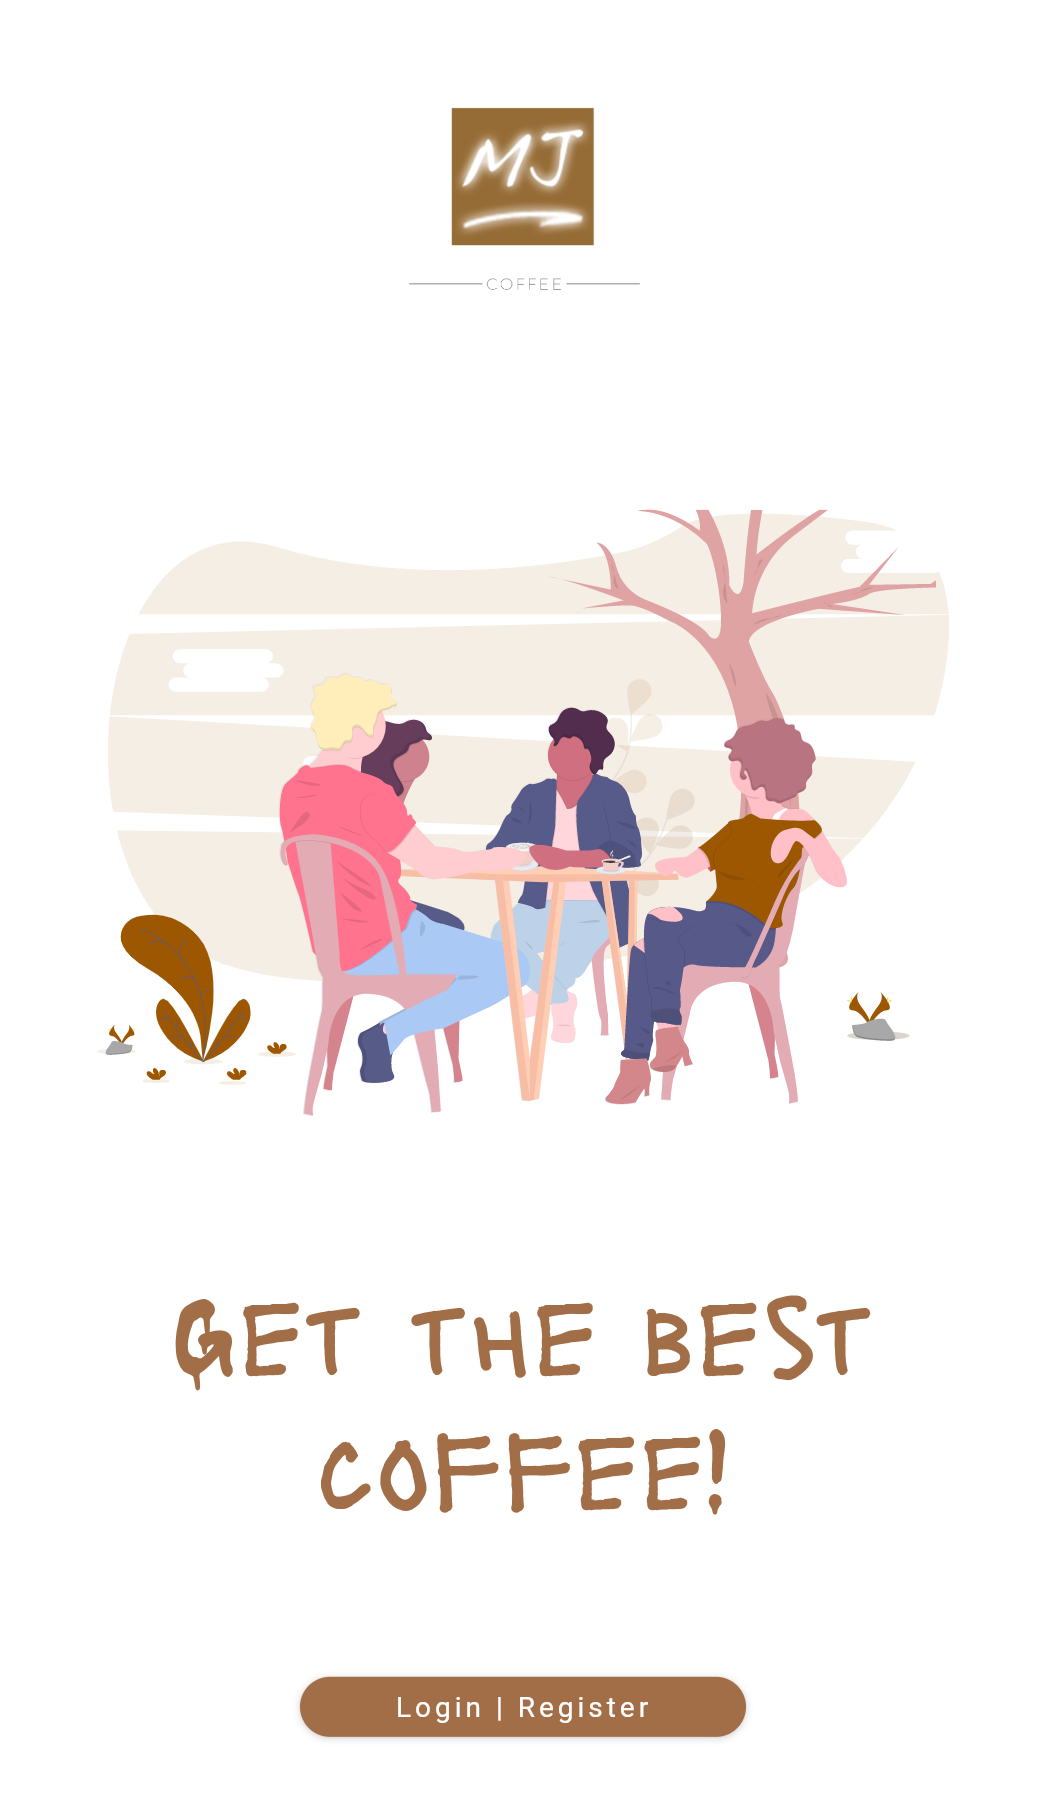
You will see the app’s home screen:
Take a quick tour of the app
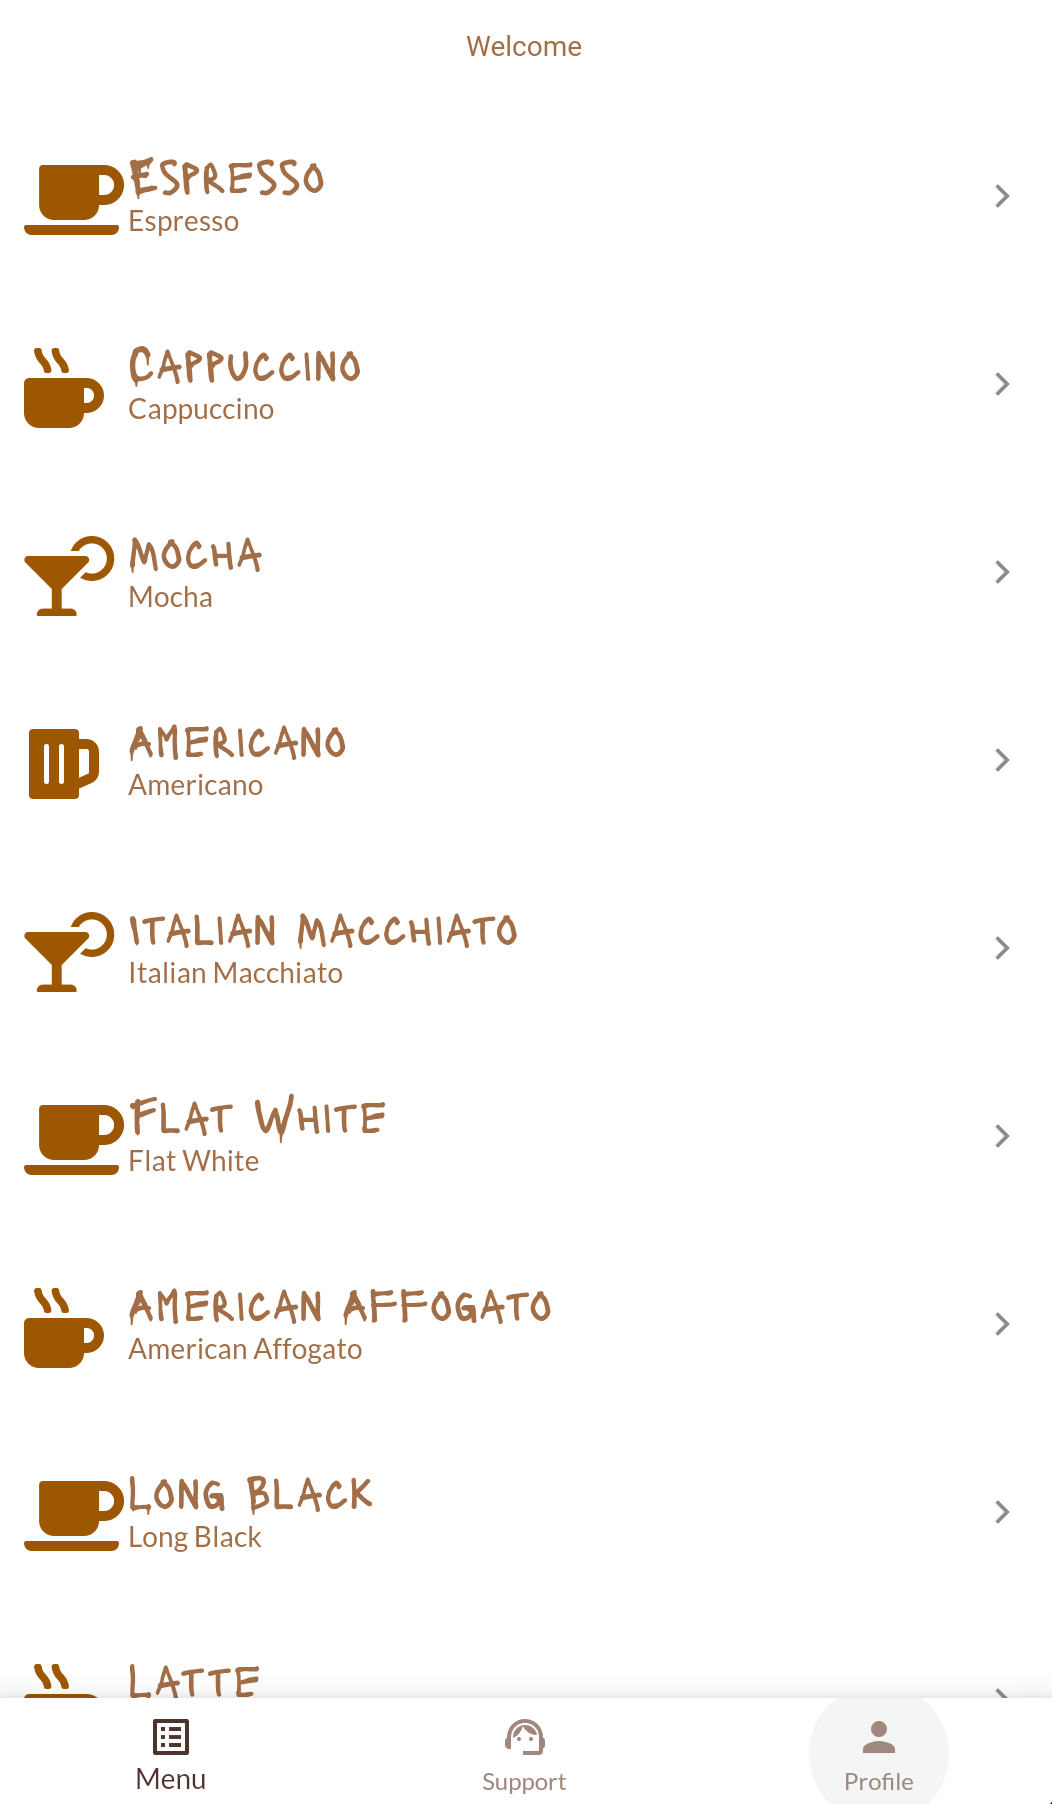
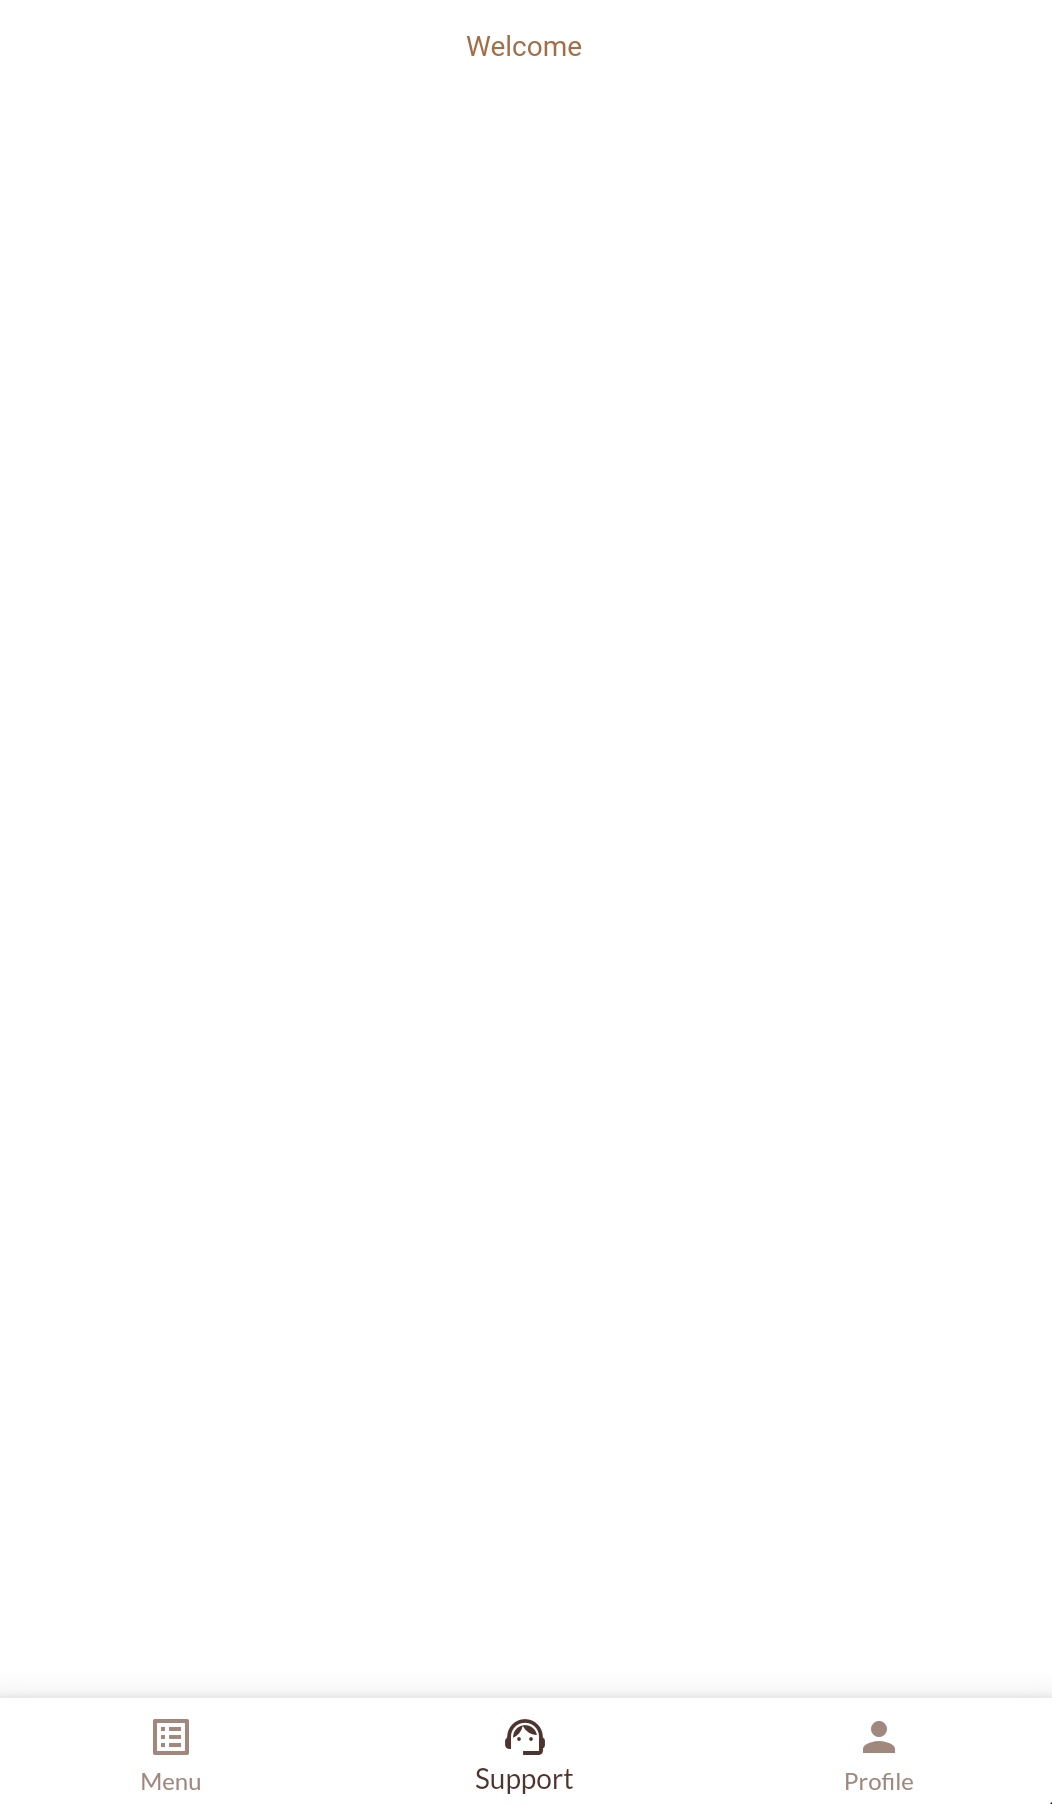
🛠 Tap the Login | Register button. Right now, there is no login functionality, so the app immediately takes you to the Menu screen:
🛠 Tap the Support button located at the bottom center of the screen. It will take you to the screen where you’ll eventually implement that support chat feature:
🛠 Now tap the Profile button located at the bottom right of the screen. It will take you to the profile screen, which will eventually display some information about the logged-in user:
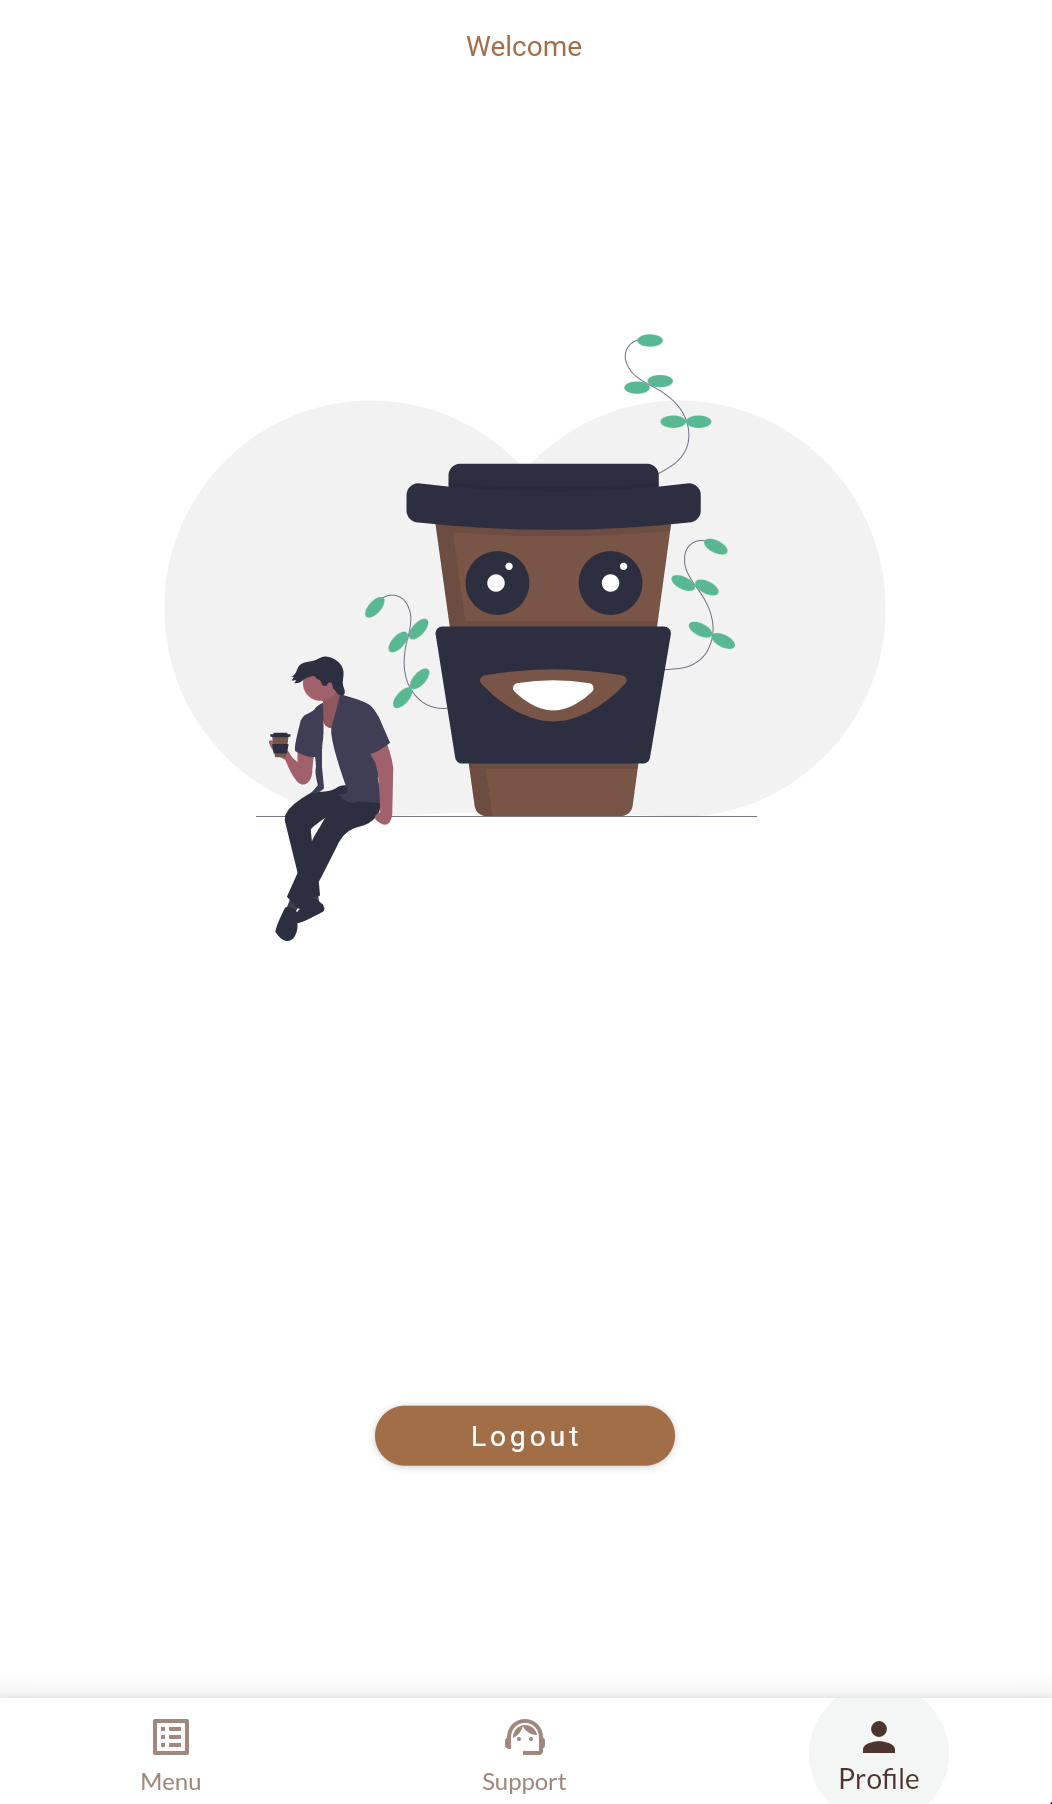
🛠 And finally, tap the Logout button, which will bring you back to the home screen.
Now that you’ve had a tour of the app, it’s time to start implementing the new features!
Implement Login
Install Flutter dependencies
The first step is to import the required libraries. You’ll do that by specifying three new dependencies:
- http: A composable, Future-based library for making HTTP requests published by the Dart team
- flutter_appauth : A well-maintained wrapper package around AppAuth for Flutter developed by Michael Bui. AppAuth authenticates and authorizes users and supports the PKCE extension.
- fluttersecurestorage: A library for securely persisting data locally; it was developed by German Saprykin. You will need this to safely store tokens and other necessary information.
You’ll install them by adding entries to the project’s /pubspec.yaml file (located in the root directory), where dependencies are specified.
🛠 Add the following lines to the /pubspec.yaml’s dependencies: section, just after the line that starts with json_annotation:
  http: ^0.13.3
  flutter_appauth: ^1.1.0
  flutter_secure_storage: ^4.2.0
The dependencies: section should end up looking like this:
dependencies:
  flutter:
    sdk: flutter
  font_awesome_flutter: ^9.1.0
  flutter_svg: ^0.22.0
  google_fonts: ^2.1.0
  json_annotation: ^4.0.1
  http: ^0.13.3
  flutter_appauth: ^1.1.0
  flutter_secure_storage: ^4.2.0
🛠 Save the file and then install the dependencies by either:
- Running the
flutter pub getcommand in the root of your project on the command line, or - Running
Pub getin your editor or IDE.
Configure the callback URL
A callback URL is a mechanism that an authorization server such as Auth0 uses to communicate back to your application. It specifies a location where the user should be returned after the user had been authenticated.
Because unauthorized parties can manipulate callback URLs, Auth0 recognizes only URLs in a list of allowed callback URLs. These are stored in the application’s Settings page in the Auth0 dashboard.
For web applications, a callback URL is a valid HTTPS URL. For native apps, your Flutter implementation, you need to create a “pseudo-URL” based on your app’s unique name (the name is the application ID in Android and the bundle name in iOS). These are similar in format to an URL.
You will specify that this app’s name is mj.coffee.app, which means that the callback URL for this application will be mj.coffee.app://login-callback.
flutter_appauth will register your app with an intent filter on that callback URL. If there's no match, the app will not receive the result.
Configure the callback URL for Android
🛠 To configure the Android version of the app, open the /android/app/build.gradle file. Update the defaultConfig section of the file by adding a new item: manifestPlaceHolders and its value, ['appAuthRedirectScheme': 'mj.coffee.app']. The value of appAuthRedirectScheme must be in lower case letters.
🛠 You should set the value for minSdkVersion to at least 18, as it's a requirement for the flutter_secure_storage package. For the MJ Coffee app, I changed the minSdkVersion to 21.
The result should look like this:
// /android/app/build.gradle

    defaultConfig {
        applicationId "mj.coffee.app"
        minSdkVersion 21
        targetSdkVersion 29
        versionCode flutterVersionCode.toInteger()
        versionName flutterVersionName
        multiDexEnabled true
        testInstrumentationRunner "androidx.test.runner.AndroidJUnitRunner"
        manifestPlaceholders = [
            'appAuthRedirectScheme': 'mj.coffee.app'
        ]
    }
Configure the callback URL for iOS
The only change that you need to make in order to configure the iOS version of the app is to add a callback scheme.
🛠 To do this, open the /ios/Runner/Info.plist file. Inside the <dict> tag, add a new key, CFBundleURLTypes so that the start of the <dict> tag looks like this:
<!-- /ios/Runner/Info.plist -->

...
<dict>
   <key>CFBundleURLTypes</key>
    <array>
        <dict>
            <key>CFBundleTypeRole</key>
            <string>Editor</string>
            <key>CFBundleURLSchemes</key>
            <array>
                <string>mj.coffee.app</string>
            </array>
        </dict>
    </array>
...
🛠 Run both Android and iOS versions and ensure that the app runs on all devices or emulators/simulators with no error by using the following command:
flutter run -d allConfigure Auth0
The next step is to register MJ Coffee as an application in the Auth0 dashboard.
You’ll need an Auth0 account for this step. If you don’t already have one, you can sign up for a free account. The free tier is generous enough for many small applications.
🛠 Log in to into your Auth0 account and follow the steps below to register the application:
- 🛠 Go to the Applications section of your dashboard:

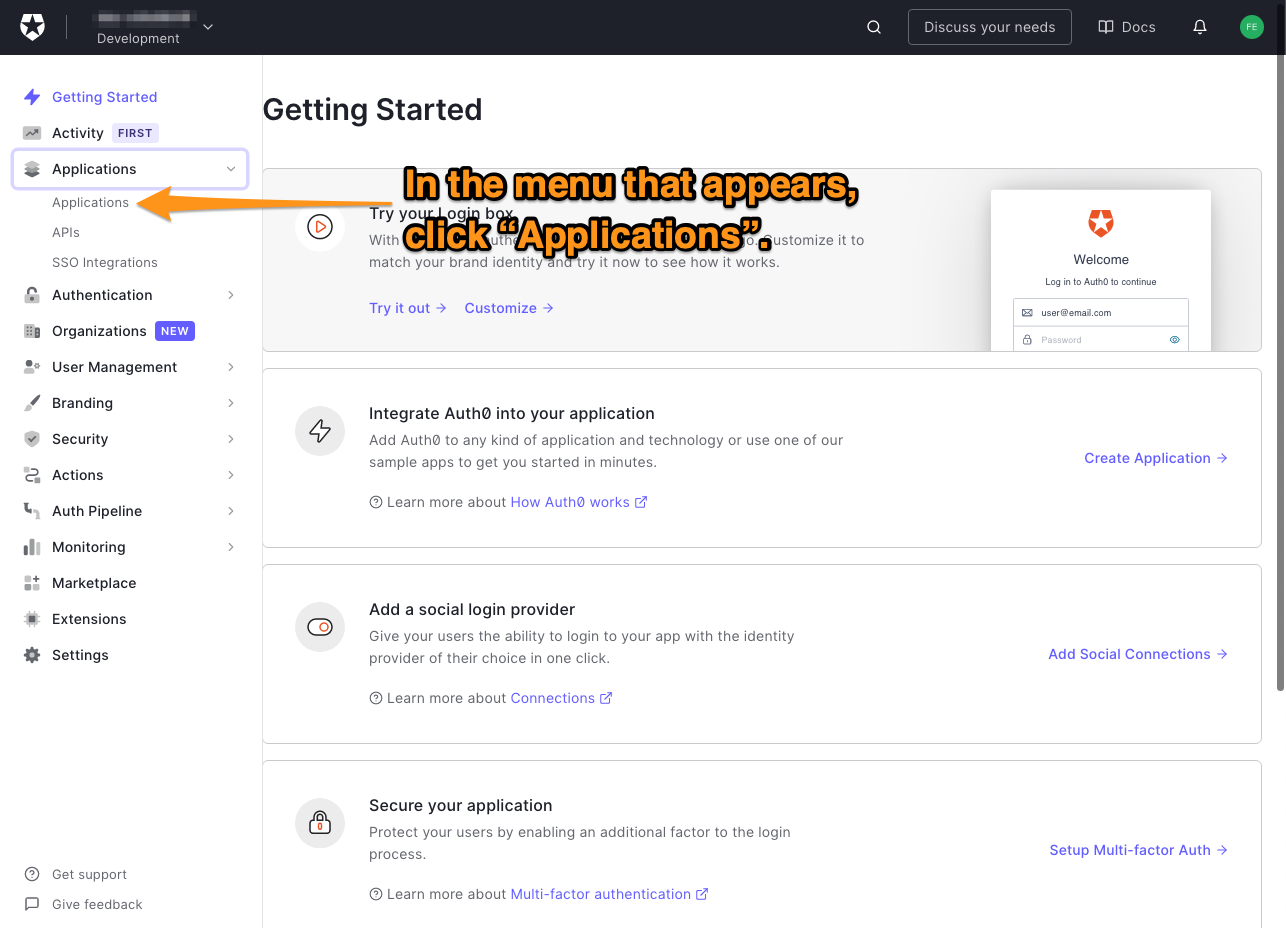
- 🛠 Click the Create Application button:
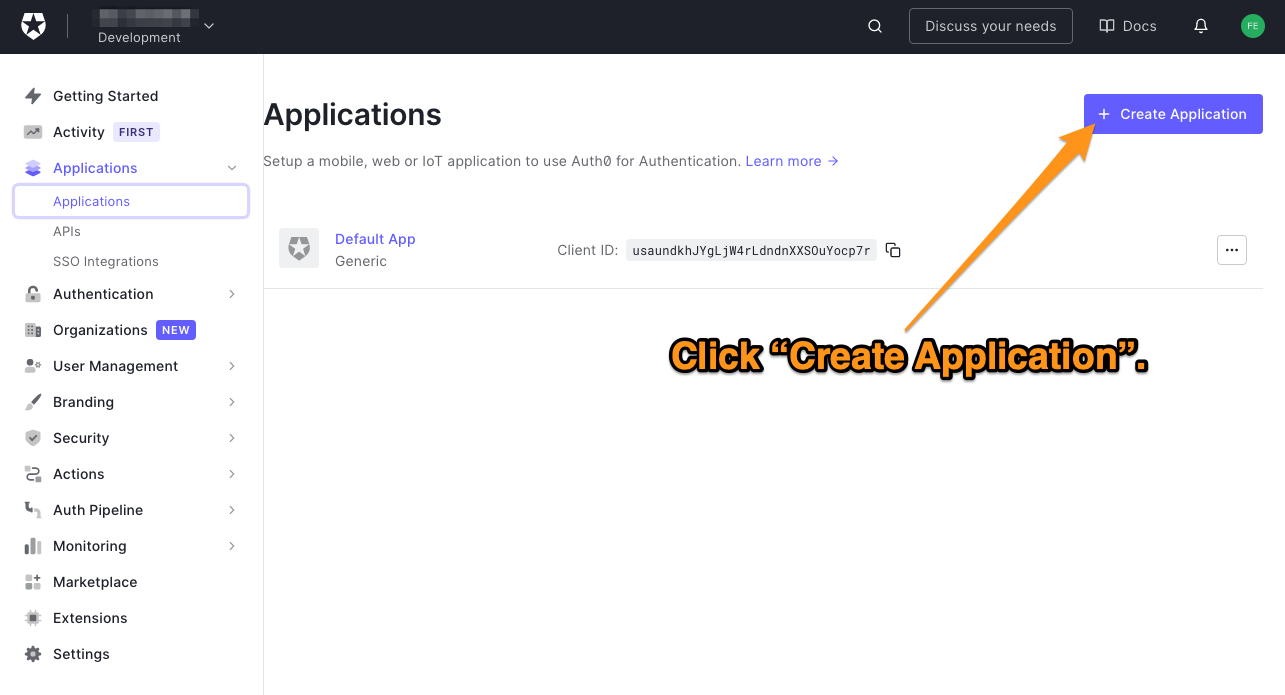
- 🛠 Enter a name for your application (e.g., "MJ Coffee Flutter Application") and select the Native application type:

- 🛠 You’ll see the Quick Start page of your newly-registered application. Go to the Connections page...

...and ensure that Username-Password-Authentication(in the Database section of the page) is selected. You can, and you will add a social connection later to this application too:

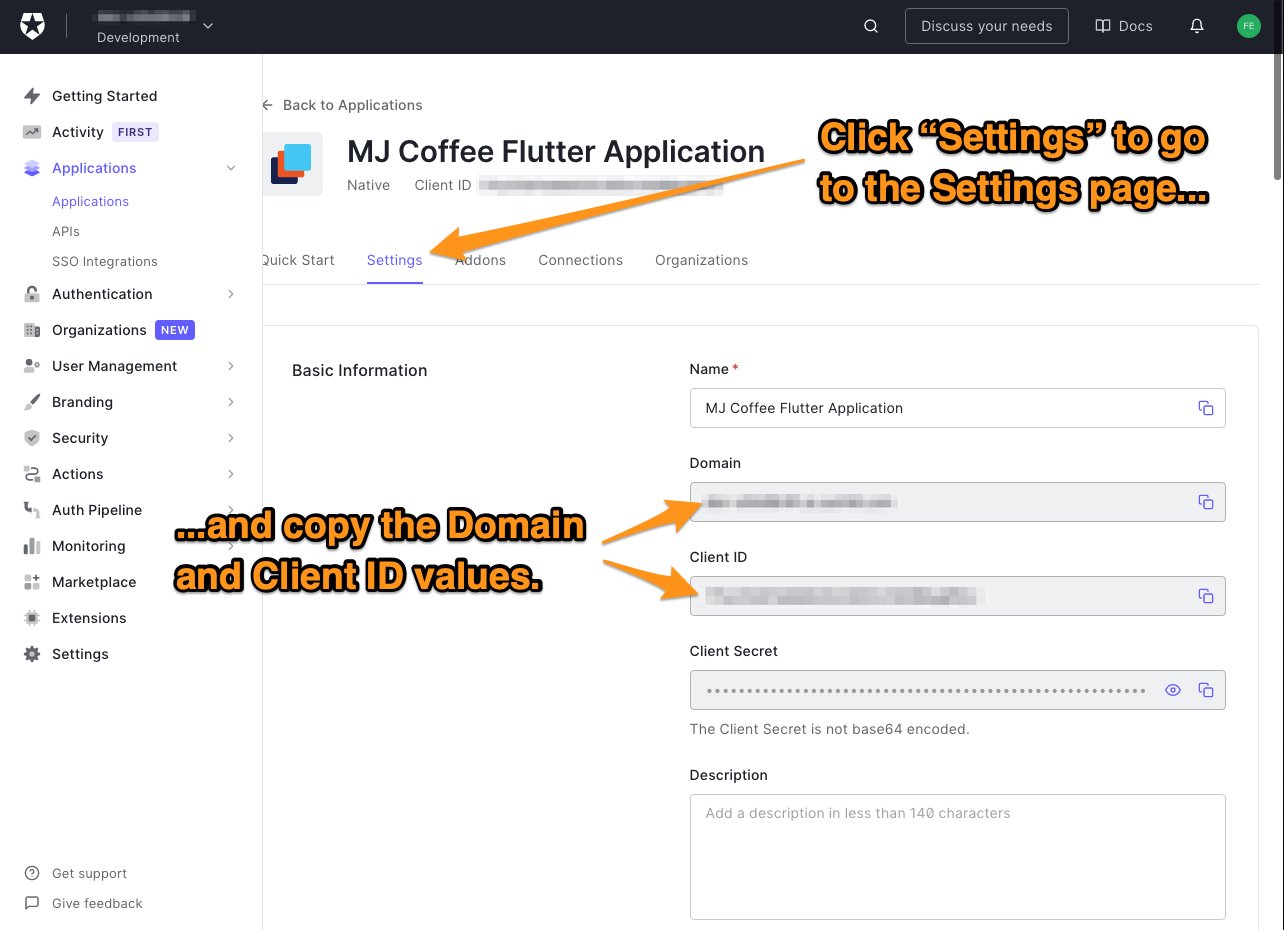
- 🛠 Then go to the Settings page. You can find all information, including client ID, client secret, domain (Tenant), etc.
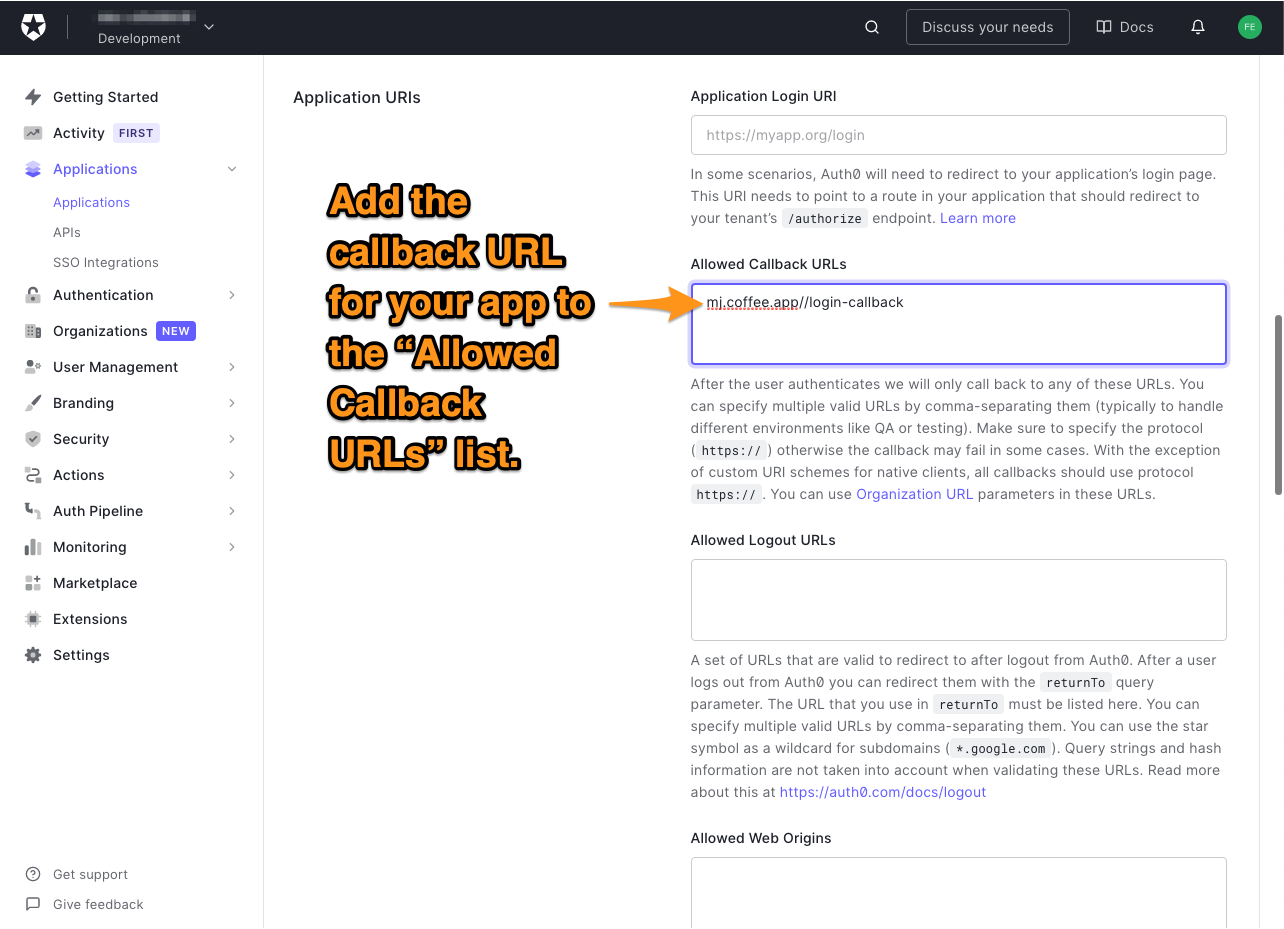
- 🛠 You need to add a callback URL for the app to the Allowed Callback URLs under Application URIs. Use the value
mj.coffee.app://login-callback:
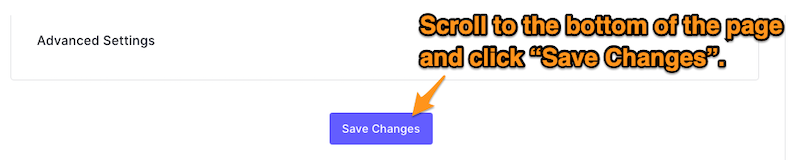
- 🛠 Scroll to the bottom of the page and click the Save Changes button:
Provide the domain and client ID to the app
You will need to use the domain and client ID that you copied from the Settings page in your Flutter application. You can either store these values in constant variables in the app’s code, or you can pass these values to the app by providing them as --dart-define arguments when you run it.
Rather than store this sensitive information in your code (which is a big security risk), I suggest that you supply the app with these values as --dart-define arguments when you run it.
🛠 To do this in Terminal or PowerShell, use this command:
flutter run -d all --dart-define=AUTH0_DOMAIN={YOUR DOMAIN} --dart-define=AUTH0_CLIENT_ID={YOUR CLIENT ID}You can optionally have your editor of choice provide these values. For example, you can have Visual Studio Code pass these additional --dart-define values by adding them to the args field of your launch configuration file (/.vscode/launch.json):
"configurations": [
  {
    "name": "Flutter",
    "request": "launch",
    "flutterMode": "debug",
    "type": "dart",
    "args": [
      "--dart-define",
      "AUTH0_DOMAIN={YOUR DOMAIN}",
      "--dart-define",
      "AUTH0_CLIENT_ID={YOUR CLIENT ID}"
    ]
  }
]
🛠 The app should capture the values you pass to it. Do this by defining these constants in the constants.dart file in the /lib/helpers/ directory -- add these just after the import statements:
// /lib/helpers/constants.dart

const AUTH0_DOMAIN = String.fromEnvironment('AUTH0_DOMAIN');
const AUTH0_CLIENT_ID = String.fromEnvironment('AUTH0_CLIENT_ID');
const AUTH0_ISSUER = 'https://$AUTH0_DOMAIN';
const BUNDLE_IDENTIFIER = 'mj.coffee.app';
const AUTH0_REDIRECT_URI = '$BUNDLE_IDENTIFIER://login-callback';
Notice that you only need the domain and client ID because the Authorization Code Flow with PKCE does not require a client secret.
The code also defines a top-level domain for your tenant, which is called the issuer.
As mentioned earlier, you need to create your redirect URI based on your bundle identifier, which you added to the "Allowed Callback URLs" list earlier. However, it would be best to keep in mind that:
- The bundle identifier must match
appAuthRedirectSchemeon Android, and - The scheme part of the redirect URL must match and
CFBundleURLSchemeson iOS...
...and that both values must be in all lowercase.
Integrating Auth0 with Flutter
Since Auth0 is a standard OAuth 2.0 authorization server, you can utilize any standard OpenID Connect SDK to authenticate against Auth0. One of them is flutter_appauth, a wrapper around the AppAuth SDK for native applications. You will need to integrate it into your application.
🛠 Open the /lib/services/auth_service.dart file and update it to import the necessary libraries as well as instantiate FlutterAppAuth and FlutterSecureStorage:
// /lib/services/auth_service.dart

import 'dart:convert';
import 'package:http/http.dart' as http;
import 'package:flutter/services.dart';
import 'package:flutter_appauth/flutter_appauth.dart';
import 'package:flutter_secure_storage/flutter_secure_storage.dart';
import 'package:mjcoffee/helpers/constants.dart';
import 'package:mjcoffee/models/auth0_id_token.dart';
import 'package:mjcoffee/models/auth0_user.dart';

class AuthService {

  static final AuthService instance = AuthService._internal();
  factory AuthService() => instance;
  AuthService._internal();

  final FlutterAppAuth appAuth = FlutterAppAuth();
  final FlutterSecureStorage secureStorage = const FlutterSecureStorage();

}
OpenID Connect has a protocol, OpenID Connect Discovery, that provides a standard way to discover authorization server endpoints in JSON documents.
In Auth0, you can find the discovery document at the /.well-known/openid-configuration endpoint of your tenant address. For MJ Coffee, this endpoint is https://YOUR-AUTH0-TENANT-NAME.auth0.com/.well-known/openid-configuration.
If you watch my videos, you will see an example of a discovery URL.
AppAuth supports three methods to configure endpoints. Conveniently, you just pass the top-level domain name (i.e., issuer) as a parameter to AppAuth methods. AppAuth then internally fetches the discovery documents from the openid-configuration endpoint and figures out where to send subsequent requests.
🛠 Let's create a login method in our AuthService to construct the AuthorizationTokenRequest. Add the following to /lib/services/auth_service.dart:
// /lib/services/auth_service.dart

  login() async {
      final authorizationTokenRequest = AuthorizationTokenRequest(
        AUTH0_CLIENT_ID, AUTH0_REDIRECT_URI,
        issuer: AUTH0_ISSUER,
        scopes: ['openid', 'profile', 'offline_access', 'email'],
      );
      final AuthorizationTokenResponse? result =
          await appAuth.authorizeAndExchangeCode(
        authorizationTokenRequest,
      );
      print(result);
  }
To construct the request, you can create AuthorizationTokenRequest object bypassing the mandatory clientID and redirectUrl parameters using the values of AUTH0_CLIENT_ID and AUTH0_REDIRECT_URI respectively, and the value of AUTH0_ISSUER as the value for issuer to enable discovery.
It would be best if you defined scopes so that when the user allows them, you can perform actions on their behalf. Here are the scopes that we have requested in the code above:
openid: Perform an OpenID connect sign-in.profile: Retrieve the user’s profile.offline_access: Retrieve a Refresh Token foroffline_accessfrom the application.email: Retrieve the user’s email.
You will add more scopes later in this tutorial.
Once the request is constructed, calling appAuth.authorizeAndExchangeCode() starts a sign-in transaction. The authentication process will start, and upon completion, the user will return to the application with the AuthorizationTokenResponse, which is shown below and contains an Access Token, ID Token, and Refresh Token:
AuthorizationTokenResponse(
    String? accessToken,
    String? refreshToken,
    DateTime? accessTokenExpirationDateTime,
    String? idToken,
    String? tokenType,
    this.authorizationAdditionalParameters,
    Map<String, dynamic>? tokenAdditionalParameters,
  )
The Access Token, Refresh Token, and ID Token
You can use the Access Token to access APIs. Clients can’t decode this token, which is all right since it only means something to the API’s authorization server.
As a security measure, the Access Token usually has a short time to live. There are different methods to keep it alive for a longer period. One way is to use Refresh Tokens, which re-authorize your users. If a Refresh Token is available, the app can use it to silently get a new Access Token. For this reason, the app will store Refresh Tokens, and for security reasons, it will securely store them.
🛠 I recommend defining a constant key for your Refresh Token. Add this to your constants.dart file:
// /lib/helpers/constants.dart

const REFRESH_TOKEN_KEY = 'refresh_token';
While the contents of the Access Token are opaque to the client, theAppAuth SDK validates the ID Token since it’s part of an OpenID Connect client’s responsibility. The app should decode the ID Token’s body to receive its JSON payload.
🛠 To get the ID Token’s payload, we’ll need to create a model. We’ll call it Auth0IdToken. Create a new file named auth0_id_token.dart in the /lib/models directory, where models go:
// /lib/models/auth0_id_token.dart
import 'package:json_annotation/json_annotation.dart';
part 'auth0_id_token.g.dart';
()
class Auth0IdToken {
Auth0IdToken({
required this.nickname,
required this.name,
required this.email,
required this.picture,
required this.updatedAt,
required this.iss,
required this.sub,
required this.aud,
required this.iat,
required this.exp,
this.authTime,
});
final String nickname;
final String name;
final String picture;
(name: 'updated_at')
final String updatedAt;
final String iss;
// In OIDC, "sub" means "subject identifier",
// which for our purposes is the user ID.
// This getter makes it easier to understand.
String get userId => sub;
final String sub;
final String aud;
final String email;
final int iat;
final int exp;
(name: 'auth_time')
final int? authTime; // this might be null for the first time login
factory Auth0IdToken.fromJson(Map<String, dynamic> json) =>
_$Auth0IdTokenFromJson(json);
Map<String, dynamic> toJson() => _$Auth0IdTokenToJson(this);
}The ID Token is made up of claims, which are name/value pairs that contain either information about the user or meta-information about the Open ID Connect service. The Auth0IdToken model contains fields to contain the token’s claims, which are:
iss: An identifier for the issuer of the response. Its value is an URL.sub: An identifier for the subject. In the case of our app, it’s the user’s ID. Sincesubis not an often-used term outside of Open ID Connect, we created a getter nameduserIdthat simply returnssub’s value.aud: An identifier for the audience — that is, whom the ID Token is intended for.iat: The time when JWT that makes up the token was issued (iatis short for “issued at).exp: The expiration time for the token. After this time, the token cannot be used.
The other fields — nickname, name, email, picture, and updatedAt are for claims that contain specific information about the user.
The Auth0IdToken class needs methods to convert data from the authentication server into an Auth0IdToken object and an Auth0IdToken object to JSON. You could write them manually, but it’s easier and less error-prone to generate them instead.
You may have noticed these two lines at the start of the file:
import 'package:json_annotation/json_annotation.dart';
part 'auth0_id_token.g.dart';- The
importline brings in thejson_annotationlibrary, which you’ll use to generate code to serialize and deserialize an object. The@JsonSerializable()annotation in the code specifies these areAuth0IdTokenobjects that are to be serialized and deserialized. - The
partline specifies that the contents of the fileauth0_id_token.g.dartbelong to this file. Theg.dartfilename extension indicates that it’s a generated dart file.
🛠 Run the following command to generate the JSON conversion methods for Auth0IdToken:
flutter pub run build_runner build --delete-conflicting-outputs🛠 Once you have generated the JSON conversion methods, you can implement the parseIdToken() method in the AuthService class by adding the following:
// /lib/services/auth_service.dart

  Auth0IdToken parseIdToken(String idToken) {
    final parts = idToken.split(r'.');
    assert(parts.length == 3);

    final Map<String, dynamic> json = jsonDecode(
      utf8.decode(
        base64Url.decode(
          base64Url.normalize(parts[1]),
        ),
      ),
    );

    return Auth0IdToken.fromJson(json);
  }
Now that you have the ID Token, you can get information about the user from the OpenID Connect endpoint for user details, which is https://[AUTH0_DOMAIN]/userinfo.
Let's create another model, Auth0User, so that we can deserialize and serialize the data from the userinfo endpoint.
🛠 Create a file auth0_user.dart in the /lib/models/ directory with the following:
// /lib/models/auth0_user.dart
import 'package:json_annotation/json_annotation.dart';
part 'auth0_user.g.dart';
()
class Auth0User {
Auth0User({
required this.nickname,
required this.name,
required this.email,
required this.picture,
required this.updatedAt,
required this.sub,
});
final String nickname;
final String name;
final String picture;
(name: 'updated_at')
final String updatedAt;
// userID getter to understand it easier
String get id => sub;
final String sub;
final String email;
factory Auth0User.fromJson(Map<String, dynamic> json) =>
_$Auth0UserFromJson(json);
Map<String, dynamic> toJson() => _$Auth0UserToJson(this);
}🛠 Like Auth0IdToken, Auth0User uses the json_annotation library to generate code to serialize and deserialize its instances. Run the following command to generate that code:
flutter pub run build_runner build --delete-conflicting-outputs🛠 This completes the model for Auth0 users, so let’s create a getUserDetails() method for the AuthService class as follows:
// /lib/services/auth_service.dart

 Future<Auth0User> getUserDetails(String accessToken) async {
    final url = Uri.https(
      AUTH0_DOMAIN,
      '/userinfo',
    );

    final response = await http.get(
      url,
      headers: {'Authorization': 'Bearer $accessToken'},
    );

    print('getUserDetails ${response.body}');

    if (response.statusCode == 200) {
      return Auth0User.fromJson(jsonDecode(response.body));
    } else {
      throw Exception('Failed to get user details');
    }
  }
🛠 getUserDetails() uses Dart’s http library, so add this import statement at the top of the file:
// /lib/services/auth_service.dart

import 'package:http/http.dart' as http;
🛠 Since you will need to reuse idToken, profile, and accessToken throughout the application, it would be nice to store their values as members of AuthService to access them easily. Add these instance variables to AuthService:
// /lib/services/auth_service.dart

  Auth0User? profile;
  Auth0IdToken? idToken;
  String? auth0AccessToken;
🛠 You can create a simple method, _setLocalVariables(), to store these local values. Add the following to AuthService:
// /lib/services/auth_service.dart

  Future<String> _setLocalVariables(result) async {
    final bool isValidResult =
        result != null && result.accessToken != null && result.idToken != null;

    if (isValidResult) {
      auth0AccessToken = result.accessToken;
      idToken = parseIdToken(result.idToken!);
      profile = await getUserDetails(result.accessToken!);

      if (result.refreshToken != null) {
        await secureStorage.write(
          key: REFRESH_TOKEN_KEY,
          value: result.refreshToken,
        );
      }

      return 'Success';
    } else {
      return 'Something is Wrong!';
    }
  }
If the Access Token and ID Token are available, it stores their values. If the Refresh Token is also available, it writes its value to secure storage, and that value is retrievable only with the Refresh Token key.
🛠 With the changes you have made, you can now update AuthService’s login() method to return the response for a successful login. Update the method so that it looks like this:
// /lib/services/auth_service.dart

Future<String> login() async {
    try {
      final authorizationTokenRequest = AuthorizationTokenRequest(
        AUTH0_CLIENT_ID,
        AUTH0_REDIRECT_URI,
        issuer: AUTH0_ISSUER,
        scopes: ['openid', 'profile', 'offline_access', 'email'],
      );

      final AuthorizationTokenResponse? result =
          await appAuth.authorizeAndExchangeCode(
        authorizationTokenRequest,
      );

      return await _setLocalVariables(result);
    } on PlatformException {
      return 'User has cancelled or no internet!';
    } catch (e) {
      return 'Unkown Error!';
    }
  }
You can catch any exceptions and return a specific response based on their type to handle errors better.
Handling the app’s initial state
The only thing missing is handling the authentication state when the app is launched. You might want to be able to silently login and retrieve a new Access Token if a Refresh Token is available.
🛠 Let’s add a new method, init(), to deal with the app’s initial state. Implement this method by adding the following to AuthService:
// /lib/services/auth_service.dart

  Future<bool> init() async {
    final storedRefreshToken = await secureStorage.read(key: REFRESH_TOKEN_KEY);

    if (storedRefreshToken == null) {
      return false;
    }

    try {
      final TokenResponse? result = await appAuth.token(
        TokenRequest(
          AUTH0_CLIENT_ID,
          AUTH0_REDIRECT_URI,
          issuer: AUTH0_ISSUER,
          refreshToken: storedRefreshToken,
        ),
      );
      final String setResult = await _setLocalVariables(result);
      return setResult == 'Success';
    } catch (e, s) {
      print('error on Refresh Token: $e - stack: $s');
      // logOut() possibly
      return false;
    }
}init() checks for a Refresh Token in secure storage and immediately returns false if there isn’t one. However, if it finds a Refresh Token, init() passes the retrieved request token via a TokenRequest object to appAuth.token() in order to automatically get new access, ID, and Refresh Tokens without requiring the user to log in manually.
Enabling login on the home screen
Now that you have the underlying methods for login and initial setup, it’s time to implement similar methods for the app’s screens, whose code is in the /lib/screens/ directory.
🛠 The app’s home screen is implemented in the HomeScreen class, located in /lib/screens/home.dart. Open that file and add this line to the other import statements:
// /lib/screens/home.dart

import 'package:mjcoffee/services/auth_service.dart';
Now scroll past the HomeScreen class to the _HomeScreenState class. You’ll need to make some changes to this class.
🛠 The first set of changes is to the instance variables at the start of _HomeScreenState. Change them to the following:
// /lib/screens/home.dart

    bool isProgressing = false;
    bool isLoggedIn = false;
    String errorMessage = '';
    String? name;
🛠 The initState() method is just below those variables. Right now, the only thing it does is call its counterpart in the superclass. Replace the implement init action comments with a call to initAction(). The method should look like this:
// /lib/screens/home.dart
void initState() {
initAction();
super.initState();
}You’ll implement initAction() shortly.
Finally, look at the build() method, which defines the home screen’s user interface. Scroll through this method until you find this Row() function call:
Row(
  mainAxisAlignment: MainAxisAlignment.center,
  children: <Widget>[
    if (isProgressing)
      CircularProgressIndicator()
    else if (!isLoggedIn)
      CommonButton(
        onPressed: () {
            CoffeeRouter.instance.pushReplacement(MenuScreen.route());
            /// ----------------------
            /// Implement login action
            /// ----------------------
        },
        text: 'Login | Register',
      )
    else
      Text('Welcome $name'),
  ], // <Widget>[]
),
🛠 Replace the Implement login section comments so that the Row() function call in the build looks like this:
Row(
  mainAxisAlignment: MainAxisAlignment.center,
  children: <Widget>[
    if (isProgressing)
      CircularProgressIndicator()
    else if (!isLoggedIn)
      CommonButton(
        onPressed: loginAction,
        text: 'Login | Register',
      )
    else
      Text('Welcome $name'),
  ], // <Widget>[]
),
🛠 Now add these methods to _HomeScreenState, after the build() method:
setSuccessAuthState() {
  setState(() {
    isProgressing = false;
    isLoggedIn = true;
    name = AuthService.instance.idToken?.name;
  });

  CoffeeRouter.instance.push(MenuScreen.route());
}

setLoadingState() {
  setState(() {
    isProgressing = true;
    errorMessage = '';
  });
}

Future<void> loginAction() async {
  setLoadingState();
  final message = await AuthService.instance.login();
  if (message == 'Success') {
    setSuccessAuthState();
  } else {
    setState(() {
      isProgressing = false;
      errorMessage = message;
    });
  }
}

initAction() async {
  setLoadingState();
  final bool isAuth = await AuthService.instance.init();
  if (isAuth) {
    setSuccessAuthState();
  } else {
    setState(() {
      isProgressing = false;
    });
  }
}
Some notes about these methods:
initAction()is called when the home screen is initiated and handles the case where the app has a Refresh Token.- The
Row()function call in thebuild()method determines what the user sees based on their login status. When the user is logged in, the screen shows a welcome message containing the user’s name. When the user isn’t logged in, it shows a progress indicator if the login is in progress, or the “Login | Register” button otherwise. - Pressing the “Login | Register” button causes the
loginAction()method to be called. - A loading indicator will appear if the login is in progress.
- A number of methods call
setSuccessAuthState(), which set the home screen’s instance variables to the appropriate values and redirects the user to the proper screen. In case some operation fails, you can easily display an error message onscreen.
Logging in
🛠 If you’ve made it this far, you’ve done well, and it’s now time to see what you’ve achieved so far. Make sure your emulators or devices are active and stop any earlier versions of this app. Once you’ve done that, run the app using this command:
flutter run -d all --dart-define=AUTH0_DOMAIN=[YOUR DOMAIN] --dart-define=AUTH0_CLIENT_ID=[YOUR CLIENT ID]Once the app is loaded, tap on the "Login | Register" button.
On iOS, when you run the app for the first time, you will see a prompt like this:
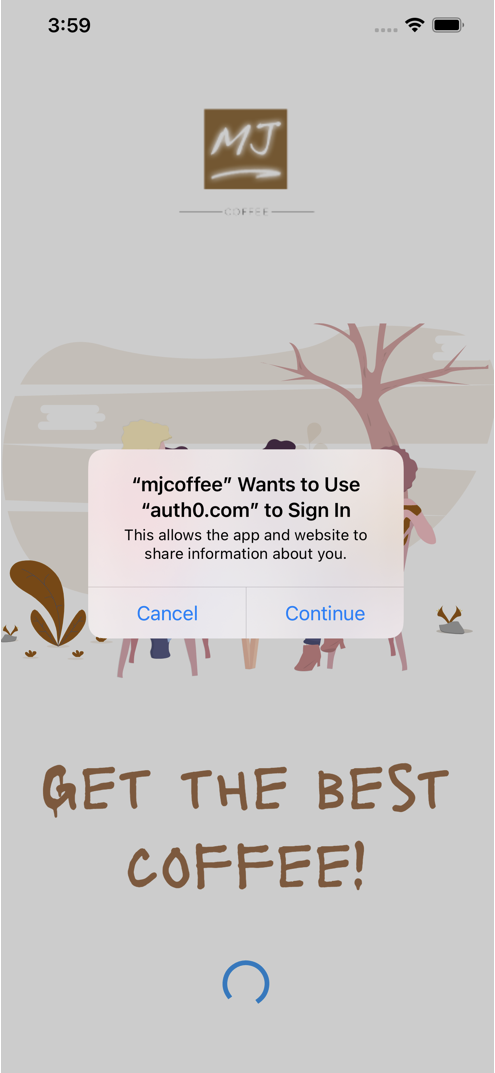
This prompt is a result of iOS’ ASWebAuthenticationSession, a session where the user is authenticated through a web service. iOS is notifying the user that the app intends to log the user in using Auth0.
If you tap “Continue” and all goes well, you will see the Auth0 Universal Login page, shown below (the Android version is on the left, and the iOS version is on the right):

Note that you can style this page or even choose other templates in the Auth0 dashboard. Watch this video to learn more about the theming of the login page in Auth0.
Once you log in, you will be redirected to the application, where you’ll be greeted by name. You’ll then be redirected to the menu screen, as specified by the final line in _HomeScreenState’s setSuccessAuthState() method:
CoffeeRouter.instance.push(MenuScreen.route());If you signed up for a new account using the app, you might receive a confirmation email from Auth0 for the app.
🛠 To confirm that the Refresh Token works, terminate the app, and run it again. The application will retrieve the Refresh Token from a secure store, get a new Access Token and ID Token, and then take you straight to the menu screen, bypassing the login process and not asking for your credentials.
Simple Logout
Layers of sessions
Every login requires logout! It’s more complicated than it looks since there are typically three-session layers you need to consider:
- Application Session Layer: This is the application, which in this case is the MJ Coffee app.
- Auth0 Session Layer: Auth0 maintains a session for each logged-in user and stores their information inside a cookie or in some other way.
- Identity Provider Session Layer: This is another service providing identity services, such as Facebook or Google.
After users log out, you can redirect users to a specific URL. You need to register the redirect URL in your tenant or application settings.
One of the parameters for OIDC authentication requests is called prompt, which specifies how the user should be prompted for reauthentication and consent. It also makes it easy to clear sessions.
prompt takes a list that can contain any combination of these values:
none: Do not display any authentication or consent user interface pages.login: Ignore any existing session and require the user to log in.consent: Ask the user for consent before returning information to the app.select_account: Show a prompt asking the user to select a user account. Useful in cases where the user has multiple accounts.
🛠 Luckily, prompt is supported in the AppAuth SDK. In the AuthService class (located in /lib/services/auth_service.dart) locate the login() method, where you have constructed AuthorizationTokenRequest. Change your call to the AuthorizationTokenRequest constructor so that it includes login as a prompt value:
// /lib/services/auth_service.dart

final authorizationTokenRequest = AuthorizationTokenRequest(
  AUTH0_CLIENT_ID,
  AUTH0_REDIRECT_URI,
  issuer: AUTH0_ISSUER,
  scopes: ['openid', 'profile', 'offline_access', 'email'],
  promptValues: ['login'],
);
Remove the Refresh Token
Thanks to the Refresh Token, the user should be able to switch to another app or even close it and then return to MJ Coffee without having to re-authenticate because they’re still logged in. Logging out implies that the user is done with the app for now. The next time someone uses the app, they should be required to log in. This is done by removing the Refresh Token.
🛠 To remove the Refresh Token, we’ll need to remove the Refresh Token key from secure storage. Add this logout() method to AuthService, just after the login() method:
// /lib/services/auth_service.dart

Future<void> logout() async {
  await secureStorage.delete(key: REFRESH_TOKEN_KEY);
}
The next time the user runs the app, they’ll be sent to the home screen and its login button since the app no longer has a Refresh Token and hence no way to authenticate automatically.
While this is approach is sufficient for the MJ Coffee app, I would like to mention that you can also manually call logout endpoints and pass necessary parameters, and shown in the example below:
// Example:

Future<bool> logout() async {
  await secureStorage.delete(key: REFRESH_TOKEN_KEY);

  final url = Uri.https(
      AUTH0_DOMAIN,
      '/v2/logout',
      {
        'client_id': AUTH0_CLIENT_ID,
        'federated': '',
        //'returnTo': 'YOUR_RETURN_LOGOUT_URL'
      },
    );

    final response = await http.get(
      url,
      headers: {'Authorization': 'Bearer $auth0AccessToken'},
    );

    print(
      'logout: ${response.request} ${response.statusCode} ${response.body}',
    );

    return response.statusCode == 200;
}
For more information, you can read Auth0’s documentation on logout.
🛠 Let’s enable the “Logout” button. It is on the profile screen, which is implemented by the ProfileScreen class (located in /lib/screens/profile.dart). In the build() method, locate the “Logout” button and its onPressed parameter. Replace the “Perform logout” comments so that the call to the Padding() function looks like this:
// /lib/screens/profile.dart

Padding(
  padding: const EdgeInsets.symmetric(horizontal: 30),
  child: CommonButton(
    onPressed: () async {
      await AuthService.instance.logout();
      CoffeeRouter.instance.pushReplacement(HomeScreen.route());
    },
    text: 'Logout',
  ),
);
When the user presses “Logout”, the AuthService instance’s logout() is called and the user is redirected to the home screen.
🛠 Since you’re making use of AuthService’s logout() method, you’ll have to import its file. Add the following to the import statements at the top of /lib/screens/profile.dart:
import 'package:mjcoffee/services/auth_service.dart';🛠 Restart your application, go to the Profile screen and log out. You’ll be sent back to the home screen. You will have to log in to use the app again.
Conclusion
Congratulations! You have just integrated Auth0-powered login and logout into the MJ Coffee app.
In an upcoming section, you will continue to add authentication features to the app. You’ll learn more about Refresh Token rotation, managing the branding that appears in the login box, roles and adding social login via Apple and Google accounts.


