---
title: "Create Secure Angular Apps in the Cloud with StackBlitz and Auth0"
description: "Learn how to create Angular applications secured by Auth0 using StackBlitz, an online cloud IDE for Angular and React web applications powered by Visual Studio Code."
authors:
- name: "Dan Arias"
url: "https://auth0.com/blog/authors/dan-arias/"
date: "Aug 7, 2018"
category: "Developers,Tutorial,Angular"
tags: ["stackblitz", "angular", "javascript", "cloud", "authentication", "auth", "ide"]
url: "https://auth0.com/blog/how-to-create-angular-apps-with-auth0-and-stackblitz/"
---
# Create Secure Angular Apps in the Cloud with StackBlitz and Auth0
Auth0 is proud to be a sponsor of the [StackBlitz](https://stackblitz.com/) platform. StackBlitz is an online IDE for web applications that is powered by [Visual Studio Code](https://code.visualstudio.com/). The platform feels as quick and flexible as its desktop counterpart. It offers us developers with great features such as:
- Intellisense, Project Search (Cmd/Ctrl+P), Go to Definition, and other key Visual Studio Code features.
- Hot reloading as we type.
- Importing NPM packages into a project.
- Editing while offline thanks to a revolutionary in-browser dev server.
- A hosted app URL where we see (or share) our live application at any time.
- And [many other great features](https://medium.com/@ericsimons/stackblitz-online-vs-code-ide-for-angular-react-7d09348497f4).
In this blog post, we are going to learn how easy and convenient is to build the foundation of an Angular app in the cloud using StackBlitz and to secure it with Auth0.
## Getting Familiar with StackBlitz
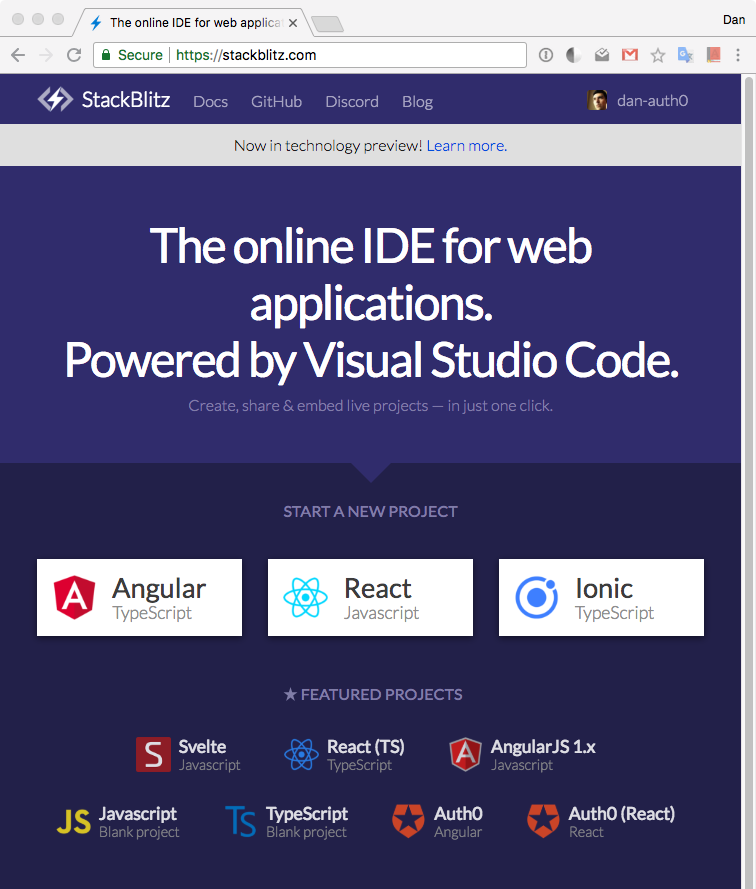
Getting started with StackBlitz is super easy. Let's point our browser to [`https://stackblitz.com`](https://stackblitz.com/). Once there, notice the `Start a New Project` section that offers us different options to get started.
At the moment of this writing, the options are Angular, React, and Ionic. Just below that area, StackBlitz offers a `Featured Projects` section that includes two quickstarts from Auth0: Angular and React. Let's go ahead and click on the `Auth0 Angular` one.
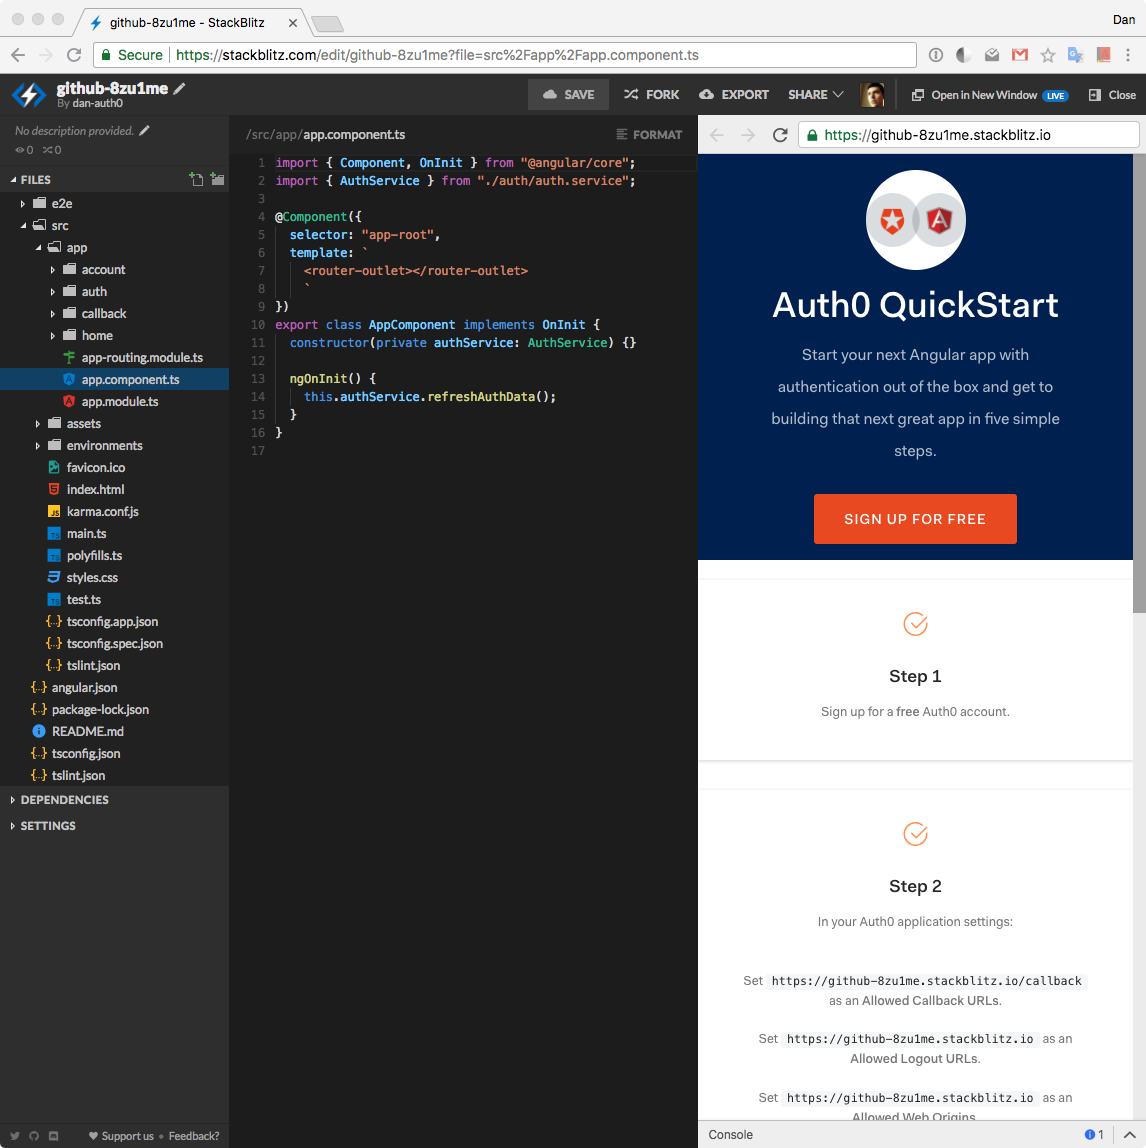
In a few seconds, StackBlitz scaffolds a brand new project environment for us complete with an online code editor and a browser preview, all within the same browser window!
Some cool StackBlitz features to mention here:
- StackBlitz lets us save our progress so that we can leave the browser and resume our work later on. To save our work, we can sign up with GitHub to create a StackBlitz profile.
- Our profile showcases all of the work that we have saved in the platform, which effectively allows us to use StackBlitz as an online portfolio that we can share with others. We can think of it as a **live code resume**!
- We can also run our GitHub projects in StackBlitz and continue their development in the online editor. StackBlitz currently supports projects using `@angular/cli` and `create-react-app`. Support for Ionic, Vue, and custom webpack configs is coming soon!
- Run the project GitHub repo by providing the username + repo name: `stackblitz.com/github/{GH_USERNAME}/{REPO_NAME}`
- Optionally, specify a branch, tag, or commit: `.../github/{GH_USERNAME}/{REPO_NAME}/tree/{TAG|BRANCH|COMMIT}`
- We can also provide our project with a custom name that would be reflected in its URL. To do this, locate the project name in the top-left corner, click on the pencil icon, and provide it a new unique name.
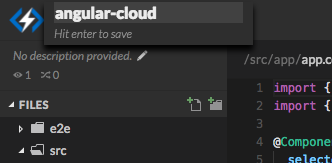
I am naming mine `angular-cloud`. If we take a look at my browser preview domain, we can see that now I also have a custom domain:
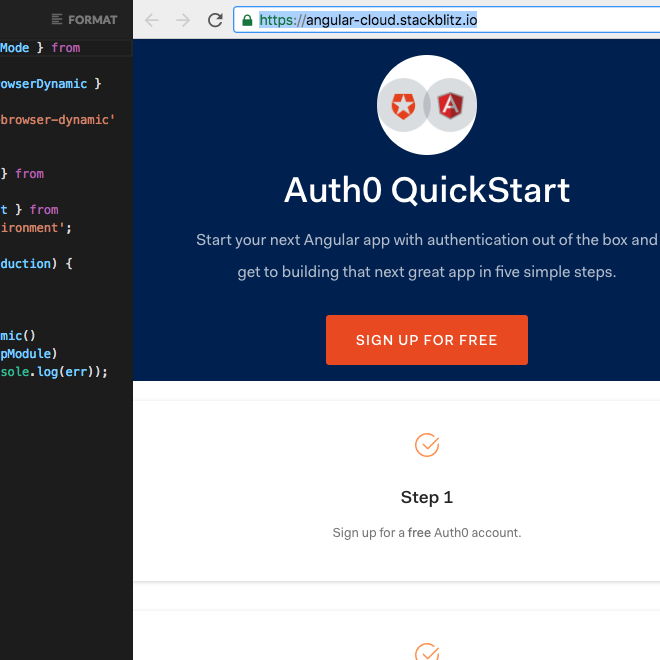
We are going to refer to this URL as the `` throughout this tutorial. It is the root URL of our StackBlitz application.
This is very similar to what GitHub does with Github pages! I can share that link with anyone I want to check out my app online. The biggest and most useful difference is that the code is alive on StackBlitz! Other people can interact with my code instead of it being static. They can also fork my project to make it their own and make any changes to it. That is definitely one of the best features of **StackBlitz: living code**.
We can hide the preview browser by clicking on the top-right corner `Close` button. But something better to do is to click on `Open in New Window`. If we do that, StackBlitz opens our app preview into a separate browser tab. We can detach that from our browser and position side to side with the editor window. Just like that, we have recreated the usual editor and browser setup. When we make any changes in the code editor, the preview tab is live and reflects the new changes super fast.
Notice on the editor tab that we have a full working project directory. StackBlitz scaffolds the foundation of our project.
As a first step, let's jump into the browser preview and learn how to get started with Auth0.
## Authentication in Five Steps
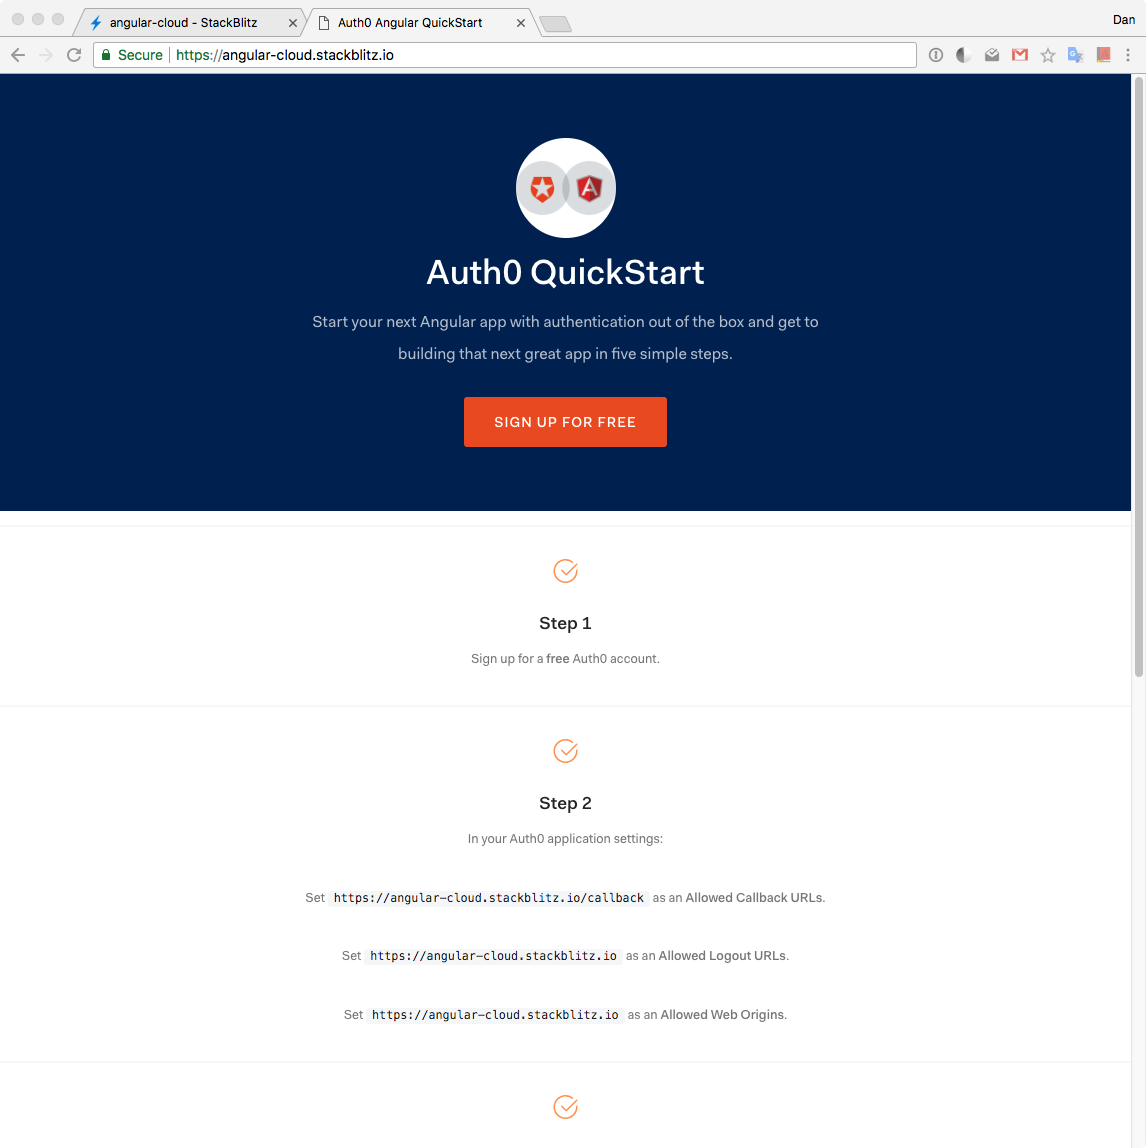
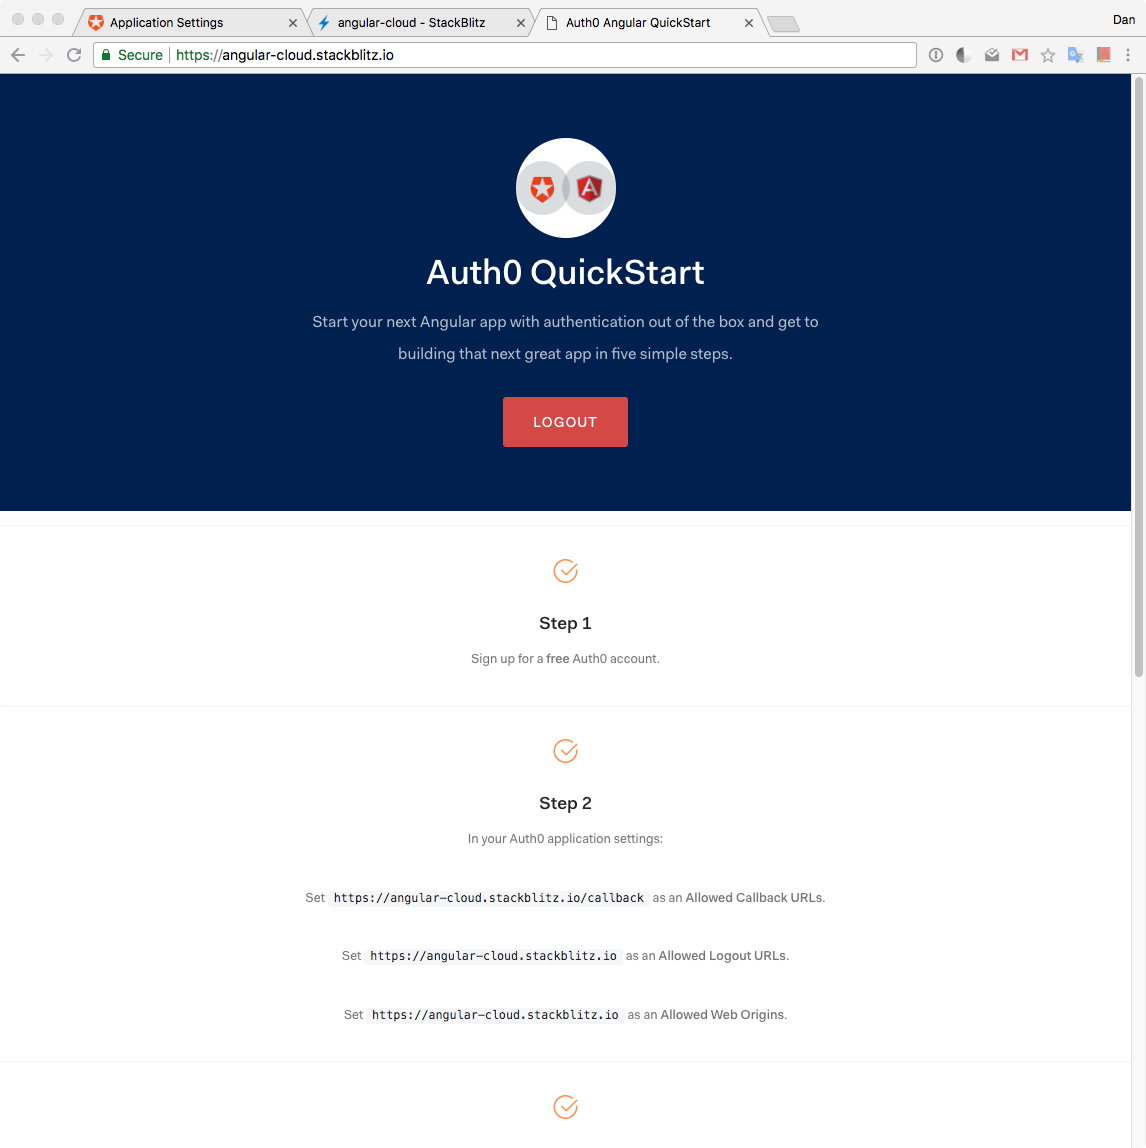
In the browser preview, we have a page that lists all the needed steps to enable authentication through Auth0 in this Angular application that lives in StackBlitz.
Auth0 is a global leader in [Identity-as-a-Service (IDaaS)](https://www.webopedia.com/TERM/I/idaas-identity-as-a-service.html). It provides thousands of customers with a Universal Identity Platform for their web, mobile, IoT, and internal applications. Our extensible platform seamlessly authenticates and secures more than 2.5B logins per month, making it loved by developers and trusted by global enterprises.
The best part of the Auth0 platform is how streamlined is to get started. Let's follow the five steps listed in the page and discuss them in detail.
### Step 1: Signing Up and Creating an Auth0 Application
Sign up for a free Auth0 account here or click on the sign up button in the page. You can start for free and save time with Auth0. A free account offers us:
- 7,000 free active users & unlimited logins.
- [Lock](https://auth0.com/lock) for Web, iOS & Android.
- Up to 2 [social identity providers](https://auth0.com/docs/identityproviders) like Facebook, Github, and Twitter.
- Unlimited [Serverless Rules](https://auth0.com/docs/rules/current).
During the sign-up process, we are going to create something called a _Tenant_, which represents the product or service to which we are adding authentication. More on this in a moment.
Once we are signed in, we are welcomed into the Auth0 Dashboard. In the left sidebar menu, let's [click on "Applications"](https://manage.auth0.com/#/applications). Let's understand better what this area represents.
Let's say that we have a photo-sharing app called Auth0gram. We then would create an _Auth0 tenant_ called `auth0gram`. From a customer perspective, Auth0gram is that customer's product or service. Auth0gram is available as a web app that can be accessed through desktop and mobile browsers and as a native mobile app for iOS and Android. That is, Auth0gram is available on 3 platforms: web as a single-page application, Android as a native mobile app, and iOS also as a native mobile app. If each platform needs authentication, then we would need to create 3 _Auth0 applications_ that would connect with each respective platform to provide the product all the wiring and procedures needed to authenticate users through that platform. Auth0gram users would belong to the _Auth0 tenant_ and are shared across _Auth0 applications_. If we have another product called "Auth0shop" that needs authentication, we would need to create another tenant, `auth0shop`, and create new Auth0 applications for it depending on the platforms where it lives.
With this knowledge, in "Applications", click on the button "Create Application". A modal titled "Create Application" will open up. We have the option to provide a `Name` for the application and choose its type.
I'll name this app the same as my StackBlitz one, `angular-cloud`. Your StackBlitz app will be named something different, feel free to use any names you like. Next, let's choose `Single Page Web Applications` as the type:
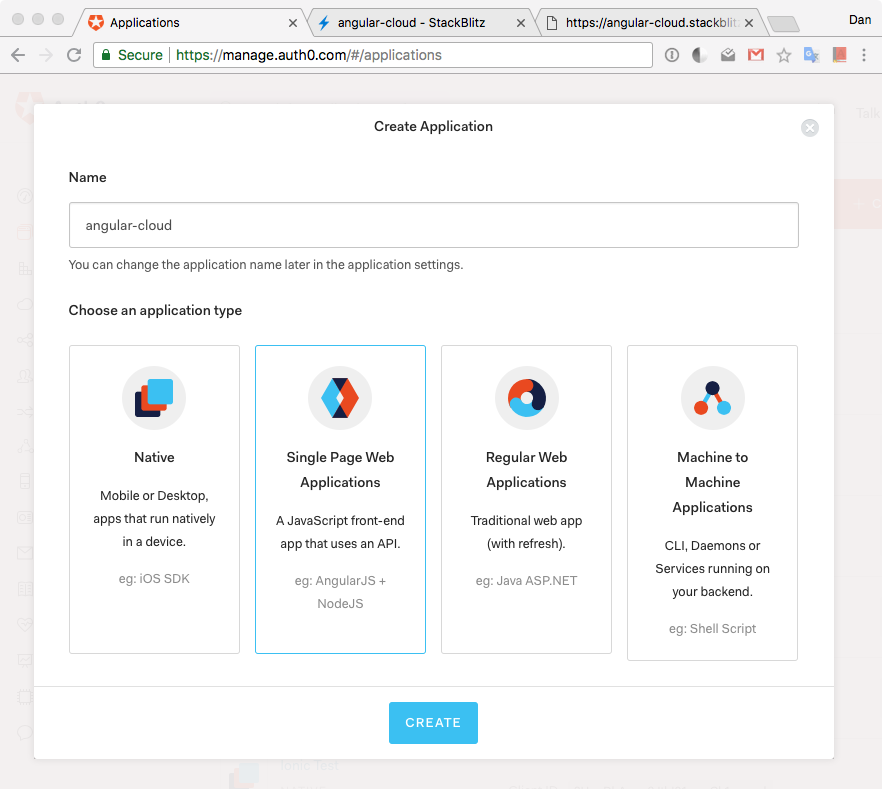
Let's click "Create". We are going to be welcomed by a view that asks us "What technology are you using for your web app?". This is a tool that we've created at Auth0 to provide you different quickstarts to get you up and running fast in setting up Auth0 within a project. Feel free to choose Angular and check out the content of that quickstart, but for this app, I am giving you the quick steps that relate to setting up Auth0 specifically for the StackBlitz architecture; therefore, let's continue here.
In the next step, we are going to discuss how to help Angular and Auth0 communicate.
### Step 2: Creating a Communication Bridge Between Angular and Auth0
One of the offerings of Auth0 to reduce the overhead of adding and managing authentication is our [Universal Login](https://auth0.com/docs/hosted-pages/login) page. Auth0's Universal Login is the most secure way to easily authenticate users for your applications.
How does [Universal Login work](https://auth0.com/docs/hosted-pages/login#how-does-universal-login-work)
Auth0 shows the login page whenever something (or someone) triggers an authentication request. Users will see the login page provided by Auth0. Once they log in, they will be redirected back to our application. With security in mind, for this to happen, we have to specify in the Auth0 Settings to what URLs Auth0 can redirect users once they are authenticated.
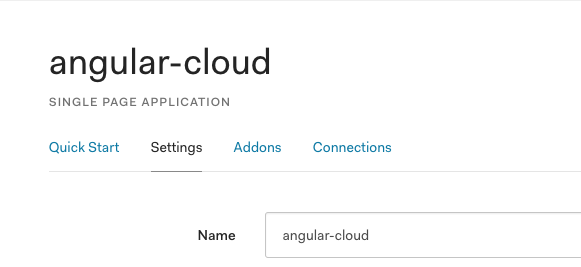
Let's click on the **Settings** tab.
Once there, let's scroll down until we see **"Allowed Callback URLs"**. We are going to specify here where we want Auth0 to redirect our users after they are authenticated: `/callback`.
In my case, I am going to paste the following URL:
`https://angular-cloud.stackblitz.io/callback`
As before, use the value of your StackBlitz app URL. Why do we need to append `/callback` to the root domain? As we are going to see later, we'd want to redirect users to a special Angular component (a view) that processes and saves authentication data in memory and sets a flag in `localStorage` indicating that the user is logged in.
We also need to tell Auth0 where to redirect a user when they log out. We are going to use the root URL of our application as that target route. Therefore, let's paste the `` in the **"Allowed Logout URLs"** field.
In my case, I am going to paste `https://angular-cloud.stackblitz.io` there.
> **Note:** If you copy the `` from the browser it may come with a forward slash at the end (`/`). You may remove it after pasting it in the field.
After the user authenticates or logs out, Auth0 will only call back to any of the URLs listed in these fields.
Finally, we need to enable Cross-Origin Authentication. [What is Cross-Origin Authentication?](https://auth0.com/docs/cross-origin-authentication#what-is-cross-origin-authentication-) When authentication requests are made from our application to Auth0, the user's credentials are sent to a domain which differs from the one that serves our application. Collecting user credentials in an application served from one origin and then sending them to another origin can present certain security vulnerabilities, including the possibility of a phishing attack.
Auth0 provides a [cross-origin authentication flow](https://raw.githubusercontent.com/jaredhanson/draft-openid-connect-cross-origin-authentication/master/Draft-1.0.txt) which makes use of [third-party cookies](https://developer.mozilla.org/en-US/docs/Web/HTTP/Cookies#Third-party_cookies). The use of third-party cookies allows Auth0 to perform the necessary checks to allow for secure authentication transactions across different origins. This **helps to prevent phishing** when creating a single sign-on experience with the Lock widget or a custom login form in our application and it also helps to create a secure login experience even if single sign-on is not the goal.
To allow transactions between our Angular app origin and Auth0, we need to add our root URL, ``, to the **Allowed Web Origins** field in the "Settings".
In my case, I am adding `https://angular-cloud.stackblitz.io/` as its value.
Save these settings by scrolling down and clicking on `Save Changes` or pressing `CMD`/`CTRL` + `S`.
### Step 3: Adding Auth0 Configuration Variables to Angular
From the Auth0 Application, we need configuration variables to allow our Angular application to use the communication bridge we previously created. Within the Auth0 Application Settings page, we need the following variables:
- **Domain**
When we created our new account with Auth0, we were asked to pick a name for our Tenant. This name, appended with `auth0.com`, will be our Auth0 Domain. It's the base URL we will be using to access the Auth0 API and the URL where users are redirected in order to authenticate.
> [Custom domains](https://auth0.com/docs/getting-started/the-basics#custom-domains) can also be used to allow Auth0 to do the authentication heavy lifting for us without compromising on branding experience.
- **Client ID**
[Each application is assigned a Client ID upon creation](https://auth0.com/docs/getting-started/the-basics). This is an alphanumeric string and it's the unique identifier for our application (such as `q8fij2iug0CmgPLfTfG1tZGdTQyGaTUA`). It cannot be modified and we will be using it in our application's code when we call Auth0 APIs.
> **Warning:** Another important piece of information present in the "Settings" is the **Client Secret**. It [protects your resources by only granting tokens to requestors if they're authorized](https://auth0.com/docs/applications/how-to-rotate-client-secret). Think of it as your application's password which must be kept confidential at all times. If anyone gains access to your Client Secret they can impersonate your application and access protected resources.
In the next section, we will discuss the Angular project structure present on StackBlitz. For now, let's start wiring our Angular app with Auth0. Open the `environment.ts` file present in the `src/environments/` folder. We need to replace the property values of the `auth` object with values from the "Settings" as follows:
```typescript
// src/environments/environment.ts
export const environment = {
production: false,
auth: {
CLIENT_ID: "[YOUR_CLIENT_ID]",
CLIENT_DOMAIN: "[YOUR_AUTH0_DOMAIN]", // e.g., 'you.auth0.com'
REDIRECT: "[OUR-AUTH0-CALLBACK]",
LOGOUT_URL: "[YOUR-AUTH0-LOGOUT-URL]"
}
};
```
- `CLIENT_ID` value with the "Client ID" value.
- `CLIENT_DOMAIN` value with "Domain" value.
- `REDIRECT` value with "Allowed Callback URLs" value.
- `LOGOUT_URL` value with "Allowed Logout URLs" value.
We'll use these variables to let our application identify itself as an authorized party to interact with the Auth0 authentication server.
### Step 4: Log in
Press the login button to test that we are communicating correctly with Auth0 and that we can get authenticated.
If everything was set up correctly, we are going to be redirected to the [Universal Login page](https://auth0.com/docs/hosted-pages/login).
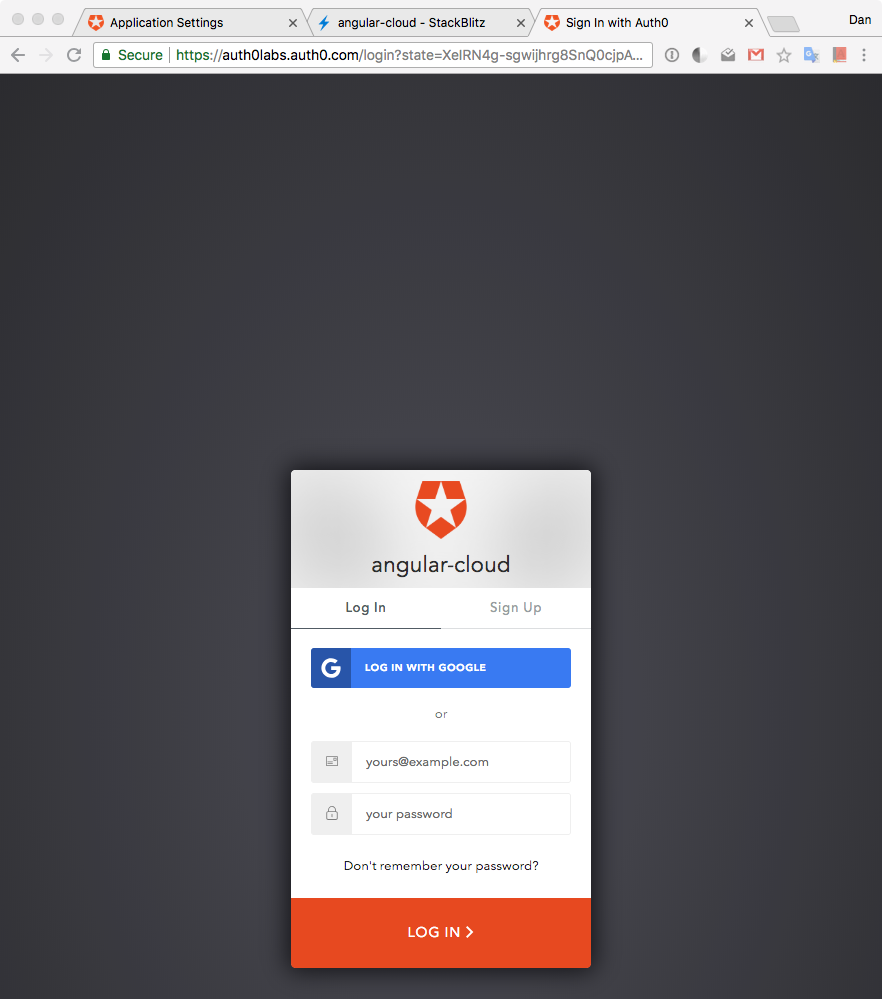
As explained earlier, this login page is provided by Auth0 with batteries included. It powers not only the login but also the signup of new users into our application. If you have any existing user already, go ahead and log in; otherwise, sign up as a new user.
> Alternatively, you may also sign up and log in with Google.
An advantage of the Universal Login page is that it is part of the Auth0 domain, not StackBlitz or our Angular app. It lets us delegate the process of user authentication, including registration, to Auth0 which makes it both convenient and secure.
Unless you signed up with Google, if you created a new user through the sign-up process, you will receive an email asking you to verify your email. There are tons of settings that we can tweak to customize the signup and login experience of our users, such as [requiring a username for registration](https://auth0.com/docs/connections/database/require-username). Feel free to check out the different options presented to you by Auth0 within the Dashboard and the [Auth0 documentation](https://auth0.com/docs).
Once we signed up or logged in, we are taken back to our Angular app hosted at StackBlitz. Notice that the button in the jumbotron (the giant header at the top of the page) changed from `Login` to `Logout`, which means that we are authenticated.
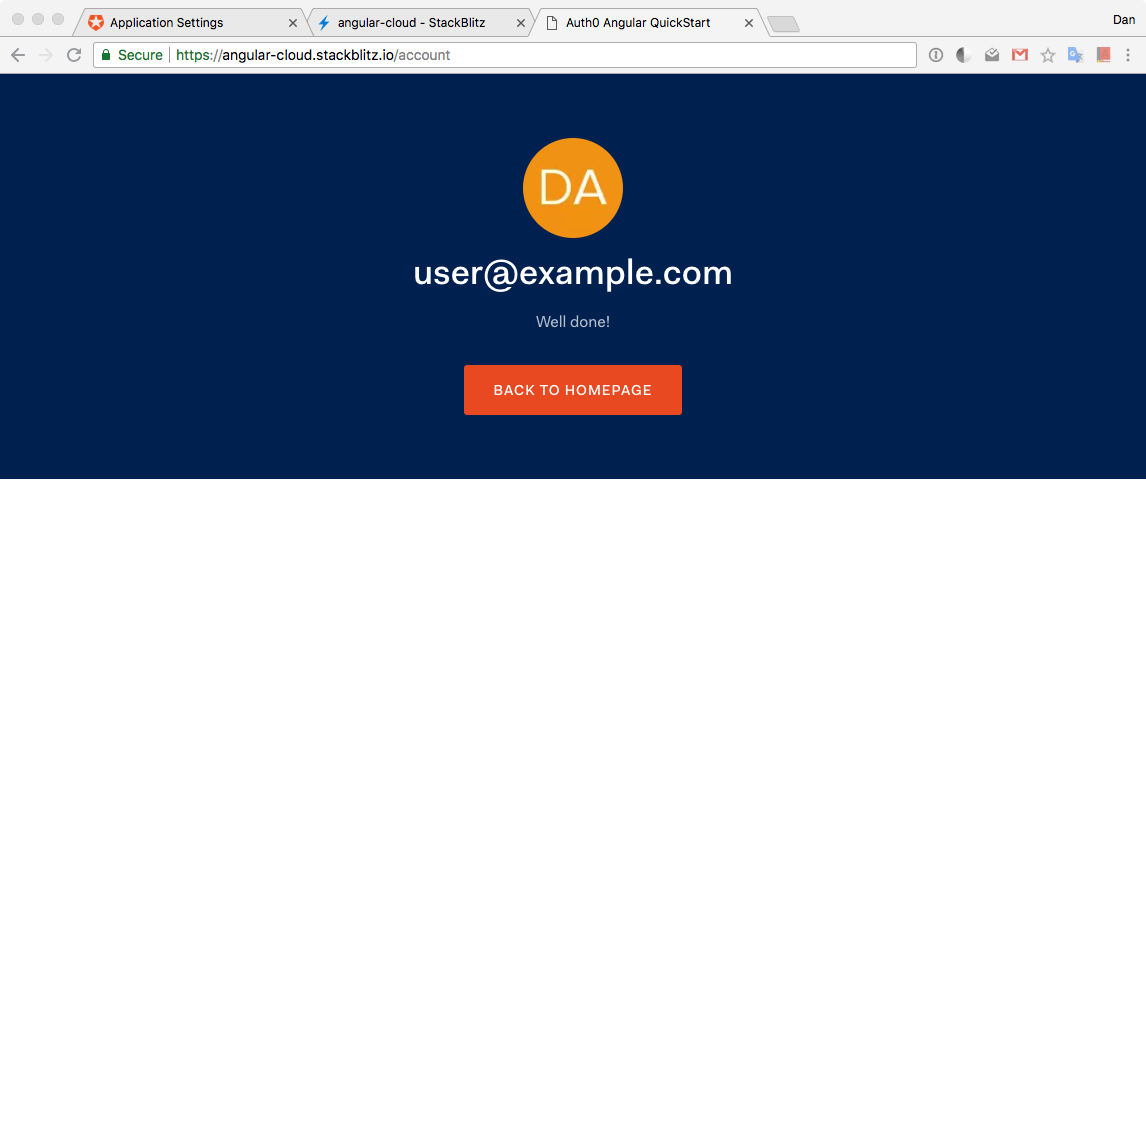
### Step 5: Accessing Guarded Routes
Our application uses Angular to guard the `/account` route. Angular route guards are for the UI only. They don't confer any security when it comes to accessing an API. However, if we were to enforce authentication and authorization in our API (as we should do in all our apps), we could take advantage of guards to authenticate and redirect users as well as stop unauthorized navigation.
The `/account` route guard prevents navigation to it if the user is not authenticated. Since we have logged in, when we click on the `guarded route` link that points to `/account`, we are successfully taken to that view. In case that we were logged out, we would remain on the home screen.
### Authentication Integration Completed
That's it! All that is left is for you to continue building your project in StackBlitz or to export the project locally by downloading it. Feel free to dive deeper into the [Auth0 Documentation](https://auth0.com/docs/getting-started) to learn more about how Auth0 helps you save time on implementing and managing identity. However, in the next sections, we'll explore what is happening under-the-hood of our Angular application in relation to authentication with Auth0.
> As a bonus, feel free to click the logout button. You'll be taken to the home page as specified in `environment.ts`.
## Auth0 Angular Starter
This application was created using the [Angular CLI](https://cli.angular.io/); thus, the project structure may feel familiar. Our application code centers around the contents of the `src` folder.
Within the `src` folder we find:
- `app` directory: It holds all the constructs that belong to the app and build it.
- `environments` directory: It holds configuration for different environments such as `development` and `production`.
- `index.html`: The entry point for the frontend application.
- `main.ts`: The entry point for the Angular application.
- `polyfills.ts`: This file includes polyfills needed by Angular and is loaded before the app. You can add your own extra polyfills to this file.
- `styles.css`: Application-wide (global) styles. Add your own to customize the app's look.
Inside the `app` folder is where the core Angular development happens. Here we find:
- `app.module.ts`, which bootstraps the application using the `app.component.ts`.
- `app-routing.module.ts`, which defines the root routes of the app.
- We have three folders that define components of the app:
- `home`: Holds a component that defines the Home view of our app.
- `callback`: The route that points to this component will be called by Auth0 once it completes the authentication process successfully. This component has logic that saves the authentication data returned by Auth0 in memory.
- `account`: Holds a component that defines an Account view that presents user profile information. This is a private view that requires authentication.
- We have an `auth` folder that holds everything related to the authentication feature of our application, which is powered by Auth0.
This is the gist of the project structure available to us. Next, let's learn about the authentication flow that this Angular application is following.
## Authentication Under the Hood
We were able to use authentication successfully and easily just like if it was magic. Let's now open the curtains and see Auth0 in action.
Within the `app/auth` folder we have two files:
- `auth.service.ts` creates a service that handles of all our authentication flow.
- `auth.guard.ts` creates a route guard based on authentication that we can use within our router configuration.
Let's explore fully the authentication flow and how the rest of our application interacts with the authentication service and route guard.
### Initializing the Authentication Service
When our application is built, `AuthService`, which lives in `auth.service.ts`, is initialized. `AuthService` is a service provided to the whole application by `AppModule`:
```typescript
// src/app/app.module.ts
// ...
import { AuthService } from "./auth/auth.service";
@NgModule({
declarations: [
AppComponent,
HomeComponent,
AccountComponent,
CallbackComponent
],
imports: [BrowserModule, AppRoutingModule],
providers: [AuthService],
bootstrap: [AppComponent]
})
export class AppModule {}
```
Notice that the only role of the `AuthService` constructor is to inject the Angular router, `Router`, in our application:
```typescript
// src/app/auth/auth.service.ts
export class AuthService {
// ...
constructor(private router: Router) {}
// ...
}
```
When `AuthService` is instantiated, we also create an instance of `auth0.WebAuth` that we store in a private variable called `_Auth0`. What is this?
[`auth0.WebAuth`](https://auth0.com/docs/libraries/auth0js/v9#initialization) initializes a new instance of an Auth0 application as follows:
```typescript
// src/app/auth/auth.service.ts
// ...
export class AuthService {
// Create Auth0 web auth instance
private _Auth0 = new auth0.WebAuth({
clientID: environment.auth.CLIENT_ID,
domain: environment.auth.CLIENT_DOMAIN,
responseType: "id_token token",
redirectUri: environment.auth.REDIRECT,
scope: "openid profile email"
});
// ...
}
```
`auth0.WebAuth` is a constructor that takes as argument an object with properties that serve as configuration options to the Auth0 application. The properties that this object requires are `domain` and `clientID` which, as we saw earlier, represent the Domain and Client ID variables from the Auth0 Application Settings.
> Earlier, we also updated those values in `src/environments/environment.ts` to match the Settings values.
The other two properties we should define that are optional are `responseType`, `redirectUri`, and `scope`.
`responseType` can be any space-separated list of the values `code`, `token`, and `id_token`, which are [tokens used by Auth0](https://auth0.com/docs/tokens). It defaults to `token` unless a `redirectUri` is provided, then it defaults to `code`. Here, we select both `id_token` and `token`.
[`id_token`](https://auth0.com/docs/tokens/id-token) is a [JSON Web Token (JWT)](https://auth0.com/docs/jwt) that contains user profile attributes represented in the form of [claims](https://www.iana.org/assignments/jwt/jwt.xhtml). The ID Token is consumed by the application and used to get user information like the user's name, email, and so forth, typically used for UI display.
`token` is a credential that can be used by an application to access an API. Auth0 uses Access Tokens to protect access to the [Auth0 Management API](https://auth0.com/docs/api/management/v2), for example.
We are going to display user profile information in the Account view so we need to request `id_token`. We also request `token` as an exercise since we are not going to be making any API request in the scope of this starter app, but it will be there if you decide to do so.
`redirectUri` represents the URL that we want Auth0 to call when it authenticates our users.
Lastly, `scope` is a string that indicates what are the default scope(s) used by the application.
[OpenID Connect (OIDC)](http://openid.net/connect/) is an authentication protocol that sits on top of [OAuth 2.0 Authorization Framework](https://tools.ietf.org/html/rfc6749), and allows the application to verify the identity of the users and obtain basic profile information about them in a interoperable way. This information can be returned in the ID Token we specified in the `responseType`, `"id_token token"`.
The basic and required scope for OpenID Connect is the `openid` scope. This scope represents the intent of the application to use the OIDC protocol to verify the identity of the user. In OpenID Connect (OIDC), we have the notion of claims. These claims are user attributes and are intended to provide the application with user details such as email, name, and picture.
We defined `scope` as follows:
```text
scope: "openid profile email"
```
We specify the required `openid` scope. The basic claim returned for the `openid` scope is the `sub` claim, which uniquely identifies the user. Applications can ask for additional scopes, separated by spaces, to request more information about the user. We also ask for the `profile` and `email` scopes.
The `profile` scope will request the claims representing basic profile information. These are `name`, `family_name`, `given_name`, `middle_name`, `nickname`, `picture`, and `updated_at`.
The `email` scope will request the `email` and `email_verified` claims.
When we specify `id_token` as a `responseType`, the Auth0 authentication server replies to our request with an object that will contain the `idTokenPayload` property. `idTokenPayload` has as properties the claims of the `openid`, `profile`, and `email` scopes that we specified. A decoded `id_token` looks like this;
```json
{
"name": "John Doe",
"nickname": "john.doe",
"picture": "https://myawesomeavatar.com/avatar.png",
"updated_at": "2017-03-30T15:13:40.474Z",
"email": "john.doe@test.com",
"email_verified": false,
"iss": "https://YOUR_AUTH0_DOMAIN/",
"sub": "auth0|USER-ID",
"aud": "YOUR_CLIENT_ID",
"exp": 1490922820,
"iat": 1490886820,
"nonce": "crypto-value",
"at_hash": "IoS3ZGppJKUn3Bta_LgE2A"
}
```
> You can read our [documentation on OIDC scopes](https://auth0.com/docs/scopes/current) for further details.
We'll use the Auth0 application stored in `_Auth0` throughout `AuthService`. We'll store the `idTokenPayload` object in an `userProfile$` observable. Within the `AccountComponent`, we are going to use the `name`, `nickname`, and `picture` properties to populate a user profile template.
### Logging In
The process of authentication is manually kicked when a user clicks on the login button. This action triggers the `login` method exposed by `AuthService`. In turn, `login` calls the `authorize` method of the `_Auth0` application instance:
```typescript
// src/app/auth/auth.service.ts
export class AuthService {
// ...
login = () => this._Auth0.authorize();
// ...
}
```
[`webAuth.authorize()`](https://auth0.com/docs/libraries/auth0js/v9#webauth-authorize-) can be used for logging in users via Universal Login, or via social connections. This method invokes the `/authorize` endpoint of the [Authentication API](https://auth0.com/docs/api/authentication) to [start an authentication/authorization transaction](https://github.com/auth0/auth0.js#api). It can take a variety of parameters via an options object.
Since we want to invoke the Universal Login page, we only need to call the `authorize()` method without any additional parameters.
As we learned, with Universal Login, users are taken to a login page hosted by Auth0. Here, users will enter their credentials and log in. If the login is successful, Auth0 will redirect the users to the callback URL we specified. Recall that our callback URL points to our `/callback` route. According to the router configuration in `app-routing.module.ts` this route calls the `CallbackComponent`:
```typescript
// app-routing.module.ts
// ...
const routes: Routes = [
{
path: "",
component: HomeComponent
},
{
path: "account",
component: AccountComponent,
canActivate: [AuthGuard]
},
{
path: "callback",
component: CallbackComponent
}
];
// ...
```
`CallbackComponent` is a super lean component. Its constructor injects `AuthService` and it has a method within its `ngOnInit` lifecycle hook that processes the successful login from Auth0, `handleLoginCallback()`:
```typescript
// src/app/callback/callback.component.ts
import { Component, OnInit } from "@angular/core";
import { AuthService } from "../auth/auth.service";
@Component({
selector: "app-callback",
template: `
Loading...
`
})
export class CallbackComponent implements OnInit {
constructor(private auth: AuthService) {}
ngOnInit() {
this.auth.handleLoginCallback();
}
}
```
Let's learn more on how we handle the callback from Auth0.
### Handling the Auth0 Callback from Authentication
`this.auth.handleLoginCallback()` is a method exposed by the public API of `AuthService`. When Auth0 redirects the user to our `/callback` route, it includes an authentication response with all the authentication data we requested as a URL hash fragment, which is appended to the `/callback` route.
We need to extract that data from the URL hash and save it in memory. To do that, we call the `webAuth.parseHash` method which we are going to manage using an `Observable` created through the `bindNodeCallback` method from RxJS. In order to preserve the scope of `this`, we'll `bind()` it like so:
```javascript
bindNodeCallback(this._Auth0.parseHash.bind(this._Auth0));
```
Here's the complete code:
```typescript
// src/app/auth/auth.service.ts
// Other imports
import { BehaviorSubject, bindNodeCallback, Observable, of } from "rxjs";
export class AuthService {
// ...
// Create observable of Auth0 parseHash method to gather auth results
parseHash$ = bindNodeCallback(this._Auth0.parseHash.bind(this._Auth0));
// ...
handleLoginCallback = () => {
if (window.location.hash && !this.authenticated) {
this.parseHash$().subscribe({
next: authResult => {
this._setAuth(authResult);
window.location.hash = "";
this.router.navigate([this.onAuthSuccessUrl]);
},
error: err => this._handleError(err)
});
}
};
// ...
}
```
> If you need a refresher on Observables, feel free to visit this [RxJS Observable Guide from the Angular Team](https://angular.io/guide/observables).
The contents of the `authResult` object returned by `this._Auth0.parseHash` depend upon which authentication parameters were used in the `responseType` of the `_Auth0` instance configuration. It can include:
- `accessToken`: An Access Token for the API.
- `expiresIn`: A string containing the expiration time (in seconds) of the `accessToken`.
- `idToken`: An ID Token JWT containing user profile information.
- `idTokenPayload`: A payload object that contains the specified `scope` claims.
Since we requested `id_token` and `token`, we get all these properties in the `authResult` object.
To save this data in memory, we call the auxiliary method, `_setAuth`:
```typescript
// src/app/auth/auth.service.ts
export class AuthService {
// ...
private _setAuth = authResult => {
// Save authentication data and update login status subject
// Observable of token
this.token$ = of(authResult.accessToken);
// Emit value for user data subject
this.userProfile$.next(authResult.idTokenPayload);
// Set flag in local storage stating this app is logged in
localStorage.setItem(this._authFlag, JSON.stringify(true));
};
// ...
}
```
This method plays a very important role. `_setAuth` receives as its argument the `authResult` object. At this point, we are certain that authentication was successful and we store a flag in [`localStorage`](https://developer.mozilla.org/en-US/docs/Web/API/Storage/LocalStorage) to communicate that state change across the application, globally. Other methods will check the value of the `this._authFlag` flag to determine if the user is authenticated or not. Soon, we'll learn more about how we control this flag.
We store `accessToken` in a reactive stream, `token$`. We also store `idTokenPayload`, which contains all the user profile information, in another reactive stream, `userProfile$`. Why use RxJS streams here? We want to be able to have tight control of the asynchronous nature of our application. By storing this data that can be used by different elements within our application in streams, we allow these elements to subscribe to the streams and get the most up-to-date value for the data.
The `AccountComponent` makes use of `userProfile$` to populate the user profile information:
```typescript
// src/app/account/account.component.ts
import { Component, OnInit } from "@angular/core";
import { AuthService } from "../auth/auth.service";
import { Component, OnInit } from "@angular/core";
import { AuthService } from "../auth/auth.service";
@Component({
selector: "app-account",
templateUrl: "./account.component.html"
})
export class AccountComponent implements OnInit {
profile: any;
constructor(public authService: AuthService) {}
ngOnInit() {
this.authService.userProfile$.subscribe(data => {
if (data) {
this.profile = { ...data };
}
});
}
}
```
Initially, the value of `data` is `null`; thus, no information is displayed. When `userProfile$` pushes the user profile information within `this._setAuth`, `data` becomes a valid object and we store its value immutably in `this.profile`. Thus, the component renders the account information. If we navigate to `/account` after we log in from the `/home` view, we won't see this so much in action. If we were to refresh the page while we are in the `/account` view, we may see a quick delay in the account information showing up if we are authenticated. That happens because we refresh authentication session tokens when we build the application. We'll learn how this happens in detail in a few sections.
After we save the authentication data, we clear the URL hash and navigate to the route stored in `onAuthSuccessUrl`:
```typescript
// src/app/auth/auth.service.ts
export class AuthService {
// ...
// Authentication Navigation
onAuthSuccessUrl = "/";
onAuthFailureUrl = "/";
logoutUrl = environment.auth.LOGOUT_URL;
// ...
handleLoginCallback = () => {
if (window.location.hash && !this.authenticated) {
this.parseHash$().subscribe({
next: authResult => {
this._setAuth(authResult);
window.location.hash = "";
this.router.navigate([this.onAuthSuccessUrl]);
},
error: err => this._handleError(err)
});
}
};
// ...
}
```
At that point, the template of `HomeComponent` is called, which uses the `authenticated()` getter method from `AuthService` to determine the authentication state of the application.
```typescript
// src/app/auth/auth.service.ts
export class AuthService {
// ...
get authenticated(): boolean {
return JSON.parse(localStorage.getItem(this._authFlag));
}
// ...
}
```
This method parses the value of the local storage flag we set earlier. Consumers of this method use its result to handle actions that depend on authentication, such as showing either the `Login` or `Logout` label in a button.
`AuthGuard`, as defined in `src/app/auth/auth.guard.ts`, is one of the consumers of `authenticated`. It uses it to determine if it can allow navigation to a route or not:
```typescript
// src/app/auth/auth.guard.ts
// ...
@Injectable()
export class AuthGuard implements CanActivate {
constructor(private authService: AuthService, private router: Router) {}
canActivate(
next: ActivatedRouteSnapshot,
state: RouterStateSnapshot
): Observable | Promise | boolean {
if (this.authService.authenticated) {
return true;
} else {
this.router.navigate([this.authService.onAuthFailureUrl]);
return false;
}
}
}
```
`authenticated` is a TypeScript accessor as defined within `AuthService` at `src/app/auth/auth.service.ts`:
```typescript
get authenticated(): boolean {
return JSON.parse(localStorage.getItem(this._authFlag));
}
```
According to the [TypeScript documentation](https://www.typescriptlang.org/docs/handbook/classes.html), within classes, TypeScript supports getters and setters to intercept access to a member of an object. This lets developers have tight control over how a member is accessed on each object. We don't have to call it as a function; the logic of the getter or setter is triggered when we try to access the property as usual — for example, using dot notation.
If the user is logged in, `authenticated` returns `true` and `AuthGuard` allows navigation. If it returns `false`, it not only prevents navigation to the route but also redirects the user to the URL defined with `onAuthFailureUrl`.
We use `AuthGuard` to guard the `/account` route in the `routes` object of `AppRoutingModule`:
```typescript
// src/app/app-routing.module.ts
// ...
const routes: Routes = [
{
path: "",
component: HomeComponent
},
{
path: "account",
component: AccountComponent,
canActivate: [AuthGuard]
},
{
path: "callback",
component: CallbackComponent
}
];
// ...
```
If we are authenticated, we can visit `/account` and see our user profile information displayed.
### Checking for an Active Session
What happens if we were to refresh the screen on any view? We have a flag in [`localStorage`](https://developer.mozilla.org/en-US/docs/Web/API/Storage/LocalStorage) that keeps track of whether or not we are logged in. But this flag has no connection with the authentication server at Auth0. Thus, it is ideal for us to have a mechanism that can check if we have an active session with the authentication server if we refresh the page.
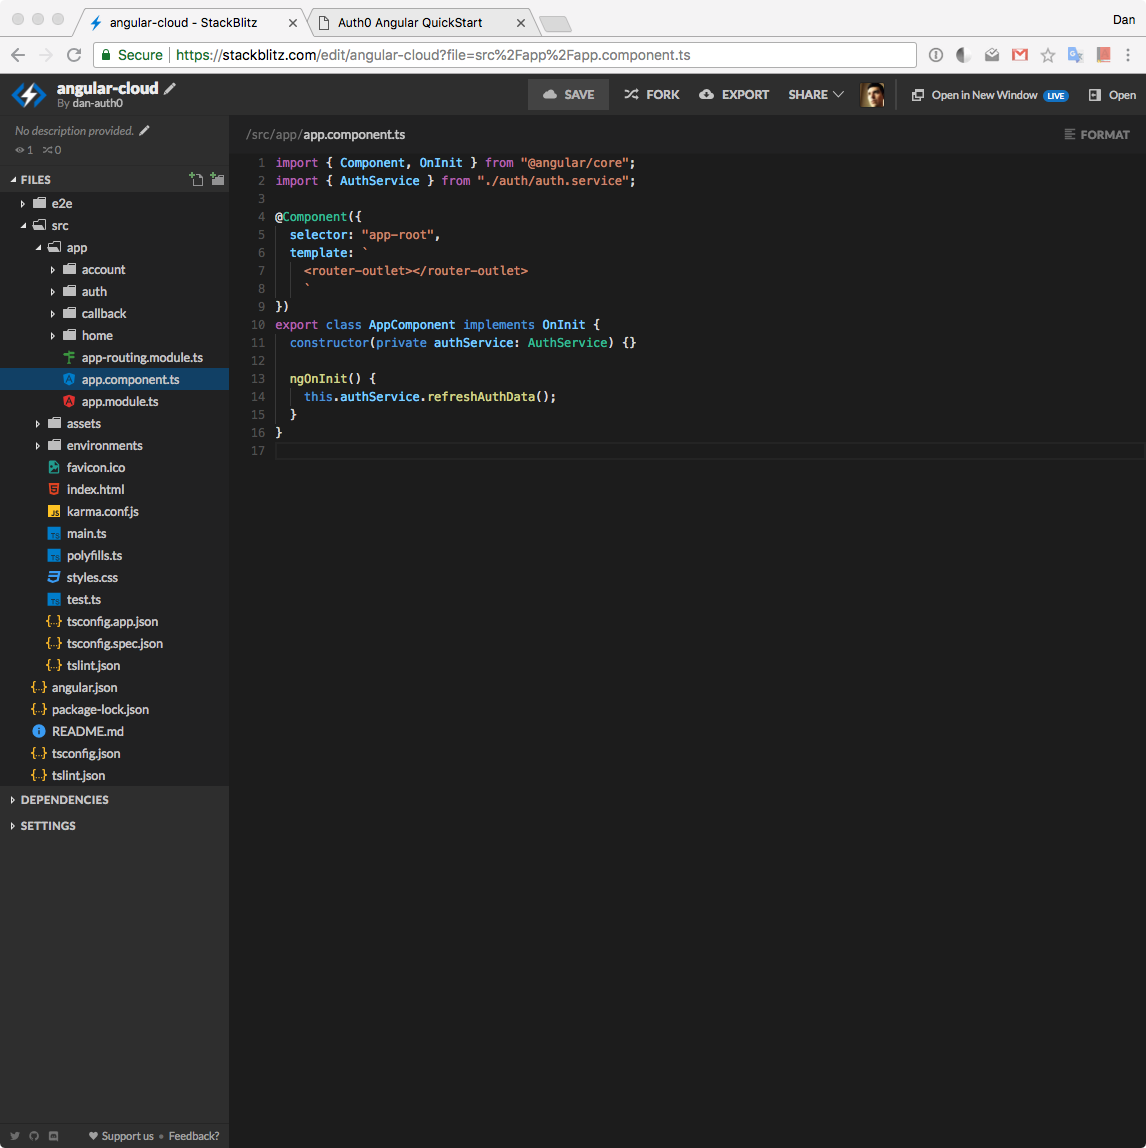
We do this by calling `this.authService.renewAuth()` in the `ngOnInit` lifecycle hook of the `AppComponent`. Why there? It's guaranteed that this component will be built whenever we refresh the page, no matter what the active route is.
```typescript
// src/app/app.component.ts
import { Component, OnInit } from "@angular/core";
import { AuthService } from "./auth/auth.service";
@Component({
selector: "app-root",
template: `
`
})
export class AppComponent implements OnInit {
constructor(private authService: AuthService) {}
ngOnInit() {
this.authService.renewAuth();
}
}
```
Let's take a closer look at `renewAuth`:
```typescript
// src/app/auth/auth.service.ts
export class AuthService {
// ...
renewAuth() {
if (this.authenticated) {
this.checkSession$({}).subscribe({
next: authResult => this._setAuth(authResult),
error: err => {
localStorage.removeItem(this._authFlag);
this.router.navigate([this.onAuthFailureUrl]);
}
});
}
}
// ...
}
```
Notice that we only execute the logic in `renewAuth` if we are logged in. If the local storage flag evaluates to `false`, the application knows globally that the user is not logged in. If it evaluates to `true`, we take that value with a grain of salt and verify with the authentication server that we have an active session using `webAuth.checkSession`. This process also let us acquire new session tokens. We also manage this method with an `Observable`:
```typescript
// src/app/auth/auth.service.ts
export class AuthService {
// ...
// Create observable of Auth0 checkSession method to
// verify authorization server session and renew tokens
checkSession$ = bindNodeCallback(this._Auth0.checkSession.bind(this._Auth0));
// ...
}
```
The [`checkSession`](https://auth0.com/docs/libraries/auth0js/v9#using-checksession-to-acquire-new-tokens) method allows us to acquire a new token from Auth0 for a user who is already authenticated against Auth0 for our domain. This method accepts any valid OAuth2 parameters that would normally be sent to `authorize`. If we omit them, it will use the ones we provided when initializing Auth0, the `_Auth0` application instance. If the user has a live authentication session with Auth0, we get an `authResult` object that has the authentication data, similar to what happened within `parseHash` earlier.
> If you used Google or any other social connection, the [`checkSession` call will always return `login_required`](https://auth0.com/docs/libraries/auth0js/v9#using-checksession-to-acquire-new-tokens) when you are using Auth0 dev keys.
Let's look back at `renewAuth`:
```typescript
// src/app/auth/auth.service.ts
export class AuthService {
// ...
renewAuth() {
if (this.authenticated) {
this.checkSession$({}).subscribe({
next: authResult => this._setAuth(authResult),
error: err => {
localStorage.removeItem(this._authFlag);
this.router.navigate([this.onAuthFailureUrl]);
}
});
}
}
// ...
}
```
On success, `checkSession$` calls the `next` method of our Observer, and we call `this._setAuth` to save the authentication data in memory. On error, the `error` method is called. We then remove the logged-in flag from `localStorage` and redirect the user to the URL defined with `this.onAuthFailureUrl`.
This refresh logic is run at any time the application is built.
### Logging out
Finally, the last step we can take in this authentication workflow is to log out. We do so by calling the `logout` method of `AuthService`:
```typescript
// src/app/auth/auth.service.ts
export class AuthService {
// ...
logout = () => {
// Set authentication status flag in local storage to false
localStorage.setItem(this._authFlag, JSON.stringify(false));
// This does a refresh and redirects back to homepage
// Make sure you have the logout URL in your Auth0
// Dashboard Application settings in Allowed Logout URLs
this._Auth0.logout({
returnTo: this.logoutUrl,
clientID: environment.auth.CLIENT_ID
});
};
// ...
}
```
The first step we take within `logout` is to set the logged-in flag to `false`. Afterward, we call `webAuth.logout` through the `this._Auth0` instance.
As the name implies, [`webAuth.logout`](https://auth0.com/docs/libraries/auth0js/v9#logout) is used to log out a user. This method accepts an options object, which can include the following optional parameters:
- `returnTo`: URL to redirect the user to after the logout action.
- `clientID`: Your Auth0 client ID
> Note that if the `clientID` parameter is included, the `returnTo` URL that is provided must be listed in the Application's Allowed Logout URLs in the Auth0 dashboard. However, if the `clientID` parameter is not included, the `returnTo` URL must be listed in the Allowed Logout URLs at the account level in the Auth0 dashboard.
When `this._Auth0.logout` is called, the logged-in flag becomes `false`, the Auth0 authentication session is over, and the user is redirected to the specified URL.
### Complete Authentication Workflow
This concludes the authentication workflow that is implemented using Angular and Auth0 in this application that is hosted in the cloud using StackBlitz. We went from zero through logging in to logging out and covered some additional procedures to ensure we query the authentication server for an active session when appropriate. The application is ready to be expanded into whatever we want it to become.
## Conclusion
I encourage you to learn more about what Auth0 can do to help you meet your identity requirements and goals and to also experiment with developing projects in the cloud using StackBlitz. Our partnership with StackBlitz was carefully selected because we saw the potential it provides to developers around the globe to create highly available applications.
Whether you are building a [B2C](https://auth0.com/b2c-customer-identity-management), [B2B](https://auth0.com/b2b-enterprise-identity-management), or [B2E](https://auth0.com/b2e-identity-management-for-employees) tool, Auth0 can help you focus on what matters the most to you, the special features of your product. [Auth0](https://auth0.com/) can improve your product's security with state-of-the-art features like [breached password surveillance](https://auth0.com/breached-passwords) and [multifactor authentication](https://auth0.com/multifactor-authentication).
[We offer a generous **free tier**](https://auth0.com/pricing) so you can get started with modern authentication.
Let me know how you like Auth0 and StackBlitz in the comments below. Please, feel free to share with us any cool project that you may have live and public on StackBlitz, whatever tech stack it may be!