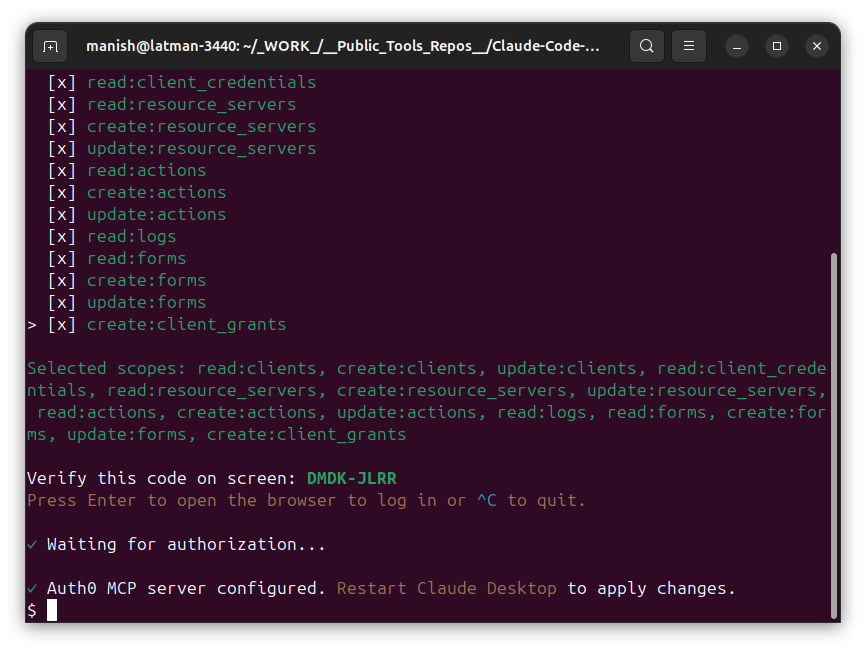
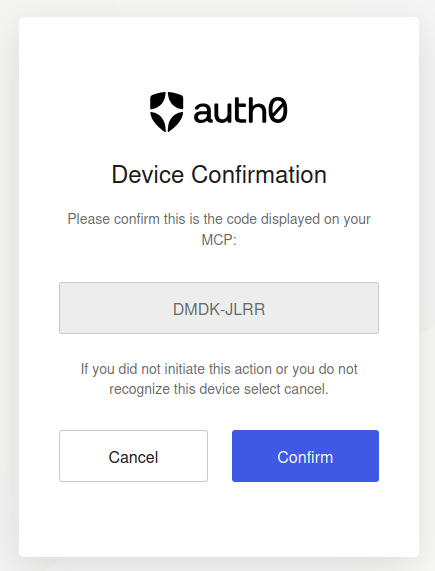
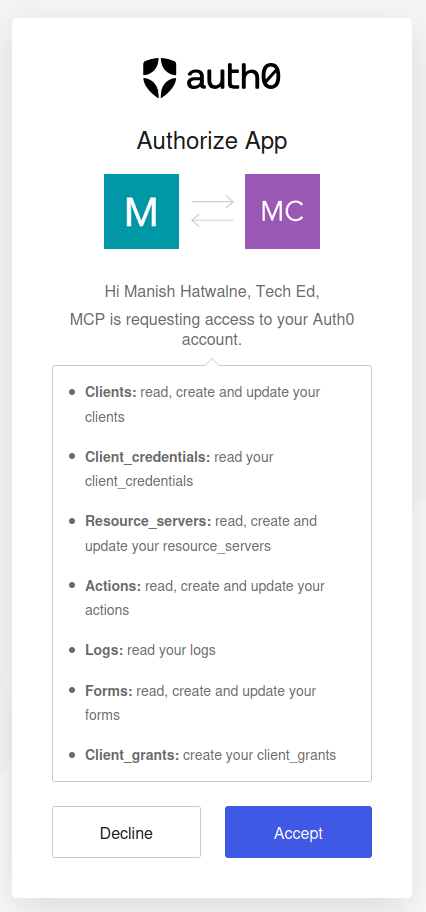
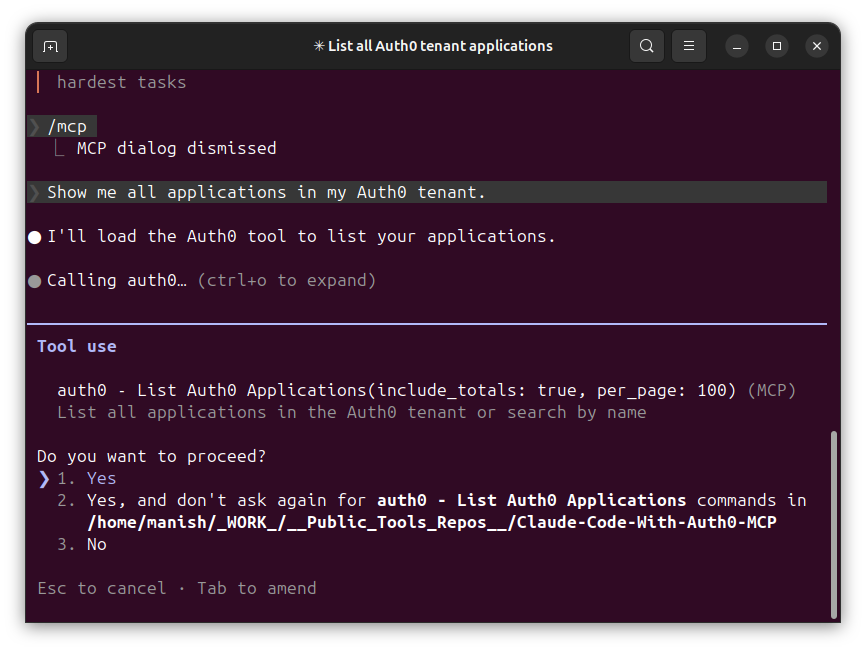
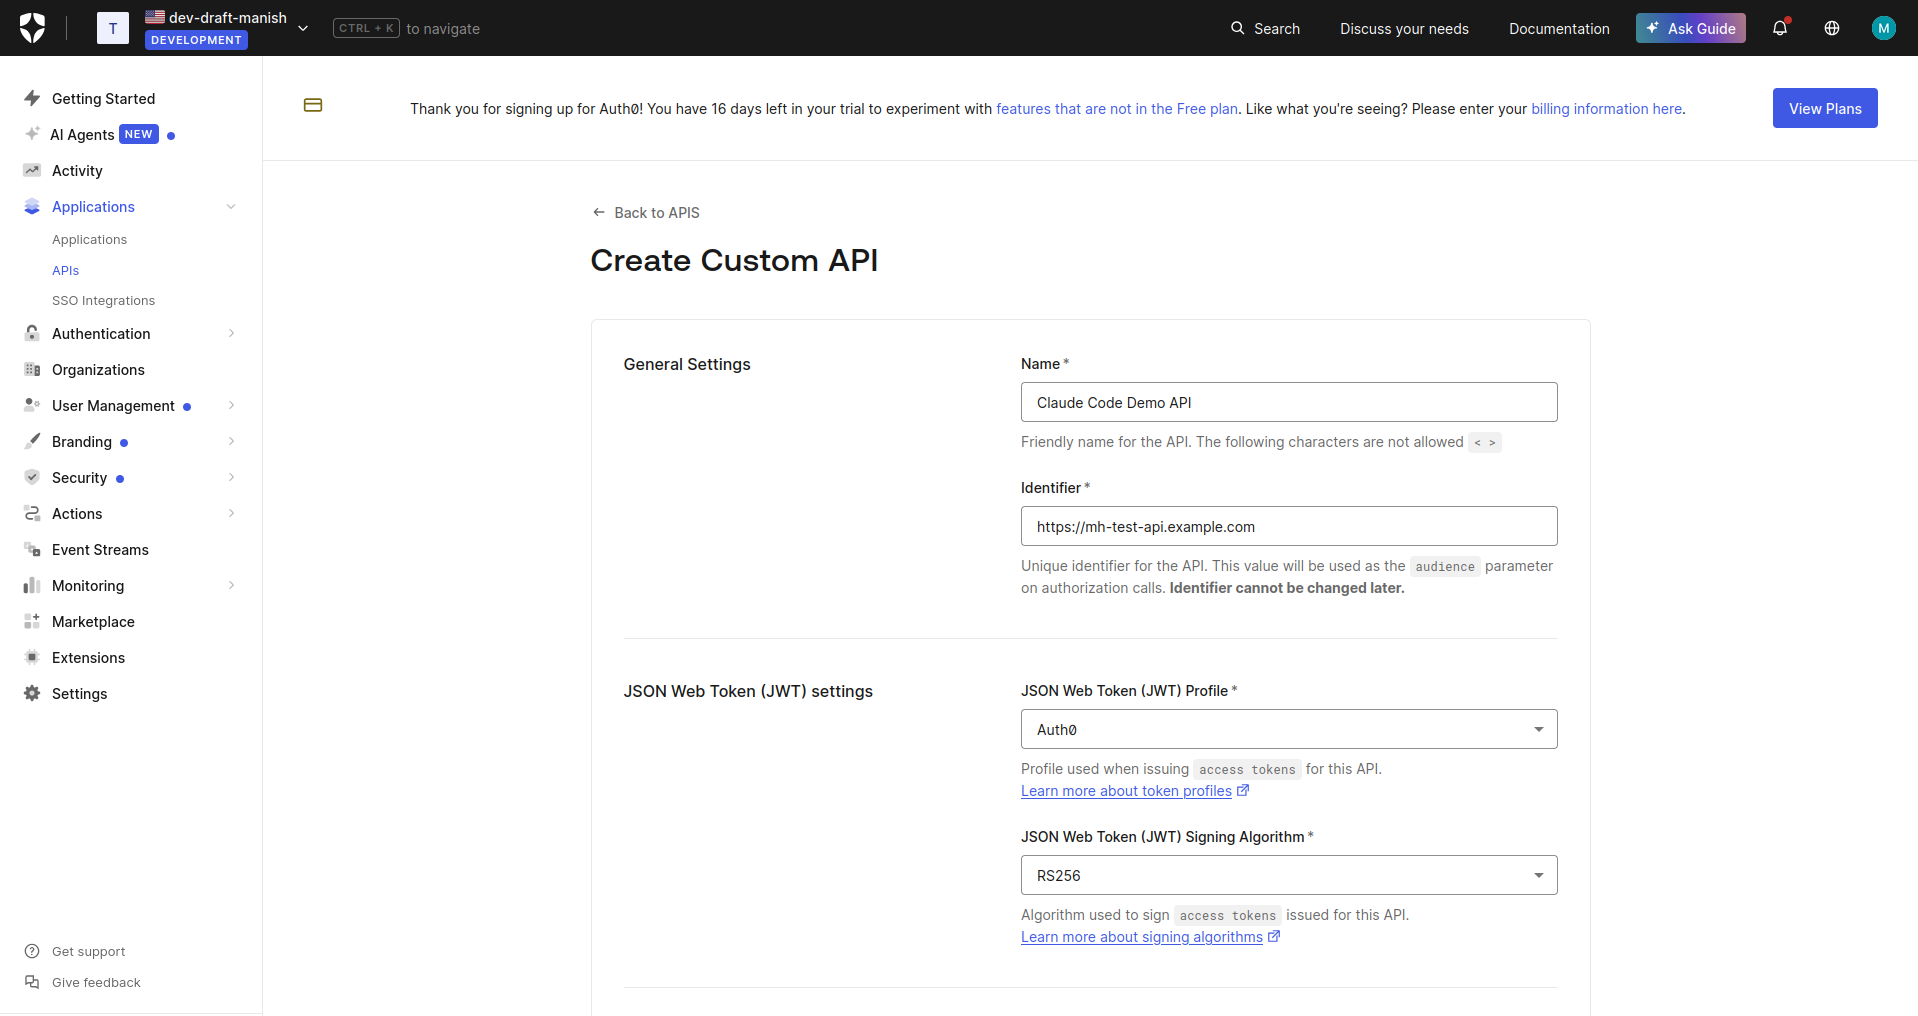
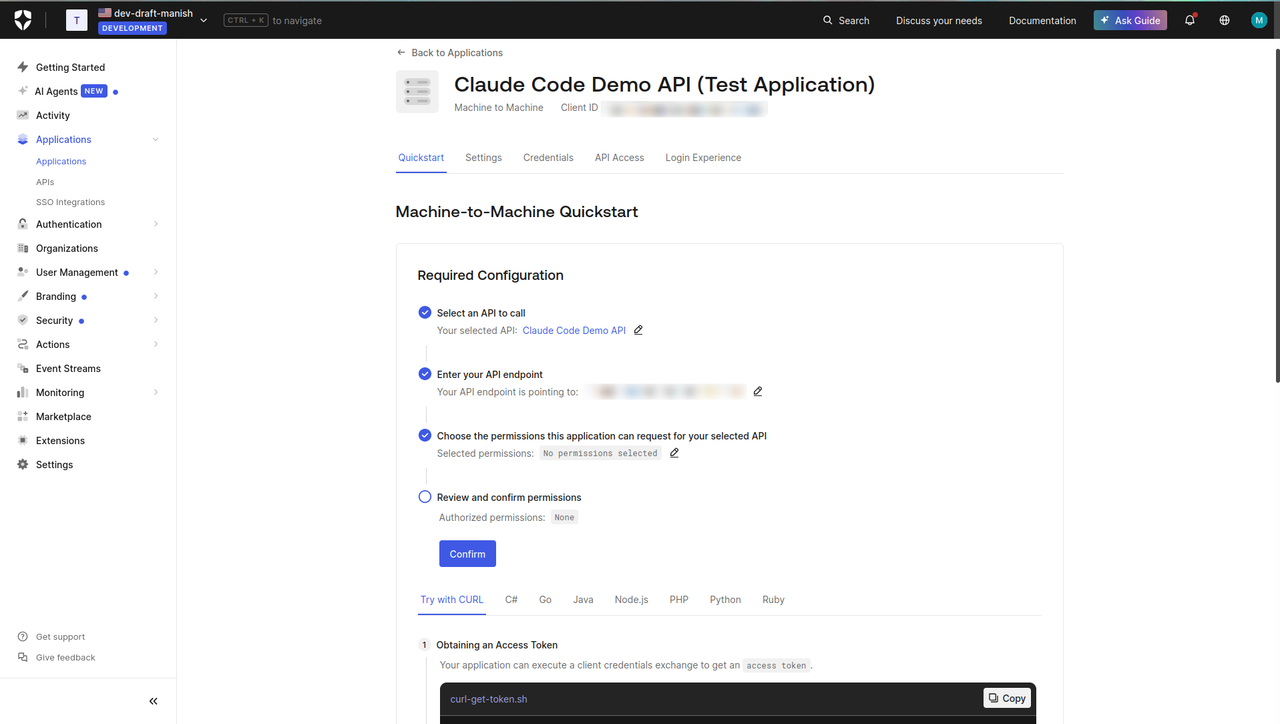
",
"audience":"https://mh-test-api.example.com",
"scope":"",
"grant_type":"client_credentials"
}'
{"access_token":"eyJhbGc...","expires_in":86400,"token_type":"Bearer"}
```
#### Calling your protected API
Download the [starter code](https://github.com/manishh/Claude-Code-With-Auth0-MCP/tree/suboptimal-implementation) into your `Claude-Code-With-Auth0-MCP` directory, create a virtual environment (`python3 -m venv ./.venv`), populate [`.env`](https://github.com/manishh/Claude-Code-With-Auth0-MCP/blob/suboptimal-implementation/.env.example) file, install dependencies (`pip install -r requirements.txt`).
Run the Flask server:
```bash
python app.py
```
Then call the protected endpoint with your Auth0 token:
```bash
TOKEN="eyJhbGc..."
curl -H "Authorization: Bearer $TOKEN" http://localhost:5000/api/protected
```
You should see a response like this:
```bash
{
"message": "Access granted to a protected resource",
"user": "UFIv...@clients"
}
```
### Running the audit prompt
The naive implementation appears to work at this point, but we can double-check it with Claude Code to ensure there are no errors and nothing crucial is missing.
Note: Some prompts in the steps below are intentionally imprecise or technically inaccurate. The goal is to test whether Claude Code (backed by live Auth0 tenant access via the MCP Server), can identify the correct implementation approach even when the instructions do not perfectly describe it.
Inside the `claude` session connected to Auth0 MCP, this prompt was run:
```markdown
Claude "Audit" Prompt:
-----------------------
Review app.py and audit the Auth0 JWT validation setup. Cross-reference it against
our actual tenant configuration using the Auth0 MCP tools. Identify any mismatches
between what the tenant is configured to issue and what the app is validating
against, and list all security or reliability problems you find. Do not make any
changes yet.
```
Claude Code reviewed the codebase, asked for relevant permissions (human in the loop) and showed this:
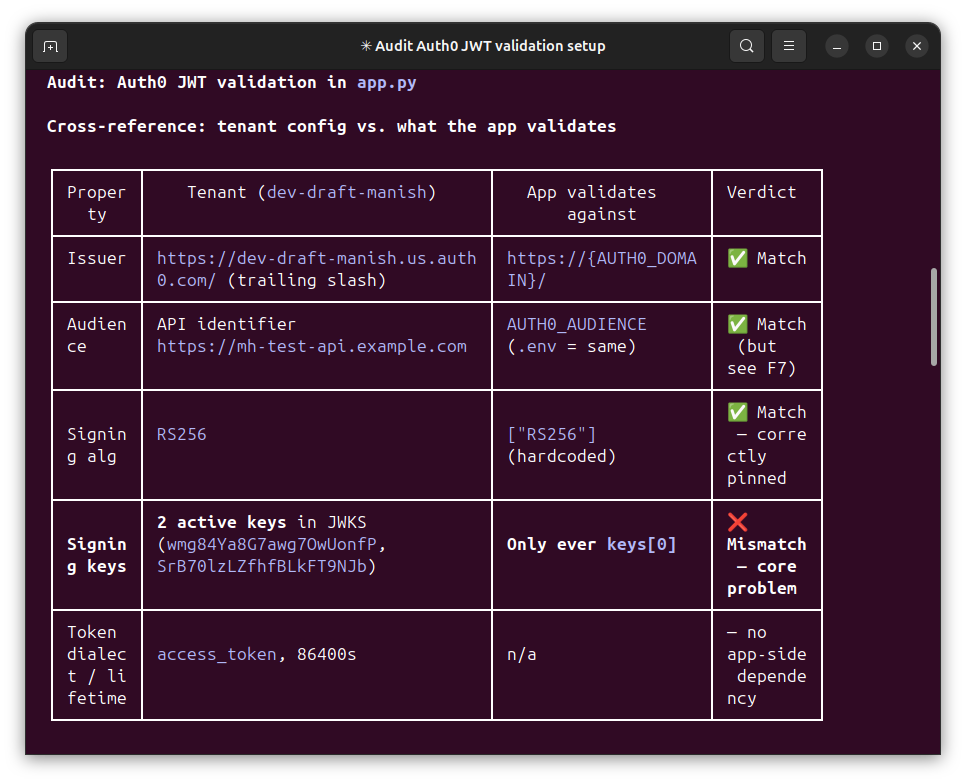 Using the Auth0 MCP Server, Claude Code pulled live tenant data and cross-referenced it against `app.py` directly for this audit. The most critical finding would never surface in static analysis: the tenant is currently publishing two rotating RS256 signing keys, while the app validates every token against only the first one. A linter can flag the missing `kid` matching logic, but a live `auth0_list_applications` call reveals that key rotation is already in progress and valid tokens are failing right now. The remaining findings cover robustness and hardening gaps, but this one mismatch makes the case for Auth0 MCP integration clearly: live tenant access surfaces the subtle bugs that static code review would miss.
Here is Claude Code audit summary:
```markdown
Claude "Audit" Response:
-------------------------
※ recap: Audited app.py's Auth0 JWT validation against the live tenant and found
the key bug: the app validates every token against only the first JWKS key while
the tenant publishes two, plus reliability issues. No changes made yet; next
action is drafting fixes if you want them. (disable recaps in /config)
```
Importantly, Claude Code made no changes during this step *as instructed*.
### Running the provision prompt
Once the audit was complete, the provision prompt asked Claude CLI to create a new M2M application (`"Claude-Auth0 MCP API Client"`) and a `read:data` scoped client grant in a single instruction:
```markdown
Claude "Provision" Prompt:
---------------------------
Create a new M2M application in our Auth0 tenant called "Claude-Auth0 MCP
API Client". Set the token lifetime to 3600 seconds. Then create a client
grant authorizing it against our API audience (https://mh-test-api.example.com)
with `read:data` scope only. Use the credentials returned to update
the `.env` file. Do not touch app.py yet.
```
Before proceeding, Claude Code flagged a real Auth0 misconception worth noting: token lifetime is a resource server setting that applies to all clients of an API, not a per-application property. Rather than applying a silent global change, it surfaced this as a clarifying question with explicit options. That pushback, grounded in live tenant data, is exactly what makes Auth0 MCP integration useful.
Using the Auth0 MCP Server, Claude Code pulled live tenant data and cross-referenced it against `app.py` directly for this audit. The most critical finding would never surface in static analysis: the tenant is currently publishing two rotating RS256 signing keys, while the app validates every token against only the first one. A linter can flag the missing `kid` matching logic, but a live `auth0_list_applications` call reveals that key rotation is already in progress and valid tokens are failing right now. The remaining findings cover robustness and hardening gaps, but this one mismatch makes the case for Auth0 MCP integration clearly: live tenant access surfaces the subtle bugs that static code review would miss.
Here is Claude Code audit summary:
```markdown
Claude "Audit" Response:
-------------------------
※ recap: Audited app.py's Auth0 JWT validation against the live tenant and found
the key bug: the app validates every token against only the first JWKS key while
the tenant publishes two, plus reliability issues. No changes made yet; next
action is drafting fixes if you want them. (disable recaps in /config)
```
Importantly, Claude Code made no changes during this step *as instructed*.
### Running the provision prompt
Once the audit was complete, the provision prompt asked Claude CLI to create a new M2M application (`"Claude-Auth0 MCP API Client"`) and a `read:data` scoped client grant in a single instruction:
```markdown
Claude "Provision" Prompt:
---------------------------
Create a new M2M application in our Auth0 tenant called "Claude-Auth0 MCP
API Client". Set the token lifetime to 3600 seconds. Then create a client
grant authorizing it against our API audience (https://mh-test-api.example.com)
with `read:data` scope only. Use the credentials returned to update
the `.env` file. Do not touch app.py yet.
```
Before proceeding, Claude Code flagged a real Auth0 misconception worth noting: token lifetime is a resource server setting that applies to all clients of an API, not a per-application property. Rather than applying a silent global change, it surfaced this as a clarifying question with explicit options. That pushback, grounded in live tenant data, is exactly what makes Auth0 MCP integration useful.
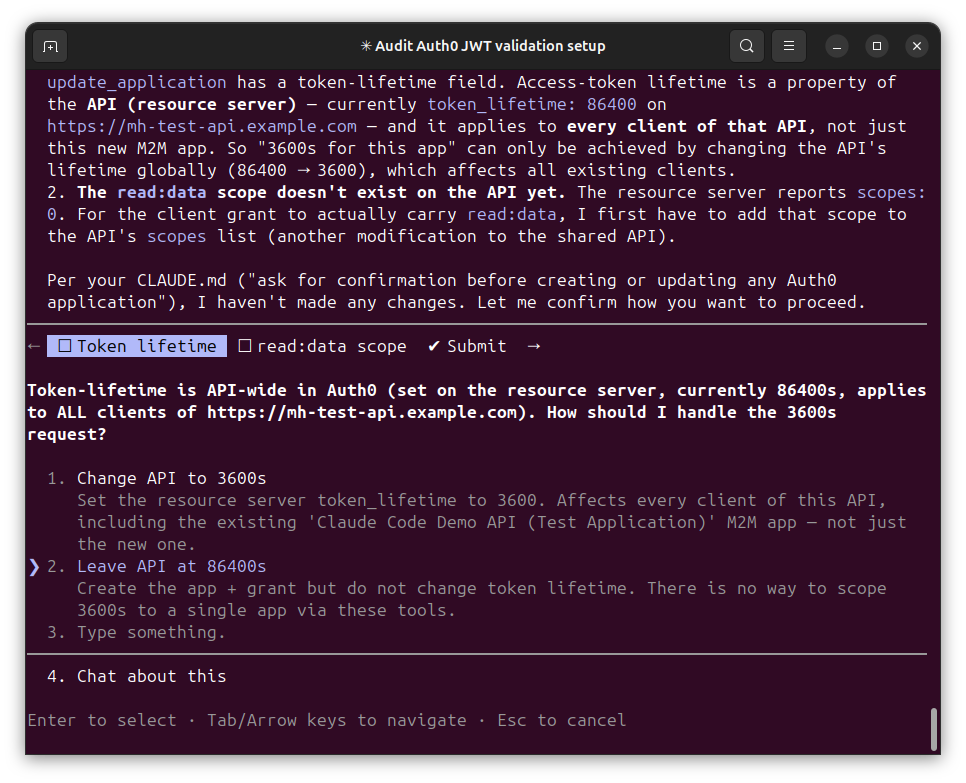 After confirming the token lifetime should remain unchanged and approving the MCP tool calls, Claude Code invoked `auth0_create_application` and `auth0_create_client_grant` in sequence, updated `.env` with the returned credentials (client ID and secret), and left `app.py` untouched as instructed.
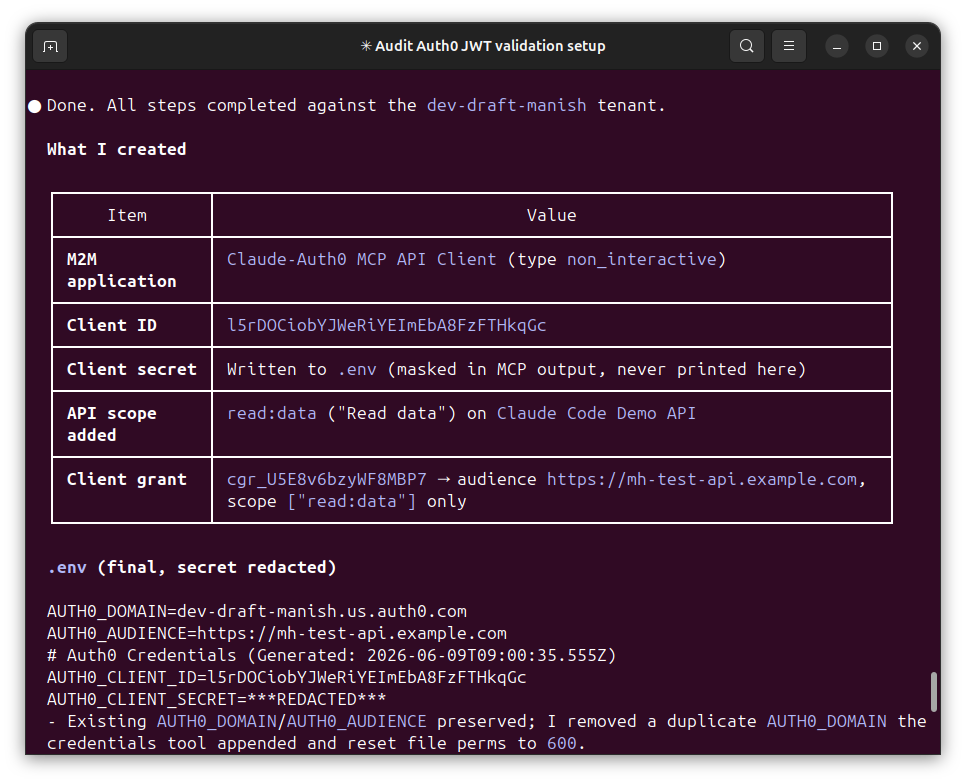 The Auth0 dashboard confirmed the new `Claude-Auth0 MCP API Client` application was added:
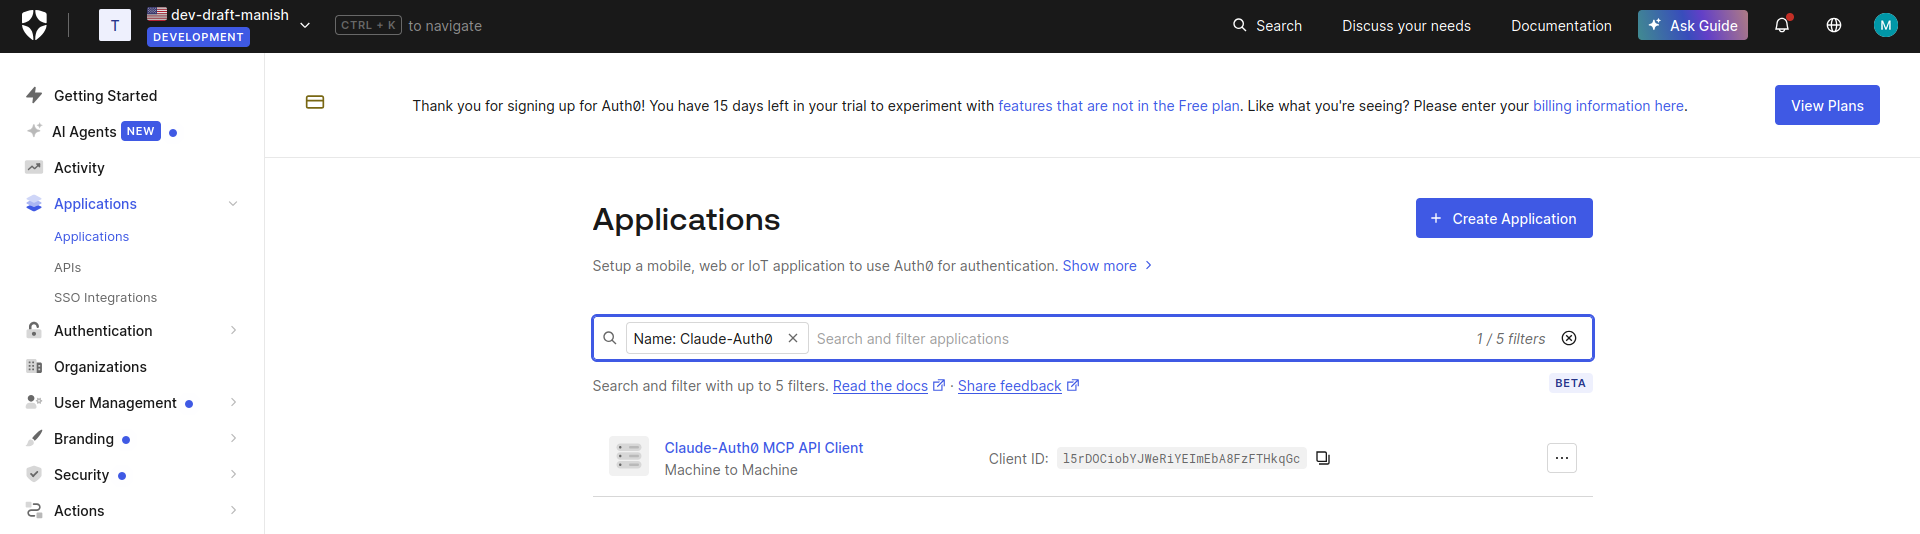 And the API confirmed the `read:data` permission was in place:
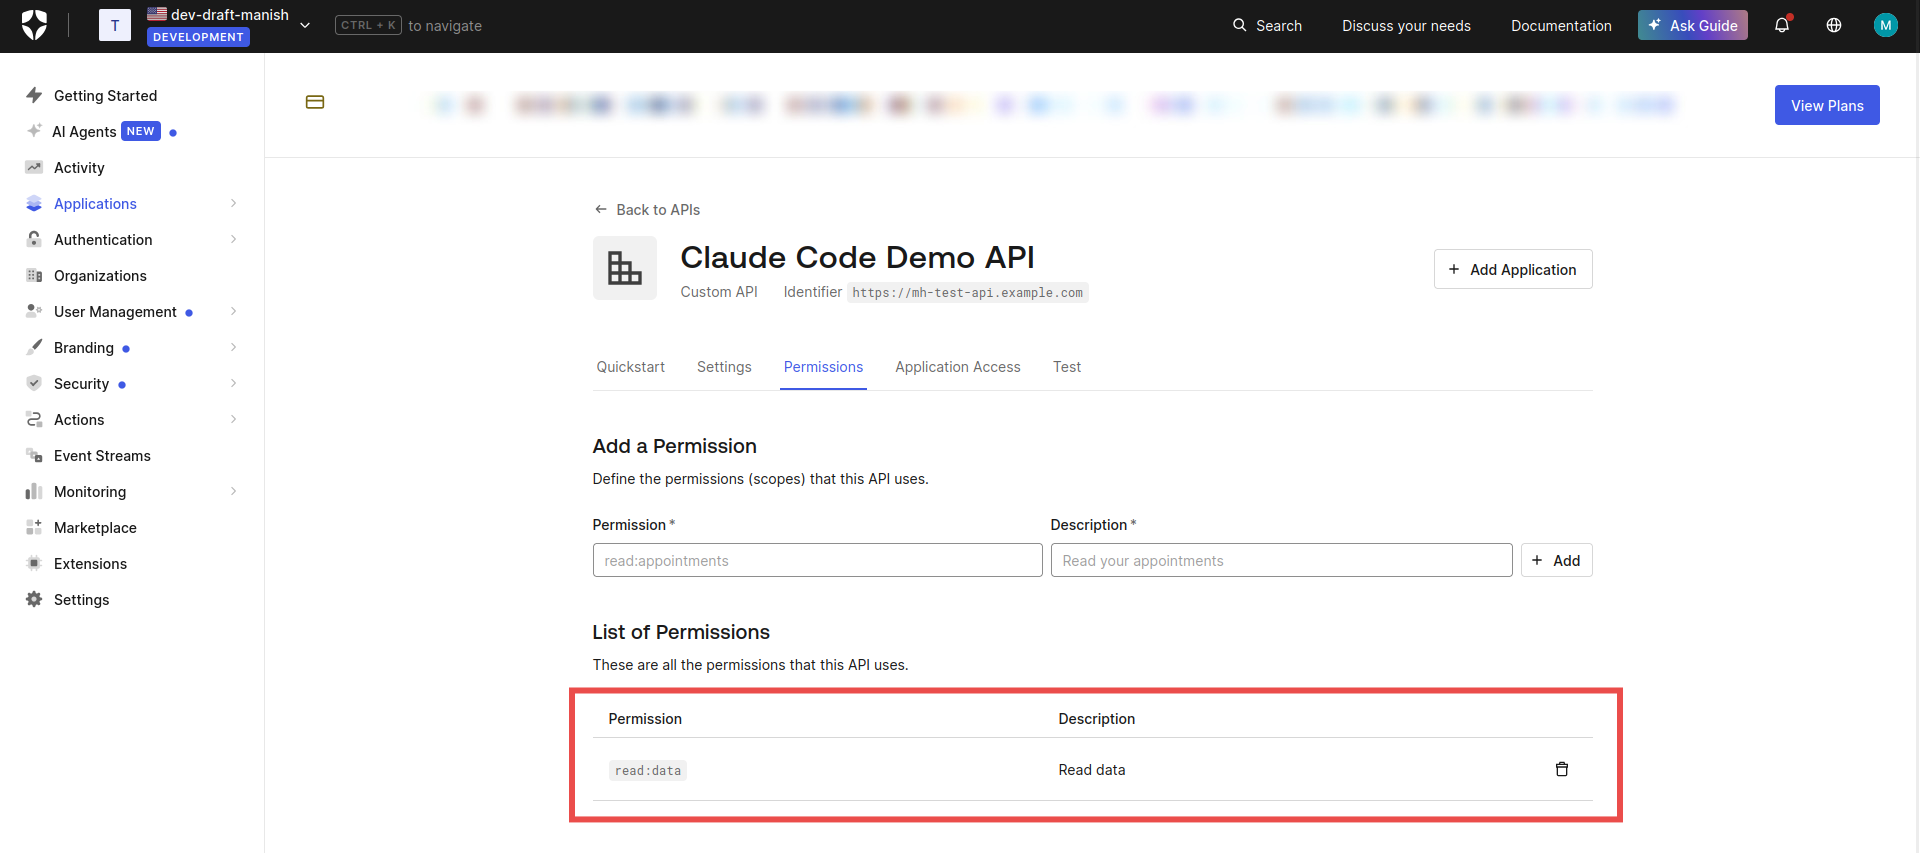 Here is how Claude Code summarized this session:
```markdown
Claude "Provision" Response:
---------------------------
※ recap: Goal: secure the Auth0 JWT setup. Audited app.py
(key bug: ignores kid, breaks on rotation) and created the M2M app,
read:data scope, grant, plus .env credentials. Next action: fix app.py's
validation issues when you're ready. (disable recaps in /config)
```
### Running the implementation prompt
This prompt gave Claude Code a single instruction to fix everything surfaced in the audit:
```markdown
Claude "Refactor" Prompt:
---------------------------
Now refactor `app.py` to fix all the issues found in the audit. Use
the credentials and tenant configuration we just provisioned: fetch
the JWKS URI, issuer, and audience dynamically from the tenant rather
than hardcoding them. Fix the kid matching, add proper error handling, and
make sure the app stays in sync with what the tenant is configured to issue.
```
With the audit findings and provisioned credentials already in context, Claude Code asked for confirmation as specified in `CLAUDE.md`, then rewrote `app.py` without needing to be walked through each fix individually.
Here is how Claude Code summarized this session:
```markdown
Claude "Provision" Response:
---------------------------
※ recap: Goal: secure the Auth0 JWT setup. Audited app.py
(key bug: ignores kid, breaks on rotation) and created the M2M app,
read:data scope, grant, plus .env credentials. Next action: fix app.py's
validation issues when you're ready. (disable recaps in /config)
```
### Running the implementation prompt
This prompt gave Claude Code a single instruction to fix everything surfaced in the audit:
```markdown
Claude "Refactor" Prompt:
---------------------------
Now refactor `app.py` to fix all the issues found in the audit. Use
the credentials and tenant configuration we just provisioned: fetch
the JWKS URI, issuer, and audience dynamically from the tenant rather
than hardcoding them. Fix the kid matching, add proper error handling, and
make sure the app stays in sync with what the tenant is configured to issue.
```
With the audit findings and provisioned credentials already in context, Claude Code asked for confirmation as specified in `CLAUDE.md`, then rewrote `app.py` without needing to be walked through each fix individually.
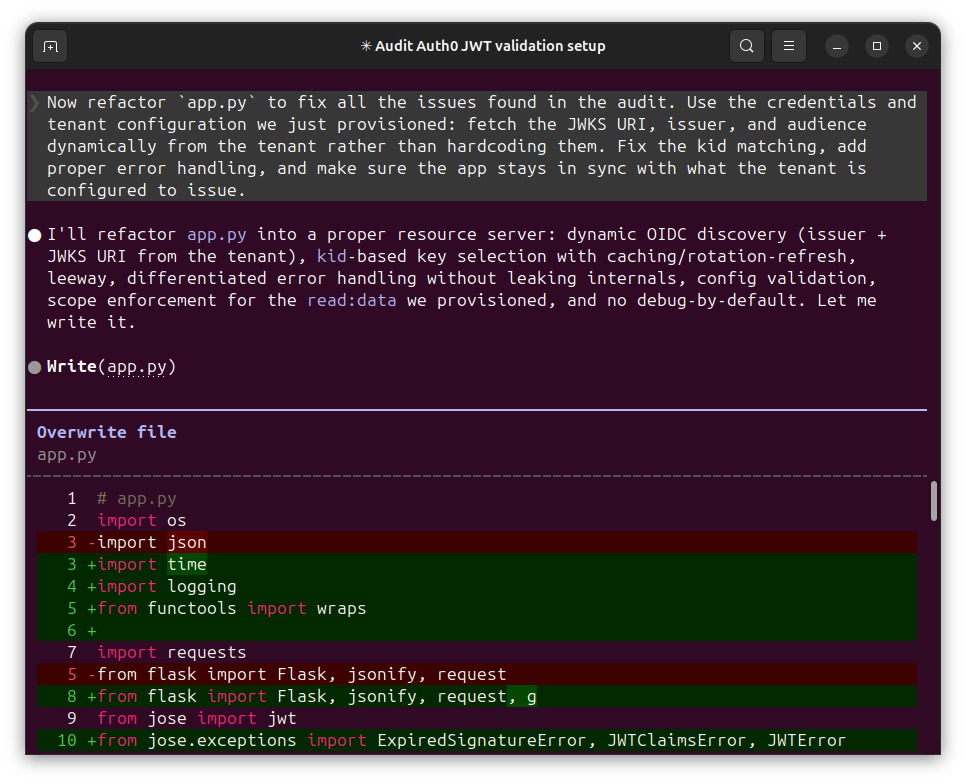 The refactored code introduced an `OIDCProvider` class that discovers the issuer and JWKS URI dynamically from the tenant's OIDC discovery document, caches the JWKS with a configurable TTL, and handles key rotation by retrying with a forced refresh on an unknown `kid`. The minimal `except` was replaced with typed exception handling that differentiates expired tokens, claim mismatches, and signature failures. Scope enforcement was added via a `require_scope` decorator (see refactored code: [**app.py**](https://github.com/manishh/Claude-Code-With-Auth0-MCP/blob/master/app.py)):
```python
def get_signing_key(self, kid):
"""Return the JWK matching ``kid`` (audit F1), refreshing if stale/rotated."""
stale = (self._jwks is None
or time.monotonic() - self._jwks_fetched_at > self._jwks_ttl)
if stale:
self._refresh_jwks()
key = self._find_key(kid)
if key is None and not stale:
# kid unknown against a cache we didn't just refresh: keys may have
# rotated. Refresh once and retry before giving up.
self._refresh_jwks()
key = self._find_key(kid)
return key
def validate_token(token):
# ...
try:
return jwt.decode(
token, rsa_key,
algorithms=ALGORITHMS,
audience=API_AUDIENCE,
issuer=oidc.issuer,
options={"leeway": LEEWAY_SECONDS},
)
except ExpiredSignatureError as e:
raise AuthError("token_expired", 401) from e
except JWTClaimsError as e:
raise AuthError("invalid_claims", 401) from e
except JWTError as e:
raise AuthError("invalid_token", 401) from e
def require_scope(required_scope):
"""Authenticate the request and enforce a scope (audit F8)."""
def decorator(fn):
@wraps(fn)
def wrapper(*args, **kwargs):
payload = validate_token(_get_bearer_token())
granted = payload.get("scope", "").split()
if required_scope not in granted:
raise AuthError("insufficient_scope", 403)
g.jwt_payload = payload
return fn(*args, **kwargs)
return wrapper
return decorator
```
A separate [`get_token.py`](https://github.com/manishh/Claude-Code-With-Auth0-MCP/blob/master/get_token.py) utility was also produced for minting test tokens using the client credentials flow, correctly kept separate from `app.py` since a resource server should not hold a client secret.
This refactored demo can be run with:
```bash
TOKEN=$(python get_token.py)
curl -H "Authorization: Bearer $TOKEN" http://localhost:5000/api/protected
```
Which produces the expected response:
```json
{"message":"Access granted to a protected resource","sub":"l5rDOCiobYJWeRiYEImEbA8FzFTHkqGc@clients"}
```
Throughout the refactor, Claude Code used the credentials it had just provisioned via the Auth0 MCP Server rather than asking for them again, keeping the codebase and tenant configuration in sync from the start.
The refactored code introduced an `OIDCProvider` class that discovers the issuer and JWKS URI dynamically from the tenant's OIDC discovery document, caches the JWKS with a configurable TTL, and handles key rotation by retrying with a forced refresh on an unknown `kid`. The minimal `except` was replaced with typed exception handling that differentiates expired tokens, claim mismatches, and signature failures. Scope enforcement was added via a `require_scope` decorator (see refactored code: [**app.py**](https://github.com/manishh/Claude-Code-With-Auth0-MCP/blob/master/app.py)):
```python
def get_signing_key(self, kid):
"""Return the JWK matching ``kid`` (audit F1), refreshing if stale/rotated."""
stale = (self._jwks is None
or time.monotonic() - self._jwks_fetched_at > self._jwks_ttl)
if stale:
self._refresh_jwks()
key = self._find_key(kid)
if key is None and not stale:
# kid unknown against a cache we didn't just refresh: keys may have
# rotated. Refresh once and retry before giving up.
self._refresh_jwks()
key = self._find_key(kid)
return key
def validate_token(token):
# ...
try:
return jwt.decode(
token, rsa_key,
algorithms=ALGORITHMS,
audience=API_AUDIENCE,
issuer=oidc.issuer,
options={"leeway": LEEWAY_SECONDS},
)
except ExpiredSignatureError as e:
raise AuthError("token_expired", 401) from e
except JWTClaimsError as e:
raise AuthError("invalid_claims", 401) from e
except JWTError as e:
raise AuthError("invalid_token", 401) from e
def require_scope(required_scope):
"""Authenticate the request and enforce a scope (audit F8)."""
def decorator(fn):
@wraps(fn)
def wrapper(*args, **kwargs):
payload = validate_token(_get_bearer_token())
granted = payload.get("scope", "").split()
if required_scope not in granted:
raise AuthError("insufficient_scope", 403)
g.jwt_payload = payload
return fn(*args, **kwargs)
return wrapper
return decorator
```
A separate [`get_token.py`](https://github.com/manishh/Claude-Code-With-Auth0-MCP/blob/master/get_token.py) utility was also produced for minting test tokens using the client credentials flow, correctly kept separate from `app.py` since a resource server should not hold a client secret.
This refactored demo can be run with:
```bash
TOKEN=$(python get_token.py)
curl -H "Authorization: Bearer $TOKEN" http://localhost:5000/api/protected
```
Which produces the expected response:
```json
{"message":"Access granted to a protected resource","sub":"l5rDOCiobYJWeRiYEImEbA8FzFTHkqGc@clients"}
```
Throughout the refactor, Claude Code used the credentials it had just provisioned via the Auth0 MCP Server rather than asking for them again, keeping the codebase and tenant configuration in sync from the start.
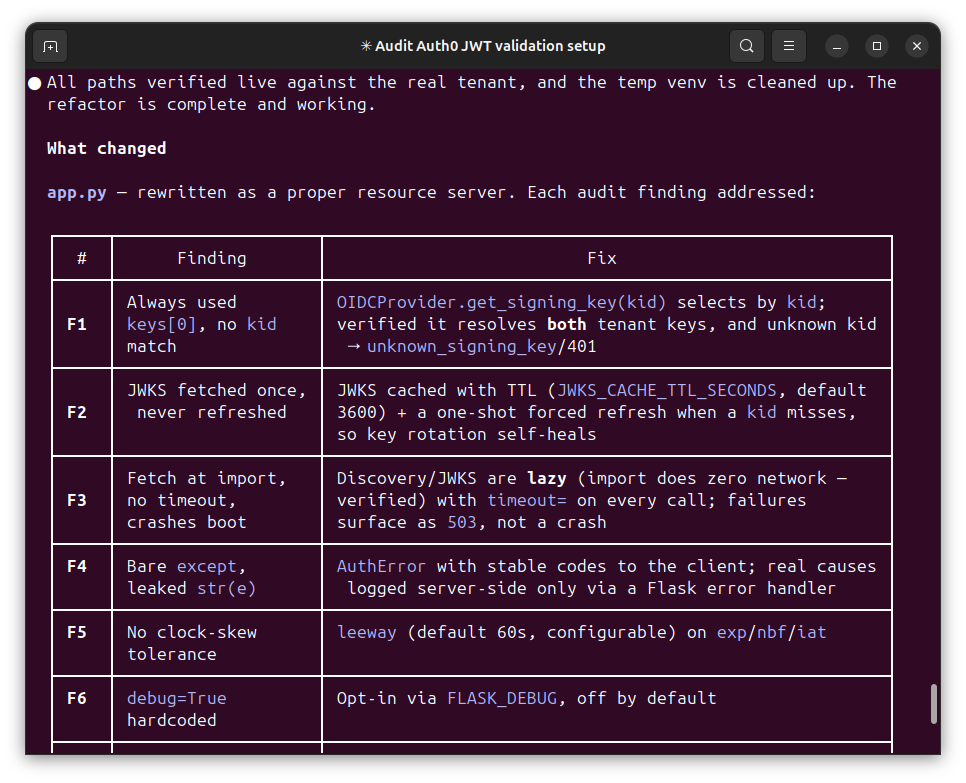 Here is how Claude Code summarized the session:
```markdown
Claude "Refactor" Response:
-----------------------------
※ recap: Goal: harden the Auth0 JWT validation in this Flask app.
Done: audited app.py, provisioned the M2M client plus read:data
grant, and refactored app.py to fix all findings, verified live.
Next action: optionally migrate from python-jose to PyJWT, or
stop here. (disable recaps in /config)
```
Here is how Claude Code summarized the session:
```markdown
Claude "Refactor" Response:
-----------------------------
※ recap: Goal: harden the Auth0 JWT validation in this Flask app.
Done: audited app.py, provisioned the M2M client plus read:data
grant, and refactored app.py to fix all findings, verified live.
Next action: optionally migrate from python-jose to PyJWT, or
stop here. (disable recaps in /config)
```
Pro Tip: For production use, consider migrating to PyJWT's PyJWKClient, which subsumes the OIDCProvider plumbing built here into a well-maintained abstraction. Claude Code flagged this during the refactor but correctly held off since it is a dependency change, not an in-file fix, and out of scope for this tutorial.
### Observations: Claude Code with Auth0 MCP server
A few things stood out running this end-to-end. Audit findings were grounded in live tenant state, not static code analysis alone. The two-key rotation mismatch only surfaced because the Auth0 MCP Server pulled the actual JWKS from the tenant and compared it against what `app.py` was doing. Without that, the finding would have been *"no `kid` matching logic"* rather than *"key rotation is already in progress and valid tokens are failing right now."* That distinction matters in production.
The token lifetime clarification was similarly useful. Seeing `token_lifetime: 86400` as a tenant-wide setting let Claude Code correctly flag that changing it would affect all clients, not just the new M2M application. A code-only agent would have missed that entirely.
The refactored code also went further than the prompt asked. The `OIDCProvider`, scope enforcement, and separation of `get_token.py` all emerged from the audit findings without individual prompting. Throughout, Claude Code asked for permission before invoking any Auth0 MCP tools, creating applications, or running bash commands.
That last point addresses the question raised in the introduction. Scoped tools, a `CLAUDE.md` that encodes your constraints, and consistent human-in-the-loop confirmation keep the agent working within a well-defined boundary. It has live tenant access, but only as far as you explicitly allow.
You can compare the [**naive implementation**](https://github.com/manishh/Claude-Code-With-Auth0-MCP/tree/suboptimal-implementation) with the [**refactored implementation**](https://github.com/manishh/Claude-Code-With-Auth0-MCP) directly.
## Security Guardrails
Giving an AI agent access to your Auth0 tenant is similar to giving a new team member API access. The same principles apply:
* **Keep the MCP server scoped to development tenants only.** A practical way to enforce this is maintaining separate `CLAUDE.md` files per environment, each pointing to the right tenant domain. That way there is no path from a local Claude Code session to production credentials by default. If a session does need to touch production, make it a deliberate, separate setup with explicit sign-off.
* **Treat the device auth token like any other API credential.** After finishing a focused session, revoke it from the Auth0 dashboard rather than leaving it active. In fact, using a short access token lifetime helps reduce security risks. If your team uses Auth0 log streaming, pipe those logs to your monitoring tool of choice so MCP-driven Management API calls show up in the same audit trail as everything else.
* **Client secrets belong in `.env`, not in `CLAUDE.md` or inline prompts.** It is easy to paste a secret into a prompt for convenience and forget it now lives in your shell history and potentially in Claude Code's session context. Let the MCP server handle authentication; your prompts should never carry credentials.
Note: Agentic changes are still code changes. The refactored app.py in this tutorial went through manual review before being accepted. All auth-critical paths deserve the same PR process, regardless of who or what wrote them.
## Code and Auth, in Sync
In this tutorial, you connected Claude Code to Auth0's Management API via the Auth0 MCP Server, built a scoped M2M credential flow, and refactored a suboptimal JWT validation setup to correctly handle key rotation, typed errors, and scope enforcement. The security principles applied throughout were practical: least-privilege scopes, device auth over static secrets, environment-specific configs, and keeping agentic changes in the normal PR review flow.
The entire workflow, from auditing a live tenant to provisioning an application to rewriting the validation code, happened in a single terminal session. The Auth0 dashboard was only needed to verify the changes Claude Code had made. Which answers the question we started with. You can give an AI agent access to sensitive authentication infrastructure securely with Auth0 MCP: secure access, scoped tools, and human-in-the-loop confirmation keep the agent within well-defined boundaries, without opening up new security risks.
Auth0's Management API exposes the full surface area of your tenant as programmable, auditable operations to any AI agent or automation you want to build on top of it. If you want to extend what you built here, the [Auth0 MCP Server tools reference](https://auth0.com/docs/get-started/auth0-mcp-server/auth0-mcp-tools-reference) is a good next stop.