---
title: "Introduction to Django 3.0 - Building, Authenticating, and Deploying - Part 1"
description: "Learn to build Django web applications in minutes and deploy them to production!"
authors:
- name: "Vihar Kurama"
url: "https://auth0.com/blog/authors/vihar-kurama/"
date: "Apr 8, 2021"
category: "Developers,Tutorial,Django"
tags: ["django", "python", "authentication", "auth0"]
url: "https://auth0.com/blog/introduction-to-django-3-building-authenticating-and-deploying-part-1/"
---
# Introduction to Django 3.0 - Building, Authenticating, and Deploying - Part 1
**TL;DR:** In this article, we’re going to build a simple web application using [Django](https://www.djangoproject.com/), a Python web framework. The idea of the application is to share code snippets for others to view. We’ll set up authentication using Auth0 for users to access the website and deploy it to production using [Heroku](https://www.heroku.com/). We’ll review in detail three primary Django boosters: robustness, security, and scalability.
This article is divided into two parts. In the first part, we'll learn how we can build applications in Django. [In the second part](https://auth0.com/blog/introduction-to-django-3.0-building-authenticating-and-deploying-part-2/), we'll add authentication to our app using Auth0 and deploy it to production on Heroku.
To find the finished code for part 1, visit [this GitHub Repo](https://github.com/auth0-blog/ga-django-python).
## Introduction - Why Python Web Frameworks?
[Python](https://www.python.org/) is a simple, powerful, and open-source language. It allows us to focus more on the problem at hand rather than struggling with the syntax and semantics of the language. There are many Python packages we can use based on our requirements. For example, if we are working on a machine learning problem, we can use [PyTorch](https://pytorch.org/) or [TensorFlow](https://www.tensorflow.org/); if we are building web applications, we can use [Flask](https://www.palletsprojects.com/p/flask/), [Tornado](https://www.tornadoweb.org/en/stable/), or [Django](https://www.djangoproject.com/). Python provides tools that allow us to integrate different solutions into our application with ease.
In this article, we’ll learn about [Django 3.0](https://docs.djangoproject.com/en/3.0/releases/3.0/). This article will equip us with the right amount of information to get the hang of building websites. However, a little knowledge of Python and the web will help us understand it even better. Let’s get started by understanding what Django is all about.
## About Django
Django can build scalable, deployable websites in little time. Once we master Django, it lays down the foundation for us to transform our ideas into applications with ease.
Various top-notch applications and websites such as **Instagram**, **NASA**, **Pinterest**, **NatGeo**, **Dubsmash**, and **DoorDash** are written in **Django**. It is one of the most-used web frameworks at top companies such as Google, Facebook, Amazon, Oracle, Adobe, and many more. All the documentation and information related to Django can be found on the [Django homepage](https://www.djangoproject.com/).
### Features of Django
The main goal behind developing Django was to quicken the pace of building websites while also satisfying all the requirements of developers by providing the right amount of tools and plugins. Once the initial configuration is done, all we need to concentrate on is the workflow that our website should operate under. It uses an MVT model, which stands for models, views, and templates. We’ll be learning about MVT in future sections. But for now, let’s see what features are in Django:
- **It’s Superfast:** Django takes care of all the files and settings. This allows us to build applications swiftly, right from development to production.
- **Highly Secure:** We tend to constantly worry about the security of our website. Questions like, is the website safe or is it hackable, seem to penetrate our minds. However, in Django, when it comes to security, just sit back and relax. SQL injection, cross-site scripting, cross-site request forgery, and clickjacking are all taken care of.
- **Easily Scalable:** Django can handle huge traffic with zero latency. We can use any cloud platform like GCP, AWS, or Heroku to deploy our Django application. One other advantage is we can integrate machine learning algorithms using Python libraries and still be able to handle it.
- **Easy Templating:** Django is a back-end web framework. To interact with the front end, Django uses [Jinja](https://jinja.palletsprojects.com/en/2.11.x/), a simple templating engine that allows us to pass variables from back end to front end. The syntax is quite easy; however, we can also configure our Django project with other templating engines.
There are many more features to motivate us to choose Django as our preferred web framework, but we’ll slowly understand them once we get started with the code!
### What’s new in Django 3.0?
Django 3.0 was released recently in December of 2019). There are only a few main changes as listed below:
**Fully Asynchronous:** Django 3.0 is now fully async-capable with its new [ASGI](https://channels.readthedocs.io/en/latest/asgi.html): an improvement on WSGI.
WSGI succeeded in allowing more freedom and innovation in the Python webspace, and ASGI’s goal is to continue this into the land of asynchronous Python.
If we aren’t sure what synchronous and asynchronous are, with synchronous state, we can run one file at a time, while in the asynchronous state, we can run multiple files at a time.
**Python Compatibility:** Django 3.0 supports Python versions that are later than 3.5. The Django 2.2.x series is the final version to support Python 3.5.
**MariaDB:** [MariaDB](https://mariadb.org/) is now supported! In the new 3.0 release, we can now configure our application with MariaDB.
**New Model Fields:** In Django 3.0, we have more options to classify our models — basically, our database schemas.
These are the core features included in Django 3.0. If we are interested in reading more, please go to the [release notes](https://docs.djangoproject.com/en/3.0/releases/3.0/).
Alright, this is a basic introduction for us to understand the capabilities of Django. In the next section, we’ll learn about the installation and configuration of our local machines to get started with code.
## Setting Up
In this section, we’ll install Python and Django on our machines.
### First things first: Installing Python
Today we will be using macOS and install Python with [Brew](https://brew.sh/). It is a package manager, and we can install any package or software with a single command, "brew install package-name." Please use the command from the website [https://brew.sh](https://brew.sh/) to install Brew. Once Brew is installed, open **Terminal** from applications and run the following command:
```bash
brew install python
```
At this point, we’ve installed Python 3.
Now to check if the installation is successful or not, in the terminal, type the following command:
```bash
python3
```
We’ll see the Python shell running, similar this:
```bash
Python 3.7.6 (default, Jan 29 2020, 13:58:13)
[Clang 11.0.0 (clang-1100.0.33.16)] on darwin
Type "help", "copyright", "credits" or "license" for more information.
```
We can exit from the Python shell using the command:
```bash
exit()
```
This exits us from the Python shell and brings us back to the terminal.
> In Mac, insert sudo at the beginning of the command to force install. This allows us to run our commands as an administrator or superuser.
### Installing Django
Installing Python also installs **pip**, a Python package installer that installs different Python packages with a single command. Make sure both pip and Python are running on the same version of Python. To check this, use the following commands:
```bash
python3 --version
pip3 --version
```
We should see `Python 3.7.6` and `pip 19.3.1 from /usr/local/lib/python3.7/site-packages/pip (python 3.7)` or something similar returned.
We will be using `python3` and `pip3` in today's example.
Let’s now install Django. Open the terminal or command prompt and run the following command:
```bash
pip3 install django
```
This command installs the Django package with a lot of other supporting packages. To check if Django was successfully installed, open the terminal followed by a Python shell, and import the Django package using the **`import`** keyword. If we see no errors after importing, then the installation is successful; otherwise, try reinstalling it. Next, use the `__version__` method as shown in the below snippet. Check the version of the installed Django package. To do all of that, run the following commands:
```bash
python3
import django
print(django.__version__)
3.0
```
## Creating a Django project
In this section, we’ll learn how to start a project in Django and understand the Django lifecycle.
Using the codeshare application, we can share code snippets for others to view (as in a blog), prior to which we should authenticate. The authentication will be handled using the Auth0, and we’ll push this application into production using Heroku in the second part of the article.
### Building the CodeShare application
We’re now fully equipped with the right instruments to get started with Django. Let’s understand its basics.
Our first step is to create a new Django project. To do so, we need to use the `django-admin` command, which was installed with Django, followed by **startproject** and the name of the project. Let’s create a new Django project named **codeshare**. Be sure to be in the directory of choice, and run this command to create the project:
```bash
django-admin startproject codeshare
```
Next, go inside that particular folder using the following command:
```bash
cd codeshare
```
We will be working in [VSCode](https://code.visualstudio.com/) in today's example. Open up the project in the code editor of choice.
We’ll see a folder named **codeshare** and a file named **manage.py**.
The **manage.py** file is the heart of the django project. To start the application or to make changes in the databases, we need to run this python file. Let’s quickly start our server and check how it works like.
To start the server in Django, use the below command:
```bash
python3 manage.py runserver
```
Here, we’re running **_manage.py_** with Python, and **`runserver`** is the command-line argument that starts the server. There are other arguments to **_manage.py_**, which we’ll learn about in the further sections. Let’s now see what this command does:
```bash
Watching for file changes with StatReloader
Performing system checks...
System check identified no issues (0 silenced).
You have 17 unapplied migration(s). Your project may not work properly
until you apply the migrations for app(s): admin, auth, contenttypes, sessions.
Run 'python manage.py migrate' to apply them.
Django version 3.0, using settings 'test.settings'
Starting development server at http://127.0.0.1:8000/
Quit the server with CONTROL-C.
```
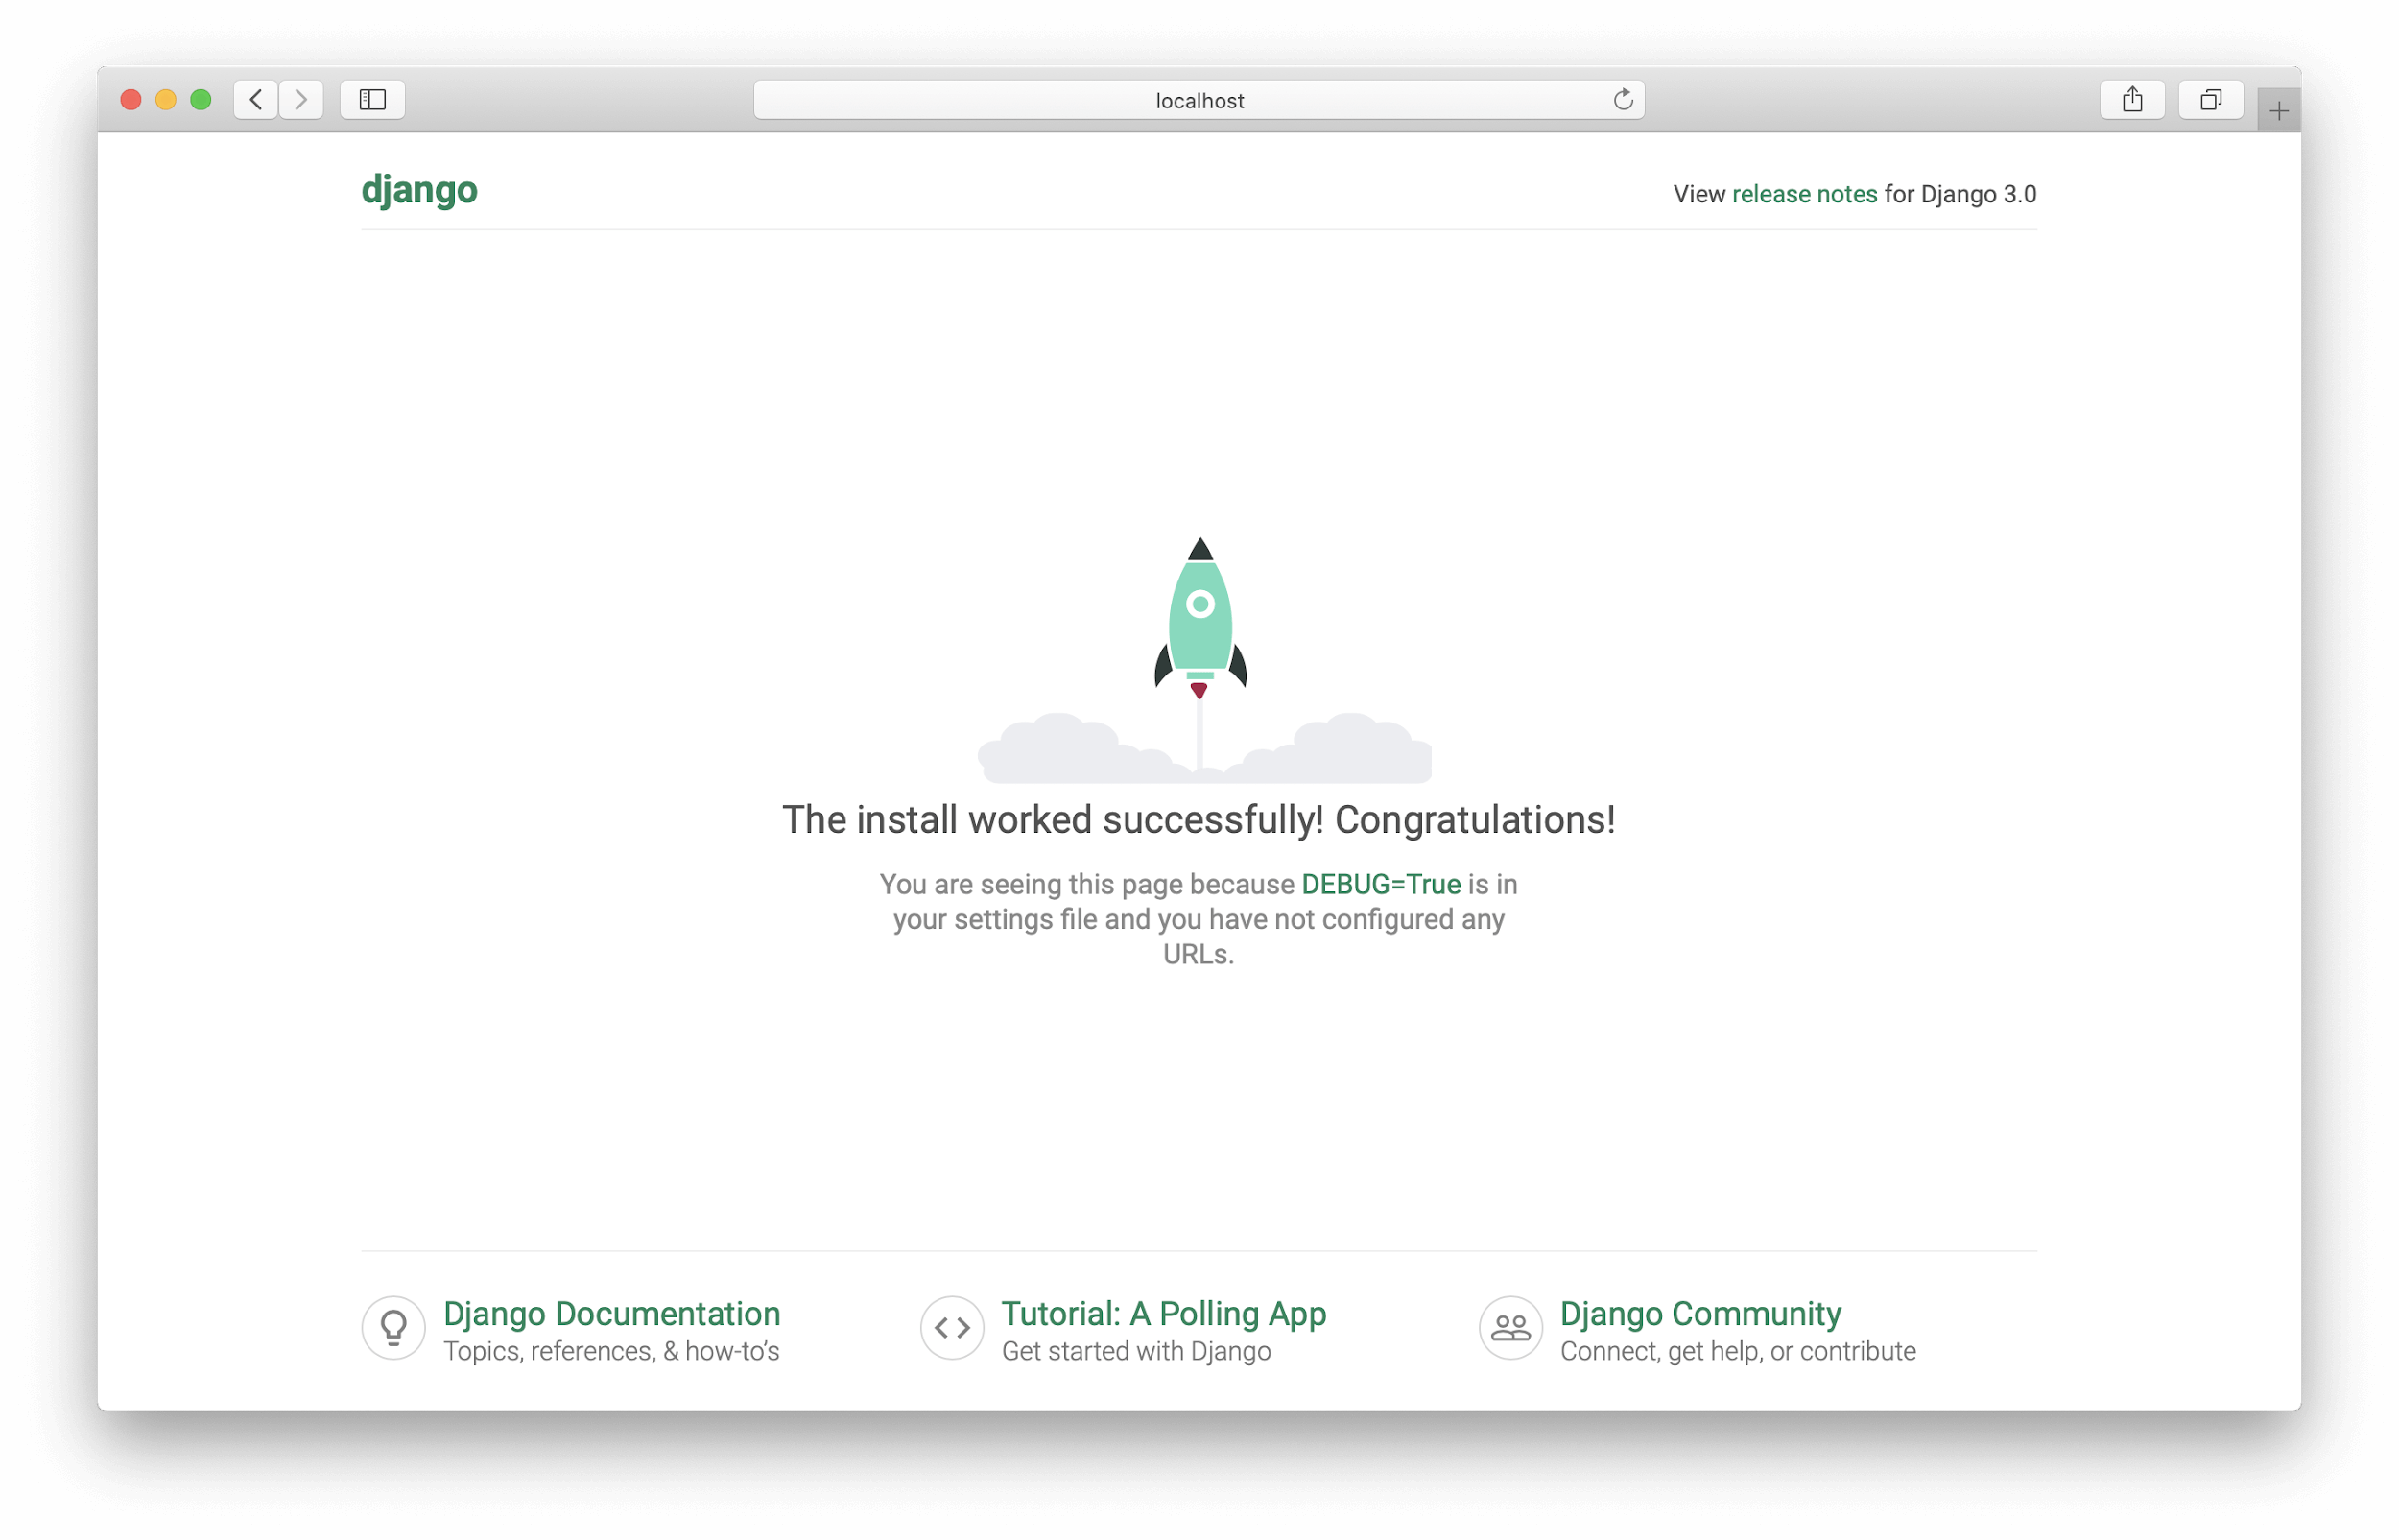
Great, this is the message that Django displays once the server is running. Now open the browser and go to the server link mentioned or [localhost:8000](http://localhost:8000/). We’ll see a page similar to the screenshot below:
The page rendered is a basic HTML template that comes with Django.
Thus, we’ve understood the **_manage.py_** file. Let’s understand how views, URLs, and other files are used. All these are consolidated into the Django lifecycle.
### Django Lifecycle
Now that we’ve learned about the Django directory structure and getting the server running, let’s understand what constitutes the Django lifecycle:
1. **Models**: Models are like classes; these define the database schema. It can be defined as an object (an object has properties and methods) that needs to be saved in the database.
2. **Views:** Views are the functions. It’s where we write our business logic. It takes a web request and returns a web response. Here, we can access the models and define our own functionalities.
3. **Templates:** Templates are the basic HTML files; here, we pass our models using views.
4. **URLs:** URLs define the paths to pages. For example, we can have a "home" URL pointing to our home page, an "about" URL pointing to an about page, and a "contact" URL to display the contact information in an HTML page.
Django stacks all these into one lifecycle. It defines the possible interactions among them, depicted in the below image:
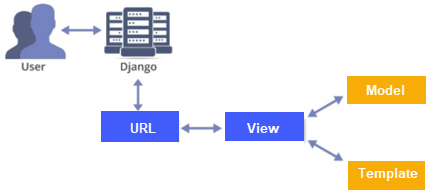
Imagine a user accessing our website. Firstly, our Django server needs to be up and running. As soon as the user enters a URL, the Django server looks at the view that corresponds to that particular URL. If there is no view against that URL, it returns a 500 Internal server error, else it processes the code written in our view. If there is any model to be used as specified in the view, it requests the model and fetches the data, and later renders that data onto the templates, else it simply returns the template as an HTML page.
This is what happens repeatedly during our website access. It’s as simple as that.
### Creating Core app within CodeShare app
That’s not it! To keep the code clean, let’s create an app inside the project. Any number of applications can be created inside a project. In our case, one should suffice. Let’s first change our directory path from the parent folder to the `codeshare` folder and create our application in there. Execute the command below at the base folder of the project:
```bash
python3 manage.py startapp core
```
We should now have two main folders within our project:
1. `codeshare/codeshare`
2. `codeshare/core`
After we create an app named _core_, it’s our responsibility to inform Django about the same. To do so, we need to include it in the `codeshare/settings.py` file. So in the `settings.py` file, append `'core'` to the `INSTALLED_APPS` list; below is how it looks like:
```python
# codeshare/settings.py
INSTALLED_APPS = [
'django.contrib.admin',
'django.contrib.auth',
'django.contrib.contenttypes',
'django.contrib.sessions',
'django.contrib.messages',
'django.contrib.staticfiles',
'core',
]
```
We’ve got our directory structure ready. However, there are various other things to work on. But what to choose first - Models or Views or URLs or Templates? We will use the following workflow: **Models -> Views -> Templates -> URLs**
### Setting up the database - PostgreSQL
To store all the posts that are to be rendered into the application, we need a database. In our application, any number of users can log in and post their set of blog posts. To keep track of what content is to be rendered, we require a database. How about the type of database that suits our application? There are structured and unstructured databases. We store posts that usually follow the same pattern, say, title, content, author, etc. It seems structured and neat. Therefore, a structured database is the one we shall opt for.
[MySQL](https://www.mysql.com/) and [PostgreSQL](https://www.postgresql.org/) are among the most used structured databases; which is a better option? PostgreSQL is the most preferred because of the ease of integrating it with Django, and the creators of Django have themselves recommended it (_If you're not tied to any legacy system and have the freedom to choose a database back end, we recommend PostgreSQL, which achieves a fine balance between cost, features, speed, and stability_). So, let’s employ the same in our application.
> Make sure to install the PostgreSQL database on our local machine; below are the links to proceed with the installation:
**macOS: [https://postgresapp.com/](https://postgresapp.com/)**
**Windows/Linux: [https://www.postgresql.org/](https://www.postgresql.org/)**
Let's go open our `codeshare/settings.py` file. In the **DATABASE** section, we'll find the following code:
```python
DATABASES = {
'default': {
'ENGINE': 'django.db.backends.sqlite3',
'NAME': os.path.join(BASE_DIR, 'db.sqlite3'),
}
}
```
By default, Django uses "sqlite3" as its database. Let’s modify it to embed PostgreSQL into our `codeshare` folder. Follow the below code snippet to modify the code:
```python
DATABASES = {
"default": {
"ENGINE": "django.db.backends.postgresql_psycopg2",
"NAME": "codeshare",
"USER": "",
"PASSWORD": "",
"HOST": "",
}
}
```
Here we’ve set `codeshare` as the DB name, but make sure to create a PostgreSQL DB with the same name locally. We can use the below command if we’re using a Mac or Linux machine:
```bash
createdb codeshare
```
> Note: Be sure Postgresql is running locally
If we’re using a Windows machine, we need to connect to PSQL first, then type the command:
```bash
CREATE DATABASE codeshare;
```
It looks like:
```bash
postgres=# CREATE DATABASE codeshare;
```
In the next step, let’s create tables in the `codeshare` database.
### Unapplied migration?
Django has a few built-in models: "admin", "auth", "contenttypes", and "sessions". These comprise the predefined table schemas. So to eliminate the error "Unapplied Migrations", which we’ve seen previously, we need to create a database and add these models into tables. Since we’re already created the database, let’s now create tables for these models. To do that, use the following command in the terminal or command prompt:
```bash
python3 manage.py migrate
```
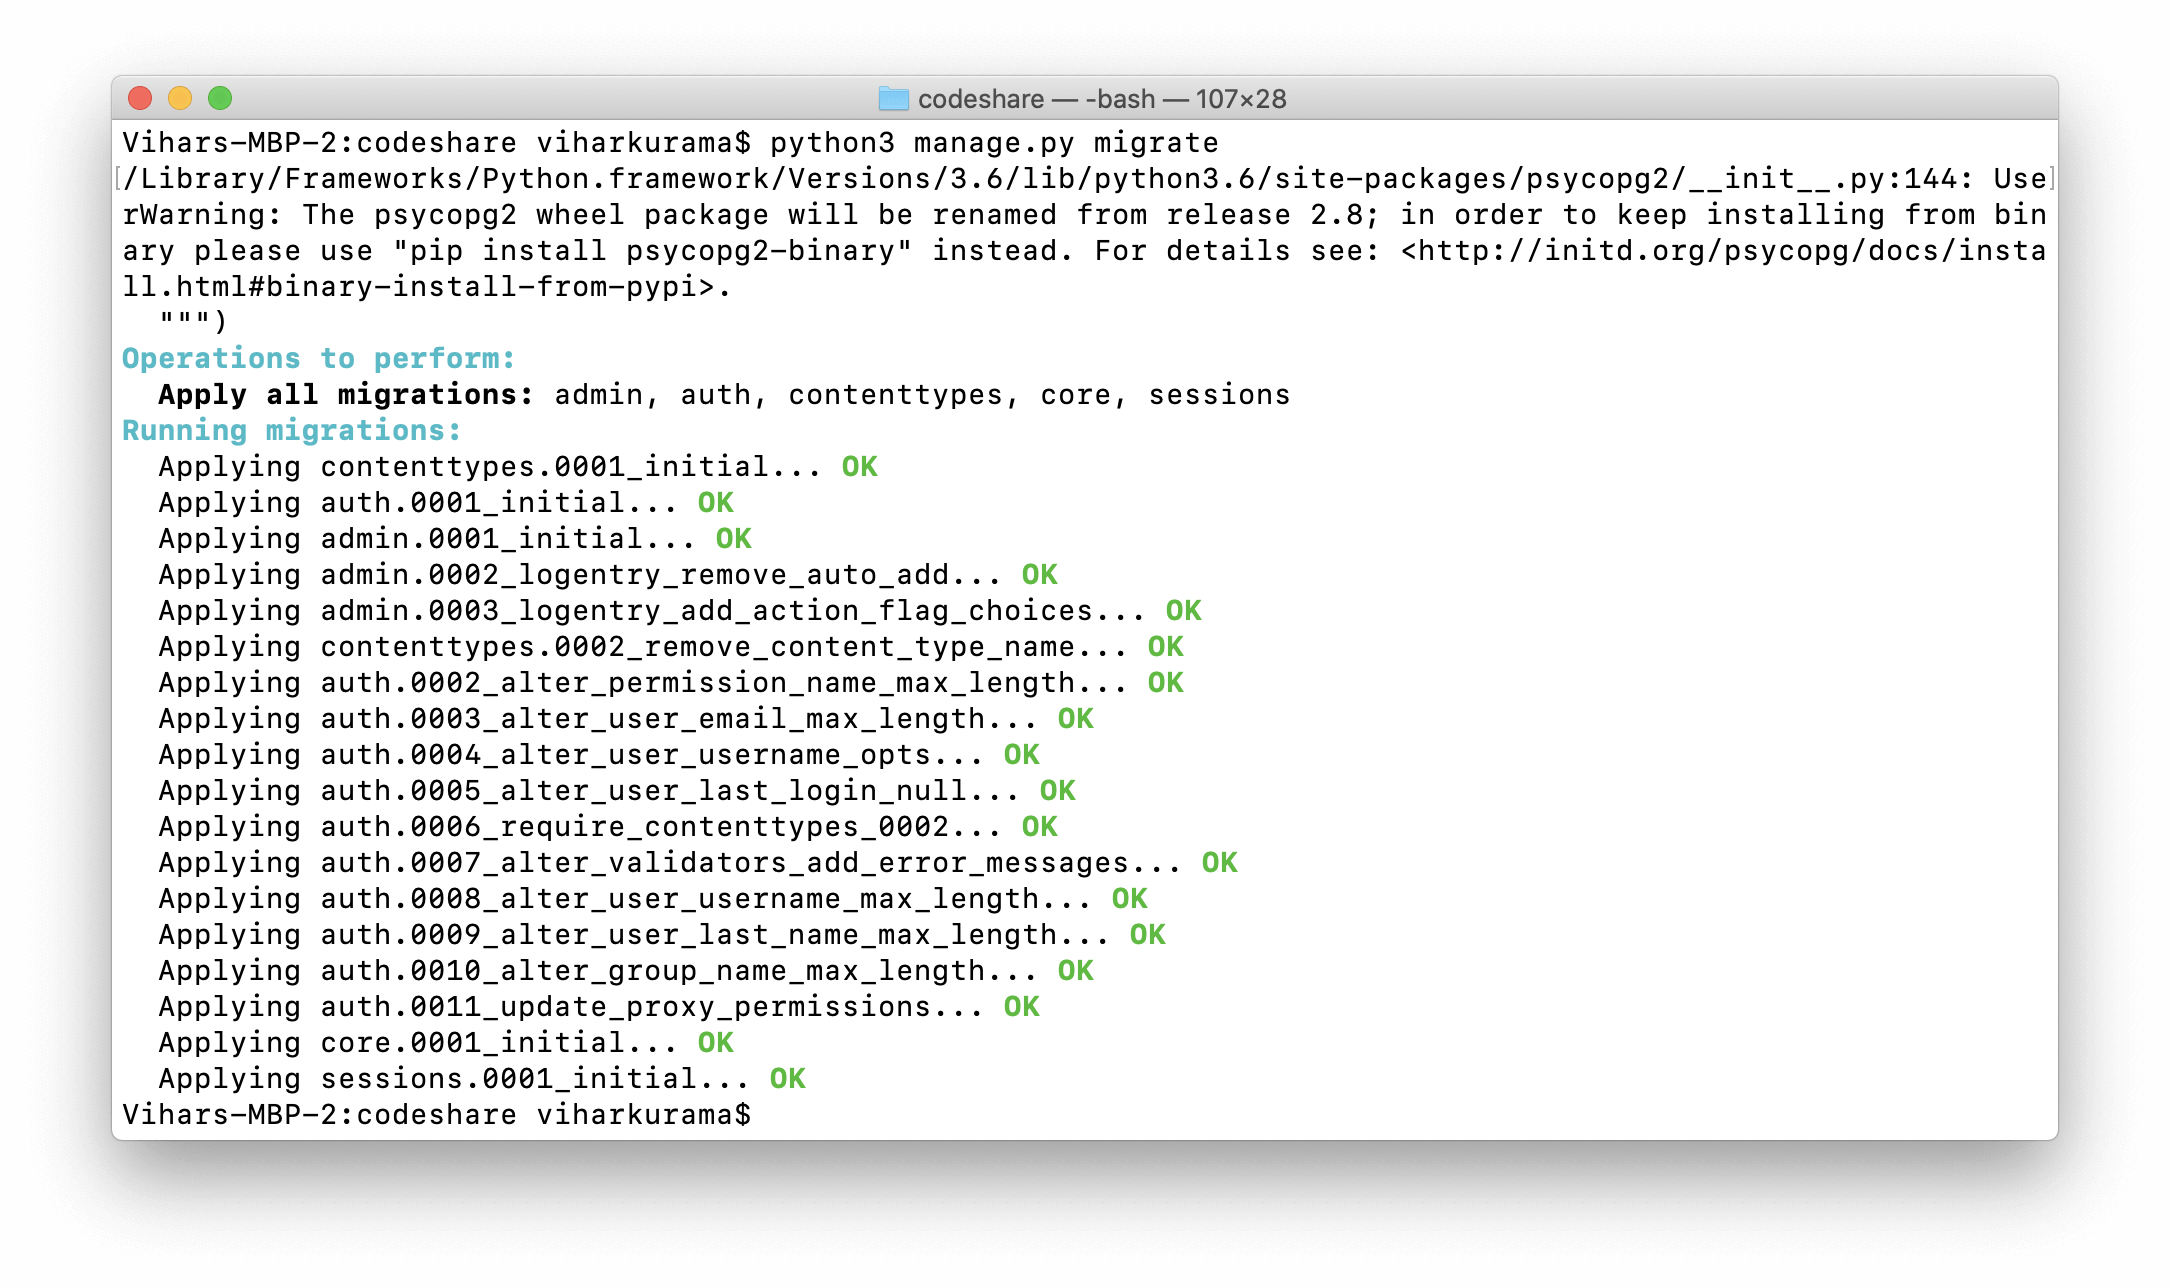
We’ll see a few messages similar to ones below:
```bash
**Operations to perform:**
**Apply all migrations:** admin, auth, contenttypes, sessions
**Running migrations:**
… OK
… OK
```
Now run the server again using the command:
```bash
python3 manage.py runserver
```
We won't come across the "Unapplied Migrations" error. This is how we migrate tables using the **migrate** argument, and this establishes a connection from our Django environment to PostgreSQL.
## Defining the Models
We’re now left with defining our database schema. Let’s quickly go to the `codeshare/core/models.py` file and create new models in there:
```python
# codeshare/core/models.py
from django.db import models
# Create our models here.
class TimeAuditModel(models.Model):
""" To path when the record was created and last modified """
created = models.DateTimeField(auto_now_add=True, verbose_name="Created At",)
updated = models.DateTimeField(auto_now=True, verbose_name="Last Modified At")
class Meta:
abstract = True
class Post(TimeAuditModel):
post_title = models.CharField(max_length=255)
post_description = models.TextField()
post_description_markdown = models.TextField(blank=True)
post_author = models.CharField(max_length=255)
def __str__(self):
return self.post_title
```
Perfect! This is how our `models.py` file should look. Let’s discuss in detail the code in it. Initially, we create a new class named `TimeAuditModel` (_an abstract class as mentioned in class 'Meta' - It cannot be used as a normal Django model, but has to be inherited_), and this should include the subclass `models.Model` as it has all the fields and data types required to create Django models. We then initialize two variables inside the `TimeAuditModel`: the first is _created_, which corresponds to a `DateTimeField`. Noticed `models.DataTimeField` here? This is why we’ve imported `models` from `django.db` in the first place. Moving on, we add a variable called `updated`, which is a `DateTimeField` as well. These two variables help in acquiring information about the date and time the objects being loaded into the model were created and updated; look at the arguments they take in and we’ll understand how they work.
Next, we create a class named `Post` which inherits the `TimeAuditModel`. This inheritance says that the two fields, _created_ and _updated_, are now a part of the `Post` model. In this class, we declare all the variables that our codesharing post should consist of. Usually, the code snippet has a title, description, markdown (to store code in markdown format), tags (to add specific tags that relate to the post), feedback, and author. Hence, we initialize them using their corresponding model types. The `__str__()` method is to define the whole object with a single value being returned in it. Here, `post_title` defines an object being created using the `Post` model.
After defining our model, we’re left with the task of adding that in our defined database _codeshare_. To do so, first, we need to tell Django about the new additions made to our models. For the same, type the below command:
```bash
python3 manage.py makemigrations core
```
This prints the following output on the terminal or command prompt:
```bash
Migrations for 'core':
core/migrations/0001_initial.py
- Create model Post
```
This creates a migration file in the folder `codeshare/core/migrations`. We then migrate the defined models using the below command:
```bash
python3 manage.py migrate core
```
The output then looks like:
This adds our models `Post` and `TimeAuditModel` to the database. To check the credibility of these commands, let’s look into Django Admin.
## Django Admin
Django Admin provides a user-friendly UI to access the models on the fly. Data is fetched from the models we create and is displayed to the admin. Let’s peek into the admin site now!
Prior to accessing the site, we first need to allow the Django admin to have access to the models we created. To do that, modify the `codeshare/core/admin.py` file in the core folder.
```python
# codeshare/core/admin.py
from django.contrib import admin
from .models import Post
admin.site.register(Post)
```
This registers the `Post` model with the admin. We now have access to view the schema of it. In addition, we can add, delete, or modify the posts. To understand this, let’s see what constitutes the admin GUI.
Type the URL `localhost:8000/admin` into our browser and a page as displayed below should pop up on our screen:

There are no admin credentials created so far. To create one, type the below command into the terminal or command prompt:
```bash
python3 manage.py createsuperuser
```
The below screenshot shows the next screen that will be displayed:
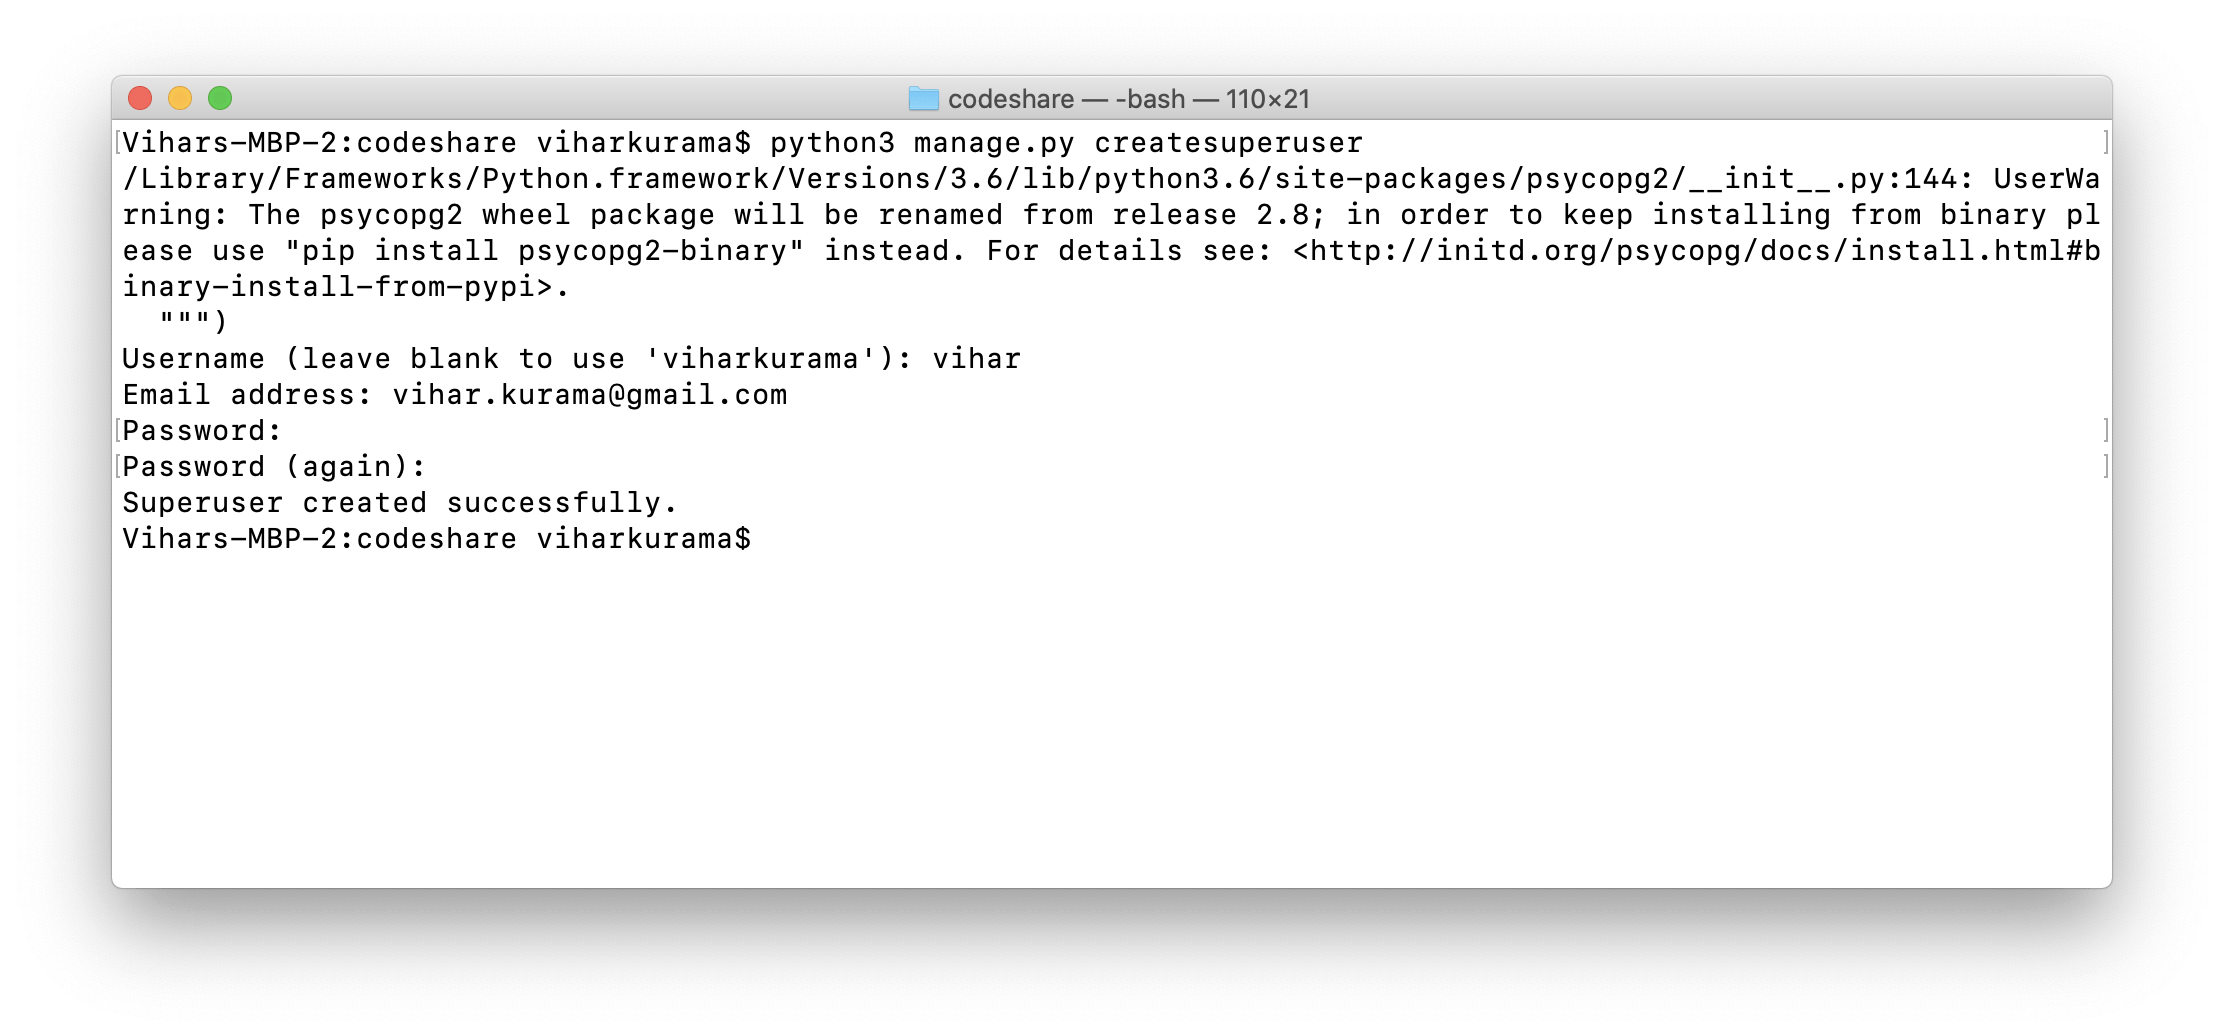
Make sure to enter all of our details. Now we’re able to access the admin site with the credentials that we’ve just created. Type in the username and password. It will take us to the admin dashboard.
We'll find the models _Groups_, _Users_, and _Posts_ in there. Click on Users and we'll find the admin that we just created. Click on Posts and the below snapshot gives us a peek into it.
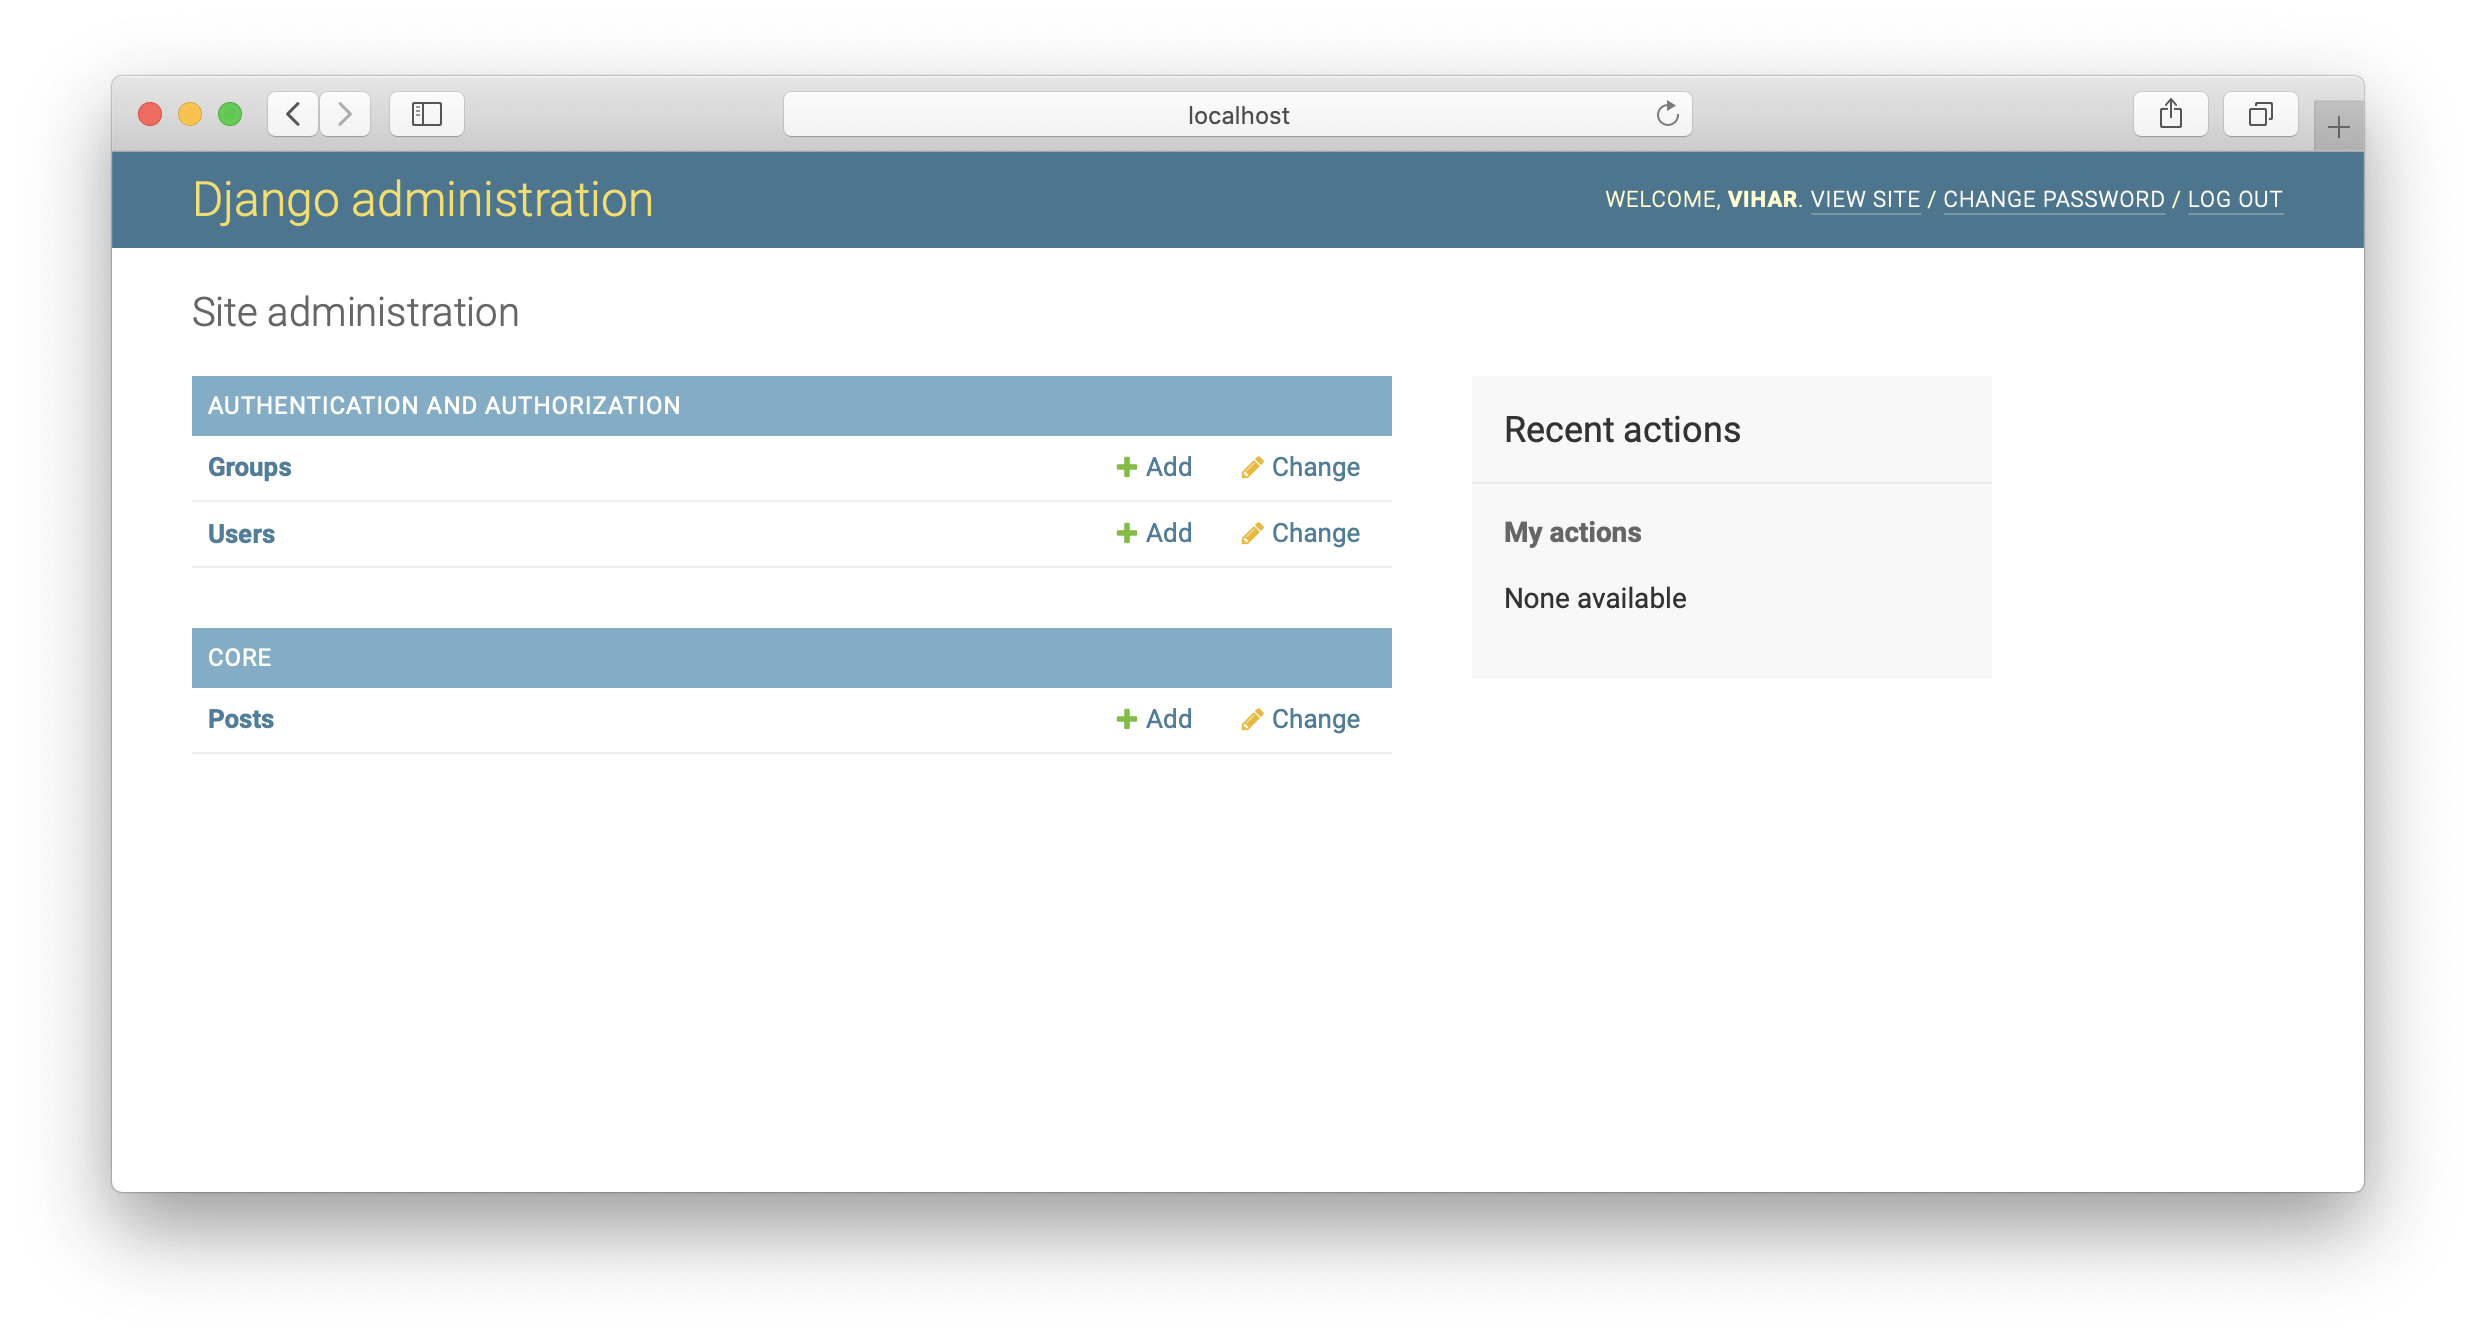
> Note: Make sure the server is running. After creating the superuser, don’t forget to turn on the server.
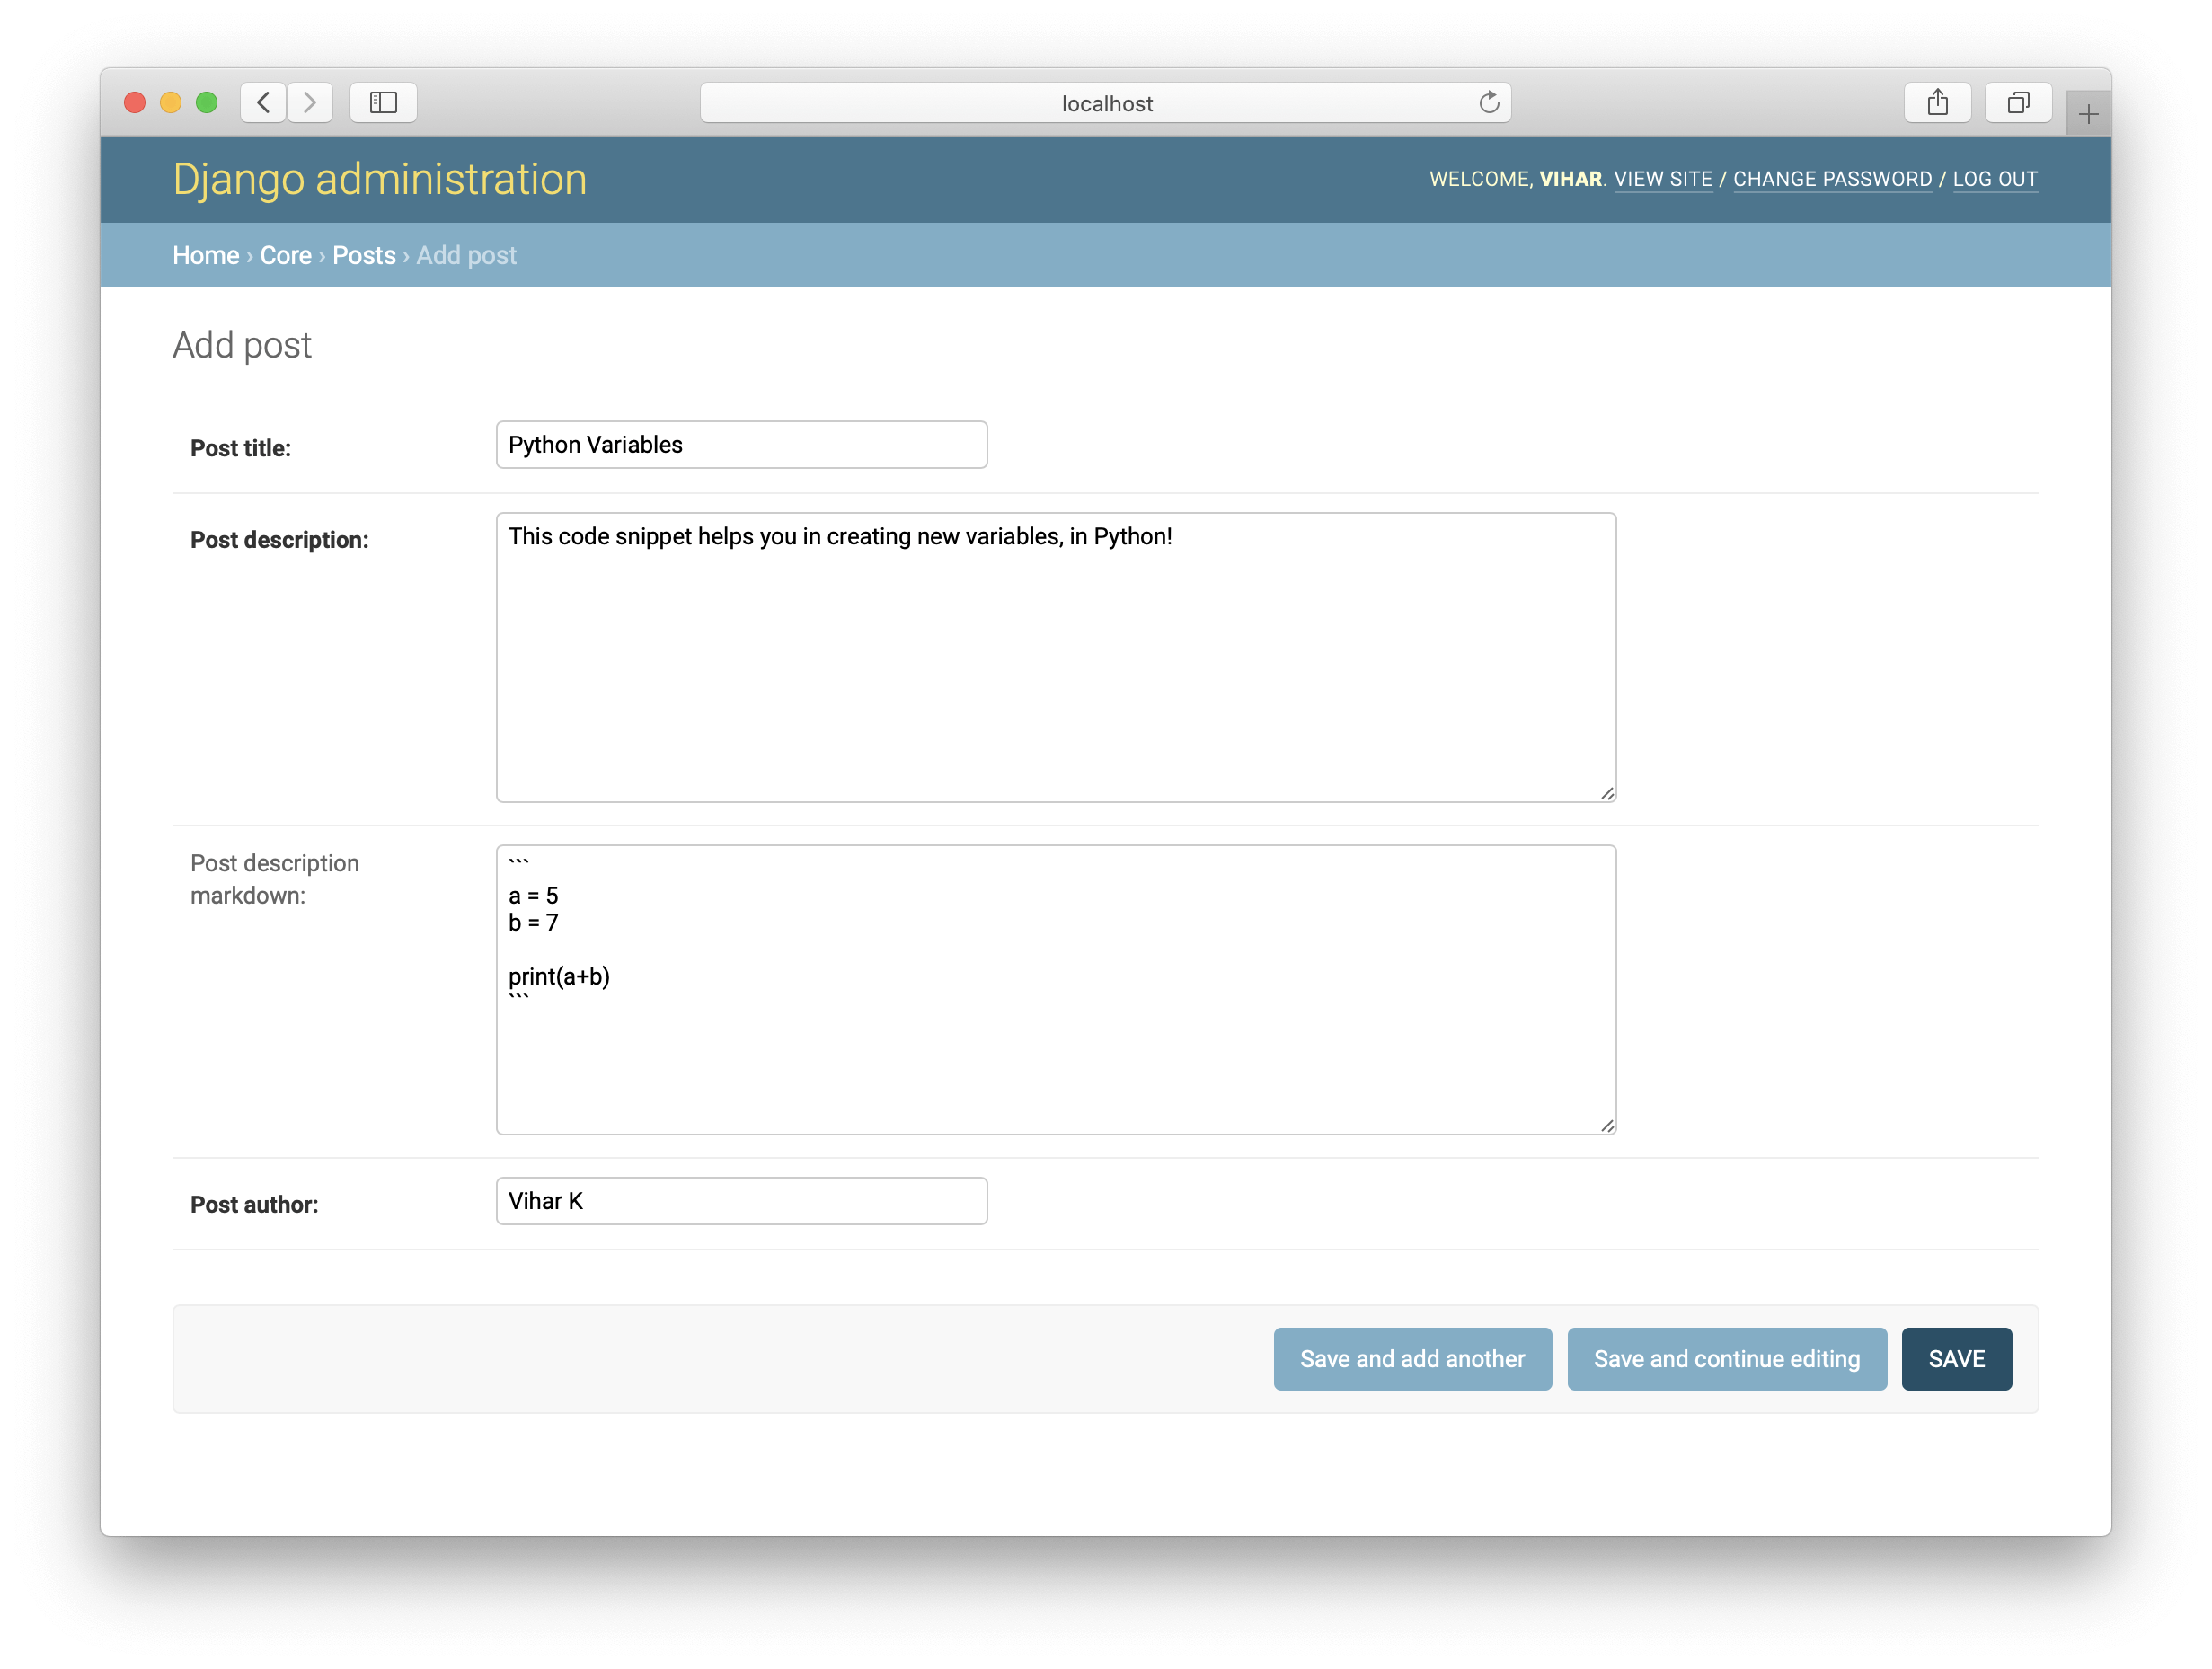
Click on "Posts" under "CORE" on the home page. Next click on "ADD POST +" in the upper right-hand corner.
Fill in the inputs and click on Save. This creates our codesharing post.

Cheers! We’ve created our first post. Moving on, let’s display these posts on HTML pages for others to look at. This process includes fetching the data from the _Post_ table and rendering it on an HTML page. All this is coded using a `View`.
## Defining the Views
Our models are up and running, and now we need to code the logic to render them onto a particular HTML screen. To do this, we need to collect all the objects that are under the class `Post` and parse them into an HTML template.
Let’s open the `codeshare/core/views.py` file and include the below code:
```python
#codeshare/core/views.py
from django.shortcuts import render, redirect
from django.views.generic import View
from .models import Post
class PostListView(View):
def get(self, request):
posts = Post.objects.all()
context = {"posts": posts}
return render(request, "home.html", context)
```
Here, we create a `ClassBasedView`. These are fast and flexible compared to regular function-based views. Our goal is to list all the posts on our home screen. So we define a class named `PostListView`, which inherits the class `View` that we import from `django.views.generic`. This is to support class-based views. Now we write a `get()` method that takes `self` and `request` as arguments.
- **`self`** is the default argument for every method, and it refers to the object instance being explicitly passed into the method.
- **`request`** refers to the HTTP request data that is being passed. To be more precise, it’s the WSGI instance.
In our `get()` method, we create a variable post to store all the `Post` objects. Hence, we import the `Post` object from `.models`to collect all the objects of `Post` class; the query we use is - **`Post.objects.all()`.**
The next task is to print all these objects onto an HTML page. Hence we use the `render()` method in Django. This takes in three arguments: `request`, the name of the HTML file, and a dictionary.
The render function takes in a dictionary to pass the ORM objects into the template.
**ORM** or **Object Relational Mapper** transmits information from a relational database to the application at hand. It acts as a middleware to facilitate the interactions between DB and application and eliminates the need to write SQL. The migrations feature embedded in Django is also a part of Django ORM wherein no specific commands are required to create tables along with their respective schemas.
> Along the same lines, there’s another concept called **Querysets**. These define Django’s way of retrieving data from the database. Django ORM supports Querysets to filter the required data from the model. Post.objects.all(), which we've used before, is a Queryset to retrieve all the objects associated with the class Post.
To keep the code clean, we name our dictionary variable as `context` (in this case, we are sending `Post` ORM object into the template).
This isn’t the whole story. Haven’t we missed the `home.html` which we passed in the `render()` method? This HTML page has to be defined as a `template`.
## Defining the Templates
To add templates to our `codeshare` directory, we first need to configure it in our `codeshare/codeshare/settings.py` file (necessary when deploying the application on Heroku). Go ahead and open the `settings.py` file. We'll find a list named `TEMPLATES` that has a dictionary inside it. Within the dictionary, we have a key named "DIRS" mapped to an empty list. Add a string called _"templates"_ there.
```python
TEMPLATES = [
{
"BACKEND": "django.template.backends.django.DjangoTemplates",
# below is the updated line
"DIRS": ["templates"],
"APP_DIRS": True,
"OPTIONS": {
"context_processors": [
"django.template.context_processors.debug",
"django.template.context_processors.request",
"django.contrib.auth.context_processors.auth",
"django.contrib.messages.context_processors.messages",
],
},
},
]
```
Now create a folder named `templates` in the root directory. All the template files can now be defined in the `codeshare/templates` directory. Let’s create our `home.html` there. Go into the newly created file, `codeshare/templates/home.html`.
Now that we have all the objects being passed in a `posts` variable, we'll use [Jinja templating](https://jinja.palletsprojects.com/en/2.11.x/) to render post items onto the HTML. In our case, we print all our post objects using a "for loop". Add in the following code to our newly created file:
``` html
{% for i in posts %}
{{ i.post_title}}
{{i.post_author}}
{{ i.post_description }}
{{ i.post_description_markdown }}
{{ i.created}}
{{ i.updated}}
{% endfor %}
```
We’re not done yet. We haven’t mentioned any URLs until now. So let’s quickly configure them in the next section.
## Defining the URLs
We have defined all our `models` and `views` inside the `codeshare/core` app. So we need to add a file named `urls.py` in the `codeshare/core` app where we can manage all our URLs. Before that, in `codeshare/codeshare/urls.py`, let’s include our `core.urls` as in the below code snippet:
```python
# codeshare/codeshare/urls.py
from django.contrib import admin
from django.urls import path, include
urlpatterns = [
path("admin/", admin.site.urls),
path("", include("core.urls"))
]
```
The empty string here defines the default route ("/"). So whenever the user opens the home route, the control goes to the `codeshare/core/urls.py` file. It then accesses those URLs. Now, we need to define URLs in the core app.
Our goal is to render all the posts that we added in the admin interface whenever the user hits the URL `localhost:8000/`. Hence we design an empty url and attach it to the `PostListView` that we created before. URLs typically take in two arguments: one is the path, and the other is the view. Since `PostListView` is a class, we call the method `as_view()`, which returns a callable view that takes a request and returns a response.
```python
# codeshare/core/urls.py
from django.urls import path
from .views import PostListView
urlpatterns = [
path("", PostListView.as_view()),
]
```
Aren’t we keen to look into what we’ve built so far using Django? Go to the browser and type in `localhost:8000/` in the URL field. Voila! Our application indeed works awesome as shown below:
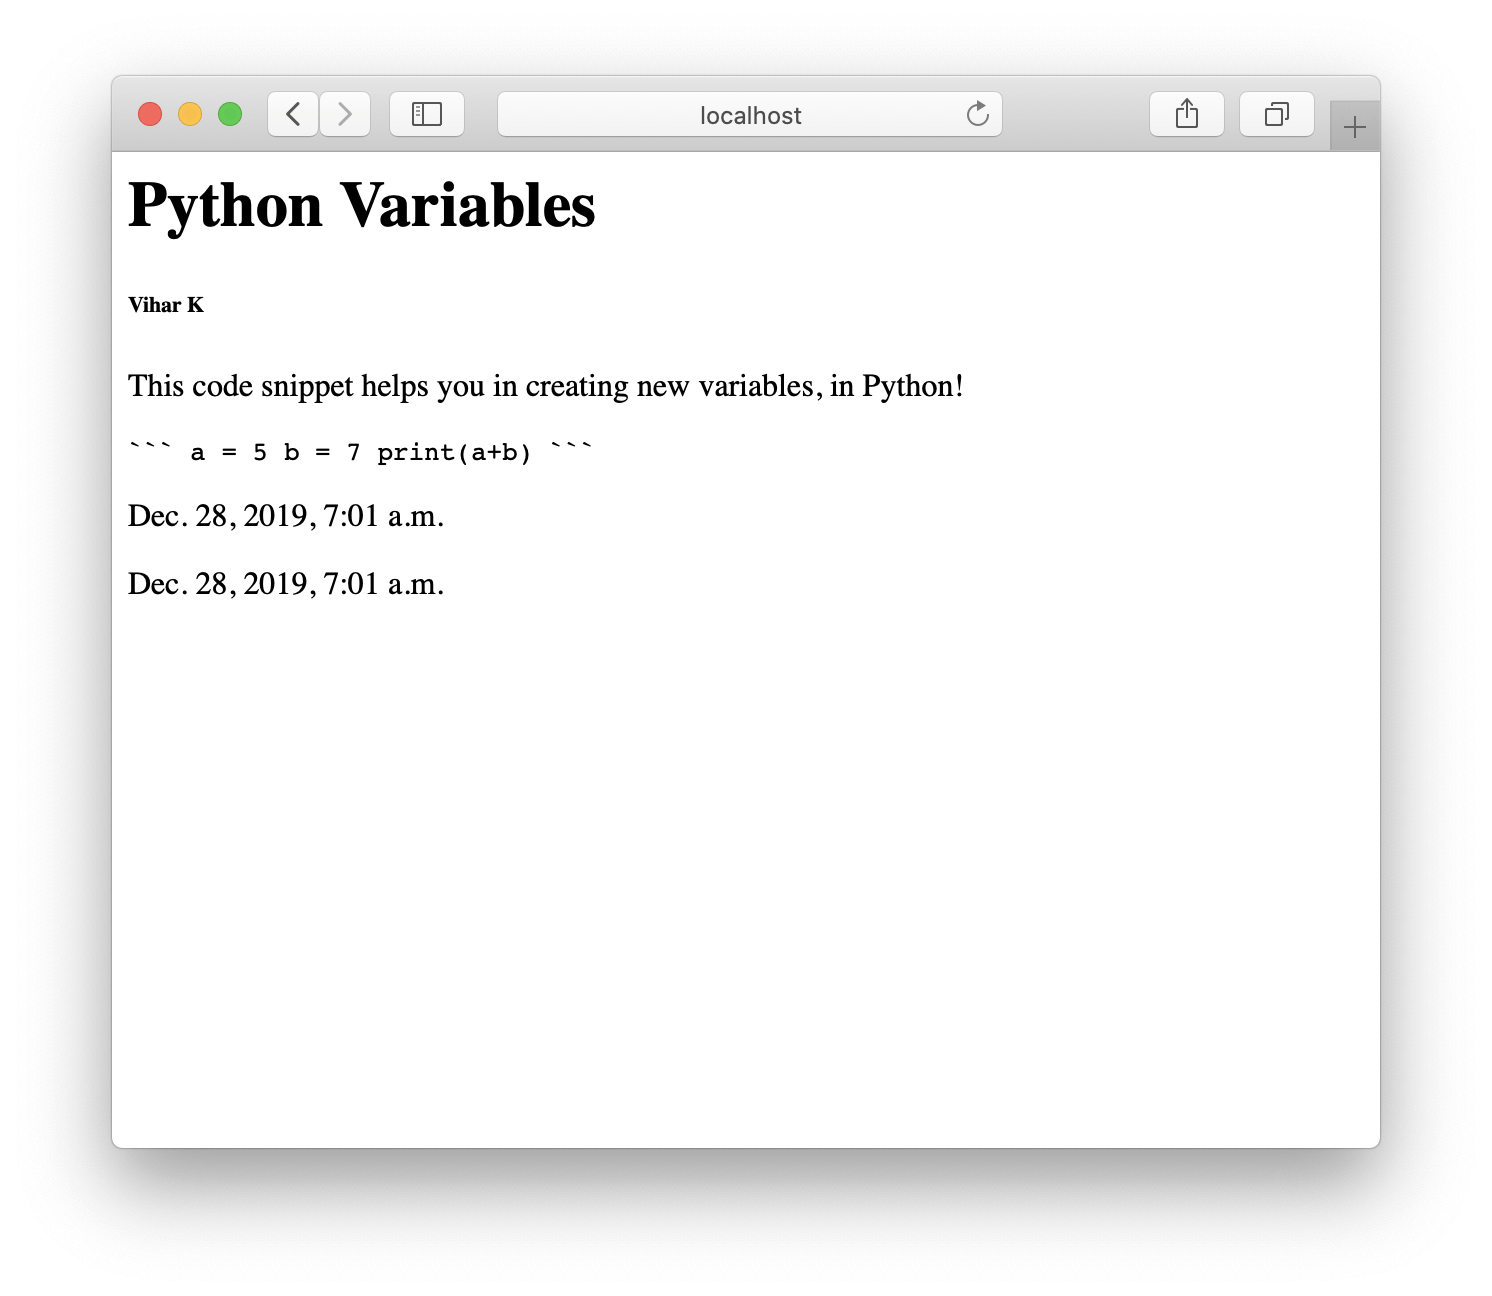
> Restarting the server may be necessary.
Great work! Let’s complete the two other tasks that are still in the pipeline: authentication and deployment. We will do that in the second part of this series, [Introduction to Django 3.0 - Building, Authenticating, and Deploying - Part 2](https://auth0.com/blog/introduction-to-django-3.0-building-authenticating-and-deploying-part-2/)!
---