---
title: "Introduction to Progressive Web Apps (Push Notifications) - Part 3"
description: "Progressive Web Apps are the future. Learn how to make your mobile web app native-like by making it work offline, load instantly and send push notifications."
authors:
- name: "Prosper Otemuyiwa"
url: "https://auth0.com/blog/authors/prosper-otemuyiwa/"
date: "Dec 28, 2016"
category: "Developers,Tutorial,Progressive Web Apps"
tags: ["pwa", "service-workers", "offline"]
url: "https://auth0.com/blog/introduction-to-progressive-web-apps-push-notifications-part-3/"
---
# Introduction to Progressive Web Apps (Push Notifications) - Part 3
---
**TL;DR:** Web development has evolved significantly over the years allowing developers to deploy a website or web application and serve millions of people around the globe within minutes. With just a browser, a user can put in a URL and access a web application. With, **Progressive Web Apps**, developers can deliver amazing app-like experiences to users using modern web technologies. In [Part 1](https://auth0.com/blog/introduction-to-progressive-apps-part-one) and [Part 2](https://auth0.com/blog/introduction-to-progressive-web-apps-instant-loading-part-2) of this tutorial, we set up our progressive web app, cached the pages and made it work fully offline. This time, we'll add the ability to activate push notifications.
---
## Recap and Introduction to Part 3
In [Introduction to Progressive Web Apps (Offline First)](https://auth0.com/blog/introduction-to-progressive-apps-part-one), we discussed how a typical progressive web application should look like and also introduced the service worker. We also cached the application shell. In [Introduction to Progressive Web Apps (Instant Loading)](https://auth0.com/blog/introduction-to-progressive-web-apps-instant-loading-part-2), we made the app cache dynamic data and load instantly from locally saved data.
This part of the tutorial will cover:
* Activating Push Notifications in the web app
* Adding a web application manifest to make the web app installable
## Push Notifications
The [Push API](https://developer.mozilla.org/en/docs/Web/API/Push_API) gives web applications the ability to receive push notification messages pushed to them from a server. This works hand in hand with the service worker. This is the process of a typical push notification flow in a web application:
* The web app brings forward a popup asking the user to subscribe to notifications.
* The user subscribes to receive push notifications.
* The service worker's push manager is responsible for handling the user's subscription.
* The users subscription ID is used whenever messages are posted from the server. Every user can actually have a customized experience based on their subscription ID.
* The service worker, with the help of the `push` listens and is ready to receive any message coming in.
## Implementation
This is a quick summary of the process of how we'll set up push notifications in this web app:
* Give the user an option to click on a button to activate or deactivate push notifications
* If the user activates, subscribe the user to receive push notifications via the service worker's push manager
* Set up an API to handle saving and deleting of users subscription ID. This API will also have endpoints that will be responsible for sending notifications to all the users that have activated push notifications
* Set up GitHub Webhook to automate the sending of notifications immediately a new commit is pushed to the `resources-i-like` repo.
### Let's Build
Create a new JavaScript file `js/notification.js` in your project. Reference the file in your `index.html` like so:
```bash
```
..and add the following code the `notification.js` like so:
```js
(function (window) {
'use strict';
//Push notification button
var fabPushElement = document.querySelector('.fab__push');
var fabPushImgElement = document.querySelector('.fab__image');
//To check `push notification` is supported or not
function isPushSupported() {
//To check `push notification` permission is denied by user
if (Notification.permission === 'denied') {
alert('User has blocked push notification.');
return;
}
//Check `push notification` is supported or not
if (!('PushManager' in window)) {
alert('Sorry, Push notification isn\'t supported in your browser.');
return;
}
//Get `push notification` subscription
//If `serviceWorker` is registered and ready
navigator.serviceWorker.ready
.then(function (registration) {
registration.pushManager.getSubscription()
.then(function (subscription) {
//If already access granted, enable push button status
if (subscription) {
changePushStatus(true);
}
else {
changePushStatus(false);
}
})
.catch(function (error) {
console.error('Error occurred while enabling push ', error);
});
});
}
// Ask User if he/she wants to subscribe to push notifications and then
// ..subscribe and send push notification
function subscribePush() {
navigator.serviceWorker.ready.then(function(registration) {
if (!registration.pushManager) {
alert('Your browser doesn\'t support push notification.');
return false;
}
//To subscribe `push notification` from push manager
registration.pushManager.subscribe({
userVisibleOnly: true //Always show notification when received
})
.then(function (subscription) {
toast('Subscribed successfully.');
console.info('Push notification subscribed.');
console.log(subscription);
//saveSubscriptionID(subscription);
changePushStatus(true);
})
.catch(function (error) {
changePushStatus(false);
console.error('Push notification subscription error: ', error);
});
})
}
// Unsubscribe the user from push notifications
function unsubscribePush() {
navigator.serviceWorker.ready
.then(function(registration) {
//Get `push subscription`
registration.pushManager.getSubscription()
.then(function (subscription) {
//If no `push subscription`, then return
if(!subscription) {
alert('Unable to unregister push notification.');
return;
}
//Unsubscribe `push notification`
subscription.unsubscribe()
.then(function () {
toast('Unsubscribed successfully.');
console.info('Push notification unsubscribed.');
console.log(subscription);
//deleteSubscriptionID(subscription);
changePushStatus(false);
})
.catch(function (error) {
console.error(error);
});
})
.catch(function (error) {
console.error('Failed to unsubscribe push notification.');
});
})
}
//To change status
function changePushStatus(status) {
fabPushElement.dataset.checked = status;
fabPushElement.checked = status;
if (status) {
fabPushElement.classList.add('active');
fabPushImgElement.src = '../images/push-on.png';
}
else {
fabPushElement.classList.remove('active');
fabPushImgElement.src = '../images/push-off.png';
}
}
//Click event for subscribe push
fabPushElement.addEventListener('click', function () {
var isSubscribed = (fabPushElement.dataset.checked === 'true');
if (isSubscribed) {
unsubscribePush();
}
else {
subscribePush();
}
});
isPushSupported(); //Check for push notification support
})(window);
```
The code above is doing many things. Just relax, I'll explain the different parts of the code.
```js
//Push notification button
var fabPushElement = document.querySelector('.fab__push');
var fabPushImgElement = document.querySelector('.fab__image');
```
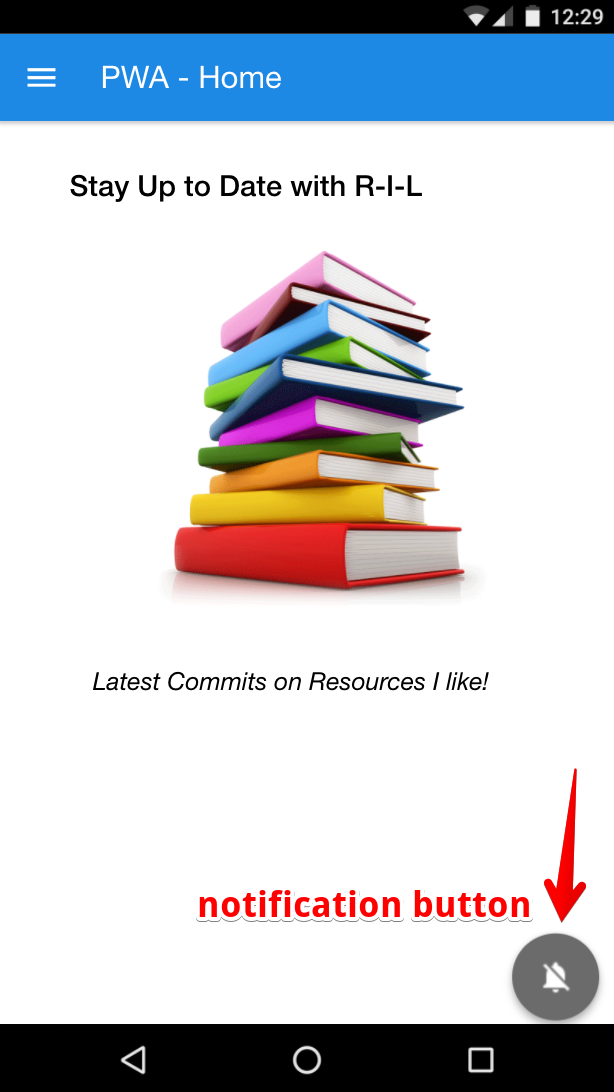
_Push Notification button_
This code simply grabs the push notification activation and deactivation button.
```js
function isPushSupported() {
//To check `push notification` permission is denied by user
if (Notification.permission === 'denied') {
alert('User has blocked push notification.');
return;
}
//Check `push notification` is supported or not
if (!('PushManager' in window)) {
alert('Sorry, Push notification isn\'t supported in your browser.');
return;
}
//Get `push notification` subscription
//If `serviceWorker` is registered and ready
navigator.serviceWorker.ready
.then(function (registration) {
registration.pushManager.getSubscription()
.then(function (subscription) {
//If already access granted, enable push button status
if (subscription) {
changePushStatus(true);
}
else {
changePushStatus(false);
}
})
.catch(function (error) {
console.error('Error occurred while enabling push ', error);
});
});
}
```
This code checks the browser to determine whether push notification is supported. Now, it's paramount that the service worker has to be registered and ready before you can even try to subscribe a user to receive push notifications. So, the code above also checks if the service worker is ready and gets the subscription of the user.
```js
//To change status
function changePushStatus(status) {
fabPushElement.dataset.checked = status;
fabPushElement.checked = status;
if (status) {
fabPushElement.classList.add('active');
fabPushImgElement.src = '../images/push-on.png';
}
else {
fabPushElement.classList.remove('active');
fabPushImgElement.src = '../images/push-off.png';
}
}
```
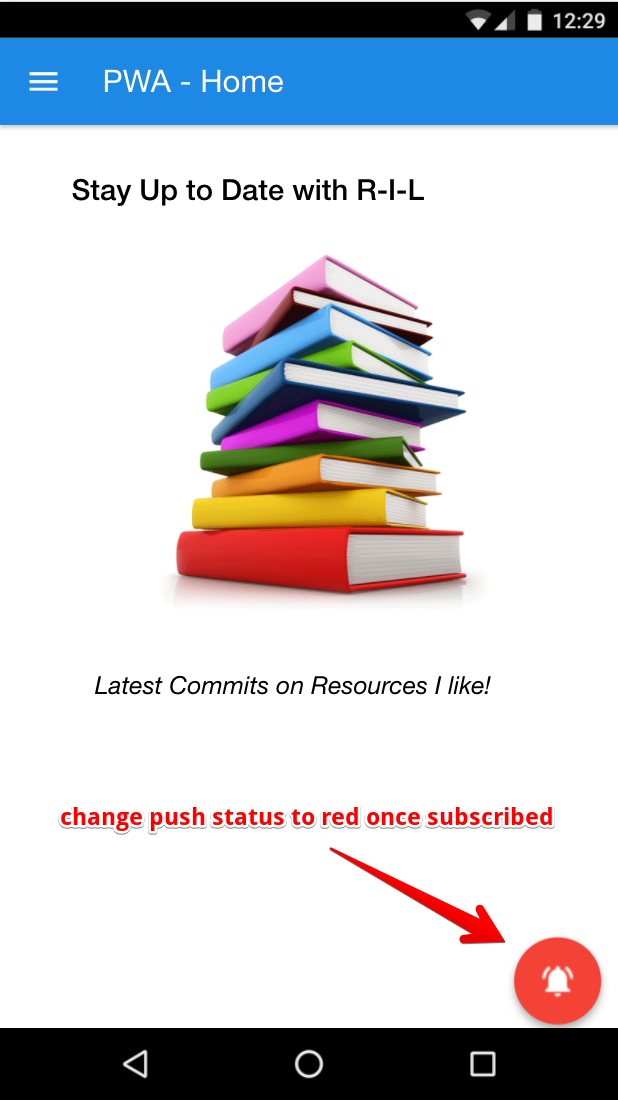
_Change push status to red when active/subscribed_

_Change push status to ash when inactive/unsubscribed_
The `changePushStatus` function simply changes the color of the button to indicate wether the user has subscribed or not.
```js
// Ask User if he/she wants to subscribe to push notifications and then
// ..subscribe and send push notification
function subscribePush() {
navigator.serviceWorker.ready.then(function(registration) {
if (!registration.pushManager) {
alert('Your browser doesn\'t support push notification.');
return false;
}
//To subscribe `push notification` from push manager
registration.pushManager.subscribe({
userVisibleOnly: true //Always show notification when received
})
.then(function (subscription) {
toast('Subscribed successfully.');
console.info('Push notification subscribed.');
console.log(subscription);
//saveSubscriptionID(subscription);
changePushStatus(true);
})
.catch(function (error) {
changePushStatus(false);
console.error('Push notification subscription error: ', error);
});
})
}
```
This code above is responsible for the pop-up that comes forth asking the user to either allow or block push notifications in the browser. If the user allows push notifications, it shows a toast message indicating the approval, then goes ahead to change the color of the button and save the subscription ID. If the push manager doesn't exist then it alerts the user that it is not supported.
**Note:** The function that saves subscription ID has been commented out for now.
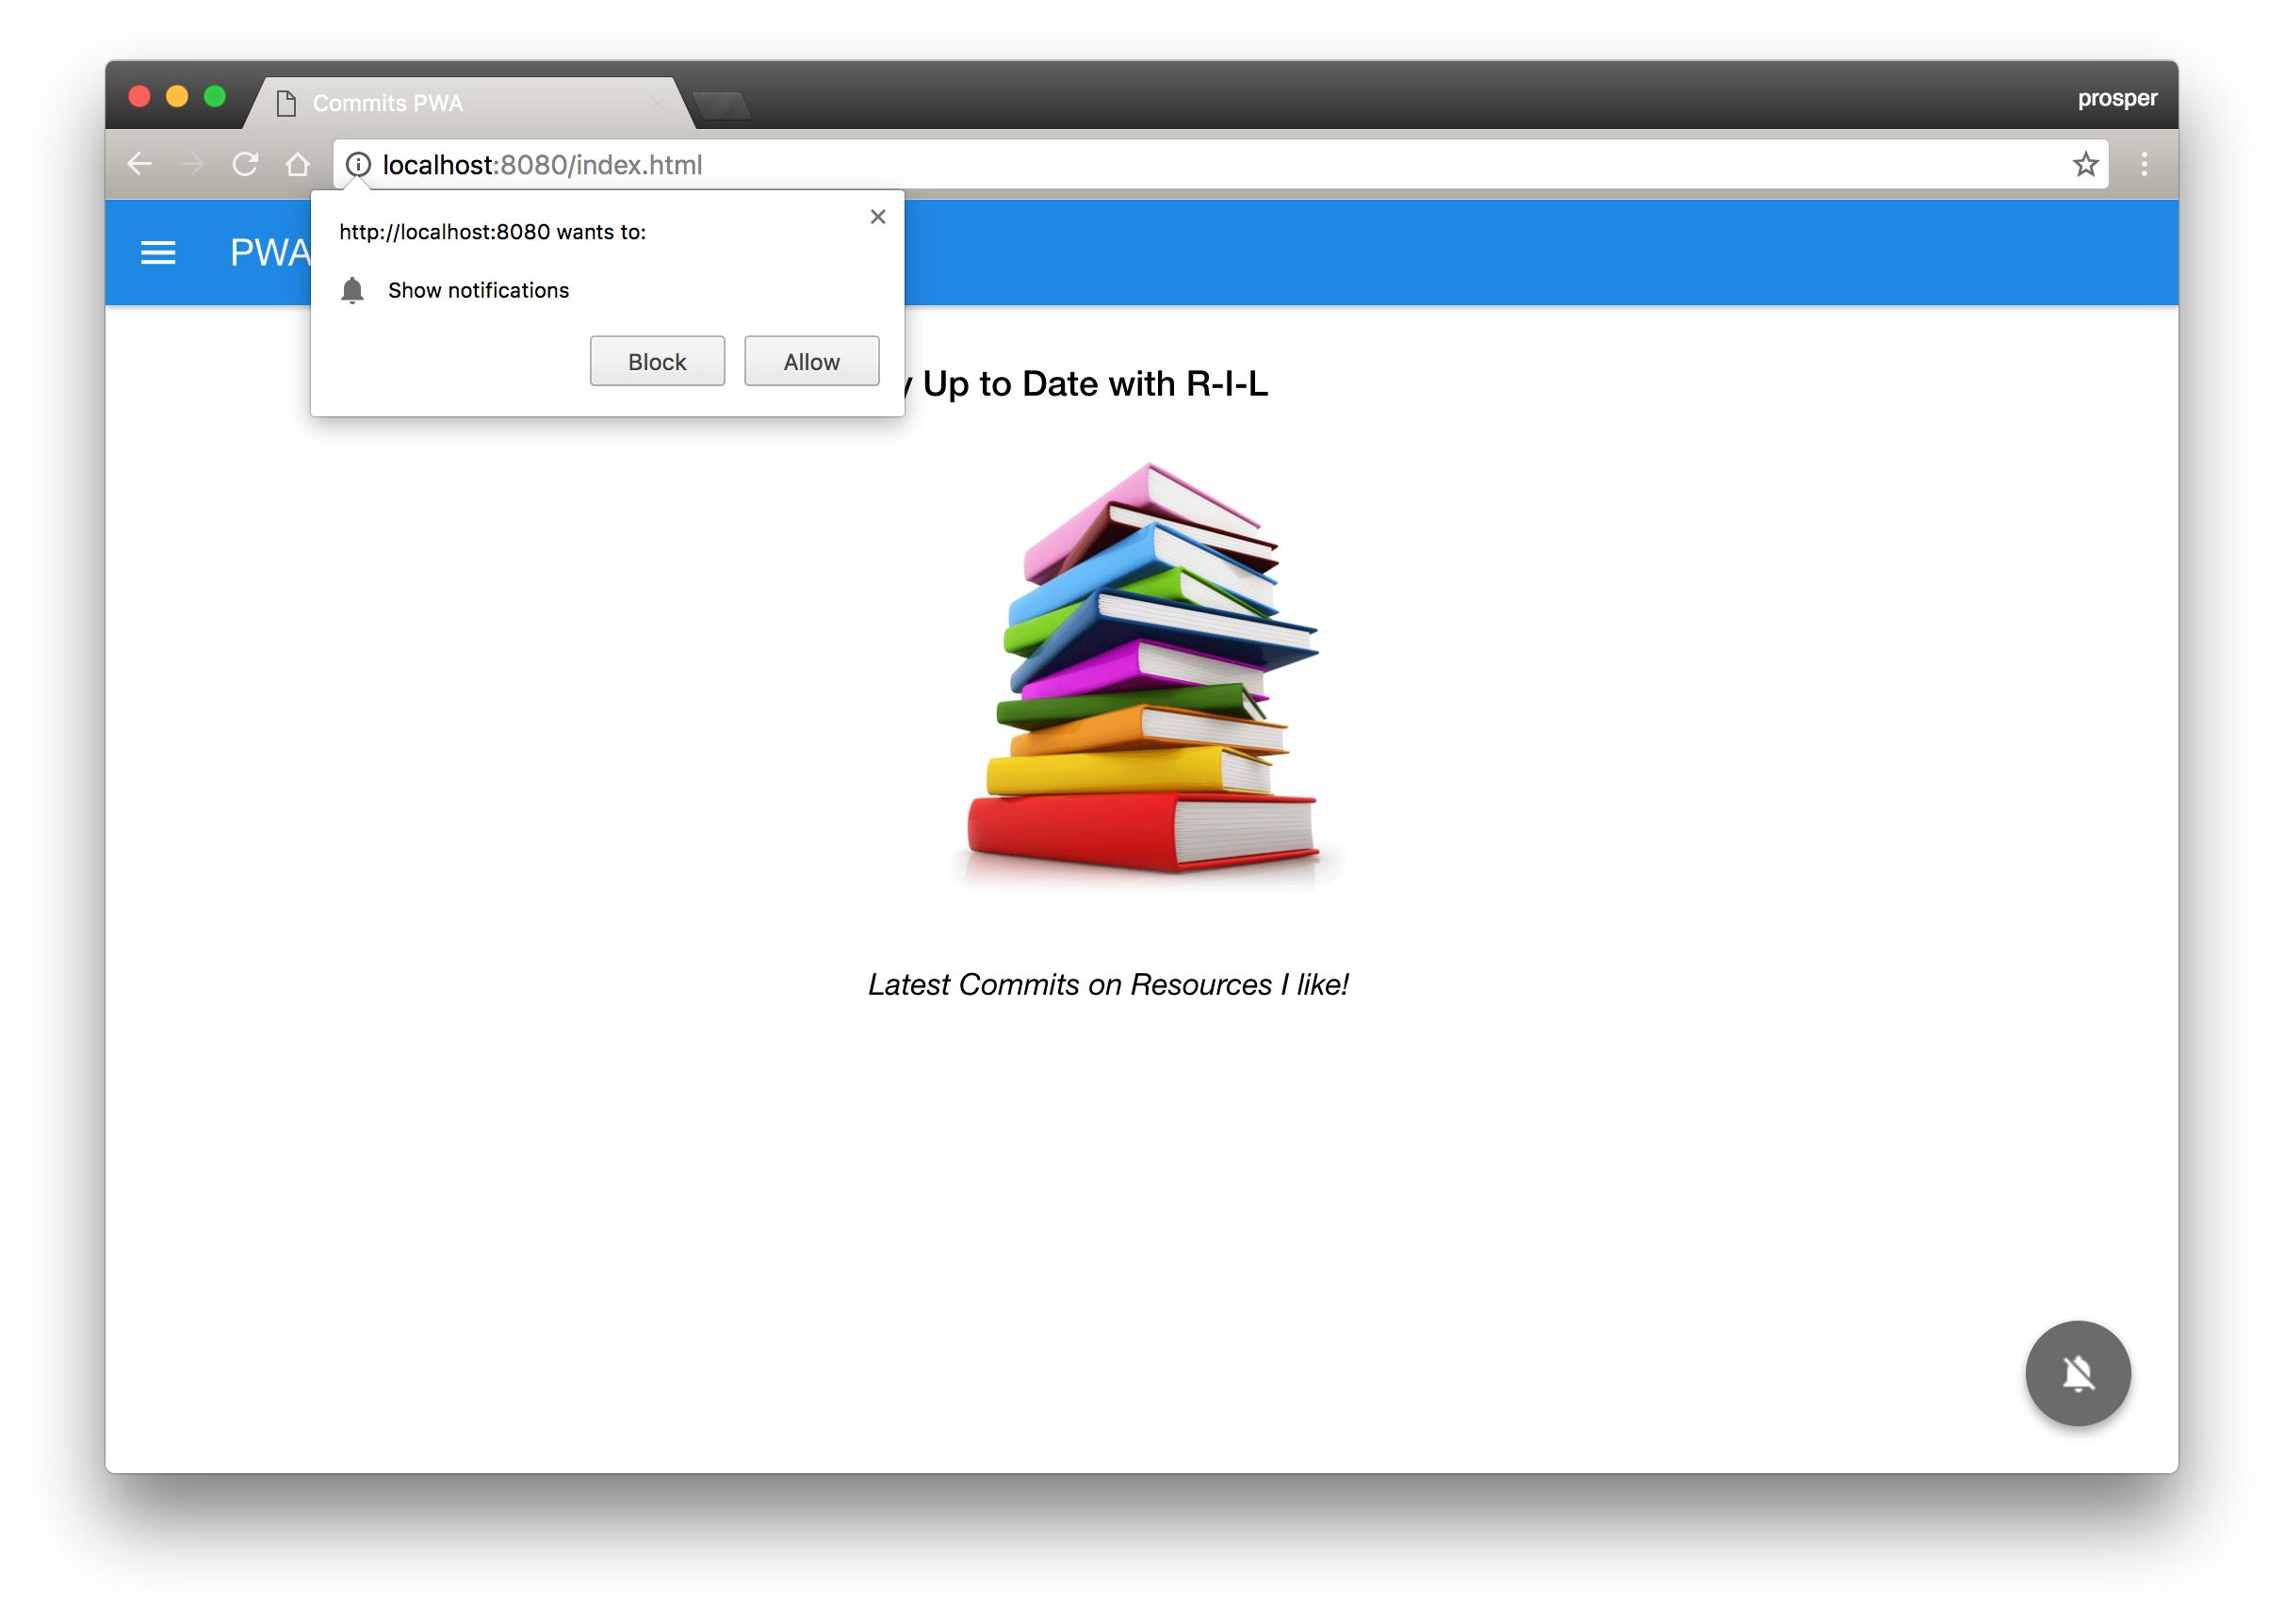
_Ask the user to allow or block notifications_

_Subscription in the console_
```js
// Unsubscribe the user from push notifications
function unsubscribePush() {
navigator.serviceWorker.ready
.then(function(registration) {
//Get `push subscription`
registration.pushManager.getSubscription()
.then(function (subscription) {
//If no `push subscription`, then return
if(!subscription) {
alert('Unable to unregister push notification.');
return;
}
//Unsubscribe `push notification`
subscription.unsubscribe()
.then(function () {
toast('Unsubscribed successfully.');
console.info('Push notification unsubscribed.');
//deleteSubscriptionID(subscription);
changePushStatus(false);
})
.catch(function (error) {
console.error(error);
});
})
.catch(function (error) {
console.error('Failed to unsubscribe push notification.');
});
})
}
```
This code is responsible for unsubscribing from push notification. A toast message indicates the unsubscription, then goes ahead to change the color of the button and delete the subscription ID.
**Note:** The function that deletes subscription ID has been commented out for now.
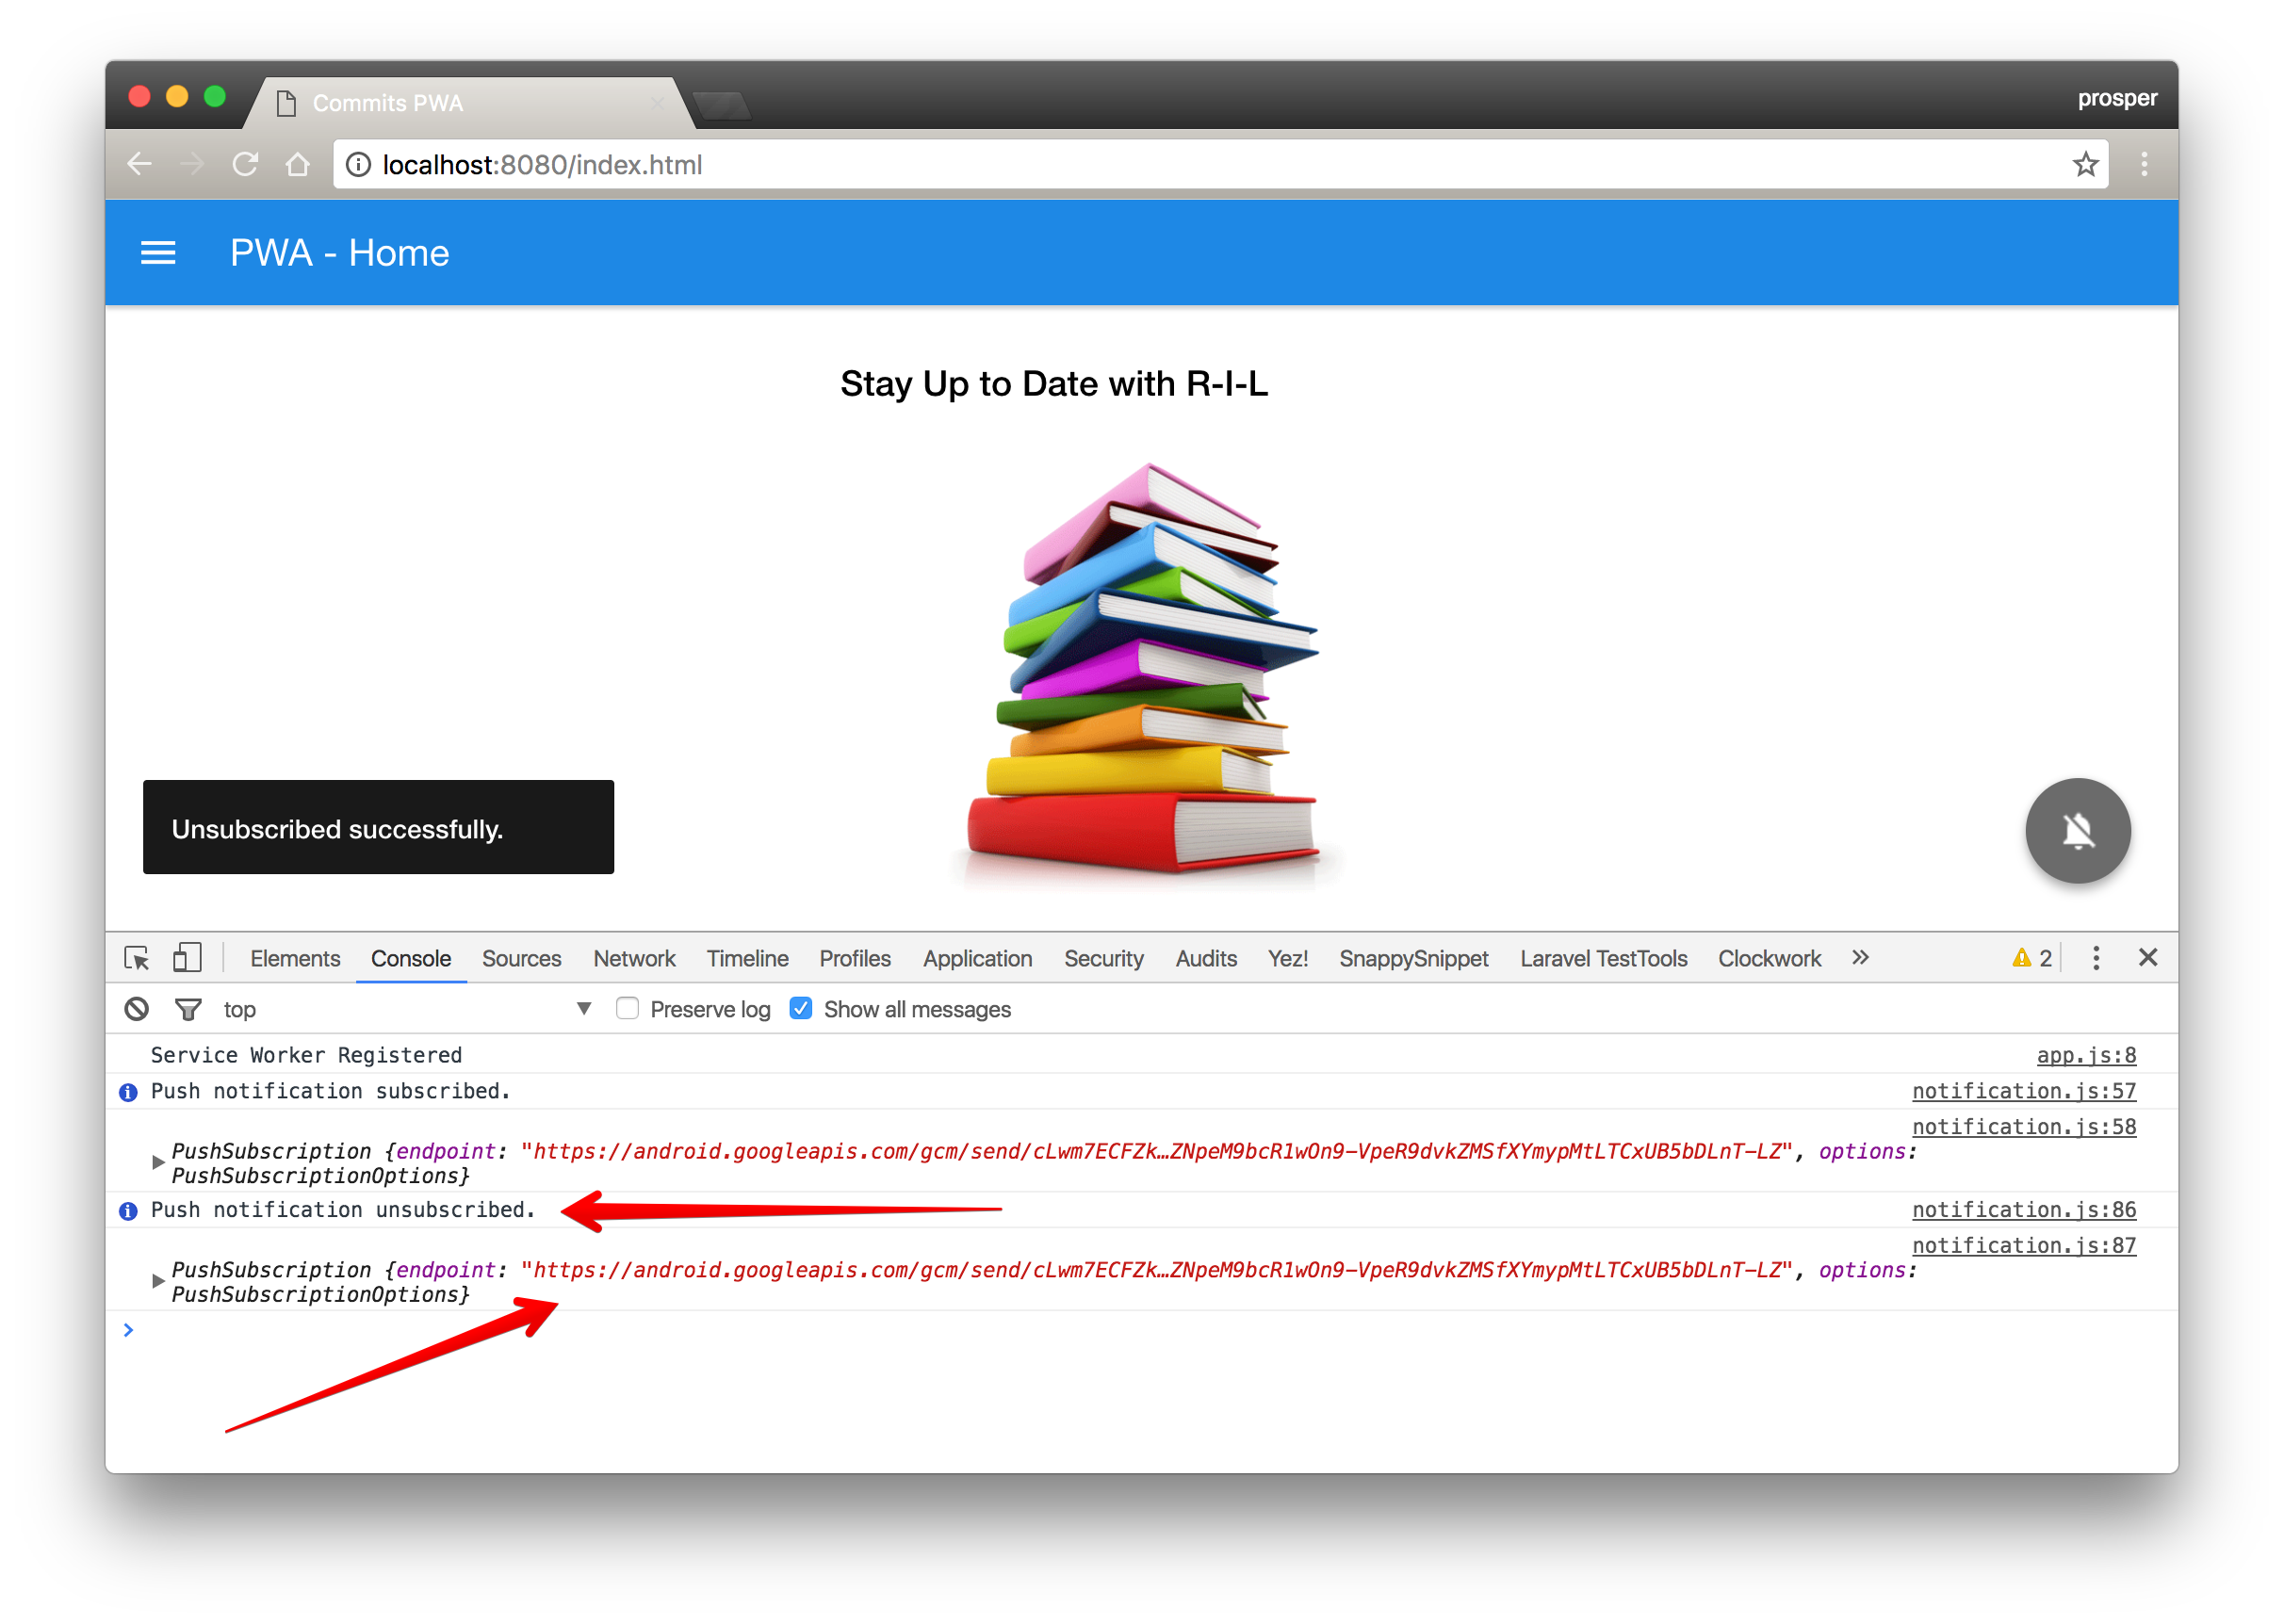
_Unsubscription in the console_
```js
//Click event for subscribe push
fabPushElement.addEventListener('click', function () {
var isSubscribed = (fabPushElement.dataset.checked === 'true');
if (isSubscribed) {
unsubscribePush();
}
else {
subscribePush();
}
});
```
This code simply adds a click event to the button to toggle between subscribing and unsubscribing a user.
### Handle Subscription IDs
We have been able to see the push subscription endpoints. Now, we need to be able to save the subscription IDs of each user, we also need to be able to delete these subscription IDs when a user unsubscribes from push notifications.
Add this code to your `notification.js` like so:
```js
function saveSubscriptionID(subscription) {
var subscription_id = subscription.endpoint.split('gcm/send/')[1];
console.log("Subscription ID", subscription_id);
fetch('http://localhost:3333/api/users', {
method: 'post',
headers: {
'Accept': 'application/json',
'Content-Type': 'application/json'
},
body: JSON.stringify({ user_id : subscription_id })
});
}
function deleteSubscriptionID(subscription) {
var subscription_id = subscription.endpoint.split('gcm/send/')[1];
fetch('http://localhost:3333/api/user/' + subscription_id, {
method: 'delete',
headers: {
'Accept': 'application/json',
'Content-Type': 'application/json'
}
});
}
```
_Save and Delete Subscription ID_
In the code above, we are extracting the subscription ID from the subscription endpoint and posting it to an API service. The `saveSubscriptionID` creates a new user and saves a subscription ID. The `deleteSubscriptionID` deletes a user with its subscription ID.
This looks weird. Why post to a remote service? It's simple. We need to have a database of all user subscription IDs so that we can send notifications to everyone at once.
### API Service
The API service handling the saving and deletion of subscription IDs will also handle the actual sending of notifications. This is a break down of the API. It will have 3 api routes/endpoints:
* `POST /api/users` to create new users and store their subscription IDs
* `DELETE /api/user/:user_id` to delete and unsubscribe users
* `POST /api/notify` to send notifications to all subscribed users
Lucky enough, I have coded the [API service](https://github.com/unicodeveloper/pwa-api). Make sure you have `node` and [`mongodb`](https://docs.mongodb.com/manual/installation) installed. Clone it and run from the terminal with `node server.js` like so:

_PWA API Server running locally_
Make sure you create a `.env` file like so:

_.env file for pwa-api_
**Note:** You can through this [good tutorial](https://chunksofco.de/push-notifications-on-the-web-building-a-pwa-crossover-20f0317987de#.x311m3x56) to see how the API service should be set up. I simply implemented a *node.js* version of the API service in this tutorial.
We are using [Firebase Cloud Messaging](https://firebase.google.com/docs/cloud-messaging) as our messaging service. So, go ahead and [set up a new project with firebase](https://console.firebase.google.com). Once you have done that, grab the **Server Key** from the dashboard, **Project settings > Cloud Messaging** like so:
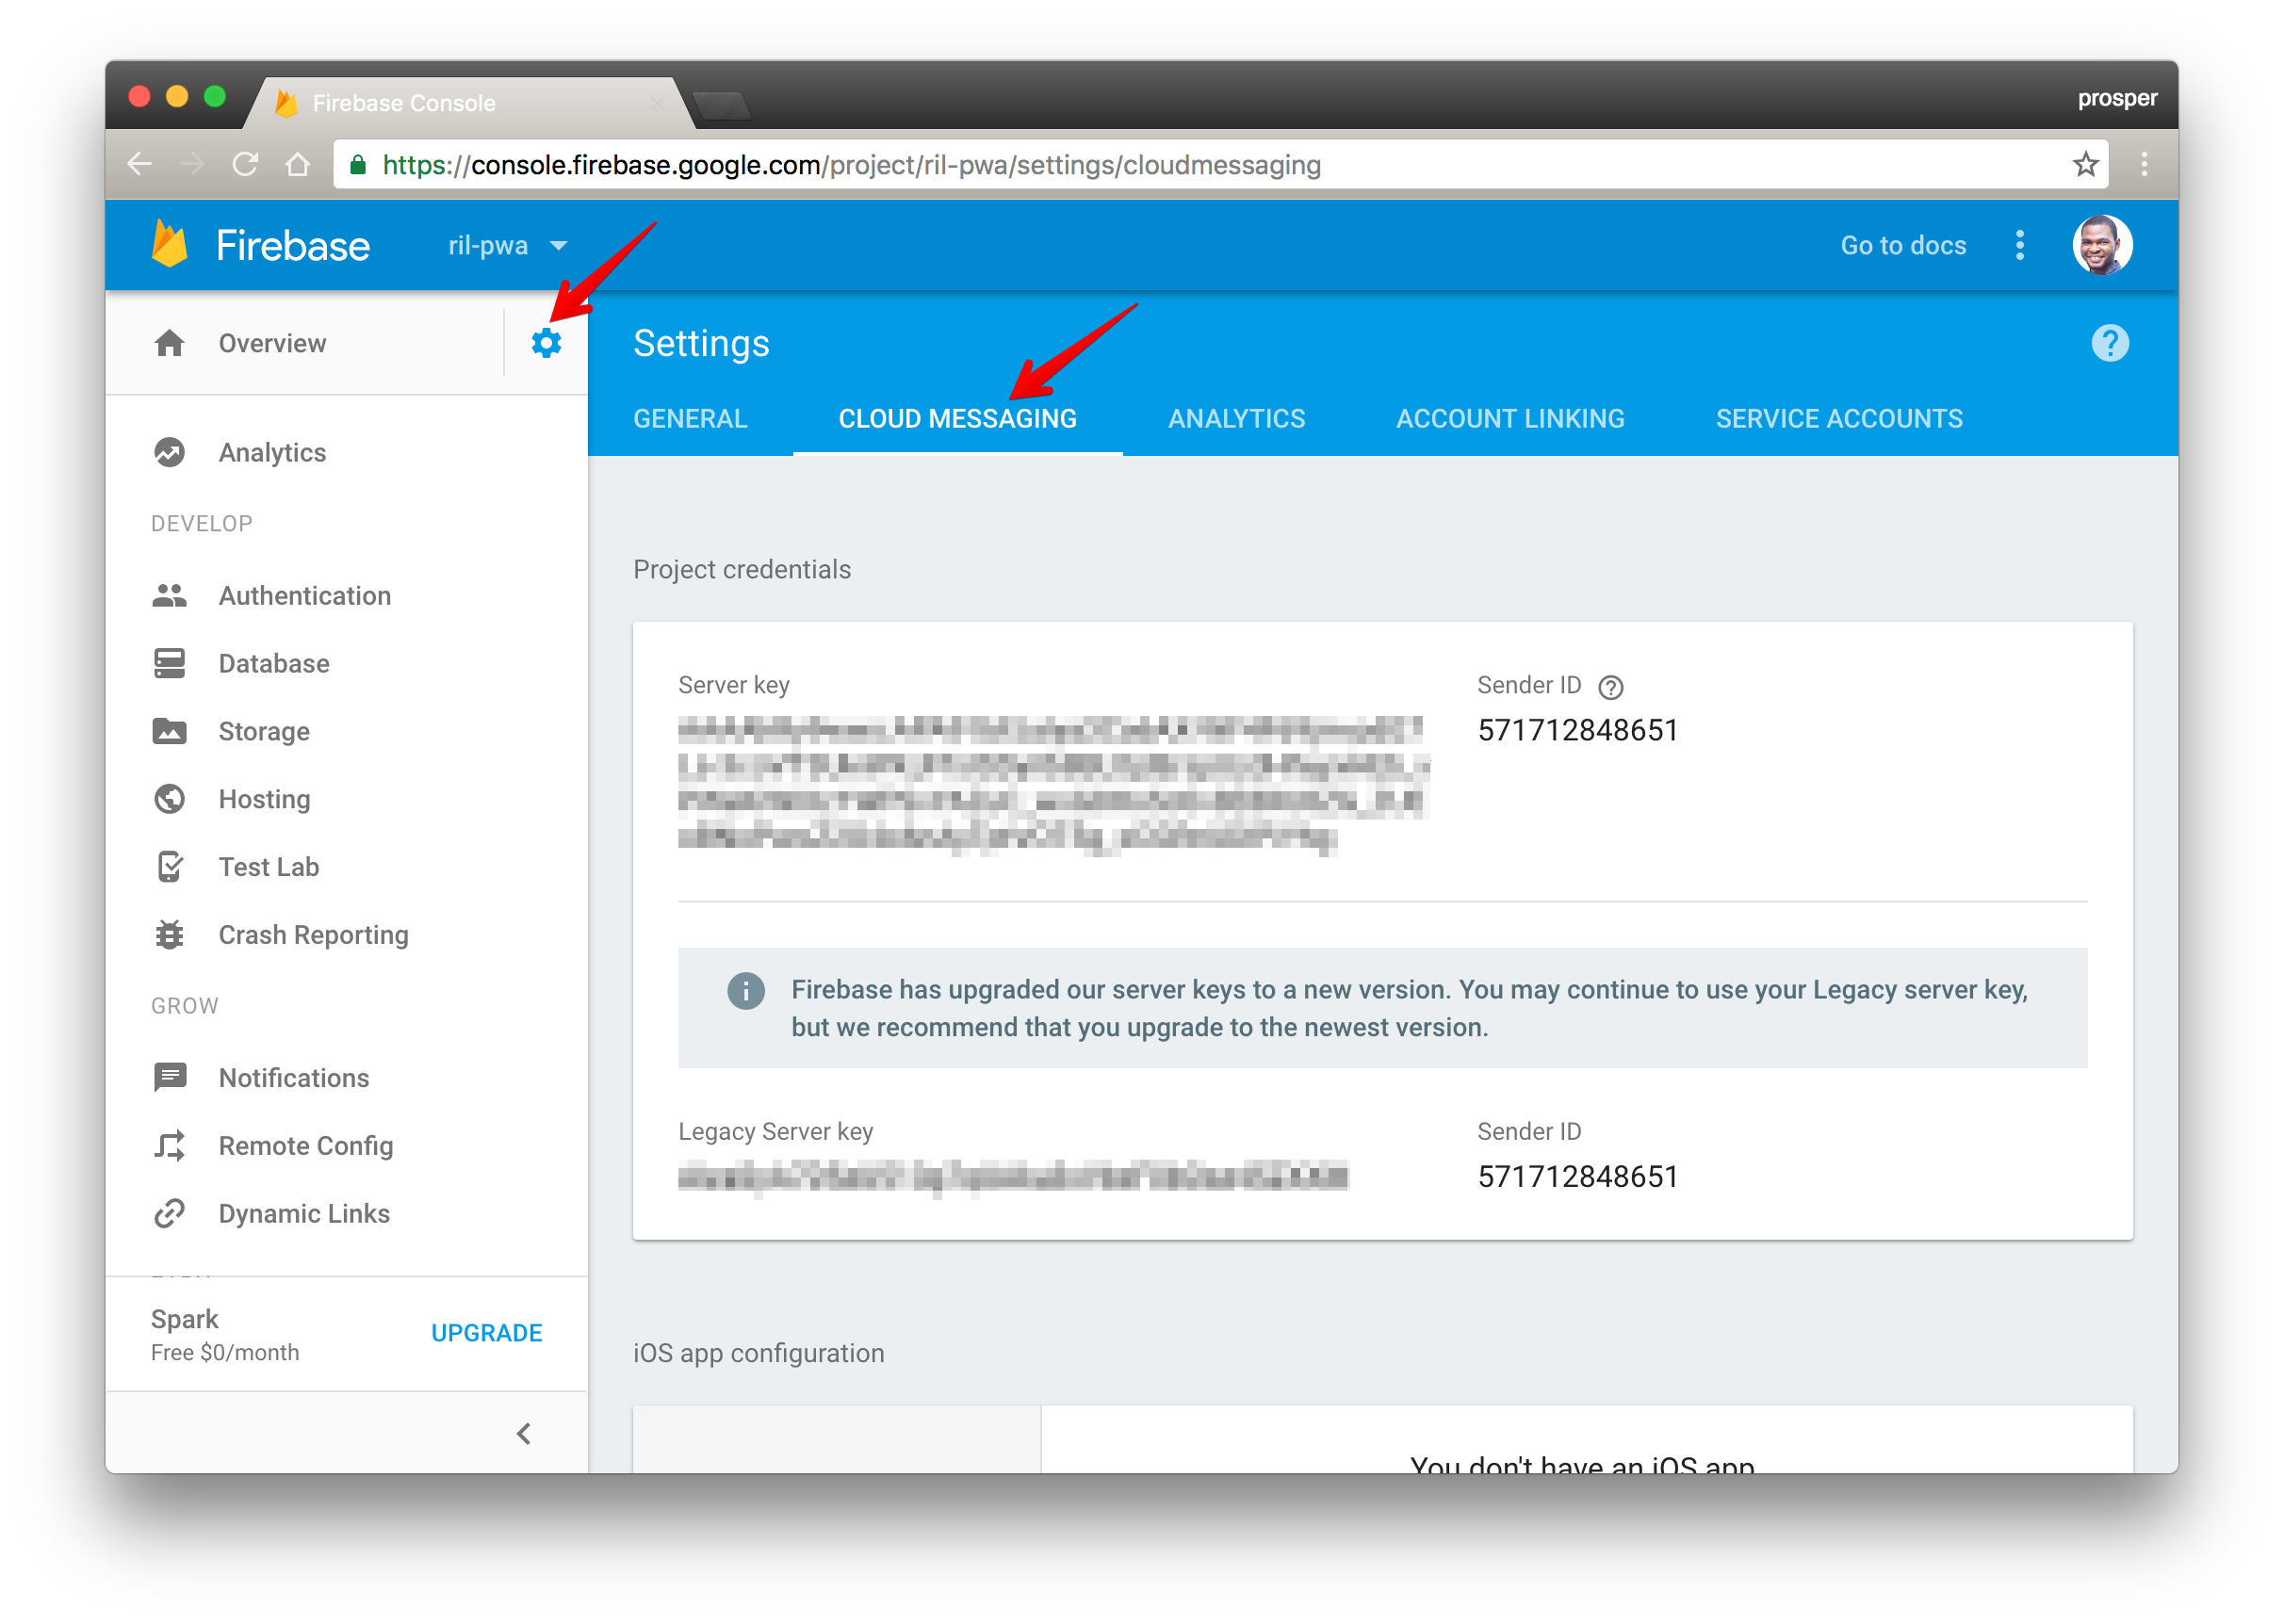
_Cloud Messaging on Firebase Dashboard_
The **Server Key** should be the value of `FCM_API_KEY` in the `.env` file of the API service.
The **Server Key** is needed when posting to Firebase Cloud Messaging via our API Server. Check out the notification controller in our API codebase:
_server/controllers/notification.server.controller.js_
```js
....
notifyUsers: function(req, res){
var sender = new gcm.Sender(secrets.fcm);
// Prepare a message to be sent
var message = new gcm.Message({
notification: {
title: "New commit on Github Repo: RIL",
icon: "ic_launcher",
body: "Click to see the latest commit'"
}
});
User.find({}, function(err, users) {
// user subscription ids to deliver message to
var user_ids = _.map(users, 'user_id');
console.log("User Ids", user_ids);
// Actually send the message
sender.send(message, { registrationTokens: user_ids }, function (err, response) {
if (err) {
console.error(err);
} else {
return res.json(response);
}
});
});
},
.....
```
Now, go back to `notification.js` and uncomment the `saveSubscriptionID` and `deleteSubscriptionID` functions we commented earlier. Your `notification.js` should look like this now:
```js
(function (window) {
'use strict';
//Push notification button
var fabPushElement = document.querySelector('.fab__push');
var fabPushImgElement = document.querySelector('.fab__image');
//To check `push notification` is supported or not
function isPushSupported() {
//To check `push notification` permission is denied by user
if (Notification.permission === 'denied') {
alert('User has blocked push notification.');
return;
}
//Check `push notification` is supported or not
if (!('PushManager' in window)) {
alert('Sorry, Push notification isn\'t supported in your browser.');
return;
}
//Get `push notification` subscription
//If `serviceWorker` is registered and ready
navigator.serviceWorker.ready
.then(function (registration) {
registration.pushManager.getSubscription()
.then(function (subscription) {
//If already access granted, enable push button status
if (subscription) {
changePushStatus(true);
}
else {
changePushStatus(false);
}
})
.catch(function (error) {
console.error('Error occurred while enabling push ', error);
});
});
}
// Ask User if he/she wants to subscribe to push notifications and then
// ..subscribe and send push notification
function subscribePush() {
navigator.serviceWorker.ready.then(function(registration) {
if (!registration.pushManager) {
alert('Your browser doesn\'t support push notification.');
return false;
}
//To subscribe `push notification` from push manager
registration.pushManager.subscribe({
userVisibleOnly: true //Always show notification when received
})
.then(function (subscription) {
toast('Subscribed successfully.');
console.info('Push notification subscribed.');
console.log(subscription);
saveSubscriptionID(subscription);
changePushStatus(true);
})
.catch(function (error) {
changePushStatus(false);
console.error('Push notification subscription error: ', error);
});
})
}
// Unsubscribe the user from push notifications
function unsubscribePush() {
navigator.serviceWorker.ready
.then(function(registration) {
//Get `push subscription`
registration.pushManager.getSubscription()
.then(function (subscription) {
//If no `push subscription`, then return
if(!subscription) {
alert('Unable to unregister push notification.');
return;
}
//Unsubscribe `push notification`
subscription.unsubscribe()
.then(function () {
toast('Unsubscribed successfully.');
console.info('Push notification unsubscribed.');
console.log(subscription);
deleteSubscriptionID(subscription);
changePushStatus(false);
})
.catch(function (error) {
console.error(error);
});
})
.catch(function (error) {
console.error('Failed to unsubscribe push notification.');
});
})
}
//To change status
function changePushStatus(status) {
fabPushElement.dataset.checked = status;
fabPushElement.checked = status;
if (status) {
fabPushElement.classList.add('active');
fabPushImgElement.src = '../images/push-on.png';
}
else {
fabPushElement.classList.remove('active');
fabPushImgElement.src = '../images/push-off.png';
}
}
//Click event for subscribe push
fabPushElement.addEventListener('click', function () {
var isSubscribed = (fabPushElement.dataset.checked === 'true');
if (isSubscribed) {
unsubscribePush();
}
else {
subscribePush();
}
});
function saveSubscriptionID(subscription) {
var subscription_id = subscription.endpoint.split('gcm/send/')[1];
console.log("Subscription ID", subscription_id);
fetch('http://localhost:3333/api/users', {
method: 'post',
headers: {
'Accept': 'application/json',
'Content-Type': 'application/json'
},
body: JSON.stringify({ user_id : subscription_id })
});
}
function deleteSubscriptionID(subscription) {
var subscription_id = subscription.endpoint.split('gcm/send/')[1];
fetch('http://localhost:3333/api/user/' + subscription_id, {
method: 'delete',
headers: {
'Accept': 'application/json',
'Content-Type': 'application/json'
}
});
}
isPushSupported(); //Check for push notification support
})(window);
```
Let's try to activate push notification and see if new users are created and stored in the database of our API service. Reload your app and push the activate button.
Oops, there is an error in our console.
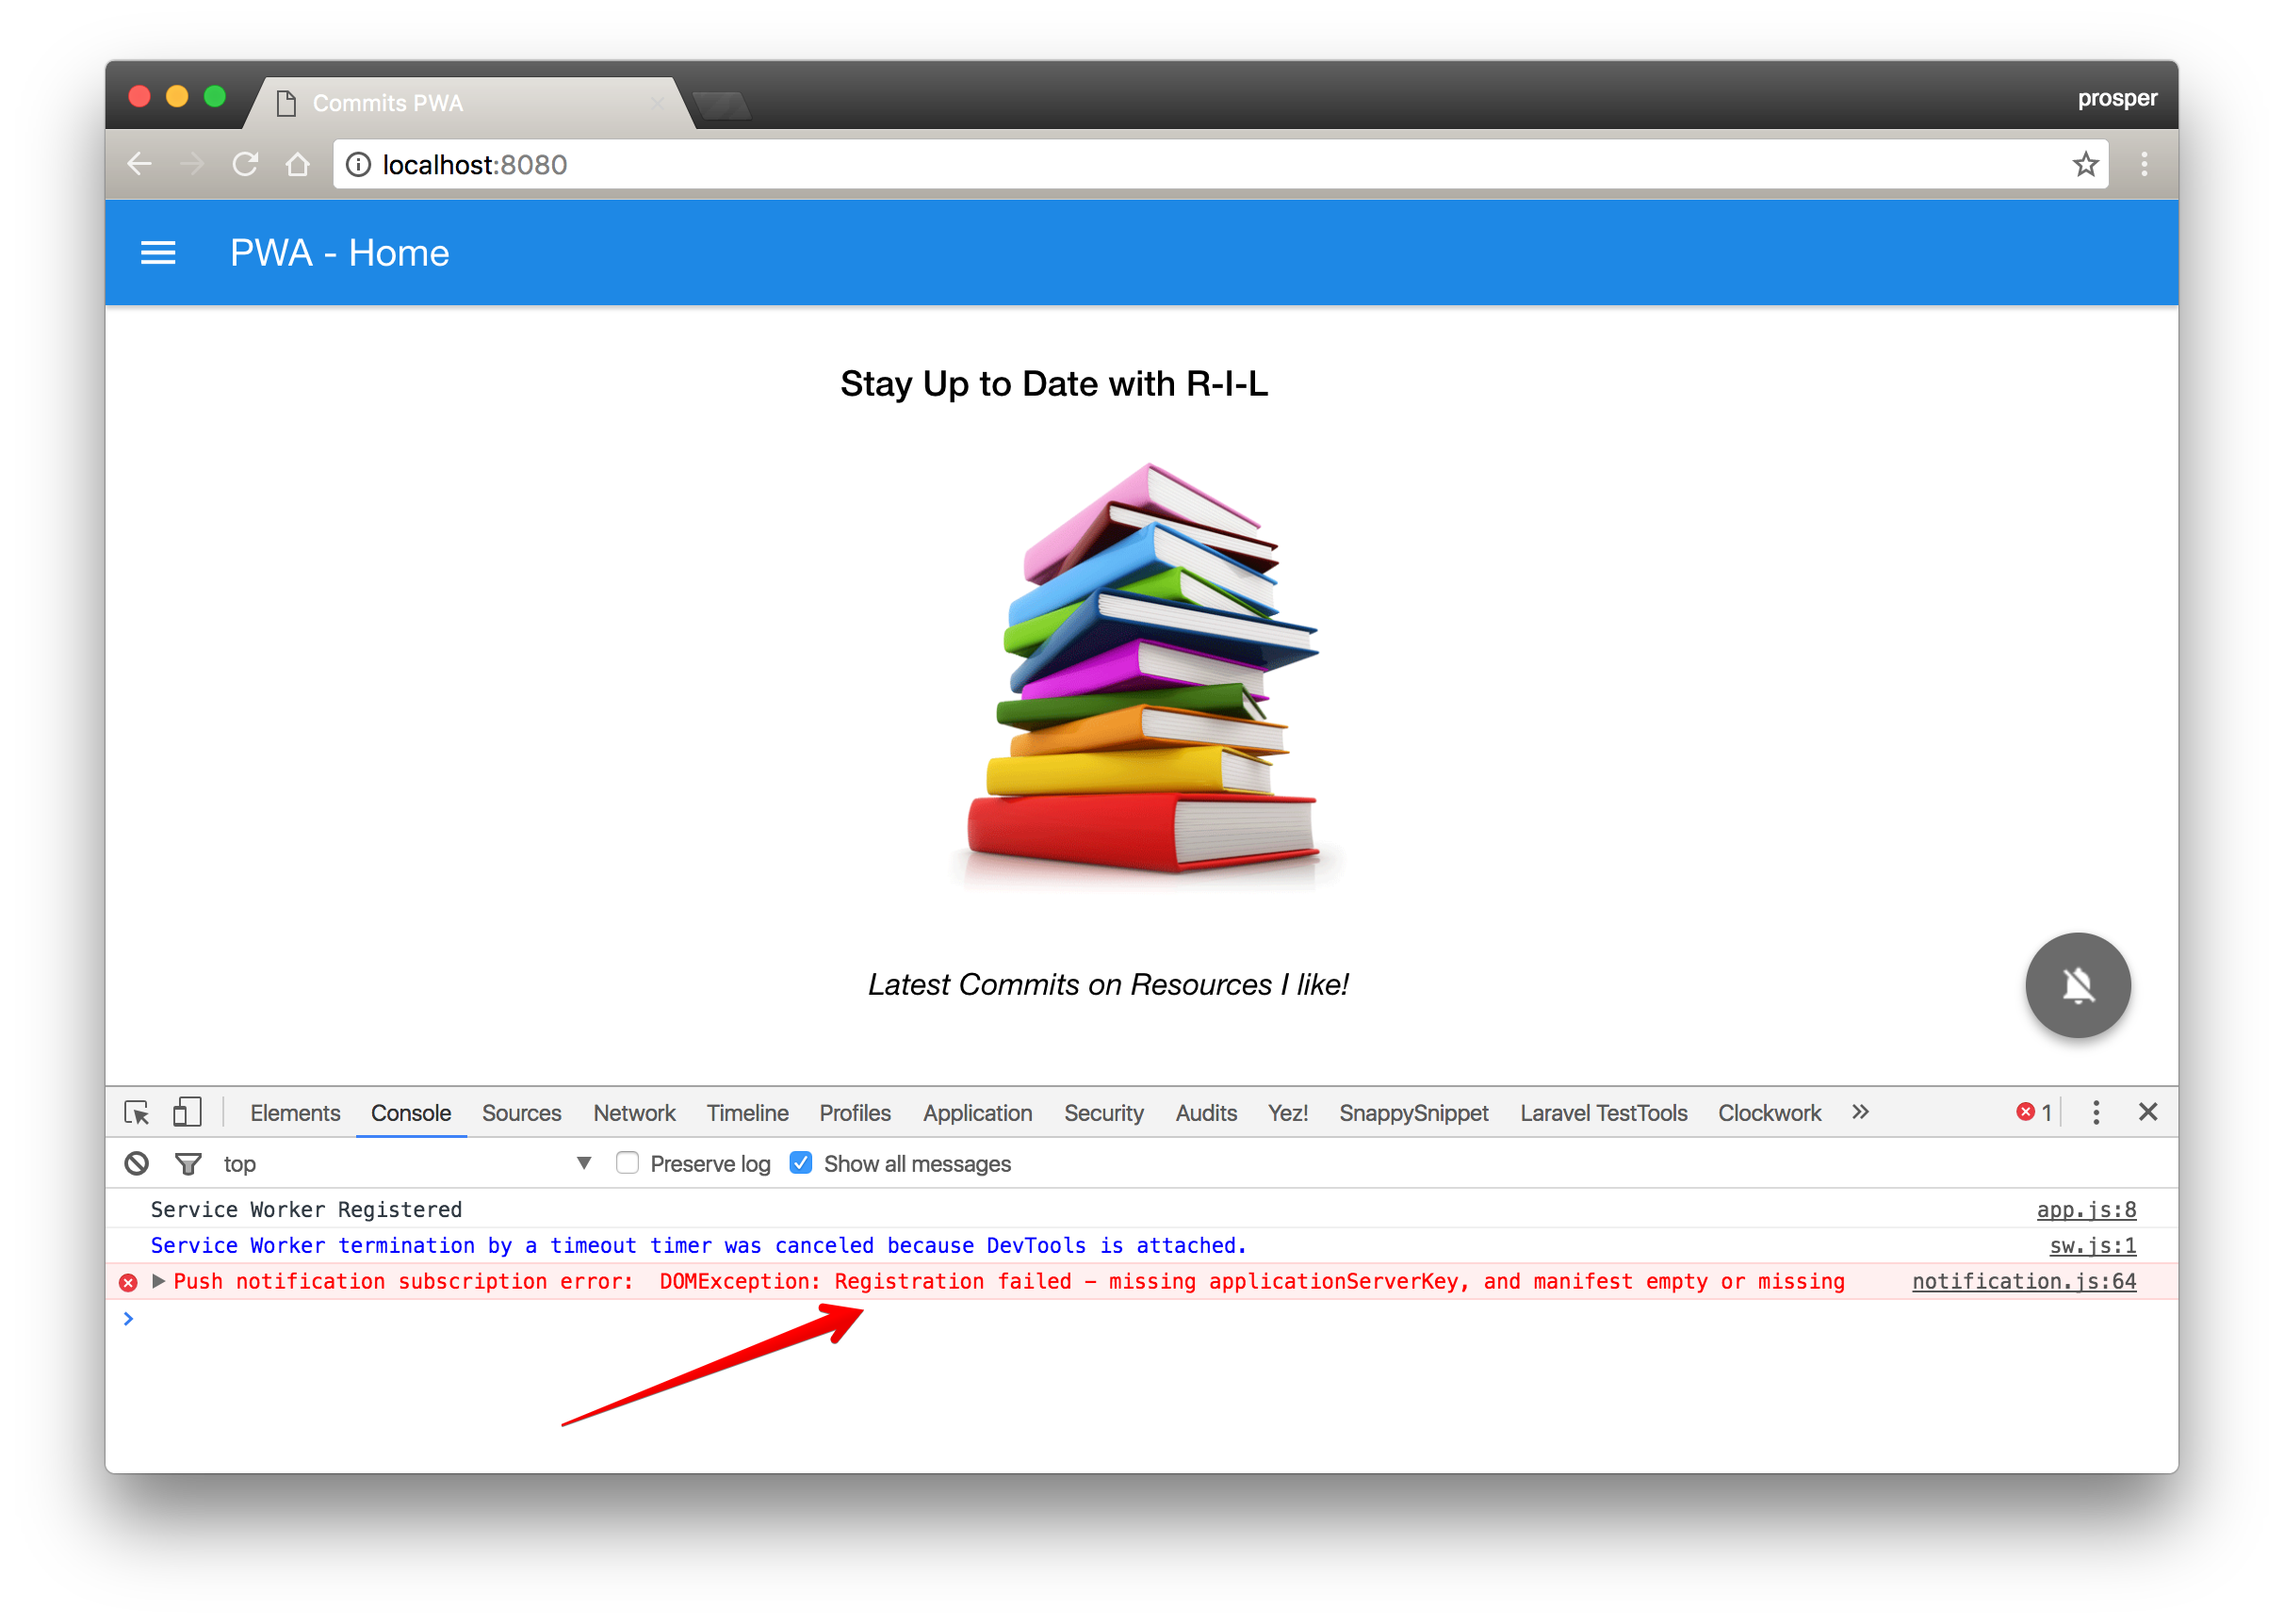
Don't fret! The reason why we are encountering this issue is because we don't have a `manifest.json` file in our web app yet.
Now, the interesting thing here is this: Creating a `manifest.json` file will solve this challenge and add another feature to our app. With a `manifest.json` file, we'll be able to add our app to a users device homescreen and make the app installable. Viola!!!
Go ahead and create a `manifest.json` file in the root directory like so:
```js
{
"name": "PWA - Commits",
"short_name": "PWA",
"description": "Progressive Web Apps for Resources I like",
"start_url": "./index.html?utm=homescreen",
"display": "standalone",
"orientation": "portrait",
"background_color": "#f5f5f5",
"theme_color": "#f5f5f5",
"icons": [
{
"src": "./images/192x192.png",
"type": "image/png",
"sizes": "192x192"
},
{
"src": "./images/168x168.png",
"type": "image/png",
"sizes": "168x168"
},
{
"src": "./images/144x144.png",
"type": "image/png",
"sizes": "144x144"
},
{
"src": "./images/96x96.png",
"type": "image/png",
"sizes": "96x96"
},
{
"src": "./images/72x72.png",
"type": "image/png",
"sizes": "72x72"
},
{
"src": "./images/48x48.png",
"type": "image/png",
"sizes": "48x48"
}
],
"author": {
"name": "Prosper Otemuyiwa",
"website": "https://twitter.com/unicodeveloper",
"github": "https://github.com/unicodeveloper",
"source-repo": "https://github.com/unicodeveloper/pwa-commits"
},
"gcm_sender_id": "571712848651"
}
```
Let's quickly highlight what these keys represent in our web app manifest file.
* **name:** represents the name of the app as it is usually displayed to the user.
* **short_name:** represents a short version of the name of the web application.
* **description:** provides a general description of the web application.
* **start_url:** is the url that loads when the user launches the web application.
* **display:** defines the default display mode for the web application. The different modes are `fullscreen`, `standalone`, `minimal-ui`.
* **orientation:** provides the default orientation for the web application. It could be `portrait` or `landscape`.
* **background_color:** represents the background color of the web app.
* **theme_color:** represents the default theme color of the app. It colors the status bar on Android.
* **icons:** represents the applications' icon set for the homescreen, splash screen and task switcher.
* **author:** is a custom key that represents the author of the app
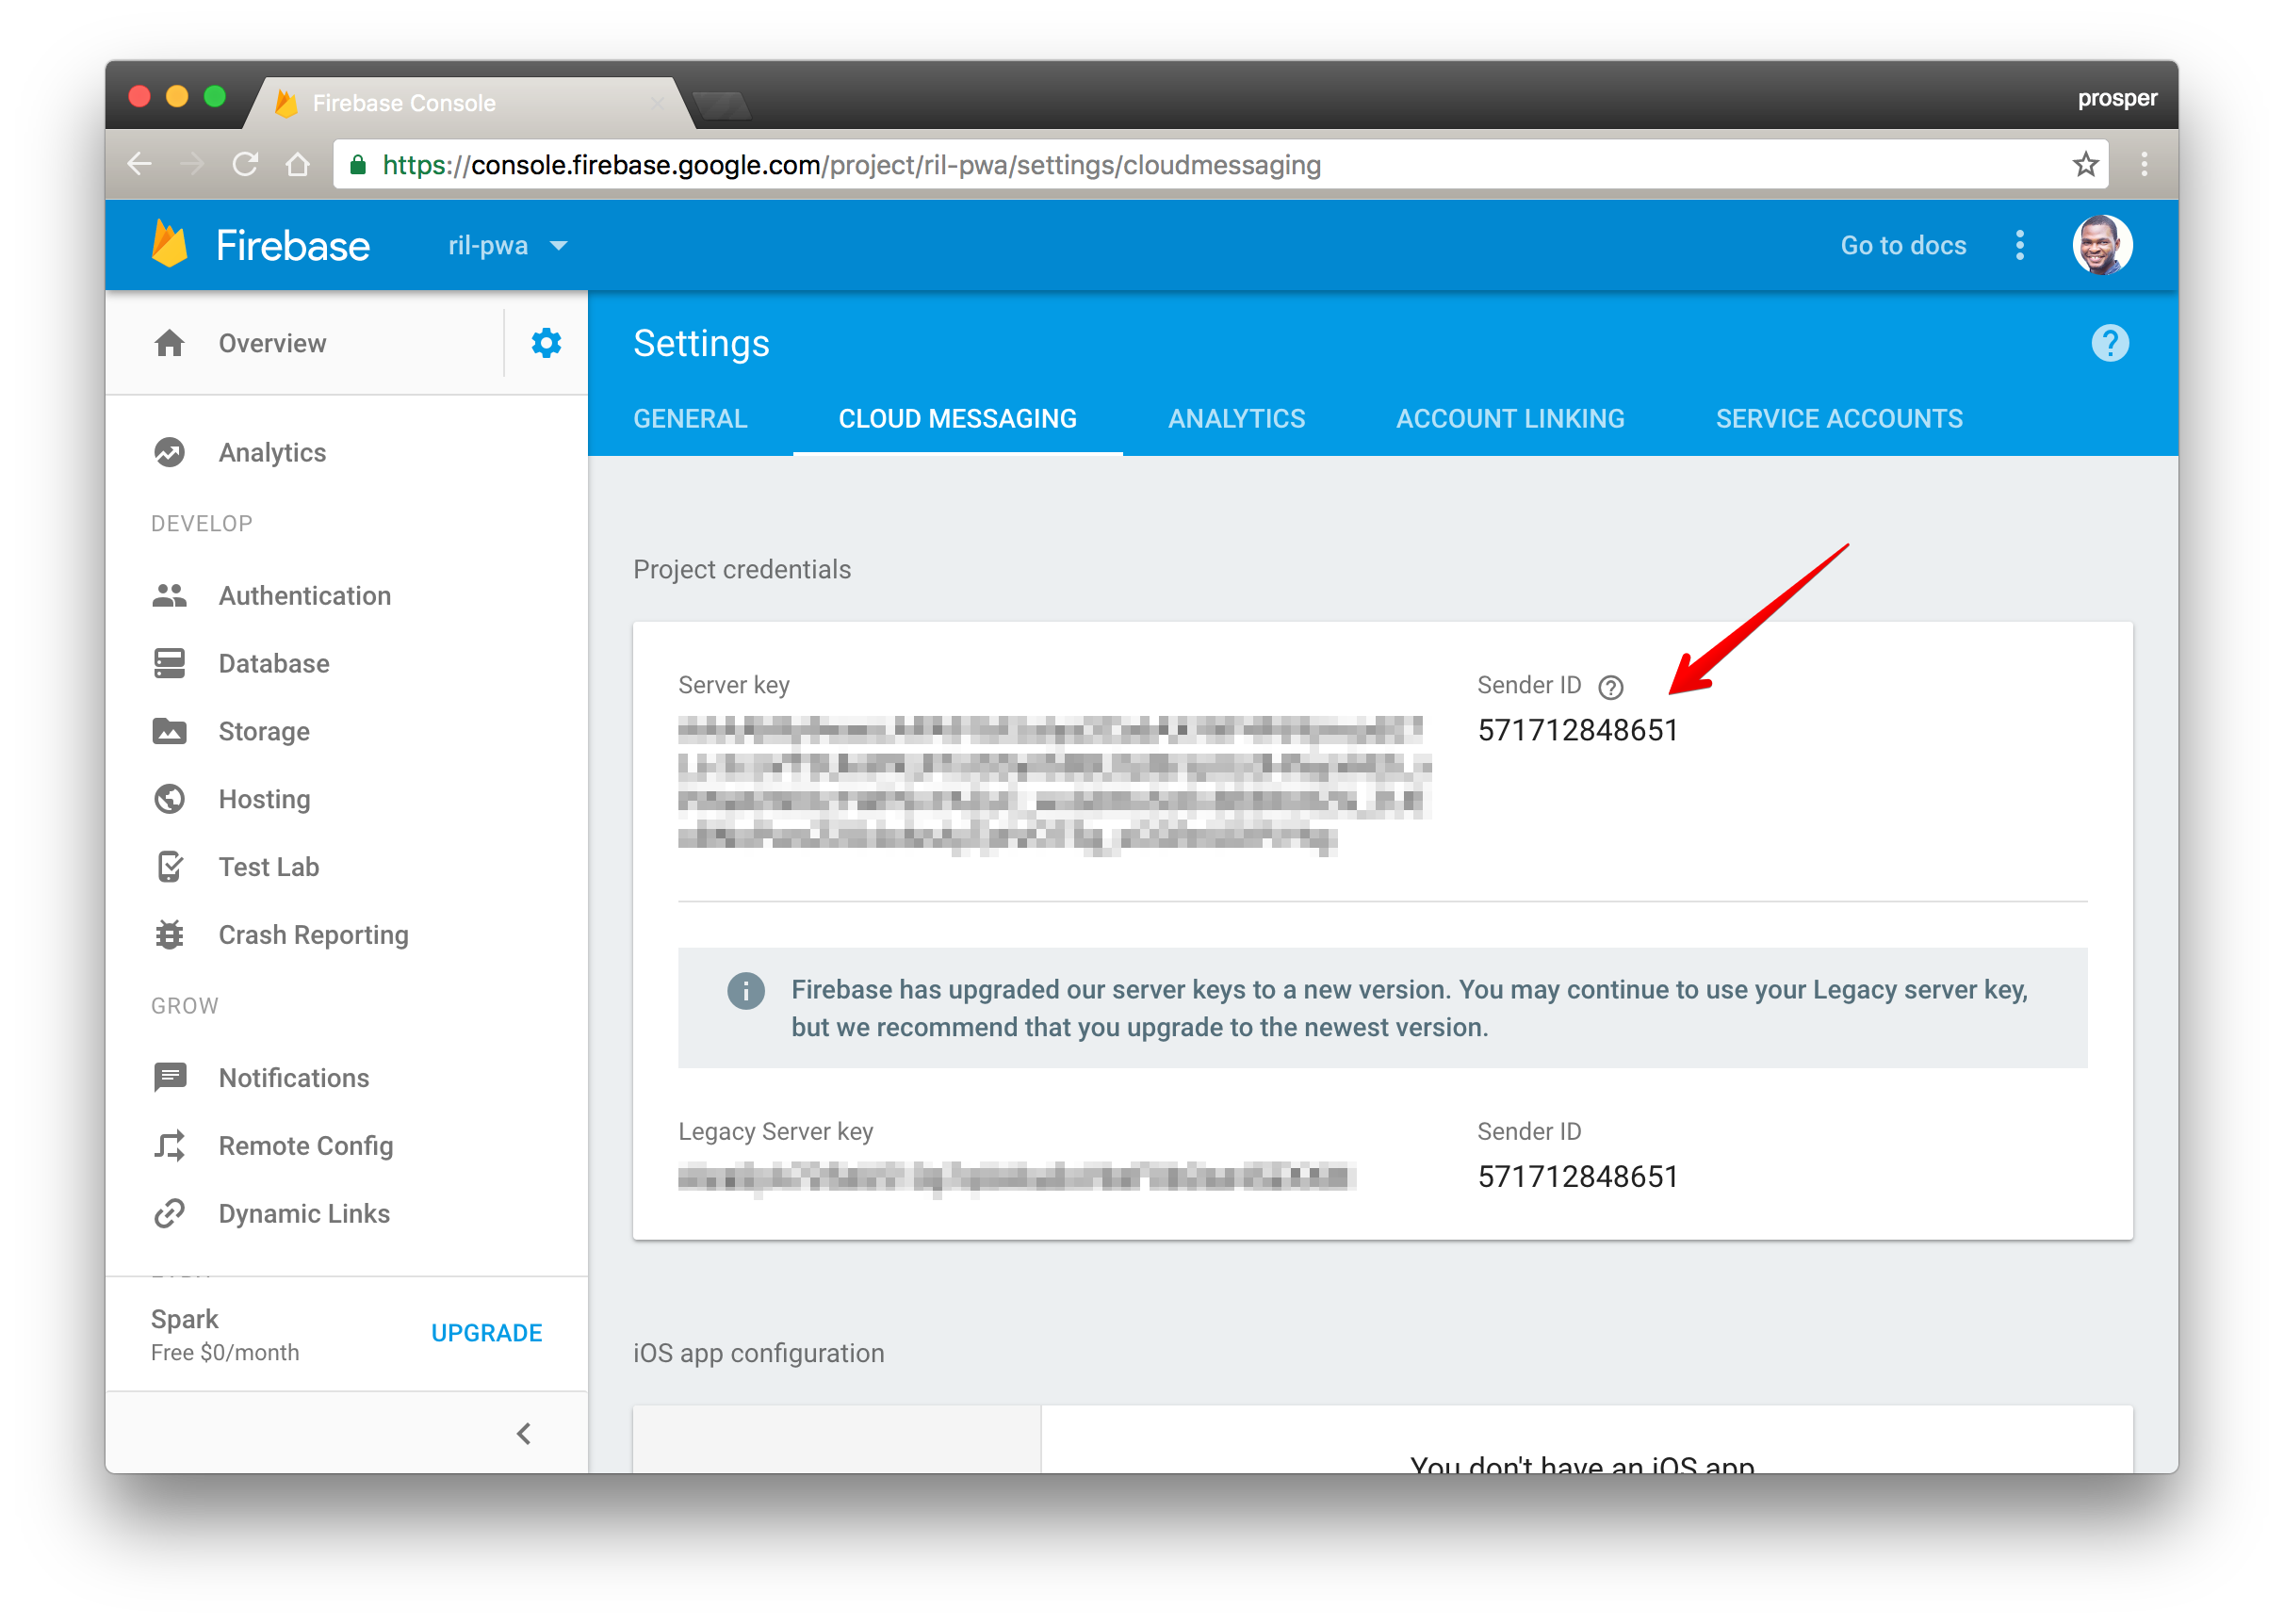
* **gcm_sender_id:** represents the `sender_id` from Firebase Cloud messaging that is used to identify the application. Replace the `sender_id` value here with that from your dashboard
In your `index.html` and `latest.html`, reference the `manifest.json` file like so:
```bash
```
Now, clear your cache, reload your application and click the notification button.
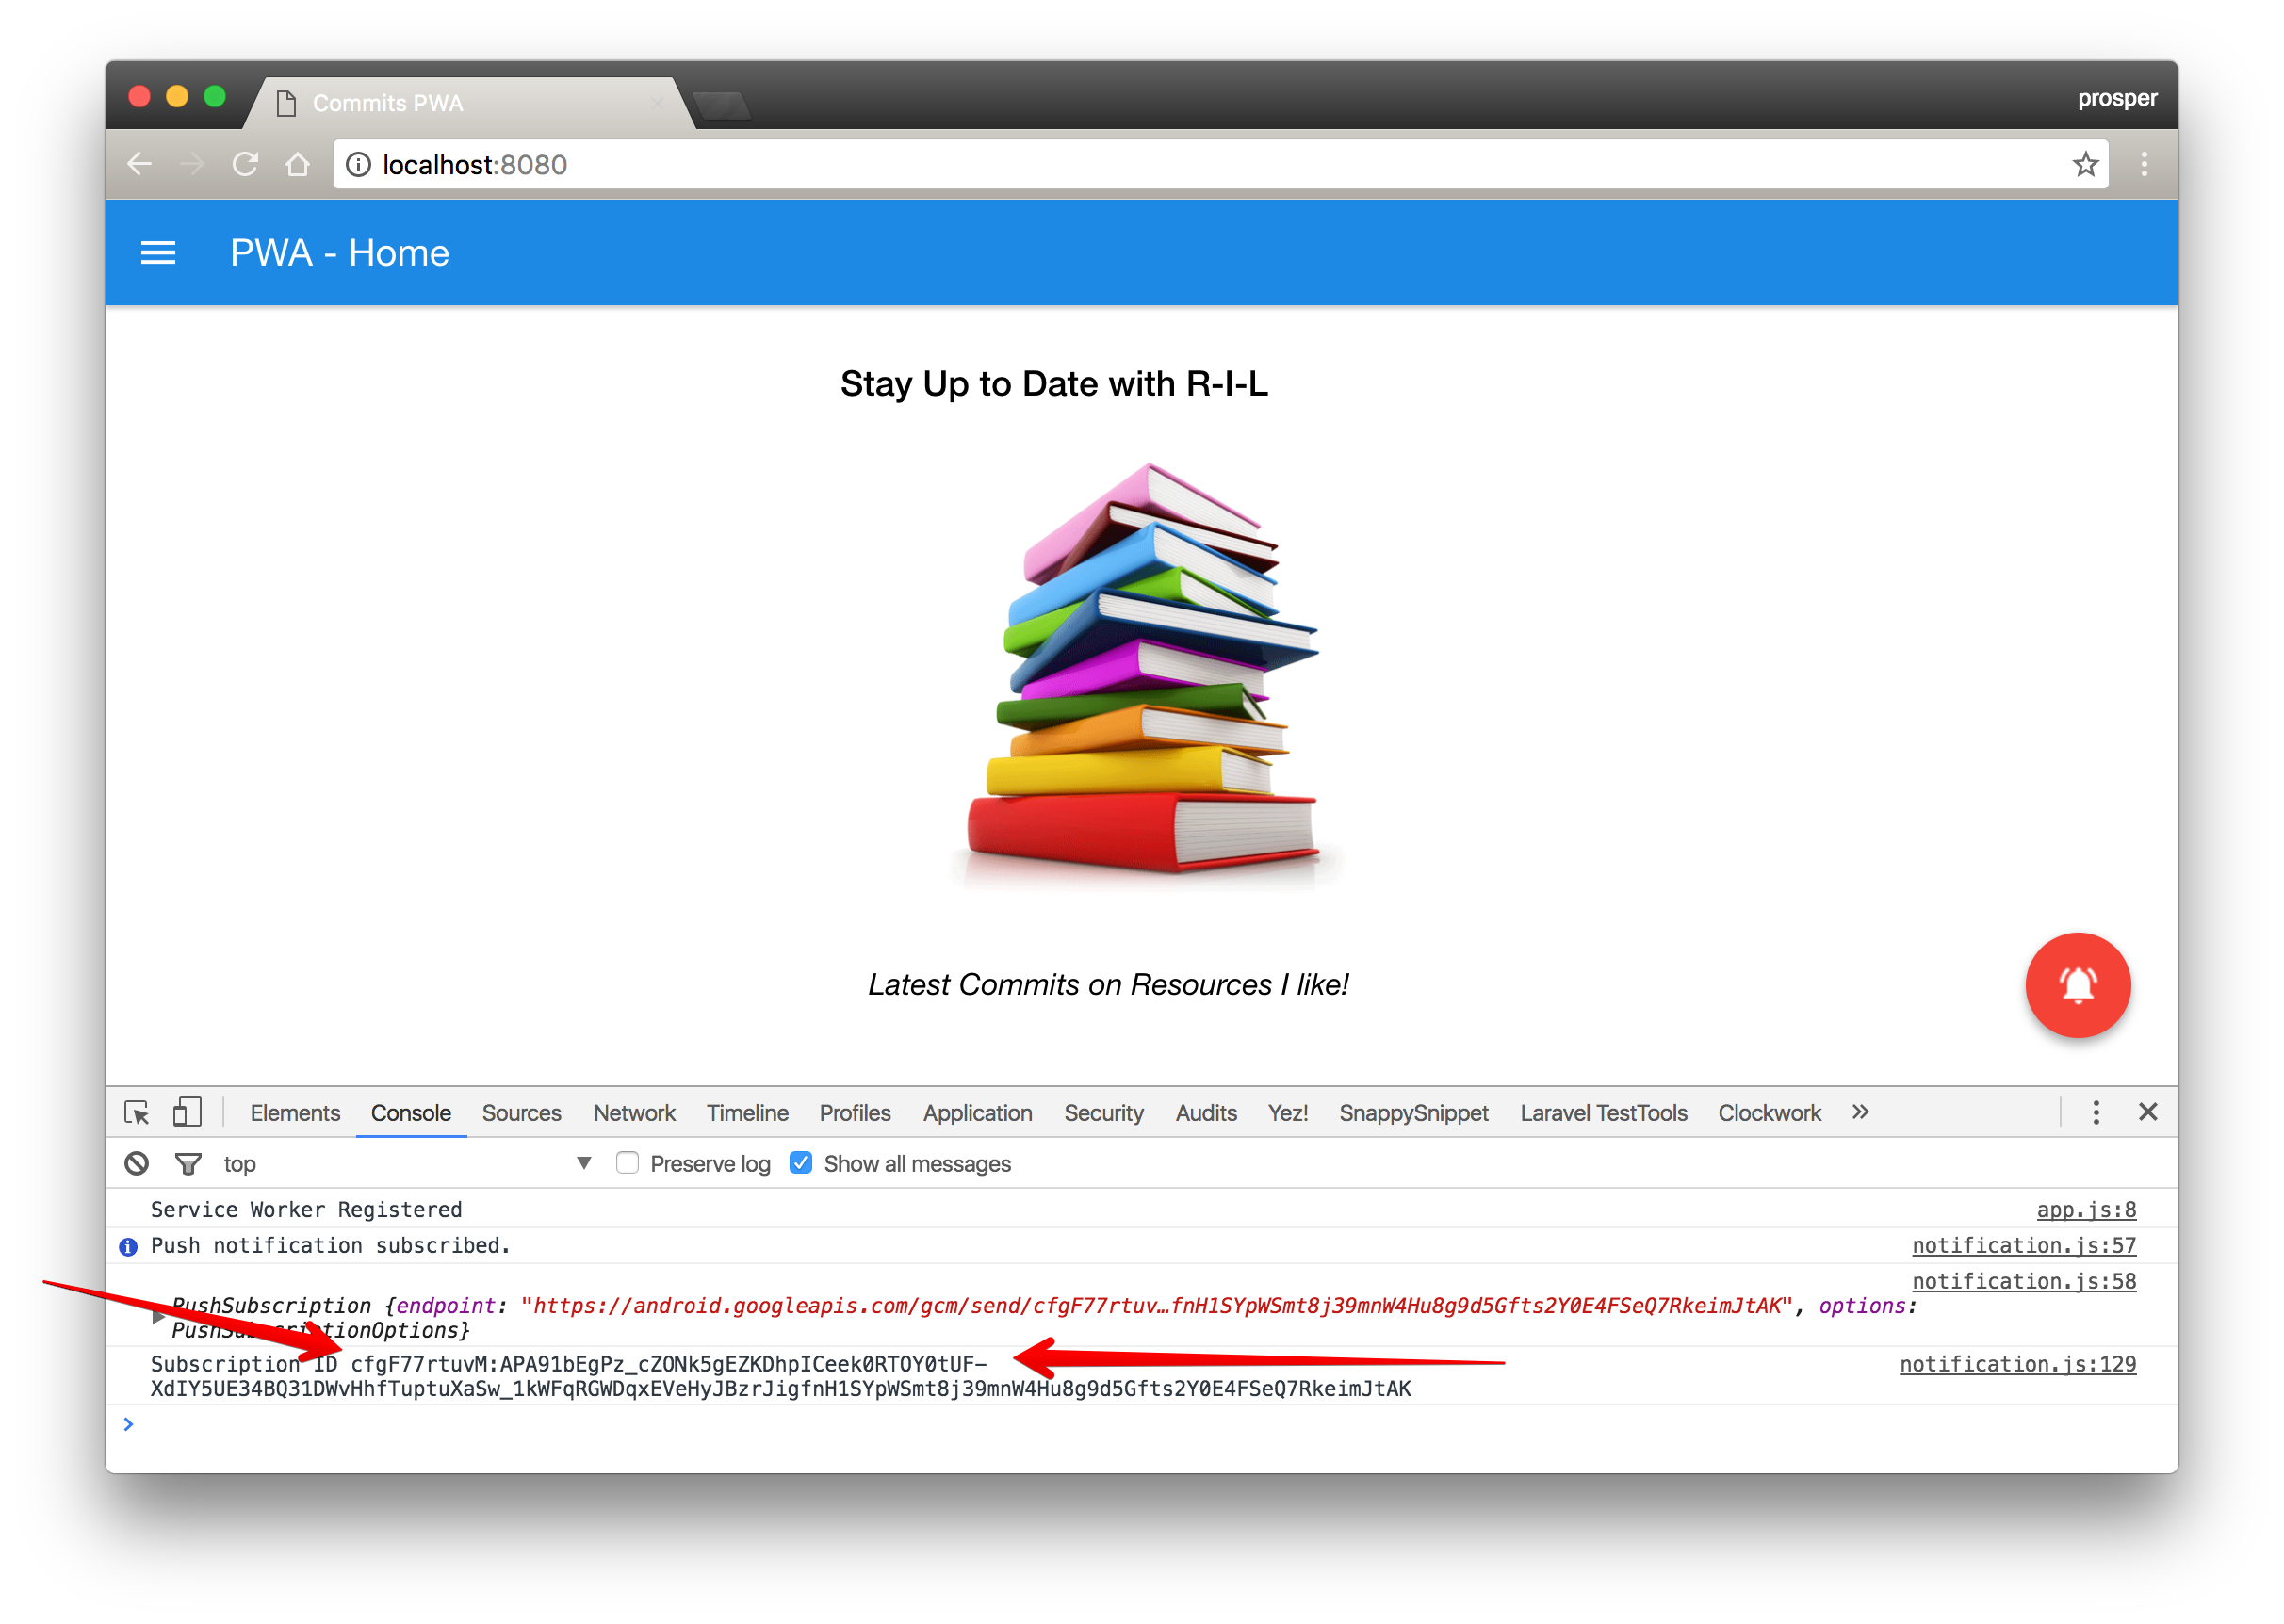
_Subscription ID in my console_
Yaaay!!, it works
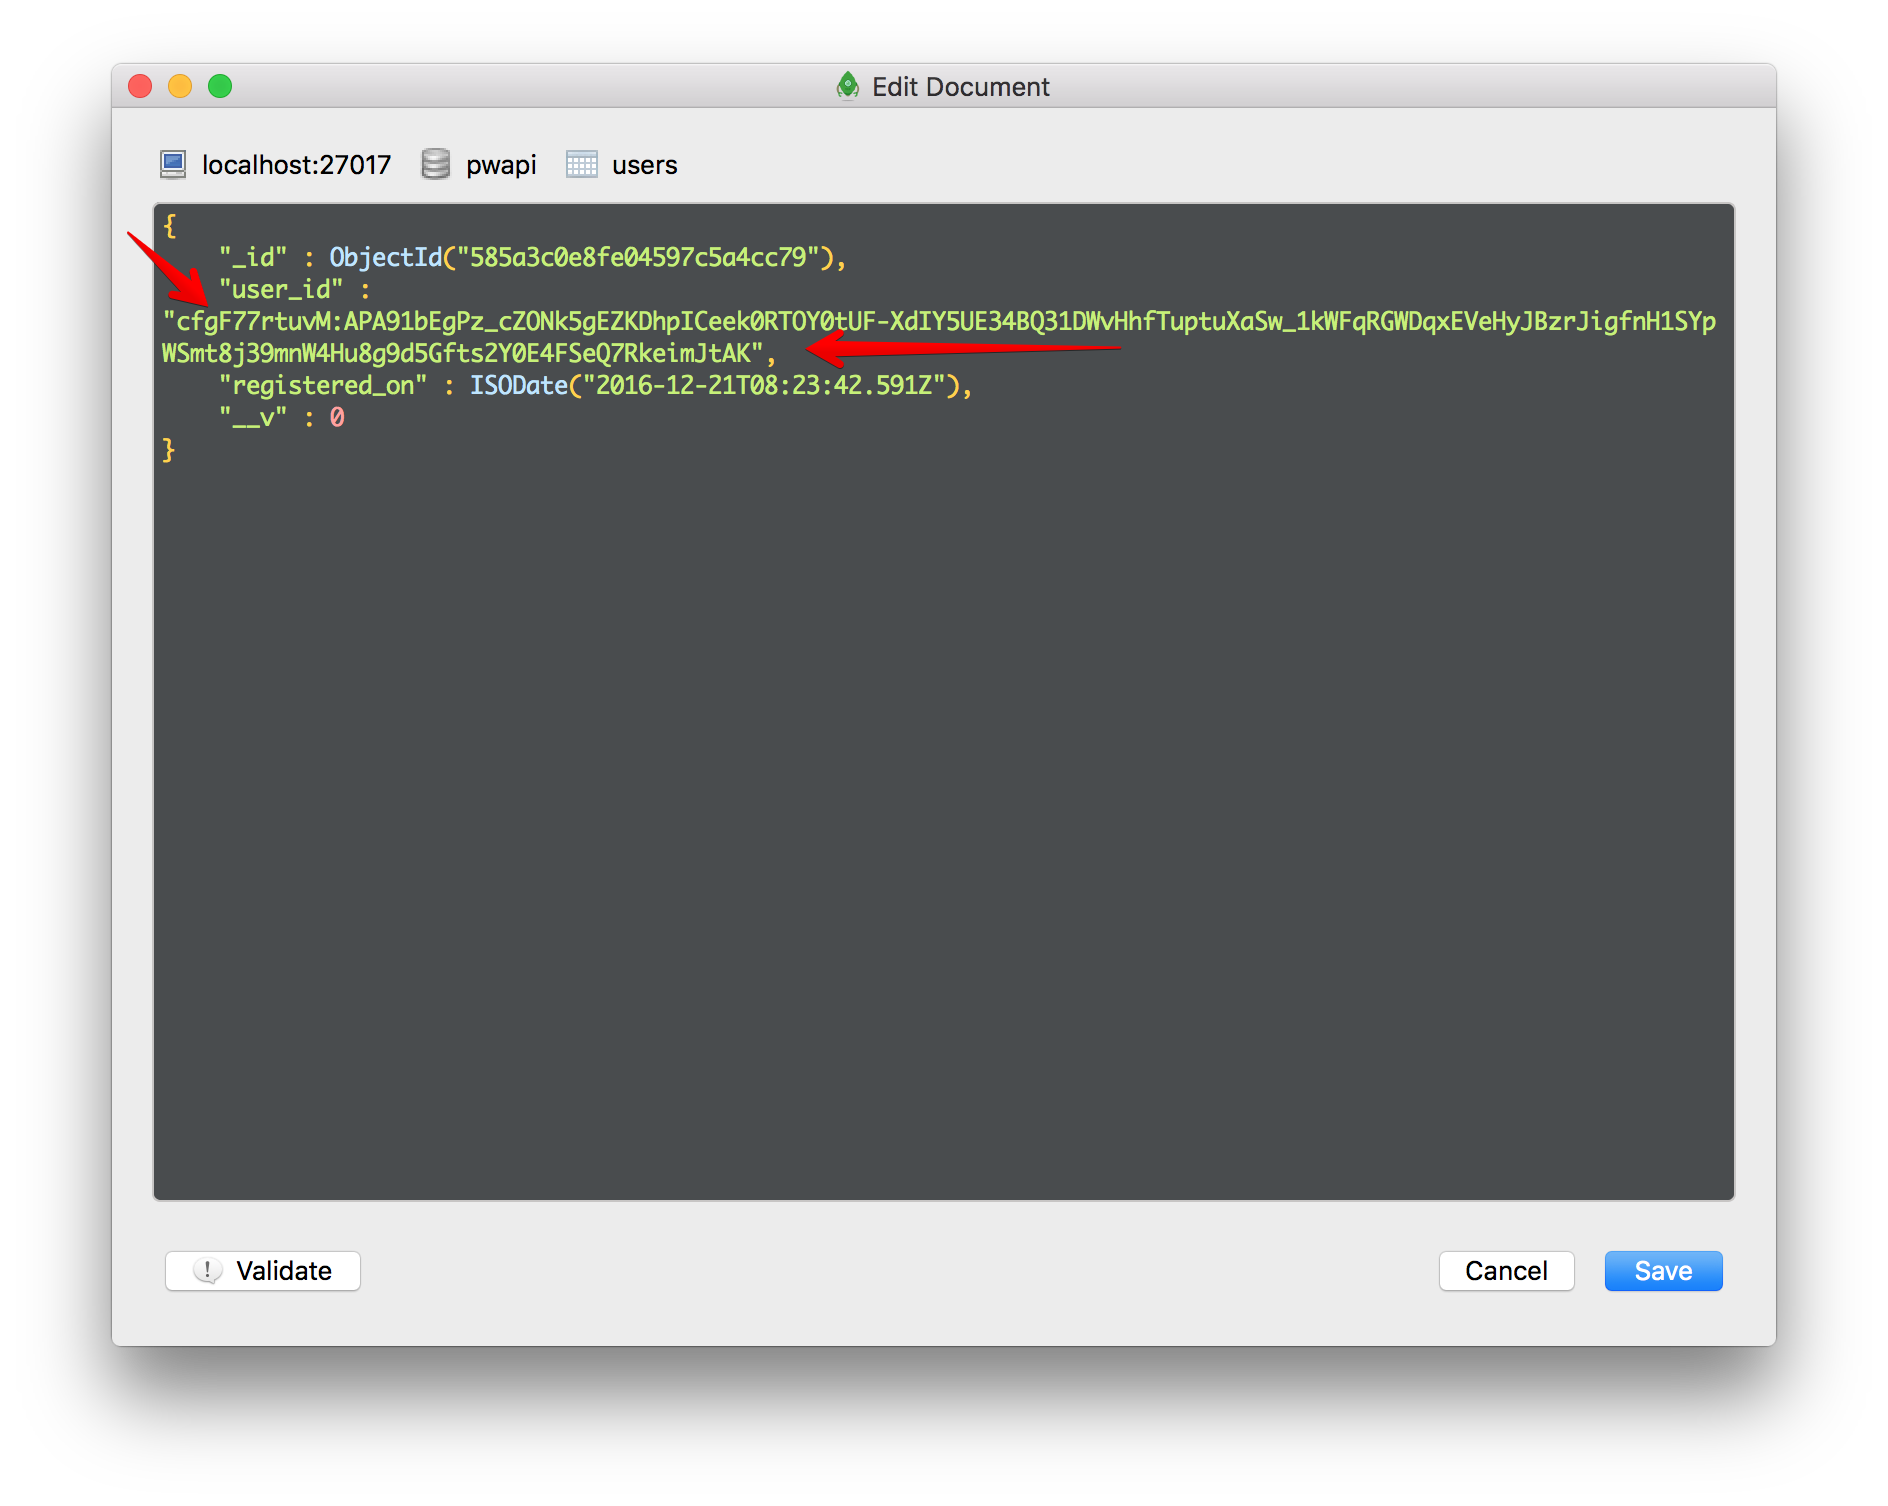
_Subscription ID in my database._
Yaay!!, it got posted
You can see that the subscription IDs are thesame, meaning it got posted and saved in the API service database.
**Note:** [RoboMongo](https://robomongo.org) is the IDE I use to manage my mongodb database.
You can try to unsubscribe and see how it deletes the user from the API service database.
### Sending and Receiving Notifications
In our API service, we have a `/api/notify` route that we can make a POST request to, and our notification will be fired via the Firebase Cloud Messaging service. Now, that's not enough. We also need a way to listen and accept this notification in the browser.
Service Worker to the rescue again! Within the service worker, we can listen to the `push` event like so:
_sw.js_
```js
self.addEventListener('push', function(event) {
console.info('Event: Push');
var title = 'New commit on Github Repo: RIL';
var body = {
'body': 'Click to see the latest commit',
'tag': 'pwa',
'icon': './images/48x48.png'
};
event.waitUntil(
self.registration.showNotification(title, body)
);
});
```
Add that piece of code to the `sw.js`. Clear your cache & reload your app. Now use [Postman](https://www.getpostman.com) to send a post request to `http://localhost:3333/api/notify` like so:
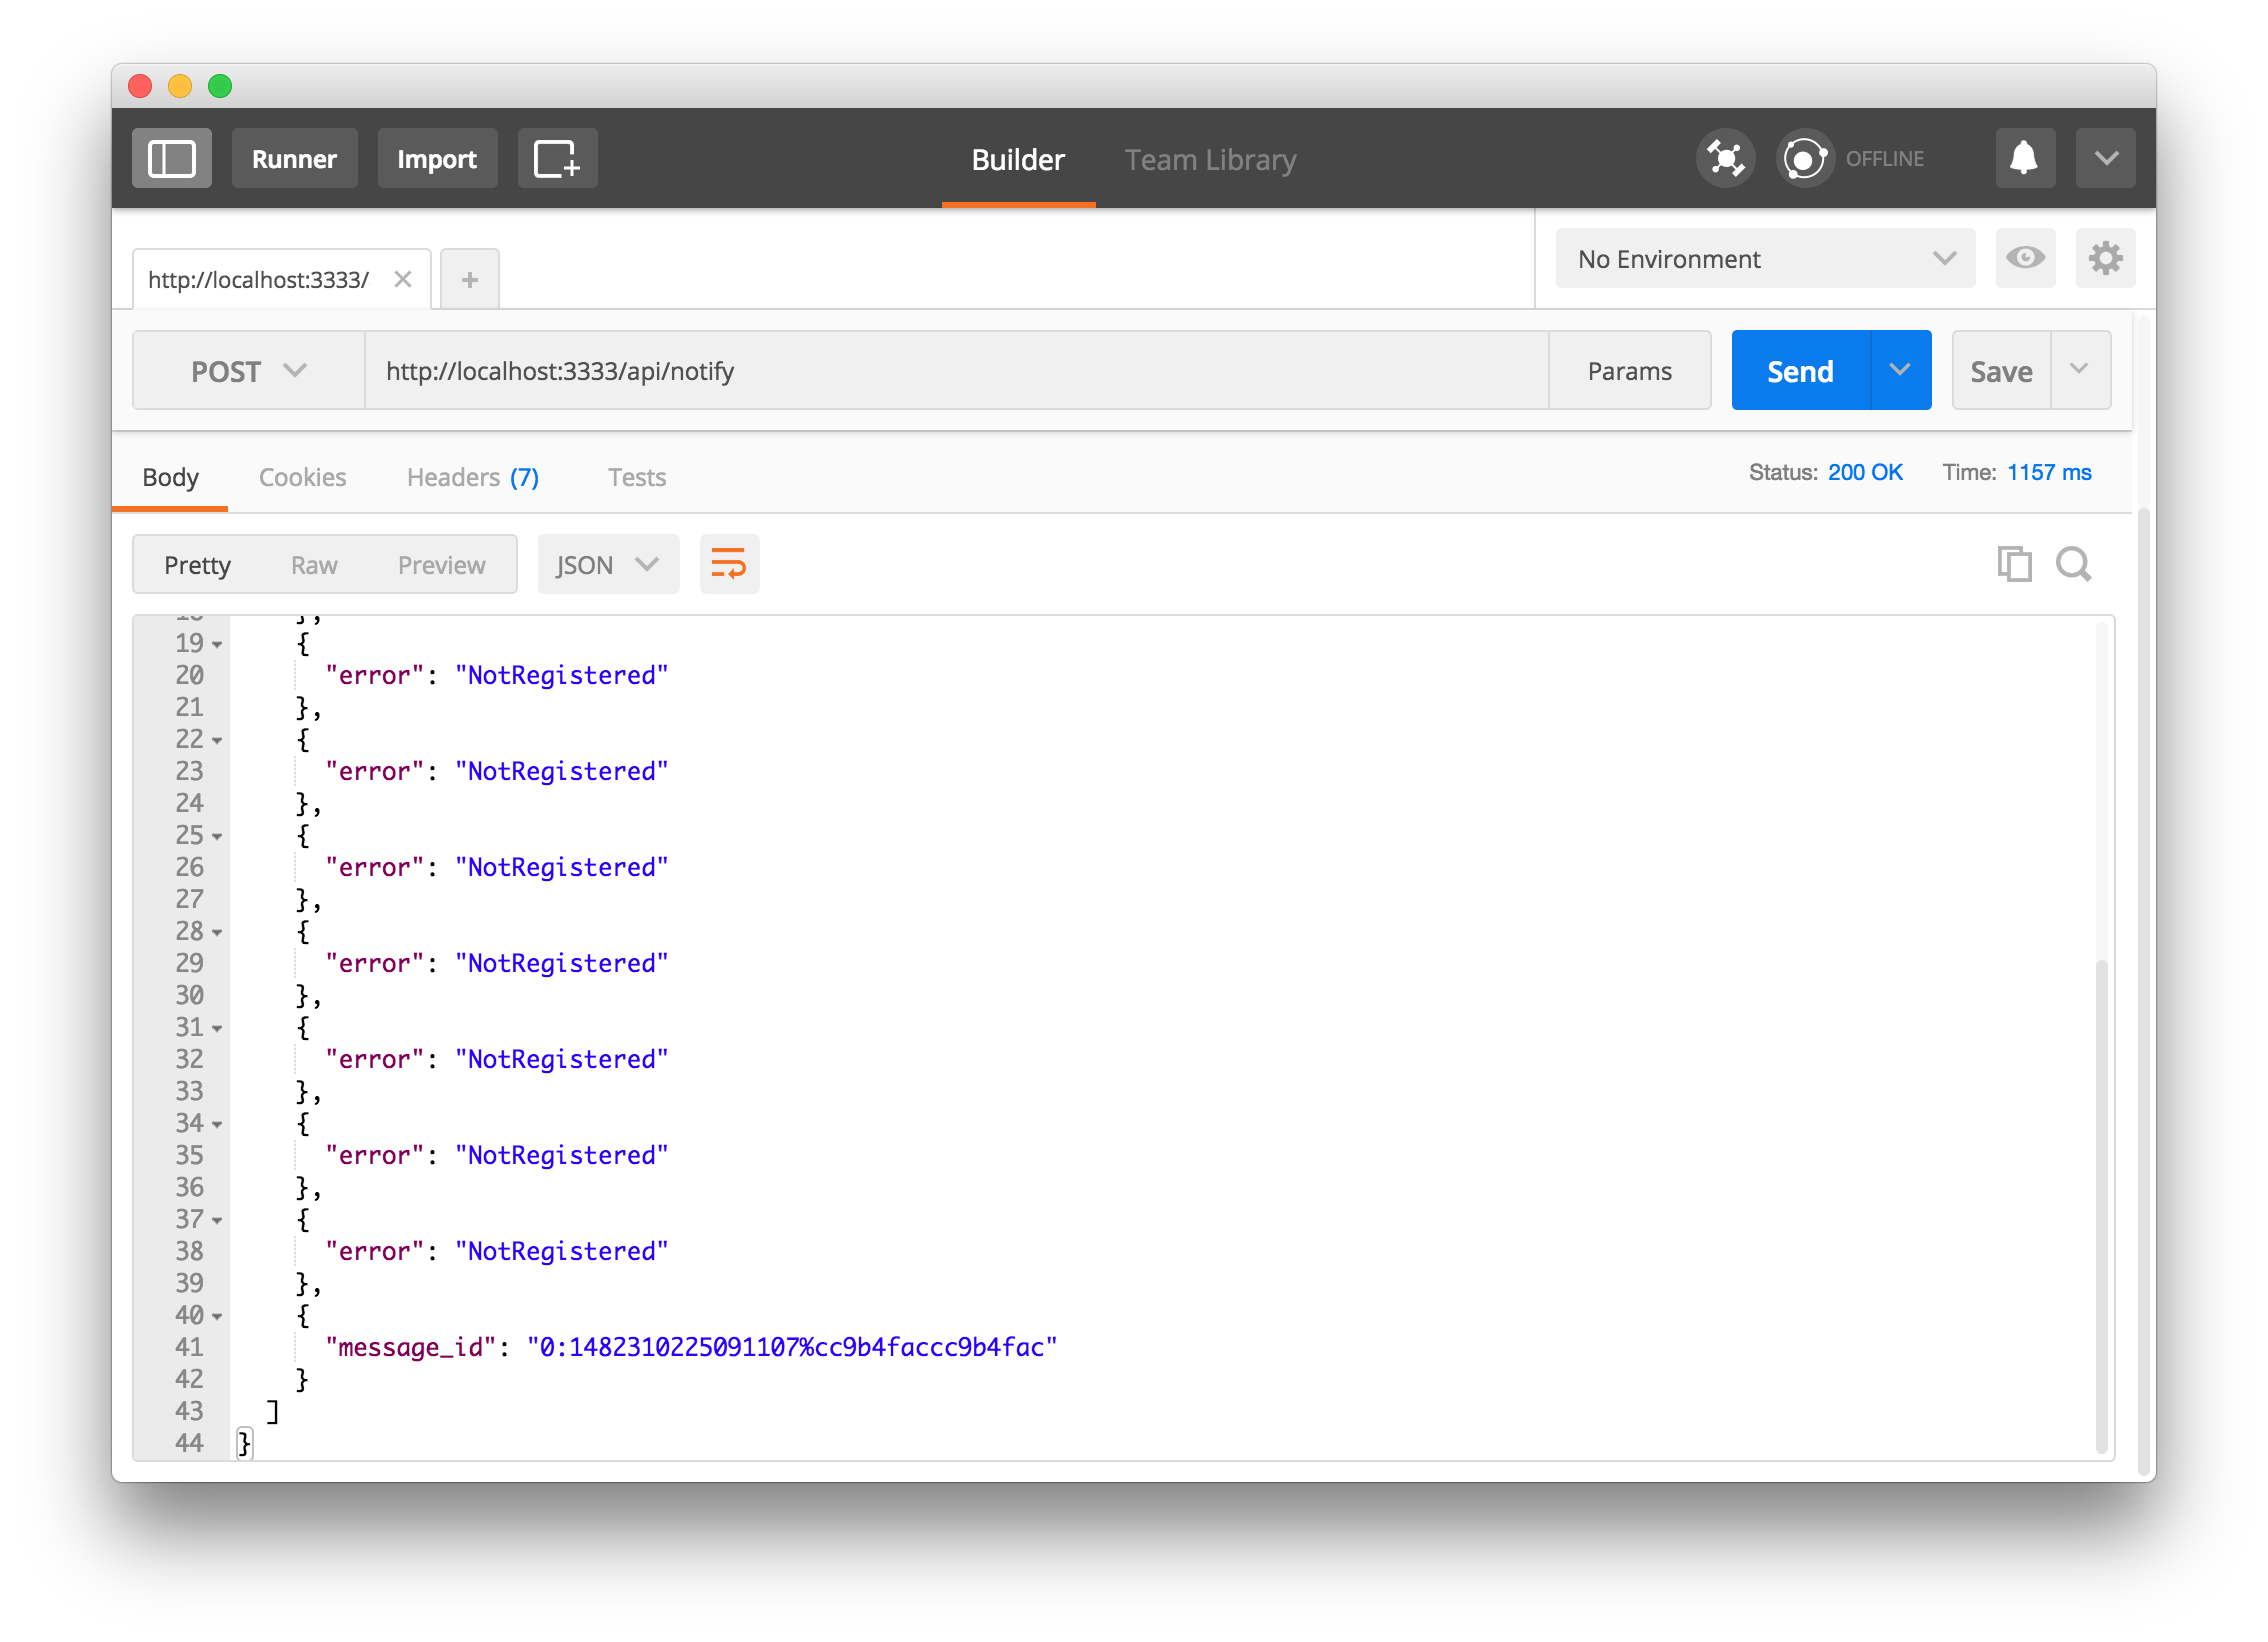
_Making the post request with Postman_
When a notification is fired, our browser will welcome the notification like so:
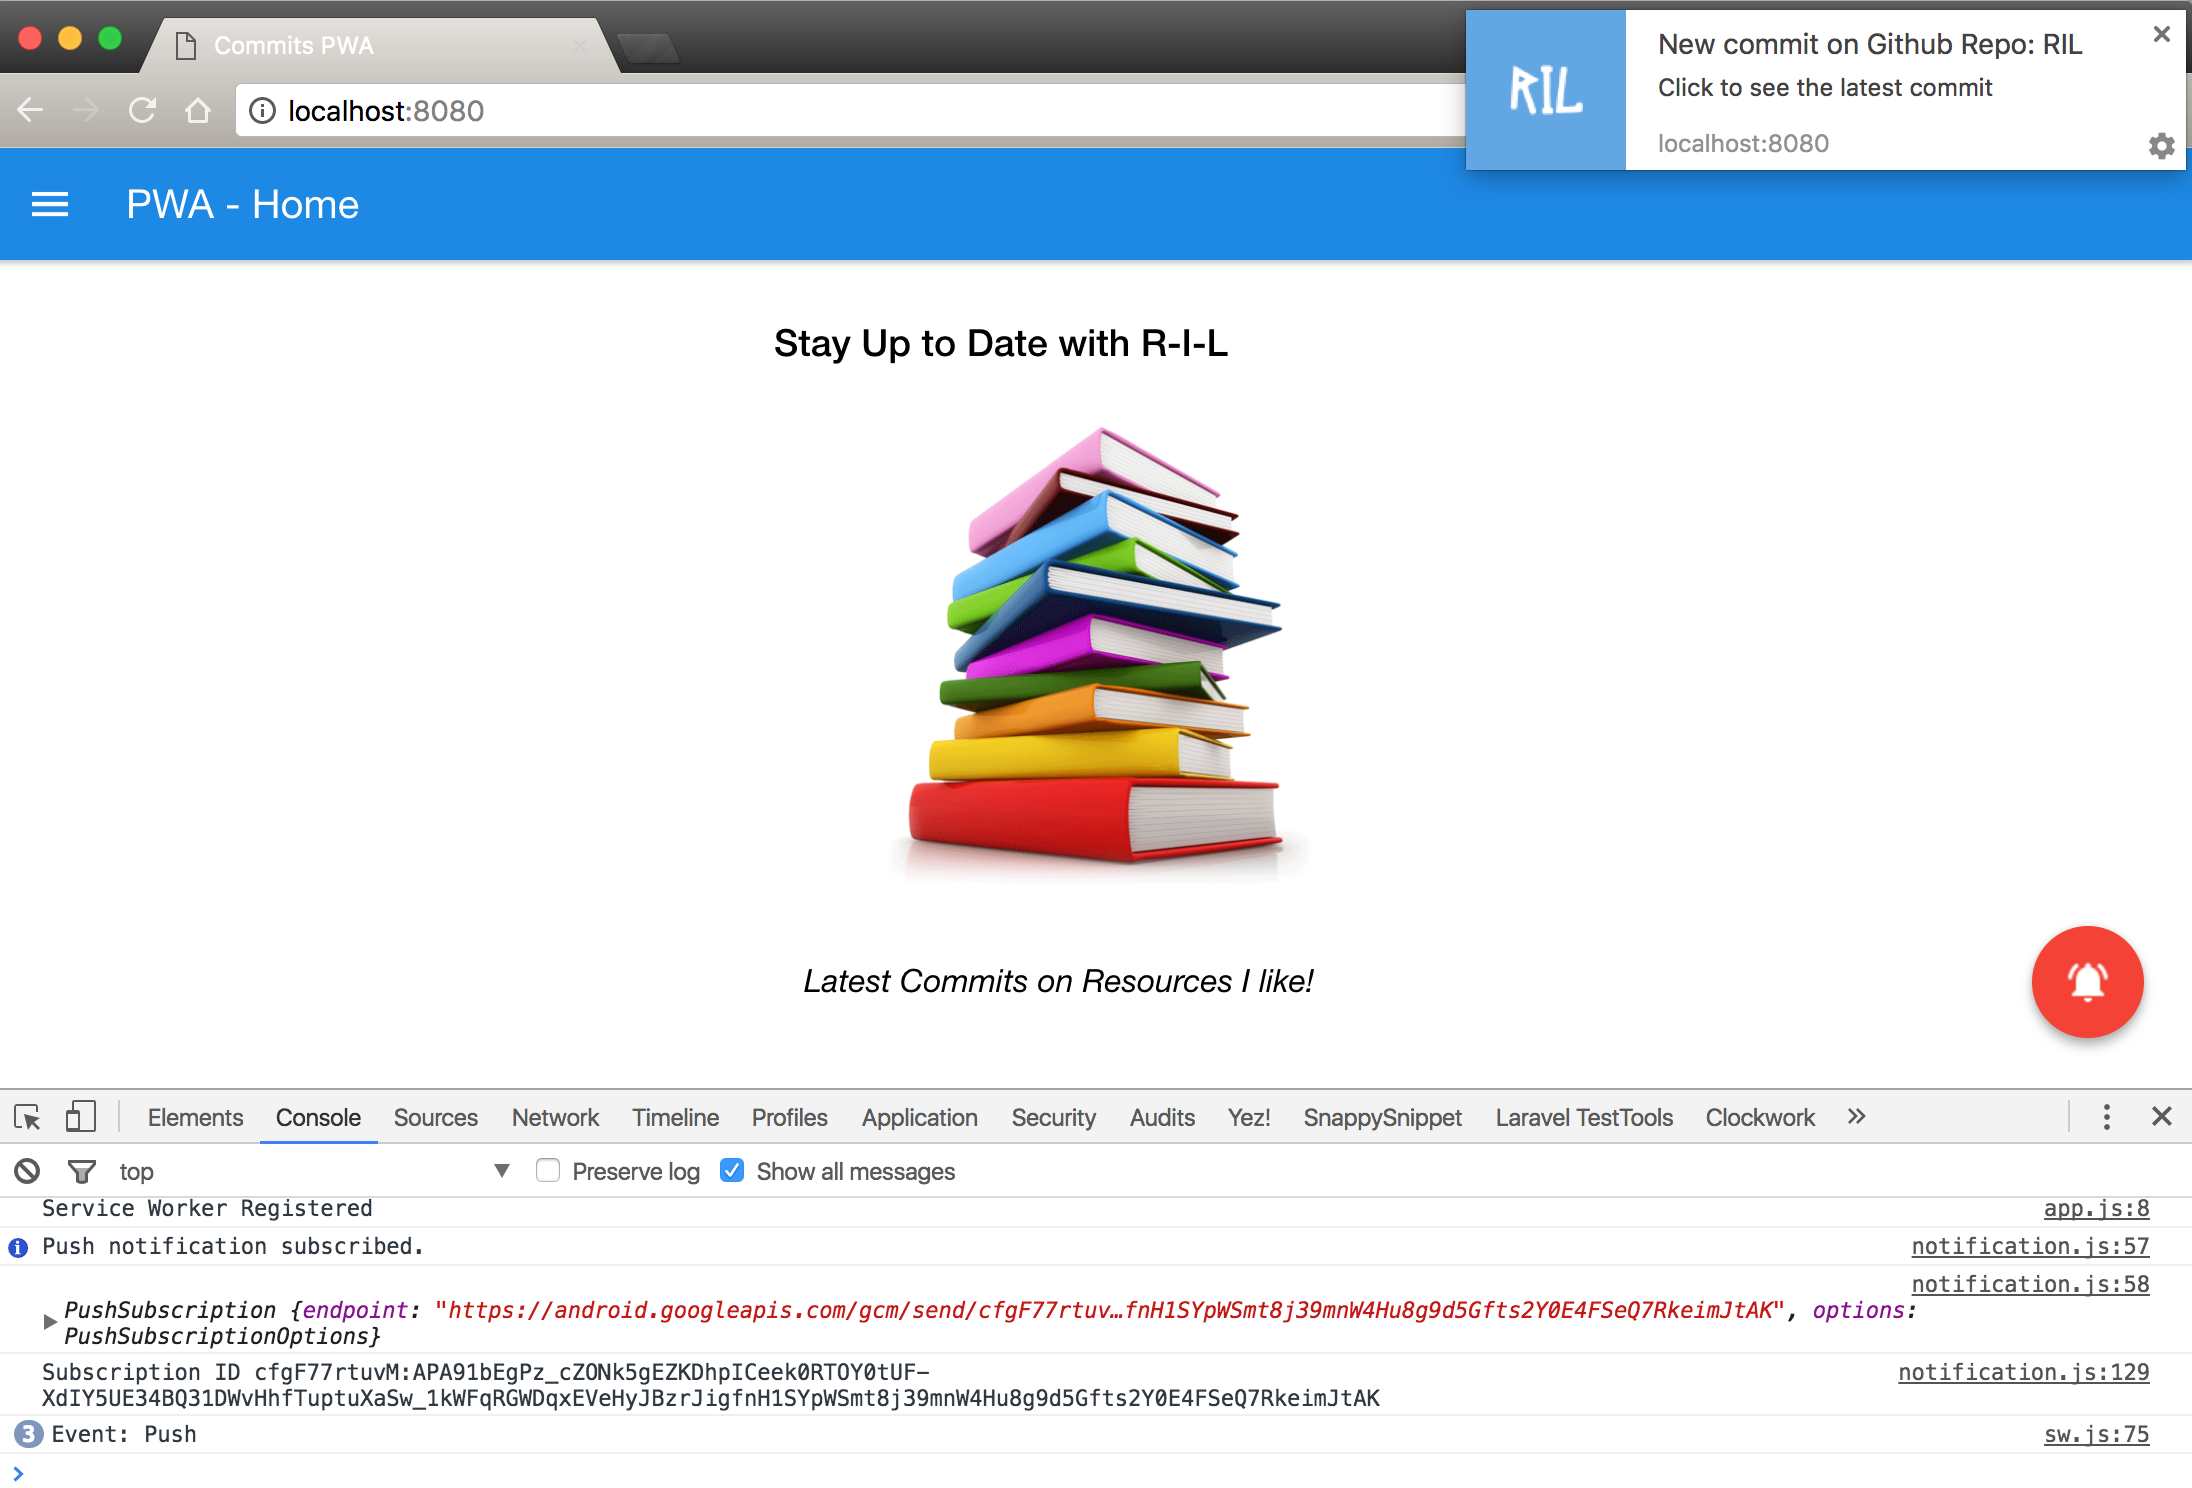
_Notification received in browser_
After receiving the notification, we can decide what to do when a user clicks on the notification. Add this piece of code to your service worker, `sw.js` like so:
```js
self.addEventListener('notificationclick', function(event) {
var url = './latest.html';
event.notification.close(); //Close the notification
// Open the app and navigate to latest.html after clicking the notification
event.waitUntil(
clients.openWindow(url)
);
});
```
Here, the code above listens to the event that is fired when a user clicks on the notification. `event.notification.close()`, closes the notification once clicked. Then, a new window or tab will be opened re-directing to `localhost:8080/latest.html.`
**Note:** `event.waitUntil()` is been called to ensure the browser doesn't terminate our service worker before our new window has been displayed.
### Automate Notification Sending Process
We have been manually making a post request via *Postman*. Practically, we want the user to get a notification once a commit has been made to the GitHub repository, `https://github.com/unicodeveloper/resources-i-like/`. So, how do we automate this process?
Ever heard of Webhooks? Yes, [GitHub Webhooks](https://developer.github.com/webhooks) to the rescue!
**Note:** Use the repository url of your choice, because you will have to make commits and see that this works as you go through this tutorial.
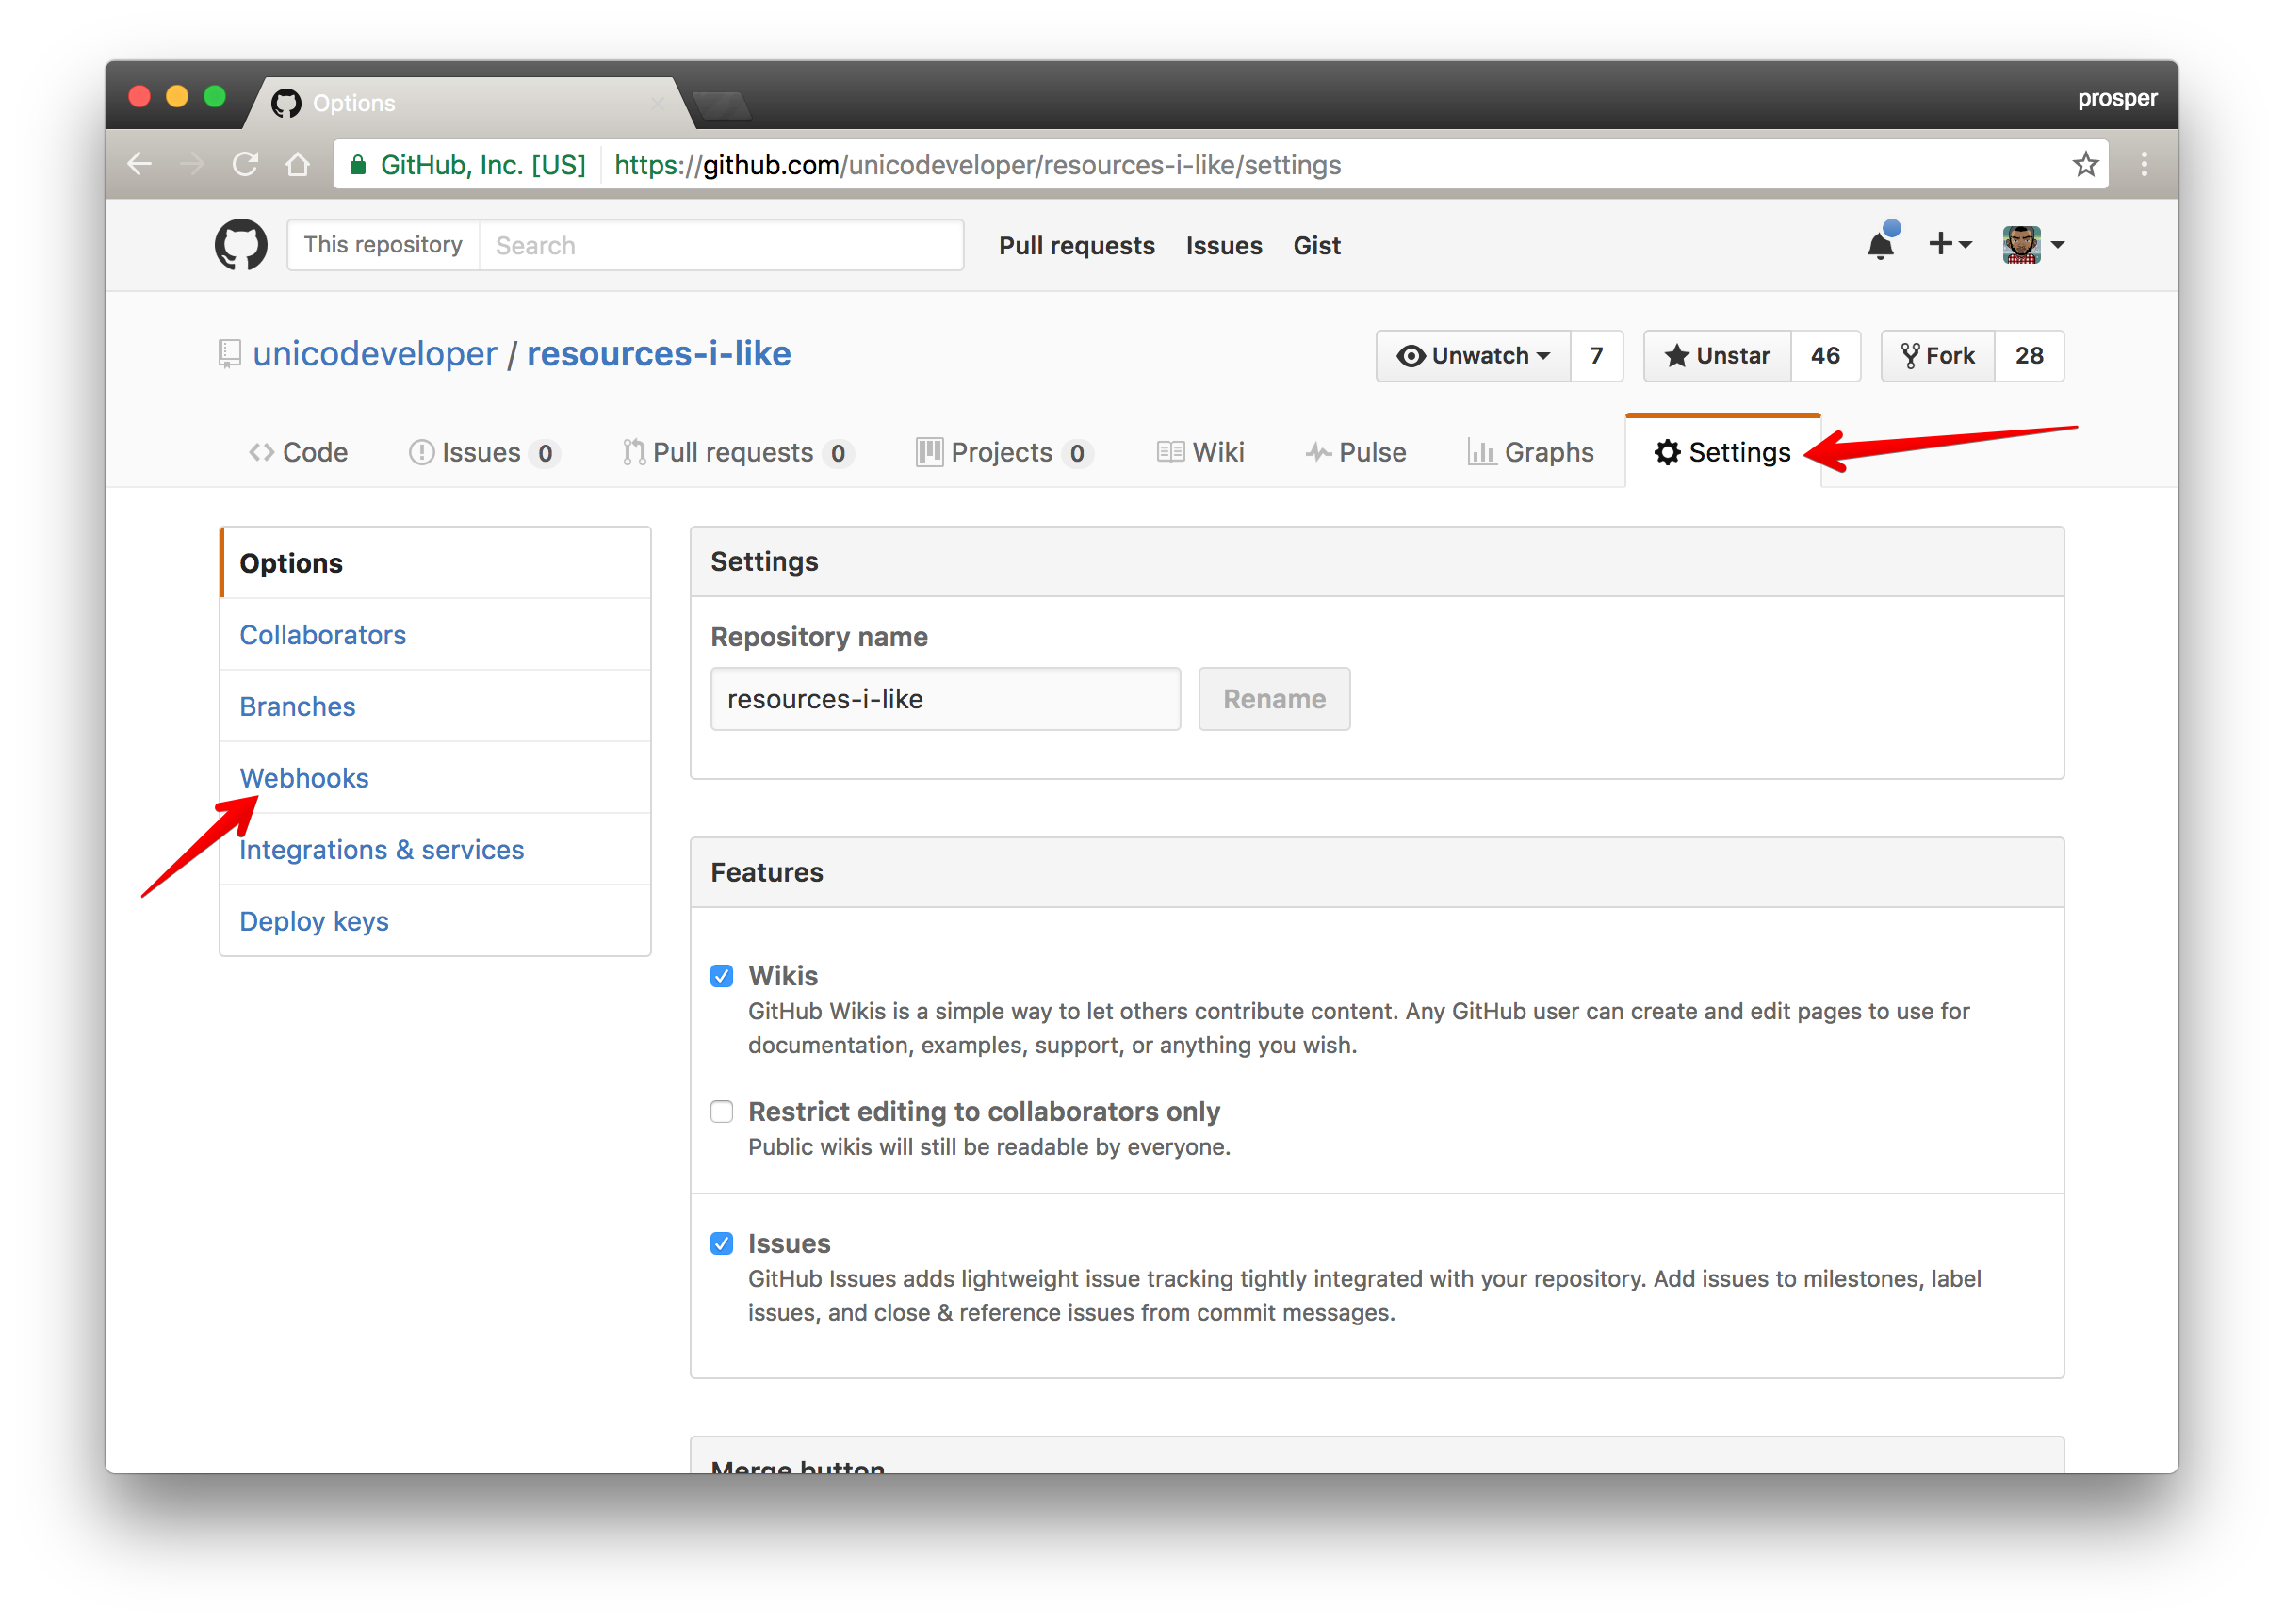
Head over to the repository of your choice. In my case it is `https://github.com/unicodeveloper/resources-i-like/` . Go to **Settings > Webhooks** like so:
Click on `Add webhook` button

Now, it's time to add a hook. The hook will be our `notify` API endpoint. When you make a commit on GitHub, a `push` event is fired. With this webhook, a `POST` request will be sent to `/api/notify` API endpoint whenever a commit is made on this particular repository. Sweet!!!
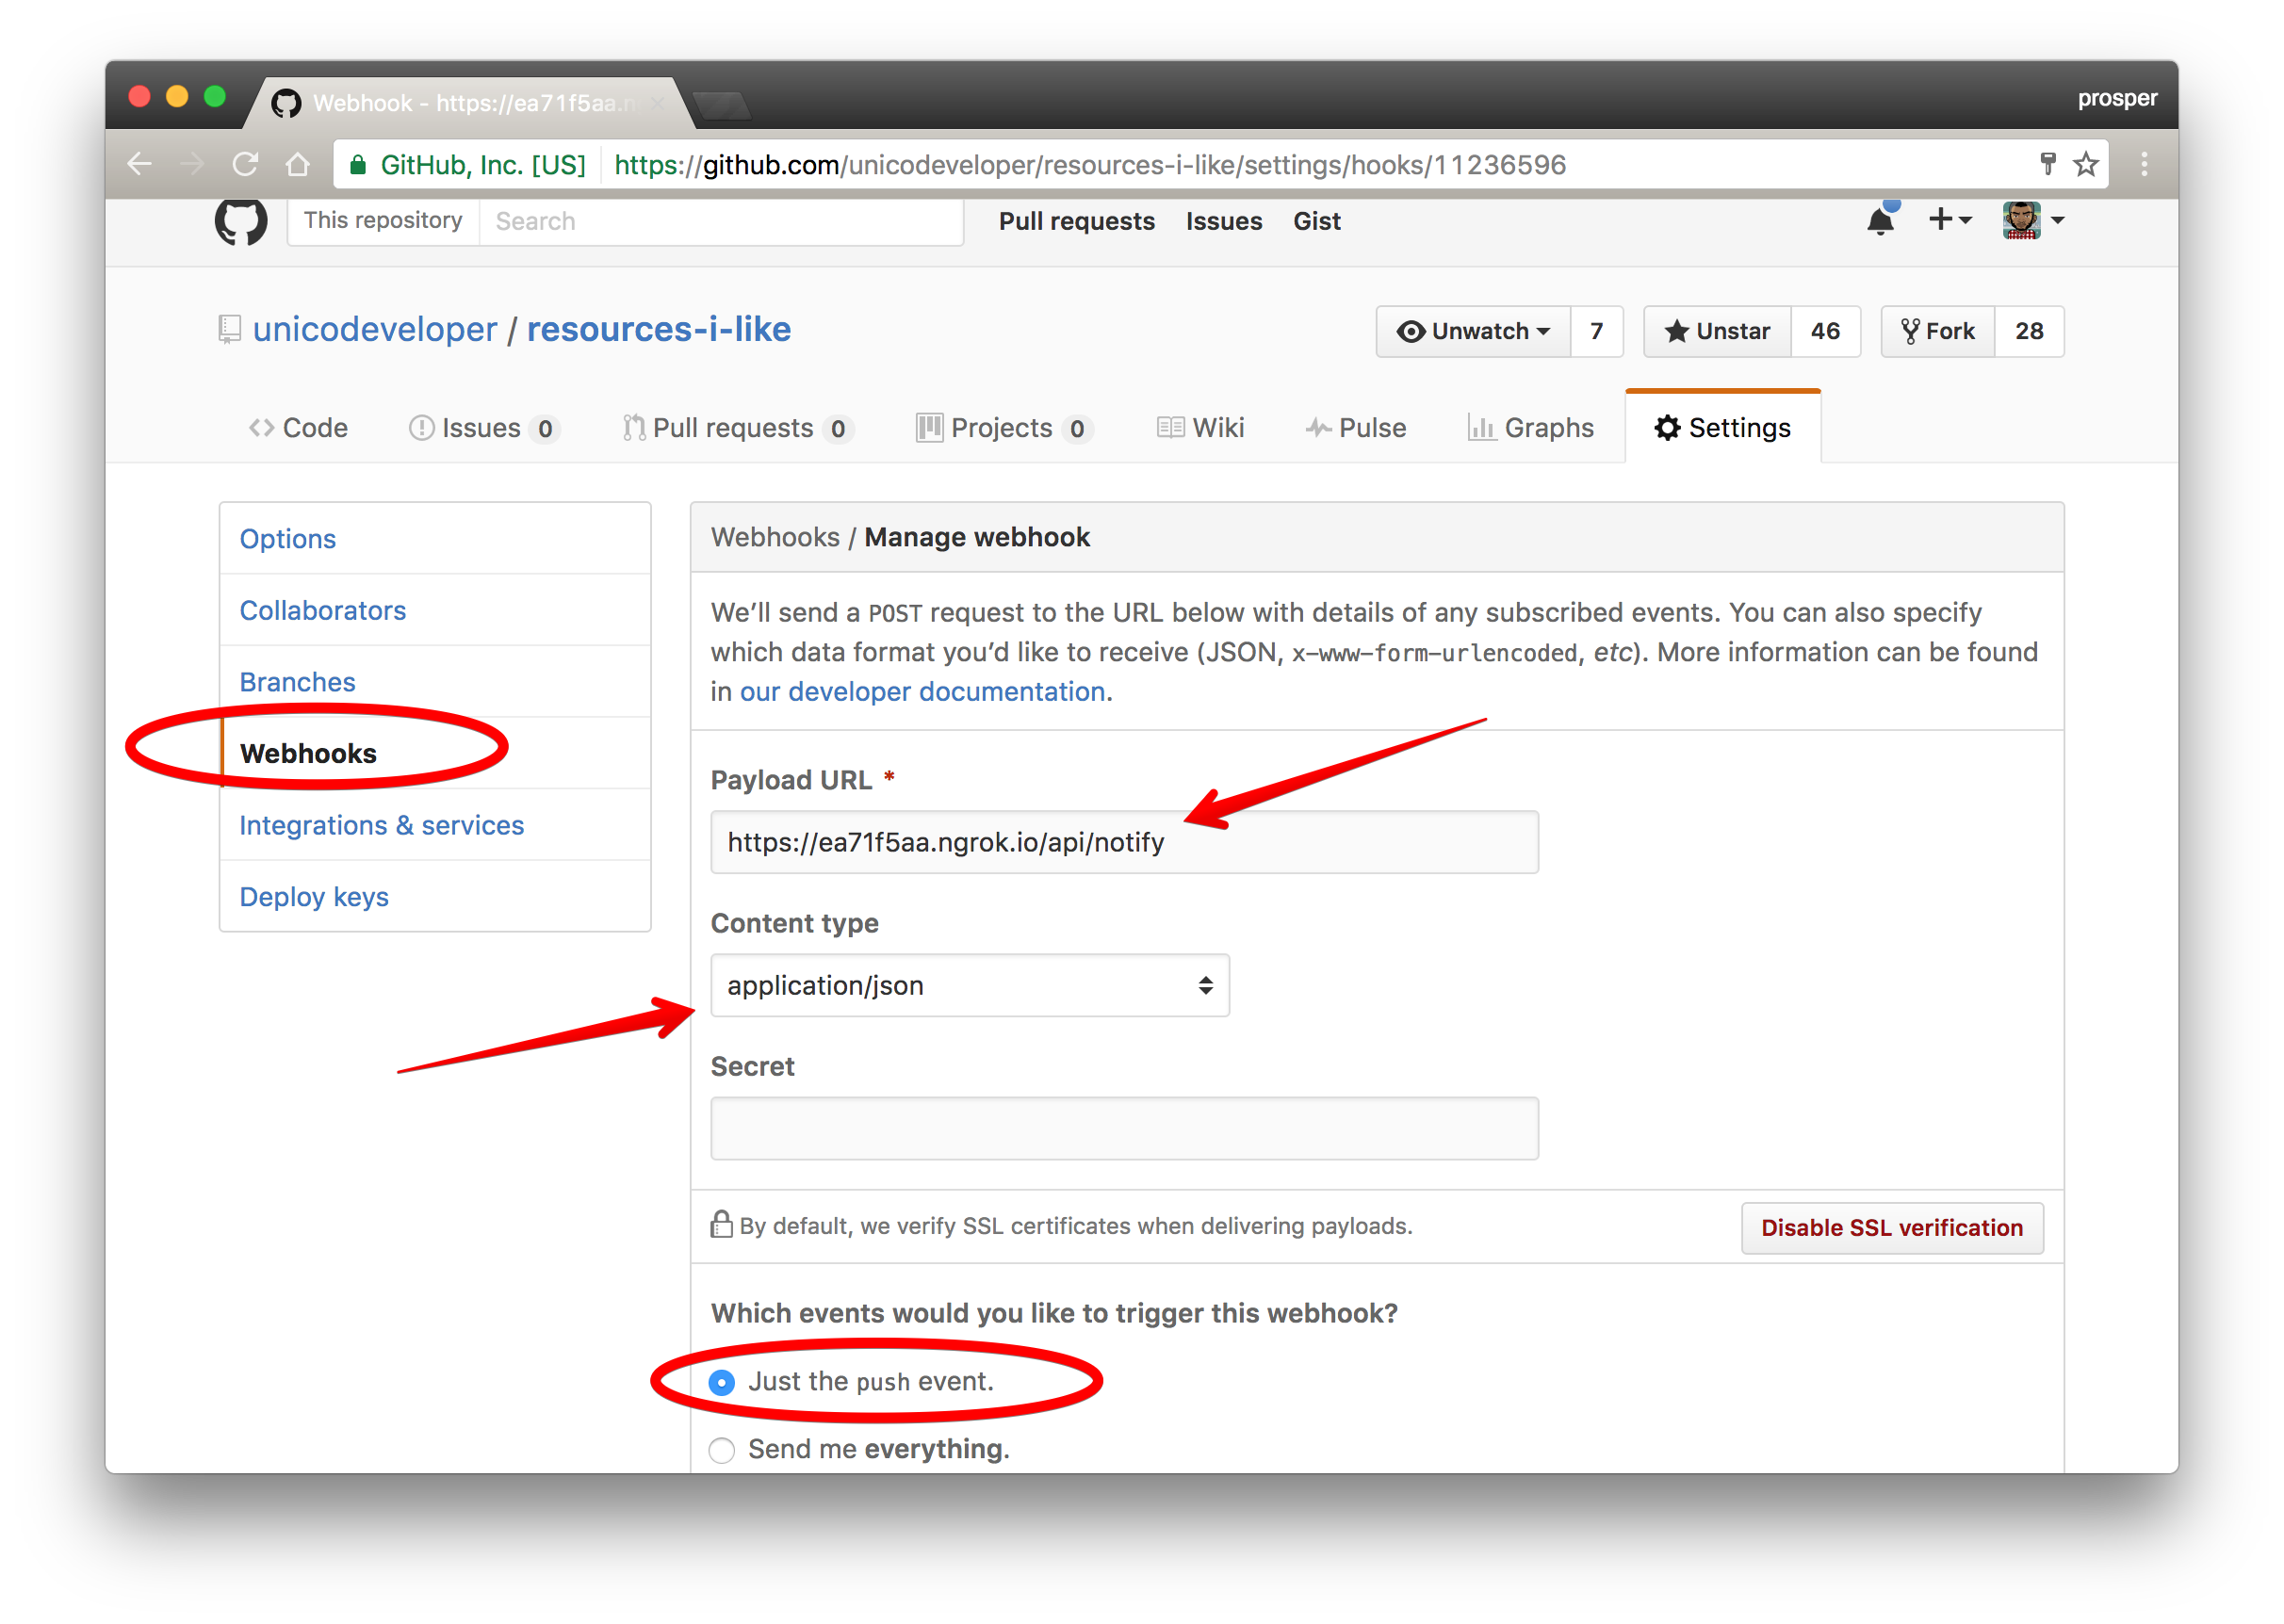
Look at the diagram above. Hold on. Wait a minute! There is a strange URL in the **Payload URL**, `https://ea71f5aa.ngrok.io/api/notify`. Where is `https://ea71f5aa.ngrok.io` coming from? How did we get that?
### Set up Ngrok
It's simple. We can't use a localhost URL. GitHub needs a URL that exists on the internet so I took advantage of a tool called [ngrok](https://ngrok.com/download). With **Ngrok**, you can expose a local server to the internet.
Install **Ngrok**. From your terminal, use ngrok to ping the port of the API server like so:
```bash
./ngrok http 3333
```
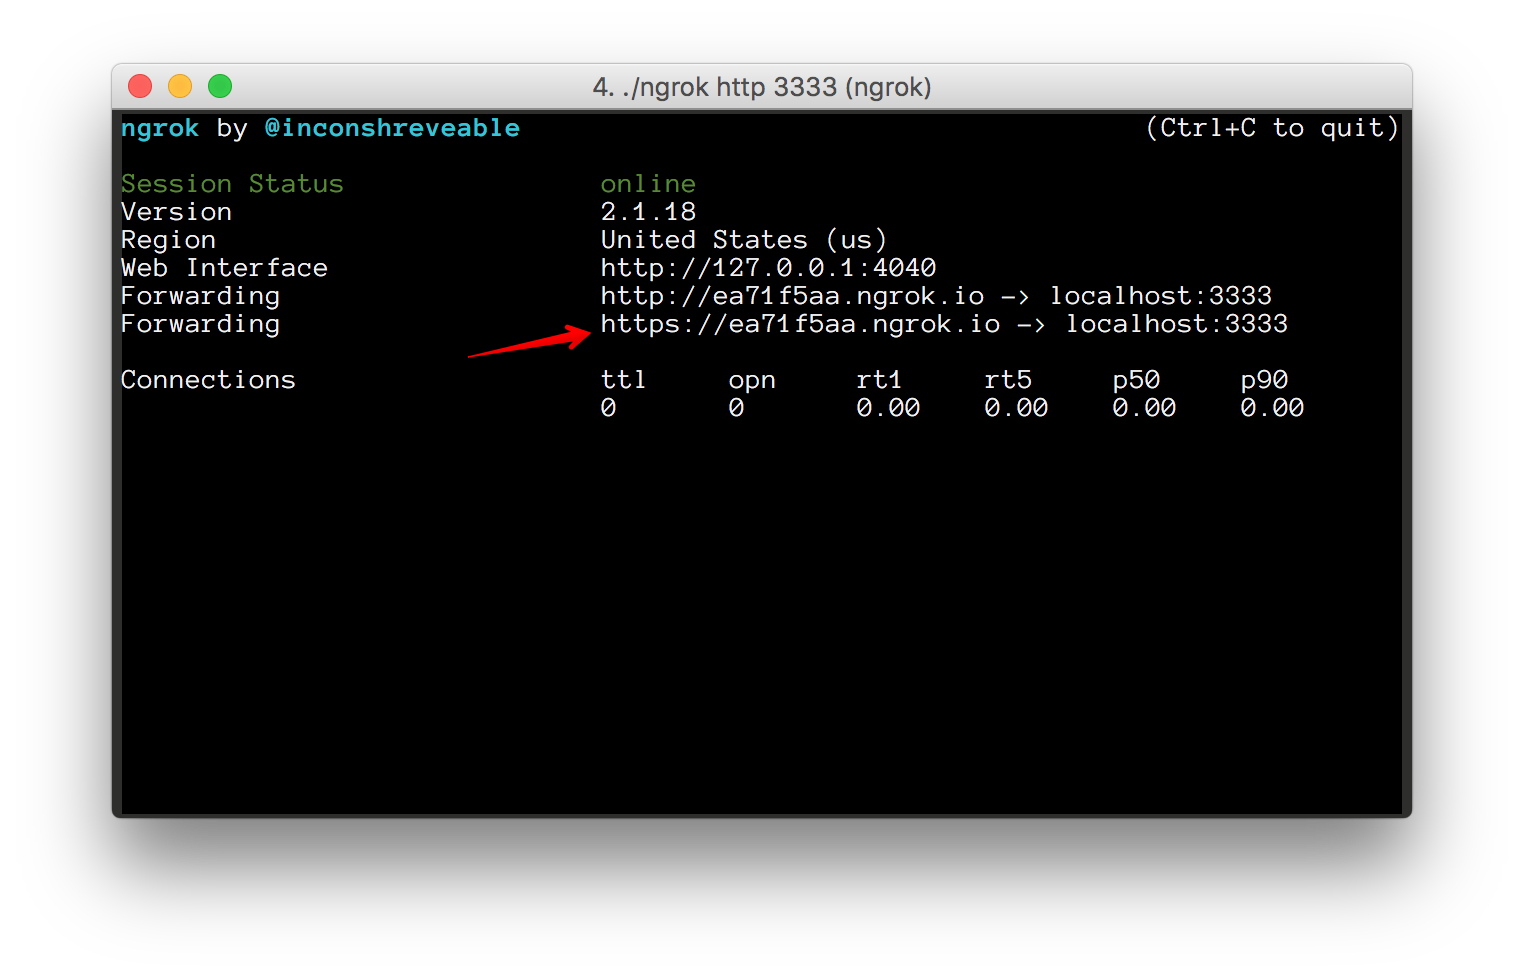
_Ngrok pinging the local API server_
So use whatever url it outputs on the terminal from ngrok in the webhook.
**Note:** Ngrok outputs both `http` and `https` URLs, so feel free to use any of them. They still map to your local server.
Now, once you have added the webhook, GitHub immediately does a test `POST` ping to the hook to determine if it is all properly set up.
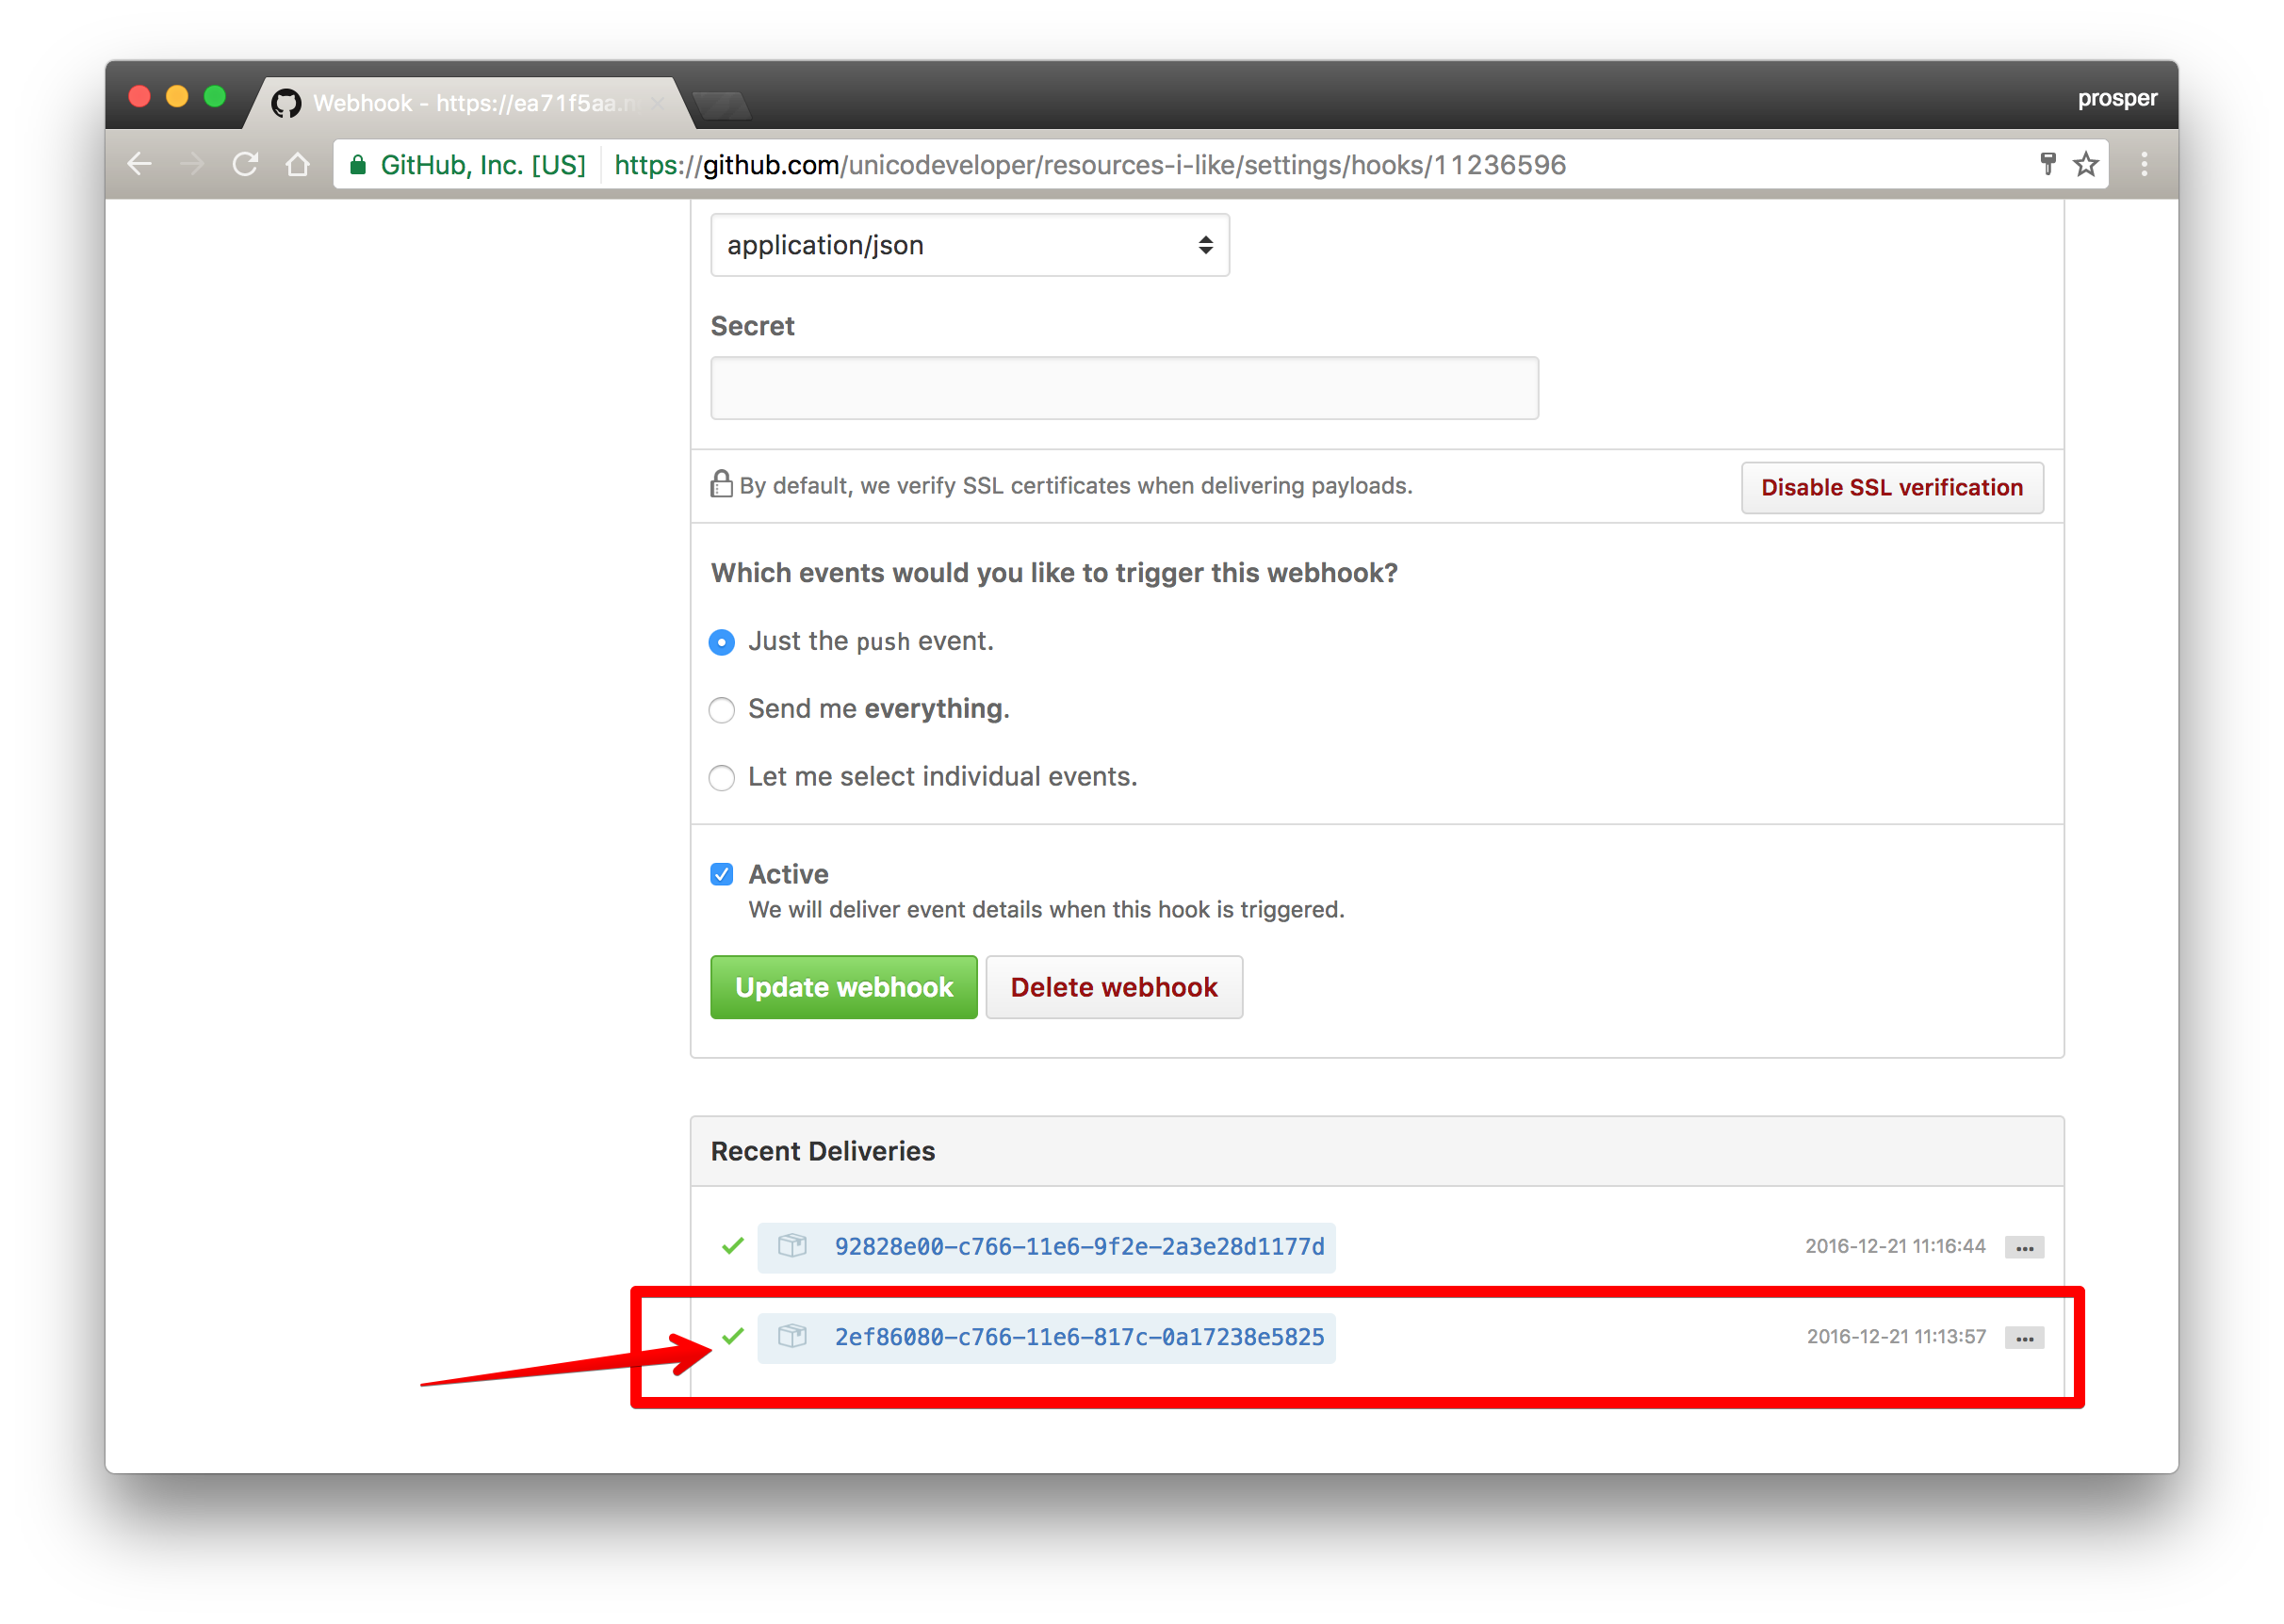
_Green mark to indicate that the hook URL is valid_
### Make A Commit
We have set everything up. Now go ahead and make a commit. Once you do that, a push notification will be sent and your browser will receive it like so:
_Push Commit, Receive Push Notification_
Yes!!!! the process has been totally automated.
## Host PWA
One of the requirements of a PWA is to have its content served via HTTPS. [Firebase hosting](https://firebase.google.com/docs/hosting/) is a very good option for deploying our app to a server that supports HTTPS.
Our [app](https://ril-pwa.firebaseapp.com) is now live. I also hosted the [API](https://rilapi.herokuapp.com/api) on heroku.
For the app to work fully, I changed the URL in the `notification.js` file to the live API URL on heroku. I also changed the Webhook URL to the live API URL.
## Add App To Homescreen
Open up your browser on your device, especially Chrome and add it like so:
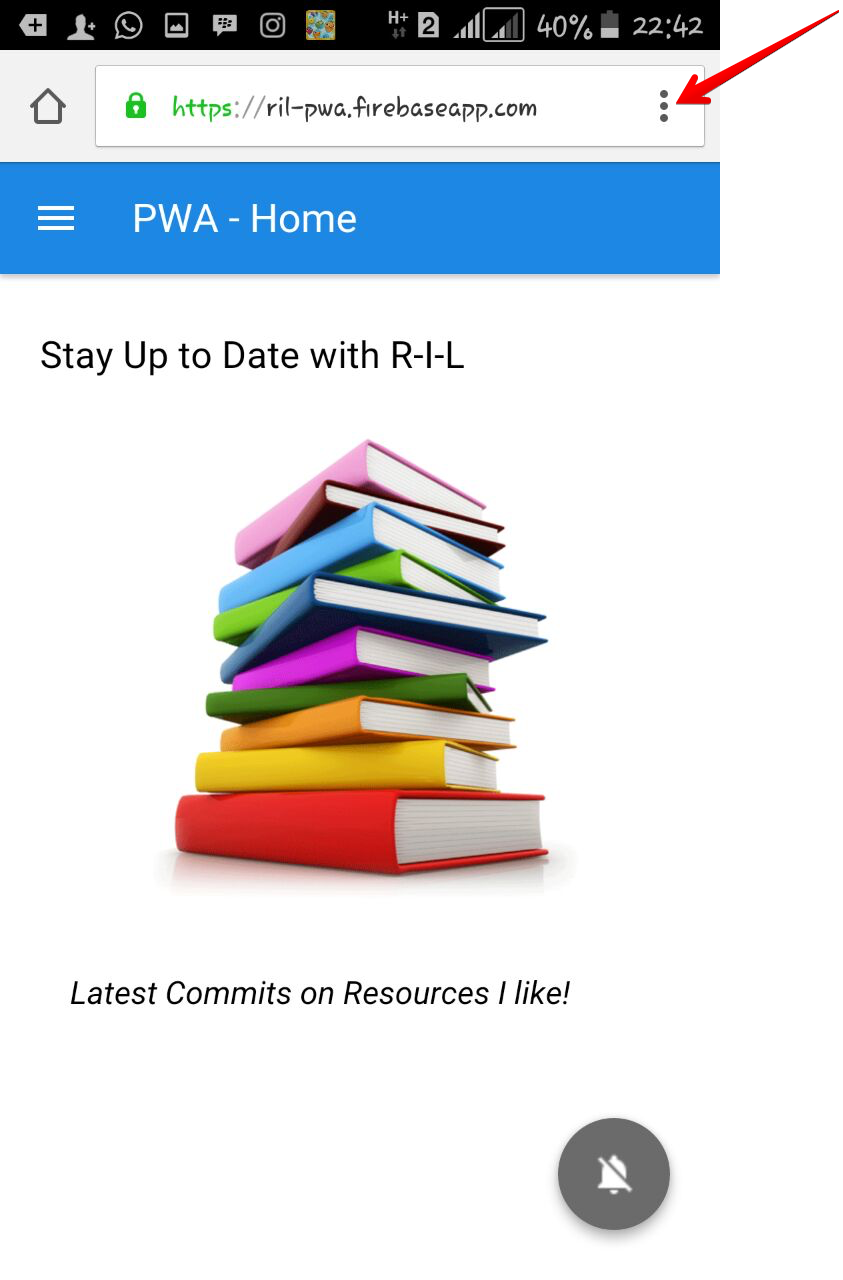
_Click on the Ellipsis icon by the right_
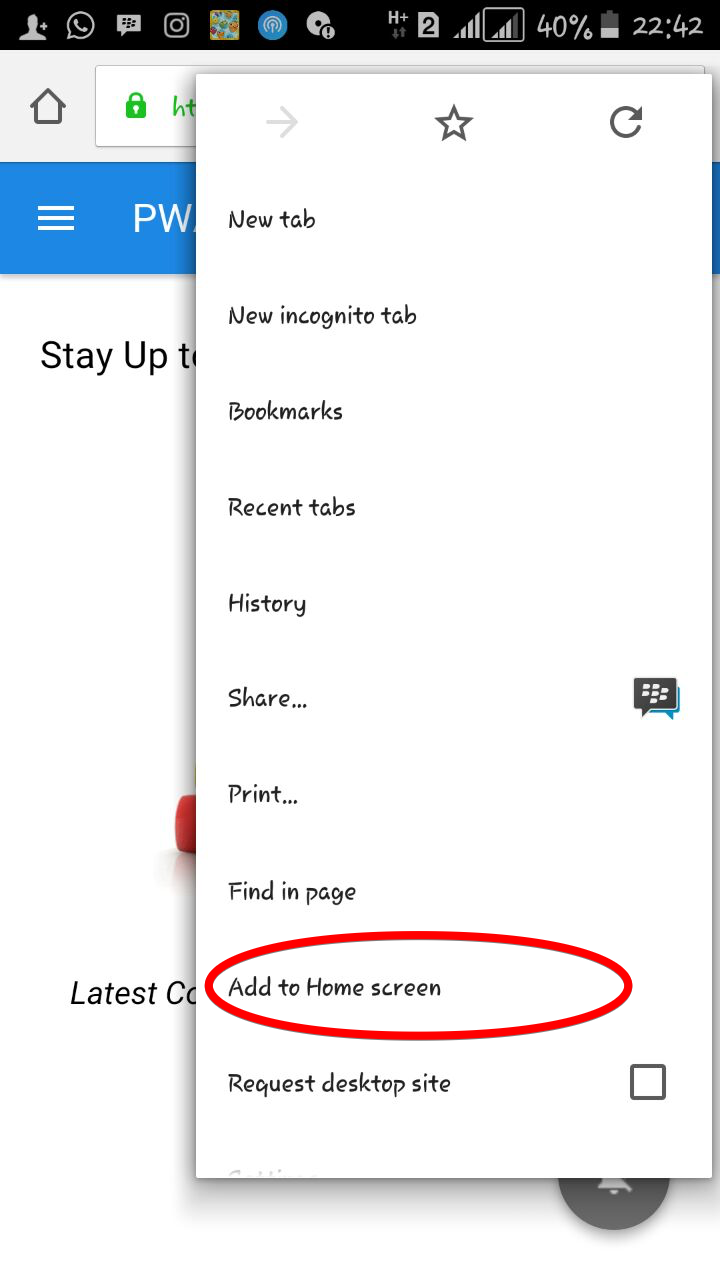
_Add to Homescreen_
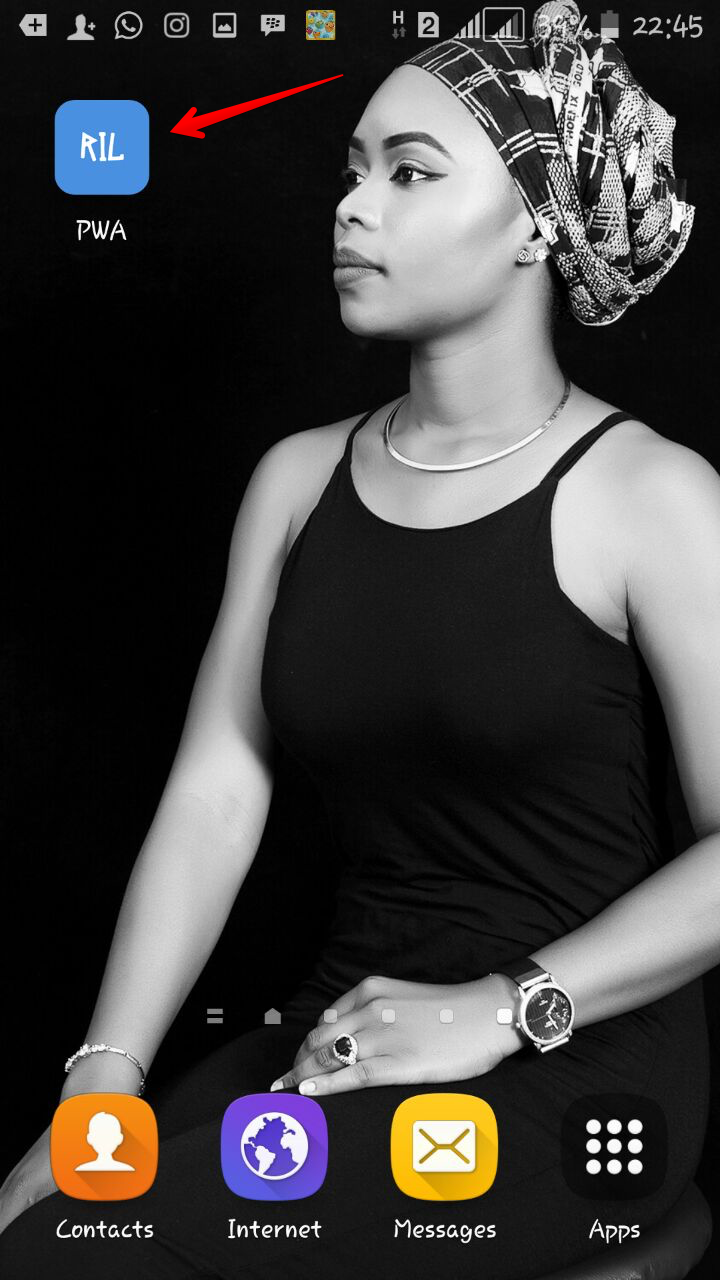
_App now on Homescreen_
The [PWA](https://github.com/unicodeveloper/pwa-commits) and [API code](https://github.com/unicodeveloper/pwa-api) is on GitHub.
In the case of an offline-first app, authenticating the user against a remote database won't be possible when network connectivity is lost. However, with service workers, you have full control over which pages and scripts are loaded when the user is offline. This means you can configure your `offline.html` file to display a useful message stating the user needs to regain connectivity to login again instead of displaying the Lock login screen.
## Conclusion
We have been able to successfully make our app work offline, load instantly, receive push notifications, and also installable.
Progressive Web Apps have a checklist. I highlighted the requirements in [Part 1](https://auth0.com/blog/introduction-to-progressive-apps-part-one) . However, there is a tool, [Lighthouse](https://github.com/GoogleChrome/lighthouse) for auditing an [app for progressive web app features](https://infrequently.org/2016/09/what-exactly-makes-something-a-progressive-web-app). It is available as a [chrome extension](https://chrome.google.com/webstore/detail/lighthouse/blipmdconlkpinefehnmjammfjpmpbjk) and also a [CLI](https://github.com/GoogleChrome/lighthouse#install-cli).
I recommend that you use this tool frequently when developing a progressive web app. This tutorial wouldn't have been possible without [Ire's series on PWA](https://bitsofco.de/bitsofcode-pwa-part-1-offline-first-with-service-worker), [Timi's server side push notification tutorial](https://chunksofco.de/push-notifications-on-the-web-building-a-pwa-crossover-20f0317987de#.x311m3x56), [Gokulakrishnan's PWA demo app](https://github.com/gokulkrishh) and the folks at Google that work and blog daily about progressive web apps. Thanks a bunch!
Hopefully you're now ready to dive fully into make your web applications progressive!