


TL;DR: In this article, we are going to learn the basic features of mocking API calls in Python tests. We'll start by exploring the tools required, then we will learn different methods of mocking, and in the end we will check examples demonstrating the outlined methods. The final code can be found on this GitHub repository.
Introduction
A mock is a fake object that we construct to look and act like the real one. We swap the actual object with a mock and trick the system into thinking that the mock is the real deal.
By mocking out external dependencies and APIs, we can run our tests as often as we want without being affected by any unexpected changes or irregularities within the dependencies. Mocking also saves us on time and computing resources if we have to test HTTP requests that fetch a lot of data.
"By mocking external dependencies, we can run tests without being affected by any unexpected changes or irregularities within the dependencies!"
Tweet This

Setup
For this tutorial, we will require Python 3 installed. Having it on our machine, let's set up a simple folder structure:
python-api-mocks/
├── users_test/
    └── test_users.py
    └── __init__.py
├── __init__.py
├── requirements.txt
├── users.py
We will make use of virtualenv; a tool that enables us to create isolated Python environments. These environments help us to manage dependencies separately from the global packages directory. Let's first install virtualenv, then let's create a virtual environment for our project, and then let's activate it:
$ pip3 install virtualenv
$ virtualenv -p python3 venv # Create virtual environment
$ source venv/bin/activate # Activate virtual environment
After that, let's install the required packages:
$ pip install nose2 requestsTo make future installations easier, we can save the dependencies to a requirements.txt file:
$ pip freeze > requirements.txt- The
nose2library extends the built-in Pythonunittestmodule to make testing easier. You can useunittestor other third-party libraries such aspytestto achieve the same results. - The
requestslibrary simplifies HTTP calls in Python.
For this tutorial, we will be communicating with a fake API on JSONPlaceholder.
To find tests, nose2 looks for modules whose names start with test in the current directories and sub-directories. In those modules, nose2 will load tests from all unittest.TestCase subclasses, as well as functions whose names start with test.
Test Driven Development (TDD)
TDD is an evolutionary approach to development that combines test-first development and refactoring. We write a test before we write just enough production code to fulfill that test. We then refactor the code to make the test pass. The main goal of TDD is the specification and not validation; it’s one way to think through our requirements before we write functional code. We will follow this approach and begin by writing a simple test to check our API's response's status code.
# users_test/test_users.py
import unittest
from users import get_users
class BasicTests(unittest.TestCase):
def test_request_response(self):
response = get_users()
# Assert that the request-response cycle completed successfully with status code 200.
self.assertEqual(response.status_code, 200)
if __name__ == "__main__":
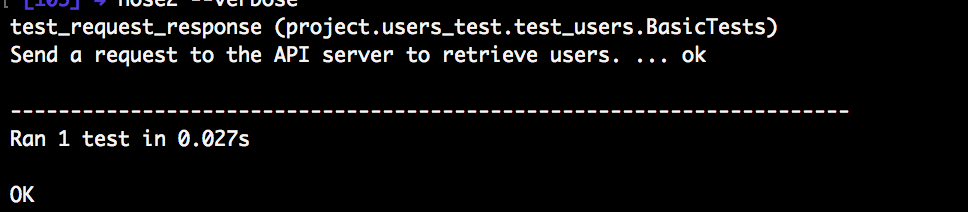
unittest.main()To run this test we can issue nose2 --verbose. The test will fail with an error since we are missing the module we are trying to test.

We then refactor the functionality to make it pass.
# users.py

import requests

USERS_URL = 'http://jsonplaceholder.typicode.com/users'


def get_users():
    """Get list of users"""
    response = requests.get(USERS_URL)
    if response.ok:
        return response
    else:
        return None
We then re-run the tests again using nose2 --verbose and this time, our test will pass.
Up to this point, we wrote and tested our API by making real API requests during the tests.
Utilizing Mocks
The code is working as expected because, until this point, the test is actually making an HTTP request. Real-world applications will result to increased complexity, more tests, and more API calls. If we wrote a thousand tests for our API calls and each takes a second to fetch 10kb of data, this will mean a very long time to run our tests. It will also require more computing and internet resources which eventually slows down the development process. In any case, our server breaks down and we stop the development of our client application since we cannot test it. In this section, we will learn how to detach our programming logic from the actual external library by swapping the real request with a fake one that returns the same data. Let's explore different ways of using mocks in our tests.
Using Decorators
The first method is the use of decorators:
# users_test/test_users.py
import unittest
from users import get_users
from unittest.mock import patch


class BasicTests(unittest.TestCase):
    @patch('users.requests.get')  # Mock 'requests' module 'get' method.
    def test_request_response_with_decorator(self, mock_get):
        """Mocking using a decorator"""
        mock_get.return_value.status_code = 200 # Mock status code of response.
        response = get_users()

        # Assert that the request-response cycle completed successfully.
        self.assertEqual(response.status_code, 200)


if __name__ == "__main__":
    unittest.main()
Running nose2 again () will make our test pass without modifying our functions in any way.

Here is how it works. First, we import the patch() function from the mock library. Next, we modify the test function with the patch() function as a decorator, passing in a string representation of the desired method (i.e. users.requests.get). In the function itself, we pass in a parameter mock_get, and then in the body of the test function, we add a line to set mock_get.return_value.status_code = 200.
So what actually happens when the test is run? To answer this question, first let's understand how the requests library works. When we call the requests.get() function, it makes an HTTP request and then returns an HTTP response in the form of a response object. The get() function itself communicates with the external server, which is why we need to target it. We need to make the mock to look and act like the requests.get() function.
When the test function is run, it finds the module where the requests library is declared, users, and replaces the targeted function, requests.get(), with a mock. The test also tells the mock to behave the way the function expects it to act. Looking at get_users(), we see that the success of the function depends on if our response has an ok property represented with response.ok which translates to a status code of 200. That is what the line mock_get.return_value.status_code = 200 is doing. When the status_code property is called on the mock, it will return 200 just like the actual object. The get_users() function will return the response, which is the mock, and the test will pass because the mock response status code is 200.
Using a Context Manager
In this example, we explicitly patch a function within a block of code, using a context manager. The with statement patches a function used by any code in the code block. When the code block ends, the original function is restored.
# users_test/test_users.py
import unittest
from unittest.mock import patch
from users import get_users


class BasicTests(unittest.TestCase):
    # ... other tests
    def test_request_response_with_context_manager(self):
        """Mocking using a context manager"""
        with patch('users.requests.get') as mock_get:
            # Configure the mock to return a response with status code 200.
            mock_get.return_value.status_code = 200

            # Call the function, which will send a request to the server.
            response = get_users()

        # Assert that the request-response cycle completed successfully.
        self.assertEqual(response.status_code, 200)


if __name__ == "__main__":
    unittest.main()
Using a Patcher
Another way to patch a function is to use a patcher. We identify the source to patch and then we start using the mock. The patching does not stop until we explicitly tell the system to stop using the mock. This is more suitable when using the setUp() and tearDown() functions in tests where we can start the patcher in the setup() method and stop it in the tearDown() method.
# users_test/test_users.py
import unittest
from unittest.mock import patch
from users import get_users


class BasicTests(unittest.TestCase):
    # ... other tests
    def test_request_response_with_patcher(self):
        """Mocking using a patcher"""
        mock_get_patcher = patch('users.requests.get')

        # Start patching 'requests.get'.
        mock_get = mock_get_patcher.start()

        # Configure the mock to return a response with status code 200.
        mock_get.return_value.status_code = 200

        # Call the service, which will send a request to the server.
        response = get_users()

        # Stop patching 'requests'.
        mock_get_patcher.stop()

        # Assert that the request-response cycle completed successfully.
        self.assertEqual(response.status_code, 200)


if __name__ == "__main__":
    unittest.main()
"I just learned about different mocking techniques on Python!"
Tweet This
Mocking a Whole Function
In the previous examples, we have implemented a basic mock and tested a simple assertion. In this section, we focus on mocking the whole functionality of get_users(). When using @patch(), we provide it a path to the function we want to mock. The function is found and patch() creates a Mock object, and the real function is temporarily replaced with the mock. When get_users() is called by the test, the function uses the mock_get the same way it would use the real get() method. That means that it calls mock_get like a function and expects it to return a response object.
# users_test/test_users.py
import unittest
from unittest.mock import patch, Mock
from users import get_users


class BasicTests(unittest.TestCase):
    # ... other tests
    def test_mock_whole_function(self):
        """Mocking a whole function"""
        mock_get_patcher = patch('users.requests.get')
        users = [{
            "id": 0,
            "first_name": "Dell",
            "last_name": "Norval",
            "phone": "994-979-3976"
        }]

        # Start patching 'requests.get'.
        mock_get = mock_get_patcher.start()

        # Configure the mock to return a response with status code 200 and a list of users.
        mock_get.return_value = Mock(status_code = 200)
        mock_get.return_value.json.return_value = users

        # Call the service, which will send a request to the server.
        response = get_users()

        # Stop patching 'requests'.
        mock_get_patcher.stop()

        # Assert that the request-response cycle completed successfully.
        self.assertEqual(response.status_code, 200)
        self.assertEqual(response.json(), users)


if __name__ == "__main__":
    unittest.main()
In this case, get_users() function that was patched with a mock returned a mock object response. Whenever the return_value is added to a mock, that mock is modified to be run as a function, and by default it returns another mock object. In this example, we made it more clear by explicitly declaring the Mock object: mock_get.return_value = Mock(status_code=200). The response object has a status_code property, so we added it to the Mock.
The response object also has a json() function that returns a list of users. We added it to the mock and appended it with a return_value, since it will be called like a function. Notice that the test now includes an assertion that checks the value of response.json(). We want to ensure that the get_users() function returns a list of users, just like the actual server does.
Mocking Third-Party Functions
The above example has been fairly straightforward. Envision a situation where we create a new function that calls get_users() and then filters the result to return only the user with a given ID. In such a case, we mock get_users() function directly. For get_users(), we know that it takes no parameters and that it returns a response with a json() function that returns a list of users. What we care most about is not its implementation details. but the fact that get_users() mock returns what the actual get_users() function would have returned.
#users_test/test_users.py
import unittest
from users import get_users, get_user
from unittest.mock import patch, Mock


class BasicTests(unittest.TestCase):
    @patch('users.get_users')
    def test_get_one_user(self, mock_get_users):
        """
        Test for getting one user using their userID
        Demonstrates mocking third party functions
        """
        users = [
            {'phone': '514-794-6957', 'first_name': 'Brant', 'last_name': 'Mekhi', 'id': 0},
            {'phone': '772-370-0117', 'first_name': 'Thalia', 'last_name': 'Kenyatta', 'id': 1},
            {'phone': '176-290-7637', 'first_name': 'Destin', 'last_name': 'Soledad', 'id': 2}
        ]
        mock_get_users.return_value = Mock()
        mock_get_users.return_value.json.return_value = users
        user = get_user(2)
        self.assertEqual(user, users[2])


if __name__ == "__main__":
    unittest.main()
In the above snippet, we mock the functionality of get_users() which is used by get_user(user_id). When we run our tests with nose2 --verbose, our test passes successfully with the following implementation of get_user(user_id):
#users.py
import requests

# ... USERS_URL and get_users definitions ...


def get_user(user_id):
    """Get a single user using their ID"""
    all_users = get_users().json()
    for user in all_users:
        if user['id'] == user_id:
            return user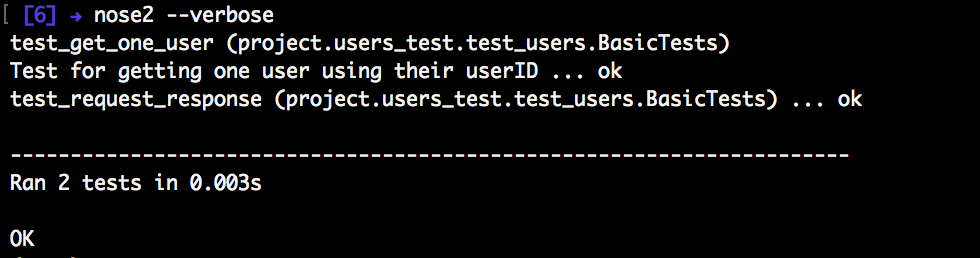
Securing Python APIs with Auth0
Securing Python APIs with Auth0 is very easy and brings a lot of great features to the table. With Auth0, we only have to write a few lines of code to get:
- A solid identity management solution, including single sign-on
- User management
- Support for social identity providers (like Facebook, GitHub, Twitter, etc.)
- Enterprise identity providers (Active Directory, LDAP, SAML, etc.)
- Our own database of users
For example, to secure Python APIs written with Flask, we can simply create a requires_auth decorator:
# Format error response and append status code

def get_token_auth_header():
    """Obtains the access token from the Authorization Header
    """
    auth = request.headers.get("Authorization", None)
    if not auth:
        raise AuthError({"code": "authorization_header_missing",
                        "description":
                            "Authorization header is expected"}, 401)

    parts = auth.split()

    if parts[0].lower() != "bearer":
        raise AuthError({"code": "invalid_header",
                        "description":
                            "Authorization header must start with"
                            " Bearer"}, 401)
    elif len(parts) == 1:
        raise AuthError({"code": "invalid_header",
                        "description": "Token not found"}, 401)
    elif len(parts) > 2:
        raise AuthError({"code": "invalid_header",
                        "description":
                            "Authorization header must be"
                            " Bearer token"}, 401)

    token = parts[1]
    return token

def requires_auth(f):
    """Determines if the access token is valid
    """
    @wraps(f)
    def decorated(*args, **kwargs):
        token = get_token_auth_header()
        jsonurl = urlopen("https://"+AUTH0_DOMAIN+"/.well-known/jwks.json")
        jwks = json.loads(jsonurl.read())
        unverified_header = jwt.get_unverified_header(token)
        rsa_key = {}
        for key in jwks["keys"]:
            if key["kid"] == unverified_header["kid"]:
                rsa_key = {
                    "kty": key["kty"],
                    "kid": key["kid"],
                    "use": key["use"],
                    "n": key["n"],
                    "e": key["e"]
                }
        if rsa_key:
            try:
                payload = jwt.decode(
                    token,
                    rsa_key,
                    algorithms=ALGORITHMS,
                    audience=API_AUDIENCE,
                    issuer="https://"+AUTH0_DOMAIN+"/"
                )
            except jwt.ExpiredSignatureError:
                raise AuthError({"code": "token_expired",
                                "description": "token is expired"}, 401)
            except jwt.JWTClaimsError:
                raise AuthError({"code": "invalid_claims",
                                "description":
                                    "incorrect claims,"
                                    "please check the audience and issuer"}, 401)
            except Exception:
                raise AuthError({"code": "invalid_header",
                                "description":
                                    "Unable to parse authentication"
                                    " token."}, 400)

            _app_ctx_stack.top.current_user = payload
            return f(*args, **kwargs)
        raise AuthError({"code": "invalid_header",
                        "description": "Unable to find appropriate key"}, 400)
    return decorated
Then use it in our endpoints:
# Controllers API

# This doesn't need authentication
@app.route("/ping")
@cross_origin(headers=['Content-Type', 'Authorization'])
def ping():
    return "All good. You don't need to be authenticated to call this"

# This does need authentication
@app.route("/secured/ping")
@cross_origin(headers=['Content-Type', 'Authorization'])
@requires_auth
def secured_ping():
    return "All good. You only get this message if you're authenticated"
To learn more about securing Python APIs with Auth0, take a look at this tutorial. Alongside with tutorials for backend technologies (like Python, Java, and PHP), the Auth0 Docs webpage also provides tutorials for Mobile/Native apps and Single-Page applications.
Conclusion
Mocking API calls is a very important practice while developing applications and, as we could see, it's easy to create mocks on Python tests. This technique introduces several advantages including, but not limited to, faster development and saving of computing resources.


