---
title: "Simple Guide to Setup AWS Directory Service"
description: "Amazon introduced today a new feature called AWS Directory Service. In a nutshell, it allows: Connect existing Active Directory to the cloud or to create"
authors:
- name: "Jose Romaniello"
url: "https://auth0.com/blog/authors/jose-romaniello/"
date: "Oct 22, 2014"
category: "Developers,Tutorial,Integration"
tags: ["aws", "ad", "ldap", "directory"]
url: "https://auth0.com/blog/simple-guide-to-setup-aws-directory-service/"
---
# Simple Guide to Setup AWS Directory Service
Amazon introduced today a new feature called [AWS Directory Service](http://aws.amazon.com/es/directoryservice/). In a nutshell, it allows:
- Connect existing Active Directory to the cloud or to create complete new Directories from scratch.
- Seamless administration of AWS Resources.
- Seamless access to AWS applications for end-users.
- Simplify Deployment of Windows Workloads on AWS.
- Pay as you go (0.05 $/hr for small installations and $0.15 for large)
More information at
In this short tutorial we will deploy a new **AWS Simple AD**, connect it to an Active Directory MMC and configure it to work with Auth0.
### Configuring the Simple AD
Open up the [Directory Service console](https://console.aws.amazon.com/directoryservice/home) and create a new Simple AD:
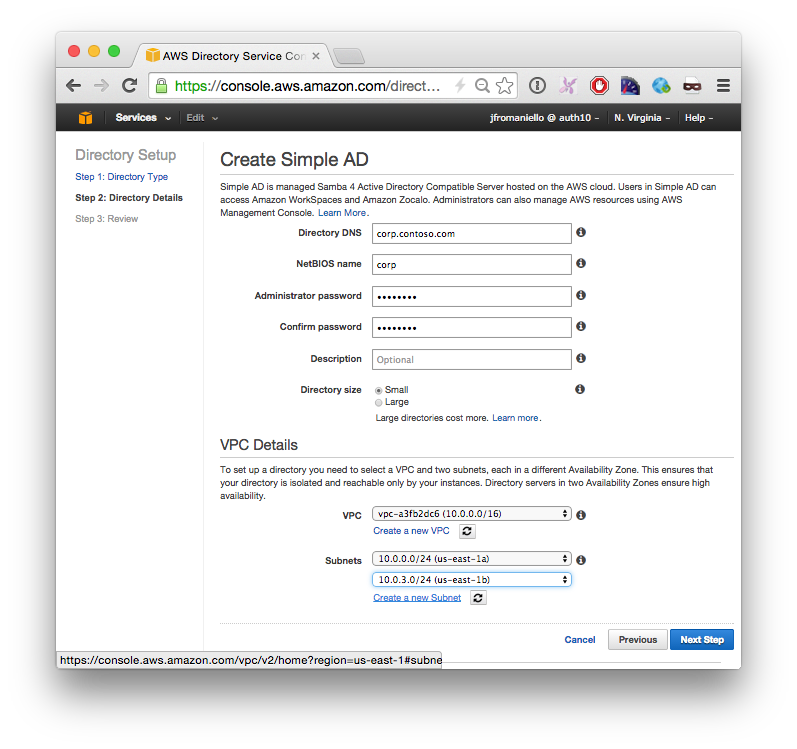
This operation can take a while to complete.
> Notice that Simple AD doesn't have a way to manage its user and roles, so the next thing we are going to do is to deploy a Windows EC2 instance on the same VPC.
### Deploy Management Interface
In this step we will deploy a new Windows 2012 VM instance and join it to the windows domain.
- Launch a new Windows 2012 on EC2.
- Connect via Remote Desktop
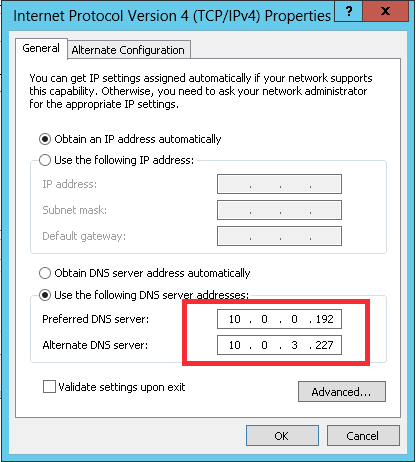
- Open **Network Connections** or run `%SystemRoot%\system32\control.exe ncpa.cpl`.
- Right-click any enabled network connection and select **Properties**.
- In the connection properties dialog box, double-click **Internet Protocol Version 4**.
- Select **Use the following DNS server addresses**, change the **Preferred DNS server** and **Alternate DNS server** addresses to the IP addresses of the **Simple AD** and click **OK**:
- Open **System Properties** or run `%SystemRoot%\system32\control.exe sysdm.cpl`, select the **Computer Name** tab, and click **Change**:
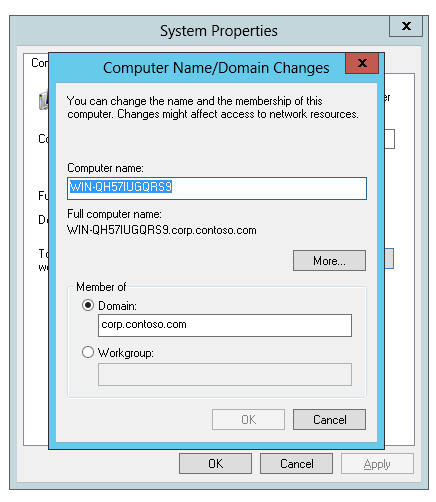
- You will have to enter a username and password, use **Administrator** and the password you selected when creating the **Simple AD**.
- You will need to restart the machine.
- Connect again via **Remote Desktop** but this time use a domain account with the qualifier, for our example `corp.contoso.com\Administrator`.
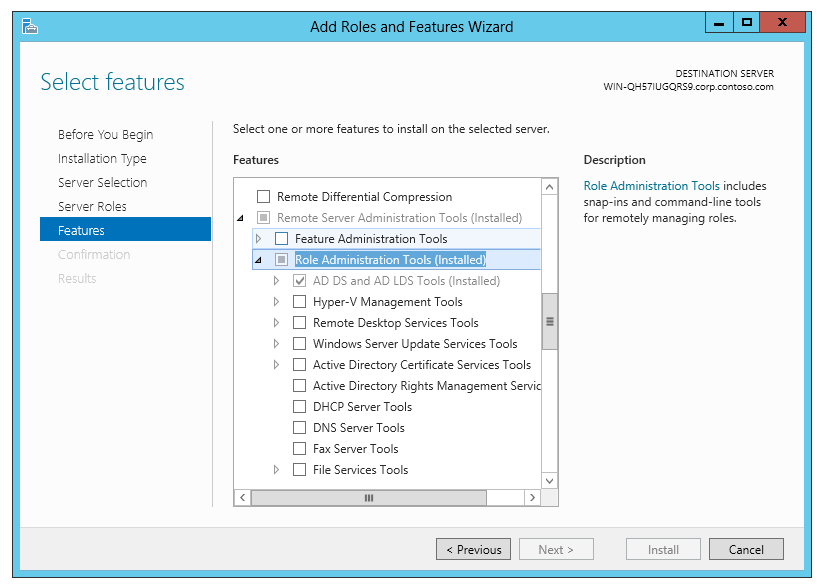
- Open **Program and features** or run `%SystemRoot%\system32\control.exe appwiz.cpl`
- Click on **Turn Windows features on or off**
- Go to the **Features** step , expand **Remote Administration Tools**, then **Role Administration Tools** and then select **AD DS and AD LDS Tools**:
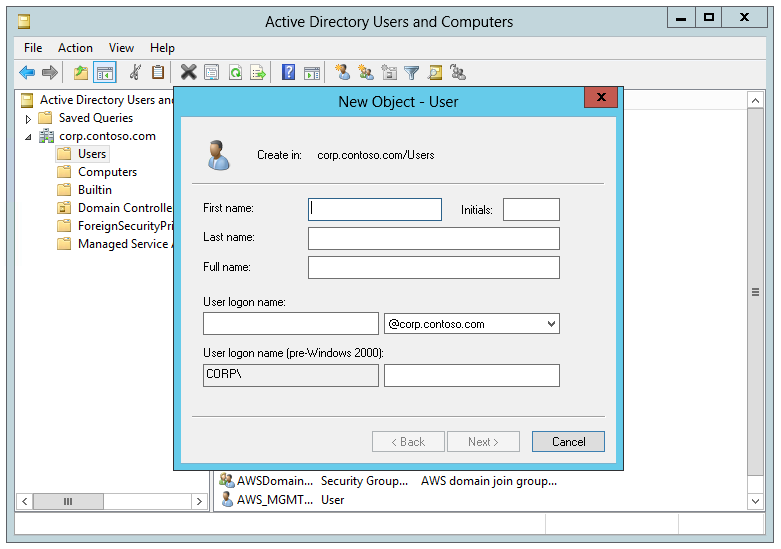
Now you will be able to create Users and Groups on your __AWS Simple AD__ using the **Active Directory Users and Groups**:
### Connect your new directory to Auth0
####1. Create a new **AD LDAP** Enterprise connection in Auth0
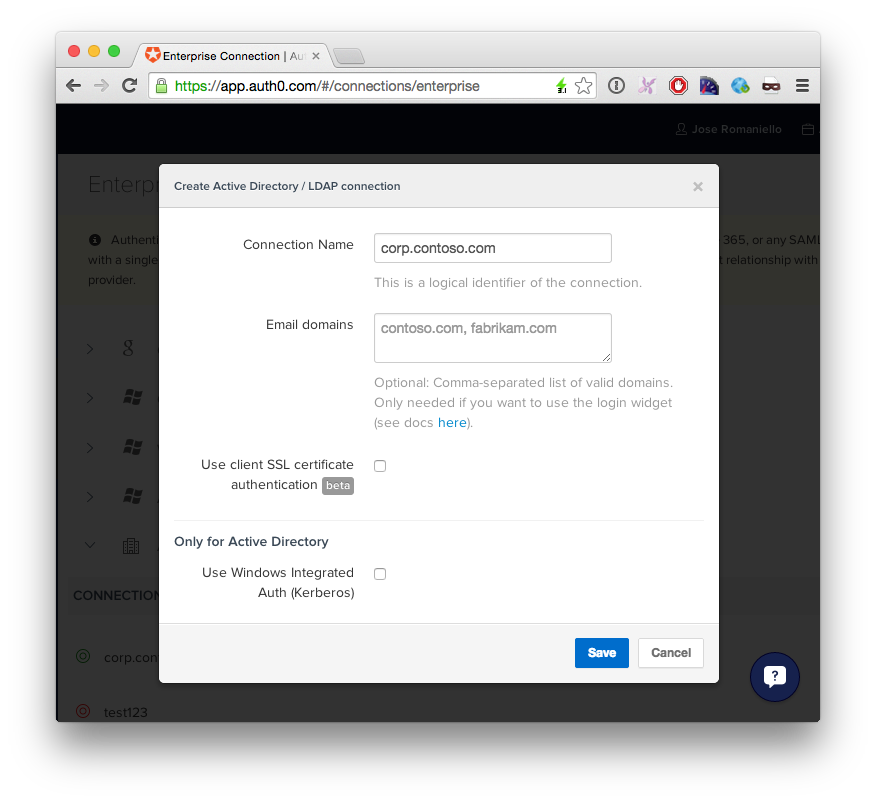
Optionally, you can enable __Kerberos__ to use __Windows Integrated Authentication__ on machines joined to the same domain.
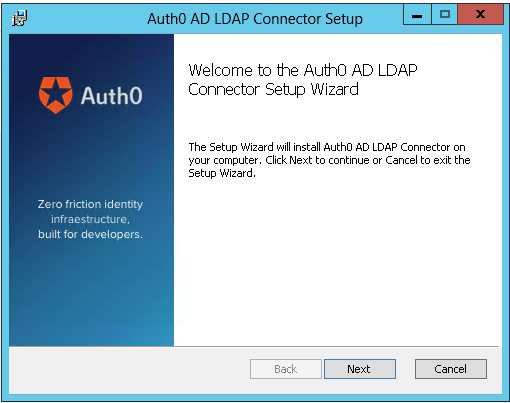
Copy the _TICKET URL_ provided by auth0 and paste in a browser inside the Windows Machine provisioned in the previous step.
####2. Download and install the agent:
After the installation a new page in the browser will came up, paste your TICKET URL:

Complete the LDAP config settings

### Testing your new connection
If you go back to your Auth0 Dashboard you should see now a green icon:

Click the __Try__ button and enter the user credentials:
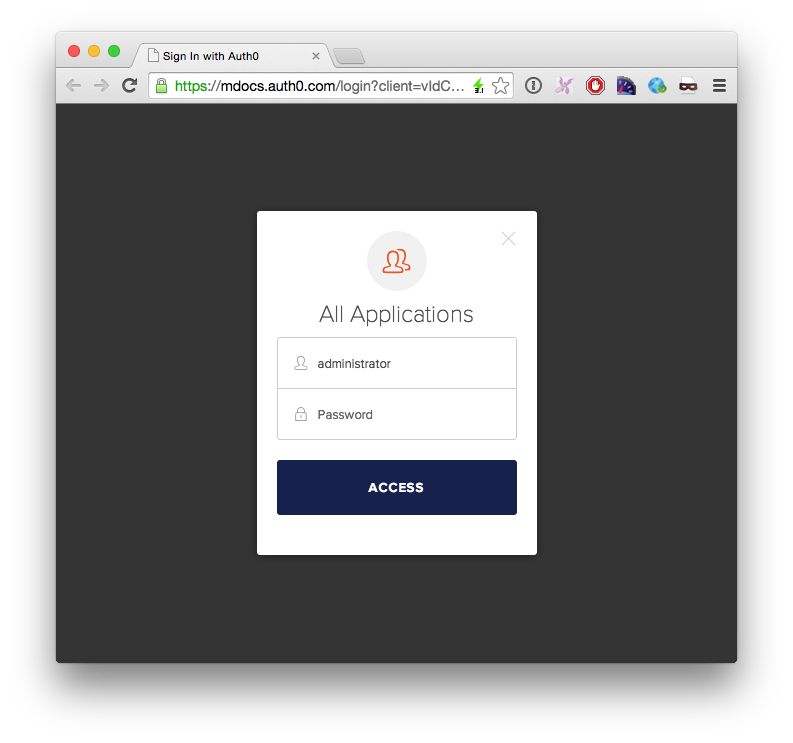
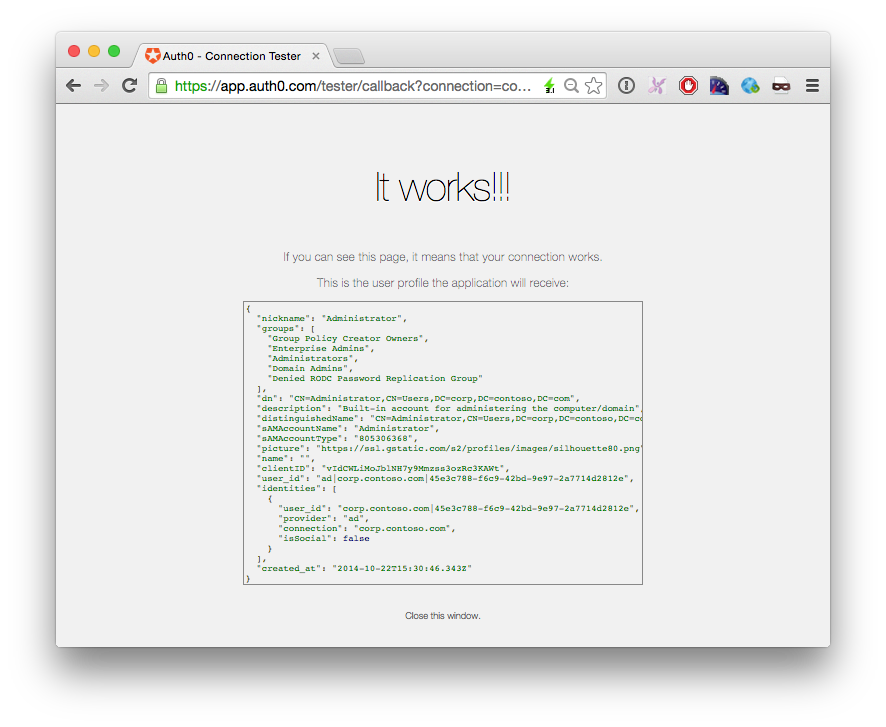
If you see this screen, then everything is working as expected:
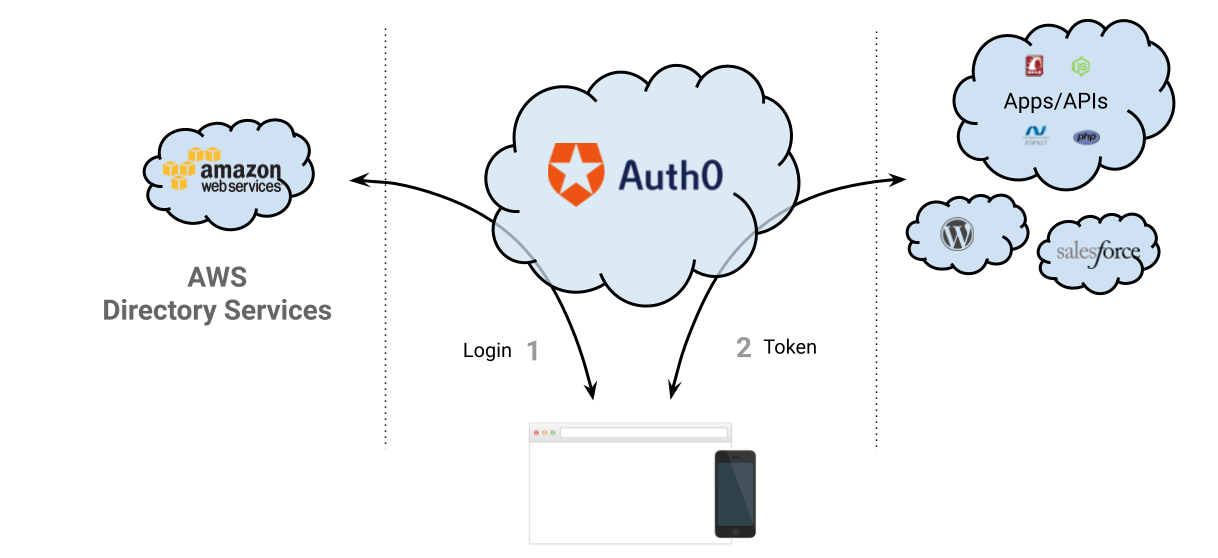
## So, what can I do now with Auth0?
When you plug Auth0 to your Active Directory you can:
* Have your custom **web, single page apps and mobile apps** authenticate with the **AWS AD** in minutes
* Connect the **AWS AD** with **Salesforce**, **Zendesk**, **NewRelic** and other SAML-based application.
* Connect the **AWS AD** with Open Source platforms like **WordPress**, **Drupal** and **Discourse**
* Configure **Single Sign On** between all these applications
* Add **Multi-factor** authentication to these applications
* **Extend the user profile** with application-related metadata
More information about Auth0: