---
title: "Secure Secrets with Spring Cloud Config and Vault"
description: "Storing secrets in your code is a bad idea. Learn how to use Spring Cloud Config and HashiCorp Vault to make your app more secure."
authors:
- name: "Jimena Garbarino"
url: "https://auth0.com/blog/authors/jimena-garbarino/"
date: "Jul 11, 2023"
category: "Developers,Tutorial,Spring Cloud"
tags: ["vault", "spring", "cloud"]
url: "https://auth0.com/blog/spring-vault/"
---
# Secure Secrets with Spring Cloud Config and Vault
In 2013, GitHub released a search feature that allows users to scan code in all public repositories. A day after the release, however, they had to partially shut it down. It was speculated that the shutdown was because the feature allowed any user to search for all kinds of secrets stored in GitHub repositories. Later, in 2014, data on 50,000 Uber drivers were stolen. It seems someone got access to the company’s database using login credentials found in a GitHub public repository. Hashicorp Vault, a tool for managing secrets and encrypting data in transit, was first announced in 2015, and Spring Vault, the integration of Spring with Vault, was first released in 2017.
It seems like a long time ago, right? Secrets leakage seems to remain pervasive and constant, happening to all kinds of developers—as explained by [this study from NC State University](https://www.ndss-symposium.org/ndss-paper/how-bad-can-it-git-characterizing-secret-leakage-in-public-github-repositories/). Exposed secrets lead to cyber-attacks, data loss or corruption, sensitive data breaches, and crypto-jacking (cryptocurrency mining using a victim’s cloud computer power). With tools like Hashicorp’s Vault and Spring Cloud Vault, the risk can be reduced.
Nowadays, it is widely recommended never to store secret values in code. Therefore, this tutorial will demonstrate the following alternatives:
* Using environment variables for Spring Boot secrets
* Secrets encryption with Spring Cloud Config
* Secrets management with HashiCorp’s Vault
* Using Spring Cloud Vault
## Use Environment Variables for Secrets; A Precursor to Spring Vault
Spring Boot applications can bind property values from environment variables. To demonstrate, create a `vault-demo-app` with OpenID Connect (OIDC) authentication using the Spring Initializr. Then add `web`, `okta`, and `cloud-config-client` dependencies, some of which will be required later in the tutorial:
```
https start.spring.io/starter.zip \
bootVersion==3.1.1 \
type==maven-project \
dependencies==web,okta,cloud-config-client \
groupId==com.okta.developer \
artifactId==vault-demo-app \
name=="Spring Boot Application" \
description=="Demo project of a Spring Boot application with Vault protected secrets" \
packageName==com.okta.developer.vault > vault-demo-app.zip
```
Unzip the file and open the project. Modify its `src/main/java/.../Application.java` class to add the `/` HTTP endpoint:
```java
package com.okta.developer.vault;
import org.springframework.boot.SpringApplication;
import org.springframework.boot.autoconfigure.SpringBootApplication;
import org.springframework.security.core.annotation.AuthenticationPrincipal;
import org.springframework.security.oauth2.core.oidc.user.OidcUser;
import org.springframework.web.bind.annotation.GetMapping;
import org.springframework.web.bind.annotation.RestController;
@RestController
@SpringBootApplication
public class Application {
public static void main(String[] args) {
SpringApplication.run(Application.class, args);
}
@GetMapping("/")
String hello(@AuthenticationPrincipal OidcUser user) {
return String.format("Welcome, %s", user.getFullName());
}
}
```
Disable the cloud configuration for the first run. Edit `application.properties` and add the following value:
```java
spring.cloud.config.enabled=false
```
### OpenID Connect authentication with Okta
In a command line session, go to the `vault-demo-app` root folder.
Before you begin, you’ll need a free Okta developer account. Install the [Okta CLI](https://cli.okta.com/) and run `okta register` to sign up for a new account. If you already have an account, run `okta login`. Then, run `okta apps create`. Select the default app name, or change it as you see fit. Choose Web and press Enter.
Select Okta Spring Boot Starter. Accept the default Redirect URI values provided for you. That is a Login Redirect of `http://localhost:8080/login/oauth2/code/okta` and a Logout Redirect of `http://localhost:8080`.
What does the Okta CLI do?
The Okta CLI will create an OIDC Web App in your Okta Org. It will add the redirect URIs you specified and grant access to the Everyone group. You will see output like the following when it’s finished:
```
Okta application configuration has been written to:
/path/to/app/src/main/resources/application.properties
```
Open `src/main/resources/application.properties` to see the issuer and credentials for your app.
```
okta.oauth2.issuer=https://dev-133337.okta.com/oauth2/default
okta.oauth2.client-id=0oab8eb55Kb9jdMIr5d6
okta.oauth2.client-secret=NEVER-SHOW-SECRETS
```
> NOTE: You can also use the Okta Admin Console to create your app. See [Create a Spring Boot App](https://developer.okta.com/docs/guides/sign-into-web-app/springboot/create-okta-application/) for more information.
Instead of storing Okta credentials in `application.properties` as part of the project code, Spring Boot allows you to bind properties from environment variables. You can see this in action by starting your application with the Maven command below:
```java
OKTA_OAUTH2_ISSUER={yourOktaIssuerURI} \
OKTA_OAUTH2_CLIENT_ID={yourOktaClientId} \
OKTA_OAUTH2_CLIENT_SECRET={yourOktaClientSecret} \
./mvnw spring-boot:run
```
> NOTE: Copy the values of `yourOktaIssuerURI`, `yourOktaClientId`, and `yourOktaClientSecret` as you will need them for configuration in the next sections. You can also just keep at hand `yourOktaClientId` and retrieve the configuration with `okta apps config --app {yourOktaClientId}`.
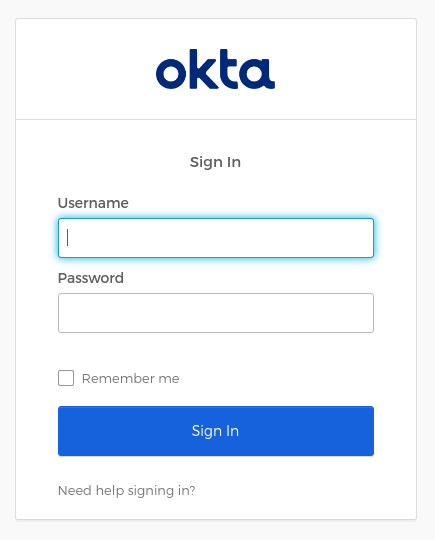
In an incognito window, go to `http://localhost:8080`. Here, you should see the Okta login page:
In the application logs, you’ll see the security filter chain initializes an OAuth 2.0 authentication flow on startup:
```
2023-07-06T18:11:28.757-06:00 INFO 61387 --- [ main] o.s.s.web.DefaultSecurityFilterChain : Will secure any request with [org.springframework.security.web.session.DisableEncodeUrlFilter@1c4057f9,
org.springframework.security.web.context.request.async.WebAsyncManagerIntegrationFilter@1ddf42dd,
org.springframework.security.web.context.SecurityContextHolderFilter@ac4e690,
org.springframework.security.web.header.HeaderWriterFilter@29892a77,
org.springframework.security.web.csrf.CsrfFilter@23469199,
org.springframework.security.web.authentication.logout.LogoutFilter@3212bfd,
org.springframework.security.oauth2.client.web.OAuth2AuthorizationRequestRedirectFilter@2673487b,
org.springframework.security.oauth2.client.web.OAuth2AuthorizationRequestRedirectFilter@ff5d4f1,
org.springframework.security.oauth2.client.web.OAuth2LoginAuthenticationFilter@2d07aacc,
org.springframework.security.web.authentication.ui.DefaultLoginPageGeneratingFilter@da22aa,
org.springframework.security.web.authentication.ui.DefaultLogoutPageGeneratingFilter@5c1c9881, org.springframework.security.oauth2.server.resource.web.authentication.BearerTokenAuthenticationFilter@18db3b3c,
org.springframework.security.web.savedrequest.RequestCacheAwareFilter@365bfc5f,
org.springframework.security.web.servletapi.SecurityContextHolderAwareRequestFilter@1a7e799e,
org.springframework.security.web.authentication.AnonymousAuthenticationFilter@1c18ee69,
org.springframework.security.oauth2.client.web.OAuth2AuthorizationCodeGrantFilter@147c00aa,
org.springframework.security.web.access.ExceptionTranslationFilter@4a4b288a,
org.springframework.security.web.access.intercept.FilterSecurityInterceptor@5613247e]
```
Using environment variables for passing secrets to containerized applications is now considered bad practice because the environment can be inspected or logged in a number of cases. So, let’s move on to using Spring Cloud Config server for secrets storage.
### Use Auth0 for OpenID Connect
The Okta Spring Boot starter works with Auth0 too! To try it out, you need to create an Auth0 account and configure an application.
Now sign up at Auth0 and install the [Auth0 CLI](https://github.com/auth0/auth0-cli). Then run:
```
auth0 login
```
The terminal will display a device confirmation code and open a browser session to activate the device.
> NOTE: My browser was not displaying anything, so I had to manually activate the device by opening the URL `https://auth0.auth0.com/activate?user_code={deviceCode}`.
On successful login, you will see the tenant, which you will use as issuer later:
```
✪ Welcome to the Auth0 CLI 🎊
If you don't have an account, please create one [here](https://a0.to/blog_signup).
Your device confirmation code is: KGFL-LNVB.
▸ Press Enter to open the browser to log in or ^C to quit...
Waiting for the login to complete in the browser... ⣻Opening in an existing browser session.
Waiting for the login to complete in the browser... done
▸ Successfully logged in.
▸ Tenant: dev-avup2laz.us.auth0.com
```
The next step is to create a client app:
```
auth0 apps create \
--name "Spring Boot + Vault" \
--description "Demo project of a Spring Boot application with Vault protected secrets" \
--type regular \
--callbacks http://localhost:8080/login/oauth2/code/okta \
--logout-urls http://localhost:8080 \
--reveal-secrets
```
Once the app is created, you will see the OIDC app’s configuration:
```
Name: Spring Boot + Vault
Description: Demo project of a Spring Boot application with Vault protected secrets
Type: Regular Web Application
Callback URLs: http://localhost:8080/login/oauth2/code/okta
Allowed Logout URLs: http://localhost:8080
=== dev-avup2laz.us.auth0.com application created
CLIENT ID ****
NAME Spring Boot + Vault
DESCRIPTION Demo project of a Spring Boot application with Vault protected secrets
TYPE Regular Web Application
CLIENT SECRET ****
CALLBACKS http://localhost:8080/login/oauth2/code/okta
ALLOWED LOGOUT URLS http://localhost:8080
ALLOWED ORIGINS
ALLOWED WEB ORIGINS
TOKEN ENDPOINT AUTH
GRANTS implicit, authorization_code, refresh_token, client_credentials
▸ Quickstarts: https://auth0.com/docs/quickstart/webapp
▸ Hint: Test this app's login box with 'auth0 test login ****'
▸ Hint: You might wanna try 'auth0 quickstarts download ****
```
You can now run the demo app passing the OIDC configuration through environment variables:
```java
OKTA_OAUTH2_ISSUER=https://{yourAuth0Tenant}/ \
OKTA_OAUTH2_CLIENT_ID={yourAuth0ClientId} \
OKTA_OAUTH2_CLIENT_SECRET={yourAuth0ClientSecret}
./mvnw spring-boot:run
```
> ⚠️ IMPORTANT NOTE: You must leave the trailing slash `/` in the issuer URL.
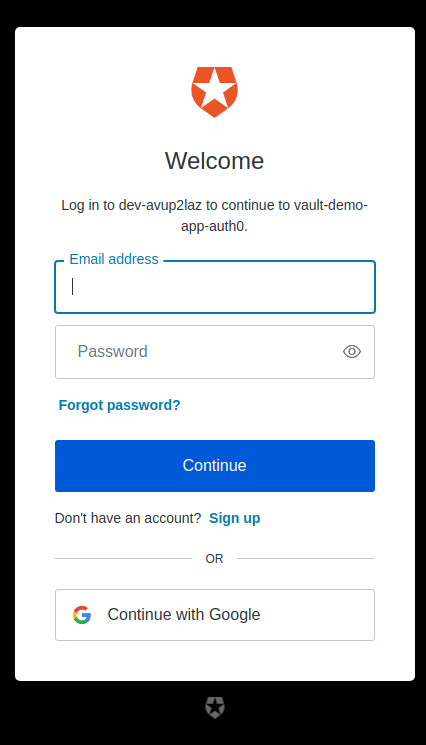
Navigate to `http://localhost:8080`, and you should be redirected to Auth0 to log in:
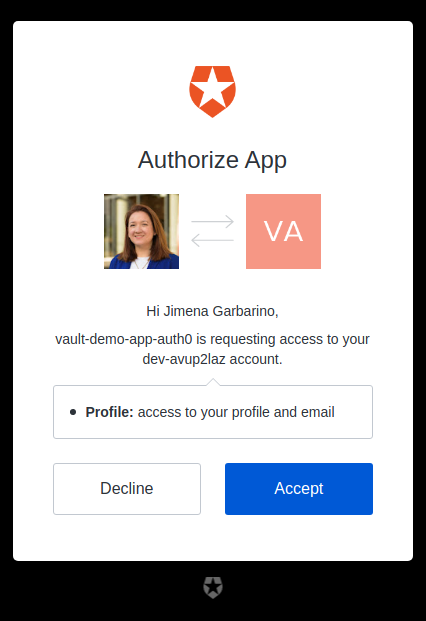
If you choose to Continue with Google, you will see the consent screen:
## Spring Cloud Config with Secrets Encryption
In microservice architectures, managing configuration with a centralized config server is essential. Secret encryption is desirable at rest and when in transit. Spring Cloud Config Server is a popular implementation. Let’s configure the server to store encrypted secrets.
> NOTE: To use encryption and decryption features in Java, you need the full-strength JCE installed in your JVM, which has been included by default since JDK 9.
Using the Spring Initializr API, create a Vault + Config Server application:
```
https start.spring.io/starter.zip \
bootVersion==3.1.1 \
type==maven-project \
dependencies==cloud-config-server \
groupId==com.okta.developer \
artifactId==vault-config-server \
name=="Spring Boot Configuration Server" \
description=="Demo project of a Spring Boot application with Vault protected secrets" \
packageName==com.okta.developer.vault > vault-config-server.zip
```
Unzip the downloaded file. Rename `src/main/resource/application.properties` to `application.yml`, edit the file to specify the port, add a `native` profile, and specify config search locations:
```
server:
port: 8888
spring:
profiles:
active: native
```
Edit `src/main/java/.../SpringBootConfigurationServerApplication.java` and add a `@EnableConfigServer` annotation:
```java
package com.okta.developer.vault;
import org.springframework.boot.SpringApplication;
import org.springframework.boot.autoconfigure.SpringBootApplication;
import org.springframework.cloud.config.server.EnableConfigServer;
@EnableConfigServer
@SpringBootApplication
public class SpringBootConfigurationServerApplication {
public static void main(String[] args) {
SpringApplication.run(SpringBootConfigurationServerApplication.class, args);
}
}
```
Start the server, as you are going to encrypt your Okta secrets using the `/encrypt` endpoint. For this example, you are using a symmetric (shared) encryption key passed through the environment variable ENCRYPT_KEY. Before running the command below, you should replace `{encryptKey}` with a random string of characters. You can use JShell to generate a UUID to use for your encrypt key.
```
jshell
UUID.randomUUID()
```
```
ENCRYPT_KEY={encryptKey} ./mvnw spring-boot:run
```
Then, in another terminal, encrypt your client ID and secret.
```
http :8888/encrypt --raw {yourClientId}
http :8888/encrypt --raw {yourClientSecret}
```
In the `vault-config-server` project folder, create a `src/main/resources/config/vault-demo-app-dev.yml` file to store the secrets for the `dev` profile, with the following contents:
```
okta:
oauth2:
issuer: {yourIssuerURI}
clientId: '{cipher}encryptedClientId'
clientSecret: '{cipher}encryptedClientSecret'
```
The `client-id` and `client-secret` encrypted values must be prefixed with `{cipher}`. Restart the config server.
To consume the config server properties, the client application must set the server address in the application configuration. In the `vault-demo-app` project, rename `application.properties` to `application.yml` and replace its contents with the following configuration:
```
spring:
cloud:
config:
uri: http://localhost:8888
config:
import: "configserver:"
application:
name: vault-demo-app
profiles:
active: dev
```
Start `vault-demo-app` without passing the environment variables:
```
./mvnw clean spring-boot:run
```
When requesting `http://localhost:8080` it should again redirect to the Okta login, or to Auth0 if you used its configuration.
In a real environment, the config server should be secured. Spring Cloud Config Server supports asymmetric key encryption as well, with the server encrypting with the public key and the clients decrypting with the private key. However, the documentation warns about spreading the key management process around clients.
## Vault as a Configuration Backend with Spring Cloud Vault
 In the cloud, secrets management has become much more difficult. Vault is a secrets management and data protection tool from HashiCorp that provides secure storage, dynamic secret generation, data encryption, and secret revocation.
Vault encrypts the secrets prior to writing them to persistent storage. The encryption key is also stored in Vault but encrypted with a _master key_ not stored anywhere. The master key is split into shards using [Shamir’s Secret Sharing algorithm](https://www.vaultproject.io/docs/concepts/seal#shamir-seals) and distributed among a number of operators. The Vault unseal process allows you to reconstruct the master key by adding shards one at a time in any order until enough shards are present; then, Vault becomes operative. Operations on secrets can be audited by enabling audit devices, which will send audit logs to a file, syslog, or socket.
As Spring Cloud Config Server supports Vault as a configuration backend, the next step is to better protect the application secrets by storing them in Vault. This configuration will be demonstrated with Okta as the OIDC provider. A similar approach can be used for Auth0 secrets.
Pull the Vault Docker image and start a container using the command below. Make sure to replace `{hostPath}` with a local directory path, such as `/tmp/vault`.
```
docker pull hashicorp/vault
```
```
docker run --cap-add=IPC_LOCK \
-e 'VAULT_DEV_ROOT_TOKEN_ID=00000000-0000-0000-0000-000000000000' \
-p 8200:8200 \
-v {hostPath}:/vault/logs \
--name my-vault hashicorp/vault
```
> NOTE: The `docker run` command above will start a vault instance with the name `my-vault`. You can stop the container with `docker stop my-vault` and restart it with `docker start my-vault`. Note that all the secrets and data will be lost between restarts, as explained in the next paragraphs.
The `IPC_LOCK` capability is required for Vault to be able to lock memory and not be swapped to disk, as this behavior is enabled by default. As the instance is run for development, the ID of the initially generated root token is set to the given value. You are mounting `/vault/logs`, as you are going to enable the `file` audit device to inspect the interactions.
Once it starts, you should notice the following logs:
```
WARNING! dev mode is enabled! In this mode, Vault runs entirely in-memory
and starts unsealed with a single unseal key. The root token is already
authenticated to the CLI, so you can immediately begin using Vault.
You may need to set the following environment variables:
$ export VAULT_ADDR='http://0.0.0.0:8200'
The unseal key, and root token are displayed below in case you want to
seal/unseal the Vault or re-authenticate.
Unseal Key: Zrk/YYbx+ExlmJNWxwhJjH/4/iHSXsLs7hcTxU/XD9E=
Root Token: 00000000-0000-0000-0000-000000000000
Development mode should NOT be used in production installations!
```
It is clear Vault is running in _dev mode_, meaning it short-circuits a lot of setup to insecure defaults, which helps for the experimentation. Data is stored encrypted in memory and lost on every restart. Copy the _Unseal Key_, as you are going to use it to test Vault sealing. Connect to the container and explore some `vault` commands:
```
docker exec -it my-vault /bin/sh
```
The command above will start a shell session with the container. After the prompt shows, run the following three commands:
```
export VAULT_TOKEN="00000000-0000-0000-0000-000000000000"
export VAULT_ADDR="http://127.0.0.1:8200"
vault status
```
The `status` command output shows if the vault instance is sealed:
```
Key Value
--- -----
Seal Type shamir
Initialized true
Sealed false
Total Shares 1
Threshold 1
Version 1.14.0
Build Date 2023-06-19T11:40:23Z
Storage Type inmem
Cluster Name vault-cluster-2324c0a1
Cluster ID e60d8783-7ff7-f342-169b-dcc78de4ab3b
HA Enabled false
```
As you can see, in development mode, Vault starts unsealed, meaning stored data can be decrypted/accessed.
Enable a file audit device to watch the interactions with Vault:
```
vault audit enable file file_path=/vault/logs/vault_audit.log
```
You should see a success message. Now store the Okta secrets for the `vault-demo-app`:
```
vault kv put secret/vault-demo-app,dev \
okta.oauth2.clientId="{yourClientId}" \
okta.oauth2.clientSecret="{yourClientSecret}" \
okta.oauth2.issuer="{yourIssuerURI}"
```
```
vault kv get secret/vault-demo-app,dev
```
As illustrated above, key-value pairs are stored with `kv put` command, and you can check the values with the `kv get` vault command.
Check `vault_audit.log` in your specified `{hostPath}` directory. Operations are logged in JSON format by default, with sensitive information hashed:
```json
{
"time":"2023-07-07T03:00:25.145796389Z",
"type":"request",
"auth":{
"client_token":"hmac-sha256:2d8d7aeded539495117218a14ef9ae9f0f525eb2f6078be25dfe8e329ceb3d3f",
"accessor":"hmac-sha256:e4c3319a57b735e10df4677193bd7a969ee757a97ebf890bbaebb0694f6a6cd5",
"display_name":"token",
"policies":[
"root"
],
"token_policies":[
"root"
],
"policy_results":{
"allowed":true,
"granting_policies":[
{
"name":"root",
"namespace_id":"root",
"type":"acl"
}
]
},
"token_type":"service",
"token_issue_time":"2023-07-07T02:55:13Z"
},
"request":{
"id":"50f70b23-3f2a-4857-5a8b-0c45982be491",
"client_id":"0DHqvq2D77kL2/JTPSZkTMJbkFVmUu0TzMi0jiXcFy8=",
"operation":"create",
"mount_type":"kv",
"mount_accessor":"kv_bf4b26f3",
"client_token":"hmac-sha256:2d8d7aeded539495117218a14ef9ae9f0f525eb2f6078be25dfe8e329ceb3d3f",
"client_token_accessor":"hmac-sha256:e4c3319a57b735e10df4677193bd7a969ee757a97ebf890bbaebb0694f6a6cd5",
"namespace":{
"id":"root"
},
"path":"secret/data/vault-demo-app,dev",
"data":{
"data":{
"okta.oauth2.clientId":"hmac-sha256:6709ec7e5682f16893369660844392809842ee1d670697fb034c3db17cfdc3d4",
"okta.oauth2.clientSecret":"hmac-sha256:c3db998af7b44aeaabf3da71c396e8bf86119fd6c36e66a41de67e91f71b116f",
"okta.oauth2.issuer":"hmac-sha256:70502e5cd54d12004df6836d0ff8d045515e4207607d984da14c0aaca5400c0a"
},
"options":{
}
},
"remote_address":"127.0.0.1",
"remote_port":58914
}
}
```
Let’s assume you don’t want to configure the root token in the `vault-demo-app`. You can instead create a policy granting read permissions on the path where the secrets were stored. Go to the Vault Web UI at `http://localhost:8200` and log in with the root token (`00000000-0000-0000-0000-000000000000`).
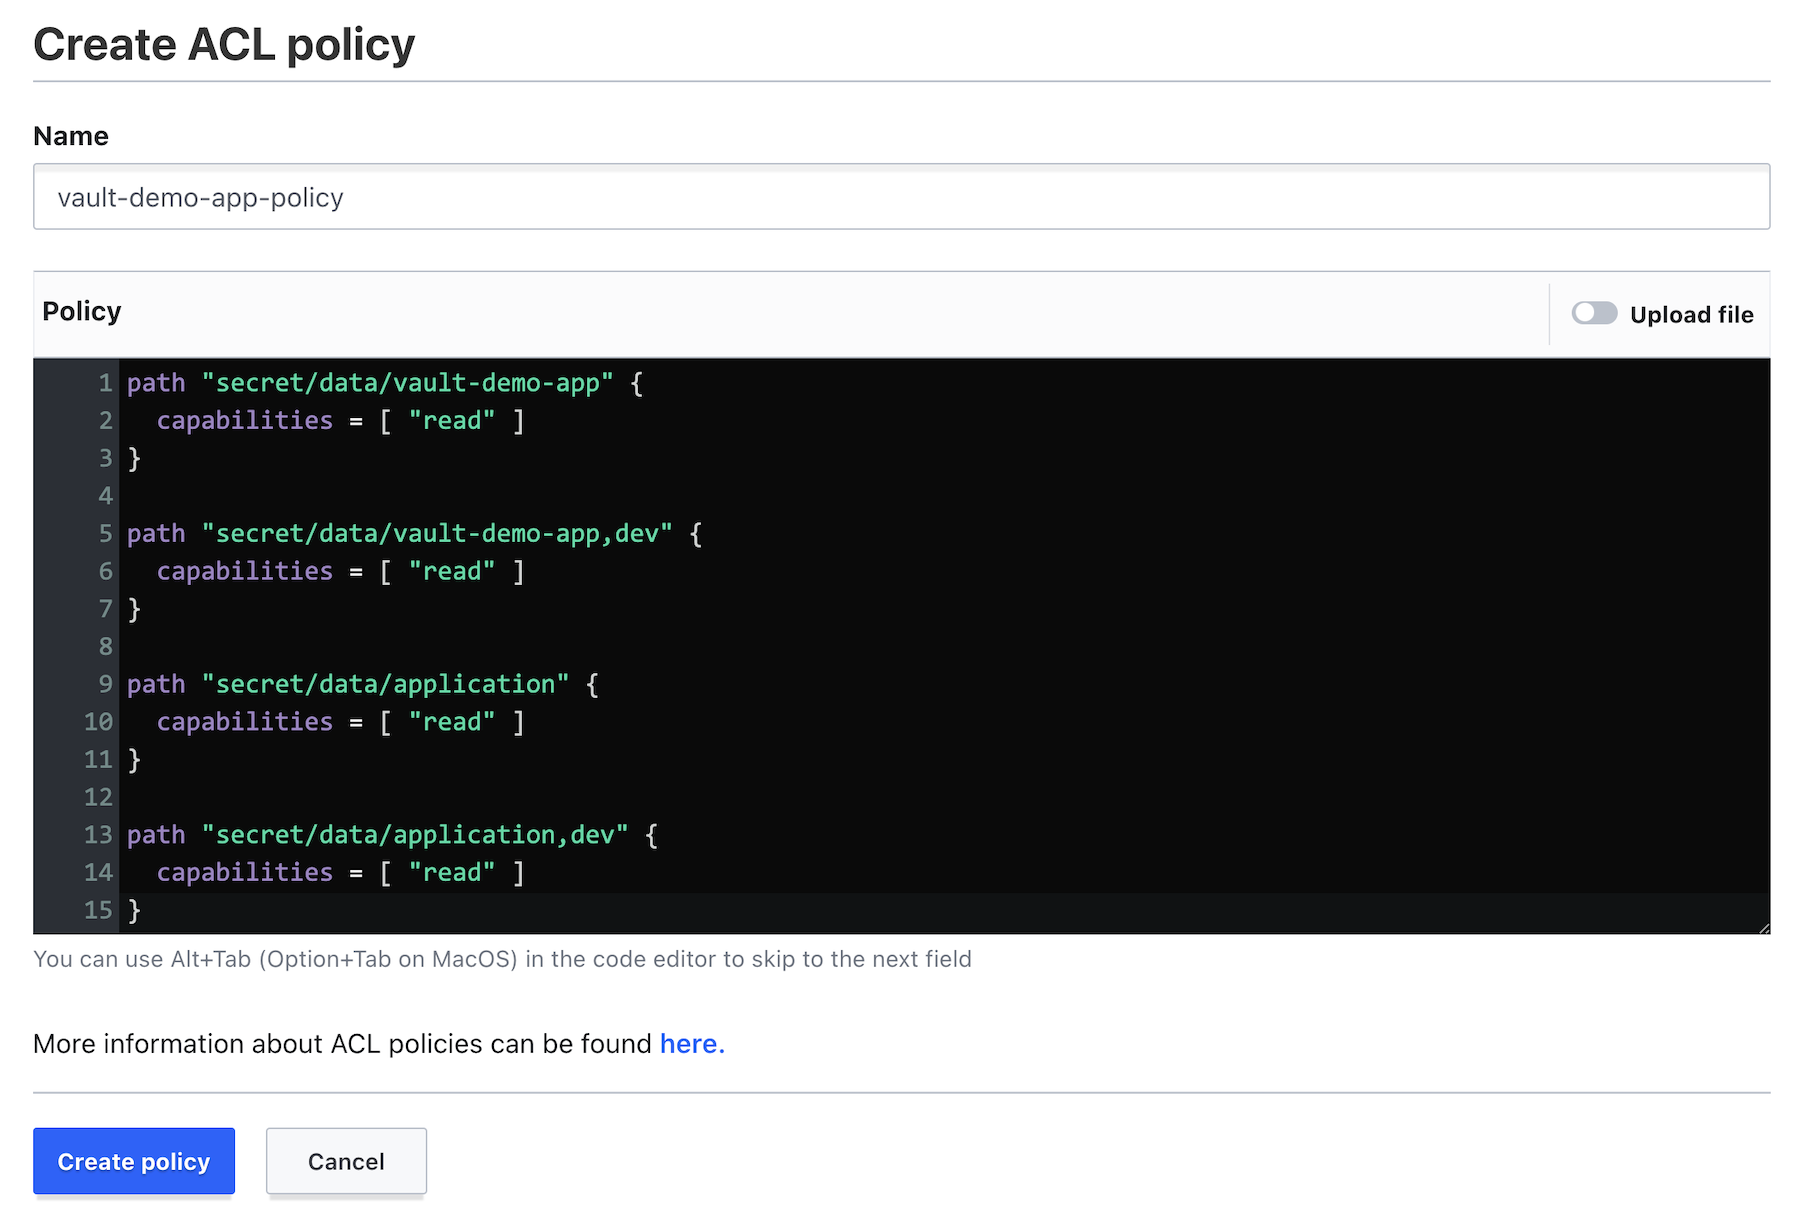
Next, go to Policies and Create ACL policy. Create a `vault-demo-app-policy` with the following capabilities:
```js
path "secret/data/vault-demo-app" {
capabilities = [ "read" ]
}
path "secret/data/vault-demo-app,dev" {
capabilities = [ "read" ]
}
path "secret/data/application" {
capabilities = [ "read" ]
}
path "secret/data/application,dev" {
capabilities = [ "read" ]
}
```
All the paths above will be requested by the config server to provide configuration for the `vault-demo-app` when it starts with the `dev` profile active.
Now, go back to the container command line, and create a token with the `vault-demo-app-policy`.
```
vault token create -policy=vault-demo-app-policy
```
```
Key Value
--- -----
token hvs.CAESIKd9pYyc9xesiqmwvepdGiHlPEB53By...
token_accessor 2pzRXmGhxChobbMtqeM5zZzM
token_duration 768h
token_renewable true
token_policies ["default" "vault-demo-app-policy"]
identity_policies []
policies ["default" "vault-demo-app-policy"]
```
You are now ready to update the config server. In the `vault-config-server` project, edit `src/main/resource/application.yml` to add Vault as the config backend:
```
server:
port: 8888
spring:
profiles:
active: vault
cloud:
config:
server:
vault:
host: 127.0.0.1
port: 8200
kvVersion: 2
logging:
level:
org.springframework.web.client: TRACE
```
Note that the logging level is set to TRACE for the web client to see the interaction between the server and Vault. Restart the `vault-config-server`.
```
./mvnw spring-boot:run
```
You should see the logs below if the server was configured correctly:
```
2023-07-06T19:36:38.555-06:00 INFO 66168 --- [main] SpringBootConfigurationServerApplication :
Started SpringBootConfigurationServerApplication in 1.011 seconds (process running for 1.184)
```
You will not see the config server trying to connect to Vault in the logs. That will happen when a config client requests the properties. Start the `vault-demo-app`, passing the token just created in the environment variable `SPRING_CLOUD_CONFIG_TOKEN`. For example:
```
SPRING_CLOUD_CONFIG_TOKEN=hvs.CAESIKd9pYyc9xesiqmwvep... \
./mvnw spring-boot:run
```
When the `vault-demo-app` starts, it will request the configuration to the config server, which in turn will make REST requests to Vault. In the config server logs, with an increased logging level, you will be able to see the requests:
```
2023-07-06T19:42:36.902 ... : HTTP GET http://127.0.0.1:8200/v1/secret/data/vault-demo-app,dev
2023-07-06T19:42:36.902 ... : Accept=[application/json, application/*+json]
2023-07-06T19:42:36.911 ... : Response 200 OK
```
Go to `http://localhost:8080` and verify that authentication with Okta works.
Finally, let’s seal Vault. Sealing allows you to lock Vault data to minimize damage when an intrusion is detected. In the container command line, enter:
```
vault operator seal
```
Restart `vault-demo-app` and verify the configuration will not be retrieved as Vault is sealed. The `vault-config-server` logs should read:
```
503 Service Unavailable: "{"errors":["Vault is sealed"]}"]
```
To unseal Vault, run:
```
vault operator unseal {unsealKey}
```
## Learn More about Encryption and Storing Secrets
Hopefully, you see the benefits of using a secrets management tool like Vault as a configuration backend, as opposed to storing secrets in a file, on a file system, or in a code repository. To learn more about Vault and Spring Cloud, check out the following links:
* [How Bad Can It Git?](https://www.ndss-symposium.org/ndss-paper/how-bad-can-it-git-characterizing-secret-leakage-in-public-github-repositories/)
* [Spring Cloud Config - Vault Backend](https://cloud.spring.io/spring-cloud-config/reference/html/#vault-backend)
* [Container Secrets with Vault](https://www.hashicorp.com/resources/securing-container-secrets-vault)
* [Amazon Engineer Leaked Private Encryption Keys](https://gizmodo.com/amazon-engineer-leaked-private-encryption-keys-outside-1841160934)
We have several related posts about encryption and storing secrets on this blog.
* [Five Anti-Patterns with Secrets in Java](https://developer.okta.com/blog/2021/12/14/antipatterns-secrets-java)
* [Security Patterns for Microservice Architectures](https://developer.okta.com/blog/2020/03/23/microservice-security-patterns)
* [How to Secure Your Kubernetes Clusters With Best Practices](https://developer.okta.com/blog/2021/12/02/k8s-security-best-practices)
You can find the code for this tutorial on GitHub in the [@oktadev/okta-spring-vault-example](https://github.com/oktadev/okta-spring-vault-example) repository.
For more tutorials like this one, follow [@oktadev](https://twitter.com/oktadev) on Twitter. We also have a [YouTube channel](https://youtube.com/c/oktadev) you might like. If you have any questions, please leave a comment below!
In the cloud, secrets management has become much more difficult. Vault is a secrets management and data protection tool from HashiCorp that provides secure storage, dynamic secret generation, data encryption, and secret revocation.
Vault encrypts the secrets prior to writing them to persistent storage. The encryption key is also stored in Vault but encrypted with a _master key_ not stored anywhere. The master key is split into shards using [Shamir’s Secret Sharing algorithm](https://www.vaultproject.io/docs/concepts/seal#shamir-seals) and distributed among a number of operators. The Vault unseal process allows you to reconstruct the master key by adding shards one at a time in any order until enough shards are present; then, Vault becomes operative. Operations on secrets can be audited by enabling audit devices, which will send audit logs to a file, syslog, or socket.
As Spring Cloud Config Server supports Vault as a configuration backend, the next step is to better protect the application secrets by storing them in Vault. This configuration will be demonstrated with Okta as the OIDC provider. A similar approach can be used for Auth0 secrets.
Pull the Vault Docker image and start a container using the command below. Make sure to replace `{hostPath}` with a local directory path, such as `/tmp/vault`.
```
docker pull hashicorp/vault
```
```
docker run --cap-add=IPC_LOCK \
-e 'VAULT_DEV_ROOT_TOKEN_ID=00000000-0000-0000-0000-000000000000' \
-p 8200:8200 \
-v {hostPath}:/vault/logs \
--name my-vault hashicorp/vault
```
> NOTE: The `docker run` command above will start a vault instance with the name `my-vault`. You can stop the container with `docker stop my-vault` and restart it with `docker start my-vault`. Note that all the secrets and data will be lost between restarts, as explained in the next paragraphs.
The `IPC_LOCK` capability is required for Vault to be able to lock memory and not be swapped to disk, as this behavior is enabled by default. As the instance is run for development, the ID of the initially generated root token is set to the given value. You are mounting `/vault/logs`, as you are going to enable the `file` audit device to inspect the interactions.
Once it starts, you should notice the following logs:
```
WARNING! dev mode is enabled! In this mode, Vault runs entirely in-memory
and starts unsealed with a single unseal key. The root token is already
authenticated to the CLI, so you can immediately begin using Vault.
You may need to set the following environment variables:
$ export VAULT_ADDR='http://0.0.0.0:8200'
The unseal key, and root token are displayed below in case you want to
seal/unseal the Vault or re-authenticate.
Unseal Key: Zrk/YYbx+ExlmJNWxwhJjH/4/iHSXsLs7hcTxU/XD9E=
Root Token: 00000000-0000-0000-0000-000000000000
Development mode should NOT be used in production installations!
```
It is clear Vault is running in _dev mode_, meaning it short-circuits a lot of setup to insecure defaults, which helps for the experimentation. Data is stored encrypted in memory and lost on every restart. Copy the _Unseal Key_, as you are going to use it to test Vault sealing. Connect to the container and explore some `vault` commands:
```
docker exec -it my-vault /bin/sh
```
The command above will start a shell session with the container. After the prompt shows, run the following three commands:
```
export VAULT_TOKEN="00000000-0000-0000-0000-000000000000"
export VAULT_ADDR="http://127.0.0.1:8200"
vault status
```
The `status` command output shows if the vault instance is sealed:
```
Key Value
--- -----
Seal Type shamir
Initialized true
Sealed false
Total Shares 1
Threshold 1
Version 1.14.0
Build Date 2023-06-19T11:40:23Z
Storage Type inmem
Cluster Name vault-cluster-2324c0a1
Cluster ID e60d8783-7ff7-f342-169b-dcc78de4ab3b
HA Enabled false
```
As you can see, in development mode, Vault starts unsealed, meaning stored data can be decrypted/accessed.
Enable a file audit device to watch the interactions with Vault:
```
vault audit enable file file_path=/vault/logs/vault_audit.log
```
You should see a success message. Now store the Okta secrets for the `vault-demo-app`:
```
vault kv put secret/vault-demo-app,dev \
okta.oauth2.clientId="{yourClientId}" \
okta.oauth2.clientSecret="{yourClientSecret}" \
okta.oauth2.issuer="{yourIssuerURI}"
```
```
vault kv get secret/vault-demo-app,dev
```
As illustrated above, key-value pairs are stored with `kv put` command, and you can check the values with the `kv get` vault command.
Check `vault_audit.log` in your specified `{hostPath}` directory. Operations are logged in JSON format by default, with sensitive information hashed:
```json
{
"time":"2023-07-07T03:00:25.145796389Z",
"type":"request",
"auth":{
"client_token":"hmac-sha256:2d8d7aeded539495117218a14ef9ae9f0f525eb2f6078be25dfe8e329ceb3d3f",
"accessor":"hmac-sha256:e4c3319a57b735e10df4677193bd7a969ee757a97ebf890bbaebb0694f6a6cd5",
"display_name":"token",
"policies":[
"root"
],
"token_policies":[
"root"
],
"policy_results":{
"allowed":true,
"granting_policies":[
{
"name":"root",
"namespace_id":"root",
"type":"acl"
}
]
},
"token_type":"service",
"token_issue_time":"2023-07-07T02:55:13Z"
},
"request":{
"id":"50f70b23-3f2a-4857-5a8b-0c45982be491",
"client_id":"0DHqvq2D77kL2/JTPSZkTMJbkFVmUu0TzMi0jiXcFy8=",
"operation":"create",
"mount_type":"kv",
"mount_accessor":"kv_bf4b26f3",
"client_token":"hmac-sha256:2d8d7aeded539495117218a14ef9ae9f0f525eb2f6078be25dfe8e329ceb3d3f",
"client_token_accessor":"hmac-sha256:e4c3319a57b735e10df4677193bd7a969ee757a97ebf890bbaebb0694f6a6cd5",
"namespace":{
"id":"root"
},
"path":"secret/data/vault-demo-app,dev",
"data":{
"data":{
"okta.oauth2.clientId":"hmac-sha256:6709ec7e5682f16893369660844392809842ee1d670697fb034c3db17cfdc3d4",
"okta.oauth2.clientSecret":"hmac-sha256:c3db998af7b44aeaabf3da71c396e8bf86119fd6c36e66a41de67e91f71b116f",
"okta.oauth2.issuer":"hmac-sha256:70502e5cd54d12004df6836d0ff8d045515e4207607d984da14c0aaca5400c0a"
},
"options":{
}
},
"remote_address":"127.0.0.1",
"remote_port":58914
}
}
```
Let’s assume you don’t want to configure the root token in the `vault-demo-app`. You can instead create a policy granting read permissions on the path where the secrets were stored. Go to the Vault Web UI at `http://localhost:8200` and log in with the root token (`00000000-0000-0000-0000-000000000000`).

Next, go to Policies and Create ACL policy. Create a `vault-demo-app-policy` with the following capabilities:
```js
path "secret/data/vault-demo-app" {
capabilities = [ "read" ]
}
path "secret/data/vault-demo-app,dev" {
capabilities = [ "read" ]
}
path "secret/data/application" {
capabilities = [ "read" ]
}
path "secret/data/application,dev" {
capabilities = [ "read" ]
}
```
All the paths above will be requested by the config server to provide configuration for the `vault-demo-app` when it starts with the `dev` profile active.

Now, go back to the container command line, and create a token with the `vault-demo-app-policy`.
```
vault token create -policy=vault-demo-app-policy
```
```
Key Value
--- -----
token hvs.CAESIKd9pYyc9xesiqmwvepdGiHlPEB53By...
token_accessor 2pzRXmGhxChobbMtqeM5zZzM
token_duration 768h
token_renewable true
token_policies ["default" "vault-demo-app-policy"]
identity_policies []
policies ["default" "vault-demo-app-policy"]
```
You are now ready to update the config server. In the `vault-config-server` project, edit `src/main/resource/application.yml` to add Vault as the config backend:
```
server:
port: 8888
spring:
profiles:
active: vault
cloud:
config:
server:
vault:
host: 127.0.0.1
port: 8200
kvVersion: 2
logging:
level:
org.springframework.web.client: TRACE
```
Note that the logging level is set to TRACE for the web client to see the interaction between the server and Vault. Restart the `vault-config-server`.
```
./mvnw spring-boot:run
```
You should see the logs below if the server was configured correctly:
```
2023-07-06T19:36:38.555-06:00 INFO 66168 --- [main] SpringBootConfigurationServerApplication :
Started SpringBootConfigurationServerApplication in 1.011 seconds (process running for 1.184)
```
You will not see the config server trying to connect to Vault in the logs. That will happen when a config client requests the properties. Start the `vault-demo-app`, passing the token just created in the environment variable `SPRING_CLOUD_CONFIG_TOKEN`. For example:
```
SPRING_CLOUD_CONFIG_TOKEN=hvs.CAESIKd9pYyc9xesiqmwvep... \
./mvnw spring-boot:run
```
When the `vault-demo-app` starts, it will request the configuration to the config server, which in turn will make REST requests to Vault. In the config server logs, with an increased logging level, you will be able to see the requests:
```
2023-07-06T19:42:36.902 ... : HTTP GET http://127.0.0.1:8200/v1/secret/data/vault-demo-app,dev
2023-07-06T19:42:36.902 ... : Accept=[application/json, application/*+json]
2023-07-06T19:42:36.911 ... : Response 200 OK
```
Go to `http://localhost:8080` and verify that authentication with Okta works.
Finally, let’s seal Vault. Sealing allows you to lock Vault data to minimize damage when an intrusion is detected. In the container command line, enter:
```
vault operator seal
```
Restart `vault-demo-app` and verify the configuration will not be retrieved as Vault is sealed. The `vault-config-server` logs should read:
```
503 Service Unavailable: "{"errors":["Vault is sealed"]}"]
```
To unseal Vault, run:
```
vault operator unseal {unsealKey}
```
## Learn More about Encryption and Storing Secrets
Hopefully, you see the benefits of using a secrets management tool like Vault as a configuration backend, as opposed to storing secrets in a file, on a file system, or in a code repository. To learn more about Vault and Spring Cloud, check out the following links:
* [How Bad Can It Git?](https://www.ndss-symposium.org/ndss-paper/how-bad-can-it-git-characterizing-secret-leakage-in-public-github-repositories/)
* [Spring Cloud Config - Vault Backend](https://cloud.spring.io/spring-cloud-config/reference/html/#vault-backend)
* [Container Secrets with Vault](https://www.hashicorp.com/resources/securing-container-secrets-vault)
* [Amazon Engineer Leaked Private Encryption Keys](https://gizmodo.com/amazon-engineer-leaked-private-encryption-keys-outside-1841160934)
We have several related posts about encryption and storing secrets on this blog.
* [Five Anti-Patterns with Secrets in Java](https://developer.okta.com/blog/2021/12/14/antipatterns-secrets-java)
* [Security Patterns for Microservice Architectures](https://developer.okta.com/blog/2020/03/23/microservice-security-patterns)
* [How to Secure Your Kubernetes Clusters With Best Practices](https://developer.okta.com/blog/2021/12/02/k8s-security-best-practices)
You can find the code for this tutorial on GitHub in the [@oktadev/okta-spring-vault-example](https://github.com/oktadev/okta-spring-vault-example) repository.
For more tutorials like this one, follow [@oktadev](https://twitter.com/oktadev) on Twitter. We also have a [YouTube channel](https://youtube.com/c/oktadev) you might like. If you have any questions, please leave a comment below!