


TL;DR: In this article, we are going to go over Auth0’s Management API v2. We will cover some of its features and how it can help with client management. We will also dive deeper into the process of updating the client name via the Management API. Each Auth0 application has its own unique client ID which allows us to manipulate each client individually. To see a working example, please take a look at this GitHub repo.
Management API v2
When using the Auth0 dashboard, we can see that we can do some of the following items:
- Create a new client
- Update the settings for each client
- Add a new rule for a client
- And the list goes on and on
Imagine being able to do all of that via the back-end of an application. At Auth0, we have the Management API that can handle client management, hence the name. Anything the Auth0 Dashboard can do, the Management API can do as well, plus more!
If we were to head over to the Auth0 Docs, we could see more information on the Auth0 Management API v2.
"Anything the Auth0 Dashboard can do, the Management API can do as well, plus more!"
Tweet This

How Can I Use It?
When using the Management API, we always need to start with a client. Each client belongs to a project or a website. We’ll start with example.com. We create an Auth0 client via the "Application" tab, hook it up to example.com, and get authentication running for example.com. Great!
One great way we could use it would be to update the client information without having to go into the Auth0 Dashboard every time. We could update the client's name, the description, etc.
The Management API helps with bulk configuration changes and/or automating application changes.
The solution
While the Management API can be used for administrative tasks like updating client information that’s not the only thing it can do. If we were to take a look at this list from Auth0 ManagementClient Documentation, we could see that there is a large list of items that the Management API can handle.
To name a few:
- getUsersByEmail
- which will get all the users with a particular email address that we input as the first parameter.
auth0.getUsersByEmail(email, function(err, users) {
  console.log(users);
});- updateRule
- we can update rules that are currently being used.
var params = { id: RULE_ID };
var data = { name: "my-rule" };
management.updateRule(params, data, function(err, rule) {
  if (err) {
    // Handle error.
  }

  console.log(rule.name); // 'my-rule'.
});- getClient
- where we can get the client’s information by using the client id.
management.getClient({ client_id: CLIENT_ID }, function(err, client) {
  if (err) {
    // Handle error.
  }

  console.log(client);
});
"Use Auth0's Management API to take care of administrative tasks."
Tweet This
Real World Example
In this article, we are going to dive deeper into the functionality that updates the client’s name. This can also be done from the dashboard, but we will be using the Management API to do it instead.
The project setup
If there is a current project we would like to add the Management API functionality to, we can add this logic to our back-end code. If we are starting with a new project, be sure to create one. We can start a new project by creating a new repository in GitHub and cloning into that repo. Once in that new project, run the following command to get npm running on it:
npm initYou will be prompted with questions, like the name of the project, etc. If starting from scratch is not what we want to do, again, pull the code from this GitHub repo and follow the instructions in the README.md
Step One - Create the Client and Enable the Management API
First things first, we need to create a client via the Auth0 dashboard. Want to follow along? Now would be the time to sign up for Auth0 for free or sign in to an existing Auth0 account and head to the Auth0 Dashboard.
Note: Remember that each Auth0 application has a unique Client ID.
Now that we are on the Dashboard view, follow these steps:
- Click on
+ Create Application - Name the App (For example, "management-api-test")
- Click on
Machine to Machine Applications - Click on
Create - Select an API - in our case, we want to select
Auth0 Management API - Choose scopes. We will choose
read:clientsandupdate:clients - Click on
Authorize. - Go to the
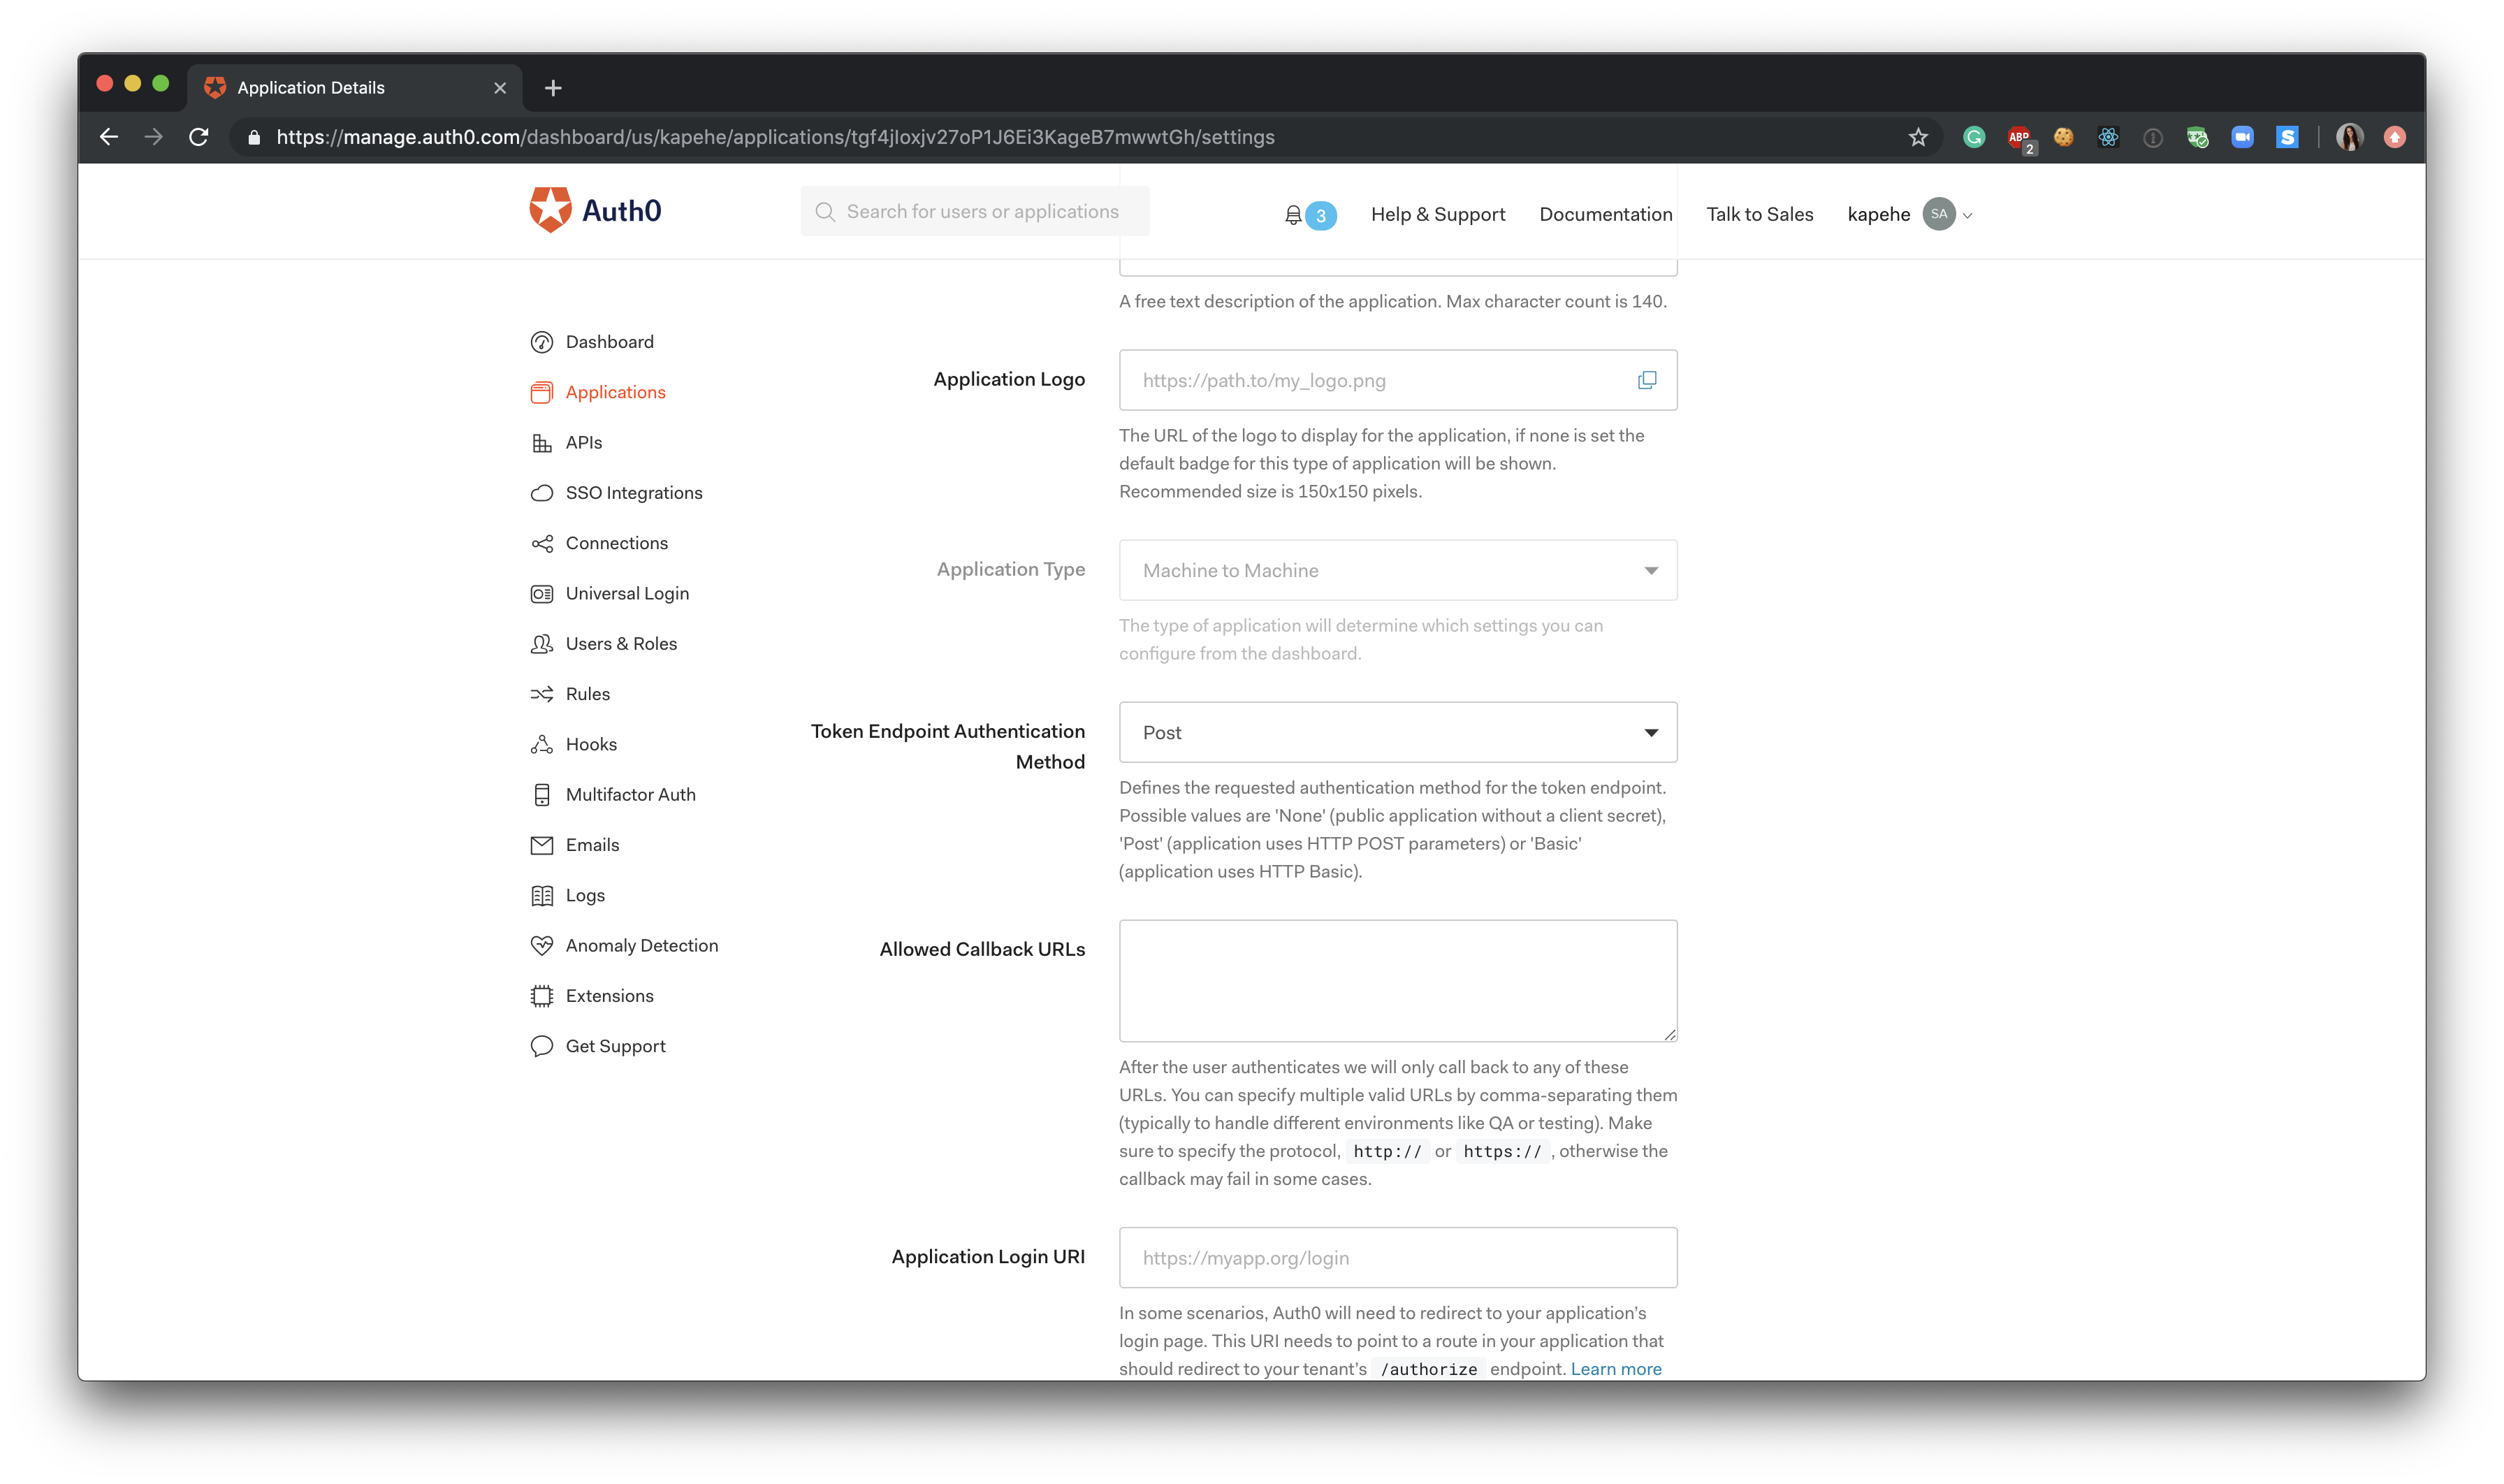
Settingstab to viewClient ID, view theClient Secret, add inAllowed Callback URLs, etc.
There are a few other steps we need to do to make sure our client is ready to communicate with the Management API. If we were to stay in the "Settings" section of our application, scroll down until we see "Token Endpoint Authentication Method". It should say anything but "None", so either "Basic" or "Post". This will allow for the "Client Credentials" to be available.
If we continue scrolling down and click on "Show Advanced Settings", we should see in the menu bar, "Grant Types". Click on that. Once clicked, we should then see that "Client Credentials" has been clicked to show the checkmark.
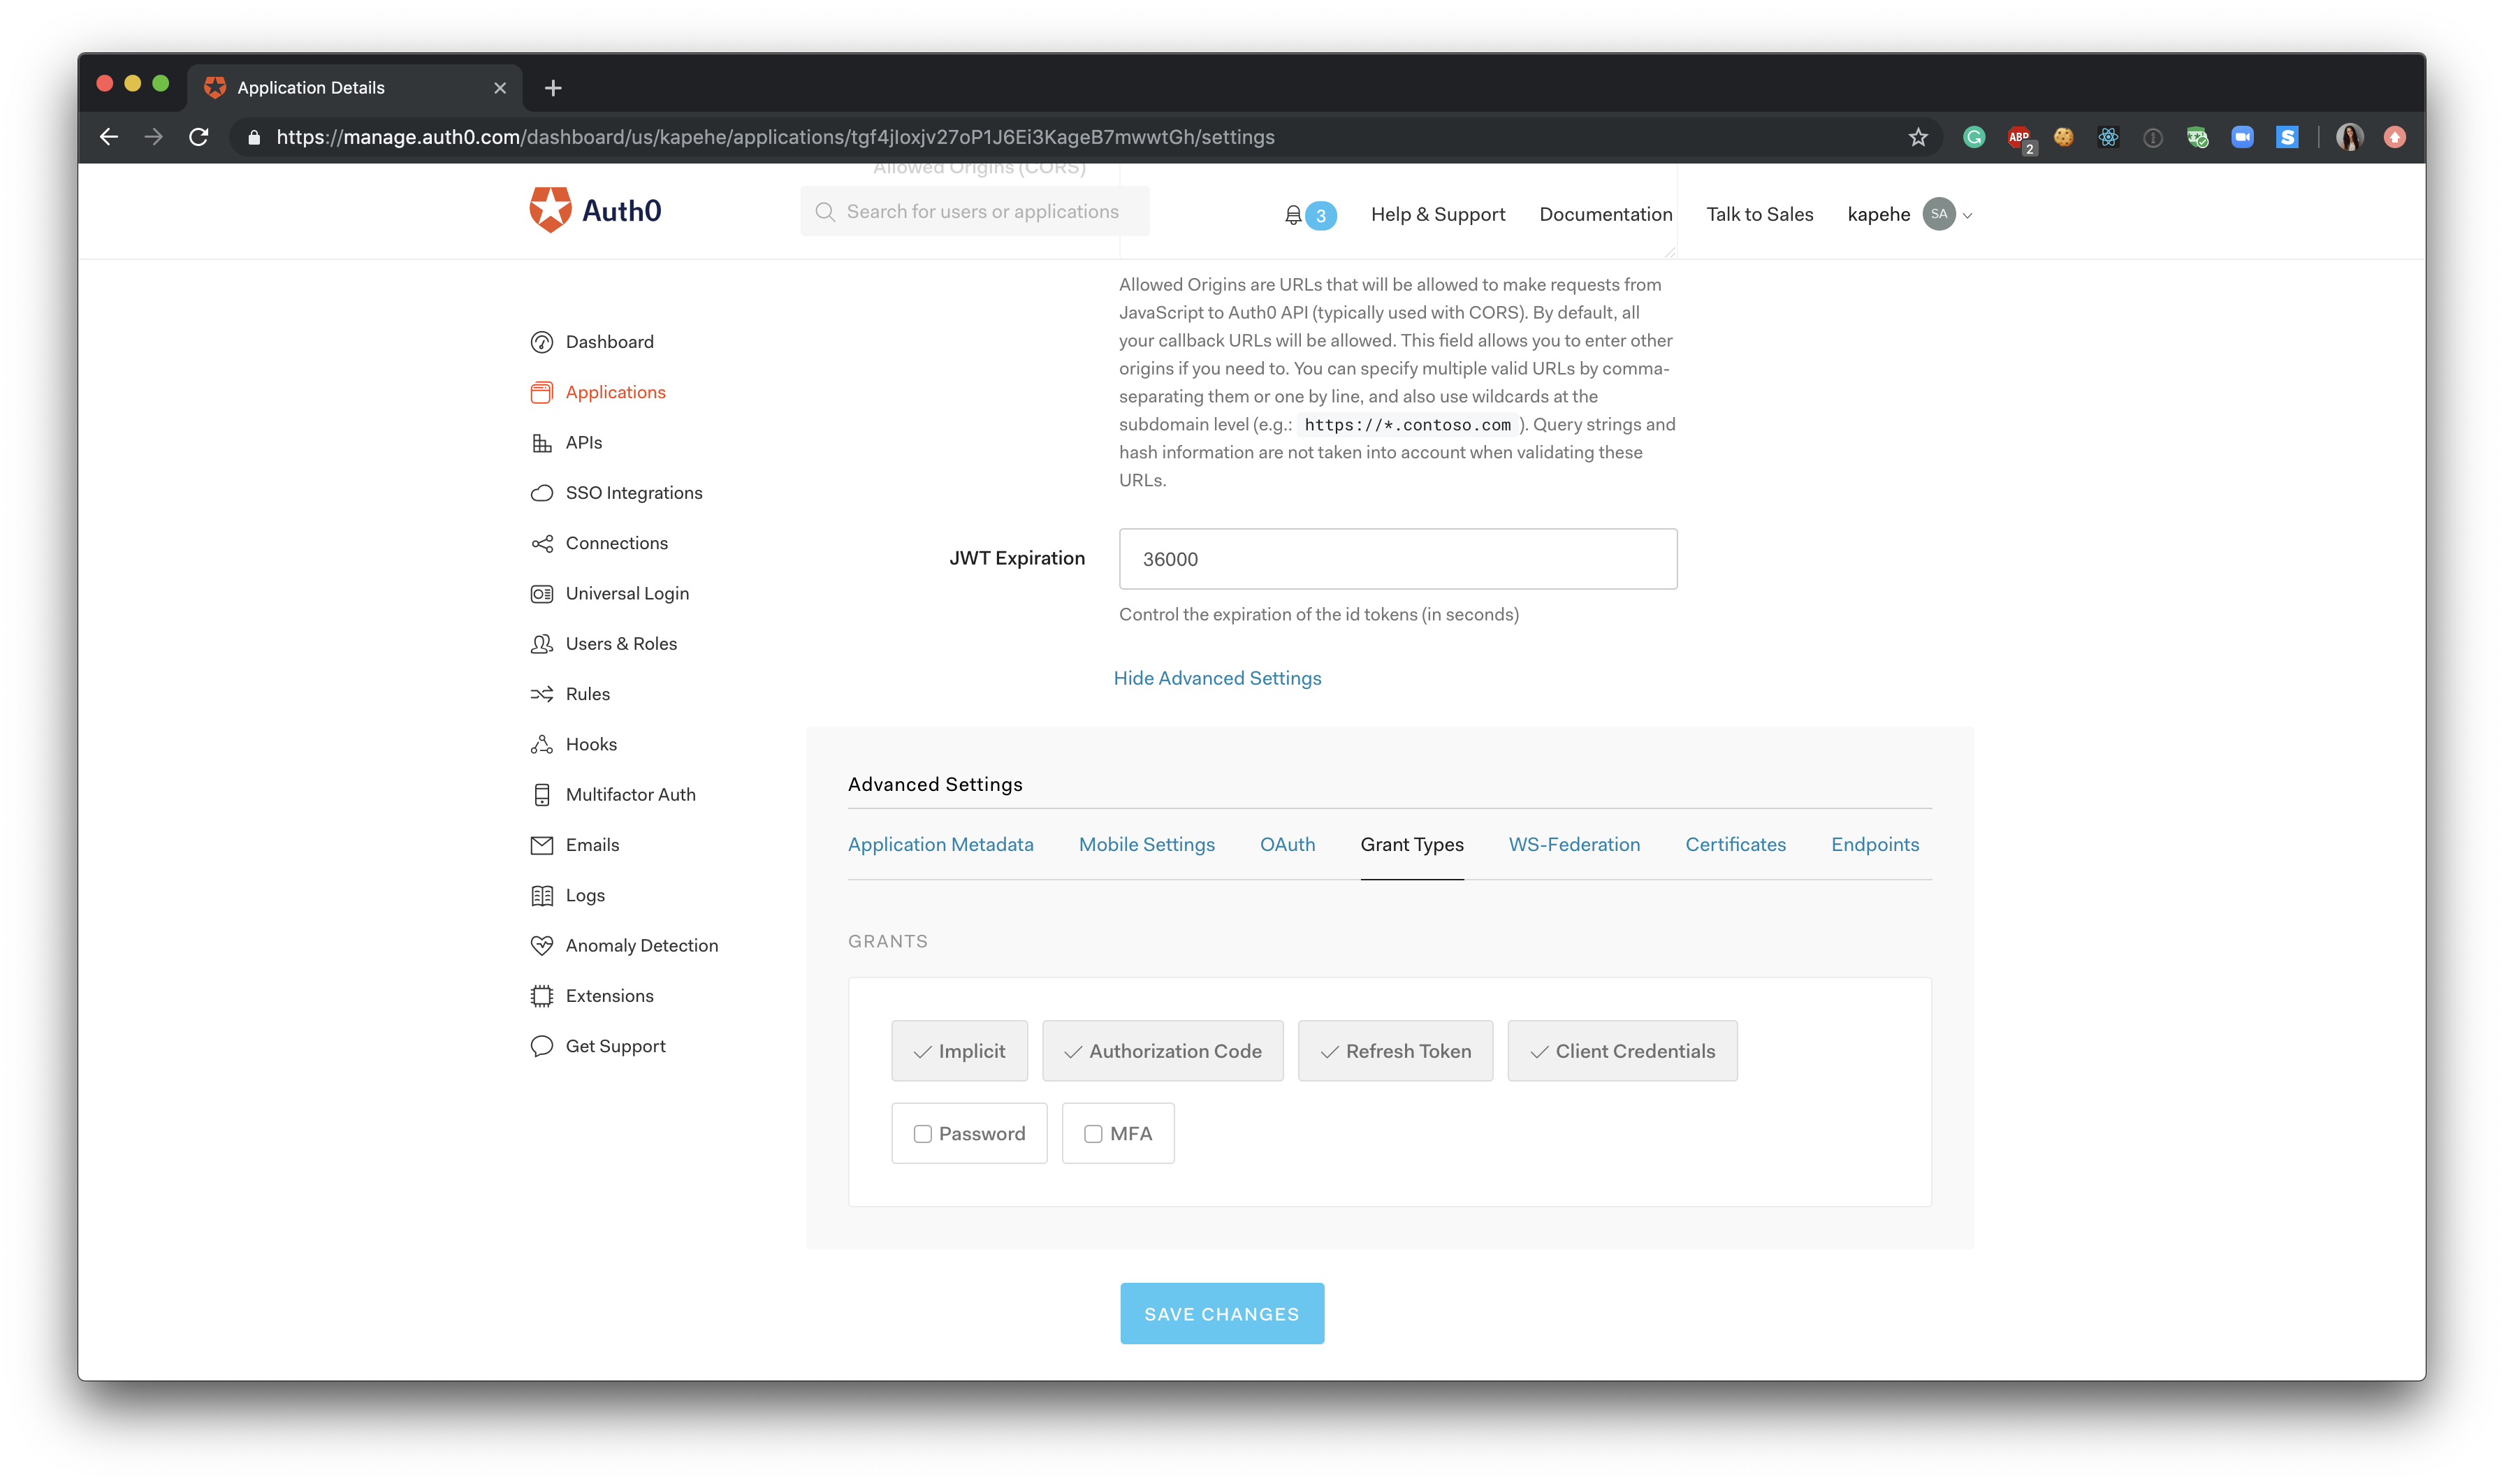
Do not forget to hit "Save Changes" at the bottom.
With both of those in, we are ready to build the code in our project.
Step Two - Create a File to Handle the ManagementClient
Rather than sticking all of our get and update code into a bunch of little files, let’s create a new file that we’ll use to organize all of our functions.
In the root of the project, create a new file that we will call Auth0Manager.js. This file will have all the Management API logic.
We will need to set up a couple of things before we build this file and start our project. We will need file-system, dotenv, axios, and auth0 installed in our project. We can get these installed by running the following command:
npm install --save file-system dotenv axios auth0In our Auth0Manager.js file we are going to have the following code:
// Auth0Manager.js

const axios = require("axios");
const ManagementClient = require("auth0").ManagementClient;

/**
 *
 * How this works:
 *  1. Requests an access token using client_id and client_secret
 *  2. Uses the access token to create a new ManagementClient
 *  3. Use the ManagementClient to interact with the API: https://auth0.github.io/node-auth0/module-management.ManagementClient.html
 *
 */

module.exports = (function() {
  let managementClient;

  return {
    init,
    getClient,
    updateClient
  };

  /**
   * Create a management client
   */
  function init() {
    return getToken()
      .then(data => data.access_token)
      .then(token => {
        const managementClient = new ManagementClient({
          domain: `${process.env.CLIENT_DOMAIN}`,
          token,
          audience: `https://${process.env.CLIENT_DOMAIN}/api/v2/`
        });

        // set it so we can use it in our other methods
        this.managementClient = managementClient;
        return true;
      })
      .catch(err => err);
  }

  /**
   * Get an access token from the Auth0 API
   * We will use this access token to connect to the management API
   * To get a token, we need to provide client_id and client_secret
   * Both of these can be found in the APIs section of Auth0 dashboard
   */
  function getToken() {
    // get the info we need
    const clientId = process.env.CLIENT_ID;
    const clientSecret = process.env.CLIENT_SECRET;
    const url = `https://${process.env.CLIENT_DOMAIN}/oauth/token`;

    // make the call to the API via POST
    return axios
      .post(url, {
        client_id: clientId,
        client_secret: clientSecret,
        grant_type: "client_credentials",
        audience: `https://${process.env.CLIENT_DOMAIN}/api/v2/`
      })
      .then(res => res.data)
      .catch(err => err);
  }

  /**
   * Make a call to the Management API to get all the data for a certain client
   * All the things that are available in the dashboard can be accessed here
   * @param string clientId
   */
  function getClient(clientId = null) {
    if (!clientId) clientId = process.env.CLIENT_ID;

    return this.managementClient
      .getClient({ client_id: clientId })
      .then(client => client)
      .catch(err => err);
  }

  /**
   * Take data and update the Auth0Client
   * This can be used to update the entire client via API instead of in the dashboard
   * Very helpful if moving settings from local to a production environment
   *
   * @param {Object} data     The data that will overwrite anything in our dashboard
   * @param {String} clientId The client that we want to update
   */
  function updateClient(data, clientId = null) {
    if (!clientId) clientId = process.env.CLIENT_ID;

    return this.managementClient
      .updateClient({ client_id: clientId }, data)
      .then(client => client)
      .catch(err => err);
  }
})();
As we can see in this file:
- We have the
init()function that is creating the management client. - We have the
getToken()function that gets an access token for us. - The
getClient()function grabs the client credentials for us to use. - Finally, the
updateClient()function allows us to update the client.
.env file
We are going to need a .env file that will hold our client credentials. We need to be sure to create one and put in the following credentials:
CLIENT_DOMAIN="your domain, example: kapehe.auth0.com";
CLIENT_ID="client id from auth0 application";
CLIENT_SECRET="client secret from auth0 application";
Note: Do not forget to add the
.envfile to.gitignore.
Step Three - Our get-client.js and update-client.js files
Now that we have our Auth0Manager.js and .env files set up, let’s use those functions in two different files, get-client.js and update-client.js.
get-client.js
We will start by building out our get-client.js file. In the root of the project, create a new file named: get-client.js. From there, we are going to want to run the information from the Auth0Manager.js file. That file will look like this:
// get-client.js

require("dotenv").config();
const Auth0Manager = require("./Auth0Manager");
var fs = require("file-system");

Auth0Manager.init()
  .then(() => Auth0Manager.getClient())
  .then(client => {
    var data = fs.writeFileSync("./client-data.json", JSON.stringify(client), {
      encoding: "utf8"
    });
    console.log(data);
    return client;
  })
  .catch(console.error);
Let's go ahead and run this code:
node get-client.jsThis will create a new file named client-data.json. The file will be automatically created and appear in the root of the project. In this file, we will see exactly the output of what we are requesting in JSON format. We will see things like:
- Tenant Name
- Client Name
- Client ID
By using the file-system npm package, it was able to "write" a new file, put the client information in a JSON format, and return that client information to the newly created file.
Updating client information
Now that we have that newly created file, client-data.json, we can go into that file and edit things directly from there. We are unable to update client_id but we can, from this file, update the name, description, or even allowed_clients.
In this example, we are going to be updating the name field. Currently, we see the name as management-api-test. Let's go ahead and type in any new name, for example, my-management-api.
Our client-data.json file name field should look like this now:
"name": "my-management-api",Save that file. Next, we are going to build the file that will read that updated name and send it to the Auth0 Dashboard for us.
update-client.js
Let's build our update-client.js file. In the root of the project, create a new file and name it update-client.js. In that file, we are going to have the following code:
// update-client.js

require("dotenv").config();
const Auth0Manager = require("./Auth0Manager");
var fs = require("file-system");

// the new data we want to set
let newData = fs.readFileSync("./client-data.json", "utf8", function(
  err,
  data
) {
  if (err) {
    throw err;
  }
  return data;
});
newData = JSON.parse(newData);
const updatedData = { name: `${newData.name}` };

Auth0Manager.init()
  .then(() => {
    return Auth0Manager.updateClient(updatedData);
  })
  .then(updatedClient => {
    console.log(updatedClient);
    return updatedClient;
  })
  .catch(err => ({ message: "There was an error!", ...err }));
Once we run the command:
node update-client.jsWe will get a returned console of the updatedClient. If we look at the name property in our console, we will see the new name that we inputted earlier! To test that all the way, go to the Auth0 Dashboard and click on "Applications". We now see the updated name for our application.
To update other properties, like the description field, we would need to update the following line in our update-client.js file:
const updatedData = {
  name: `${newData.name}`,
  description: `${newData.description}`
};
And update the description field in the client-data.json file, like so:
"description": "my new description",We would now be able to see the updated name and description in our console but also in the Auth0 application dashboard view after we run:
node update-client.js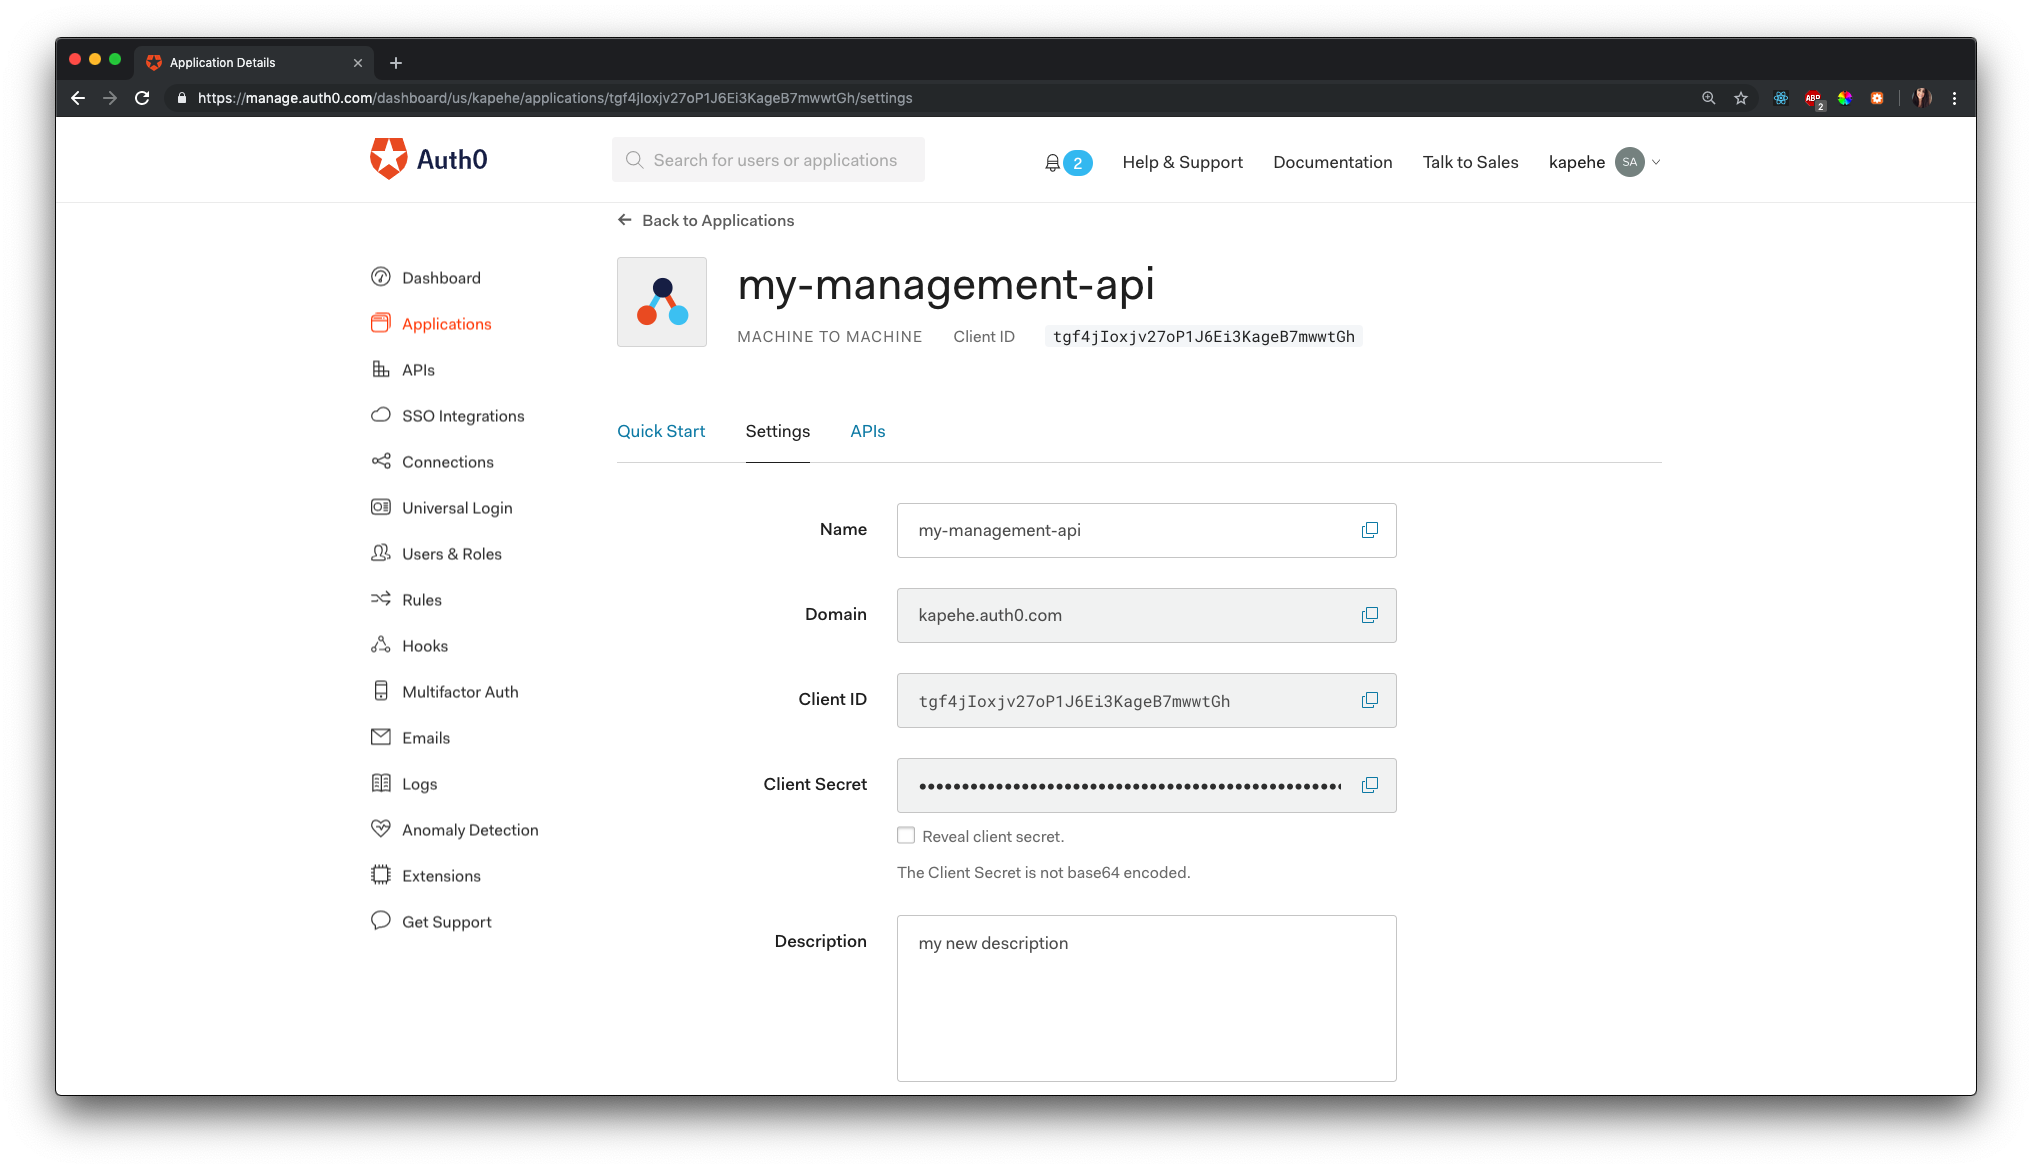
Conclusion
As we saw in this example, the Management API took care of the task of updating the client's name without having to do it via our Auth0 Dashboard. We can use the Management API to do many administrative tasks, so getting familiar with it can be very beneficial in time management but also with ensuring data was updated or transferred correctly.
Go ahead and use the Management API in other available ways. It's amazing what it can do! Again, if you want to see a working example of this project, check out this GitHub repo.
About Auth0
Auth0 by Okta takes a modern approach to customer identity and enables organizations to provide secure access to any application, for any user. Auth0 is a highly customizable platform that is as simple as development teams want, and as flexible as they need. Safeguarding billions of login transactions each month, Auth0 delivers convenience, privacy, and security so customers can focus on innovation. For more information, visit https://auth0.com.


