> ## Documentation Index
> Fetch the complete documentation index at: https://auth0.com/llms.txt
> Use this file to discover all available pages before exploring further.
> OpenID Inbound SCIM for Older Azure Connections
# Inbound SCIM for Older Azure AD Connections
Ensure your Auth0 tenant is connected to Azure AD using the [Microsoft Azure AD connection type](/docs/authenticate/identity-providers/enterprise-identity-providers/azure-active-directory/v2).
This integration will require two applications to be registered in Azure AD: the OpenID Connect integration and the SCIM integration. To streamline this setup process for your customers, consider [publishing your app in the Azure Active Directory app gallery](https://learn.microsoft.com/en-us/azure/active-directory/develop/v2-howto-app-gallery-listing).
Auth0 can integrate with Microsoft Azure Active Directory (now known as Microsoft Entra ID) with the [Microsoft Azure AD connection type](/docs/authenticate/identity-providers/enterprise-identity-providers/azure-active-directory/v2), which uses the OpenID Connect (OIDC) protocol for user authentication. This section describes how to configure a non-gallery enterprise application to manage user accounts in update- and delete-only mode, which makes it possible to use SCIM with older Azure AD connections in which [pairwise IDs](https://learn.microsoft.com/en-us/entra/identity-platform/id-token-claims-reference#use-claims-to-reliably-identify-a-user) are present.
For new connections, read [New Connections](/docs/authenticate/protocols/scim/inbound-scim-for-new-azure-ad-connections).
### Configure SCIM settings in Auth0
1. In your [Auth0 Dashboard](https://manage.auth0.com/#/), go to **Authentication > Enterprise > Microsoft Azure AD > \[your-connection] > Settings.**
2. Ensure that **User ID Attribute Type** is set to **Pairwise Subject Identifier (sub)** and the **Use Common Endpoint** toggle is **Disabled**.
3. Select the **Provisioning** taband enable both **Sync user profile attributes at each login** and **Sync user profiles using SCIM**.
4. On the **Mapping** tab, ensure the **SCIM attribute containing the User ID** setting is set to **externalId**.
5. Review the **Additional Mappings** to ensure the extended SCIM attributes are mapped to your preferred Auth0 attributes. See [attribute mapping](/docs/authenticate/protocols/scim/configure-inbound-scim#attribute-mapping) for details.
### Retrieve SCIM endpoint URL and token
This section uses the Auth0 Dashboard, but you can also complete these steps with the Management API. See the [Deployment Guidelines](/docs/authenticate/protocols/scim/configure-inbound-scim#deployment-guidelines) section for best practices.
1. In the Auth0 dashboard, navigate to the SCIM **Setup** tab and copy the **SCIM Endpoint URL**. Make note of this URL as you will need to provide it in a future step.
2. Generate SCIM token by clicking **Generate New Token** and set an expiration date for the token if desired.
3. Select the following scopes: `get:users`, `patch:users`, and `delete:users`.
### Configure SCIM in Azure AD for OIDC Apps
1. Confirm that an OpenID Connect application has already been registered for your app in the **Microsoft Entra ID > App registrations** section of the [Azure portal](https://portal.azure.com).
2. Next, register a new **Non-gallery** application in the [Azure portal](https://portal.azure.com) by browsing to **Microsoft Entra ID > Enterprise applications > New application > Create your own application,** entering an application name, and selecting **Create**.
3. Go to the **Users and Groups** tab and assign the Azure AD users and groups who currently have access.
4. Select the **Provisioning** tab, select **Get started**, and choose **Automatic** as the **Provisioning Mode.**
5. Select **Admin Credentials**, then enter the **SCIM Endpoint URL** value you saved earlier as the **Tenant URL**. At the end of the URL, add the `?aadOptscim062020` query parameter to fix [known Azure AD issues](https://learn.microsoft.com/en-us/entra/identity/app-provisioning/application-provisioning-config-problem-scim-compatibility).
6. Paste the token value into the **Secret Token** field and select **Save.**
7. Go to **Mappings** and select **Provision Azure Active Directory Users,** then find **Provision Azure Active Directory Users** and deselect **Create** under **Target Object Actions.**
 8. Go to **Attribute Mappings** and edit the attributes of the line containing `externalId` and `mailNickname`
9. On the **Edit Attribute** screen, change **Source attribute** to **objectId,** then choose **OK**.
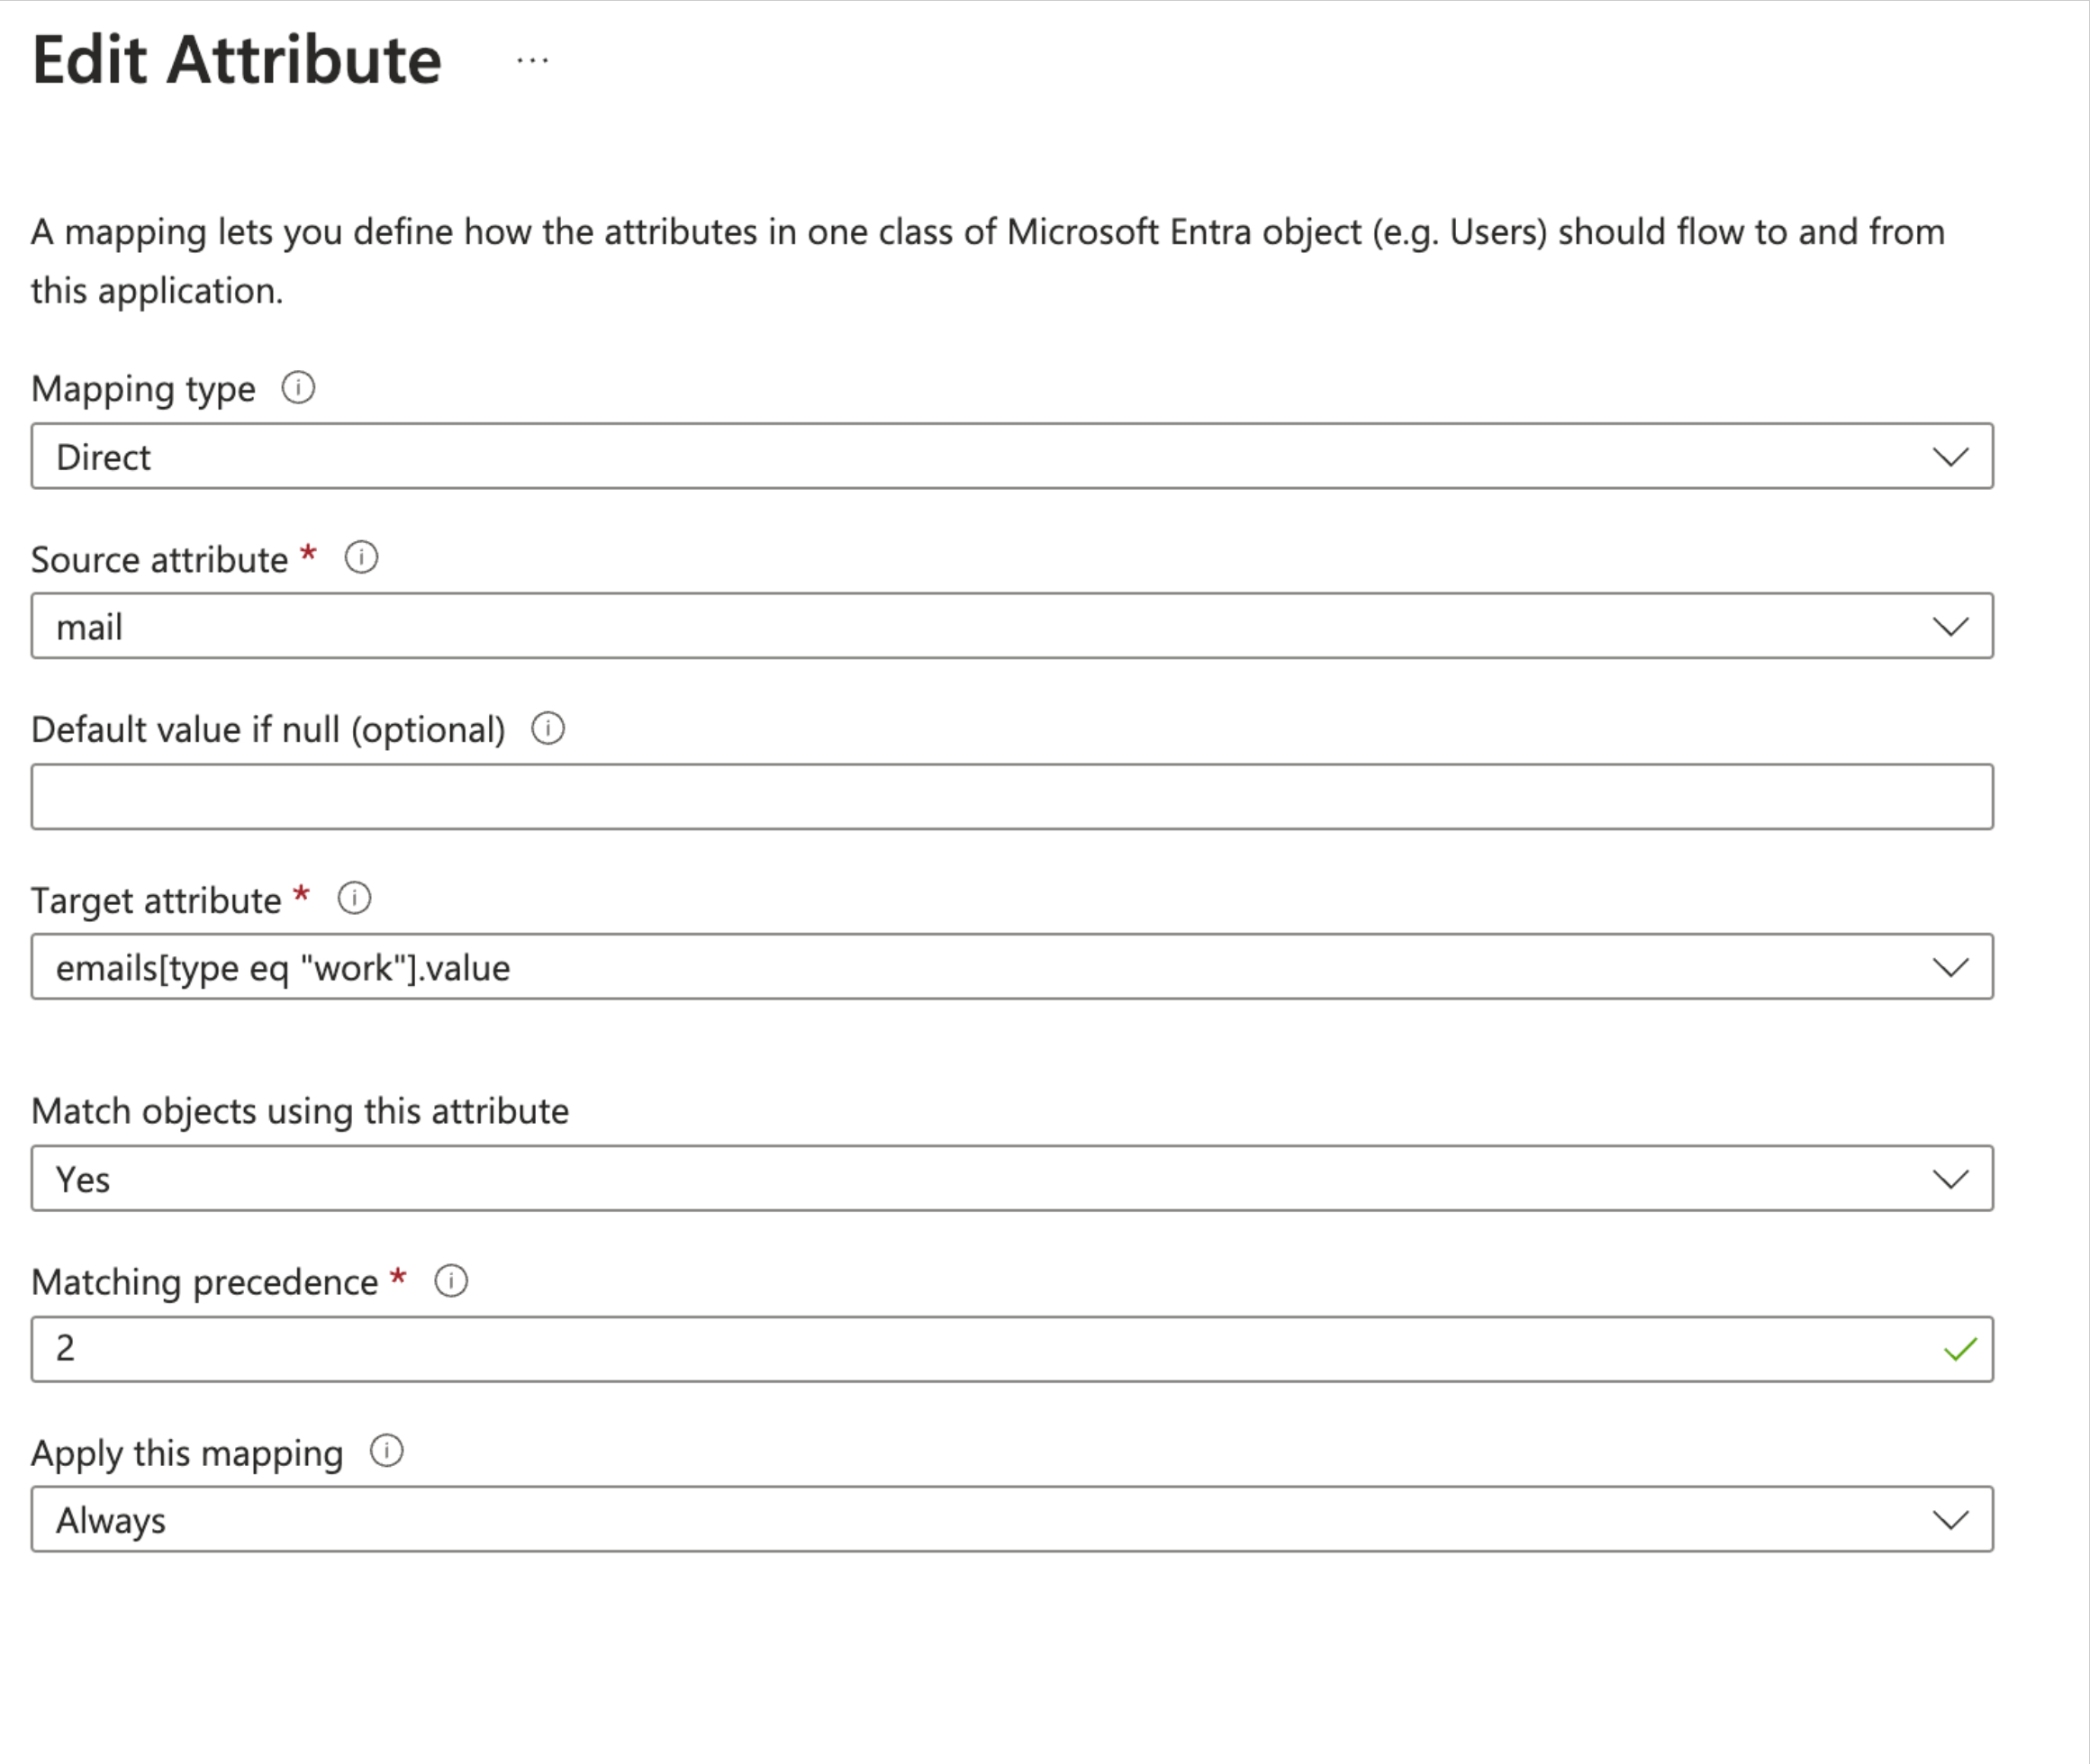
10. Return to **Attribute Mappings** and select the line containing `emails[type eq "work"].value` and `mail`
11. On the **Edit Attribute** screen, change **Match objects using this attribute** to **Yes,** thenset **Matching precedence** to **2** and choose **OK.**
8. Go to **Attribute Mappings** and edit the attributes of the line containing `externalId` and `mailNickname`
9. On the **Edit Attribute** screen, change **Source attribute** to **objectId,** then choose **OK**.
10. Return to **Attribute Mappings** and select the line containing `emails[type eq "work"].value` and `mail`
11. On the **Edit Attribute** screen, change **Match objects using this attribute** to **Yes,** thenset **Matching precedence** to **2** and choose **OK.**
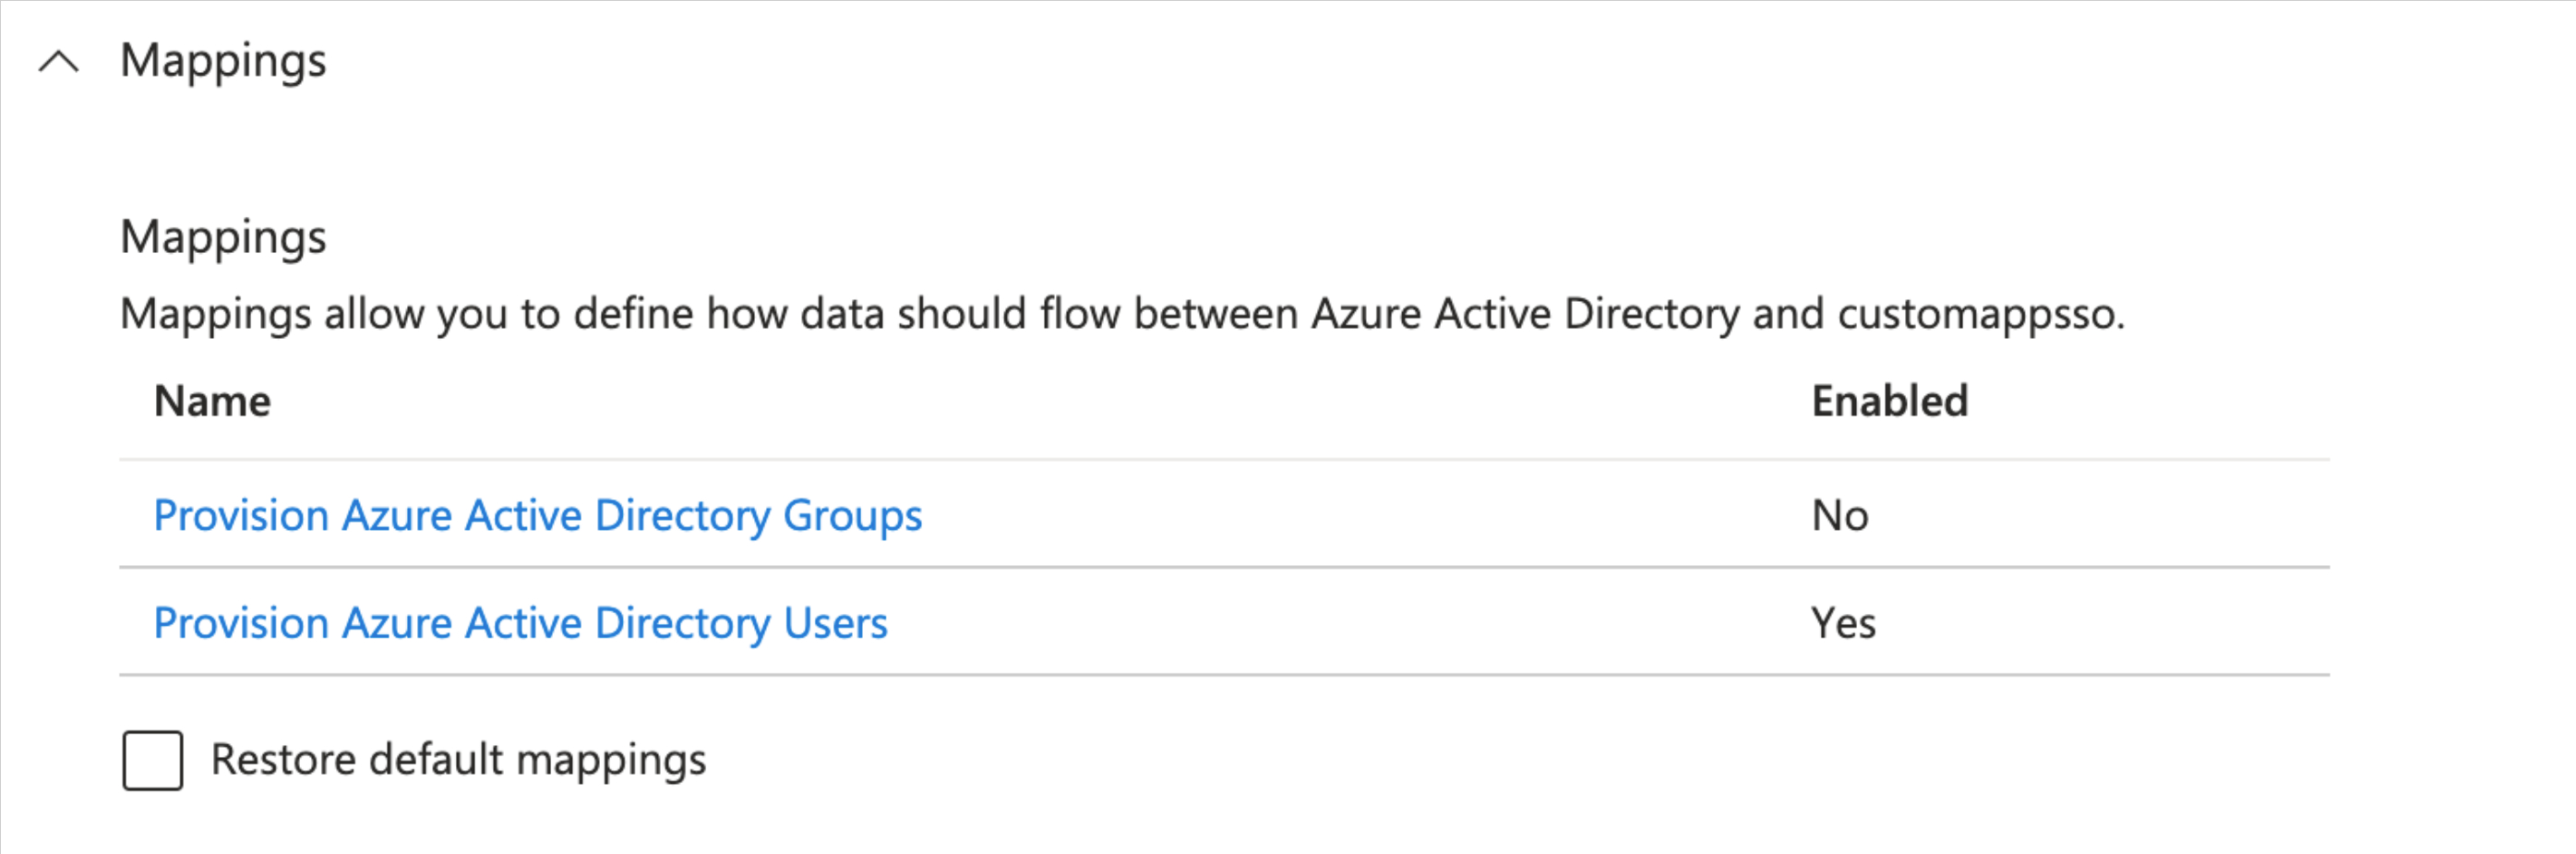
 12. Choose **Save** to save the attribute mappings. The following view appears:
 13. Select **X** in the upper-right corner to return to the **Provisioning** screen.
#### Testing
1. On the Enterprise application overview screen, select **Manage > Provisioning** and then **Provision on Demand** to test the SCIM connection.
2. Go to **Select a user or group** and type the name of a user that you assigned to the application, then select the user and choose **Provision**. If the user is not present in the Auth0 tenant, you receive an error. If the user is present in the Auth0 tenant, a message confirms that the user has been updated.
3. Turn on provisioning by following [Microsoft's instructions](https://learn.microsoft.com/en-us/entra/identity/app-provisioning/configure-automatic-user-provisioning-portal#provisioning-status) to set the **Provisioning Status** to **On**.
13. Select **X** in the upper-right corner to return to the **Provisioning** screen.
#### Testing
1. On the Enterprise application overview screen, select **Manage > Provisioning** and then **Provision on Demand** to test the SCIM connection.
2. Go to **Select a user or group** and type the name of a user that you assigned to the application, then select the user and choose **Provision**. If the user is not present in the Auth0 tenant, you receive an error. If the user is present in the Auth0 tenant, a message confirms that the user has been updated.
3. Turn on provisioning by following [Microsoft's instructions](https://learn.microsoft.com/en-us/entra/identity/app-provisioning/configure-automatic-user-provisioning-portal#provisioning-status) to set the **Provisioning Status** to **On**.