Auth0 Universal Login
Auth0 Universal Login provides the essential feature of an authorization server: the login flow. When a user needs to prove their identity to gain access to your application, you can redirect them to Universal Login and let Auth0 handle the authentication process.
With Universal Login, you don’t have to complete any integration work to accommodate different methods of authentication. You can start with a simple username and password flow, then add additional features, such as social login or multi-factor authentication (MFA), to customize a secure and user-friendly login experience.
Configuring Universal Login is dynamic and does not require any application-level changes, as web pages hosted on Auth0’s centralized authentication server completely drive the login flow. Additionally, you don’t need to manually update your code for applications to benefit from improvements Auth0 makes to Universal Login.
From the Auth0 Dashboard, you can customize the appearance and behavior of login pages to create a consistent, branded experience. For advanced use cases, you can also change the code of each page individually.
To learn more about the differences between Universal Login and embedded login, review Centralized Universal Login vs. Embedded Login.
Configure Universal Login
On your Auth0 Dashboard, you can choose which experience to use for default login pages under Branding > Universal Login > Advanced Options.
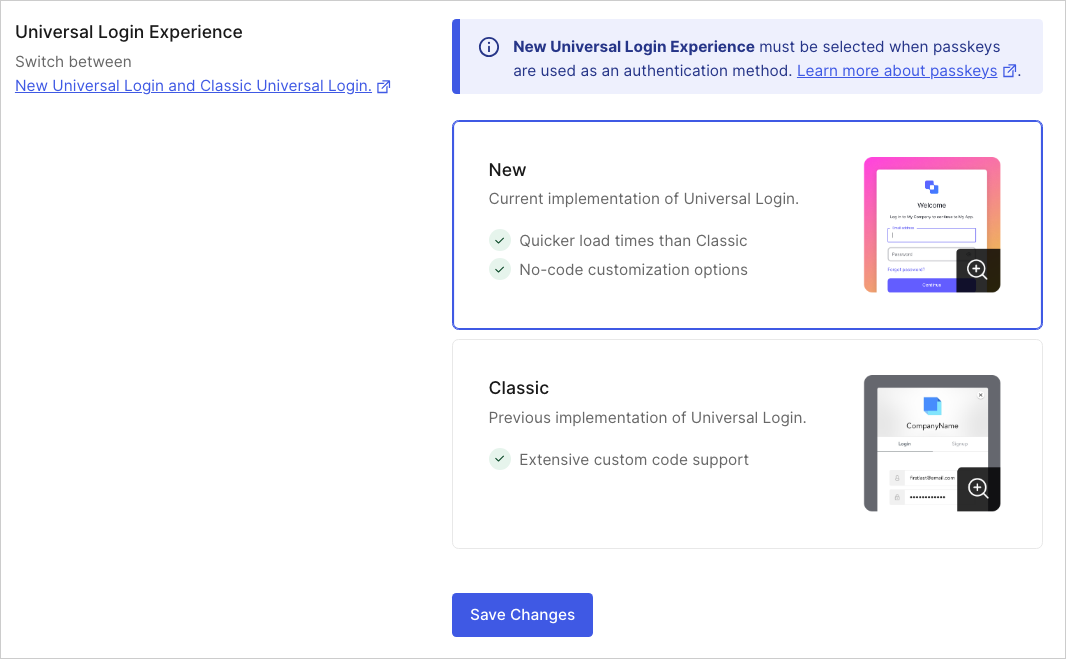
Auth0 offers two hosted login experiences:
Universal Login offers a streamlined experience for users and does not require the use of JavaScript for customization.
Classic Login uses JavaScript controls for each page of the login flow.
At this time, Auth0’s active development efforts are focused on Universal Login, and Classic Login no longer receives updates. Unless your specific use case requires the Classic experience, implementing Universal Login is recommended.
To learn more about how these two experiences compare, review Universal Login vs. Classic Login.
Accessibility
Auth0 is implementing WCAG 2.2 standards to improve access to universal login flows for people with different vision levels. During the initial Early Access rollout, you can use WCAG standards by enabling the toggle on your Auth0 Dashboard.

This feature can also be enabled in the Management API by updating the enable_ulp_wcag_compliance flag in the Update Prompt Settings endpoint:
curl -L -X PATCH 'https://<tenant_name>.auth0.com/api/v2/prompts' \
-H 'Content-Type: application/json' \
-H 'Accept: application/json' \
-H 'Authorization: Bearer 'abc123' \
-d '{"universal_login_experience":"new","identifier_first":true,"webauthn_platform_first_factor":true,"enable_ulp_wcag_compliance":true}'
Was this helpful?
These improvements are optional during the Early Access period and do not apply to Classic Login. After the feature is made generally available, the option to opt in will be deprecated and removed for all customers.
Customize login page
After enabling Universal Login, you can customize your login page directly from the Auth0 Dashboard. Specifically, you can customize page templates and themes, sign-up and login prompts, and other text elements. To learn more, review Customize Universal Login.
If you decide to implement Classic Login, you can customize basic branding options from the Auth0 Dashboard. You can then configure advanced customization with the SDK used to build your login flow. To learn more, review Customize Classic Login.
Implement Universal Login
After enabling either Universal Login or Classic Login within your tenant, follow the steps below to implement the experience:
Register your application with Auth0.
Configure your application to call the Login endpoint of the Authentication API to trigger the login flow and handle the response. and handle the response. You can configure this directly or use one of Auth0's SDKs.
Create a Database, Enterprise, or Social connection and enable it for your application.
Navigate to the login page
You can call the Login endpoint directly from any browser:
https://{yourDomain}/authorize?
  response_type=code|token&
  client_id={yourClientId}&
  connection={connectionName}&
  redirect_uri={https://yourApp/callback}&
  state={state}
Was this helpful?
The request must include the following values:
response_type(eithercodeortoken)client_idredirect_uristateTo better understand why this value is required review Prevent Attacks and Redirect Users With OAuth 2.0 State Parameters.
Optionally, you can include the connection parameter to prompt users to authenticate with the specified connection.
Use the Quickstart guides
For more information on how you can set up Universal Login for your application, review the Quickstart guides. Choose the approach that best fits your technologies and follow the Quickstart for a walkthrough of the implementation.