Pick your tech stack
LangGraph.js + Next.js
Vercel AI + Next.js
LangGraph + FastAPI
Vercel AI + Node.js
Prerequisites
Before getting started, make sure you have completed the following steps:Create an Auth0 Account
To continue with this quickstart, you need to have an Auth0 account.
Create an Auth0 Application
Go to your Auth0 Dashboard to create a new Auth0 Application.
- Navigate to Applications > Applications in the left sidebar.
- Click the Create Application button in the top right.
- In the pop-up select Regular Web Applications and click Create.
- Once the Application is created, switch to the Settings tab.
- Scroll down to the Application URIs section.
- Set Allowed Callback URLs as:
http://localhost:3000/auth/callback - Set Allowed Logout URLs as:
http://localhost:3000 - Click Save in the bottom right to save your changes.
Enable CIBA Grant
Enable the CIBA Grant for your Auth0 Application. Go to Applications > [Your Application] > Settings > Advanced > Grant Types and enable the Client Initiated Backchannel Authentication (CIBA) grant type.
Configure Notification Channel settings
Configure the notification channels (such as email or push notifications) for your Auth0 Application. Go to Applications > [Your Application] > Settings > Client-Initiated Backchannel Authentication (CIBA) section > and enable the notification channel(s) to use with the asynchronous authorization requests for this application. To learn more about configuring notification channels and using the requested expiry setting, read the Asynchronous Authorization documentation.
Enable Guardian Push
Enable Mutli-factor authentication (MFA) with Guardian Push Notifications for your Auth0 tenant. To learn more about MFA with Guardian, read the Auth0 Guardian documentation.
Enroll your user to use Auth0 Guardian
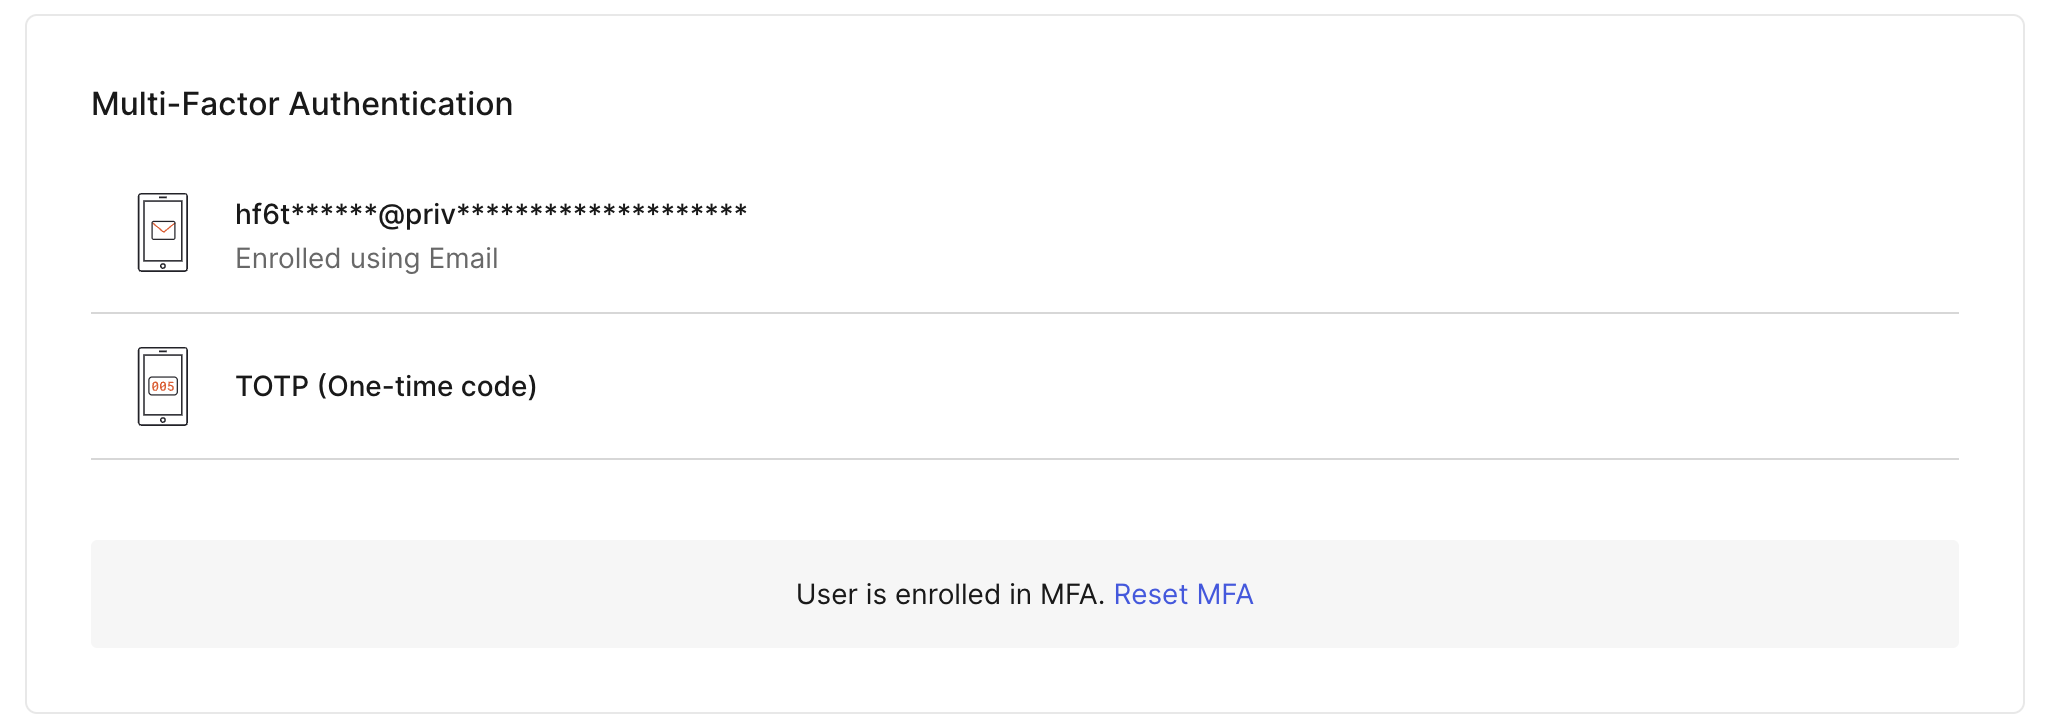
To initiate a CIBA push request, the authorizing user must be enrolled in MFA using push notifications. To verify if the authorizing user is enrolled for MFA push notifications in the Auth0 Dashboard, navigate to User Management > Users and click on the user. Under Multi-Factor Authentication, Auth0 lists the factors the user is enrolled in: If the user is not enrolled, you can send an enrollment request by email:


OpenAI Platform
Set up an OpenAI account and API key.
Download sample app
Start by downloading and extracting the sample app. Then open in your preferred IDE.Install dependencies
In the root directory of your project, install the following dependencies:@auth0/ai-langchain: Auth0 AI SDK for LangChain built for AI agents powered by LangChain.@langchain/langgraph: For building stateful, multi-actor applications with LLMs.langchain: The LangChain library.@langchain/core: LangChain core libraries.@langchain/openai: OpenAI provider for LangChain.langgraph-nextjs-api-passthrough: API passthrough for LangGraph.
Update the environment file
Copy the.env.example file to .env.local and update the variables with your Auth0 credentials. You can find your Auth0 domain, client ID, and client secret in the application you created in the Auth0 Dashboard.Set up Human-in-the-Loop approvals
Integrate the Auth0 AI SDK into your application to secure your async AI agent workflow. For this quickstart, we will use a blocking request flow. In real use cases, often an asynchronous flow is preferred.Configure the Auth0 AI SDK
To require asynchronous authorization for your tool, the tool needs to be wrapped with the Async authorizer,withAsyncAuthorization(). Let’s create a helper function to wrap the tool with the Async authorizer.Create a file at src/lib/auth0-ai.ts and instantiate a new Auth0 AI SDK client:src/lib/auth0-ai.ts
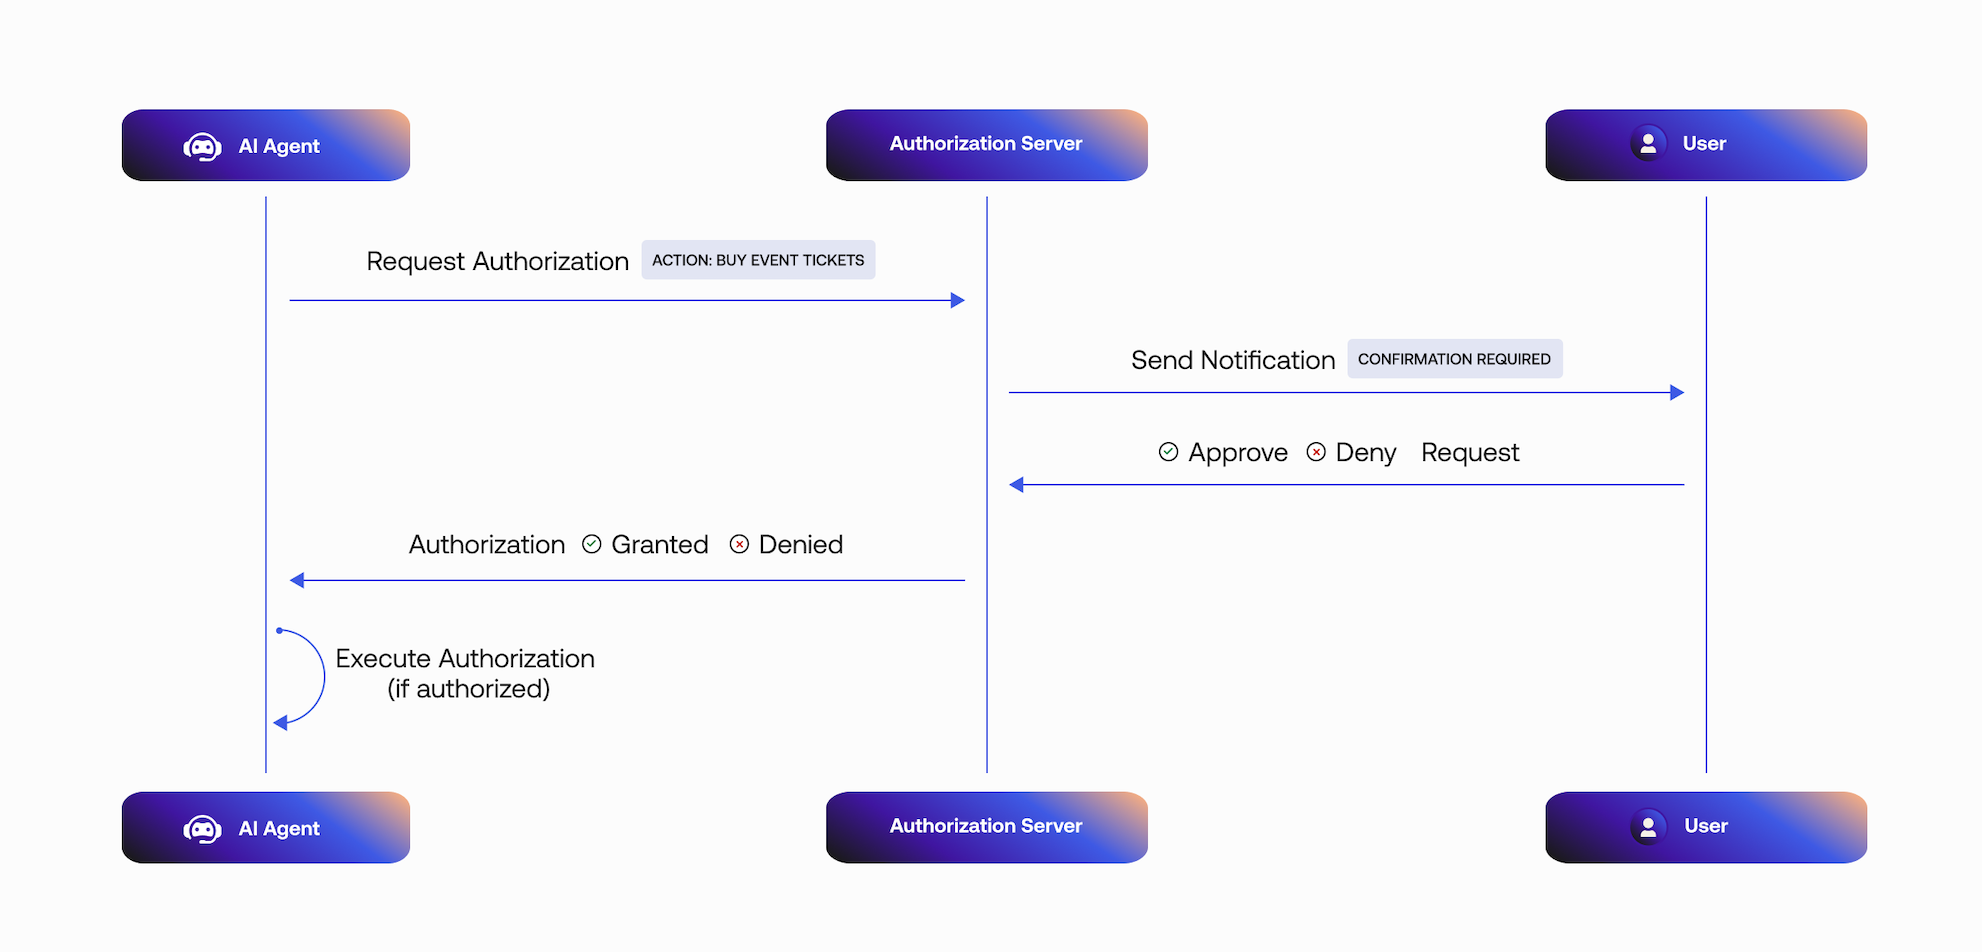
- The Async Authorization request includes the user ID that will approve the request.
- Auth0 sends the user a mobile push notification. The AI agent polls the
/tokenendpoint for a user response. - The mobile application retrieves the
bindingMessagecontaining the consent details, in this case, the details of the product to purchase. - The user responds to the request:
- If the request is approved, the tool execution will continue.
- If the request is rejected, the tool execution will not continue.

Pass credentials to the tools
Next, add the following code tosrc/lib/auth0.ts:src/lib/auth0.ts
/src/app/api/chat/[..._path]/route.ts file with the following code. The access token will be passed to your LangGraph agent so we can use it from the Auth0 AI SDK to get the current user.src/app/api/chat/[..._path]/route.ts
Add Custom Authentication
For more information on how to add custom authentication for your LangGraph Platform application, read the Custom Auth guide.
langgraph.json, add the path to your auth file:langgraph.json
src/lib/auth.ts
Create a tool to call your API
In this example, we use a tool that buys products on the user’s behalf. When the user approves the transaction, the Auth0 AI SDK retrieves an access token to call the shop’s API. Upon completing the Async Authorization flow, the AI agent responds with a message confirming the purchase. The Auth0 AI SDK returns an error response if the user denies the transaction.Now, create a filesrc/lib/tools/shop-online.ts and add the following code:src/lib/tools/shop-online.ts
Update environment variables
You need to obtain an API Key from OpenAI or another provider to use an LLM.If you want to use an API, it must be registered with Auth0 and have a valid audience.Update the.env.local file with the following variables:.env.local
Require async authorization for your tool
Call the tool from your AI app to make purchases. Update thesrc/lib/agent.ts file with the following code:src/lib/agent.ts
Test the application
Start the application withnpm run all:dev. Then, navigate to http://localhost:3000.This will open the LangGraph Studio in a new tab. You can close it as we won’t
require it for testing the application.
Next steps
You have successfully added an authorization step to protect tool calling in asynchronous AI agents. For next steps:- Asynchronous Authorization docs.
- Learn more about the Client-Initiated Backchannel Authentication Flow.
- Learn how to Configure Rich Authorization Requests.
- Learn more about Auth0 Guardian Android SDK.
- Learn more about Auth0 Guardian iOS SDK.

