
Rust has picked up a lot of momentum since we last looked at it in 2015. Companies like Amazon and Microsoft have adopted it for a growing number of use cases. Microsoft, for example, sponsors the Actix project on GitHub, which is a general purpose open source actor framework based on Rust. The Actix project also maintains a RESTful API development framework, which is widely regarded as a fast and performant web framework. Although the project was temporarily on hold in early 2020, the project ownership has moved to a new maintainer, and development continues.
In this article, we will explore the actix-web web framework by writing a small CRUD API using it. Our API will be backed by a Postgres database using Diesel. Finally, we will implement authentication for our API using Auth0.
Getting Started
The first step is to install Rust and all related tools. The community supported method is using Rustup, so that's what we'll use in this tutorial. The installation instructions are available here. During installation, select the default option (which should amend $PATH to include cargo installation directory). We will then initialize an empty project using Cargo:
cargo init --bin rust-blogpost-auth-async
This will create a directory with the given name and a few files in it. Let’s open the Cargo.toml file and edit it to add all the packages that we need, the file should look like this:
[package]
name = "rust-blogpost-auth-async"
version = "0.1.0"
authors = ["First Last <no@gmail.com>"]
edition = "2018"

[dependencies]
actix-web = "2.0.0"
actix-web-httpauth = { git = "https://github.com/actix/actix-web-httpauth" }
chrono = { version = "0.4.10", features = ["serde"] }
derive_more = "0.99.2"
diesel = { version = "1.4.2", features = ["postgres","uuidv07", "r2d2", "chrono"] }
dotenv = "0.15.0"
futures = "0.3.1"
r2d2 = "0.8.8"
serde = "1.0"
serde_derive = "1.0"
serde_json = "1.0"
actix-service = "1.0.1"
alcoholic_jwt = "1.0.0"
reqwest = "0.9.22"
actix-rt = "1.0.0"
We will explain why we need these dependencies as we move forward. Rust has recently implemented two new features which we'll see in action in this application. As shown in Cargo.toml, we are using the 2018 edition of Rust that lets us use these two features in our project.
Setting Up the API
In this tutorial, we will build an API that has a single resource. Our API should be able to create new users given a JSON input, display a given user given their user id, delete by a given id, and list all users. Thus, we will have the following endpoints:
GET /users— returns all usersGET /users/{id}— returns the user with a given idPOST /users— takes in a JSON payload and creates a new user based on itDELETE /users/{id}— deletes the user with a given id
Cargo will create a barebone main.rs file for us. Let us edit that and add our dependencies, as shown below. For now, we depend only on the actix_web crate.
// src/main.rs

use actix_web::{web, App, HttpServer};
We will create four different routes in our application to handle the endpoints described previously. To keep our code well organized, we will put them in a different module called handlers and declare it in main.rs. We will define this module in the next section. Underneath the previous lines in main.rs, we will add the following:
mod handlers;
Now our main function, which is the primary entry point for our application, looks like this:
// src/main.rs

// dependencies here

// module declaration here

#[actix_rt::main]
async fn main() -> std::io::Result<()> {
    std::env::set_var("RUST_LOG", "actix_web=debug");

    // Start http server
    HttpServer::new(move || {
        App::new()
            .route("/users", web::get().to(handlers::get_users))
            .route("/users/{id}", web::get().to(handlers::get_user_by_id))
            .route("/users", web::post().to(handlers::add_user))
            .route("/users/{id}", web::delete().to(handlers::delete_user))
    })
    .bind("127.0.0.1:8080")?
    .run()
    .await
}
The first important point to note here is that we are returning a Result type from main. This enables us to use the ? operator in main, which bubbles any error returned by the associated function up to the caller.
The second thing to note is async/await. These are language-level constructs that add native support for yielding control from the current thread to some other thread that can run while the current one blocks.
These are the two features mentioned earlier that we're able to use because we specified the 2018 version of Rust in Cargo.toml.
Notice the use of the annotation #[actix_rt::main] in our main function. Actix actors need a runtime that will schedule and run those actors. This is achieved using the actix_rt crate. We mark our main function to be executed by the actix runtime using the actix_rt::main attribute. In our main, we instantiate a HttpServer, add an App to it and run it on localhost on a given port. We add a few route handlers in our App, each pointing to a designated handler function in our handlers module.
The next step is to write the handlers module. It is located in a different file called handlers.rs. We will first create it from our shell with:
touch src/handlers.rs
We can then paste the following code in that file, which should look like:
// src/handlers.rs

use actix_web::Responder;

pub async fn get_users() -> impl Responder {
    format!("hello from get users")
}

pub async fn get_user_by_id() -> impl Responder {
    format!("hello from get users by id")
}

pub async fn add_user() -> impl Responder {
    format!("hello from add user")
}

pub async fn delete_user() -> impl Responder {
    format!("hello from delete user")
}
As expected, we have four handler functions for our four routes. Each of those are designated as async functions returning something that implements the Responder trait in actix-web. For now, our handlers are simple; they just return a fixed string. We will later modify the handlers to implement interactions with a backing database.
Let’s run the project using cargo:
cargo run

Finished dev [unoptimized + debuginfo] target(s) in 0.49s
Running `target/debug/actix-diesel-auth`
In another terminal, we can use curl to access the API once it's done compiling
curl 127.0.0.1:8080/users
hello from get users

curl -X POST 127.0.0.1:8080/users
hello from add user
Connecting with a Postgres Database
The most popular framework for working with database interactions from Rust applications is Diesel, which provides a type-safe abstraction over SQL. We will use Diesel to connect our API to a backing Postgres database. We will use another crate called R2D2 for connection pooling.
Let us modify the main.rs file and add the changes. Like last time, we will start with declaring our dependencies:
// src/main.rs

#[macro_use]
extern crate diesel;

use actix_web::{dev::ServiceRequest, web, App, Error, HttpServer};
use diesel::prelude::*;
use diesel::r2d2::{self, ConnectionManager};
We will use separate modules for functionalities to be able to maintain a clean separation of concern. Thus, we will need to declare those modules in main.rs
// src/main.rs

mod errors;
mod handlers;
mod models;
mod schema;
We then define a custom type for the connection pool. This step is purely for convenience. If we do not do this, we will need to use the complete type signature later.
// src/main.rs

pub type Pool = r2d2::Pool<ConnectionManager<PgConnection>>;
We can now move on to our main function
// src/main.rs

// dependencies here

// module declarations here

// type declarations here

#[actix_rt::main]
async fn main() -> std::io::Result<()> {
    dotenv::dotenv().ok();
    std::env::set_var("RUST_LOG", "actix_web=debug");
    let database_url = std::env::var("DATABASE_URL").expect("DATABASE_URL must be set");


    // create db connection pool
    let manager = ConnectionManager::<PgConnection>::new(database_url);
    let pool: Pool = r2d2::Pool::builder()
        .build(manager)
        .expect("Failed to create pool.");

    // Start http server
    HttpServer::new(move || {
        App::new()
            .data(pool.clone())
            .route("/users", web::get().to(handlers::get_users))
            .route("/users/{id}", web::get().to(handlers::get_user_by_id))
            .route("/users", web::post().to(handlers::add_user))
            .route("/users/{id}", web::delete().to(handlers::delete_user))
    })
    .bind("127.0.0.1:8080")?
    .run()
    .await
}
The most important change since the previous version is passing in the database connection pool to each of the handlers via a .data(pool.clone()) call. This enables the handler functions to interact with the database independently. We also need database connection information, which we get from an environment variable called DATABASE_URL. Our main function tries to get the value of that variable and aborts if it is not set. Since our API always needs a backing database, this is an irrecoverable error for us.
We will use a file named .env to load our environment variables. Let us create it from our shell
touch .env
The next step is to put our environment variable named DATABASE_URL in the file. It should look like:
cat .env
DATABASE_URL=postgres://username:password@localhost/auth0_demo?sslmode=disable
Note
Note Make sure you have PostgreSQL installed before running the next command. This is a great resource for setting up PostgreSQL on Mac.
Diesel needs its own setup steps. For that, we will need to start with installing the diesel CLI:
cargo install diesel_cli --no-default-features --features postgres
Note
If you run into an error here, make sure you've added Cargo's bin directory in your system's
PATHenvironment variable. You can do this by runningsource $HOME/.cargo/envin the terminal.
Here we tell diesel to install only postgres specific configuration since we are only interested in PostgreSQL as a database. Diesel needs its own configuration file, which can be generated using the CLI:
diesel setup
This command will generate the database named auth0_demo if it does not exist. Notice the new directory, migrations, that was created. Also notice a file called diesel.toml in the project root directory, which should look like this:
# For documentation on how to configure this file,
# see diesel.rs/guides/configuring-diesel-cli

[print_schema]
file = "src/schema.rs"
This file can be used to configure diesel's behavior. In our case, we use it to tell diesel where to write the schema file when we run the print-schema command using diesel CLI, as we will do later.
The next step now is to add our migrations using the CLI:
diesel migration generate add_users
This will create a new directory in the migrations directory with two empty files in it. By default, the directory will be named based on the current date and the name of the revision. In our case, it is called 2019-10-30-141014_add_users. The directory will have two empty files named up.sql and down.sql. We will first edit up.sql to add SQL to create our table, and it should look like this:
CREATE TABLE users (
  id SERIAL NOT NULL PRIMARY KEY,
  first_name TEXT NOT NULL,
  last_name TEXT NOT NULL,
  email TEXT NOT NULL,
  created_at TIMESTAMP NOT NULL
);
The other file is used when diesel needs to reverse a migration. It should undo whatever we do in up.sql. In our case, it simply removes the table:
-- This file should undo anything in `up.sql`
DROP TABLE users;
Having done all that, we are at a position we can define our model and schema. For our case, the model is in a file called models.rs in the src directory. We start with the necessary imports and then define our model for a user stored in the database.
Create that file now and paste in the following:
// src/models.rs

use crate::schema::*;
use serde::{Deserialize, Serialize};

#[derive(Debug, Serialize, Deserialize, Queryable)]
pub struct User {
    pub id: i32,
    pub first_name: String,
    pub last_name: String,
    pub email: String,
    pub created_at: chrono::NaiveDateTime,
}
Our User struct closely resembles the SQL we wrote to create the users table.
// src/models.rs

#[derive(Insertable, Debug)]
#[table_name = "users"]
pub struct NewUser<'a> {
    pub first_name: &'a str,
    pub last_name: &'a str,
    pub email: &'a str,
    pub created_at: chrono::NaiveDateTime,
}
We use different structures to represent input to the database, NewUser is used while inserting a user to the users table. In this case, the user id is automatically generated by the database. The User struct is used to query a user from the database. Consequently, NewUser derives Insertable and User derives Queryable.
With this information, diesel can automatically generate the schema it needs in a file called schema.rs. Run the following command to generate it:
diesel print-schema > src/schema.rs
In our case, the schema file looks like this:
// src/schema.rs

table! {
    users (id) {
        id -> Int4,
        first_name -> Text,
        last_name -> Text,
        email -> Text,
        created_at -> Timestamp,
    }
}
We can now move on to our handlers where we will add necessary functionality to interact with the database. Like the previous cases, we start with declaring our dependencies:
// src/handlers.rs

use super::models::{NewUser, User};
use super::schema::users::dsl::*;
use super::Pool;
use crate::diesel::QueryDsl;
use crate::diesel::RunQueryDsl;
use actix_web::{web, Error, HttpResponse};
use diesel::dsl::{delete, insert_into};
use serde::{Deserialize, Serialize};
use std::vec::Vec;
We define a new struct here to represent a user as input JSON to our API. Notice that this struct does not have the id which is generated by the database or created_at, which we generate before inserting the record. At this point, we should delete everything in the handlers.rs file to replace with code as shown in this section.
// src/handlers.rs

#[derive(Debug, Serialize, Deserialize)]
pub struct InputUser {
    pub first_name: String,
    pub last_name: String,
    pub email: String,
}
We can now write the individual handlers, starting with GET /users that returns all the users in the database.
// src/handlers.rs

// dependencies here

// Handler for GET /users
pub async fn get_users(db: web::Data<Pool>) -> Result<HttpResponse, Error> {
    Ok(web::block(move || get_all_users(db))
        .await
        .map(|user| HttpResponse::Ok().json(user))
        .map_err(|_| HttpResponse::InternalServerError())?)
}

fn get_all_users(pool: web::Data<Pool>) -> Result<Vec<User>, diesel::result::Error> {
    let conn = pool.get().unwrap();
    let items = users.load::<User>(&conn)?;
    Ok(items)
}
We have moved all database interactions to a helper function to keep the code cleaner. In our handler, we block on the helper function and return the results if there were no errors. In case of an error, we return a InternalServerError. The helper function gets a reference to the connection pool and uses diesel to load all users, which it returns back to the caller as a Result.
The rest of the handlers are similar in construction.
// src/handlers.rs

// dependencies here

// Handler for GET /users/{id}
pub async fn get_user_by_id(
    db: web::Data<Pool>,
    user_id: web::Path<i32>,
) -> Result<HttpResponse, Error> {
    Ok(
        web::block(move || db_get_user_by_id(db, user_id.into_inner()))
            .await
            .map(|user| HttpResponse::Ok().json(user))
            .map_err(|_| HttpResponse::InternalServerError())?,
    )
}

// Handler for POST /users
pub async fn add_user(
    db: web::Data<Pool>,
    item: web::Json<InputUser>,
) -> Result<HttpResponse, Error> {
    Ok(web::block(move || add_single_user(db, item))
        .await
        .map(|user| HttpResponse::Created().json(user))
        .map_err(|_| HttpResponse::InternalServerError())?)
}

// Handler for DELETE /users/{id}
pub async fn delete_user(
    db: web::Data<Pool>,
    user_id: web::Path<i32>,
) -> Result<HttpResponse, Error> {
    Ok(
        web::block(move || delete_single_user(db, user_id.into_inner()))
            .await
            .map(|user| HttpResponse::Ok().json(user))
            .map_err(|_| HttpResponse::InternalServerError())?,
    )
}

fn db_get_user_by_id(pool: web::Data<Pool>, user_id: i32) -> Result<User, diesel::result::Error> {
    let conn = pool.get().unwrap();
    users.find(user_id).get_result::<User>(&conn)
}

fn add_single_user(
    db: web::Data<Pool>,
    item: web::Json<InputUser>,
) -> Result<User, diesel::result::Error> {
    let conn = db.get().unwrap();
    let new_user = NewUser {
        first_name: &item.first_name,
        last_name: &item.last_name,
        email: &item.email,
        created_at: chrono::Local::now().naive_local(),
    };
    let res = insert_into(users).values(&new_user).get_result(&conn)?;
    Ok(res)
}

fn delete_single_user(db: web::Data<Pool>, user_id: i32) -> Result<usize, diesel::result::Error> {
    let conn = db.get().unwrap();
    let count = delete(users.find(user_id)).execute(&conn)?;
    Ok(count)
}
Lastly, we will need to implement our custom errors in a new file, src/errors.rs. The errors module looks like this:
// src/errors.rs

use actix_web::{error::ResponseError, HttpResponse};
use derive_more::Display;

#[derive(Debug, Display)]
pub enum ServiceError {
    #[display(fmt = "Internal Server Error")]
    InternalServerError,

    #[display(fmt = "BadRequest: {}", _0)]
    BadRequest(String),

    #[display(fmt = "JWKSFetchError")]
    JWKSFetchError,
}

// impl ResponseError trait allows to convert our errors into http responses with appropriate data
impl ResponseError for ServiceError {
    fn error_response(&self) -> HttpResponse {
        match self {
            ServiceError::InternalServerError => {
                HttpResponse::InternalServerError().json("Internal Server Error, Please try later")
            }
            ServiceError::BadRequest(ref message) => HttpResponse::BadRequest().json(message),
            ServiceError::JWKSFetchError => {
                HttpResponse::InternalServerError().json("Could not fetch JWKS")
            }
        }
    }
}
At the top level, we have a generic ServiceError that defines all possible errors from our API. We also define a few specific error cases like ServiceError::InternalServerError, ServiceError::BadRequest and ServiceError::JWKSFetchError that we use in our handlers. Actix semantics requires us to implement ResponseError for our custom error wrapper so that we can return those errors from our handlers as HTTP responses.
We have changed our handlers to return a Result where the success case is a HttpResponse, and the error case is a generic Error. In each of the handlers, we asynchronously call a function that actually interacts with the database. We map the result to an appropriate HttpResponse resulting in a status being sent back to the client. The error case is always marked by an internal server error.
Having setup our application, navigate to the project directory in a terminal window. We will then apply our database migration using the following command:
diesel migration run
Now we are ready to run our application using the following command:
cargo run
We should now be able to interact with this API again using curl in another terminal:
curl -v -H "Content-Type: application/json"  -X POST -d '{"first_name": "foo1", "last_name": "bar1", "email": "foo1@bar.com"}' 127.0.0.1:8080/users

* Trying 127.0.0.1...
* TCP_NODELAY set
* Connected to 127.0.0.1 (127.0.0.1) port 8080 (#0)
> POST /users HTTP/1.1
> Host: 127.0.0.1:8080
> User-Agent: curl/7.64.1
> Accept: */*
>
< HTTP/1.1 200 OK
< content-length: 229
< content-type: application/json
< date: Mon, 13 Jan 2020 11:03:37 GMT
<
* Connection #0 to host 127.0.0.1 left intact
{"id":10,"first_name":"foo1","last_name":"bar1","email":"foo1@bar.com","created_at":"2019-10-31T11:20:58.710236"}* Closing connection 0

curl -v 127.0.0.1:8080/users

*   Trying 127.0.0.1...
* TCP_NODELAY set
* Connected to 127.0.0.1 (127.0.0.1) port 8080 (#0)
> GET /users HTTP/1.1
> Host: 127.0.0.1:8080
> User-Agent: curl/7.64.1
> Accept: */*
>
< HTTP/1.1 200 OK
< content-length: 229
< content-type: application/json
< date: Mon, 13 Jan 2020 11:10:10 GMT
<
* Connection #0 to host 127.0.0.1 left intact
[{"id":10,"first_name":"foo1","last_name":"bar1","email":"foo1@bar.com","created_at":"2019-10-31T11:20:58.710236"}]* Closing connection 0
Securing the API
The next step now is to implement JWT based authentication for our API. We will use Auth0 as our authentication provider. Let's start with creating a new Auth0 tenant. First, sign up for a free Auth0 account, click on "Create Application", choose a name, select "Regular web application", and press "Create"." The next step is to create a new API for our application. Click on "APIs", then "Create API", choose a name and a domain identifier and click create.
Try out the most powerful authentication platform for free.
Get started →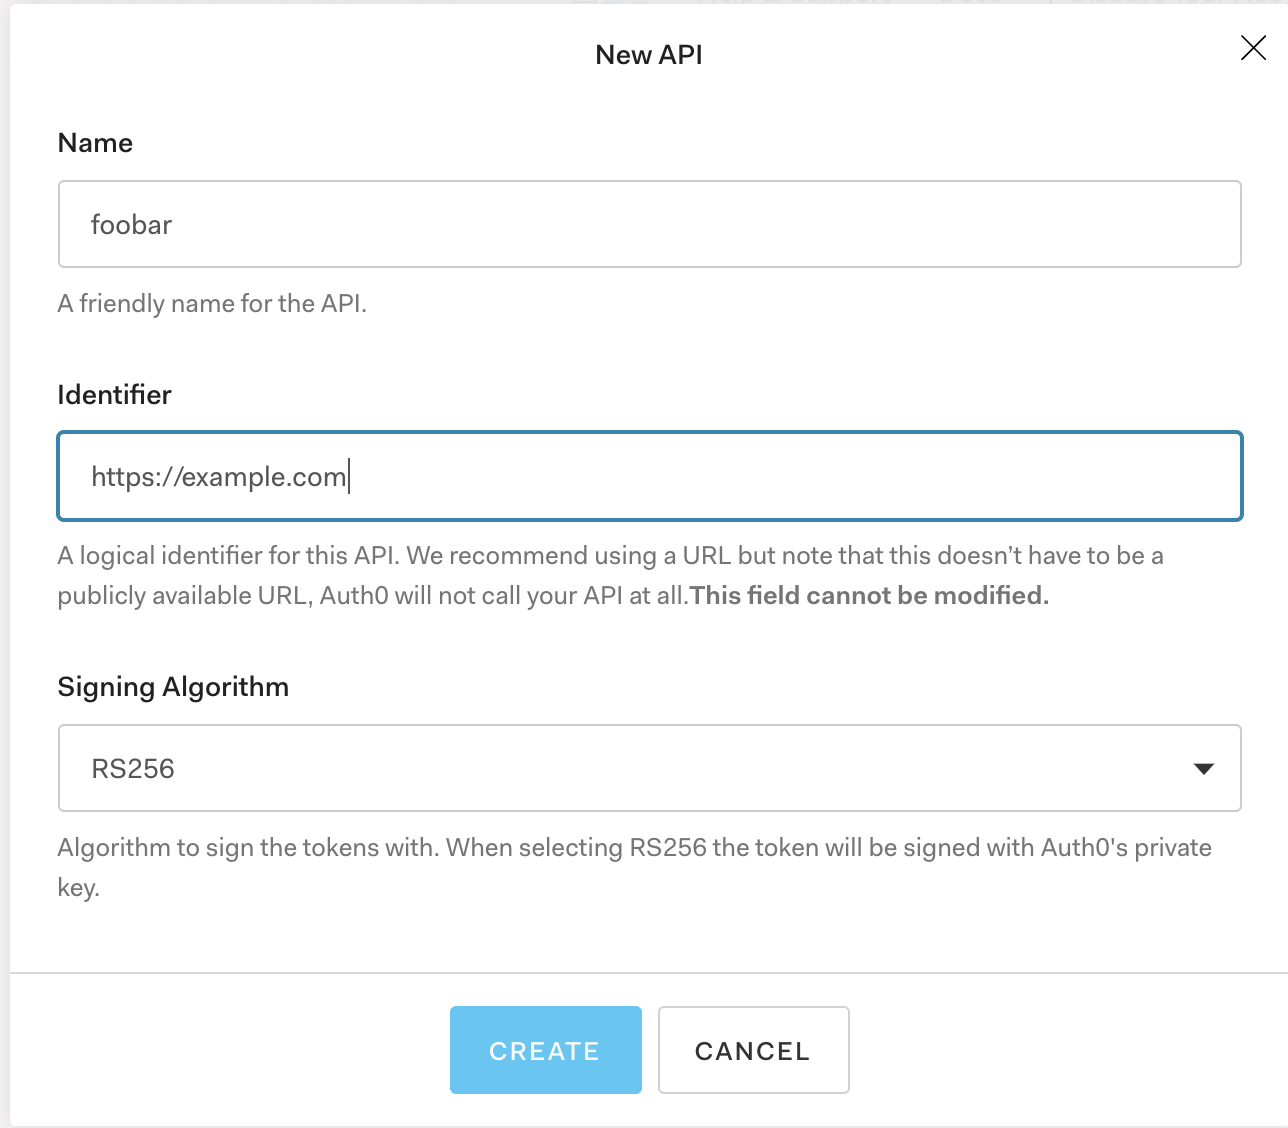
Please keep this tab open in your browser since we will need the authentication token from here later. Since we want to implement bearer-based authentication, we will send this token in an Authorization header.
In our code, we will use another supporting crate, actix_web_httpauth, that provides an actix middleware, making it simple to add authentication to any actix based API. The middleware requires us to provide a validator function which takes in the incoming request and the token in the Authorization header. It returns back the request for further processing by other middlewares and any error. In our case, the errors will indicate authentication failure and send back a 401. It looks like this:
// src/main.rs

use actix_web_httpauth::extractors::bearer::{BearerAuth, Config};
use actix_web_httpauth::extractors::AuthenticationError;
use actix_web_httpauth::middleware::HttpAuthentication;

async fn validator(req: ServiceRequest, credentials: BearerAuth) -> Result<ServiceRequest, Error> {
    let config = req
        .app_data::<Config>()
        .map(|data| data.get_ref().clone())
        .unwrap_or_else(Default::default);
    match auth::validate_token(credentials.token()) {
        Ok(res) => {
            if res == true {
                Ok(req)
            } else {
                Err(AuthenticationError::from(config).into())
            }
        }
        Err(_) => Err(AuthenticationError::from(config).into()),
    }
}
Our main function is changed to include the middleware and looks like this:
// src/main.rs

// dependencies here

mod auth;

HttpServer::new(move || {
        let auth = HttpAuthentication::bearer(validator);
        App::new()
            .wrap(auth)
            .data(pool.clone())
            .route("/users", web::get().to(handlers::get_users))
            .route("/users/{id}", web::get().to(handlers::get_user_by_id))
            .route("/users", web::post().to(handlers::add_user))
            .route("/users/{id}", web::delete().to(handlers::delete_user))
})
.bind("127.0.0.1:8080")?
.run()
.await
We delegate actual token validation to a helper function in a module called auth. Create a new file, src/auth.rs, and paste in the following:
// src/auth.rs

use crate::errors::ServiceError;
use alcoholic_jwt::{token_kid, validate, Validation, JWKS};
use serde::{Deserialize, Serialize};
use std::error::Error;

#[derive(Debug, Serialize, Deserialize)]
struct Claims {
    sub: String,
    company: String,
    exp: usize,
}

pub fn validate_token(token: &str) -> Result<bool, ServiceError> {
    let authority = std::env::var("AUTHORITY").expect("AUTHORITY must be set");
    let jwks = fetch_jwks(&format!("{}{}", authority.as_str(), ".well-known/jwks.json"))
        .expect("failed to fetch jwks");
    let validations = vec![Validation::Issuer(authority), Validation::SubjectPresent];
    let kid = match token_kid(&token) {
        Ok(res) => res.expect("failed to decode kid"),
        Err(_) => return Err(ServiceError::JWKSFetchError),
    };
    let jwk = jwks.find(&kid).expect("Specified key not found in set");
    let res = validate(token, jwk, validations);
    Ok(res.is_ok())
}
The validate_token function takes in a token as string and returns either a bool, indicating whether validation passed or failed, or a ServiceError. In this case, our validation is simple. We just validate the domain in the token and if subject is not empty. We will need to download the JWKS to validate our token, which we do in a separate function. It uses reqwest to issue a GET to a given remote URI.
Paste the following function below validate_token in the same file. This function downloads the jwks keys from Auth0 to validate our token.
// src/auth.rs

fn fetch_jwks(uri: &str) -> Result<JWKS, Box<dyn Error>> {
    let mut res = reqwest::get(uri)?;
    let val = res.json::<JWKS>()?;
    return Ok(val);
}
Before we start, we will need to add another environment variable to our environments file. This will represent the domain we want to validate our token against. Any token that is not issued by this domain should fail validation. In our validation function, we get that domain and fetch the set of keys to validate our token from Auth0. We then use another crate called alcoholic_jwt for the actual validation. Finally, we return a boolean indicating the validation result.
Here is how the .env file should look at this point:
// .env

DATABASE_URL=postgres://localhost/auth0_demo?sslmode=disable
AUTHORITY=https://example.com/
Note the trailing slash at the end of the URL in AUTHORITY. This slash is necessary to be able to generate the well known JWKS URL correctly. We can finally run an end-to-end test. For this, we will again use curl. Let us run the API in a terminal and use another terminal to access it:
curl -v 127.0.0.1:8080/users

* Trying 127.0.0.1...
* TCP_NODELAY set
* Connected to 127.0.0.1 (127.0.0.1) port 8080 (#0)
> GET /users HTTP/1.1
> Host: 127.0.0.1:8080
> User-Agent: curl/7.64.1
> Accept: */*
>
< HTTP/1.1 401 Unauthorized
< content-length: 0
< www-authenticate: Bearer
< date: Mon, 13 Jan 2020 11:59:21 GMT
<
* Connection #0 to host 127.0.0.1 left intact
* Closing connection 0
As expected, this failed with a 401 Unauthorized error since we did not include a token in our request. If we set our token to a variable called TOKEN and use to to request again, this time our API sends back the expected results with a 200 status code. Go back to the Auth0 dashboard and copy the token from the test tab.

Then and set it to an environment variable, as shown below:
export TOKEN=yourtoken
curl -H "Authorization: Bearer $TOKEN" -v 127.0.0.1:8080/users

* Trying 127.0.0.1...
* TCP_NODELAY set
* Connected to 127.0.0.1 (127.0.0.1) port 8080 (#0)
> GET /users HTTP/1.1
> Host: 127.0.0.1:8080
> User-Agent: curl/7.64.1
> Accept: */*
> Authorization: Bearer ****
>
< HTTP/1.1 200 OK
< content-length: 229
< content-type: application/json
< date: Mon, 13 Jan 2020 12:00:58 GMT
<
* Connection #0 to host 127.0.0.1 left intact
[{"id":10,"first_name":"foo1","last_name":"bar1","email":"foo1@bar.com","created_at":"2019-10-31T11:20:58.710236"},{"id":11,"first_name":"foo2","last_name":"bar2","email":"foo1@bar.com","created_at":"2020-01-13T11:03:29.489640"}]* Closing connection 0
Summary
In this article, we wrote a simple CRUD API based on actix-web using Rust. We implemented authentication using Auth0 and some simple token validation. This should give you a good start at implementing your own APIs based on actix. The sample code is located here. Please let me know if you have any questions in the comments below.
Related Documentation
About the author

Abhishek Chanda
Senior Systems Engineer (Auth0 Alumni)