
Getting Started
In this tutorial, you'll learn how to create a simple Laravel API and add authorization to it using Auth0. You can find the final code in this GitHub repository.
👋 If you already have a Laravel API that you want to secure, you can go ahead and skip to the "Secure your Laravel API" section.
Prerequisites
This tutorial uses the latest version of Laravel at the time of writing (v8). I will assume you have some basic knowledge of Laravel. If you're new to Laravel, Build a Laravel CRUD Application with Authentication may be a better primer for you!
You'll also need the following:
- Composer
- PHP >=
7.3 - A free Auth0 account
What you'll build
You'll be building a simple API with a single /comment resource. The API should allow anyone to view comments. However, only authorized users should be able to create, update, or delete a comment.
Public endpoints:
GET /comments— Return all commentsGET /comments/{id}— Return the comment with the specifiedid
Private endpoints:
POST /comments— Add a new commentPUT /comments/{id}— Update the comment with the specifiedidDELETE /comments/{id}— Delete the comment with the specifiedid
Setting Up Your Laravel Application
Installation
First, start by creating your new Laravel application. Make sure you have Composer installed, and then run the following:
composer create-project laravel/laravel laravel-api-auth
cd laravel-api-auth
php artisan serve
You can now view your starter Laravel application at http://localhost:8000!
👩💻 Tip: There are several other options for starting a new Laravel project. You can now even run your Laravel project with Docker using the brand new Laravel Sail.
Sign up for Auth0
Next, you need to sign up for a free Auth0 account if you don't already have one.
Your free account allows you to easily add authentication and authorization to your applications. You'll also have access to:
- 7,000 free active users and unlimited logins
- Auth0 Universal Login for Web, iOS & Android
- Up to 2 social identity providers like Google, GitHub, and Twitter
- Unlimited Serverless Rules to customize and extend Auth0's capabilities
You'll go through a short sign-up process where you'll create your Auth0 tenant. Once you've finished, leave the dashboard open, as you'll be revisiting it soon.
Create the Database
For this tutorial, you'll be using SQLite as the database. In your terminal, run:
touch database/database.sqlite
This will create the .sqlite file at database/database.sqlite. Next, open up .env and find the section that specifies the database. Update it as follows:
DB_CONNECTION=sqlite
DB_DATABASE=/absolute/path/to/database.sqlite
Note: You need to use the absolute path to the
database.sqlitefile you just created as the value forDB_DATABASE. You can usually get this by right-clicking the file in your code editor and clicking "Copy path".
Models, Migrations, Factories, and Seeding
Next, you need to set up the Comment model, migration, factory, and seeder. You can do this all with one command, but let's go over each individually.
👩💻 Tip: To create a model, factory, migration, seeder, and controller all with a single Artisan command:
php artisan make:model Comment -mfsc
Create Comment model
In your terminal, run the following:
php artisan make:model Comment
Open up the model file that was created at app/Models/Comment.php and replace it with the following:
<?php

namespace App\Models;

use Illuminate\Database\Eloquent\Factories\HasFactory;
use Illuminate\Database\Eloquent\Model;

class Comment extends Model
{
  use HasFactory;

  protected $fillable = [
    'name',
    'text'
  ];
}
In Laravel, the model name is written in singular camel-case. This way, it can be automatically matched up to its corresponding database table, which is assumed to be singular snake-case.
In other words, the Comment model corresponds to the comments table in the database.
A comment in this API is very simple. It will have the following attributes:
id— Primary keycreated_at— Comment creation dateupdated_at— Comment updated datename— Name of the commentertext— Comment text
You'll notice that only name and text are listed as fillable, with no mention of the other attributes. This is because Laravel assumes that id, created_at, and updated_at exist in your table and will automatically update them when a model is created.
👩💻 Tip: If you don't want an auto-incrementing primary key, set
public $incrementing = false;. If you don't want automatic timestamps, setpublic $timestamps = false;.
Create Comment migration
Next, it's time to create the migration. In your terminal, run the following:
php artisan make:migration create_comments_table
This will create a new file in the database/migrations directory. The filename will start with the timestamp of when the file was created, followed by create_comments_table.php. When you run your migrations, they'll be run based on the timestamp from earliest to most recent.
Open the file up and replace it with the following:
<?php

use Illuminate\Database\Migrations\Migration;
use Illuminate\Database\Schema\Blueprint;
use Illuminate\Support\Facades\Schema;

class CreateCommentsTable extends Migration
{
  /**
    * Run the migrations.
    *
    * @return void
    */
  public function up()
  {
    Schema::create('comments', function (Blueprint $table) {
      $table->id();
      $table->timestamps(); // created_at and updated_at
      $table->string('name');
      $table->string('text');
    });
  }

  /**
    * Reverse the migrations.
    *
    * @return void
    */
  public function down()
  {
    Schema::dropIfExists('comments');
  }
}
Here, you're using the Schema facade with the create method to create the comments table in the database. You're then able to define the table columns using the schema builder's column methods. In this case, you're creating the id, created_at, updated_at, name, and text columns. The last two will get a type of string.
Now, run the migration in your terminal with:
php artisan migrate
Comment seeder
When you're testing your application, it's helpful to have some mock data in your database. This is where the seeder comes into play. By creating a seeder, you can easily add mock data to your database with a single command.
In a large application, you can create separate seeder files for every model by running php artisan make:seeder CommentSeeder. For our purposes, putting the seeder in the main DatabaseSeeder.php file is fine.
Open up /database/seeders/DatabaseSeeder.php and update it as follows:
<?php

namespace Database\Seeders;

use Illuminate\Database\Seeder;
use App\Models\Comment;

class DatabaseSeeder extends Seeder
{
  /**
    * Seed the application's database.
    *
    * @return void
    */
  public function run()
  {
    Comment::factory()
      ->times(3)
      ->create();
  }
}
When you run the seeder, the run method will execute, which is where the mock data is created. Instead of manually creating mock data for every table, you can use Eloquent model factories to define the guidelines for this mock data. Let's define the factory now.
Create Comment factory
Create your Comment factory by running the following:
php artisan make:factory CommentFactory
Open up the newly generated factory file in database/factories/CommentFactory.php and replace it with the following:
<?php

namespace Database\Factories;

use App\Models\Comment;
use Illuminate\Database\Eloquent\Factories\Factory;
use Illuminate\Support\Str;

class CommentFactory extends Factory
{
  /**
    * The name of the factory's corresponding model.
    *
    * @var string
    */
  protected $model = Comment::class;

  /**
    * Define the model's default state.
    *
    * @return array
    */
  public function definition()
  {
    return [
      'name' => $this->faker->name,
      'text' => $this->faker->text()
    ];
  }
}
In the definition method, you're returning the two attributes, name and text, with their mock data. The mock data is generated using the PHP Faker library.
Back in the DatabaseSeeder.php file, you have this run method:
public function run()
{
  Comment::factory()
    ->times(3)
    ->create();
}
Now, when you run the seeder, it will run this Comment model factory three times, thus creating three entries in the comments table.
Let's test it out now by running the following:
php artisan db:seed
To confirm that it was created, you can use Tinker, which allows you to interact with your Laravel application from the command line.
In your terminal, run:
php artisan tinker
This will open up Tinker. Next, enter:
App\Models\Comment::all()
This will return the Eloquent collection with existing comments:
Illuminate\Database\Eloquent\Collection {
  all: [
    App\Models\Comment {#4262
      id: "1",
      created_at: "2020-12-08 19:57:33",
      updated_at: "2020-12-08 19:57:33",
      name: "Eleonore Kohler",
      text: "Dolor rerum saepe rerum pariatur. Corporis eos unde eveniet itaque aut omnis voluptas.",
    },
    App\Models\Comment {#4263
      id: "2",
      created_at: "2020-12-08 20:01:32",
      updated_at: "2020-12-08 20:01:32",
      name: "Mr. Alfonso Schmidt",
      text: "Iste dolores reiciendis eius dolorem dolorem qui et mollitia. Vel deserunt ea deleniti ipsam fugiat. Velit assumenda odio ipsum qui nisi voluptatem molestiae.",
    },
    App\Models\Comment {#4264
         id: "3",
         created_at: "2020-12-08 21:56:52",
         updated_at: "2020-12-08 21:56:52",
         name: "Ms. Destany Kozey DDS",
         text: "Rem reprehenderit voluptas quasi est ea. Quibusdam accusamus et dolores porro veritatis quo eos. Et beatae et voluptatem voluptatem aperiam dolores fugit.",
       },
     ],
  ]
}
You can exit Tinker by typing in exit.
Now that all the heavy lifting is done, let's set up the API!
Create the Comment Controller
First, you need to create the Comment controller. In your terminal, run the following:
php artisan make:controller API/CommentController --resource
This will create a new file at app/Http/Controllers/API/CommentController.php, complete with all of the methods you'll need.
Open this up now and update it as follows:
<?php

namespace App\Http\Controllers\API;

use App\Http\Controllers\Controller;
use App\Models\Comment;
use Illuminate\Http\Request;

class CommentController extends Controller
{
  /**
    * Display a listing of the resource.
    *
    * @return \Illuminate\Http\Response
    */
  public function index()
  {
    $comments = Comment::all();
    return response()->json($comments);
  }

  /**
    * Store a newly created resource in storage.
    *
    * @param  \Illuminate\Http\Request  $request
    * @return \Illuminate\Http\Response
    */
  public function store(Request $request)
  {
    $request->validate([
      'name' => 'required|max:255',
      'text' => 'required'
    ]);

    $newComment = new Comment([
      'name' => $request->get('name'),
      'text' => $request->get('text')
    ]);

    $newComment->save();

    return response()->json($newComment);
  }

  /**
    * Display the specified resource.
    *
    * @param  int  $id
    * @return \Illuminate\Http\Response
    */
  public function show($id)
  {
    $comment = Comment::findOrFail($id);
    return response()->json($comment);
  }

  /**
    * Update the specified resource in storage.
    *
    * @param  \Illuminate\Http\Request  $request
    * @param  int  $id
    * @return \Illuminate\Http\Response
    */
  public function update(Request $request, $id)
  {
    $comment = Comment::findOrFail($id);

    $request->validate([
      'name' => 'required|max:255',
      'text' => 'required'
    ]);

    $comment->name = $request->get('name');
    $comment->text = $request->get('text');

    $comment->save();

    return response()->json($comment);
  }

  /**
    * Remove the specified resource from storage.
    *
    * @param  int  $id
    * @return \Illuminate\Http\Response
    */
  public function destroy($id)
  {
    $comment = Comment::findOrFail($id);
    $comment->delete();

    return response()->json($comment::all());
  }
}
Let's go over each method in this controller.
index() method:
public function index()
{
  $comments = Comment::all();
  return response()->json($comments);
}
This will be used to get all comments. You're using the Eloquent all() method on the Comment model, which will return all results in the comments table. Then, you're returning the comments as a JSON response.
store() method:
public function store(Request $request)
{
  $request->validate([
    'name' => 'required|max:255',
    'text' => 'required'
  ]);

  $newComment = new Comment([
    'name' => $request->get('name'),
    'text' => $request->get('text')
  ]);

  $newComment->save();

  return response()->json($newComment);
}
The store() method is used to create a new comment. You can use the validate() method to set validation rules for incoming requests. For this example, you're just setting name and text as required and limiting the name field to 255 characters. If the validation fails, the error will be automatically sent back to the view.
If the validation passes, a new comment is created and saved to the database. The new comment is then returned as a JSON response.
show(id) method:
public function show($id)
{
  $comment = Comment::findOrFail($id);
  return response()->json($comment);
}
The show() method is used to get a single comment. It accepts the id of the requested comment and then uses Eloquent's findOrFail() method to find the comment in the database.
update(id) method:
public function update(Request $request, $id)
{
  $comment = Comment::findOrFail($id);

  $request->validate([
    'name' => 'required|max:255',
    'text' => 'required'
  ]);

  $comment->name = $request->get('name');
  $comment->text = $request->get('text');

  $comment->save();

  return response()->json($comment);
}
The update() method is similar to store(), but instead of creating a new comment, you first grab the existing requested comment with findOrFail($id). You then validate the new request, update the existing comment if the request is valid, save it in the database, and return the updated comment.
destroy(id) method:
public function destroy($id)
{
  $comment = Comment::findOrFail($id);
  $comment->delete();

  return response()->json($Comment::all());
}
Finally, you have the destroy() method. This takes the id of the comment that is being deleted, finds the comment, deletes it, and returns all comments so that you can verify that the deleted comment no longer exists.
Create the API Routes
Finally, let's set up the API routes.
Open up routes/api.php and replace everything with the following:
<?php

use Illuminate\Http\Request;
use Illuminate\Support\Facades\Route;
use App\Http\Controllers\API\CommentController;

/*
|--------------------------------------------------------------------------
| API Routes
|--------------------------------------------------------------------------
|
| Here is where you can register API routes for your application. These
| routes are loaded by the RouteServiceProvider within a group which
| is assigned the "api" middleware group. Enjoy building your API!
|
*/

Route::apiResource('comments', CommentController::class);
Using Route::apiResource() here creates all of the routes needed to create, show, update, and delete comments.
You can see all of the routes in your application by running:
php artisan route:list

You'll also notice that everything is going in the api.php file instead of the commonly used web.php file. By placing the API routes in the api.php file, you get the following:
- An
/apiprefix, e.g.,yourdomain.com/api/comments - Throttle middleware is automatically applied
- No automatic session state and CSRF protection, like you would get with
routes/web.php
Next, let's test out the API to make sure everything works.
Testing your API
You can confirm that your API works correctly by using a tool such as Postman or testing from your terminal with cURL. I'll show the cURL commands first and then the Postman instructions at the end of the section if you prefer using that approach.
As a reminder, here are the API endpoints that were created:
GET https://localhost:8000/api/comments— Return all commentsGET https://localhost:8000/api/comments/{id}— Return the comment with the specifiedidPOST https://localhost:8000/api/comments— Add a new commentPUT https://localhost:8000/api/comments/{id}— Update the comment with the specifiedidDELETE https://localhost:8000/api/comments/{id}— Delete the comment with the specifiedid
cURL commands
Get all comments:
curl http://localhost:8000/api/comments -i
Response:
[
    {
        "id": 1,
        "created_at": "2021-03-03T21:31:36.000000Z",
        "updated_at": "2021-03-03T21:31:36.000000Z",
        "name": "Dee Sporer",
        "text": "Quod nam qui modi sunt. Illum ut delectus minima nisi corporis assumenda voluptate. Quaerat voluptate omnis vitae ex."
    },
    {
        "id": 2,
        "created_at": "2021-03-03T21:31:36.000000Z",
        "updated_at": "2021-03-03T21:31:36.000000Z",
        "name": "Lurline Schinner",
        "text": "Culpa blanditiis nihil quisquam minima nam. Rerum placeat vero corrupti nobis reiciendis accusantium necessitatibus. Maiores vel nesciunt voluptatum ex. Eveniet quidem aut neque."
    },
    {
        "id": 3,
        "created_at": "2021-03-03T21:31:36.000000Z",
        "updated_at": "2021-03-03T21:31:36.000000Z",
        "name": "Pete McClure MD",
        "text": "Amet impedit mollitia consectetur eveniet natus. Cumque perspiciatis debitis ratione est. Dolor expedita vitae recusandae ut quos earum."
    }
]
Get a single comment:
curl http://localhost:8000/api/comments/1 -i
Response:
{
    "id": 1,
    "created_at": "2021-03-03T21:31:36.000000Z",
    "updated_at": "2021-03-03T21:31:36.000000Z",
    "name": "Dee Sporer",
    "text": "Quod nam qui modi sunt. Illum ut delectus minima nisi corporis assumenda voluptate. Quaerat voluptate omnis vitae ex."
}
Create a comment:
curl -X POST -H 'Content-Type: application/json' -d '{
    "name": "Holly",
    "text": "You are the best!"
}' http://localhost:8000/api/comments -i
Response:
{
  "name": "Holly",
  "text": "You are the best!",
  "updated_at": "2021-03-03T23:16:31.000000Z",
  "created_at": "2021-03-03T23:16:31.000000Z",
  "id": 4
}
Update a comment:
curl -X PUT -H 'Content-Type: application/json' -d '{
  "name": "Holly",
  "text": "My updated comment"
}' http://localhost:8000/api/comments/4 -i
Response:
{
  "id": 4,
  "created_at": "2021-03-05T13:41:17.000000Z",
  "updated_at": "2021-03-05T13:51:40.000000Z",
  "name": "Holly",
  "text": "My updated comment"
}
Delete a comment:
curl -X DELETE http://localhost:8000/api/comments/4 -i
Response:
[
  {
    "id": 1,
    "created_at": "2021-03-05T14:27:49.000000Z",
    "updated_at": "2021-03-05T14:27:49.000000Z",
    "name": "Burdette Medhurst",
    "text": "Hic dolores minus illum modi consectetur. Qui est officia distinctio voluptatem at aut non. Sapiente perspiciatis nesciunt ea eos. Perferendis dolorem harum rerum magnam totam."
  },
  {
    "id": 2,
    "created_at": "2021-03-05T14:27:49.000000Z",
    "updated_at": "2021-03-05T14:27:49.000000Z",
    "name": "Keaton Wuckert",
    "text": "Id distinctio rerum tenetur et. Molestias excepturi aut labore enim. Vitae aperiam aut odit sed. Qui est sit cupiditate ut placeat sint nam."
  },
  {
    "id": 3,
    "created_at": "2021-03-05T14:27:49.000000Z",
    "updated_at": "2021-03-05T14:27:49.000000Z",
    "name": "Violet Kulas",
    "text": "Nostrum adipisci tempora tempore ad et. Quia minus odit rem. Non nihil maiores quidem eum molestiae voluptatem cum."
  }
]
Postman instructions
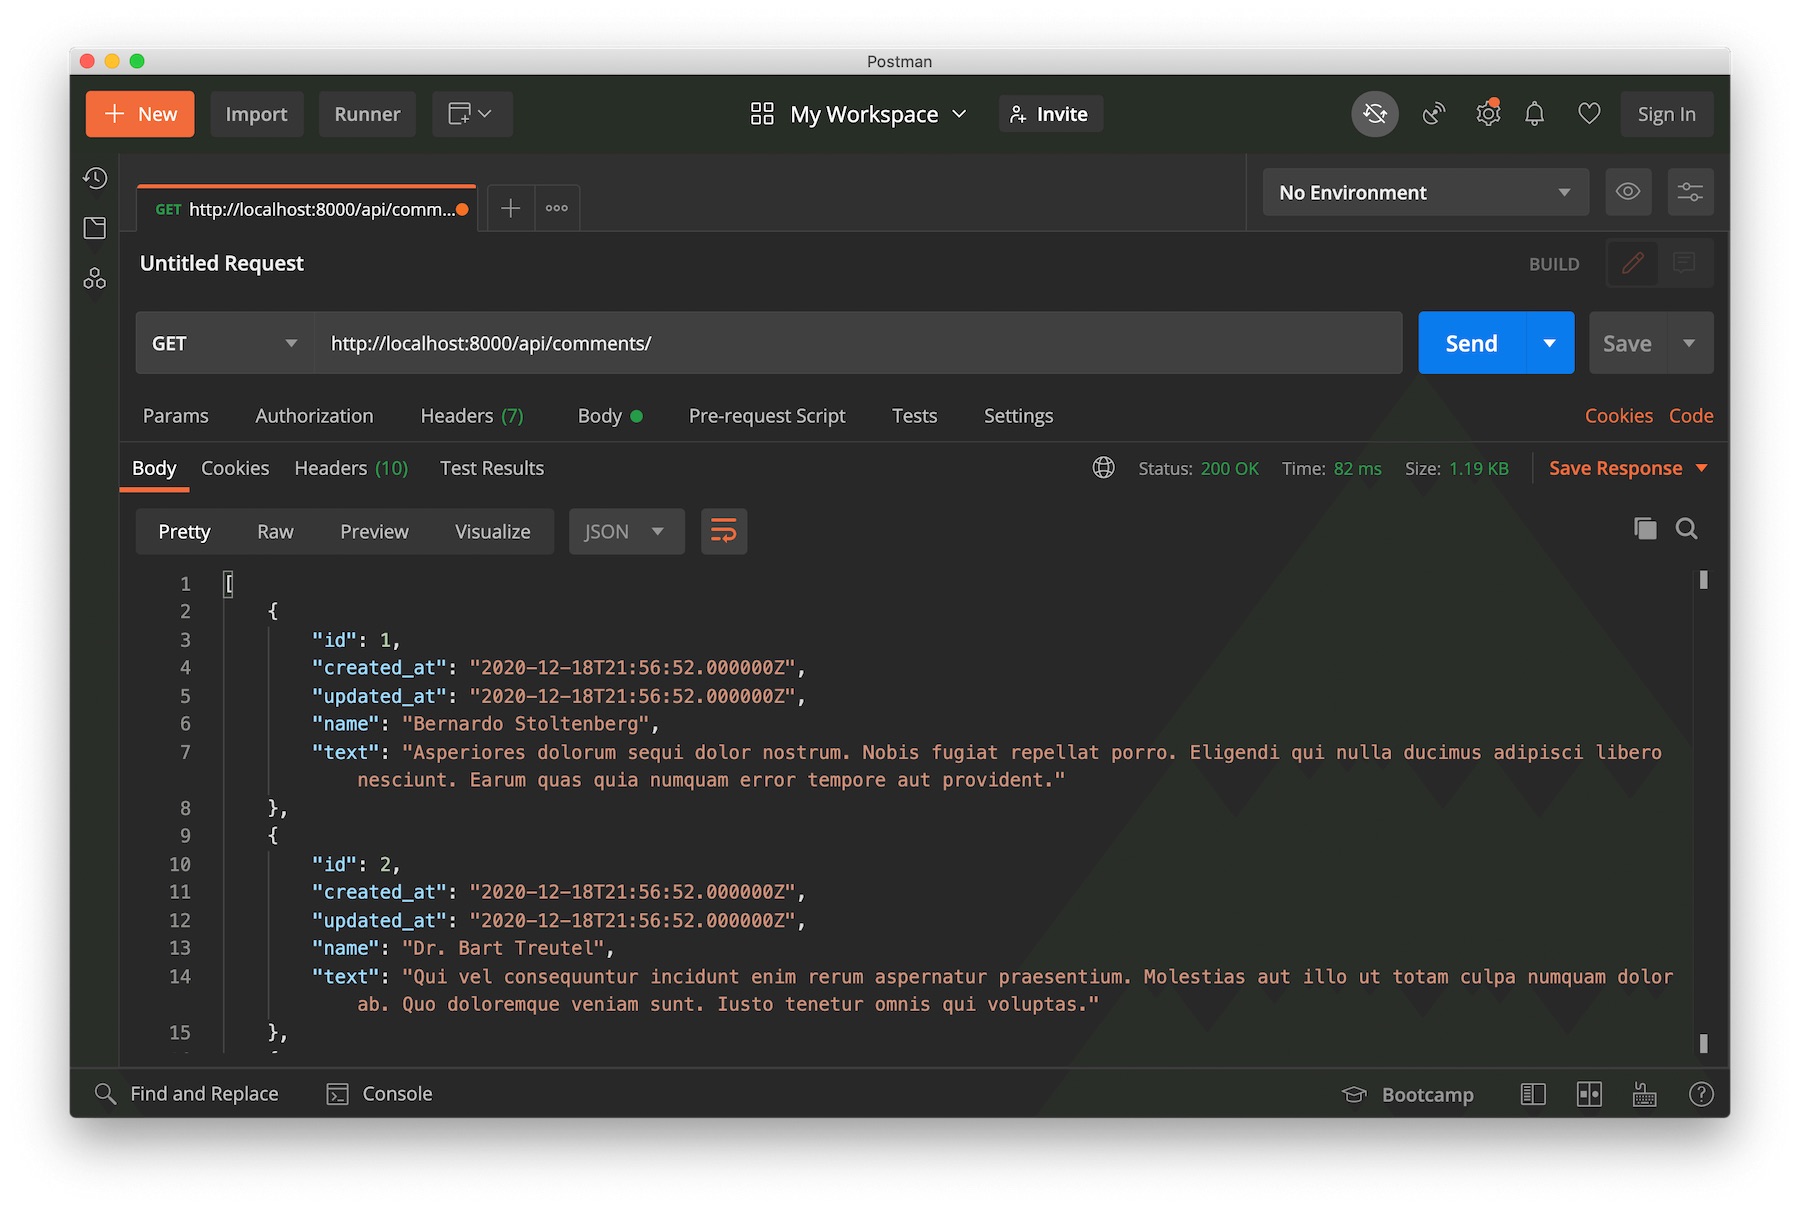
Open up Postman and create a new GET request at https://localhost:8000/api/comments. Click "Send", and you should see the JSON response of all the comments in your application.
You can test getting a single comment with https://localhost:8000/api/comments/1.
To test creating a new comment, change the request to a POST request and type in http://localhost:8000/api/comments/ as the request URL. Next, click on "Body" and enter in name and text as the keys with any string as the value. Click "Send" to create the new comment, and you'll see the new comment returned below.
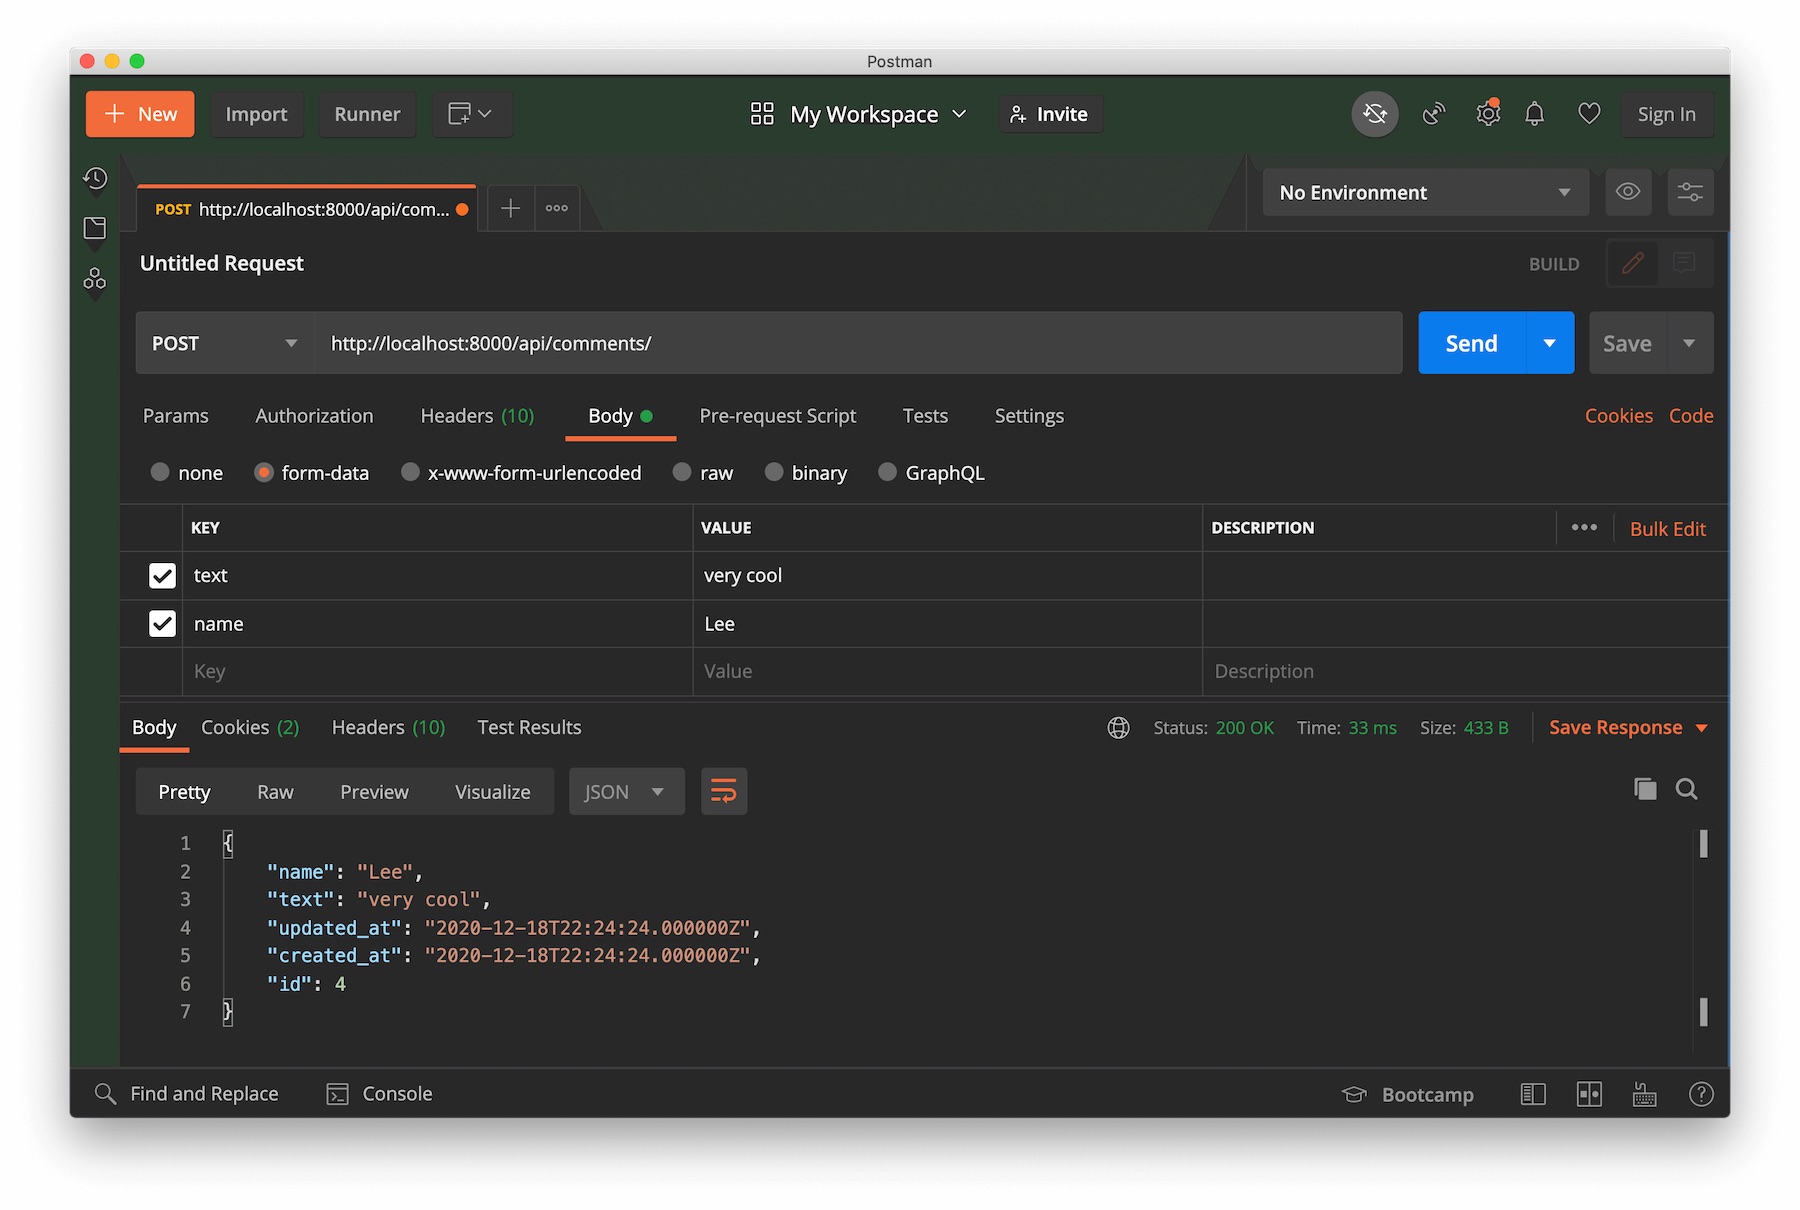
Just to confirm, switch back to a GET request and get all the comments again. You should see your new comment now listed.
You can also easily update and delete comments using this same method, but make sure you change the HTTP verb to PUT or DELETE, respectively.
Secure your Laravel API
💃 You finally have a fully functional API!
However, we can't celebrate just yet. If you recall, one of the application constraints was that some of these API endpoints should be private. Currently, anyone can perform any operation on your API. Let's fix that.
Configure Auth0
You're going to be using Auth0 to protect the private endpoints. If you haven't already, sign up for a free account now.
Once in your dashboard, you need to register your Laravel API with Auth0.
- Click on "Applications" > "APIs" in the left sidebar.
- Click the "Create API" button.
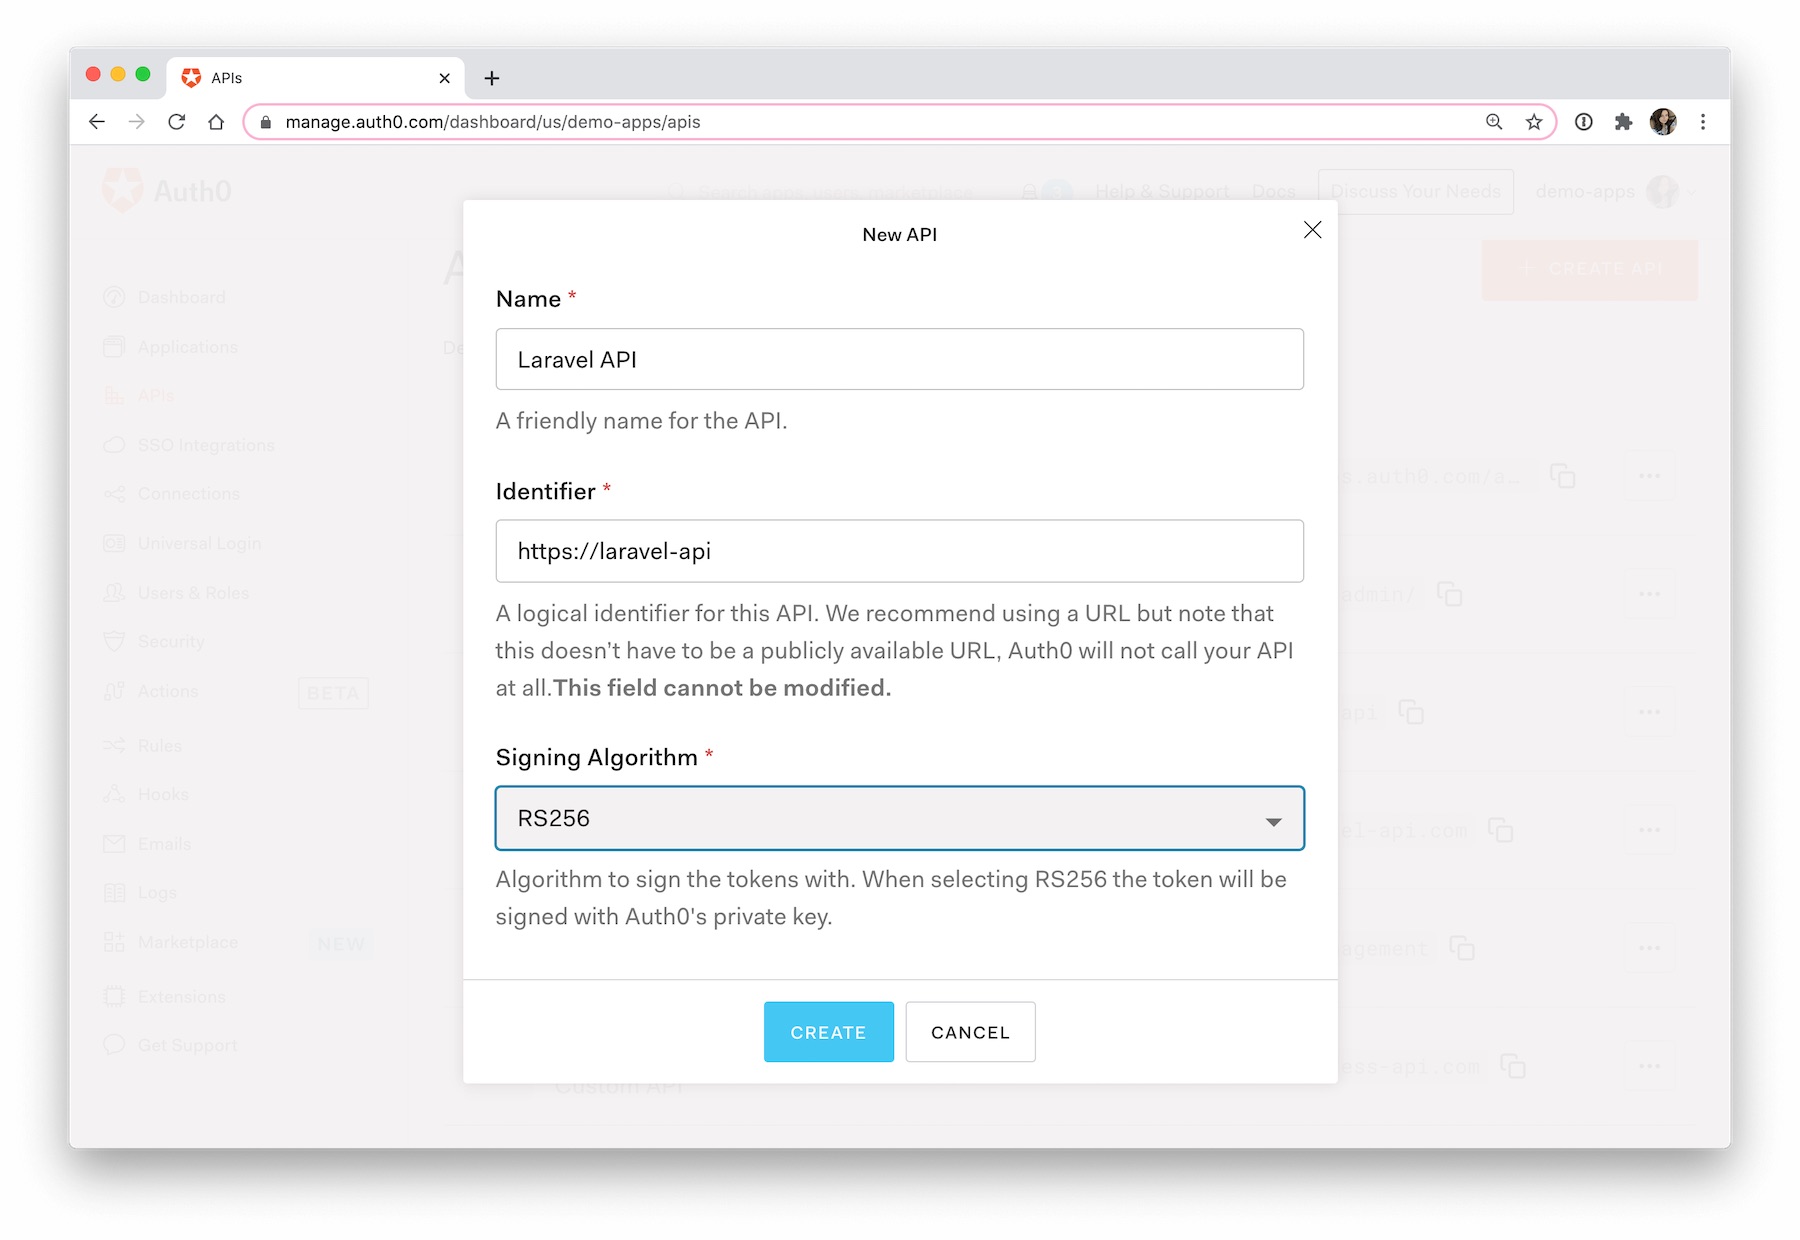
- Enter a "Name" and "Identifier" for your API. You can name it anything you want.
Note: For Identifier, we recommend using a URL. This doesn't have to be a publicly available URL, and Auth0 will never call it.
- Leave Signing Algorithm as is.
- Click "Create".
Keep this tab open, as you'll need to grab some values from it soon.
Install dependencies
Once you have your API set up, switch back to your terminal and run:
composer require auth0/login
This will install the Auth0 Laravel plugin.
Next, you need to generate the configuration file. To do this, run:
php artisan vendor:publish --provider "Auth0\Login\LoginServiceProvider"
This will generate a configuration file at config/laravel-auth0.php. Open it up now, and you should see these values interspersed throughout:
return [
  // ...
  'domain'        => env('AUTH0_DOMAIN'),
  'client_id'     => env('AUTH0_CLIENT_ID'),
  'client_secret' => env('AUTH0_CLIENT_SECRET'),
  'redirect_uri'  => env( 'APP_URL' ).'/auth0/callback',
  'authorized_issuers' => [ 'https://'.env('AUTH0_DOMAIN').'/' ],
  // 'api_identifier' => '',
  'supported_algs' => [ 'RS256' ],
  // ...
];
Find api_identifier, uncomment it, and replace it with:
'api_identifier' => env('API_IDENTIFIER'),
Finally, you need to update your .env file to include some of these values. Paste the following into .env.
AUTH0_DOMAIN=your-domain.auth0.com
API_IDENTIFIER=https://your-api.com
AUTH0_CLIENT_ID=
Now let's fill them in. Back in the Auth0 dashboard:
- Go to the Laravel API you just registered
- Click on the "Quick Start" tab
- Click on "PHP"
- You'll see two values there:
valid_audiencesandauthorized_iss - Copy the value for
valid_audiencesand paste it in as the value forAPI_IDENTIFIER - Copy the value for
authorized_issand paste it in as the value forAUTH0_DOMAIN. - Click on the "Machine to machine applications" tab and find the Test Application that was created for your API. Copy the Client ID and paste it in as the value for
AUTH0_CLIENT_ID.
❗ Important: Omit the
https://portion of forAUTH0_DOMAIN. For example, you'll paste inyour-domain.auth0.cominstead ofhttps://your-domain.auth0.com.
Here is some clarification about what each of these .env values mapped to the config/laravel-auth0.php values do:
authorized_issuers— An array of allowed token issuers, which is just your tenant URLapi_identifier— The identifier for your API registered with Auth0supported_algs— The signing algorithm used by the API
Create the middleware
Next, you need to create a middleware that will check for the existence and validity of the bearer token when making a request to a private endpoint.
To create the middleware, run the following:
php artisan make:middleware CheckJWT
This will create a new file at app/Http/Middleware/CheckJWT.php. Open it up and replace it with the following:
<?php
// app/Http/Middleware/CheckJWT.php

namespace App\Http\Middleware;

use Auth0\Login\Contract\Auth0UserRepository;
use Auth0\SDK\Exception\CoreException;
use Auth0\SDK\Exception\InvalidTokenException;
use Closure;

class CheckJWT
{
  protected $userRepository;

  /**
    * CheckJWT constructor.
    *
    * @param Auth0UserRepository $userRepository
    */
  public function __construct(Auth0UserRepository $userRepository)
  {
    $this->userRepository = $userRepository;
  }

  /**
    * Handle an incoming request.
    *
    * @param  \Illuminate\Http\Request  $request
    * @param  \Closure  $next
    * @return mixed
    */
  public function handle($request, Closure $next)
  {
    $auth0 = app()->make('auth0');

    $accessToken = $request->bearerToken();
    try {
      $tokenInfo = $auth0->decodeJWT($accessToken);
      $user = $this->userRepository->getUserByDecodedJWT($tokenInfo);
      if (!$user) {
        return response()->json(["message" => "Unauthorized user"], 401);
      }

    } catch (InvalidTokenException $e) {
      return response()->json(["message" => $e->getMessage()], 401);
    } catch (CoreException $e) {
      return response()->json(["message" => $e->getMessage()], 401);
    }

    return $next($request);
  }
}
When a request is made to a private endpoint, the handle() method of this middleware will run. It grabs the bearer token from the request and passes it to the decodeJWT() function.
The decodeJWT() function will then attempt to decode and verify the token. If the token is valid, the Auth0JWTUser will be retrieved. Otherwise, an error is thrown.
Next, you need to register this middleware. Open up app/Http/Kernel.php and scroll down to the $routeMiddleware array. Add in the following to register the middleware:
protected $routeMiddleware = [
  // ...
  'jwt' => \App\Http\Middleware\CheckJWT::class,
  // ...
];
Apply middleware to routes
Finally, let's use this middleware to protect the API endpoints!
As a reminder, the goal is that the endpoints to get all comments and get a single comment remain public, while the rest require a token to access.
Open up routes/api.php. Currently, you have a single apiResource route doing everything, but you don't want to apply the middleware to every resource. To fix this, you can break them apart and then only apply middleware to the store, update, and destroy actions:
Route::resource('comments', CommentController::class)->only([
  'index', 'show'
]);

Route::resource('comments', CommentController::class)->only([
  'store', 'update', 'destroy'
])->middleware('jwt');
Testing your protected routes
Let's test it one more time to make sure that comments can't be created, updated, or destroyed without an access token.
But first, try to make a new comment from your command line without a token:
curl -X POST -H 'Content-Type: application/json' -d '{
  "name": "Lucy",
  "text": "An authorized comment"
}' http://localhost:8000/api/comments -i
This should return a 401 Unauthorized status code.
Now, let's try it again, but this time with an access token.
Back in the Auth0 dashboard, click on the Laravel API that you created earlier, and then click on the "Test" tab. Under "Response", you'll see an access token that has been generated for you to test your API.
Click the copy symbol to copy that token.
Modify the previous cURL command with the following, but make sure you first replace YOUR_ACCESS_TOKEN_HERE with the test token from your dashboard:
curl -X POST -H 'Authorization: Bearer YOUR_ACCESS_TOKEN_HERE' -H 'Content-Type: application/json' -d '{
    "name": "Lucy",
    "text": "An authorized comment"
}' http://localhost:8000/api/comments -i
The comment creation should now work! Feel free to test this with updating and deleting comments as well.
Now, if you want to protect any other routes in your API, all you need to do is add the jwt middleware!
Conclusion
And that's it! Just to recap, you've learned how to set up a Laravel API complete with the following:
- SQLite database
- Easy-to-run migrations
- A seeder that uses Faker to create mock data
- Authorization using Auth0
Please let me know if you have any questions in the comments below. Thanks for reading!
About the author

Holly Guevara
Former Developer Content Manager (Auth0 Alumni)