
TL;DR: In this article, we'll take a look at CORS, the circumstances under which it is needed, the benefits it provides, and how to configure a Node + Express application to support CORS. If you wish, you can grab the accompanying source code from GitHub!
Cross-Origin Resource Sharing (CORS) is a protocol that enables scripts running on a browser client to interact with resources from a different origin. This is useful because, thanks to the same-origin policy followed by XMLHttpRequest and fetch, JavaScript can only make calls to URLs that live on the same origin as the location where the script is running. For example, if a JavaScript app wishes to make an AJAX call to an API running on a different domain, it would be blocked from doing so thanks to the same-origin policy.
But why is this necessary, and how does it work?
“Learn all about CORS, the difference between simple and preflighted requests, and how to add CORS support to an existing Node Express app!”
Tweet This
CORS - Why Is It Needed?
Most of the time, a script running in the user's browser would only ever need to access resources on the same origin (think about API calls to the same backend that served the JavaScript code in the first place). So the fact that JavaScript can't normally access resources on other origins is a good thing for security.
In this context, "other origins" means the URL being accessed differs from the location that the JavaScript is running from, by having:
- a different scheme (HTTP or HTTPS)
- a different domain
- a different port
However, there are legitimate scenarios where cross-origin access is desirable or even necessary. For example, if you're running a React SPA that makes calls to an API backend running on a different domain. Web fonts also rely on CORS to work.
Want to get up to speed with OAuth2 and OpenID Connect?
Download the free ebook
Identifying a CORS Response
When a server has been configured correctly to allow cross-origin resource sharing, some special headers will be included. Their presence can be used to determine that a request supports CORS. Web browsers can use these headers to determine whether or not an XMLHttpRequest call should continue or fail.
There are a few headers that can be set, but the primary one that determines who can access a resource is Access-Control-Allow-Origin. This header specifies which origins can access the resource. For example, to allow access from any origin, you can set this header as follows:
Access-Control-Allow-Origin: *
Or it can be narrowed down to a specific origin:
Access-Control-Allow-Origin: https://example.com
Understanding CORS Request Types
There are two types of CORS request: "simple" requests, and "preflight" requests, and it's the browser that determines which is used. As the developer, you don't normally need to care about this when you are constructing requests to be sent to a server. However, you may see the different types of requests appear in your network log and, since it may have a performance impact on your application, it may benefit you to know why and when these requests are sent.
Let's have a look at what that means in more detail in the next couple of sections.
Simple requests (GET, POST, and HEAD)
The browser deems the request to be a "simple" request when the request itself meets a certain set of requirements:
- One of these methods is used:
GET,POST, orHEAD - A CORS safe-listed header is used
- When using the
Content-Typeheader, only the following values are allowed:application/x-www-form-urlencoded,multipart/form-data, ortext/plain - No event listeners are registered on any
XMLHttpRequestUploadobject - No
ReadableStreamobject is used in the request
The request is allowed to continue as normal if it meets these criteria, and the Access-Control-Allow-Origin header is checked when the response is returned.
Preflight requests (OPTIONS)
If a request does not meet the criteria for a simple request, the browser will instead make an automatic preflight request using the OPTIONS method. This call is used to determine the exact CORS capabilities of the server, which is in turn used to determine whether or not the intended CORS protocol is understood. If the result of the OPTIONS call dictates that the request cannot be made, the actual request to the server will not be executed.
The preflight request sets the mode as OPTIONS and sets a couple of headers to describe the actual request that is to follow:
Access-Control-Request-Method: The intended method of the request (e.g.,GETorPOST)Access-Control-Request-Headers: An indication of the custom headers that will be sent with the requestOrigin: The usual origin header that contains the script's current origin
An example of such a request might look like this:
# Request
curl -i -X OPTIONS localhost:3001/api/ping \
-H 'Access-Control-Request-Method: GET' \
-H 'Access-Control-Request-Headers: Content-Type, Accept' \
-H 'Origin: http://localhost:3000'
This request basically says "I would like to make a GET request with the Content-Type and Accept headers from http://localhost:3000 - is that possible?".
The server will include some Access-Control-* headers within the response to indicate whether the request that follows will be allowed or not. These include:
Access-Control-Allow-Origin: The origin that is allowed to make the request, or*if a request can be made from any originAccess-Control-Allow-Methods: A comma-separated list of HTTP methods that are allowedAccess-Control-Allow-Headers: A comma-separated list of the custom headers that are allowed to be sentAccess-Control-Max-Age: The maximum duration that the response to the preflight request can be cached before another call is made
The response would then be examined by the browser to decide whether to continue with the request or to abandon it.
So a response to the earlier example might look like this:
HTTP/1.1 204 No Content
Access-Control-Allow-Origin: *
Access-Control-Allow-Methods: GET,HEAD,PUT,PATCH,POST,DELETE
Vary: Access-Control-Request-Headers
Access-Control-Allow-Headers: Content-Type, Accept
Content-Length: 0
Date: Fri, 05 Apr 2019 11:41:08 GMT
Connection: keep-alive
The Access-Control-Allow-Origin header, in this case, allows the request to be made from any origin, while the Access-Control-Allow-Methods header describes only the accepted HTTP methods. If a given HTTP method is not accepted, it will not appear in this list.
In this example, Access-Control-Allow-Headers echos back the headers that were asked for in the OPTIONS request. This indicates that all the requested headers are allowed to be sent. If for example, the server doesn't allow the Accept header, then that header would be omitted from the response and the browser would reject the call.
How to Add CORS to a Nodejs Express App
As a concrete example of how this works, let's take an existing Node Express application and modify it to allow cross-origin JavaScript requests. The application you're going to work with was created using Vue CLI 3 and runs on port 3000, along with an Express server running on port 3001. The Vue frontend provides a UI that makes an API call to the server, but unfortunately, this doesn't work as the server is not CORS-enabled. You're going to fix that!
To start, check out the tutorial repository to somewhere on your local machine. The following commands will get you set up with the application:
# Clone the repository using SSH
git clone git@github.com:auth0-blog/express-cors-demo.git

# Move into the project directory
cd express-cors-demo

# Install dependencies
npm install

# Run the application
npm run dev
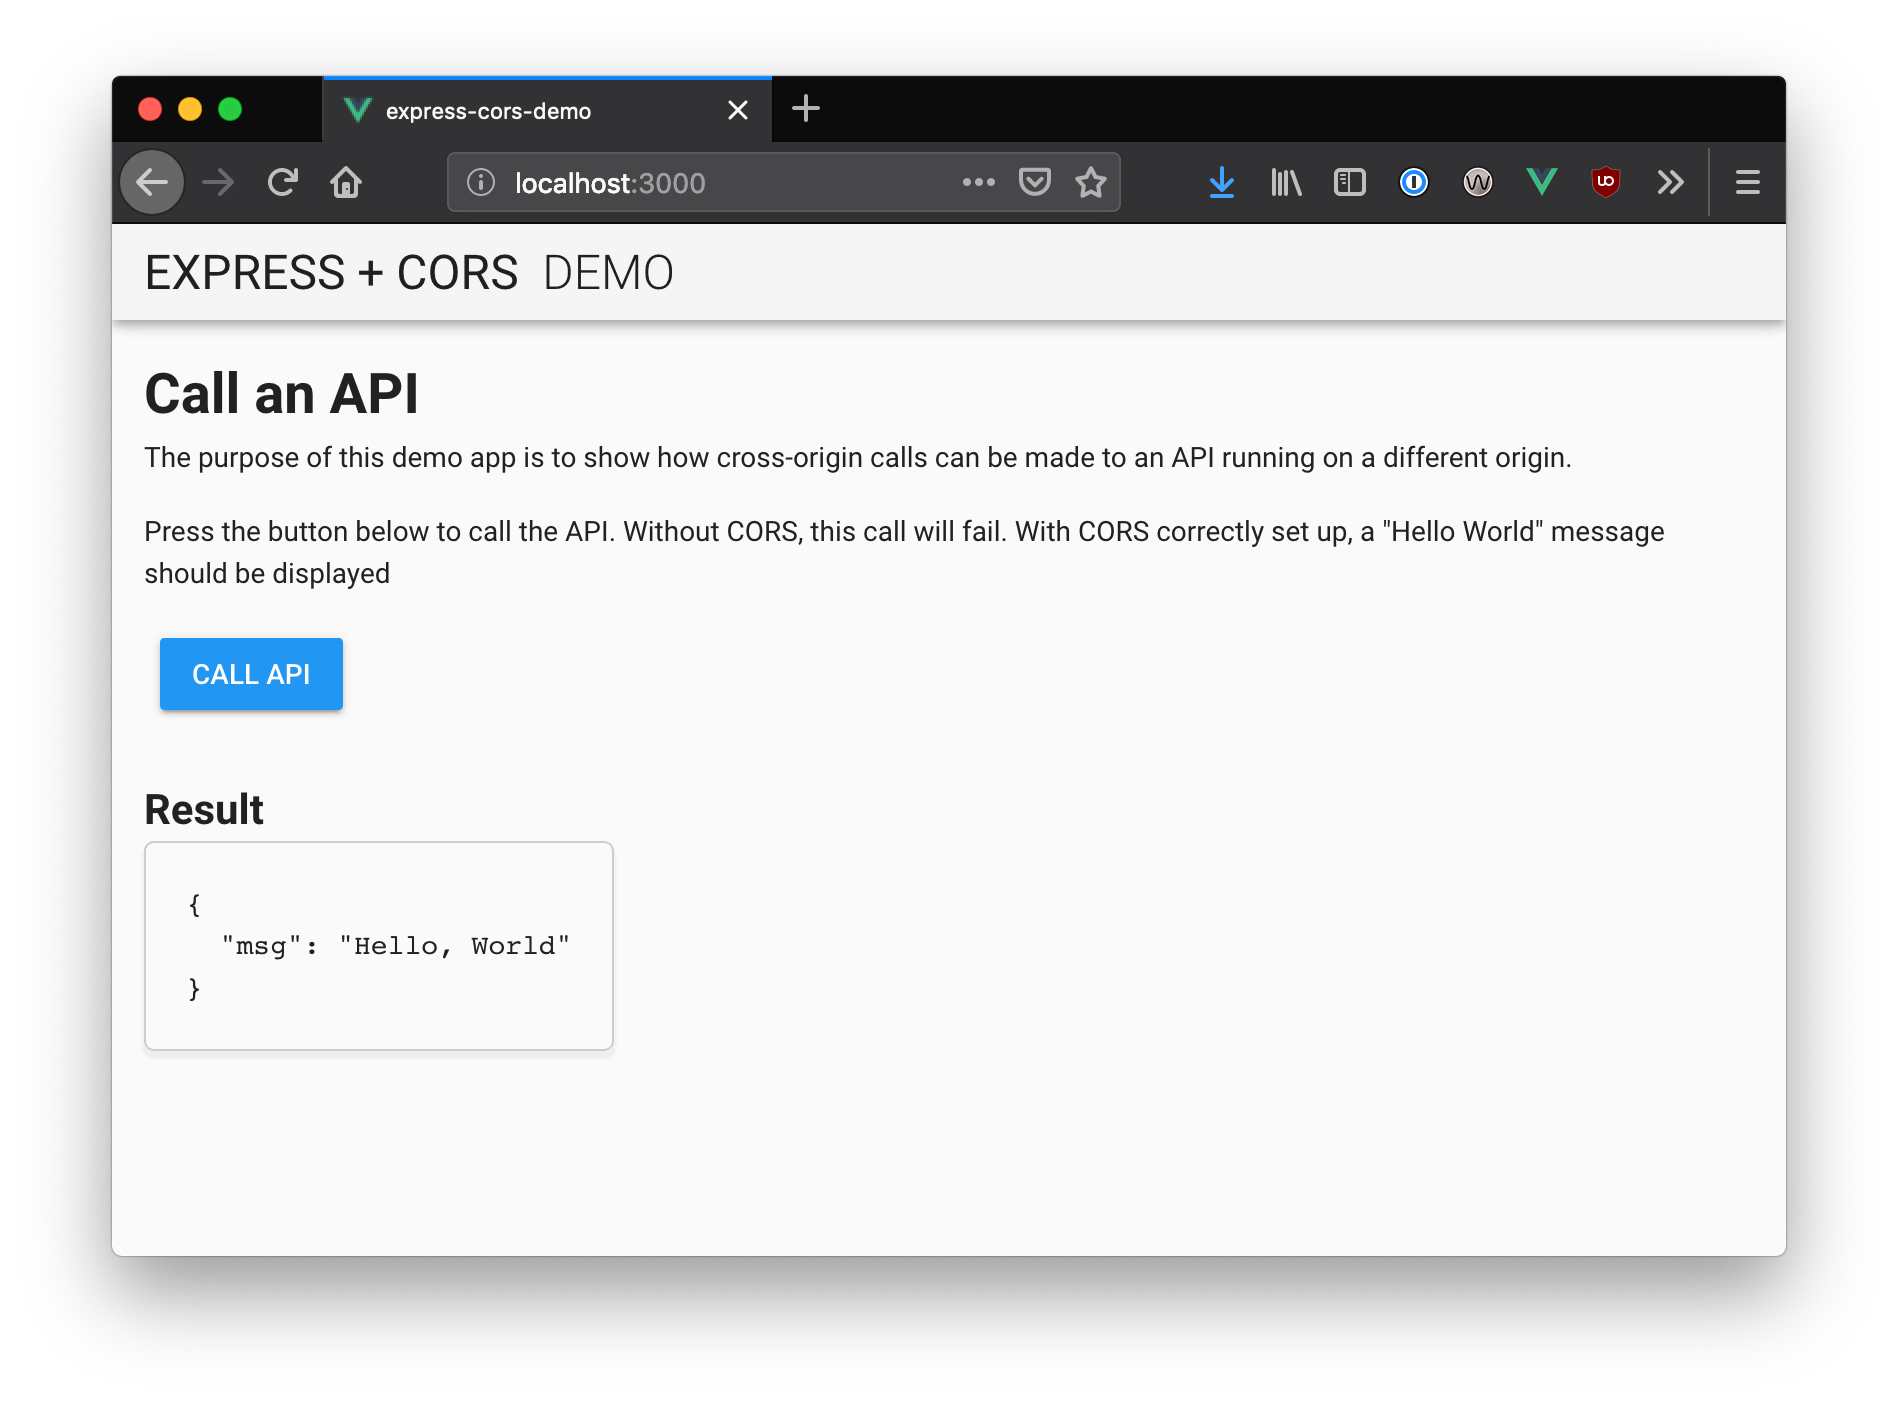
Now open the website at http://localhost:3000 and click the Call API button. You should find that the call will fail. This is because a request is being made to the API at http://localhost:3001/api/ping which, thanks to the different port number, makes it a different origin from where the web application is running. Therefore, it constitutes a cross-origin request and is blocked by the browser by default.
Make the same request from curl to see that no CORS headers are returned:
curl -i localhost:3001/api/ping

HTTP/1.1 200 OK
Content-Type: application/json; charset=utf-8
Content-Length: 22
ETag: W/"16-IP+nb8Blfh+WTVdL6Lq1eXiDJXg"
Date: Fri, 05 Apr 2019 12:23:48 GMT
Connection: keep-alive

{"msg":"Hello, World"}%
Note: The call using
curlworks just fine, as CORS only affectsXMLHttpRequestcalls in the browser.
Adding CORS headers to the app
Now modify the server to return CORS headers and make this API call work from the browser. To do this, open the server/index.js file and modify it to look like the following:
const express = require("express");
const debug = require("debug")("server");

const app = express();
const port = process.env.SERVER_PORT || 3001;

// NEW - Add CORS headers - see https://enable-cors.org/server_expressjs.html
app.use(function(req, res, next) {
  res.header("Access-Control-Allow-Origin", "*");
  res.header(
    "Access-Control-Allow-Headers",
    "Origin, X-Requested-With, Content-Type, Accept"
  );
  next();
});

// API endpoint
app.get("/api/ping", (req, res) => {
  res.send({
    msg: "Hello, World"
  });
});

app.listen(port, () => debug(`Listening on port ${port}`));
Notice that some custom middleware is added before the /api/ping endpoint is defined. The code to add these headers has been taken from enable-cors.org.
Let's run that curl command again to see the effects:
curl -i localhost:3001/api/ping

HTTP/1.1 200 OK
Access-Control-Allow-Origin: *
Access-Control-Allow-Headers: Origin, X-Requested-With, Content-Type, Accept
Content-Type: application/json; charset=utf-8
Content-Length: 22
ETag: W/"16-IP+nb8Blfh+WTVdL6Lq1eXiDJXg"
Date: Fri, 05 Apr 2019 12:31:51 GMT
Connection: keep-alive

{"msg":"Hello, World"}%
Here you can see the headers have been added correctly. Now open the web application again and click the Call API button; this time the call should work!
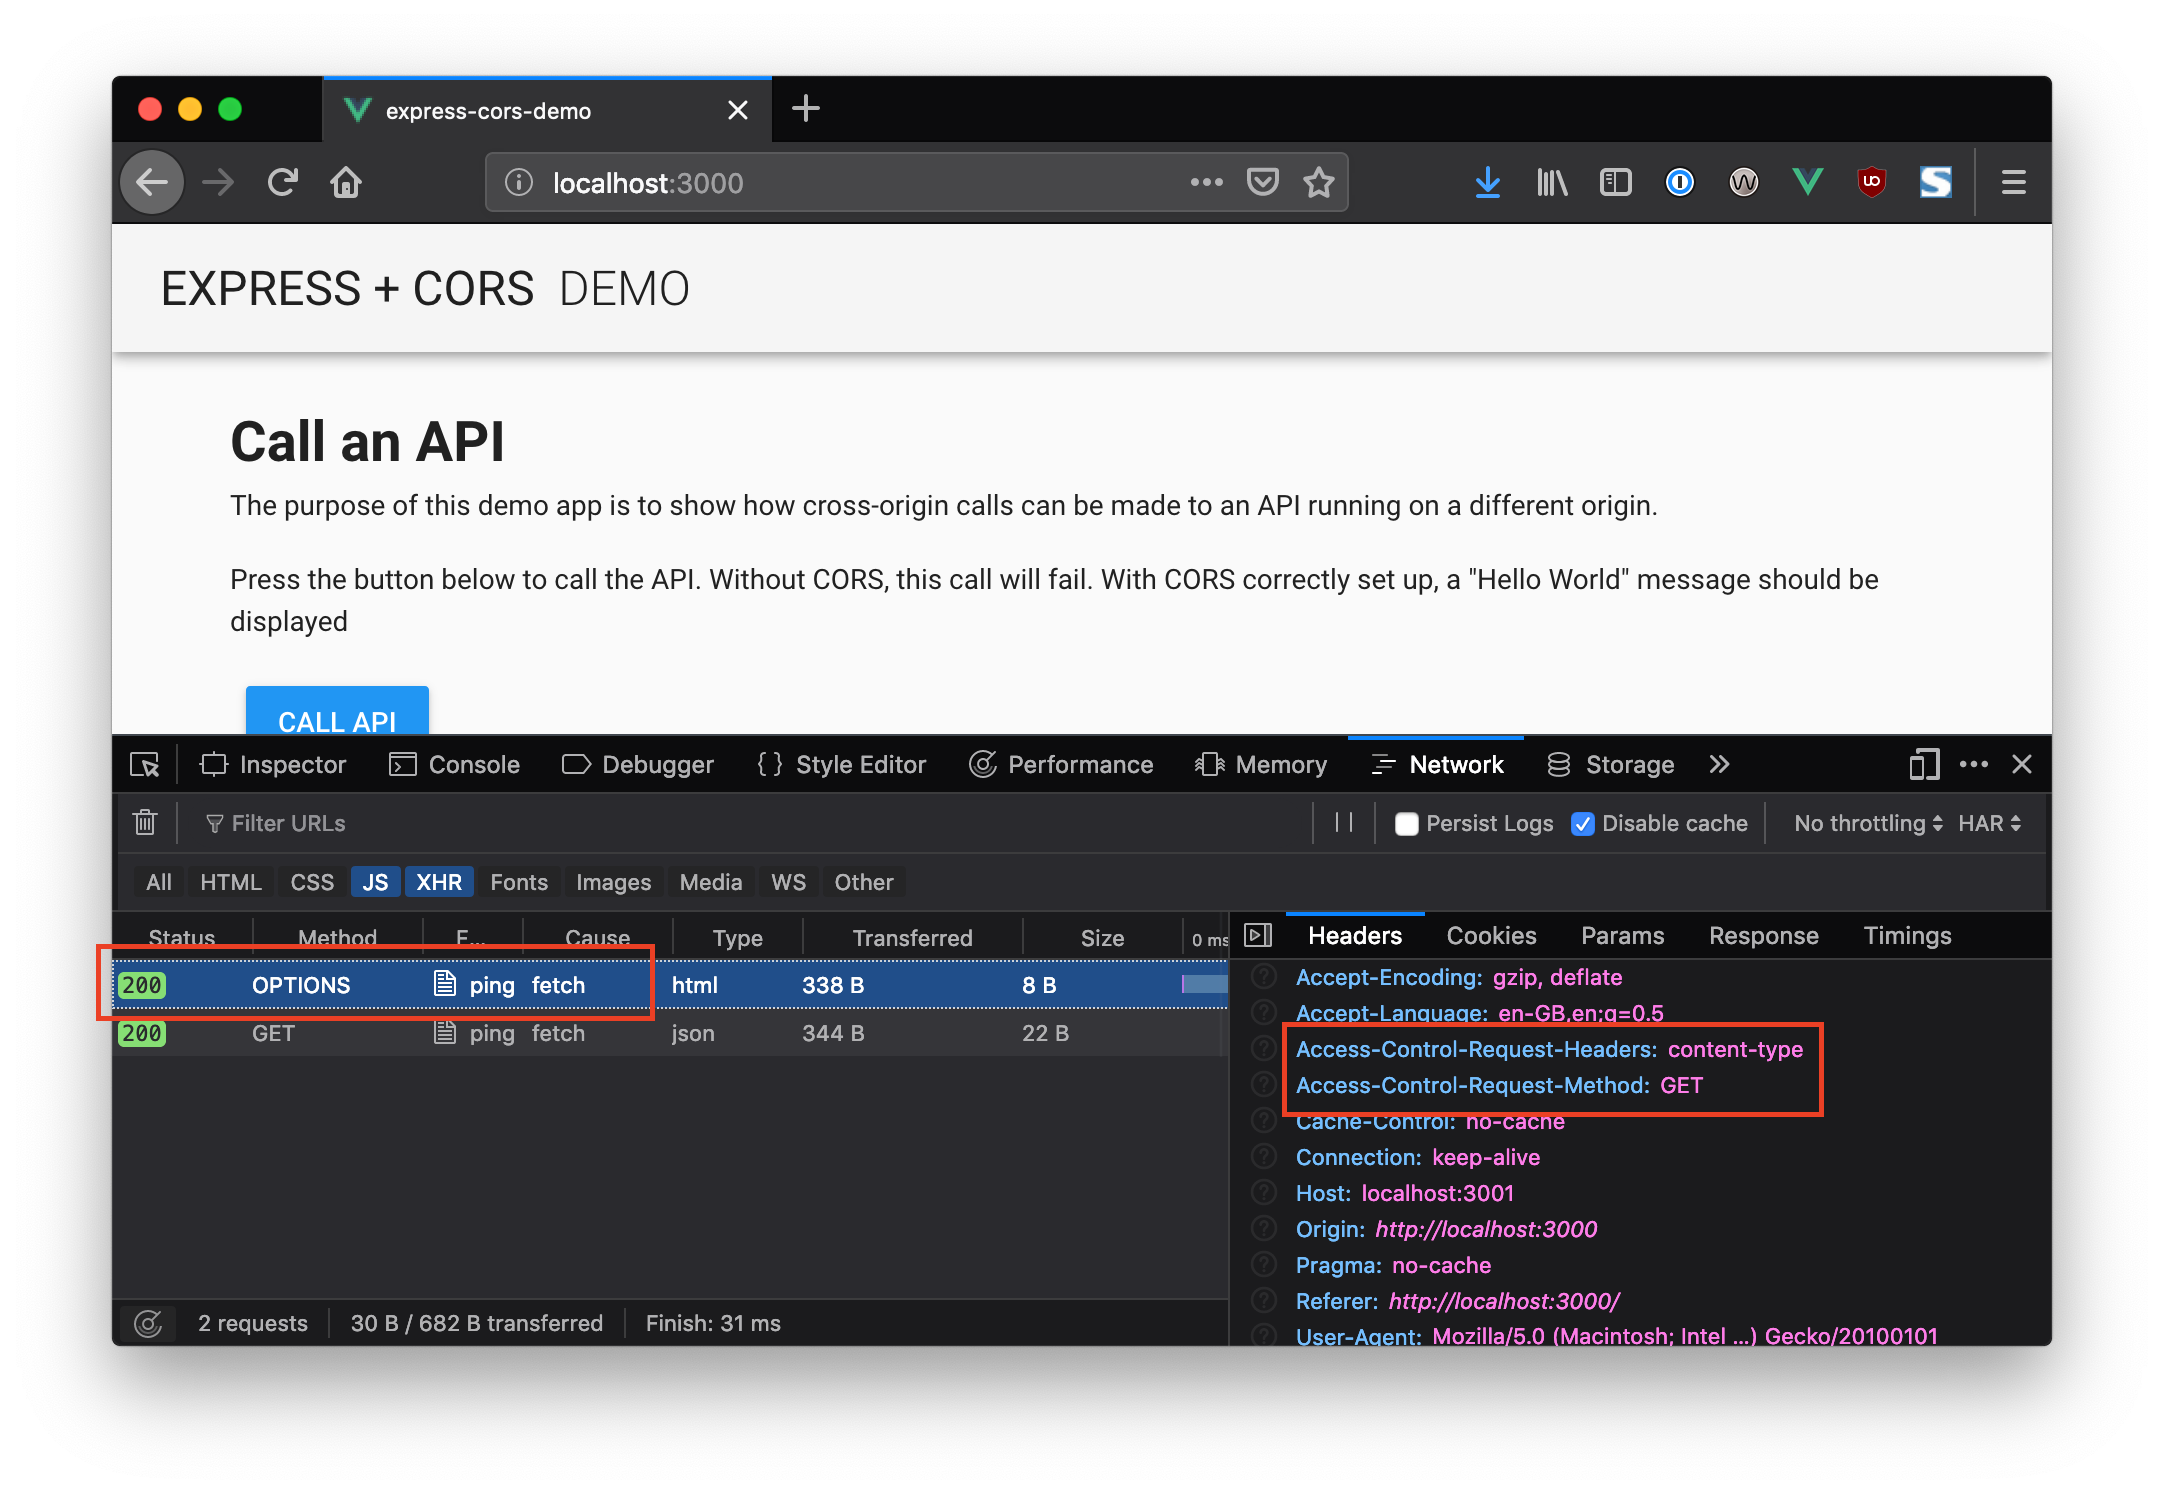
Forcing a preflight request
The request made by clicking the Call API button meets the criteria for being a simple request, so no preflight is needed. You can force one by modifying the call so that its effect on the network is more visible.
Open the src/components/CallAPI.vue file and modify the callApi() function so that it sends a Content-Type: application/json header. This is because a content type of application/json is not within the criteria for a simple request, as explained earlier.
This will not affect the call but it will force the browser to send a preflight request before the real call is made:
// ...

methods: {
    callApi() {
      fetch("//localhost:3001/api/ping", {
        // NEW - add a Content-Type header
        headers: {
          "Content-Type": "application/json"
        }
      })
        .then(async response => {
          if (response.ok) {
            this.apiError = false;
            this.result = await response.json();
          } else {
            this.apiError = true;
          }
        })
        .catch(() => (this.apiError = true));
    }
  }

// ...
Click the Call API button again. This time an initial preflight request will be sent before the actual request, which can be observed in the network tab of your browser development tools:
Using the CORS middleware for Express
Instead of manually specifying the headers, there is a CORS Express middleware package that can be used instead.
To use it, install the package from the terminal:
npm install cors
Then modify the server to use this package instead of the custom middleware that was inserted earlier. Your server/index.js file should look something like the following:
const express = require("express");
const debug = require("debug")("server");

// NEW - bring in the cors library
const cors = require("cors");

const app = express();
const port = process.env.SERVER_PORT || 3001;

// NEW - replace custom middleware with the cors() middleware
app.use(cors());

app.get("/api/ping", (req, res) => {
  res.send({
    msg: "Hello, World"
  });
});

app.listen(port, () => debug(`Listening on port ${port}`));
Once these changes are made, the application should automatically restart. If it doesn't, use Ctrl+C to stop the application and then run npm run dev once more. Open http://localhost:3000 once again and click the Call API. Note that the application still works as intended!
Configuring the CORS middleware
The CORS middleware can be configured to accept only specific origins and headers. It's a good idea for security reasons to be restrictive by default.
As an example of how to do this, you can reconfigure the CORS middleware to only accept requests from the origin that the frontend is running on. Modify the cors() setup from the previous example to look like the following:
app.use(
  cors({
    origin: "http://localhost:3000", // restrict calls to those this address
    methods: "GET" // only allow GET requests
  })
);
Again, the application should restart once these changes are made and the file is saved. Open the application in the browser and click the Call API button once again. The application should be working as normal, but let's have a closer look at the response from the server:

Notice that the OPTIONS request has returned the more restrictive values that you specified. This still allows the sample application to work, but calls from scripts running on other origins would be denied.
You can have a look at the other cors configuration options on the GitHub page.
“I learned how to take an existing Node Express app and add CORS support to it!”
Tweet This
Recap
In this article you learned about CORS, what the different headers mean and the differences between simple and preflight requests. You then altered a broken Node + Express application so that it accepted cross-origin requests, and could successfully make API calls to a backend running on a different origin.
About Auth0
Auth0 by Okta takes a modern approach to customer identity and enables organizations to provide secure access to any application, for any user. Auth0 is a highly customizable platform that is as simple as development teams want, and as flexible as they need. Safeguarding billions of login transactions each month, Auth0 delivers convenience, privacy, and security so customers can focus on innovation. For more information, visit https://auth0.com.
About the author

Steve Hobbs
Developer Experience Engineer