
Logging into a website with your username and password is a straightforward way to log in and access your content. You've been doing it for years, you've created several passwords, and it works. Logging in with just a password isn't as secure for your users as it used to be. Hackers can steal passwords from one site and use credential stuffing to pose as your user and gain access to other sites. It's common for your users to re-use passwords since they have several to remember across all their applications. You can help keep your users' data secure by offering another layer of protection by enabling Multi-factor Authentication (MFA).
To learn more, read this guide about MFA and its different methods on the Auth0 blog.
You've likely experienced MFA in real life. For example, if you start working for a new company, they may ask for your ID card and a birth certificate. Those are two different factors of identification. It helps verify you are who you say you are to make sure your paycheck goes to you and lowers the success rate of someone posing as you.
In this blog post, you'll learn how to implement SMS-based MFA with Auth0 Actions and Plivo.
Prerequisites
- An Auth0 account
- A Plivo account
- A Plivo phone number
If you do not have a Plivo account or an Auth0 account, you can sign up for a free Plivo account and a free Auth0 account.
If you already have an application created in your Auth0 account, you can skip to Create Action for MFA.
Set up & Configure a React App Application with Auth0
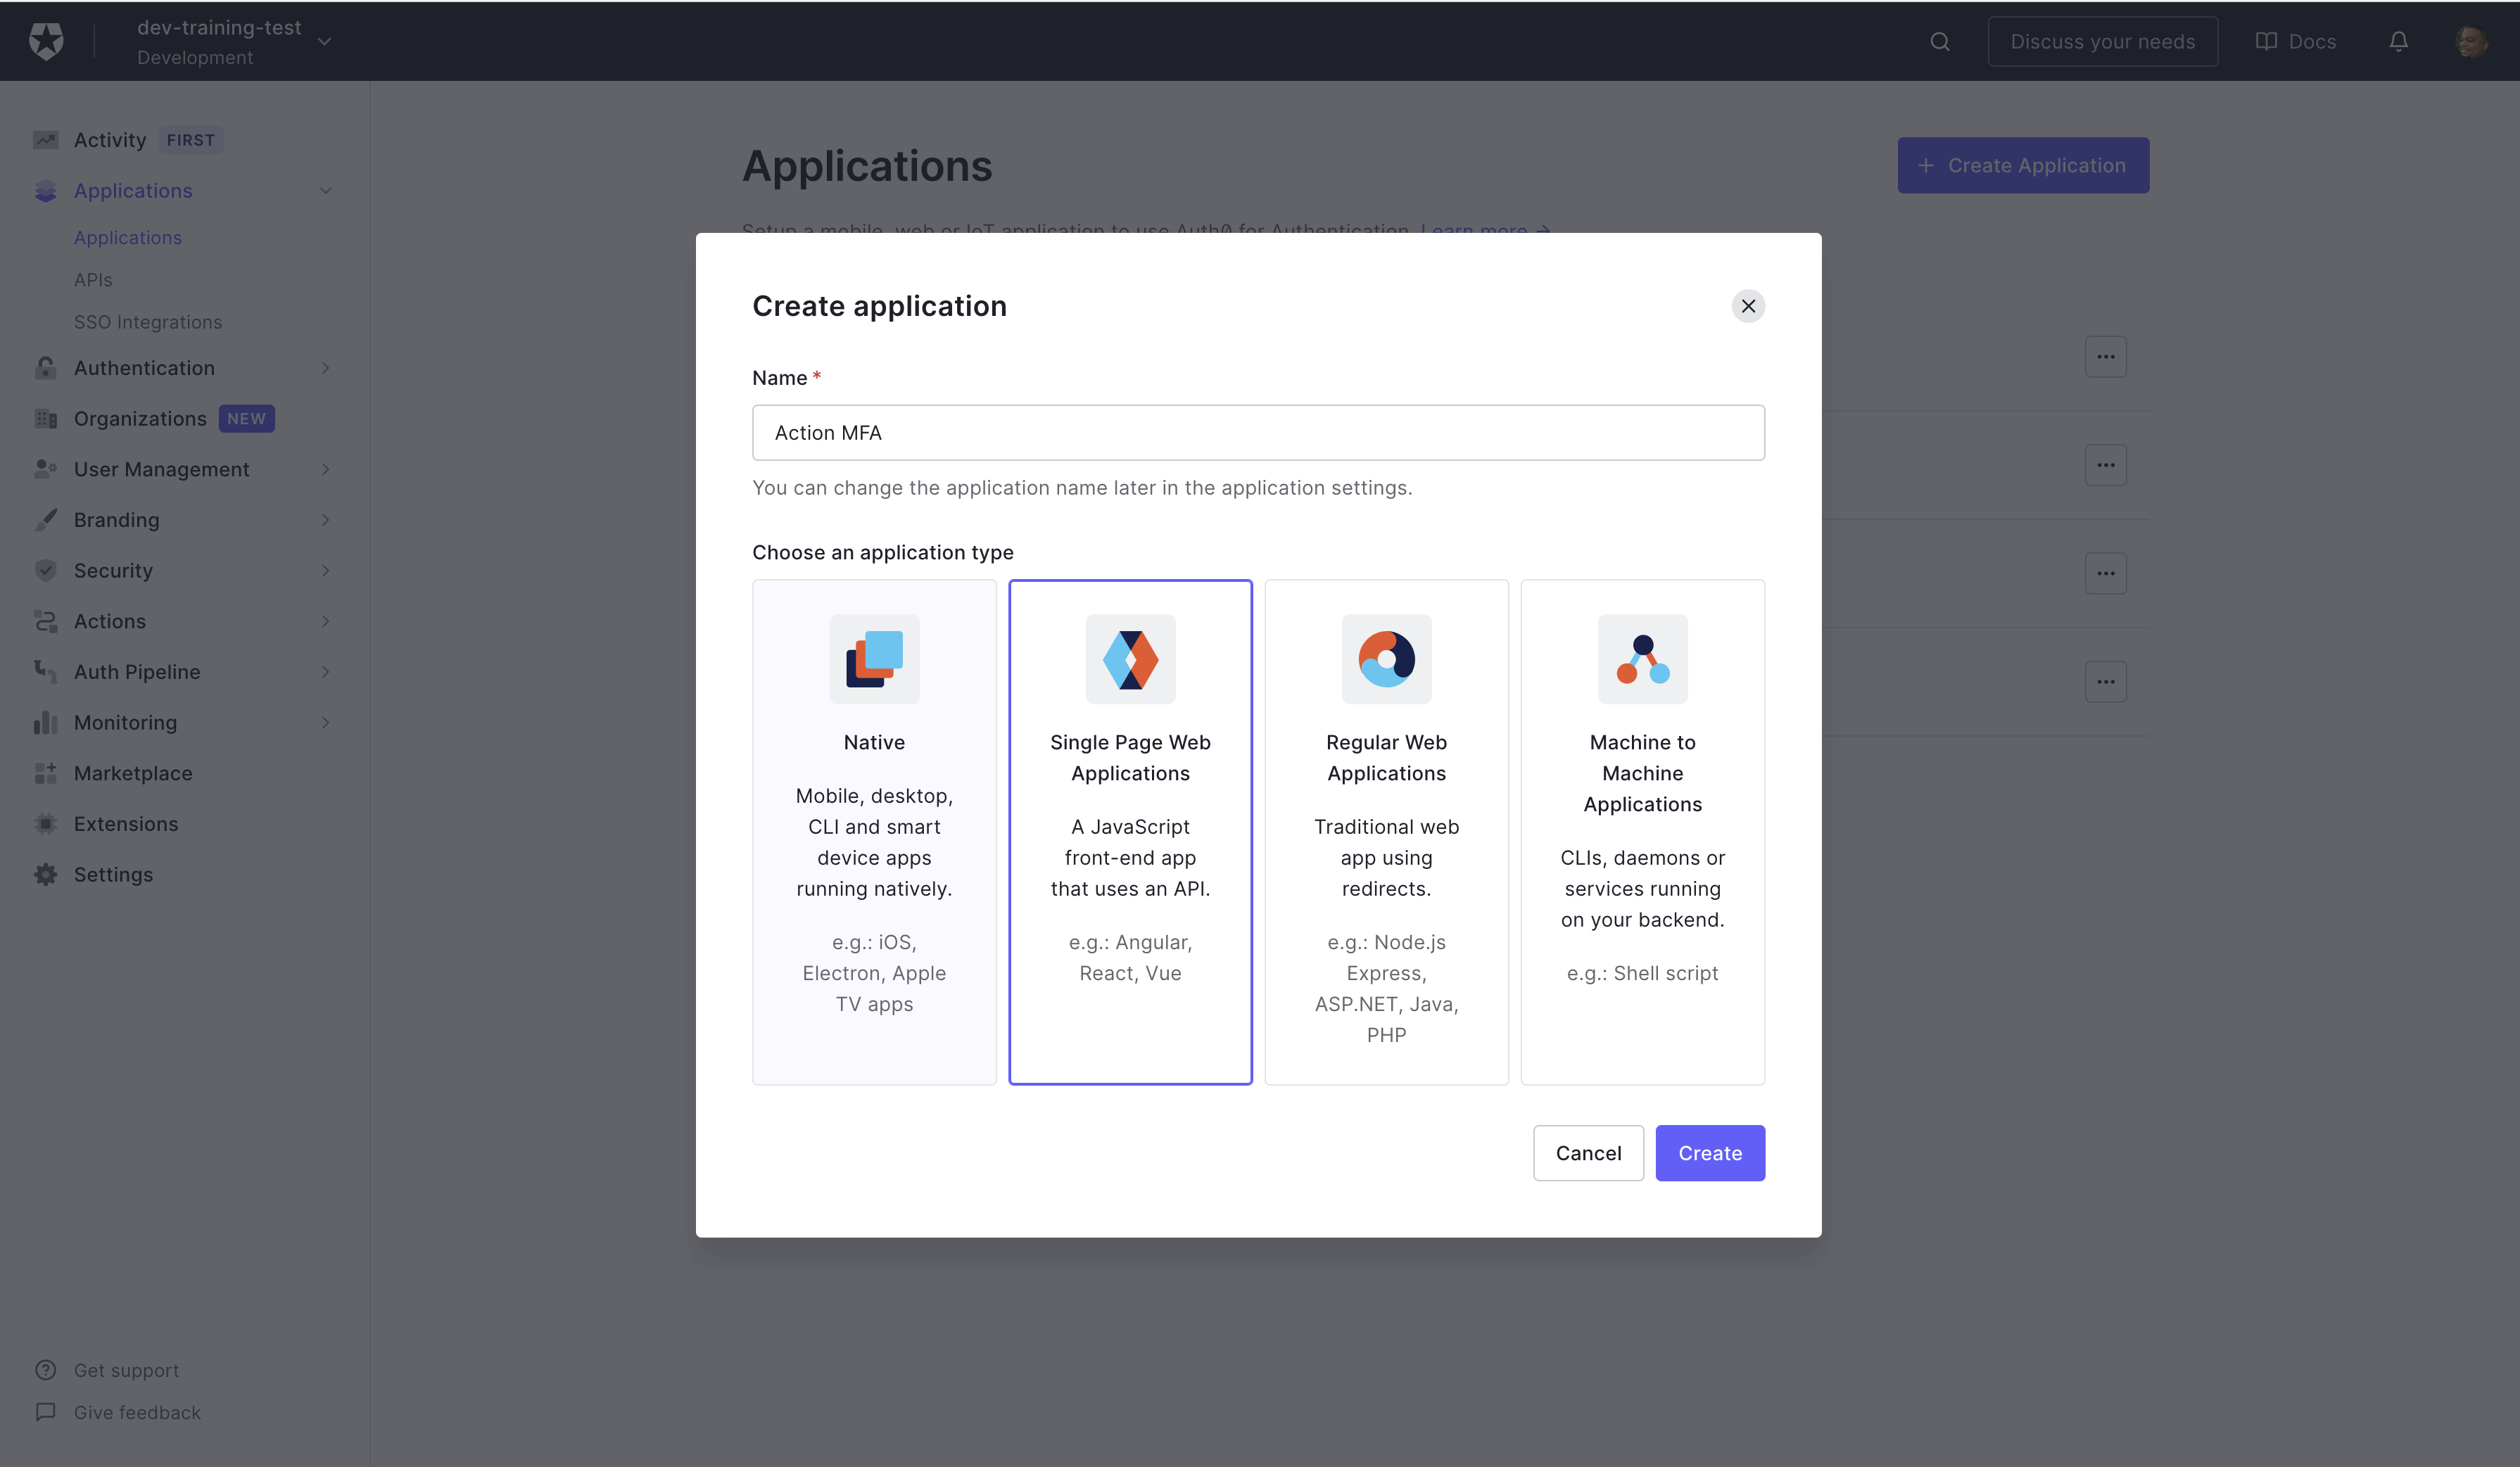
In the Auth0 dashboard, create a new application by clicking on Applications > Applications > Create Application. On the next screen, create a name for your application and select Single Page Web Applications since you're using a React app.
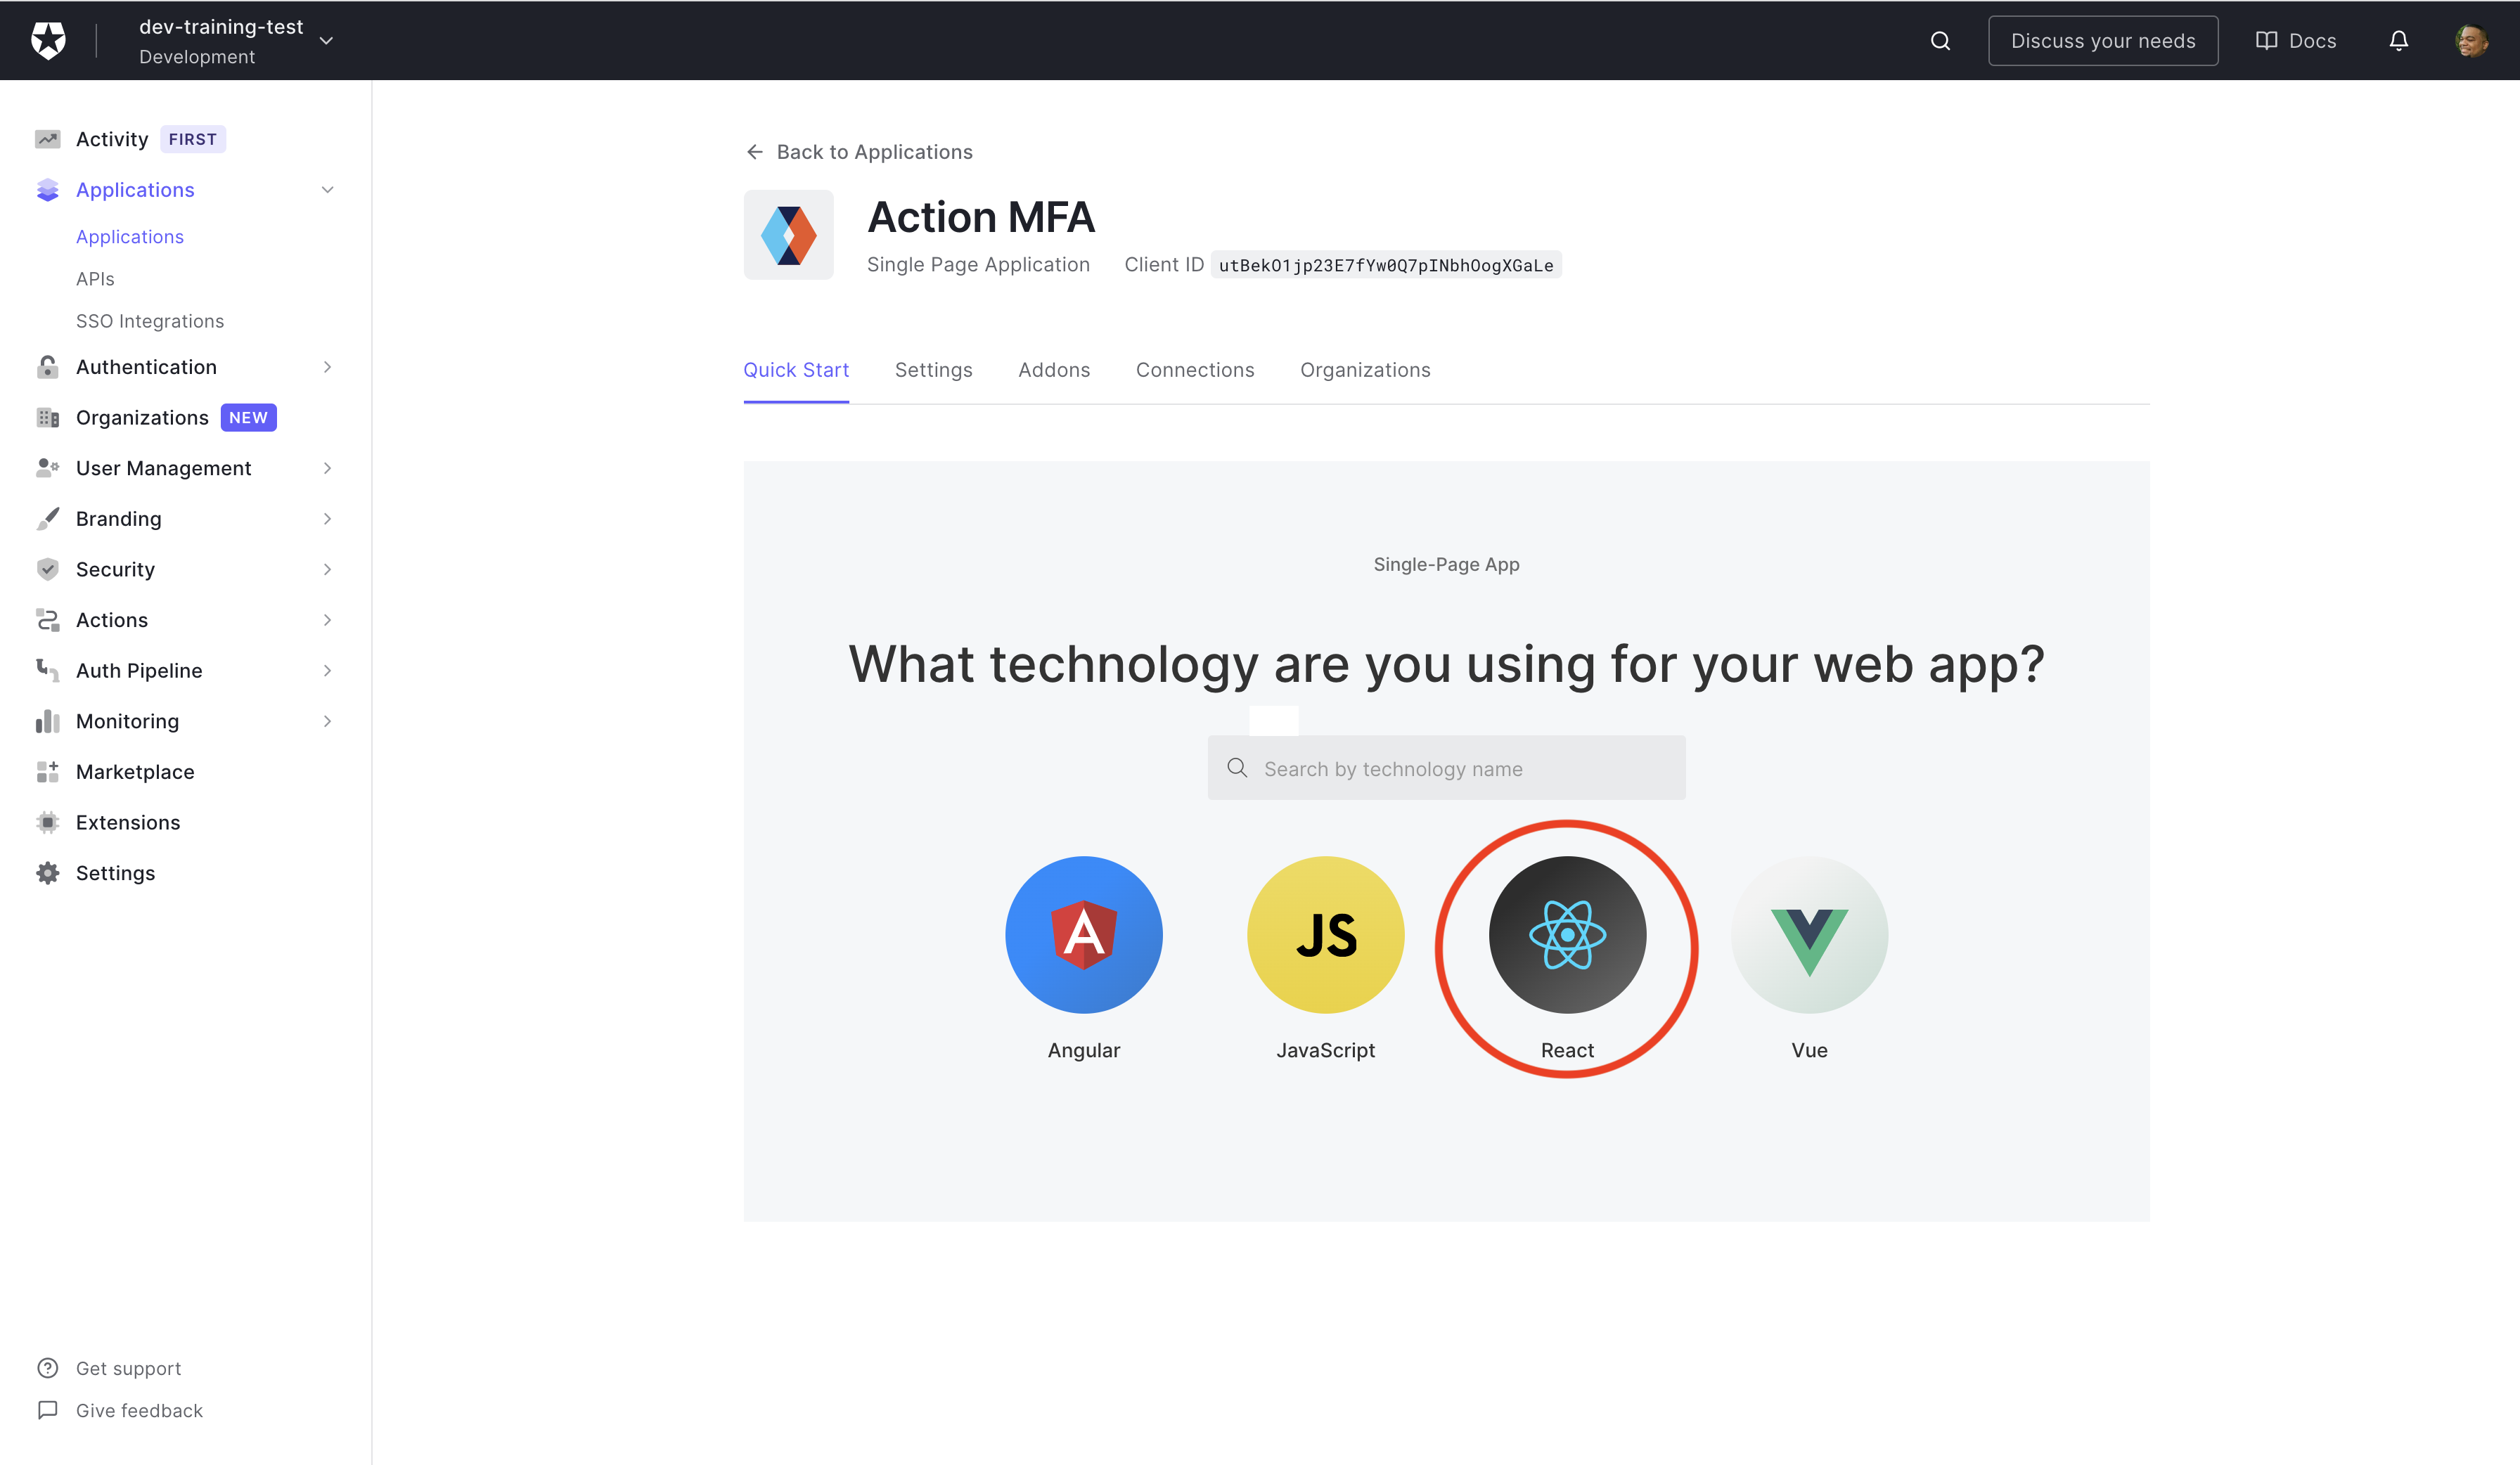
The next screen will ask you, "What technology are you using for your web app?" Select React.
To get up and running quickly, you can download a sample React application integrated with Auth0 on GitHub.
Once it is downloaded, type cd auth0-react-samples on your terminal, then run npm install to install the dependencies.
Configure Auth0 Credentials
For the authentication flow to work, the project needs your Auth0 domain and client ID. In your code editor, copy the content of src/auth_config.json.example into a new file in the same src folder called auth_config.json, and replace the values with your own Auth0 application credentials:
{
  "domain": "{YOUR AUTH0 DOMAIN}",
  "clientId": "{YOUR AUTH0 CLIENT ID}",
}
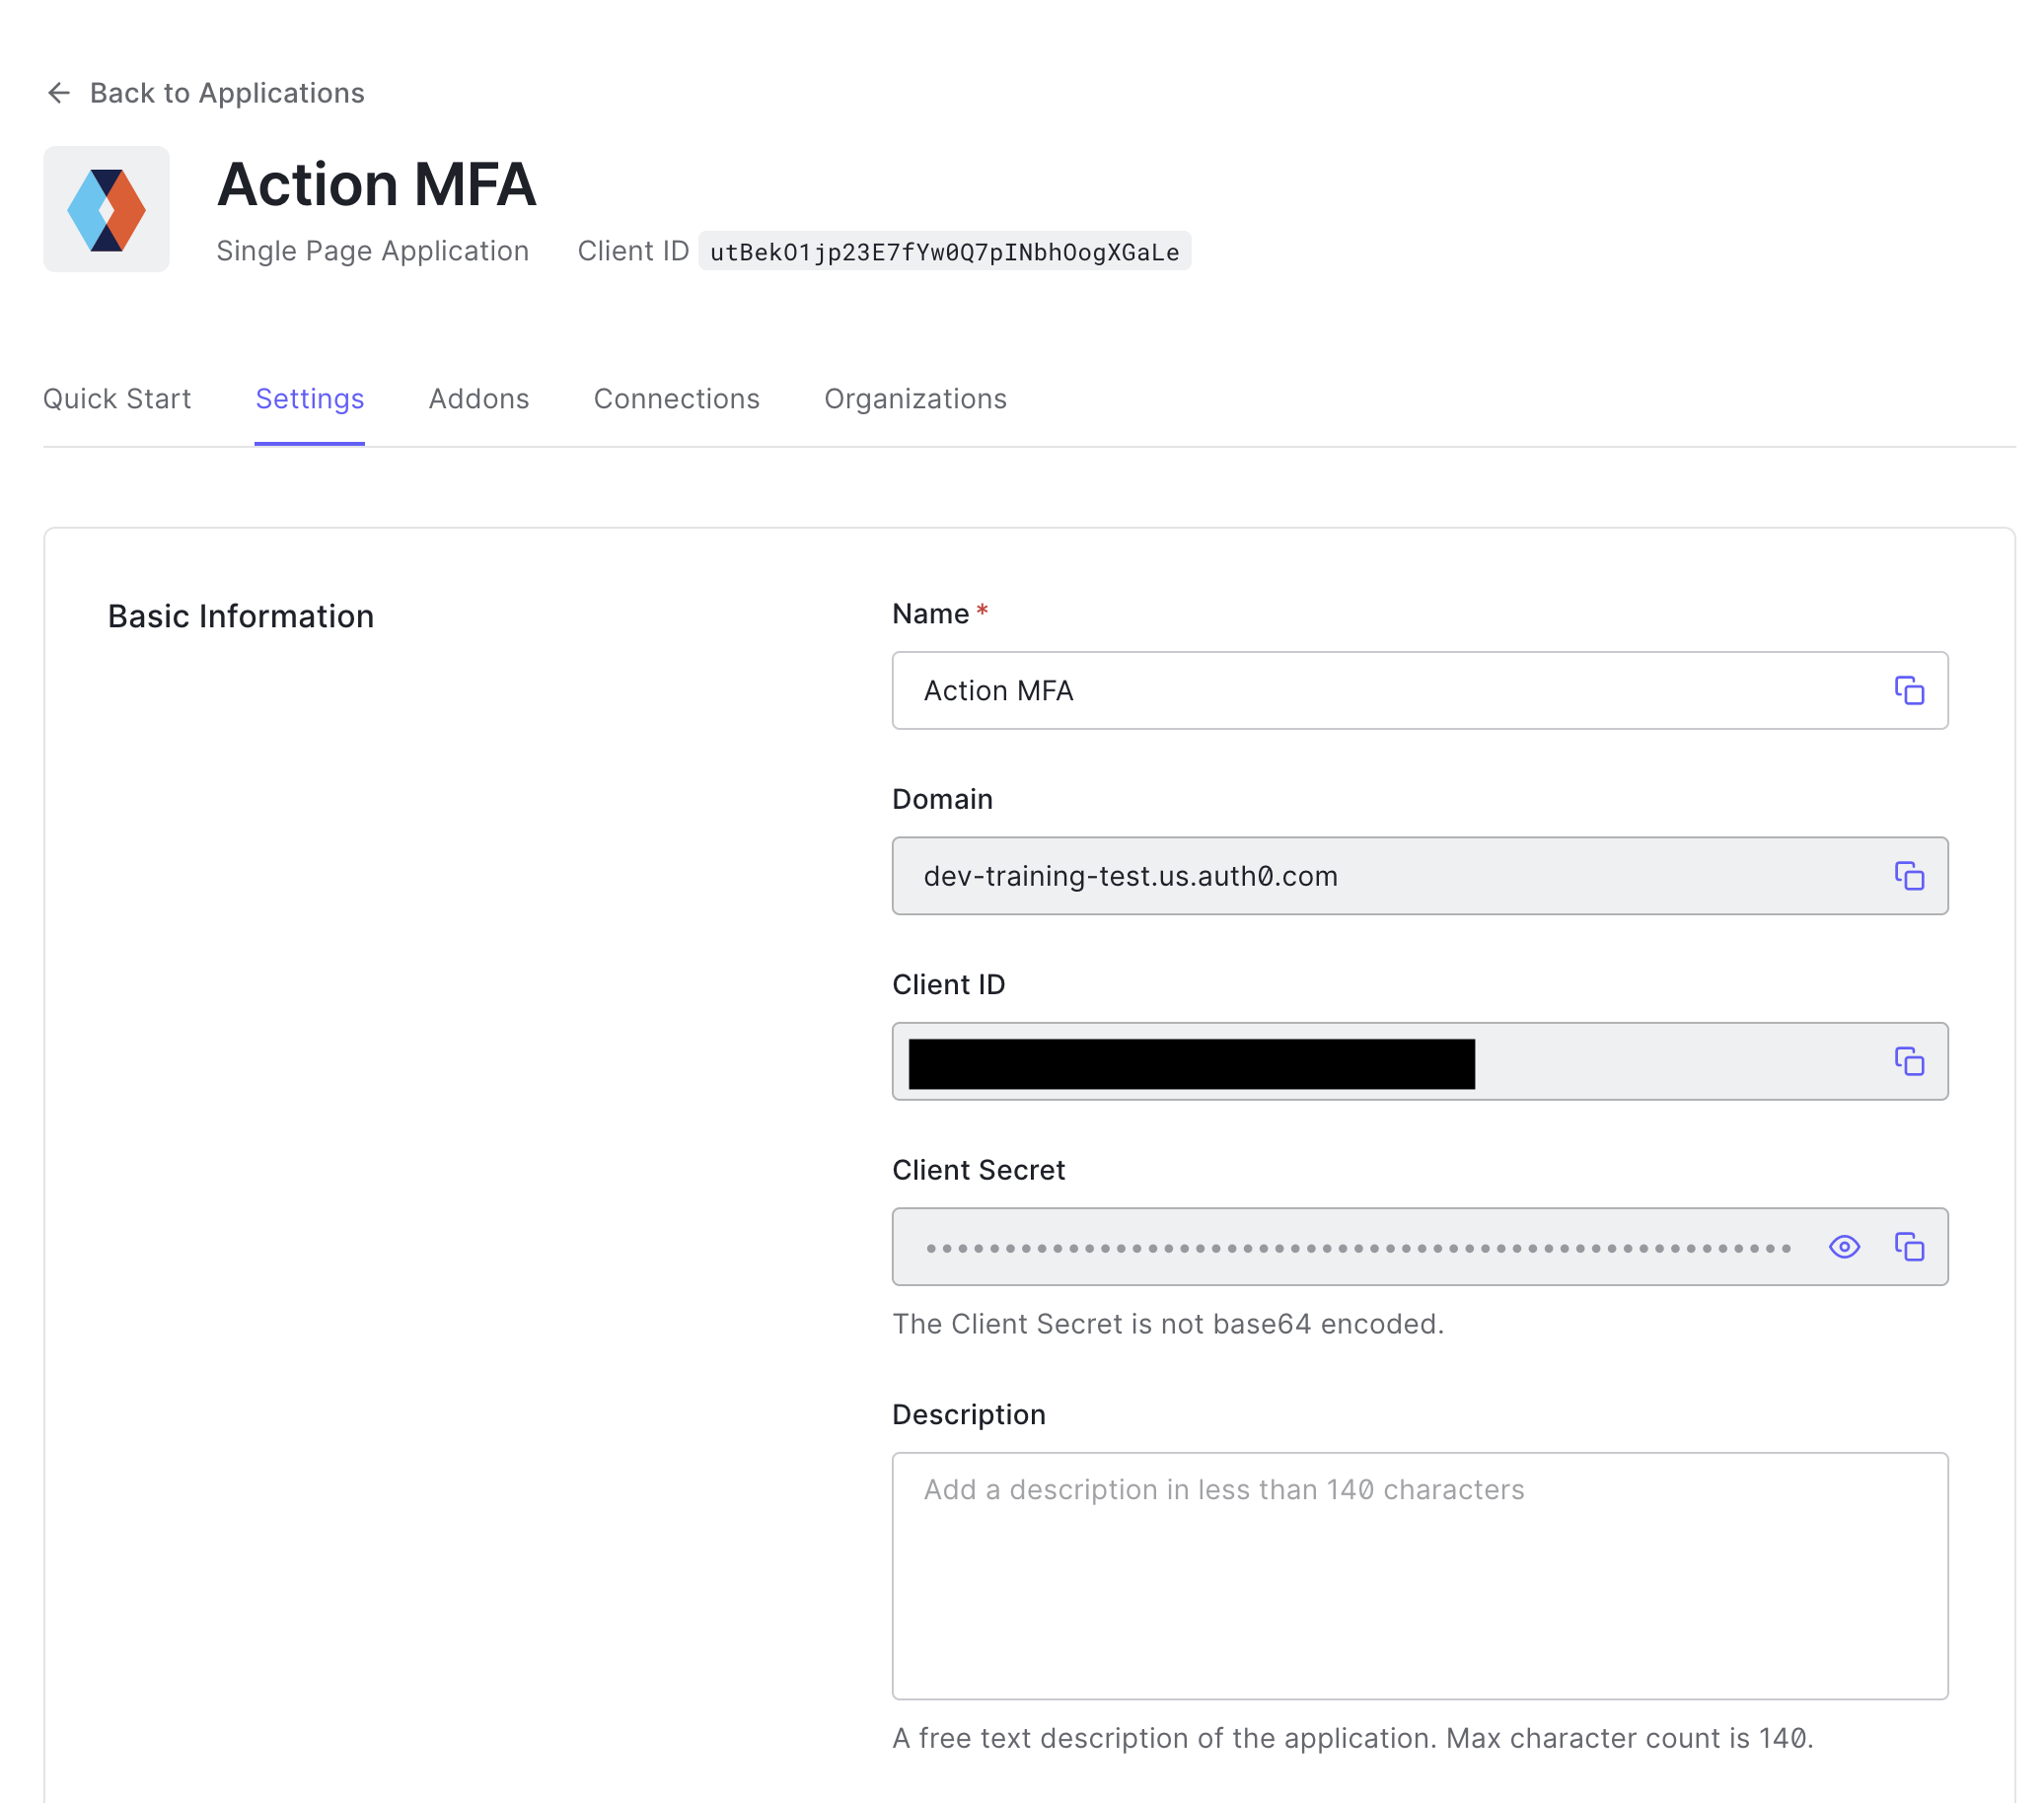
You can get the client ID and domain from the settings tab on your new application page.
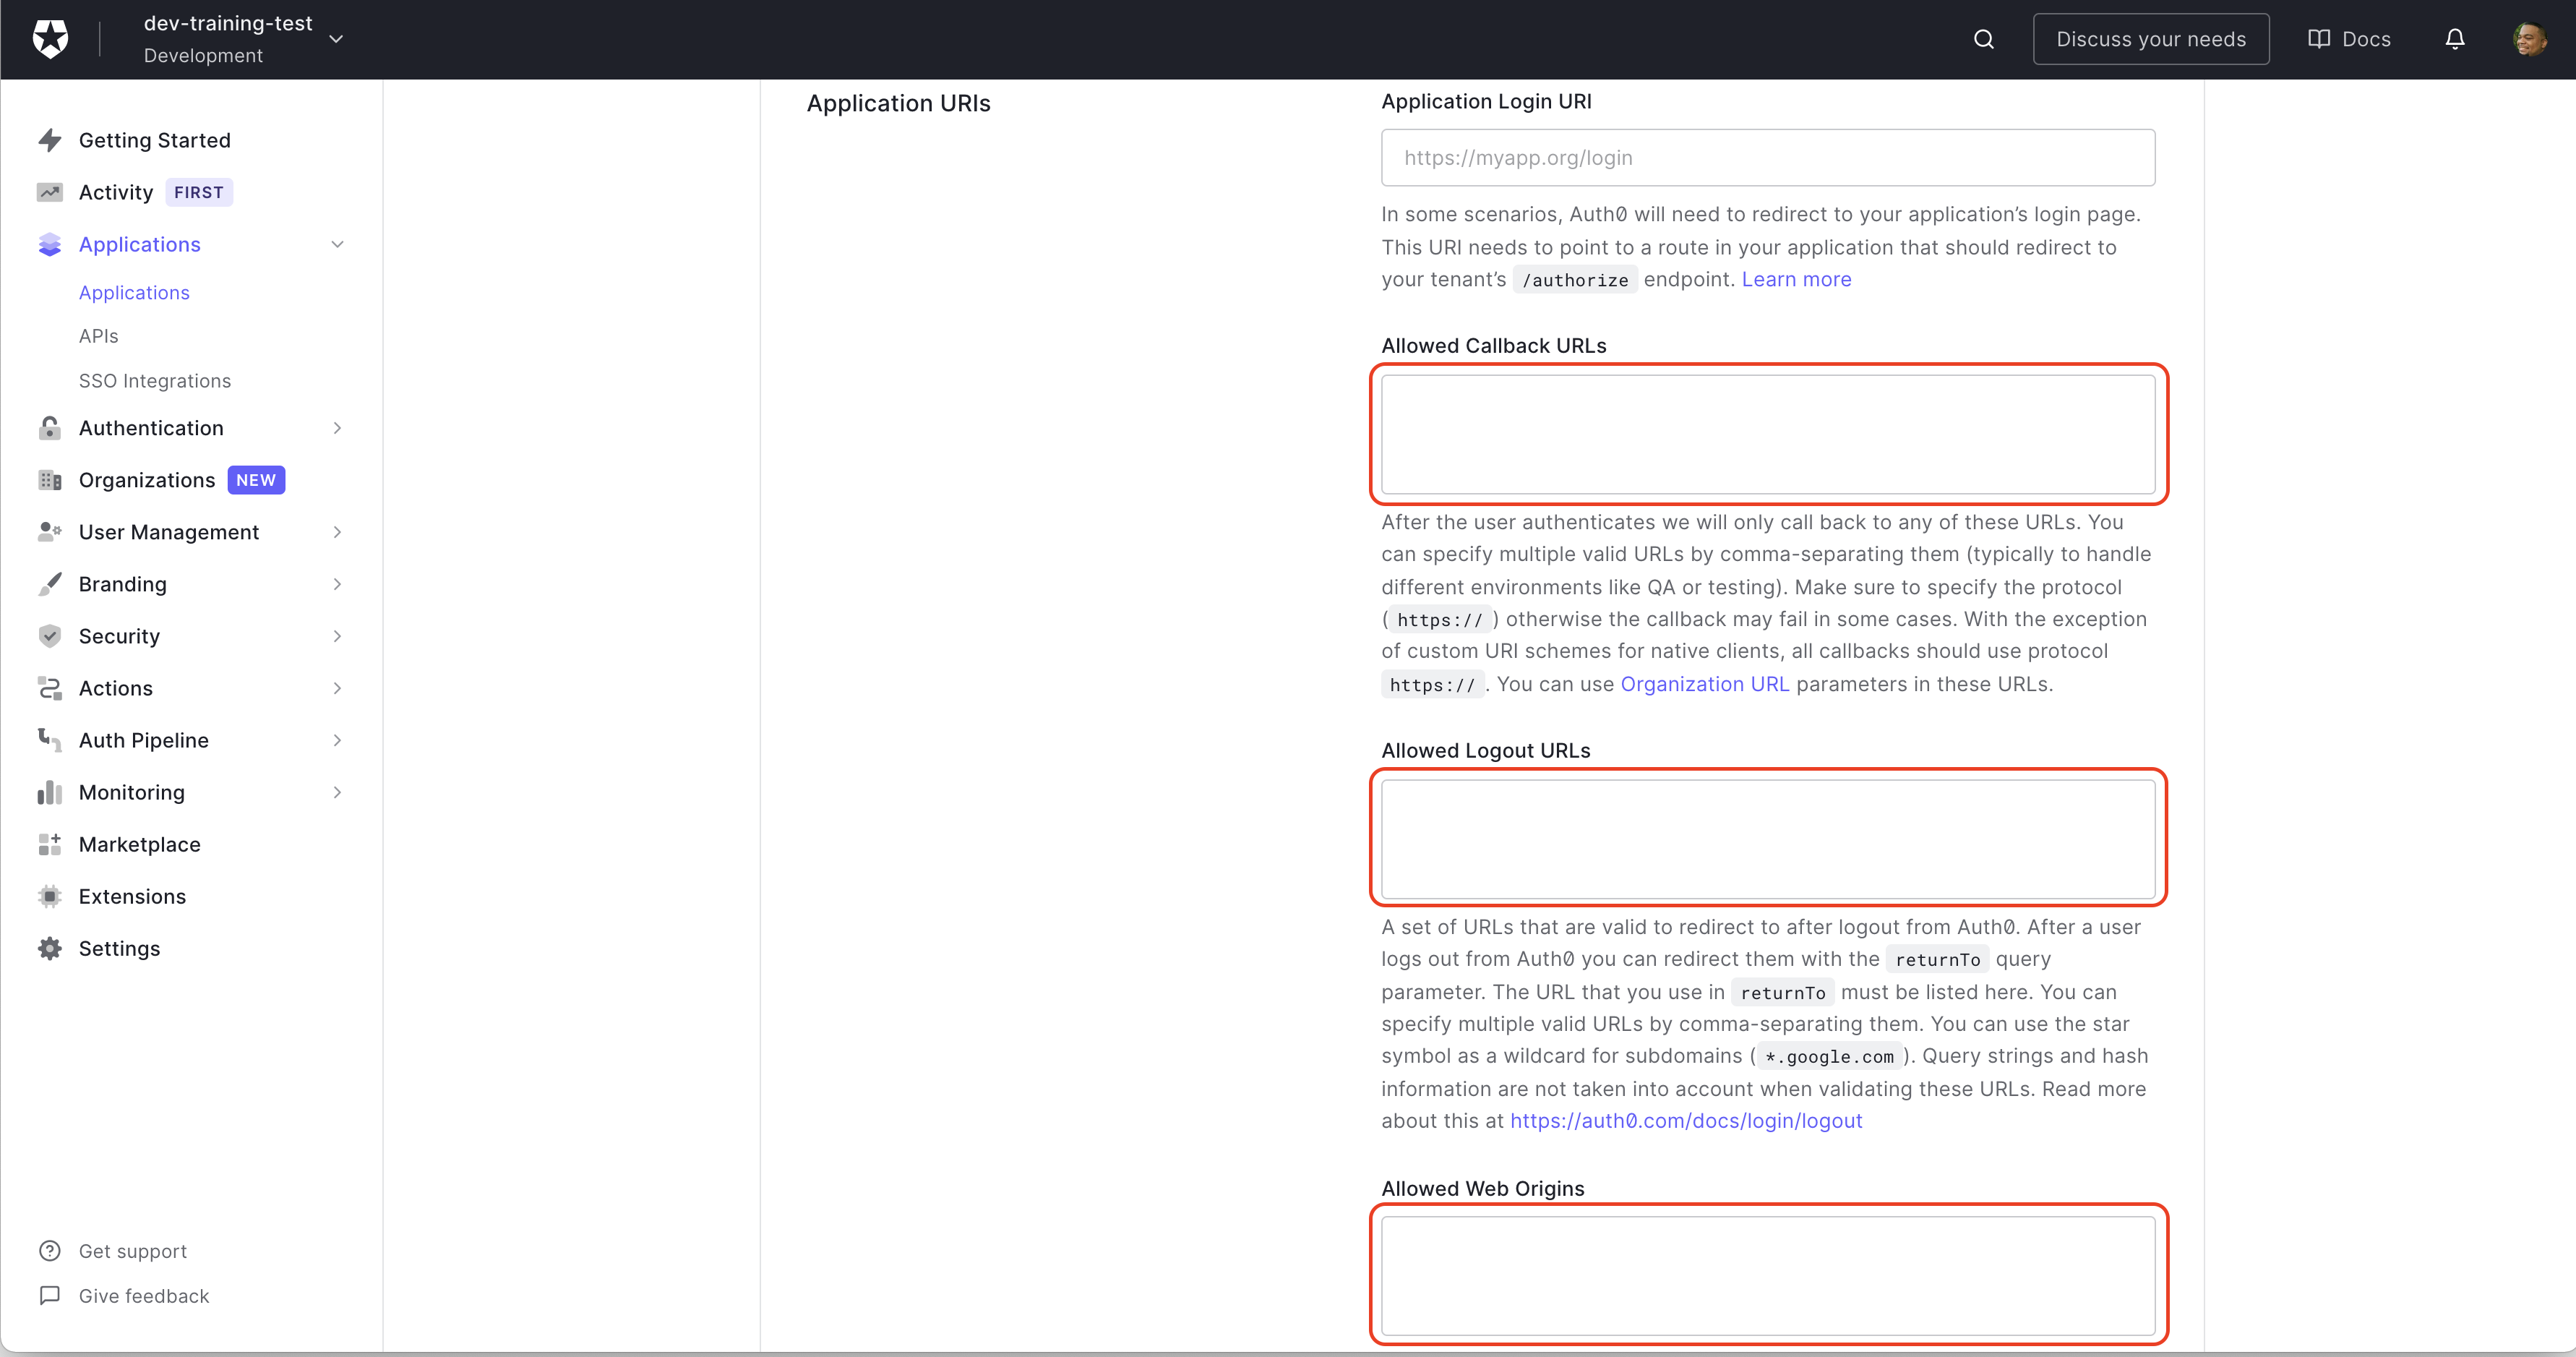
Next, scroll down to the Application URIs section to fill in Allowed Callback URLs, Allowed Logout URL, and Allowed Web Origins. This example is running locally, so enter http://localhost:3000 into each field. When you're finished, scroll to the bottom of the page and click Save Changes.
Create Action for MFA
With an application linked to the Auth0 dashboard, you can create an Action that will run globally for all applications in your Auth0 tenant. Actions are functions written in Node.js that you set to run at specific events based on your users' actions. Actions let you write custom code that fits your needs and integrates third-party vendors with Auth0 to work together. This post is going to focus on integrating with Plivo.
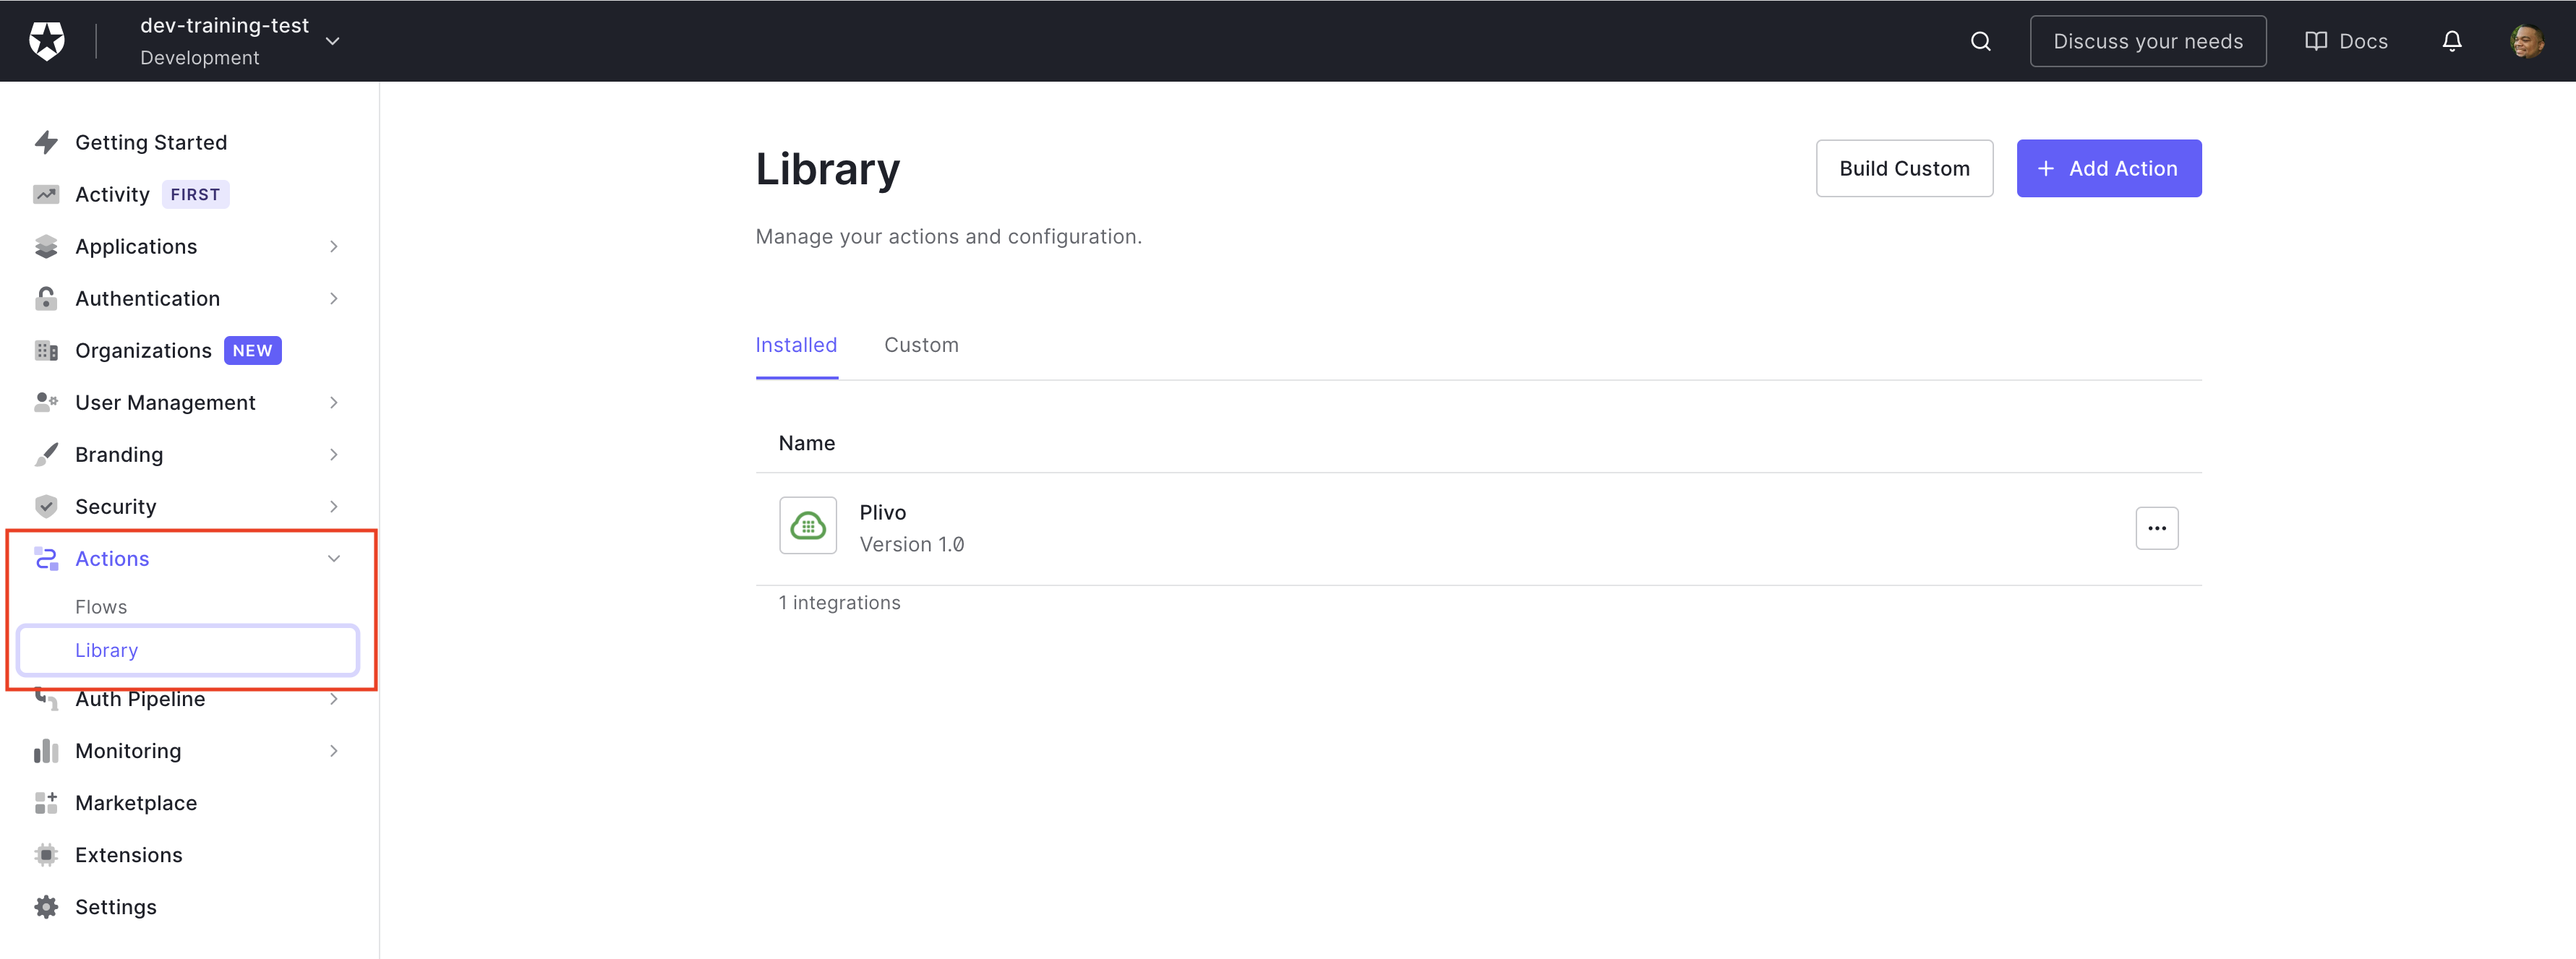
To get started with Actions, you need to add an Action to your library. On the Auth0 dashboard side menu, click Actions > Library.
On the Library Page, click Add Action. On the Browse Actions page, search for Plivo and click on it. On the next page, click on Add Integration. You'll then be met with a prompt telling you, "Plivo will need access to: Read and share user profile information" if you agree, click Continue.
Access and Add Plivo Credentials
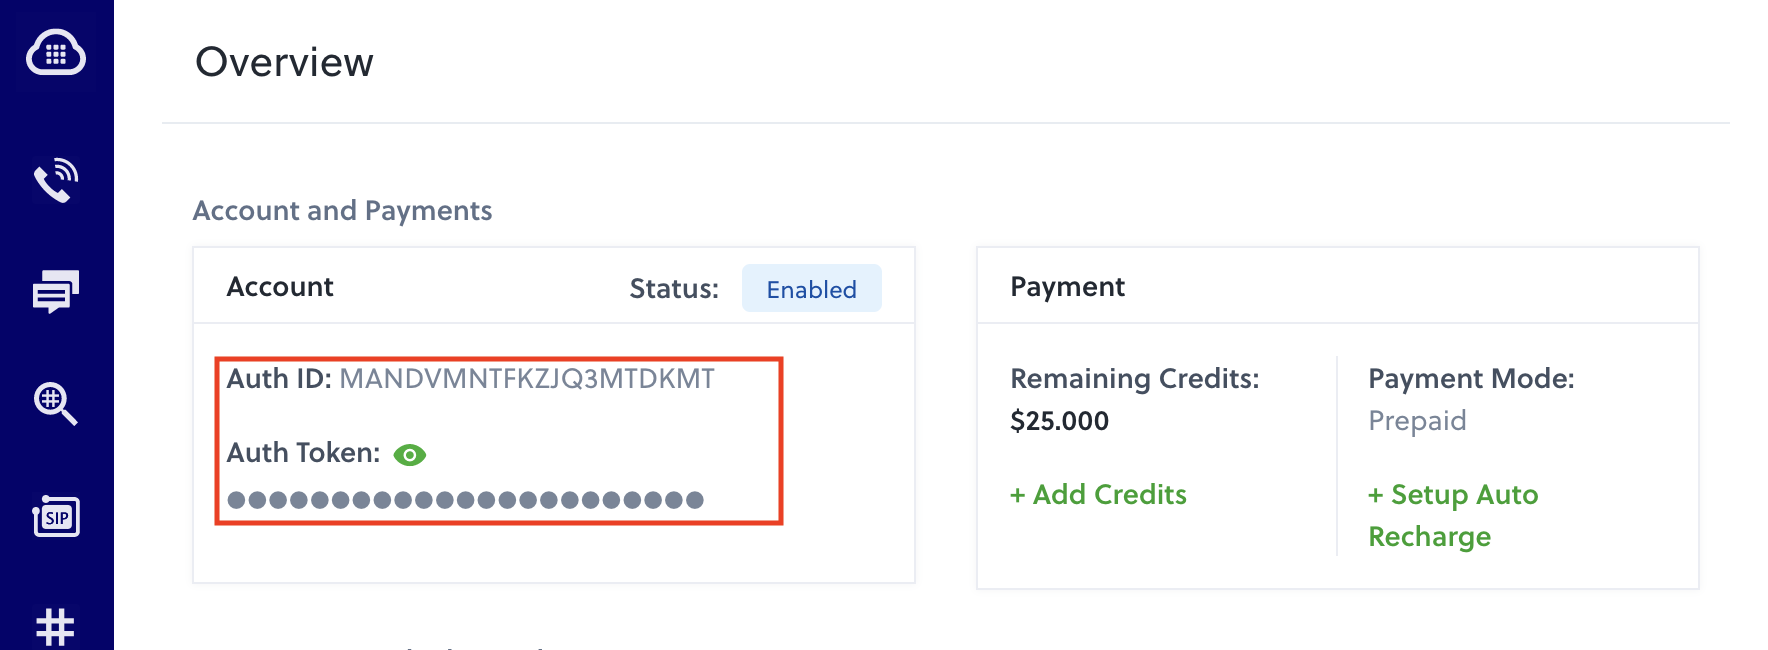
This will bring up a page to enter your Plivo credentials such as Plivo authorization ID, Plivo phone number, and Plivo authorization token. You can find the authorization ID and Token on the Account and Payments section of your Plivo dashboard.
Access your Plivo phone number by clicking on Phone Numbers on the left side menu. If you don't have a Plivo phone number, you can rent one following these instructions on the Plivo Docs.
Make sure you add the phone number in the E.164 format(ex. +15554443232)
Then click Create, and you'll go to the Library page. You can create an Action Flow from here. You'll learn how to use flows next.
Create Send Phone Message Flow
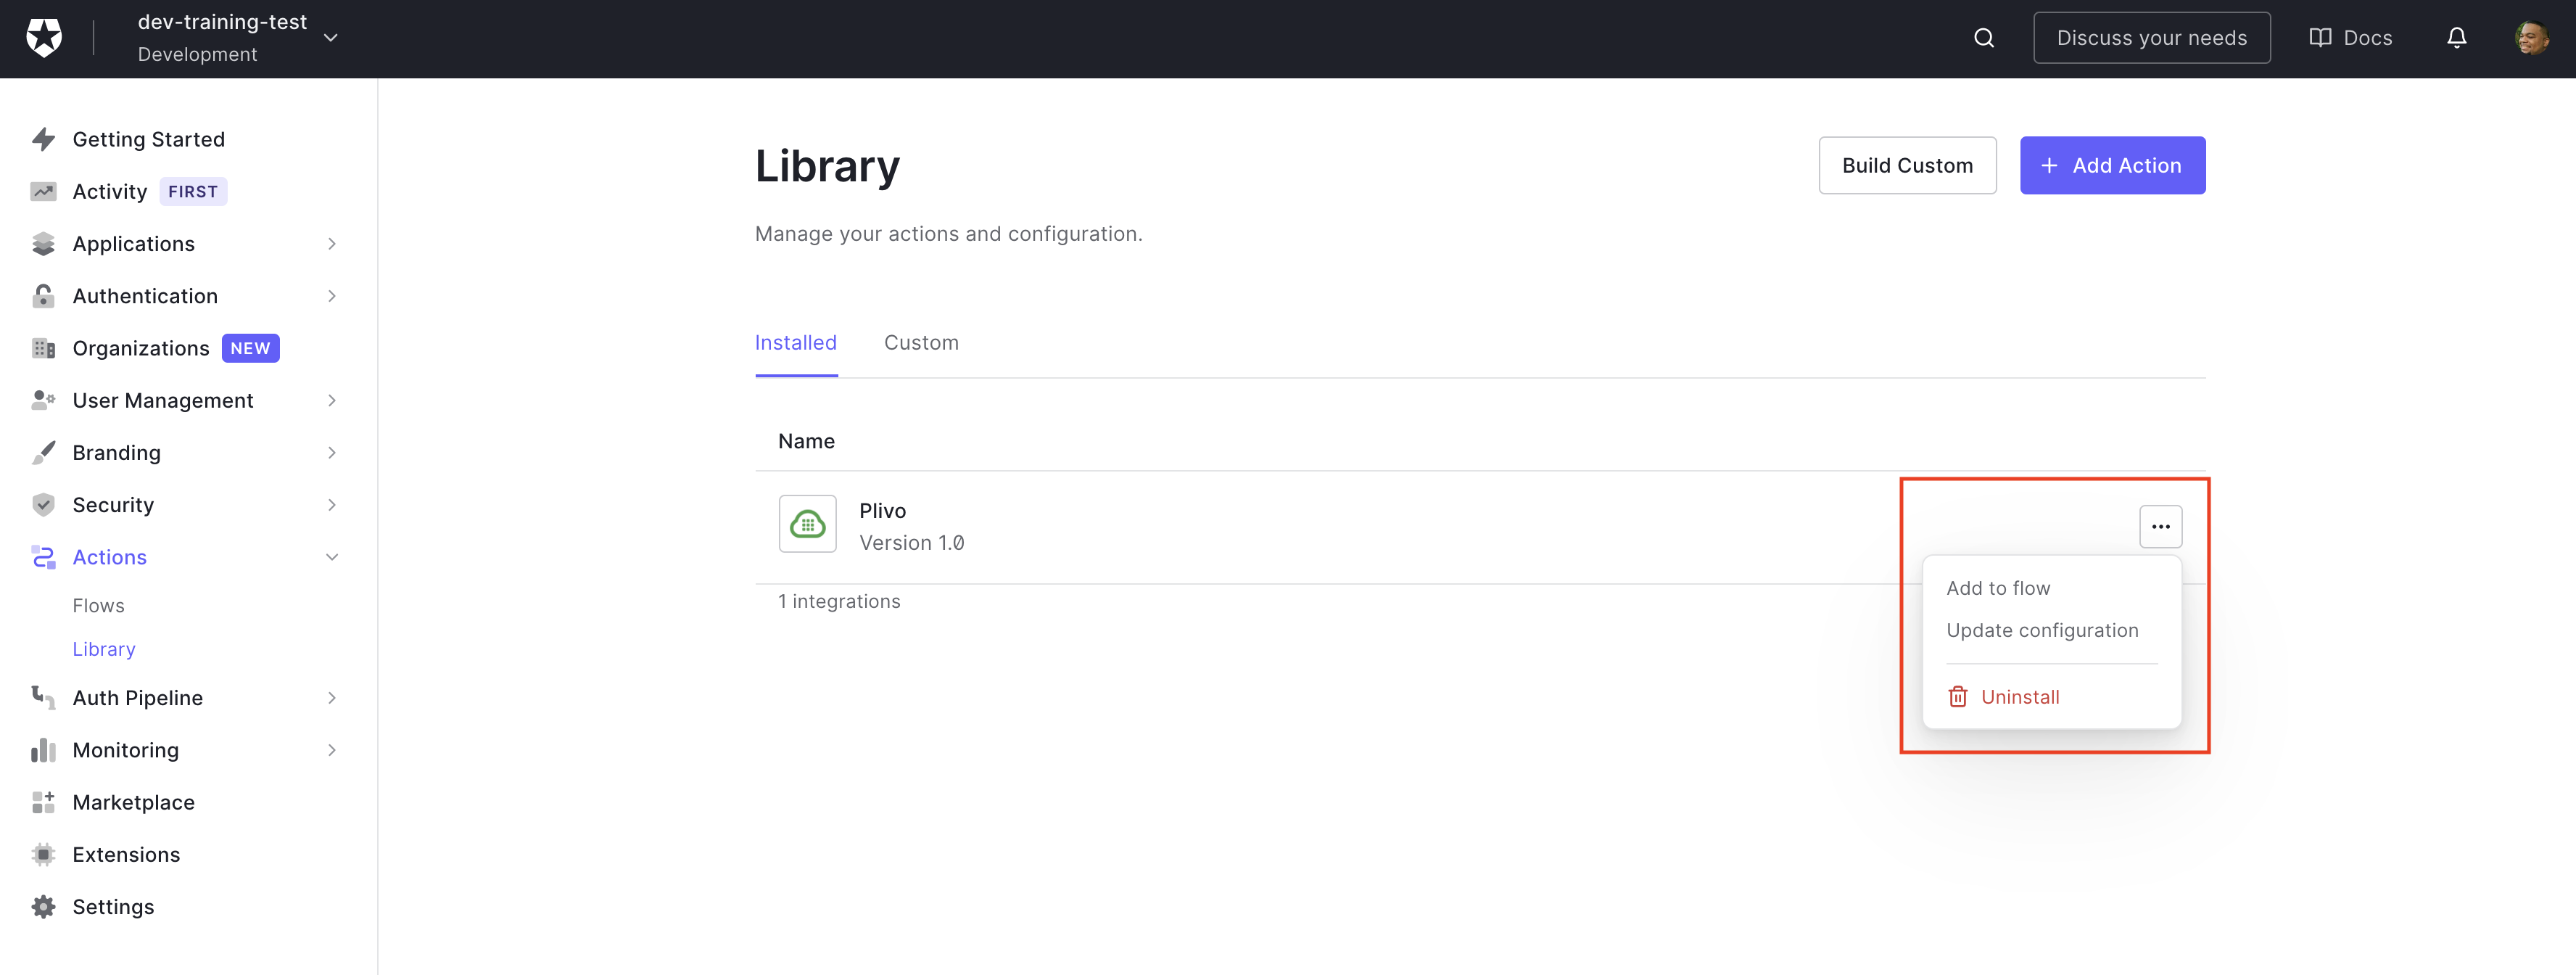
You should now see the Plivo Action on the installed tab of the Library page. Click the three dot menu on the right and select Add to flow.
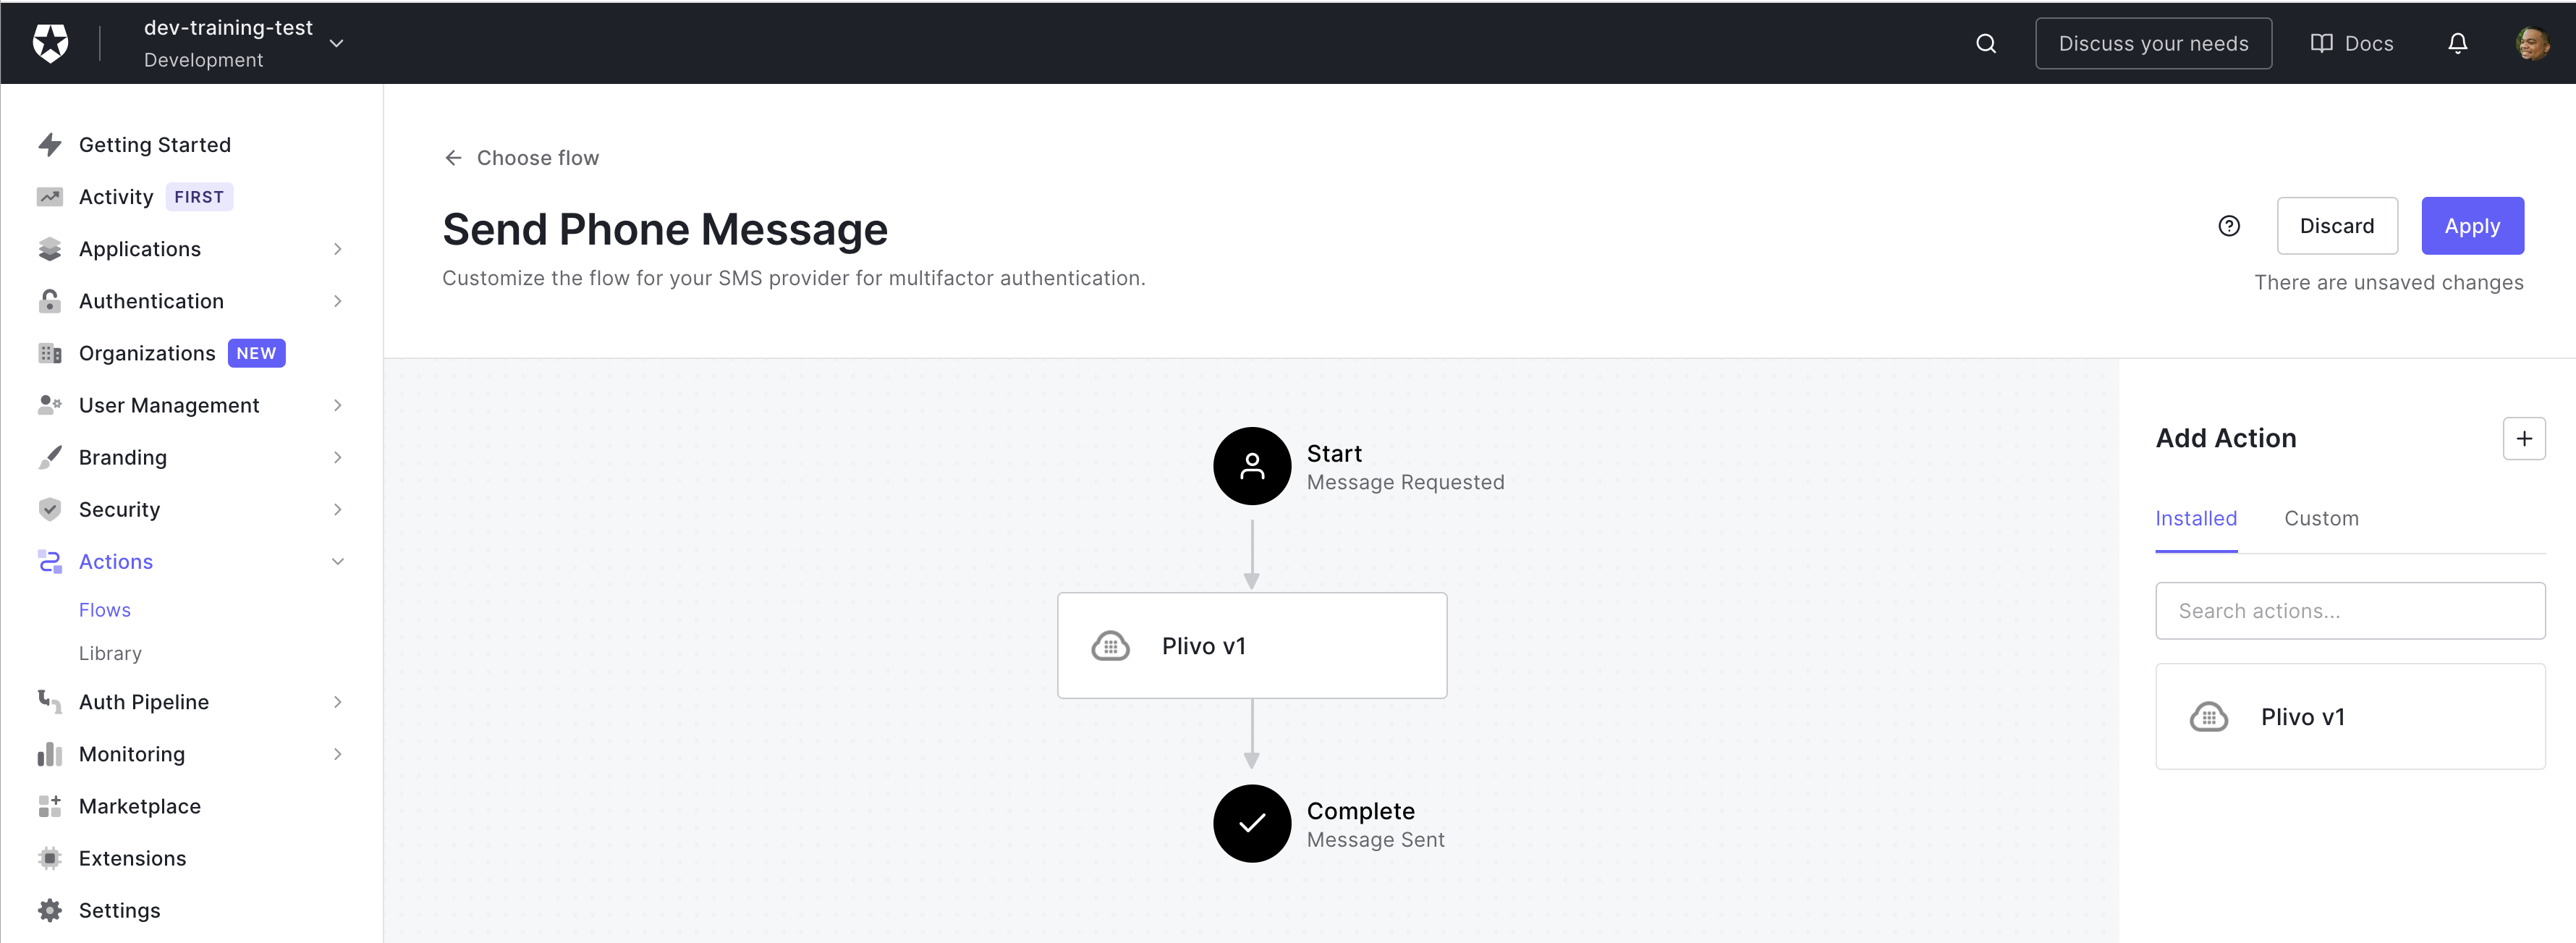
This will take you directly to the Send Phone Message flow. Flows are the steps your application takes when using Auth0 as your identity provider. You'll see the Start and Complete trigger points in the flow in Action flow visualizer in the middle of the screen. On the ride side of the screen, you'll see the Add Action section. This will show a list of installed Actions like the Plivo one we created, and there is also a tab for custom Actions.
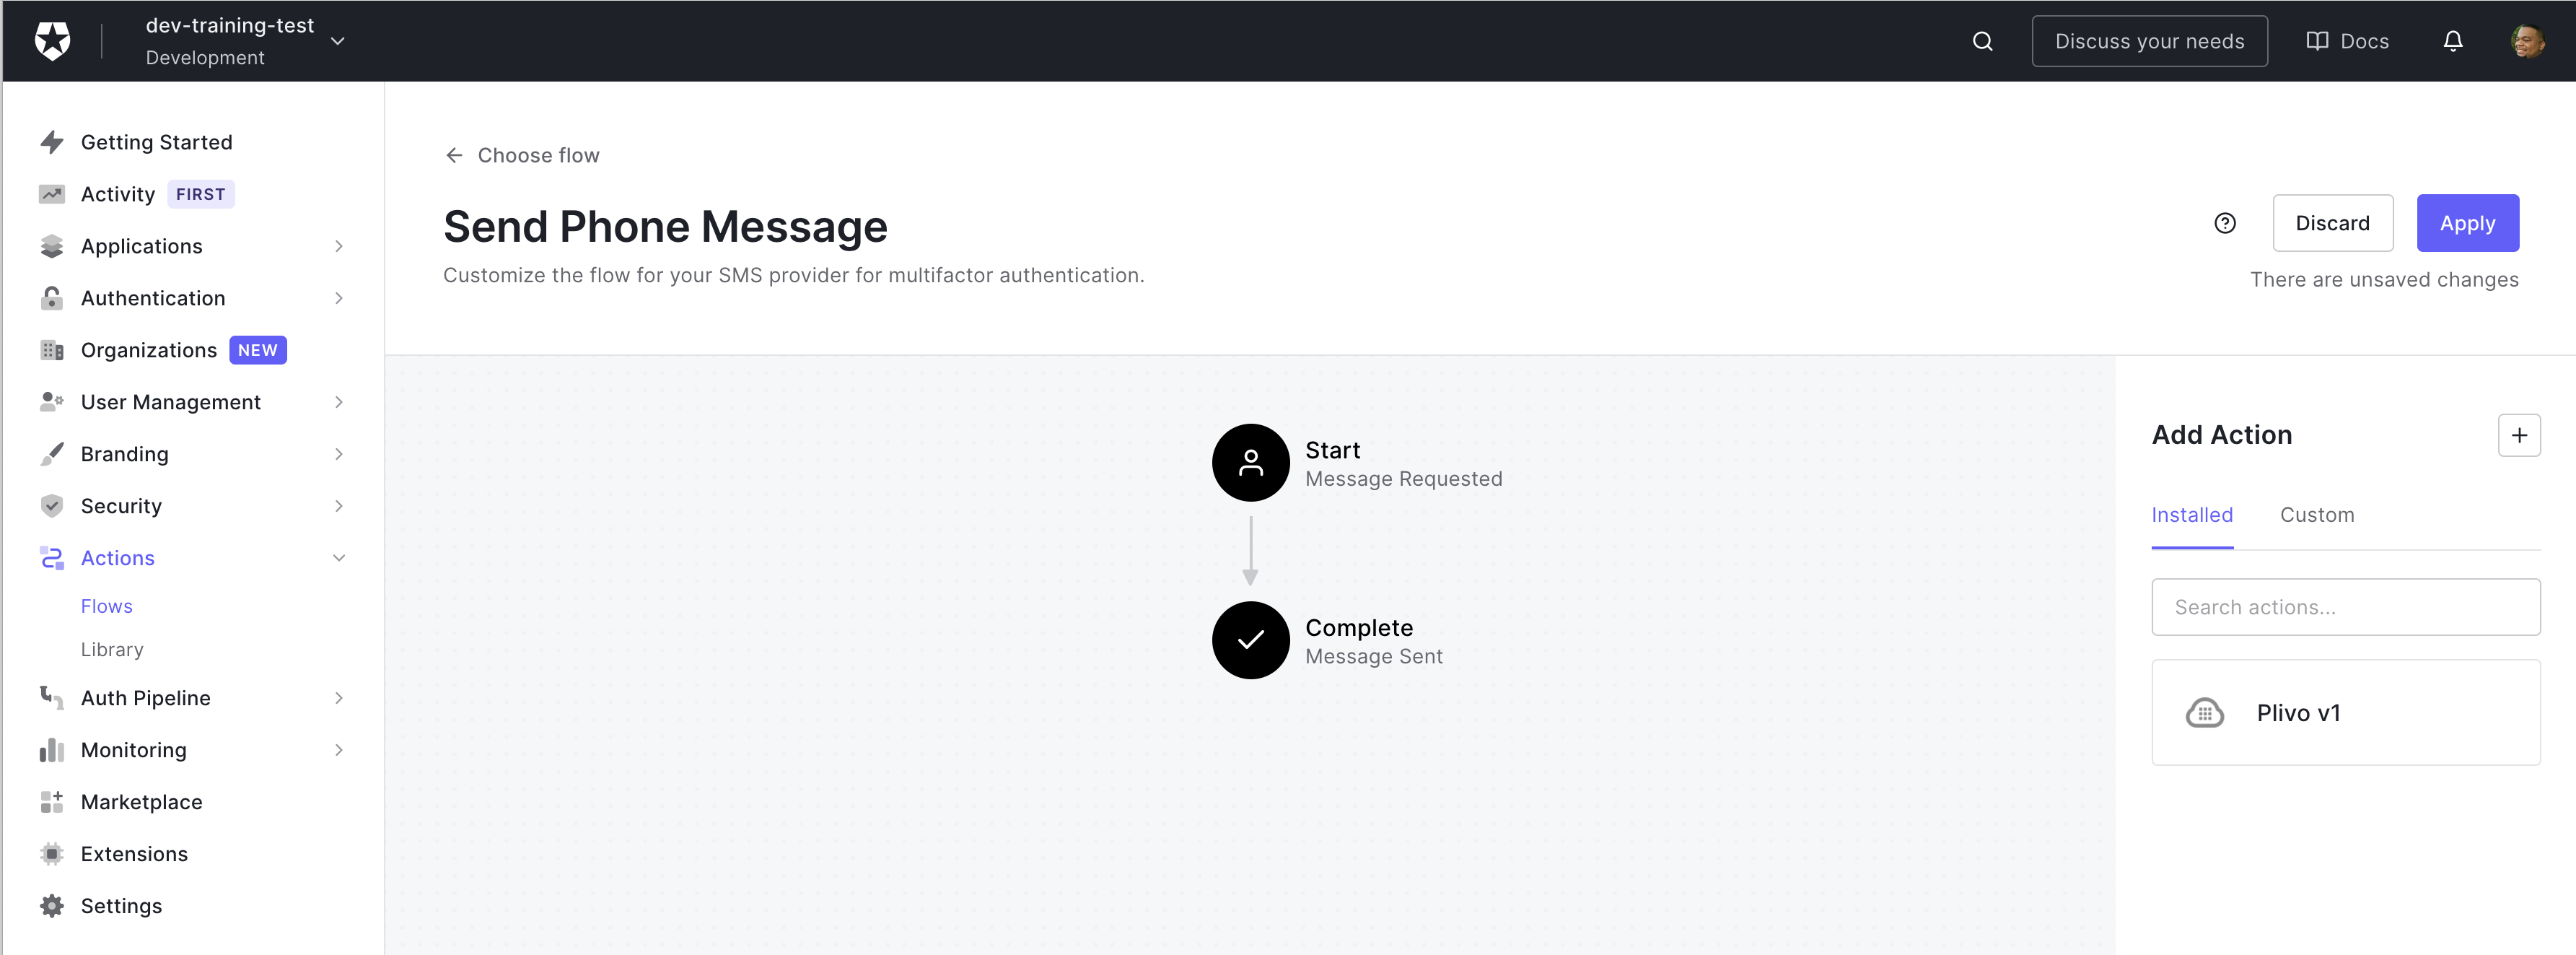
You can drag and drop the Actions to the point in the flow that you want them to trigger. Grab the Plivo Action and drop it in between Start and Complete, then click Apply.
Now, when an SMS message is requested, your application will signal Pilvo to send an SMS message. But how do you trigger the message request? You have to turn on SMS-based Multi-factor Authentication.
Turn on MFA in Auth0 Dashboard
On the left side menu in the Auth0 dashboard, click Security > Multi-factor Auth.
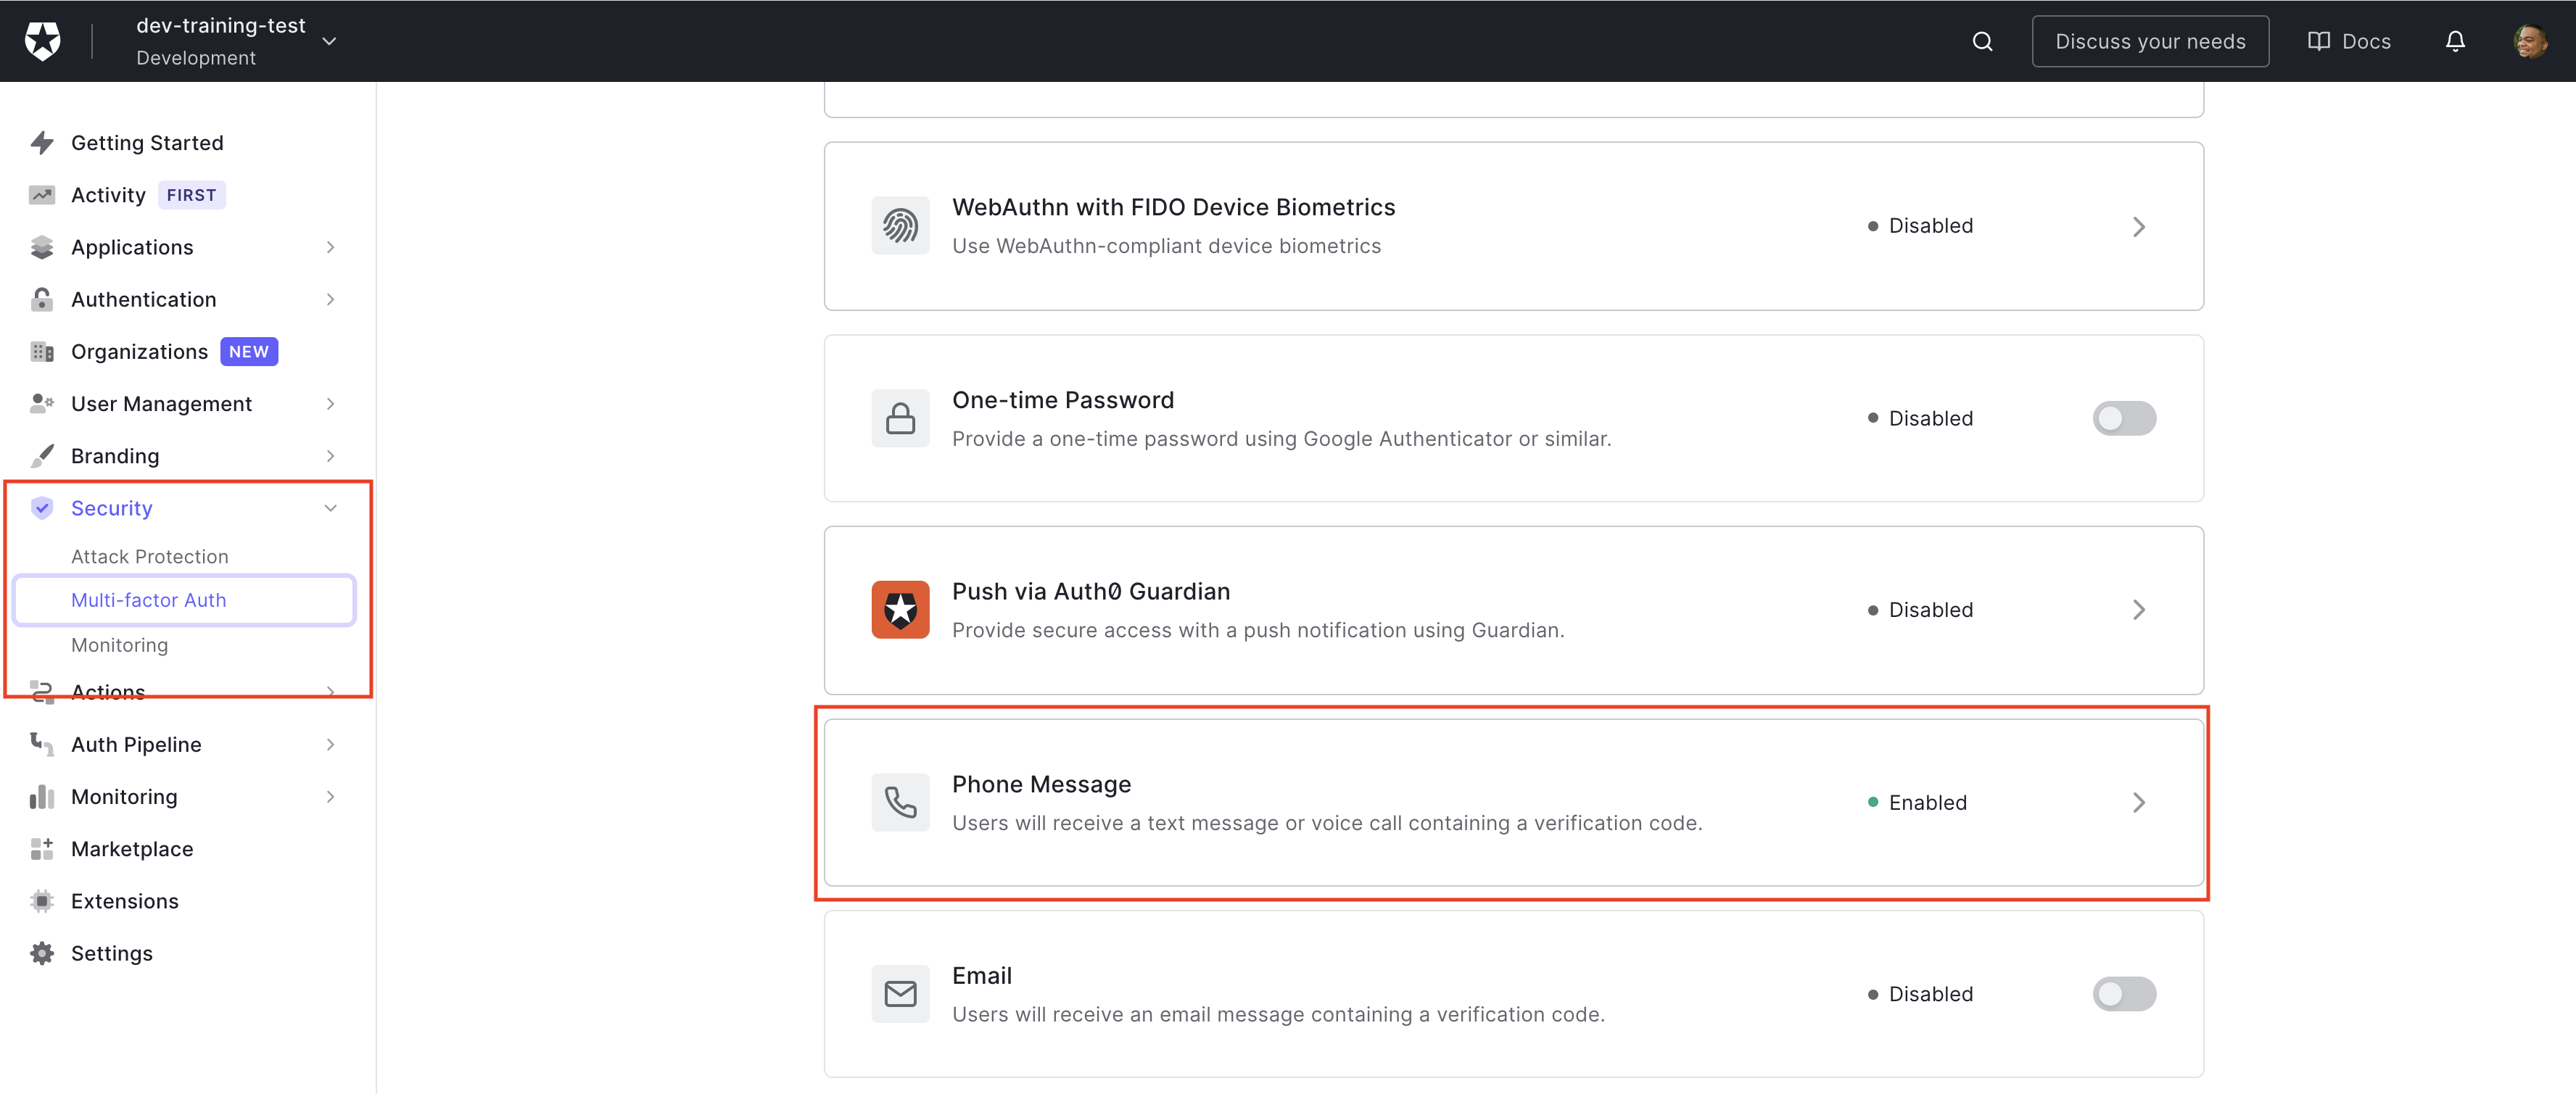
In the Factors section, scroll down and click Phone Message. Click the toggle on the upper right side of the screen to enable Phone Message. With this turned on, it requests a phone message be sent to your users with a code to verify their login.
Under Choose a delivery provider, select Custom, since you created the Plivo "Send Phone Message" hook to handle sending an SMS to users. For Choose a delivery method, choose SMS.
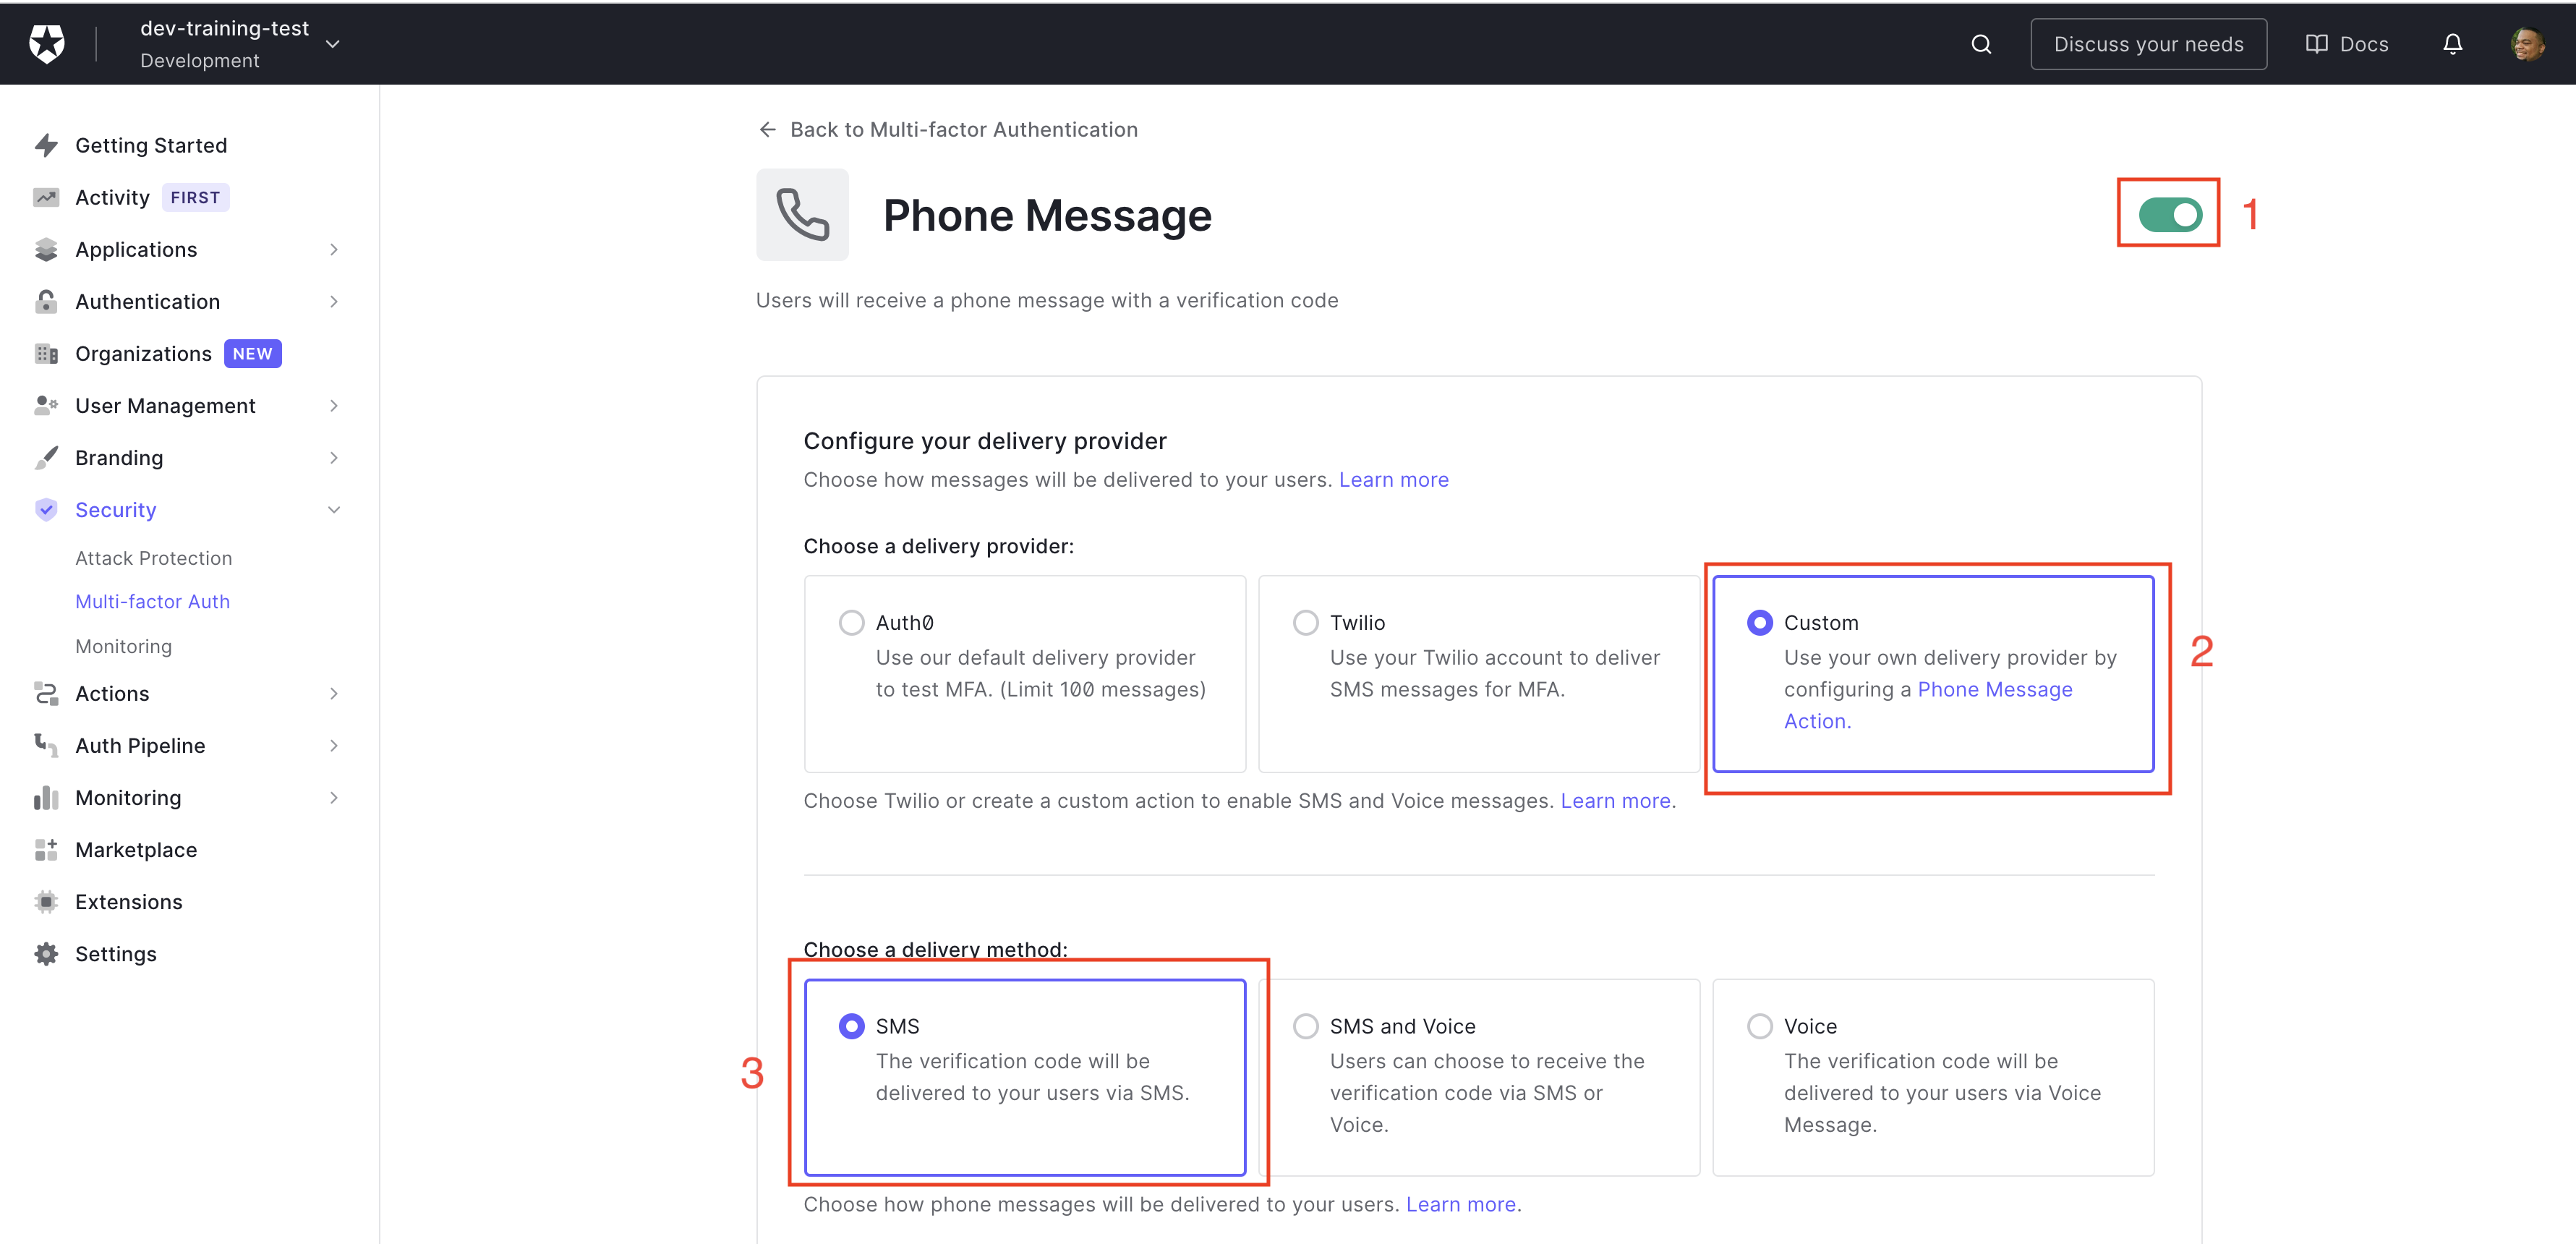
Scroll to the bottom of the page and click Save to save these settings.
Return to the Multi-factor Authentication page and scroll down to the Define policies section. This section tells Auth0 when you want the Phone Message MFA request to trigger. For this example, select Always to ensure your users have an extra layer of protection each time they log in. Then click Save.
You will then be asked, "Are you sure you want to continue?" This prompt also lets you know that all users will be required to enroll in MFA and that all applications in your Auth0 tenant will now use MFA. Click Continue.
You have everything set up to require your users to receive an SMS message with a verification code from Plivo after logging in. But it's always a good idea to test out new features after you add them.
Test Your MFA Login Flow
Run your sample application locally by launching the npm run dev command in the project's root folder. Then, head your browser to the http://localhost:3000 address and click Login on the home page. On the login page, enter your email and password. Next, you'll be prompted to add a phone number to secure the account. This is what your users will see the next time they log in after you enable MFA.
You can select the code for your country on the first line, then type in your phone number and click Continue. You'll revieve an SMS message with a verification code. Enter that code into the input box on your application.
You've successfully added another factor of protection for your users!
Test MFA flow in Auth0 Dashboard
Another way you can test the MFA flow is by using the Auth0 dashboard. You can test Actions you created without having to run your entire application.
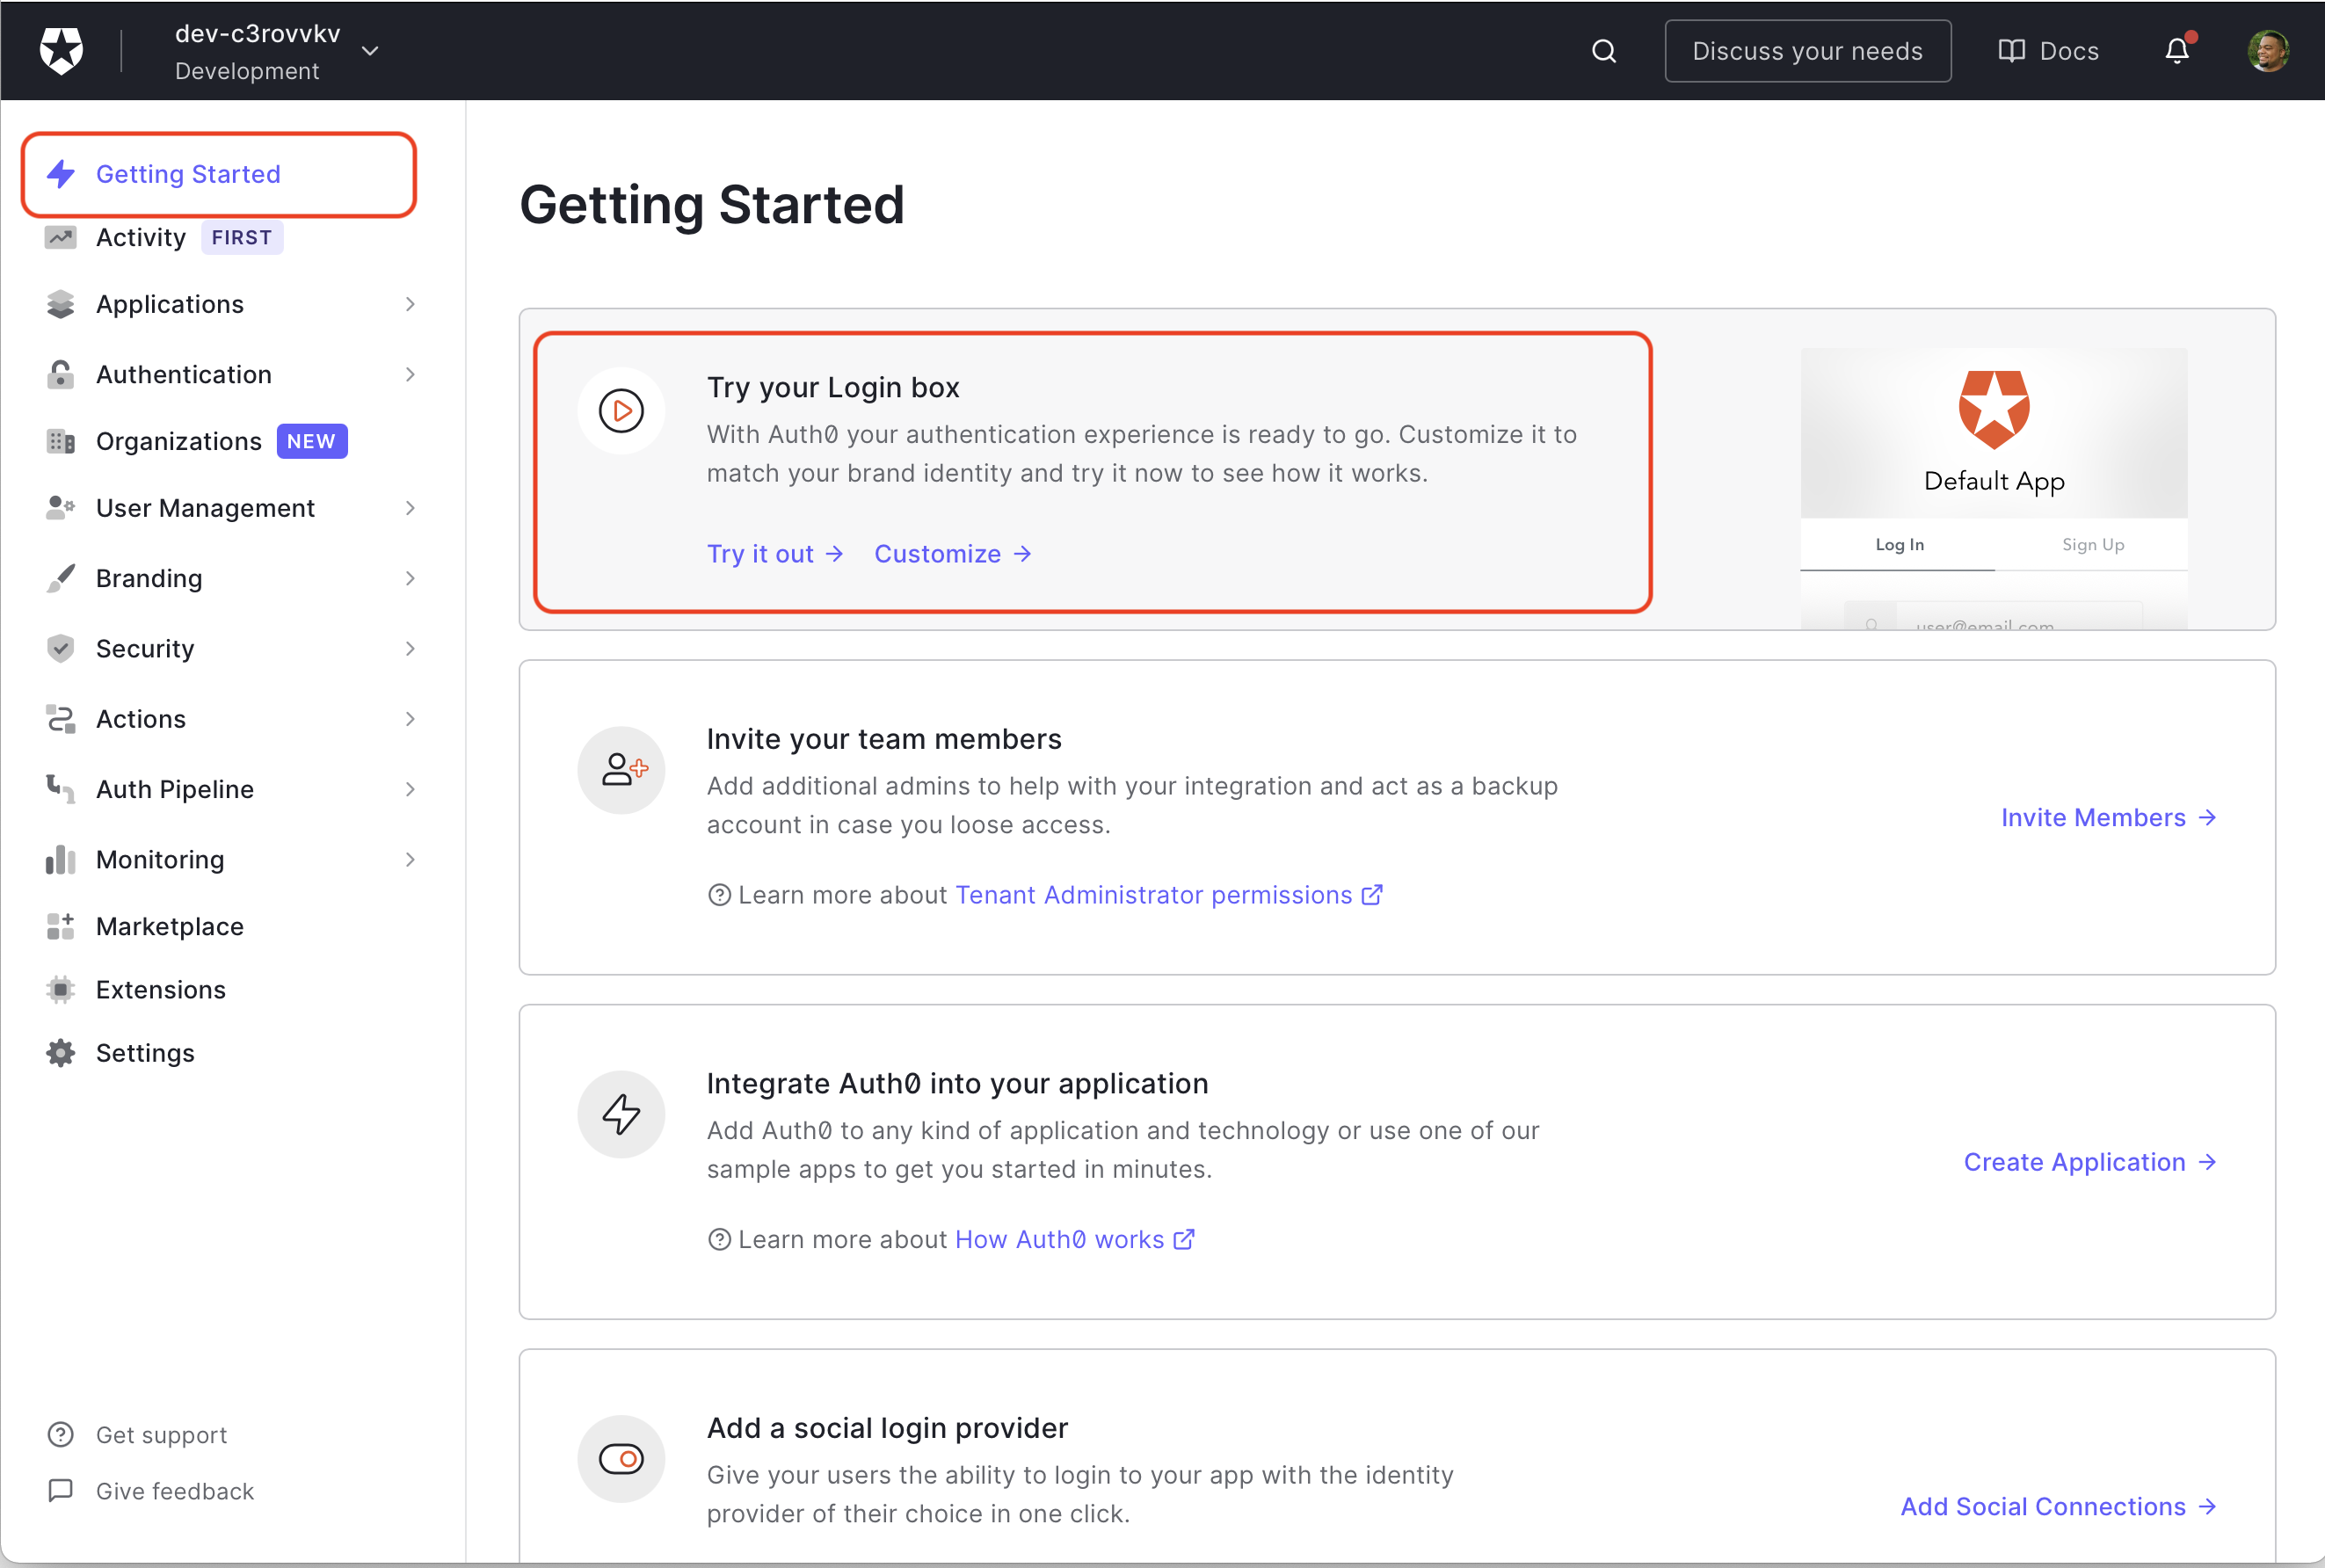
Click Getting Started at the top of the left menu on the Auth0 dashboard. You'll go to the Getting Started page, where you'll see the option to Try your Login box. Clicking Try it out will bring you to the login box that your app will use.
Log in as one of the users in your tenant (If you don't have any users, click Sign up).
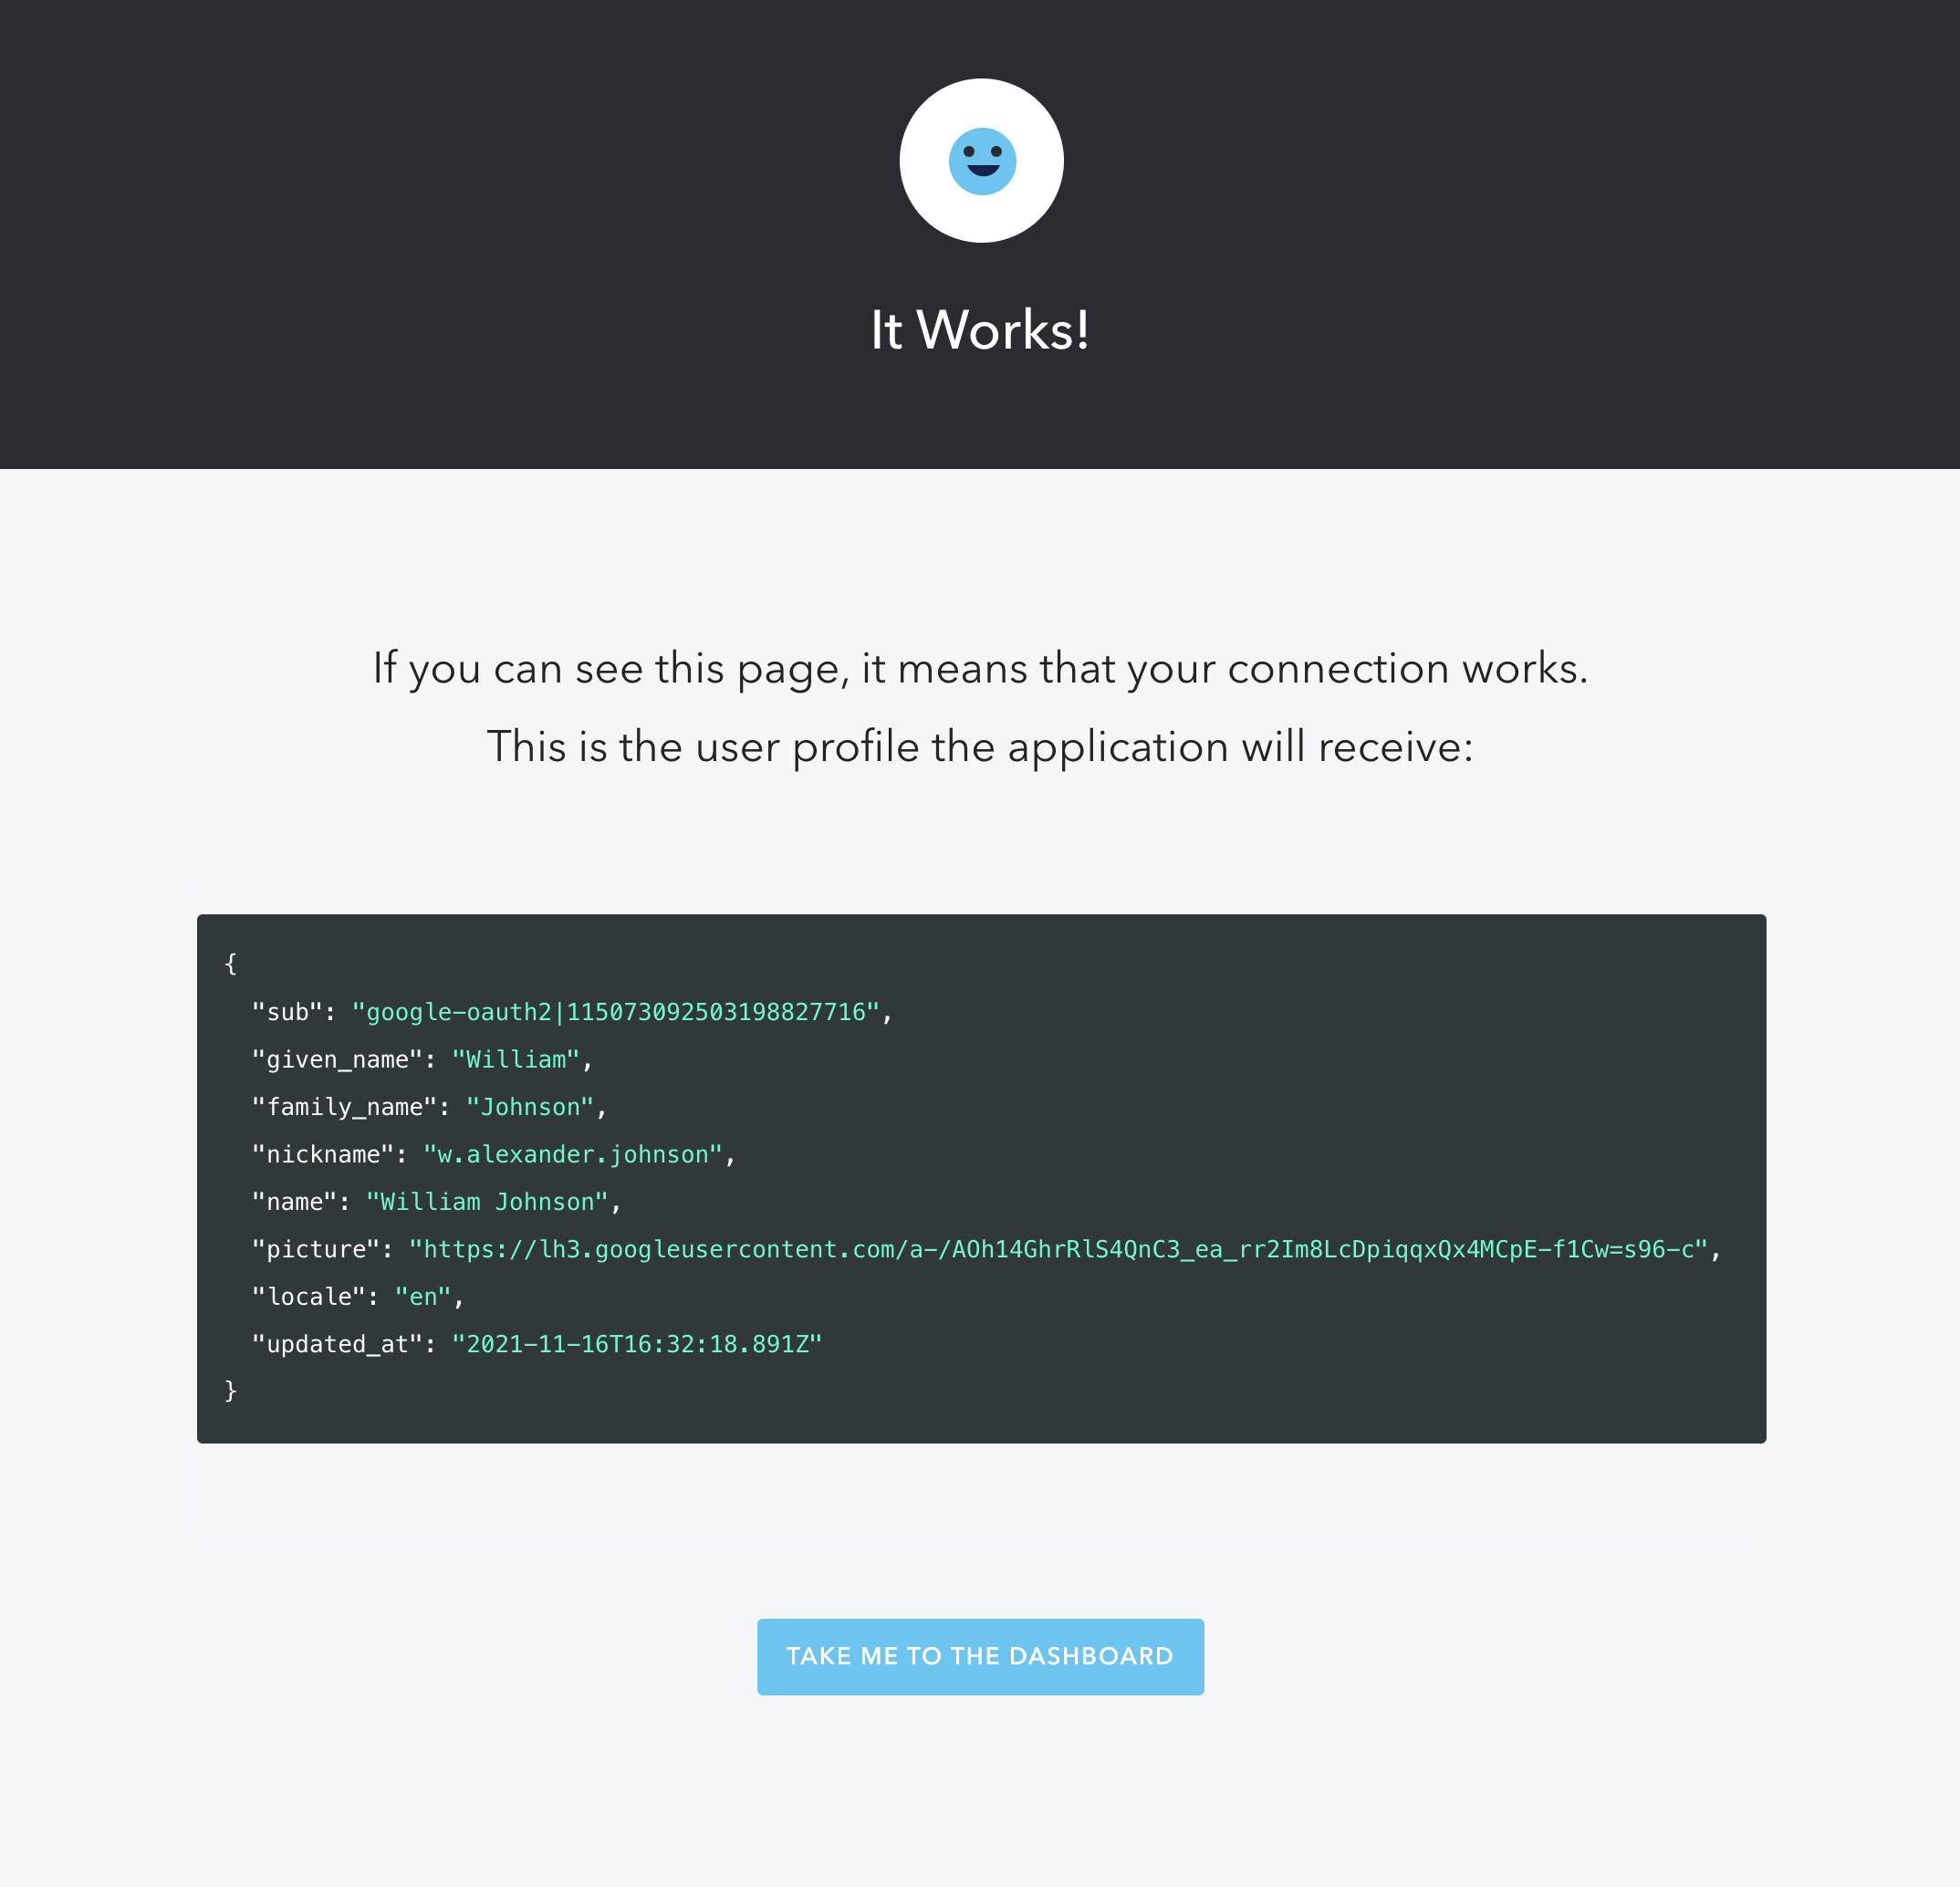
Once logged in, you'll be asked to provide a phone number. Enter the number for your mobile phone. You'll receive an SMS message from your Plivo phone number with a six-digit code. Enter this code into the Auth0 login box and click Continue. You'll be greeted with the It Works page, confirming that your MFA Action worked!
Conclusion
Congrats! You just added another layer of protection to keep your users' data safe. First, you included the Plivo integration from Actions Library. You then created a "Send Phone Message" flow using the Plivo integration and the Actions drag and drop interface. After that, you enabled the Action by turning on MFA in the Auth0 dashboard. Finally, you tested everything out using "Try your Login box" in the Auth0 dashboard.
About the author

Will Johnson
Developer Advocate
Will Johnson is a Developer Advocate at Auth0. He loves teaching topics in a digestible way to empower more developers. He writes blog posts, records screencasts, and writes eBooks to help developers. He's also an instructor on egghead.io.
View profile