
Java's library ecosystem is deep and complex. This is both a blessing and a curse: there are great tools out there, but picking the right combination and setting them up to work together can be quite complex. Furthermore, the depth and breath of many of these libraries makes the getting-started step somewhat hard. JHipster comes to the rescue. See how easy it is to get started on your new Java + JavaScript web app with it. Read on!
“Java's library ecosystem is deep and complex. This is both a blessing and a curse.”
Tweet This
Introduction: Java in the Modern Web
Java's viability as a web platform is tried and tested. Huge projects, such as Netflix, have been in production mode using Java technologies in the backend for extended periods of time. Although popular technologies such as Node.js, Ruby on Rails and Django have been on the rise among startups and a new generation of developers, Java's benefits are undeniable. Although some may find tried and tested technologies boring, Java remains a safe bet for a big number of use cases. So how does Java fit in the ever changing landscape of web development nowadays?
Modern web apps: REST and Microservices
The rise of IaaS and PaaS solutions has pushed microservices to the forefront. Familiarity with the web has also made REST the preferred architectural style. Java's extensive support for all sorts of technologies does not fail in this case. A whole bunch of libraries and frameworks are available to pick from. So what are some of the most popular alternatives?
Spring
For a long time, Spring has been one of the most used frameworks in the Java world. With a strong inversion-of-control (IoC) ideology and a somewhat pervasive reliance on annotations in recent releases, Spring has use cases in nearly any backend application. Spring covers many areas of backend development: authentication/authorization, data access, messaging, transaction management, REST services, testing, among others.
Netflix Tools
Netflix has contributed a series of open-source tools based on their necessities. Eureka, a service registry and failover service that goes hand-in-hand with microservice-based architectures; Zuul, a proxy with dynamic routing; and Ribbon, a load-balancer.
Hibernate
Hibernate, an implementation of the Java Persistence API, is a popular alternative for object-relational mapping (ORM). Although you may prefer to skip ORM, Java has great support for it.
SQL and NoSQL
Popular choices in the SQL camp include MySQL/MariaDB and PostgreSQL. In the NoSQL camp: MongoDB and Cassandra are good alternatives.
Setting up a combination of these libraries, frameworks and tools can be quite bothersome. Let's see how we can do that with JHipster.
Setup a New Project with JHipster
First, we have to make sure we have all the baseline dependencies: Java 8 and Node.js.
1. Install JHipster
npm install yo generator-jhipster
It is also a good idea to make sure Gulp and Bower are available:
npm install gulp bower
You can perform global installations using
npm install -g <package>.
2. Create a Project
yo jhipster
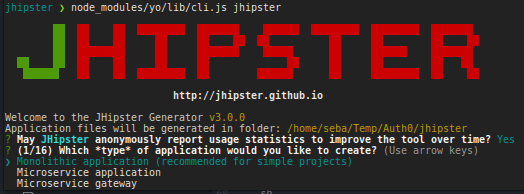
You will be asked a series of questions about your project. Most of these are self explanatory. There is one question that may not be entirely obvious: monolithic vs microservice application. JHipster makes a hard distinction between applications that bundle frontend and backend components in a single distributable/runnable artifact and applications that don't. As you can imagine, monolithic applications are those that bundle frontend and backend components together. The microservices profile allows you to build independent components that run in separate instances, usually providing RESTful services. In this case, Netflix Eureka is used to register services and make sure they are running. If these are your first steps developing Java + JavaScript apps, go for the monolithic approach. You will find it simpler, for now.
After all questions are answered, run the boot step. This will make sure all dependencies are installed and you are ready to start working on your app:
# In case you picked Maven:
mvn spring-boot:run

# In case you picked Gradle:
gradle bootRun
3. Fire up Your IDE!
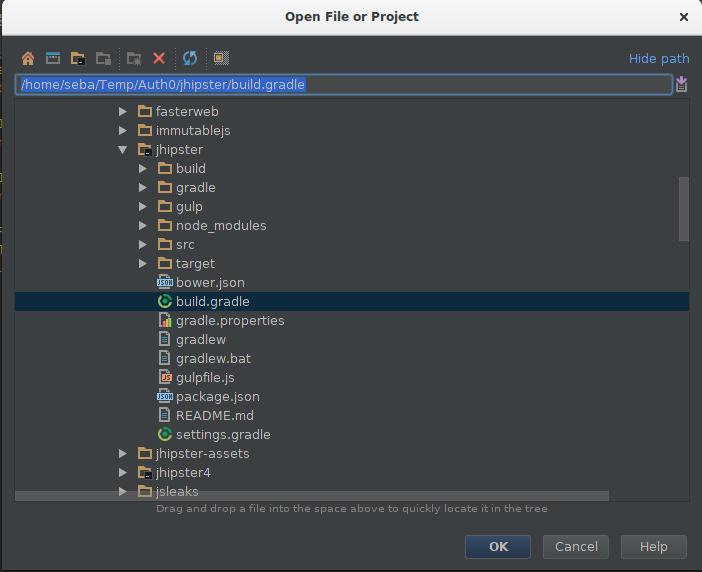
I love IntelliJ IDEA. Most Java IDEs can import Maven and Gradle project setups. Open your IDE and point it to your new JHipster project directory.
Additional IDE specific settings may improve your experience. For instance, you may want to setup autocompletion for the frontend libraries if supported. JHipster docs provide details for Eclipse and IntelliJ IDEA.
4. Next Steps
The sky is the limit. In general, you will want to create new views, models and controllers and create some sort of mapping between them and other components in your application. JHipster's help does not stop at the project creation stage: it can help you add new components to your existing app. For this, we can create entities using yo jhipster:entity <entityName>. New entities create database documents or tables, the necessary ORM code, an AngularJS controller (and router and service), a HTML view and tests. In other words, JHipster does all the boilerplate for you.
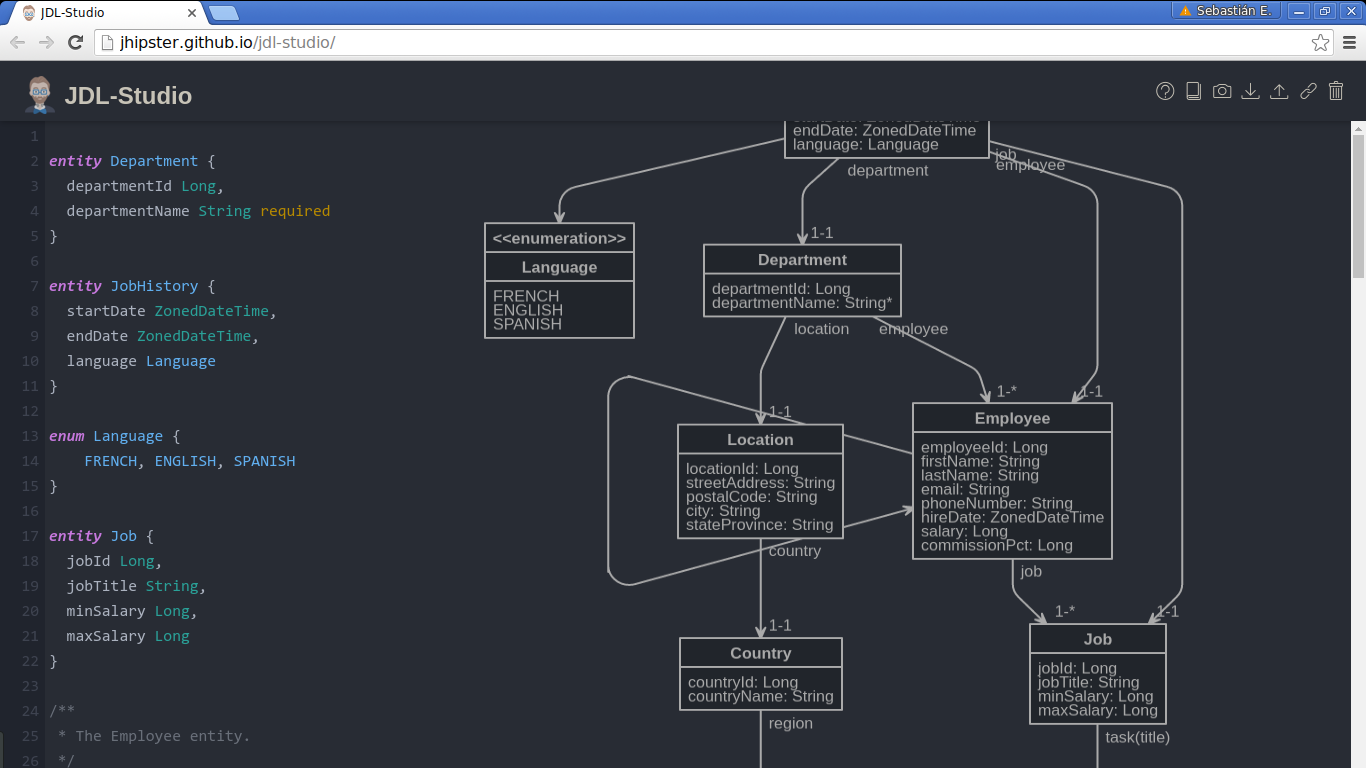
But there's more. Complex applications usually have many entities and relationships. Keeping track of these can be problematic. Furthermore, designing a coherent architecture can be troublesome without proper visualization tools. Again, JHipster comes to the rescue: JHipster-UML and JDL-Studio. JHipster-UML takes the output from common UML editors (such as Modelio) and generate entities from them. JDL-Studio, on the other hand, is a web-based UML-like visual editor that can create JDL files. These files can then be fed to JHipster's entity generator. How cool is that?!
Application logic may be more complex than what can be reasonably put inside entities. In this case, separate units of work may be required. These are called services by JHipster. A call to yo jhipster:service <serviceName> will create a service stub for you to modify.
You will also want to focus on cross-cutting concerns such as authentication/authorization, logging and monitoring. Fortunately, Spring excels at this thanks to its aspect-oriented design. The base JHipster project has a good example of this in the LoggingAspect class.
Aside: Did you know you can use Auth0 with Java?
JHipster comes with three choices for authentication: standard session based authentication, OAuth2 authentication and JWT authentication. If you know what we do at Auth0, you know we use JWTs everywhere. Therefore, it should come as no surprise to know you can add Auth0 to a JHipster app.
But before getting started a word of caution: JHipster generators write a lot of code for you. In fact, the basic application generated by JHipster sets up a database for authentication when picking JWT as the choice. Therefore, some work is needed to set up Auth0 as the backend. We will use the monolithic base application, using JWT as an auth mechanism. So, let's get started!
“JHipster generators write a lot of code for you.”
Tweet This
1. Set up Auth0 Lock and its frontend dependencies
As JHipster apps are Angular apps, adding the dependencies is as easy as:
bower install auth0-lock auth0-angular a0-angular-storage --save
gulp # to automatically update the index.html file.
2. Set up Auth0's Java library
If you picked Gradle, open build.gradle and add the following dependency:
dependencies {
    compile 'com.auth0:auth0:0.1.1'
    // (...)
}
Or, if you picked Maven:
<dependency>
  <groupId>com.auth0</groupId>
  <artifactId>auth0</artifactId>
  <version>0.1.1</version>
</dependency>
3. Set up Auth0 Lock
Create a new app in the Auth0 dashboard and get the application domain and client id. Then set these in src/main/webapp/app/app.module.js:
angular
    .module('testApp', [
        'ngStorage',
        'tmh.dynamicLocale',
        'pascalprecht.translate',
        'ngResource',
        'ngCookies',
        'ngAria',
        'ngCacheBuster',
        'ngFileUpload',
        'ui.bootstrap',
        'ui.bootstrap.datetimepicker',
        'ui.router',
        'infinite-scroll',
        // jhipster-needle-angularjs-add-module JHipster will add new module here
        'angular-loading-bar',
        'angular-storage', // <---- ADD THIS
        'auth0'            // <---- ADD THIS
    ])
    .config(config)
    .run(run);

// New config function, add it.
function config(authProvider) {
    authProvider.init({
        domain: 'YOUR_AUTH0_DOMAIN',
        clientID: 'YOUR_CLIENT_ID'
    });

    authProvider.on('loginSuccess', function($location, profilePromise, idToken, store, $localStorage) {
        profilePromise.then(function(profile) {
            $localStorage.authenticationToken = idToken;
        });
    });

    authProvider.on('loginFailure', function($location, error) {
        console.log('Login error');
    });

    authProvider.on('authenticated', function($location) {
        console.log('Still authenticated');
    });
}
4. Set the right client secret in Application.yml
Open Application.yml, find jhipster.security.authentication.jwt.secret and set it to the client secret found in your Auth0 dashboard.
jhipster:
    security:
        authentication:
            jwt:
                secret: YOUR_CLIENT_SECRET
5. Show Auth0 Lock when requested
Now, when the user wants to login, rather than show JHipster's custom login form, we will show Auth0 Lock. To do this, edit login.service.js. You can find this file at src/main/webapp/app/components/login/login.service.js:
function LoginService ($uibModal, auth, $localStorage, $rootScope) {
    var service = {
        open: open
    };

    var modalInstance = null;
    var resetModal = function () {
        modalInstance = null;
    };

    return service;

    function open () {
        auth.signin({
            authParams: {
                scope: 'openid app_metadata'
            }
        });
    }
}
Normally at this point you would set up an Angular HTTP interceptor to add the JWT to each HTTP request. Fortunately this was already done by JHipster. You can see this at src/main/webapp/app/blocks/interceptor/auth.interceptor.js.
6. Add roles to your users!
A piece of cake. Go to to the Auth0 dashboard, then go to rules. Add a new rule:
function (user, context, callback) {
  user.app_metadata = user.app_metadata || {};
  // You can add a Role based on what you want
  // In this case I check domain
  var addRolesToUser = function(user, cb) {
    var endsWith = '@admindomain.com';
    if (user.email && (user.email.substring(user.email.length - endsWith.length, user.email.length) === endsWith)) {
      if (!user.email_verified) {
        return callback(new UnauthorizedError('Please verify your email before logging in.'));
      } else {
        return callback(null, user, context);
      }
      cb(null, ['admin']);
    } else {
      cb(null, ['user']);
    }
  };

  addRolesToUser(user, function(err, roles) {
    if (err) {
      callback(err);
    } else {
      user.app_metadata.roles = roles;
      auth0.users.updateAppMetadata(user.user_id, user.app_metadata)
        .then(function(){
          context.idToken['https://admindomain.com/roles'] = user.app_metadata.roles;
          callback(null, user, context);
        })
        .catch(function(err){
          callback(err);
        });
    }
  });
}
This rule will make all users with admindomain.com emails administrators by adding the admin role to their JWT.
Note: Since you are giving the
adminrole to some users, it will be a good idea to require that these users have to verify their emails before proceeding.
7. Change the backend to pick the roles from the right key
Go to TokenProvider.java and change getAuthentication in the following manner:
public Authentication getAuthentication(String token) {
    Claims claims = Jwts.parser()
        .setSigningKey(secretKey)
        .parseClaimsJws(token)
        .getBody();

    String principal = claims.getSubject();

    // CHANGES START HERE
    String roles = claims.get(AUTHORITIES_KEY, Map.class).get("roles").toString();
    if(roles != null && roles.length() > 0) {
        roles = roles.substring(1, roles.length() - 1);
    }

    Collection<? extends GrantedAuthority> authorities =
        Arrays.asList(roles.split(",")).stream()
            .map(authority -> new SimpleGrantedAuthority("ROLE_" + authority.toUpperCase()))
            .collect(Collectors.toList());

    return new UsernamePasswordAuthenticationToken(principal, token, authorities);
}
As you can see, roles are present in a different key in JHipster example. With the above code, our new roles key works as expected.
Also note that the token is now passed to UsernamePasswordAuthenticationToken. This makes it easy to retrieve the id token in the future.
8. Go nuts!
Now its time to wreak havoc. It is up to you to choose what you prefer at this point. JHipster's UserRepository, UserService, UserDetailsService, AccountResource, UserResource and UserJWTController handle logins by fetching user information from a database. You may choose to follow this path by mapping or creating new users in this database with the information provided by Auth0. Or you may choose to remove all this code and settle with a simple proxy to Auth0's user profile service. Whatever you choose, these classes and their respective frontend counterparts will need to be modified. Bear in mind Auth0's Java API does not provide a user list service. In other words, user management as shown by JHipster's sample application cannot be implemented without a database in your backend.
Retrieving the user profile is as easy as:
@Service //Or some other Spring-enabled entity
public class SomeClass {
    private static final Auth0 auth0 = new Auth0("YOUR_AUTH0_DOMAIN", "YOUR_CLIENT_ID");

    public Request<UserProfile> getUserProfile() {
        SecurityContext securityContext = SecurityContextHolder.getContext();
        Authentication authentication = securityContext.getAuthentication();
        String token = (String)authentication.getCredentials();
        AuthenticationAPIClient client = auth0.newAuthenticationAPIClient();
        return client.tokenInfo(token);
    }
}
Using the returned Request object is simple enough:
request.start(new BaseCallback<UserProfile>() {
    @Override
    public void onSuccess(UserProfile u) {
        //u.getId()
        //u.getEmail()
        //u.getName()
    }
    @Override
    public void onFailure(Auth0Exception error) {
    }
});
For simpler use cases there is also spring-security-auth0, a library to easily secure request paths using Auth0 and Spring. See the docs to find if this fits your use case the best. Or sign up and try it yourself!
Conclusion
Java frameworks are complex beasts. Dependency injection, broad applications, and great flexibility come at a cost: getting started can be quite a burden. Fortunately JHipster can take a lot of that pain away, as long as the choice of preselected tools is what you had in mind. If Angular.js + Spring is your cup of tea, forget about the boilerplate and get started in a few minutes. Try it, you might be pleasantly surprised.
About the author

Sebastian Peyrott
Senior Engineer