Sometimes the cause of unexpected behavior in your application is not a bug in your code but the missing knowledge about the details of how the framework works internally. This can be the case with Blazor Server, one of the Blazor framework's hosting models for developing Single Pages Applications (SPAs) in .NET. In particular, at first glance, a Blazor Server application can have a strange behavior when handling logout in the presence of multiple tabs on the same application. In this article, you will analyze this specific problem to understand its cause and solve it using the solution provided by the framework, which, unfortunately, is not very well documented at this time.
Prerequisites
This article assumes that you are a .NET developer with some knowledge about Blazor. If you don't, you can read the following article as an introduction to the framework: What is Blazor? A Tutorial on Building Web Apps with Authentication.
Also, you need the .NET SDK 7.0 or later installed on your machine.
The article will use a Blazor Server application based on the Auth0 Templates for .NET package. So you need to install this package as well if you want to follow the steps described here. Alternatively, you can create your Blazor Server application from scratch by following this tutorial. To learn more about the Auth0 Templates for .NET, read this article.
Finally, you need an Auth0 account to integrate authentication into your application. If you don't have an Auth0 account, you can sign up for a free one.
The Application Setup
The better way to explain the problem is to get experience of it. So, let's create a very simple Blazor Server application with embedded authentication by using the Auth0 Templates for .NET.
Register your app with Auth0
First, you need to register the application you are going to create in the Auth0 dashboard.
Once in the dashboard, move to the Applications section and follow these steps:
- Click on Create Application.
- Provide a friendly name for your application (for example, My Blazor Server App) and choose Regular Web Applications as an application type.
- Finally, click the Create button.
These steps make Auth0 aware of your Blazor application and will allow you to control access. After the application has been registered, move to the Settings tab and take note of your Auth0 domain and client id. You will need them in a moment.
Create your Blazor Server application
Now open a terminal window on your machine and run the following command:
dotnet new auth0blazorserver \
    --domain <YOUR_AUTH0_DOMAIN> \
    --client-id <YOUR_CLIENT_ID> \
    -o MyBlazorServerApp
The line continuation character (
\) shown above is just for presentation purposes. Use the appropriate character for your command line shell if you want to use it in your operating system.
Replace the placeholders <YOUR_AUTH0_DOMAIN> and <YOUR_CLIENT_ID> with the values you got when registering your app in the Auth0 dashboard. This command will create your Blazor Server application in the MyBlazorServerApp folder.
You may prefer using Visual Studio for creating your Blazor Server application. Follow the instructions in this document to learn how to use the Blazor Server template in Visual Studio for Windows and for Mac.
Go to the MyBlazorServerApp folder and run the command dotnet run. Now point your browser to the address shown in the terminal, in my case http://localhost:7235. You should see your application's home page as shown below:

You can see a message telling you that you need to authenticate to access the page content. This message also appears when you try to access the other pages of the application.
A final step
To complete your application registration with Auth0, you need to do a final step. Go back to the Settings tab of your application in the Auth0 dashboard and scroll down to the Application URIs section.
Assign the value https://localhost:<YOUR_PORT_NUMBER>/callback to the Allowed Callback URLs field and the value https://localhost:<YOUR_PORT_NUMBER>/ to the Allowed Logout URLs field. Replace the <YOUR_PORT_NUMBER> placeholder with the actual port number assigned to your application.
The first value tells Auth0 which URL to call back after the user authentication. The second value tells Auth0 which URL a user should be redirected to after their logout.
Click the Save Changes button to apply them.
Now you are ready to use your Blazor Server application with Auth0 authentication embedded.
The Logout Problem in Action
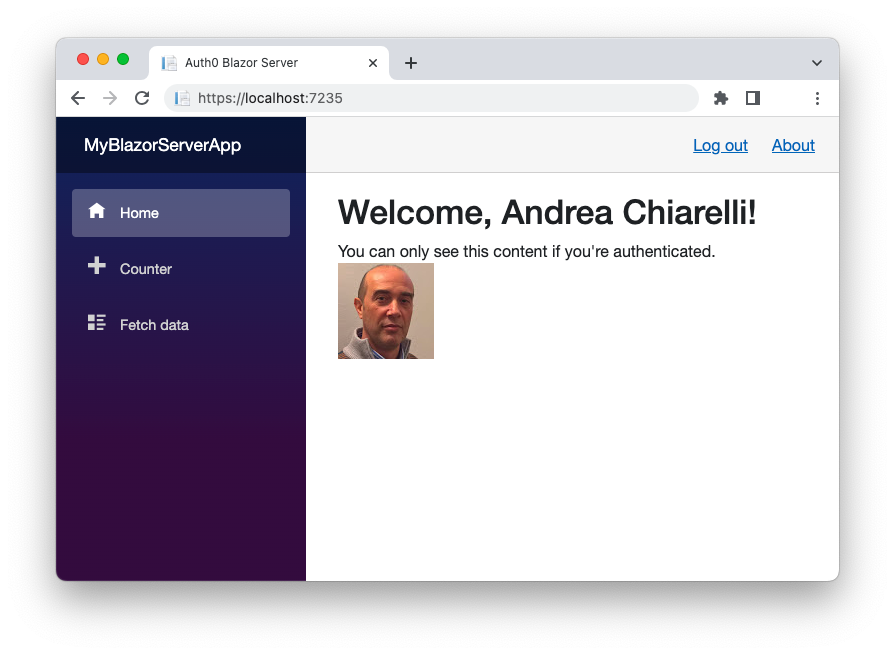
With your Blazor application running, click on the Log in link in the upper right corner to start an authenticated session. After authentication, you should see a page with the user details similar to the following picture:
Now, open a second browser tab pointing to the same Blazor application. You should be able to see the pages of the applications without the need to authenticate again. That's something you should expect. You are working on the same browser, and so you are sharing the same authenticated session.
Now, log out of the application from the first browser tab. You are turned back to the initial home page and can no longer access the application's pages. Nothing strange so far!
Go to the second tab. Here everything works as you didn't log out from the application. You can still see the user's details, interact with the counter, and get the weather forecasting data. In other words, your authenticated session is still alive.
This is something uncommon in the usual web navigation user experience. Normally, when you log out of an application in one browser tab, you are logged out of all the other tabs pointing to the same application.
The Cause of the Logout Problem
Why are you getting this strange behavior with Blazor Server apps? What's happening here?
Let's start by reminding you that, despite the name, a Blazor Server app is a Single-Page Application (SPA). The initial page rendering happens on the server, and the DOM is then updated through client/server communication via SignalR. So, after the initial request, in most cases there are no longer HTTP requests from the client to the server. The server part of the application is responsible for maintaining the application state, and the connection between the client and the server part is known as a circuit.
Unlike traditional web applications, opening the same application in another browser tab creates a new circuit. This means that a new state is maintained on the server for the new client-side app instance. Therefore, two independent circuits are active for the same application, and your user is working on two independent application states. This explains why when you log out of a tab, the other tab continues to work with an authenticated session.
Note that if you refresh the page in the tab, you are logged out correctly. This happens because, in this case, you are actually making an HTTP request, which restarts the authentication validation e finds out that the user is no longer logged in. But you can't ask the user to manually reload the application in all the tabs it was opened, of course.
Besides the user experience problem, this aspect opens up potential security flaws. A user might open a new tab on the same application just to perform an aside action. Then they go back to the initial tab, conclude their activity, and log out of the application, thinking that they are logged out of any instance of the application running in that browser.
Leverage Auth0's authentication and authorization services in your .NET applications.
DOWNLOAD THE FREE EBOOK
Authentication State Validation
Now that you understand why the logout problem happens let's explore how you can solve it.
You have seen that reloading the page in a tab starts the authentication state validation. Unfortunately, the page reloading approach is not viable. However, the Blazor Server framework provides a specific class that helps you validate the current authentication state without reloading the page: the RevalidatingServerAuthenticationStateProvider class.
As a Blazor developer, you know that the authentication state of the current user of a Blazor application is maintained by an AuthenticationState instance. This object contains information about the currently authenticated user and is created at the authentication time by an AuthenticationStateProvider. In a basic Blazor Server application, all this happens automatically behind the scenes. But now you need to know a bit about this architecture to understand how authentication state revalidation works.
The RevalidatingServerAuthenticationStateProvider base class allows you to define a provider that receives an authentication state from the host environment and revalidate it at regular intervals. So, basically, when you create an instance of this provider, you are scheduling a periodical check of the authentication state.
Let's take a look at what this class offers for your purpose.
First, it has a RevalidationInterval property. This property allows you to define how often you want to check the authentication state for validity. It's up to you to define the correct time value for this check. For the logout problem, this value expresses the maximum time you can tolerate that a user is logged out of a tab, but they are still logged in in another tab.
The class also has the ValidateAuthenticationStateAsync() method. This is the core functionality of the class. This method receives an authentication state and returns a boolean that establishes if the authentication state is still valid or not. Of course, the implementation of the validation criteria is up to you since it strictly depends on your specific authentication approach and your business logic.
Validation Strategies
Let's explore what validation strategies you can apply to the authentication state of your app to handle the logout problem. This will translate into how you will implement the ValidateAuthenticationStateAsync() method.
Authentication cookie check
Since your Blazor Server is a web application, you may think of checking the existence of the authentication cookie in your browser to determine if an authenticated session is still alive or not. While this could seem like a good idea as an authentication state validation criteria, it is not viable in Blazor. To access cookies in ASP.NET Core, you should use the current HTTP context, implemented by HttpContext or accessible through IHttpContextAccessor. Unfortunately, the HTTP context is not fully available in Blazor apps. Some restrictions exist, as the official documentation explains.
Using shared information
Checking the authentication cookie is not viable, but the general idea behind it is valid. You need some global information shared between the tabs and circuits of your Blazor application. For example, you can store some information in a global data structure when the user logs in to your application and remove this information when the user logs out. The validation method should check if this shared information is still there. If it is not there, the authentication state is no longer valid.
With this idea in mind, let's go to implement it.
A Solution for the Logout Problem
You will implement this solution in two steps:
- Implement the data structure to track the login state of the user.
- Implement the validation criteria for the authentication state.
Let's start the implementation by creating a Services folder in your Blazor application's root folder. This folder will contain the code for the data structure and the authentication state validator you are going to implement.
Tracking the login state
In the Services folder, create a LoginState.cs file with the following content:
// Services/LoginState.cs

using System;
using System.Collections.Concurrent;

public class LoginState
{
  private List<string> loggedInUsers
        = new List<string>();

  public void AddId(string id)
  {
    if (!loggedInUsers.Contains(id)) loggedInUsers.Add(id);
  }

  public void RemoveId(string id)
  {
    if (loggedInUsers.Contains(id)) loggedInUsers.Remove(id);
  }

  public bool IsUserLoggedIn(string id)
  {
    return loggedInUsers.Contains(id);
  }
}
The LoginState class defined above allows you to store a list of identifiers associated with the users in the private list loggedInUsers. This list will track all the currently logged-in users to your application. The class also implements three methods that allow you to add an id to the list (AddId()), remove an id (RemoveId()), and check if an id is in the list, which means that the user is still logged in (IsUserLoggedIn()).
Bear in mind that the solution illustrated here is an outline of a possible solution. This may not be suitable for your needs, and may have issues. For example, it's not scalable if you have many users.
Once you define the data structure, let's register it as a singleton. Open the Program.cs file in the root of the project and add the line highlighted in the following:
// Program cs

// ...existing code...

builder.Services.AddSingleton<WeatherForecastService>();

// 👇 new code
builder.Services.AddSingleton<LoginState>();
// 👆 new code

var app = builder.Build();

// ...existing code...
From now on, a single instance of the LoginState class will be available throughout the application.
Let's use the LoginState class instance to store the logged-in users. Open the Index.razor file under the Pages folder and apply the changes highlighted below:
// Pages/Index.razor

@page "/"
@inject AuthenticationStateProvider AuthState
@inject LoginState loginState;  // 👈 new code
@attribute [Authorize]

<PageTitle>Auth0 Blazor Server</PageTitle>

<!-- ...existing code... -->

@code {
    // ...existing code...

  protected override async Task OnInitializedAsync()
  {
    // ...existing code...

    // 👇 new code
    if (state.User.Identity.IsAuthenticated)
    {
      var id = state.User.Claims
            .Where(c => c.Type.Equals("sid"))
            .Select(c => c.Value)
            .FirstOrDefault();

      if (id != null) loginState.AddId(id);
    }
    // 👆 new code

    await base.OnInitializedAsync();
  }
}
You injected the LoginState instance to make it available in the page through the loginState variable. In the OnInitializedAsync() method of the page, you added a new block of code. This code checks if the current user is authenticated and, in this case, extracts the id of the current user session and adds it to the LoginState object.
Note that in the code above, the
sidclaim is used. This is actually not a user id but the user's session id. You can use the claim that better fits your needs in terms of user experience or business logic. For example, if you use the user identifier, you will be able to log the user out of any browser connected to your application.
Now let's perform the opposite operation: when the user logs out of the application, their session id should be removed from the list. Open the Logout.cshtml.cs file in the Pages folder and add the code shown below:
// Pages/Logout.cshtml.cs

// ...existing code...

namespace MyBlazorServerApp.Pages;

public class LogoutModel : PageModel
{
  // 👇 new code
  private LoginState _loginState;

  public LogoutModel(LoginState loginState)
  {
    _loginState = loginState;
  }
  // 👆 new code

  [Authorize]
  public async Task OnGet()
  {
    // ...existing code...

    // 👇 new code
    if (User.Identity.IsAuthenticated)
    {
      var id = User.Claims
            .Where(c => c.Type.Equals("sid"))
            .Select(c => c.Value)
            .FirstOrDefault();

      if (id != null) _loginState.RemoveId(id);
    }
    // 👆 new code
  }
}
You added the constructor to the LogoutModel class, which gets the LoginState instance from the dependency injection system and assigns it to the _loginState private variable.
At the end of the OnGet() method, the new code block removes the logging-out user's session id from the list of logged-in users.
Validating the authentication state
Now that you have the infrastructure for tracking the user's login state, let's implement the authentication state validation step. Add a new file named AuthenticationStateValidator.cs to the Services folder, and put the following code in it:
// Services/AuthenticationStateValidator.cs

using System;
using Microsoft.AspNetCore.Components.Authorization;
using Microsoft.AspNetCore.Components.Server;

public class AuthenticationStateValidator
    : RevalidatingServerAuthenticationStateProvider
{
  protected override TimeSpan RevalidationInterval => TimeSpan.FromSeconds(10);

  private LoginState _loginState;

  public AuthenticationStateValidator(ILoggerFactory loggerFactory, LoginState loginState)
    : base(loggerFactory)
  {
    _loginState = loginState;
  }

  protected override Task<bool> ValidateAuthenticationStateAsync(AuthenticationState authenticationState, CancellationToken cancellationToken)
  {
    var id =
        authenticationState.User.Claims
        .Where(c => c.Type.Equals("sid"))
        .Select(c => c.Value)
        .FirstOrDefault();

    return Task.FromResult(_loginState.IsUserLoggedIn(id??""));
  }
}
You define the AuthenticationStateValidator class by inheriting from the RevalidatingServerAuthenticationStateProvider class. Here are the relevant features of the class definition:
- According to the
RevalidationIntervalproperty's value, the validation occurs every 10 seconds. - The class constructor injects the
LoginStatesingleton object and assigns it to the_loginStateprivate variable. - The
ValidateAuthenticationStateAsync()method uses theauthenticationStateobject received as a parameter to get the current user's session id and checks if the user is still logged in by using theIsUserLoggedIn()method of theLoginStatesingleton.
Now you have almost everything in place. Only one thing is missing: you have to register the AuthenticationStateValidator service. Open the Program.cs file again and add the lines highlighted below:
// Program cs

using Microsoft.AspNetCore.Components;
using Microsoft.AspNetCore.Components.Web;
using MyBlazorServerApp.Data;
using Auth0.AspNetCore.Authentication;
using Microsoft.AspNetCore.Components.Authorization;
// 👇 new code
using Microsoft.AspNetCore.Components.Authorization;
// 👆 new code

// ...existing code...

builder.Services.AddSingleton<WeatherForecastService>();
builder.Services.AddSingleton<LoginState>();

// 👇 new code
builder.Services.AddScoped<AuthenticationStateProvider, AuthenticationStateValidator>();
// 👆 new code

var app = builder.Build();

// ...existing code...
Now you are ready to run your Blazor application again and test the logout functionality. This time when you log out of your application from one tab, you will be logged out of the other tabs as well.
Summary
Now you know a little bit more about the internal behavior of Blazor Server applications.
You learned about the annoying problem of logging out users from multiple tabs on the same application and found out that this is due to the internal behavior of Blazor Server applications. In fact, it happens because of the use of circuits for client/server communication instead of the classic HTTP communication.
You learned that the solution is to revalidate the user's authentication state periodically by using the RevalidatingServerAuthenticationStateProvider class.
You put this knowledge into practice by implementing a simple Blazor Server project that revalidates the user authentication state based on a global list of user sessions.
About the author

Andrea Chiarelli
Principal Developer Advocate
I have over 20 years of experience as a software engineer and technical author. Throughout my career, I've used several programming languages and technologies for the projects I was involved in, ranging from C# to JavaScript, ASP.NET to Node.js, Angular to React, SOAP to REST APIs, etc.
In the last few years, I've been focusing on simplifying the developer experience with Identity and related topics, especially in the .NET ecosystem.