

TL;DR: This is a series on how to build a full-stack TypeScript web application using Angular and Nest.js. In this first part, you are going to learn how to build a simple backend API with Nest.js. The second part of this series is about the frontend application using Angular. You can find the final code developed throughout this article in this GitHub repository.
“Learn how to develop full-stack @typescriptlang applications with @nestframework and @angular.”
Tweet This
What Is Nest.Js and Why Use It with Angular?
Nest.js is a framework for building Node.js server-side web applications. What makes it special is that it addresses a problem that no other framework does: the architecture of a Node.js project. If you have ever tried to build a project using Node.js, you may have realized that you can do a lot with one module (for example, an Express middleware can do everything from authentication to validation) which can lead to unorganized and hard-to-support projects. As you will see through this article, Nest.js helps developers keeping their code organized by providing different classes that specialize in different problems.
Besides that, what makes combining Nest.js and Angular a good idea is that Nest.js is heavily inspired by Angular. For example, you will find that both frameworks use guards to allow or prevent access to some parts of your apps and that both frameworks provide the CanActivate interface to implement these guards. Nevertheless, it is important to notice that, although sharing some similar concepts, both frameworks are independent of each other. That is, in this article, you will build a front-end-agnostic API. So, after building the API, you will be able to use it with other frameworks and libraries like React, Vue.js, and so on.
“As @nestframework is heavily inspired by @angular, using both together is very easy!”
Tweet This
Restaurant Ordering Web App
The app that you are going to create in this tutorial is a simple app for restaurants where users will be able to order items online. There are some business rules for this app:
- any user can see the items of this menu;
- only identified users may add items to a shop cart (order food online);
- and only admin users may add new items to the menu.
To keep things simple, you are not going to interact with any external database, nor implement the shop cart functionality.
Getting Started with Nest.js
To install Nest.js, first, you will need to install Node.js (v.8.9.x or newer) and NPM. So, go to the Node.js download website and follow the instructions to download and install Node.js to your operating system (NPM comes with Node.js). When done, you can check if everything went well by running the following commands:
node -v # v.8.9.0
npm -v # 5.6.0
There are a few ways to start a Nest.js project; you may check all of them in the Nest.js documentation. Here, you are going to use nest-cli to do so. To install this tool, run the following command:
npm i -g @nestjs/cli # it will install the nest command
Then, you can create a new project by running a single command. This command will trigger some questions about the project, such as version and project name, but you can stick with default options:
nest new nest-restaurant-api # nest-restaurant-api
This command will ask you the following question: "Which package manager would you ❤️ to use?". You can choose the option you prefere, but keep in mind that if you choose Yarn, you will have to adjust the commands on this article accordingly.
If everything went well, you will get by the end of this process a directory called nest-restaurant-api with the following structure:
nest-restaurant-api
├── src
│   ├── app.controller.spec.ts
│   ├── app.controller.ts
│   ├── app.module.ts
│   ├── app.service.ts
│   └── main.ts
├── test
│   ├── app.e2e-spec.ts
│   └── jest-e2e.json
├── .gitignore
├── .prettierrc
├── nest-cli.json
├── nodemon.json
├── nodemon-debug.json
├── package.json
├── package-lock.json
├── README.md
├── tsconfig.build.json
├── tsconfig.json
└── tslint.json
Now, you can navigate to this directory and type the following command to start the API:
# move into the project
cd nest-restaurant-api

# start the development server
npm run start:dev
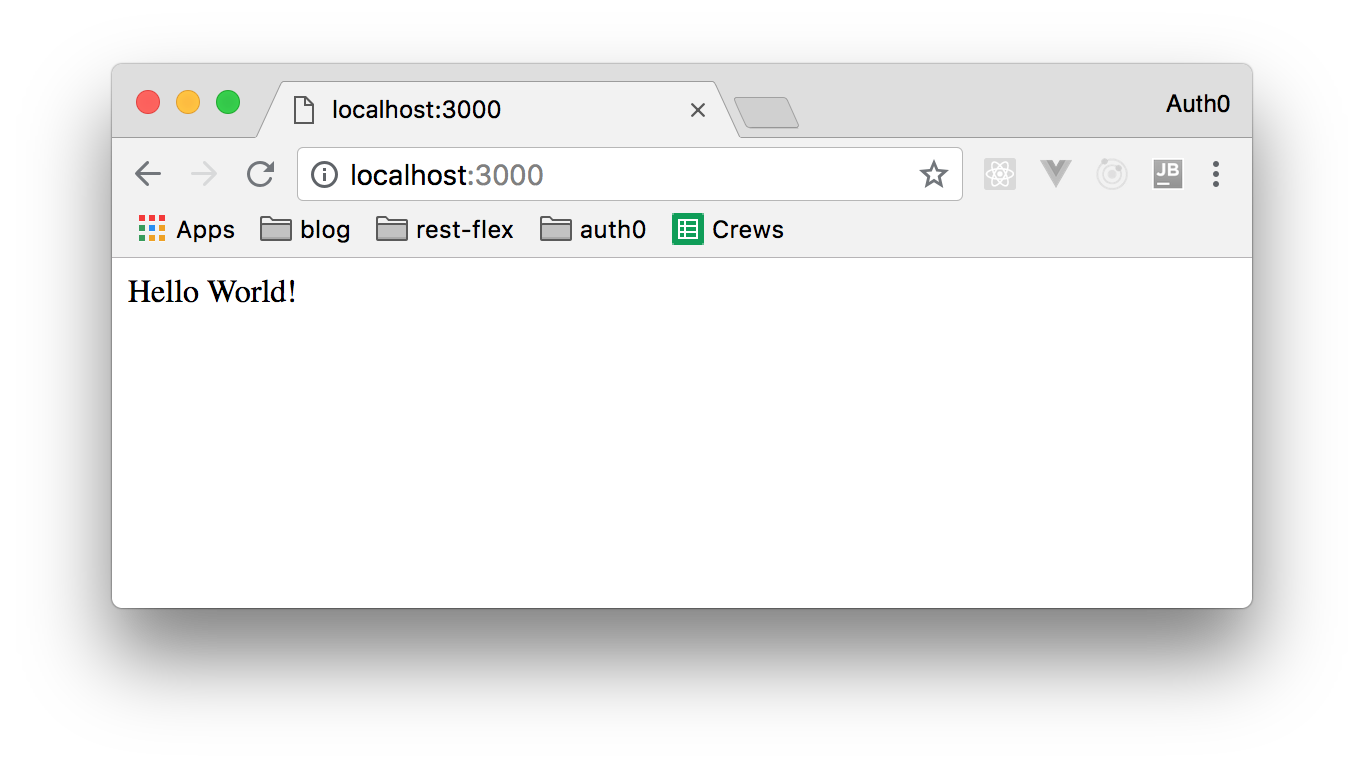
Then, if you head to http://localhost:3000 in your browser, you will see a "Hello World!" page like the following one:
To avoid adding more complexity, this article is not going to teach you how to write automated tests for your API (though you should write them for any production-ready app). As such, you can go ahead and delete the test directory and the src/app.controller.spec.ts file (which is test relate). After that, the remaining files inside the src directory will be:
app.controller.tsandapp.service.ts: those files are responsible for generating the message Hello world when the endpoint/is accessed through the browser. Because this endpoint is not important to this application, you may delete these files as well. Soon you are going to learn in more details what controllers and services are.app.module.ts: this is a class of the type module that is responsible for declaring imports, exports, controllers, and providers to a Nest.js application. Every application has at least one module but you may create more than one module for more complex applications (more details on Nest.js documentation). The application of this tutorial will have only one module.main.ts: this is the file responsible for starting the server.
Note: after removing
app.controller.tsandapp.service.tsyou won't be able to start your app. Don't worry; you will fix this soon.
Creating Nest.js Endpoints
The most important endpoint of this app will be /items because, from there, users will be able to retrieve the items available and admins will be able to manage these items. So, this is the first endpoint that you are going to implement.
To do so, you will have to create a directory called items inside src. You will store all files related to the /items endpoint in this new directory.
Creating a Nest.js Controller
In Nest.js, like in many other frameworks out there, controllers are responsible for mapping endpoints to functionalities. To create a controller in Nest.js, you can use the @Controller decorator, as follows: @Controller(${ENDPOINT}). Then, to map different HTTP methods like GET and POST, you would use decorators like: @Get, @Post, @Delete, etc.
So, as in your case you will need to create a controller that returns items available on a restaurant and that admins can use to manage these items, you can create a file called items.controller.ts inside the items directory and add the following code into it:
import { Get, Post, Controller } from '@nestjs/common';

@Controller('items')
export class ItemsController {
  @Get()
  async findAll(): Promise<string[]> {
    return ['Pizza', 'Coke'];
  }

  @Post()
  async create() {
    return 'Not yet implemented';
  }
}
Then, to make your controller available in your module (and in your app), you will have to replace the code on app.module.ts with the following:
import { Module } from '@nestjs/common';
import { ItemsController } from './items/items.controller';

@Module({
  imports: [],
  controllers: [ItemsController],
  providers: [],
})
export class AppModule {}
Now, you can head to http://localhost:3000/items (you might need to restart your app: npm run start:dev) and you will get the following response: ['Pizza', 'Coke'].
Adding a Nest.js Service
For now, the array returned by the /items endpoint is just a static array that is recreated for every request and that cannot be changed. As the handling of structures that persist data should not be addressed by controllers, you will create a service to do that.
Services, in Nest.js, are classes marked with the @Injectable decorator. As the name states, adding this decorator to classes makes them injectable in other components, like controllers.
So, to create this service, you can create a new file called items.service.ts in the ./src/items directory, and add the following code:
import { Injectable } from '@nestjs/common';

@Injectable()
export class ItemsService {
  private readonly items: string[] = ['Pizza', 'Coke'];

  findAll(): string[] {
    return this.items;
  }

  create(item: string) {
    this.items.push(item);
  }
}
Then, you will need to change ItemsController (which you declared on the items.controller.ts file) to use this service:
import { Get, Post, Body, Controller } from '@nestjs/common';
import { ItemsService } from './items.service';

@Controller('items')
export class ItemsController {
  constructor(private readonly itemsService: ItemsService) {}

  @Get()
  async findAll(): Promise<string[]> {
    return this.itemsService.findAll();
  }

  @Post()
  async create(@Body() item: string) {
    this.itemsService.create(item);
  }
}
In the new version of your controller, you are defining a parameter decorated with @Body() in the create method. This parameter is used to automatically map data sent through req.body['item'] to the parameter itself (item in this case).
Also, your controller now gets an instance of the ItemsService class injected through the constructor. The private readonly that accompanies the ItemsService declaration makes this instance unchangeable and only visible inside this class.
Now, to make ItemsService available in your app, you will need to update app.module.ts as follows:
import { Module } from '@nestjs/common';
import { ItemsController } from './items/items.controller';
import { ItemsService } from './items/items.service';

@Module({
  imports: [],
  controllers: [ItemsController],
  providers: [ItemsService],
})
export class AppModule {}
With these changes in place, you can issue HTTP POST requests to the menu:
curl -X POST -H 'content-type: application/json' -d '{
  "item": "Salad"
}' localhost:3000/items
After that, you will be able to see this new item in your menu by issuing the following GET request (or by heading to http://localhost:3000/items in your browser):
curl localhost:3000/items
Creating a Nest.js Route for the Shop Cart
Now that you have the first version of your /items endpoint, you can start creating the shopping cart feature. As you will see, the process will be similar to the process of creating the /items endpoint. Therefore, to keep the article easier to grasp, this feature will only acknowledge with an OK status when triggered.
So, first, create a directory called shopping-cart alongside the items directory. Then, create a new file called shopping-cart.controller.ts inside it and add the following code:
import { Post, Controller } from '@nestjs/common';

@Controller('shopping-cart')
export class ShoppingCartController {
  @Post()
  async addItem() {
    return 'This is a fake service :D';
  }
}
Then, add this controller to your module (app.module.ts):
import { Module } from '@nestjs/common';
import { ItemsController } from './items/items.controller';
import { ShoppingCartController } from './shopping-cart/shopping-cart.controller';
import { ItemsService } from './items/items.service';

@Module({
  imports: [],
  controllers: [ItemsController, ShoppingCartController],
  providers: [ItemsService],
})
export class AppModule {}
To test this endpoint, make sure your app is running, and issue the following command:
curl -X POST localhost:3000/shopping-cart
Adding a Typescript Interface for Items
Back to the items service, imagine that you want to keep more than just the name of the items (for instance, its prices too). Do you agree that an array of strings may not be the ideal structure to handle this data?
To solve this problem, you could create an array of objects, but it would be hard to keep all items coherent (i.e., with similar structures). As such, the best approach is to create a TypeScript interface to define the structure of your items. To do this, create a new file called item.interface.ts inside the src/items directory and add the following code to it:
export class Item {
  readonly name: string;
  readonly price: number;
}
Then, change the items.service.ts file to use this interface:
import { Injectable } from '@nestjs/common';
import { Item } from './item.interface';

@Injectable()
export class ItemsService {
  private readonly items: Item[] = [];

  findAll(): Item[] {
    return this.items;
  }

  create(item: Item) {
    this.items.push(item);
  }
}
And the items.controller.ts file as well:
import { Get, Post, Body, Controller } from '@nestjs/common';
import { ItemsService } from './items.service';
import { Item } from './item.interface';

@Controller('items')
export class ItemsController {
  constructor(private readonly itemsService: ItemsService) {}

  @Get()
  async findAll(): Promise<Item[]> {
    return this.itemsService.findAll();
  }

  @Post()
  async create(@Body() item: Item) {
    this.itemsService.create(item);
  }
}
Adding Validation on Nest.js with DTOs and Pipes
Even though you created an interface to define the structure of items, the application won't return an error status if you post any data other than the one defined in the interface. For example, the following request should return a 400 (bad request) status, but instead, it returns a 200 (all good) status:
curl -H 'Content-Type: application/json' -d '{
  "name": 3,
  "price": "any"
}' http://localhost:3000/items
To solve this problem, you are going to create a DTO (Data Transfer Object) together with a Pipe. A DTO, as the name states, is an object that defines how data must be transferred among processes. To create a DTO to your items, add a new file called create-item.dto.ts in the src/items directory and add the following code to it:
import { IsString, IsInt } from 'class-validator';

export class CreateItemDto {
  @IsString() readonly name: string;

  @IsInt() readonly price: number;
}
Pipes are Nest.js components that are used for validation. For your API, you are going to create a pipe that verifies if the data sent to a method matches its DTO. As pipes can be used by several controllers, you will create a directory called common inside src and a file called validation.pipe.ts inside it that looks like this:
import {
  ArgumentMetadata,
  BadRequestException,
  Injectable,
  PipeTransform,
} from '@nestjs/common';
import { validate } from 'class-validator';
import { plainToClass } from 'class-transformer';

@Injectable()
export class ValidationPipe implements PipeTransform<any> {
  async transform(value, metadata: ArgumentMetadata) {
    const { metatype } = metadata;
    if (!metatype || !this.toValidate(metatype)) {
      return value;
    }
    const object = plainToClass(metatype, value);
    const errors = await validate(object);
    if (errors.length > 0) {
      throw new BadRequestException('Validation failed');
    }
    return value;
  }

  private toValidate(metatype): boolean {
    const types = [String, Boolean, Number, Array, Object];
    return !types.find(type => metatype === type);
  }
}
Note: You will have to install class-validator and class-transformer modules. To do so, just type npm install class-validator class-transformer on the terminal inside your project's directory and restart the server.
Now, you will have to adapt the items.controller.ts file to use this new pipe and the DTO. After doing that, this is how the code of the controller should like:
import { Get, Post, Body, Controller, UsePipes } from '@nestjs/common';
import { CreateItemDto } from './create-item.dto';
import { ItemsService } from './items.service';
import { Item } from './item.interface';
import { ValidationPipe } from '../common/validation.pipe';

@Controller('items')
export class ItemsController {
  constructor(private readonly itemsService: ItemsService) {}

  @Get()
  async findAll(): Promise<Item[]> {
    return this.itemsService.findAll();
  }

  @Post()
  @UsePipes(new ValidationPipe())
  async create(@Body() createItemDto: CreateItemDto) {
    this.itemsService.create(createItemDto);
  }
}
Now, running your code again, the /item endpoint will only accept data as defined in the DTO, such as in the following example:
curl -H 'Content-Type: application/json' -d '{
  "name": "Salad",
  "price": 3
}' http://localhost:3000/items
Inserting invalid data (data that does not pass the checks on the ValidationPipe) will result in the following response:
{"statusCode":400,"error":"Bad Request","message":"Validation failed"}
Managing Identity with Auth0
One of the requirements for this project is that only identified users could add something to the shopping carts and only admin users could add a new product. To easily and securely achieve that, you are going to use Auth0.
First, you have to create a free Auth0 account if you don't have one yet.
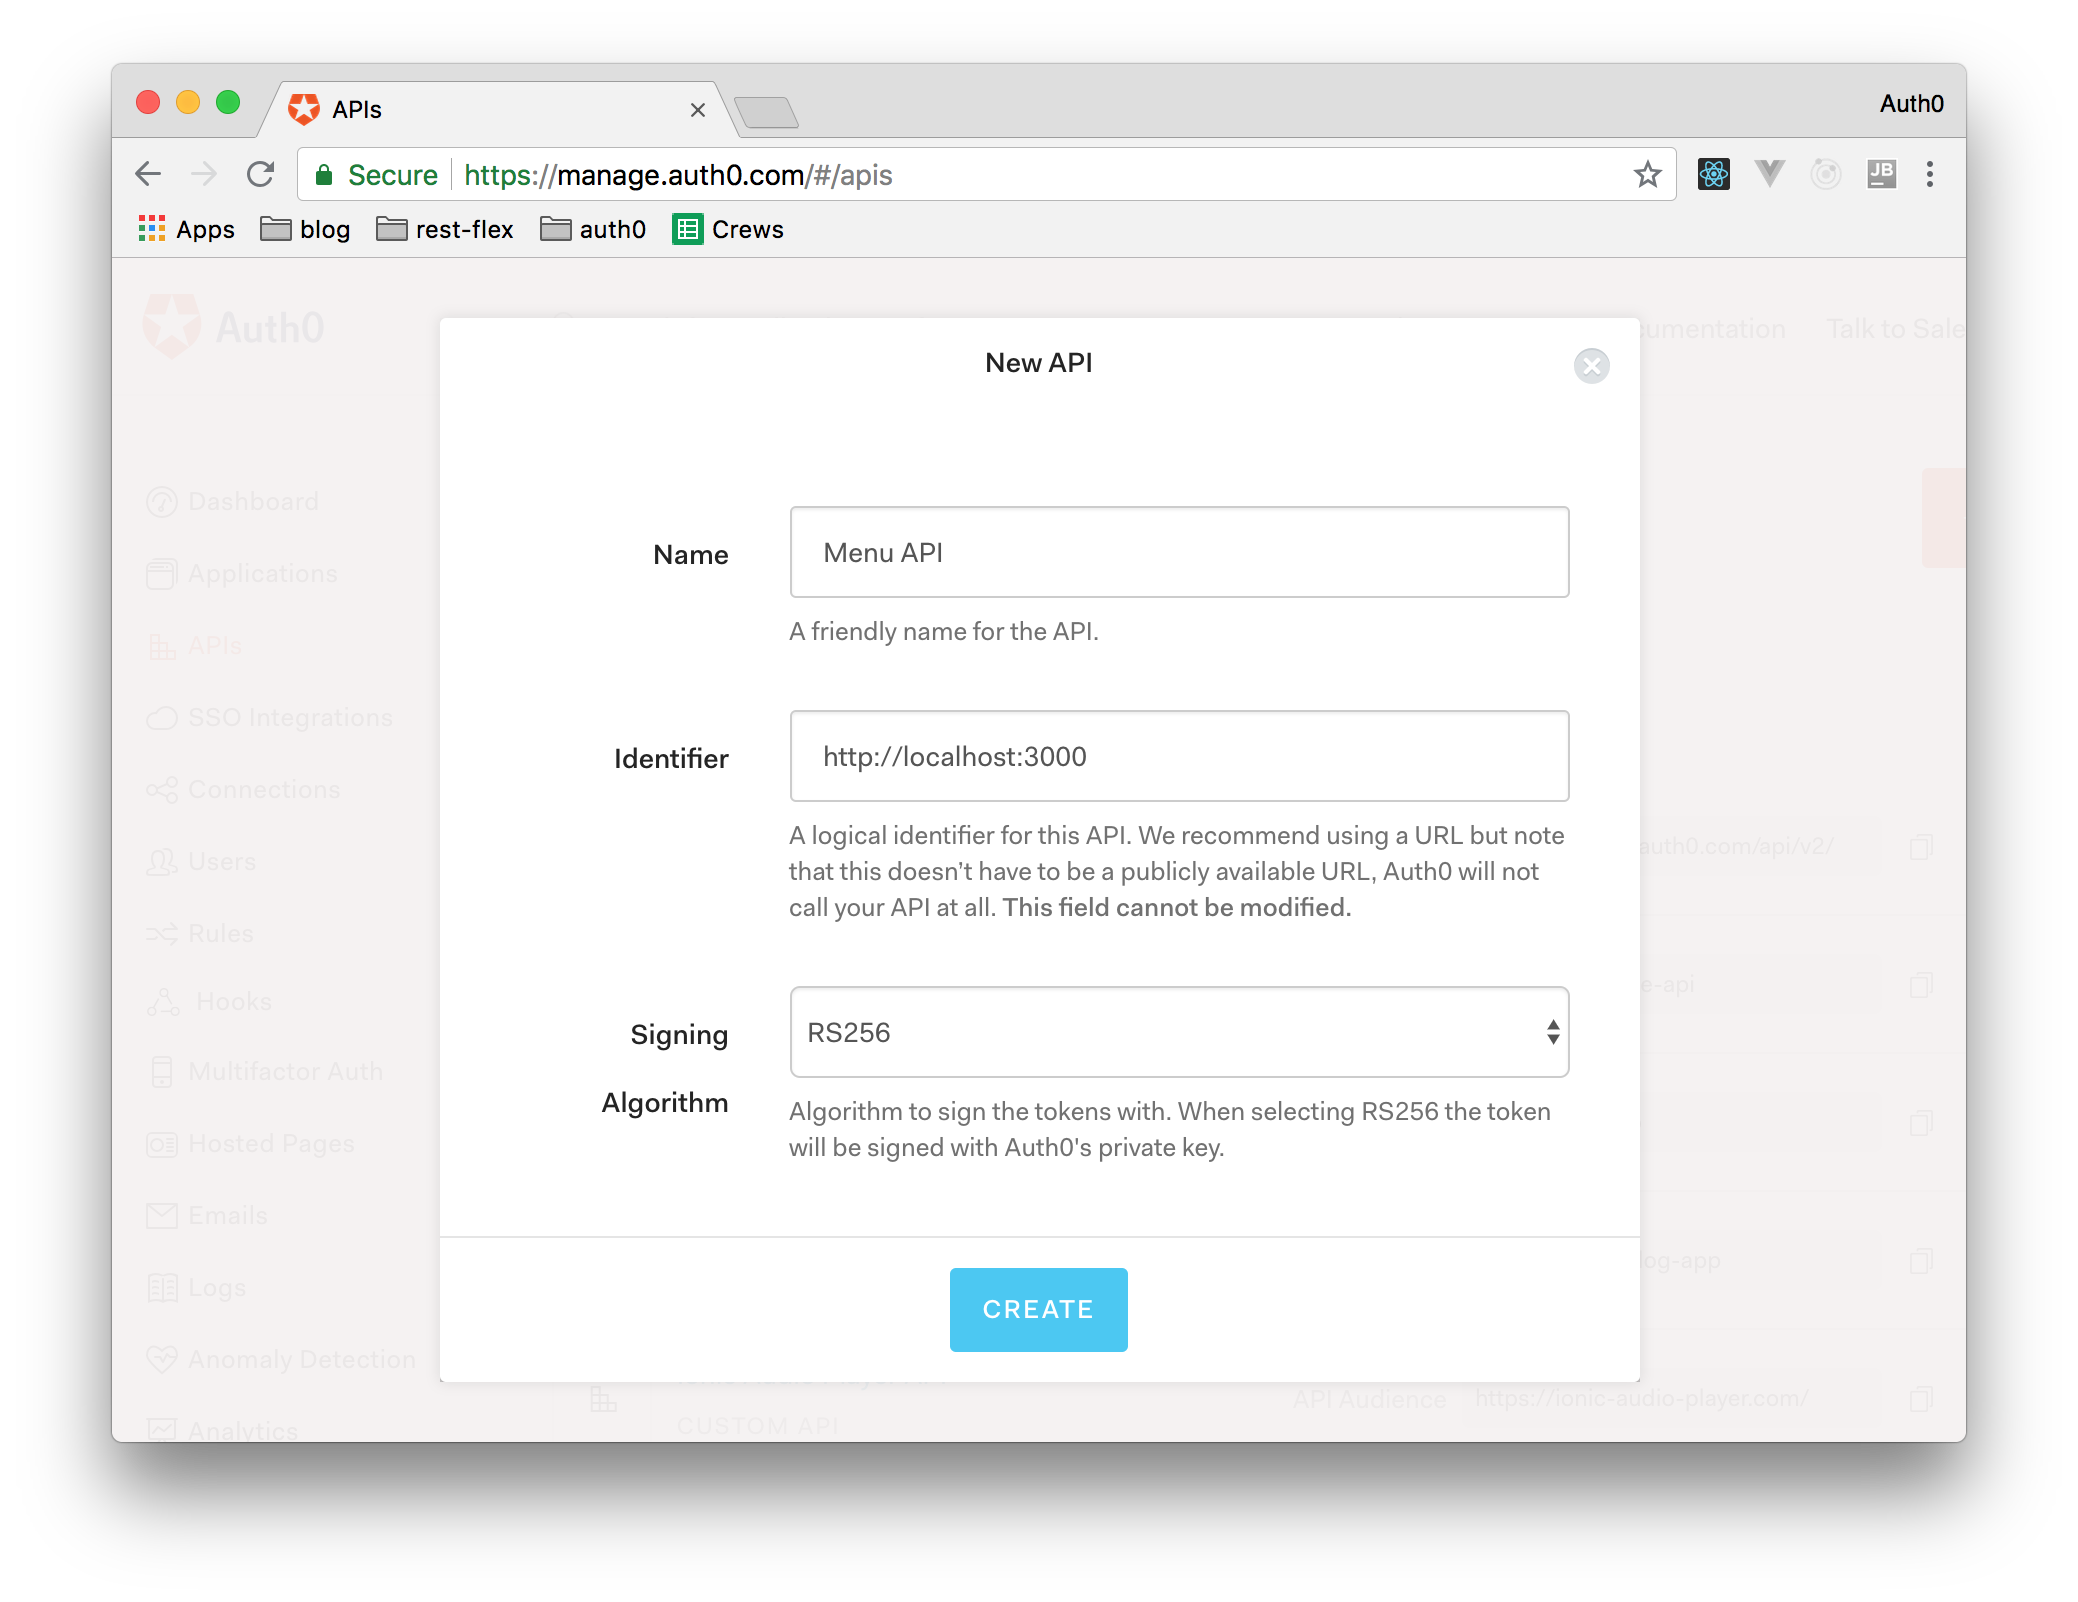
After creating your account, log in to it, head to the APIs section in your Auth0 dashboard, and hit the Create API button. Then, in the form that Auth0 shows, add a name to your API (something like Menu API), set its identifier to http://localhost:3000, and hit the Create button.
Don't change the signing algorithm (leave it as
RS256) as it is the best option from the security point of view.
Then you should visit the Applications section of your Auth0 management dashboard to create an Auth0 Application to represent the front-end Angular app you will create in the next part of this series.
In this page, click on Create Application. Auth0 will show you a form where you will need to define a Name to your application (e.g., Menu Angular App) and you will have to select Single Page Web Application as its type. Then, after clicking on the Create button to conclude the process, Auth0 will take you to the Quick Start section of your new application.
From there, go to the Settings section of your Auth0 Application. In this section, you will have to add http://localhost:4200/login (you are going to use it in the next article) to the Allowed Callback URLs field and save the changes. Then, leave this page open as you will need to copy Domain, Client ID, and Client Secret to configure your API.
Now, you can generate an access token with Auth0 (you will use this token soon, after securing your API). To do this, head to the following address in your browser:
AUTH0_DOMAIN=${AUTH0_DOMAIN}
AUTH0_CLIENT_ID=${AUTH0_CLIENT_ID}

open https://$AUTH0_DOMAIN/authorize?audience=http://localhost:3000&scope=SCOPE&response_type=code&client_id=$AUTH0_CLIENT_ID&redirect_uri=http://localhost:4200/login&state=STATE?prompt=none
Note: You will need to replace
${AUTH0_DOMAIN}and${AUTH0_CLIENT_ID}in the URL above with the values retrieved from your Auth0 Application.
If everything is correct, you should get the following page:
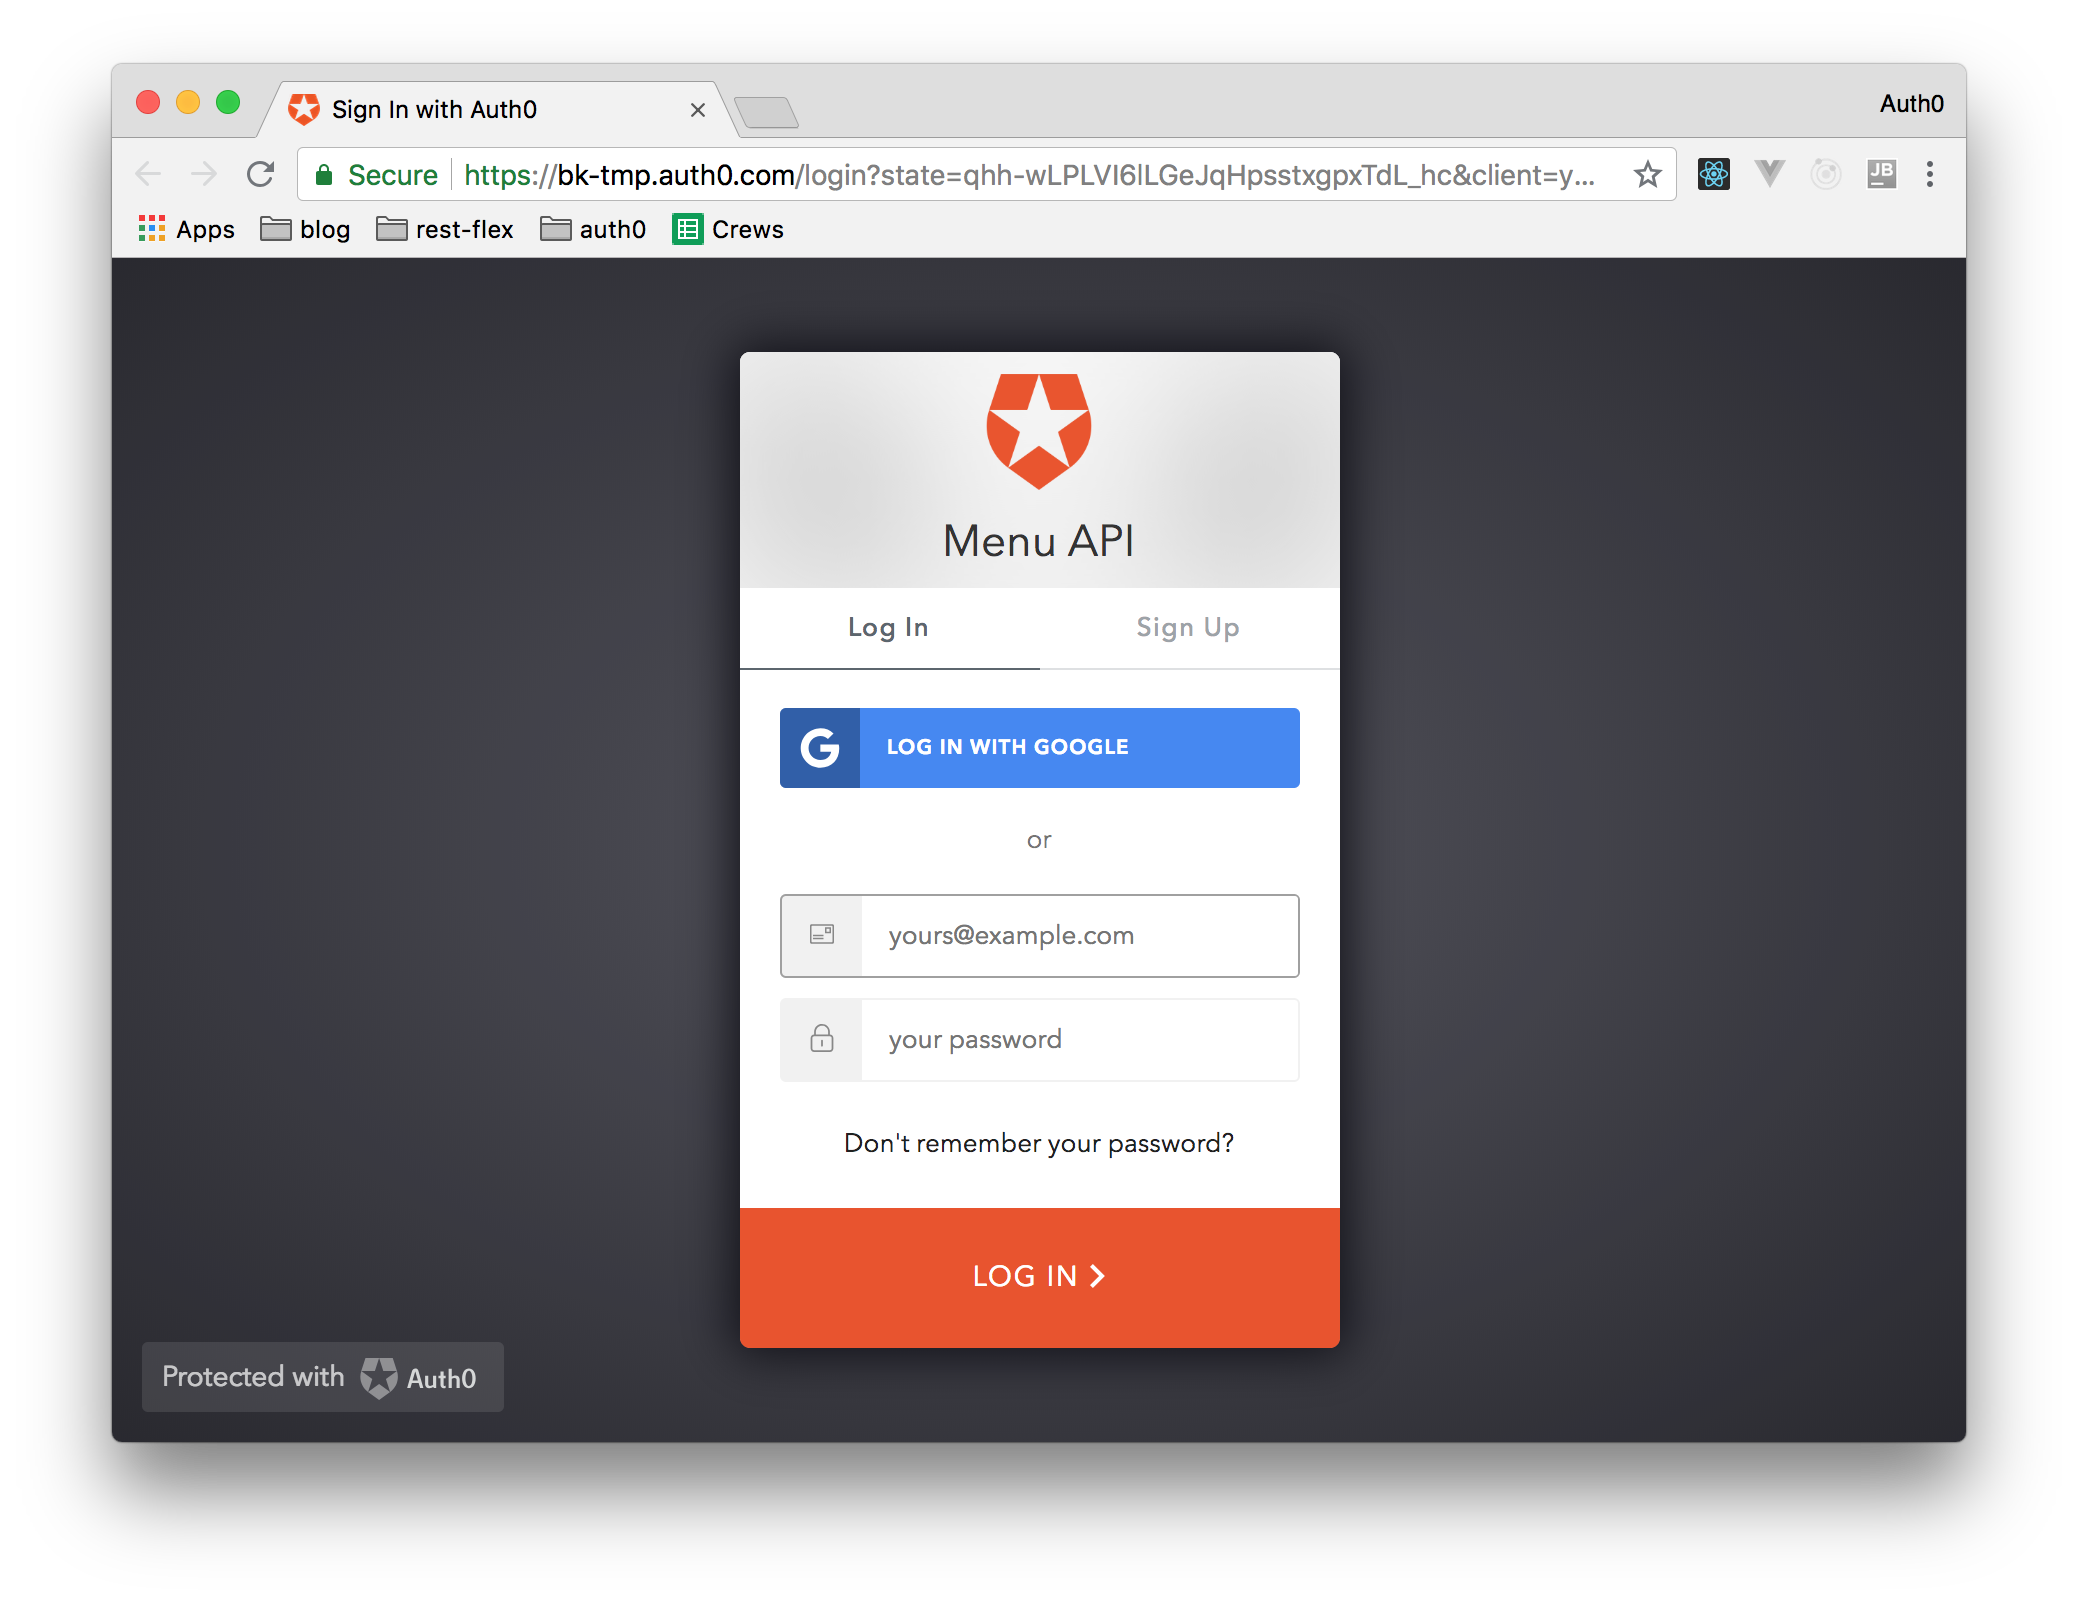
Then, you can proceed to login as you would do in any application secured with Auth0 (you may create a new account or use your Google Account) and then the page will return to the following address:
http://localhost:4200/login?code=${CODE}&state=${SOME_STATE}
You will get an error page saying that the connection was refused. Don't worry, this is expected. From there, copy the value returned in the place of ${CODE} and run the following in a terminal:
AUTH0_DOMAIN=${AUTH0_DOMAIN}
AUTH0_CLIENT_ID=${AUTH0_CLIENT_ID}
AUTH0_CLIENT_SECRET=${AUTH0_CLIENT_SECRET}
CODE=${CODE}

curl -X POST -H 'content-type: application/json' -d '{
  "grant_type": "authorization_code",
  "client_id": "'$AUTH0_CLIENT_ID'",
  "client_secret": "'$AUTH0_CLIENT_SECRET'",
  "code": "'$CODE'",
  "redirect_uri": "http://localhost:4200"
}' https://$AUTH0_DOMAIN/oauth/token
Note: You will need to replace
${AUTH0_DOMAIN},${AUTH0_CLIENT_ID},${AUTH0_CLIENT_SECRET}, and${CODE}in the snippet above.
You will get back a JSON object containing the token, the expiration (86400 seconds), and the token type (bearer). Keep this token around as you are going to use it soon.
Defining a Nest.js Middleware
According to Auth0 quick start guide page, the recommended way to verify a JWT token issued by Auth0 is through an Express middleware provided by express-jwt. This middleware will automate a huge part of the work.
To do this, you will need to create a file named authentication.middleware.ts inside the src/common directory with the following code:
import { NestMiddleware } from '@nestjs/common';
import * as jwt from 'express-jwt';
import { expressJwtSecret } from 'jwks-rsa';

export class AuthenticationMiddleware implements NestMiddleware {
  use(req, res, next) {
    jwt({
      secret: expressJwtSecret({
        cache: true,
        rateLimit: true,
        jwksRequestsPerMinute: 5,
        jwksUri: 'https://${DOMAIN}/.well-known/jwks.json',
      }),

      audience: 'http://localhost:3000',
      issuer: 'https://${DOMAIN}/',
      algorithms: ['RS256'],
    })(req, res, err => {
      if (err) {
        const status = err.status || 500;
        const message =
          err.message || 'Sorry, we were unable to process your request.';
        return res.status(status).send({
          message,
        });
      }
      next();
    });
  };
}
Then, you will need to change the ${DOMAIN} placeholder with the domain found in your Auth0 Application's settings.
Also, you will have to install the express-jwt and jwks-rsa libraries. To do so, type npm install express-jwt jwks-rsa) and restart the development server (npm run start:dev).
After that, you will have to open the ./src/app.module.ts and replace its contents with this:
import { Module, MiddlewareConsumer, RequestMethod } from '@nestjs/common';

import { AuthenticationMiddleware } from './common/authentication.middleware';
import { ItemsController } from './items/items.controller';
import { ShoppingCartController } from './shopping-cart/shopping-cart.controller';
import { ItemsService } from './items/items.service';

@Module({
  imports: [],
  controllers: [ItemsController, ShoppingCartController],
  providers: [ItemsService],
})
export class AppModule {
  public configure(consumer: MiddlewareConsumer) {
    consumer
      .apply(AuthenticationMiddleware)
      .forRoutes(
        { path: '/items', method: RequestMethod.POST },
        { path: '/shopping-cart', method: RequestMethod.POST },
      );
  }
}
With this code in place, both POST methods of the /items and /shopping-cart routes will be protected by the Express middleware that verifies if requests include access tokens.
To test this, you can try calling your Nest.js API with this:
# this will not work
curl -X POST http://localhost:3000/shopping-cart

# so you have to define a variable to your access token
TOKEN="eyJ0eXAiO...Mh0dpeNpg"

# and issue a POST request with it
curl -X POST -H 'authorization: Bearer '$TOKEN http://localhost:3000/shopping-cart
Note: you have to define
TOKENwith your own access token retrieved previously.
Managing Roles with Auth0
Currently, any user that has a verified token can post an item in your API. However, as described before, you want to restrict this operation to admin users only. To implement this feature, you are going to use Auth0 rules.
So, go to your Auth0 dashboard and navigate to the rules section. There, you can hit the button to create a new rule, and select "Set roles to a user" as the rule model.
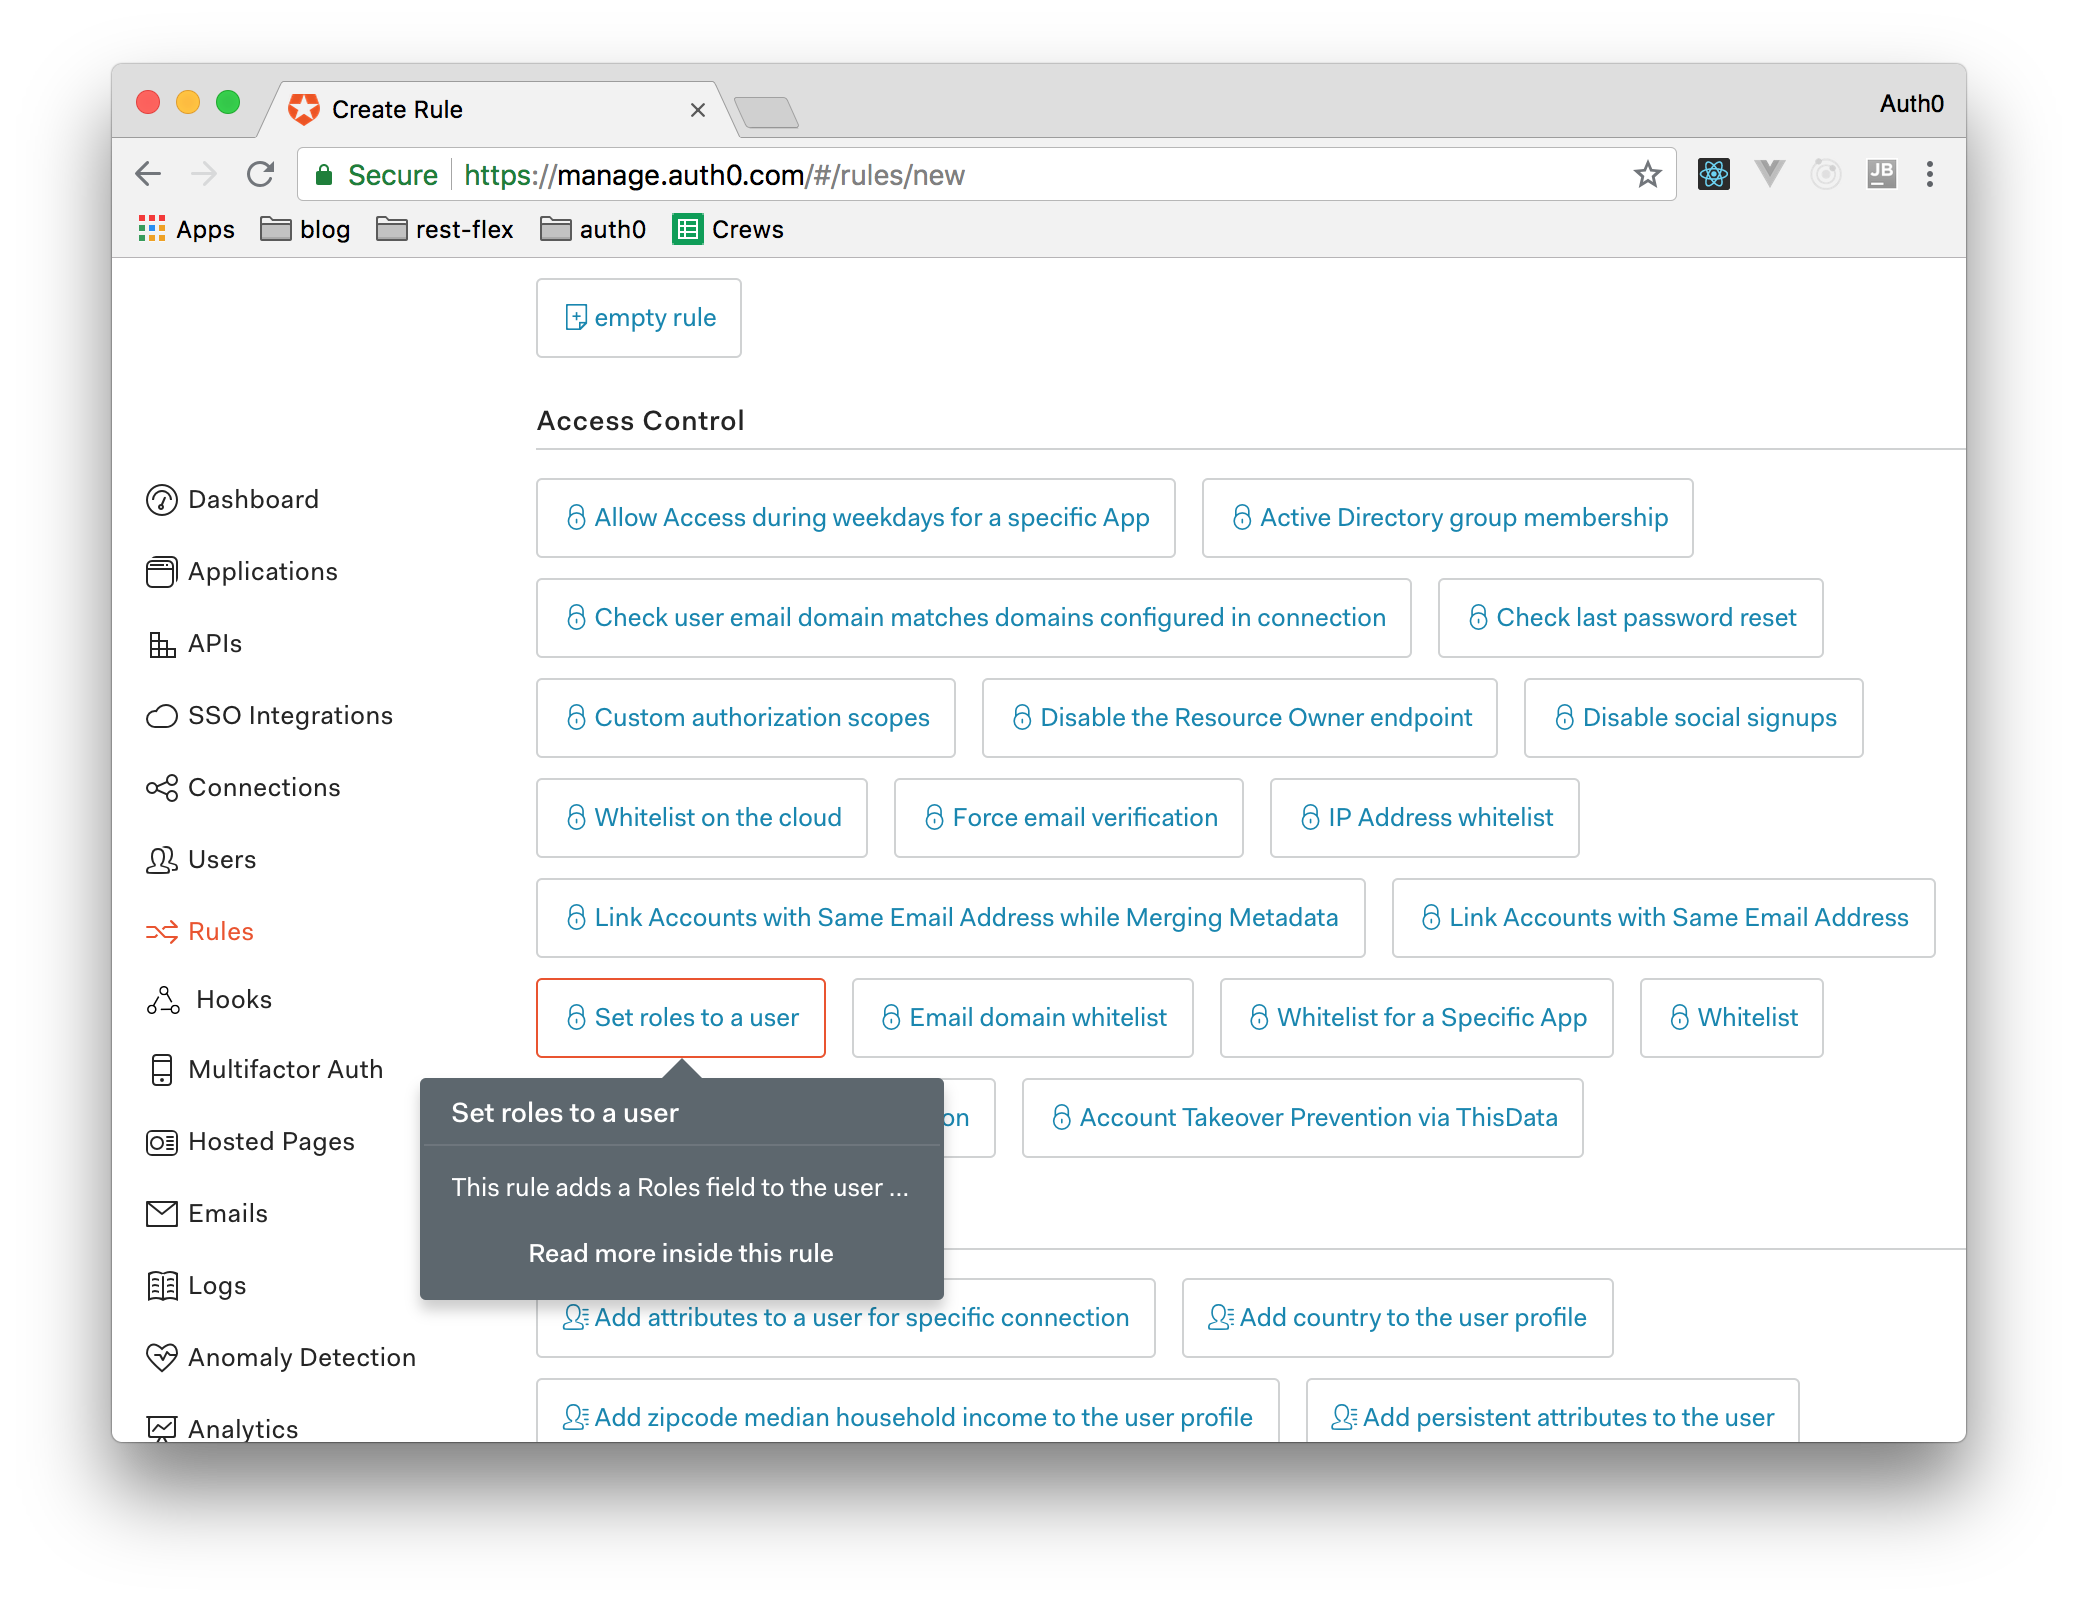
By doing that, you will get a JavaScript file with a rule template that adds the admin role to any user who has an email provided by some domain. You should change a few details in this template to get a functional example. For your app, you may choose to give admin access only to your own email address. You also will need to change where the information about the admin status is saved.
For now, this information is saved in an identification token (used to provide information about the user) but, to access resources in an API, you should use an access token. The code after the changes should look like the following one:
function (user, context, callback) {
  user.app_metadata = user.app_metadata || {};

  if (user.email && user.email === '${YOUR_EMAIL}') {
    user.app_metadata.roles = ['admin'];
  } else {
    user.app_metadata.roles = ['user'];
  }

  auth0.users
    .updateAppMetadata(user.user_id, user.app_metadata)
    .then(function() {
      context.accessToken['http://localhost:3000/roles'] =
        user.app_metadata.roles;
      callback(null, user, context);
    })
    .catch(function(err) {
      callback(err);
    });
}
Note: You will have to replace
${YOUR_EMAIL}with your own email address. Another thing that is important to note is that, usually, when you are dealing with emails in Auth0 Rules, the ideal is to force email verification. In this case, this is not required because you are using your own email address and you will sign up (i.e., take ownership of the email address) as soon as you deploy your app, right?
To check if the token passed to your API has an admin role, you will have to create a Nest.js guard. To do so, create a file called admin.guard.ts inside the src/common directory and add the following code to it:
import { Injectable, CanActivate, ExecutionContext } from '@nestjs/common';

@Injectable()
export class AdminGuard implements CanActivate {
  canActivate(context: ExecutionContext): boolean {
    const user = context.getArgs()[0].user['http://localhost:3000/roles'] || '';
    return user.indexOf('admin') > -1;
  }
}
Now, if you go through the login process described before and use the email address defined in the rule, you will get an access_token with a new claim. To check the contents of this access_token, copy and paste the token in the https://jwt.io/ website. Pasting it there, you will be able to see that the payload section of this token contains the following array:
"http://localhost:3000/roles": [
  "admin"
]
If your token does include this claim, you can go ahead and wrap up the integration with Auth0. So, open the items.controller.ts file to use this new guard:
import {
  Get,
  Post,
  Body,
  Controller,
  UsePipes,
  UseGuards,
} from '@nestjs/common';
import { CreateItemDto } from './create-item.dto';
import { ItemsService } from './items.service';
import { Item } from './item.interface';
import { ValidationPipe } from '../common/validation.pipe';
import { AdminGuard } from '../common/admin.guard';

@Controller('items')
export class ItemsController {
  constructor(private readonly itemsService: ItemsService) {}

  @Get()
  async findAll(): Promise<Item[]> {
    return this.itemsService.findAll();
  }

  @Post()
  @UseGuards(new AdminGuard())
  @UsePipes(new ValidationPipe())
  async create(@Body() createItemDto: CreateItemDto) {
    this.itemsService.create(createItemDto);
  }
}
Now, with your new token, you should be able to add new items to your backend API:
# run the development server
npm run start:dev

# issue the POST request
curl -X POST -H 'Content-Type: application/json' \
-H 'authorization: Bearer '$TOKEN -d '{
  "name": "Salad",
  "price": 3
}' http://localhost:3000/items
“I just built a fullstack @typescriptlang application with @nestframework and @angular!”
Tweet This
Conclusion
Congratulations! You just finished building your Nest.js API and can now focus on the development of the frontend app! Be sure to check out the second part of this series: Full-Stack TypeScript Apps - Part 2: Developing Frontend Angular Apps.
To recapitulate, in this article, you had the chance to use Nest.js/TypeScript features like modules, controllers, services, interfaces, pipes, middleware, and guard to build an API. Hopefully, you had a great experience and are ready to keep evolving your application. If you have any doubts, a good resource to rely on is the official Nest.js documentation.