Purpose
The purpose of this sample project is to demonstrate how you can use Auth0 to add an ID4me-compliant identity provider as an option to your end-users to sign up and log in to your web application.
About ID4me
ID4me is an open, global, federated standard to manage online identities. It allows the user to establish their identity using their own domain name and then use that identity to log in and sign up at websites that support ID4me.
ID4me provides full data sharing control. ID4me users are not only free to choose their identity provider, they can change their provider at any time. This is also what differentiates ID4me from other commonly known social identity providers in the field.
The user can also use single-sign-on across different services with just one ID, which means they don't have to remember multiple passwords for different websites.
The initiative’s mission is to provide users with open and internationally available identity services that adhere to security and data protection standards, that foster user choice, and that avoid identity lock-ins.
ID4me is an open group of internet service providers, software developers, and other entities that care about the future of the internet and want to defend its distributed and federated architecture when it comes to digital identities.
About Auth0
Auth0 is an Identity as a Platform (IDaaS) service provider.
With Auth0, you take perhaps the riskiest endeavor your engineering organization will face, managing and securing the identities of your customers and employees, and abstract away this complexity and risk with our identity platform.
Our standards-based Identity-as-a-Service platform is built for developers, by developers so that your engineering organization can focus on building the solutions that delight your customers and drive your revenue. Our customers find that what typically either takes months to deliver or simply cannot be delivered via internal or external solutions, takes them only days to deliver with Auth0 due to our extensive SDKs, intuitive API, extensible architecture, and our simple management dashboard.
This is why Auth0 is the leader in developer-focused identity management, with more than 7,000 customers trusting us with billions of transactions everyday.
Prerequisites
If you don't already have an Auth0 account, sign up for a free Auth0 account here.
We assume that you have an existing ID4me identity and have already chosen an identity authority (identity provider) and identity agent (claims/user information provider). If not, go to the Identity Agent website and create one for free.
This example demonstrates the use of id.test.denic.de (DENIC-ID test environment) as the user identity authority and identityagent.de as the identity agent, according to the ID4me specification.
Terminology
Before we proceed, let's clarify some terminology up front.
Relying party
An online service that uses ID4me to validate user logins.
In our example: a Node.js web application, but brokered via Auth0. (So, technically, Auth0 is the Relying Party).
Identity authority
An online entity ensuring the correct authorization of the user at every login, by storing and verifying their authentication credentials, such as their password. It represents the “back-end” and trust source for the provision of the authorization service, but it generally does not deal directly with the user and does not store or supply the user’s personal information.
In our example: id.test.denic.de
Identity agent
An online entity providing the ID4me service to users. It represents the “front-end” for the provision of the authorization service, selling or supplying ID4me identifiers to users and creating them at an identity authority. It also stores the user’s personal information, communicating it to the relying parties when the user consents, and can potentially provide the user with reports and statistics on the service.
In our example: identityagent.de
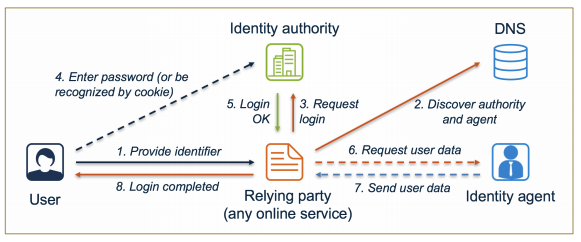
A typical ID4me authentication flow, and the parties involved, looks like this:
Configuration
The flow of this authentication process is a bit different than with other custom social connection providers added to Auth0, which is grounded in the federative concept of ID4me. Because of this, our integration with Auth0 will also be a little different.
We assume that the reader is generally familiar with the concept of ID4me. If you need to brush up, you can find more details on the ID4me website.
ID4me makes use of the Distributed Claims mechanism.
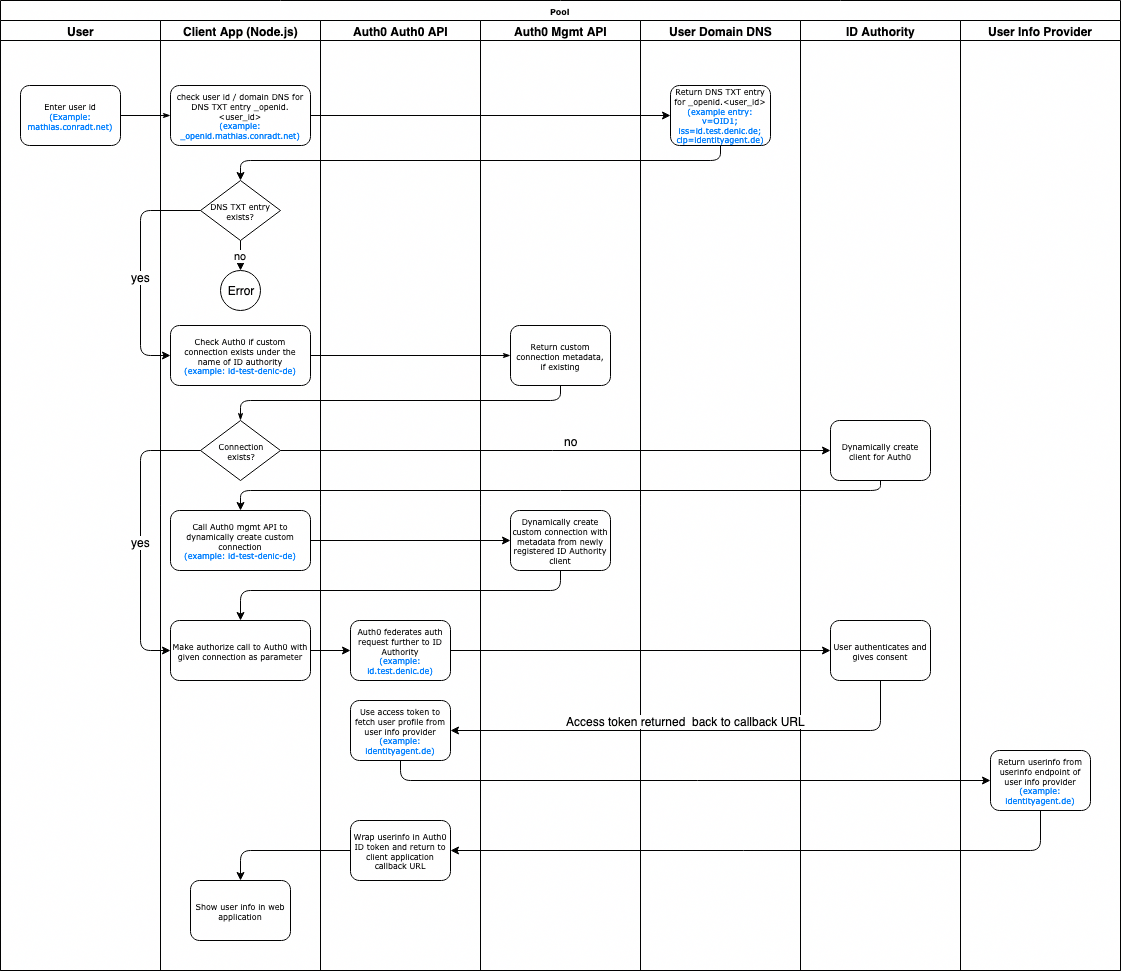
The following diagram outlines the flow of the overall authentication process when integrated with Auth0:
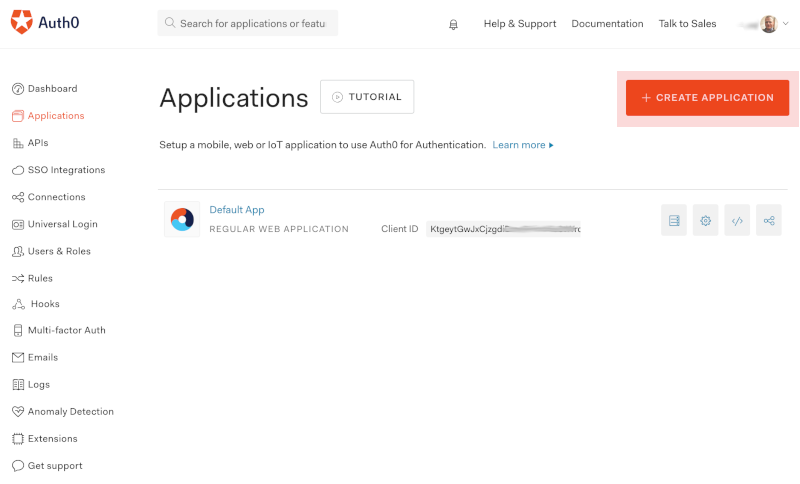
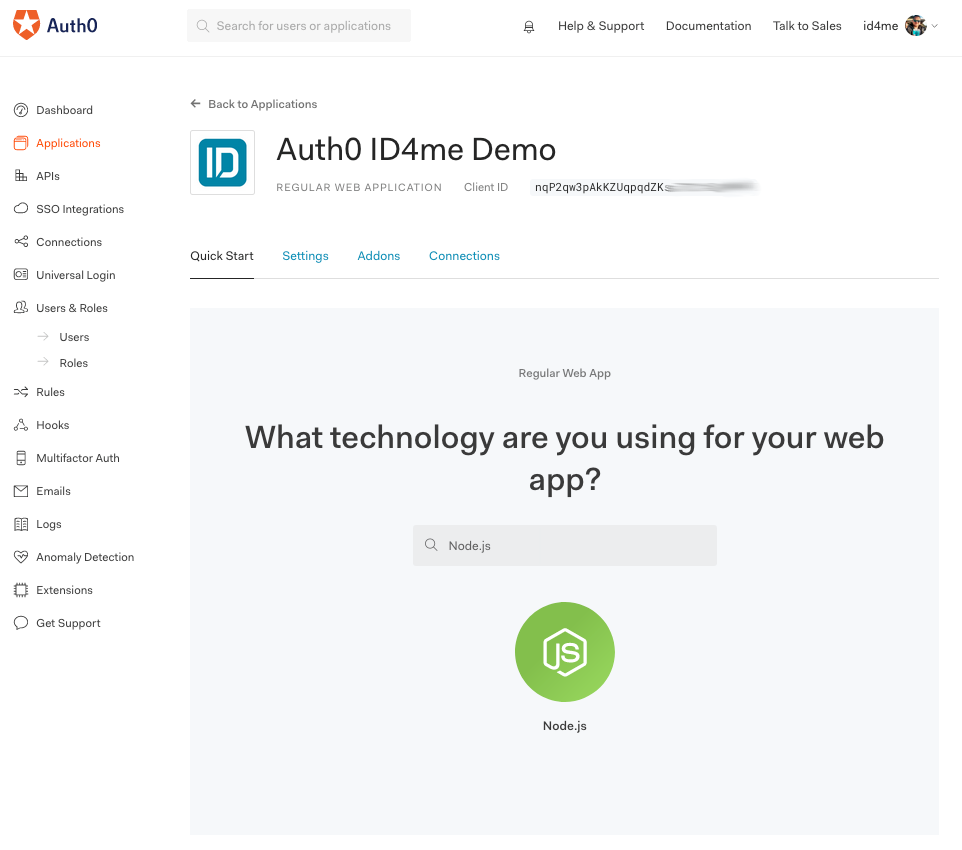
1. Create Application
Register an Auth0 client application by creating a new application within Auth0. Go to the Applications section in the Auth0 dashboard and click the + Create Application button.
Give the application any name you'd like (such as Auth0 ID4me Demo) and choose Regular Web Application as the type.

Next, choose Node.js as the technology.
2. Client Application Settings
Click the Settings tab of the client application.
In the application settings:
- Make sure
Application Typeis set toRegular Web Application. - Set
Allowed Callback URLstohttp://localhost:3000/callback - Set
Allowed Logout URLstohttp://localhost:3000
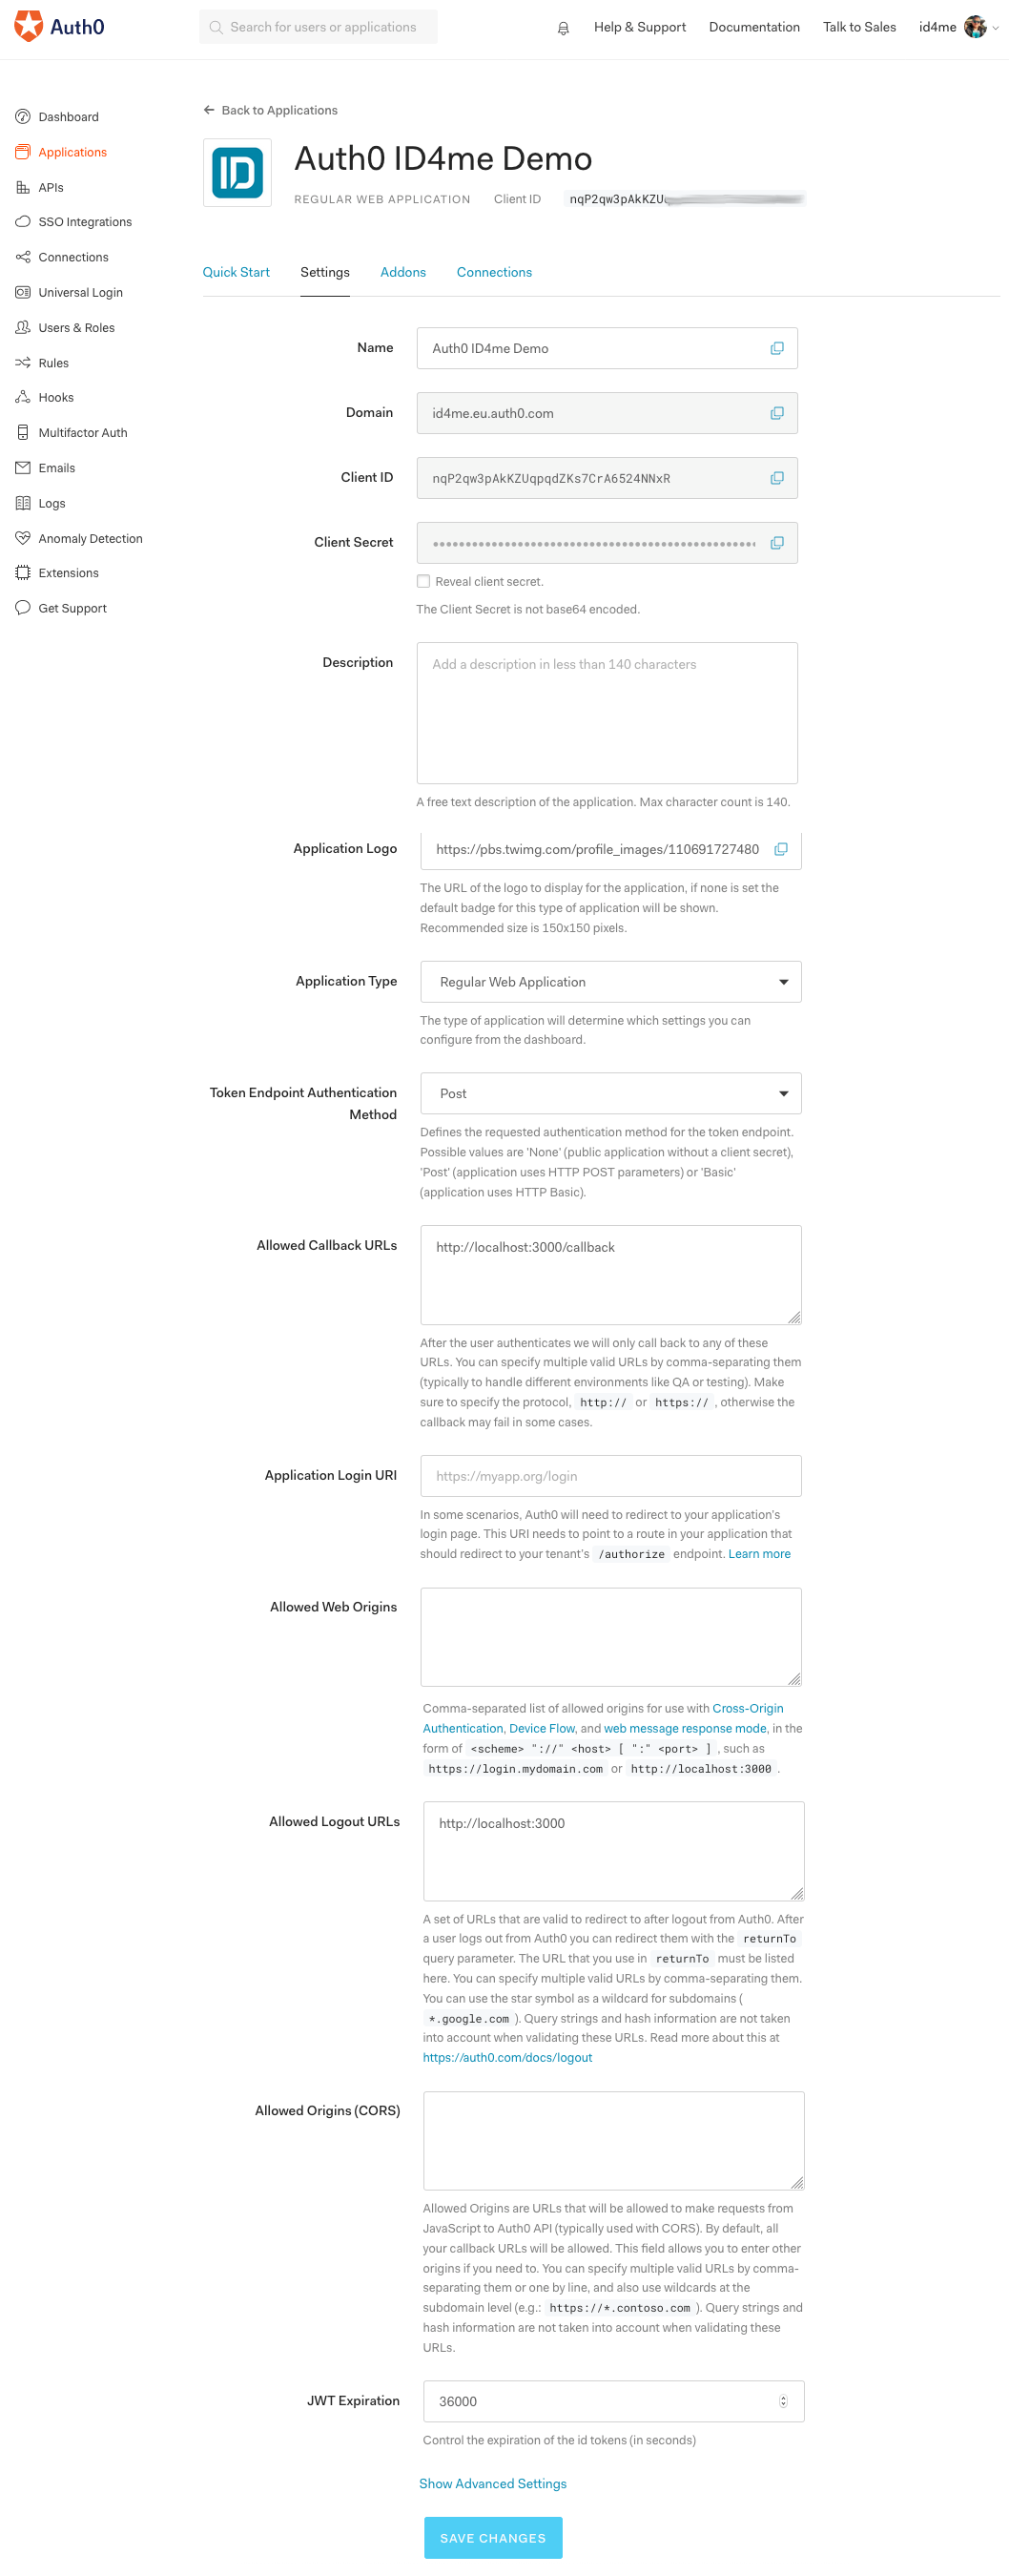
The Application Logo can be adjusted to your liking. It's not a mandatory field.
Take note of client_id and client_secret, you will need these later in the actual Node.js application.
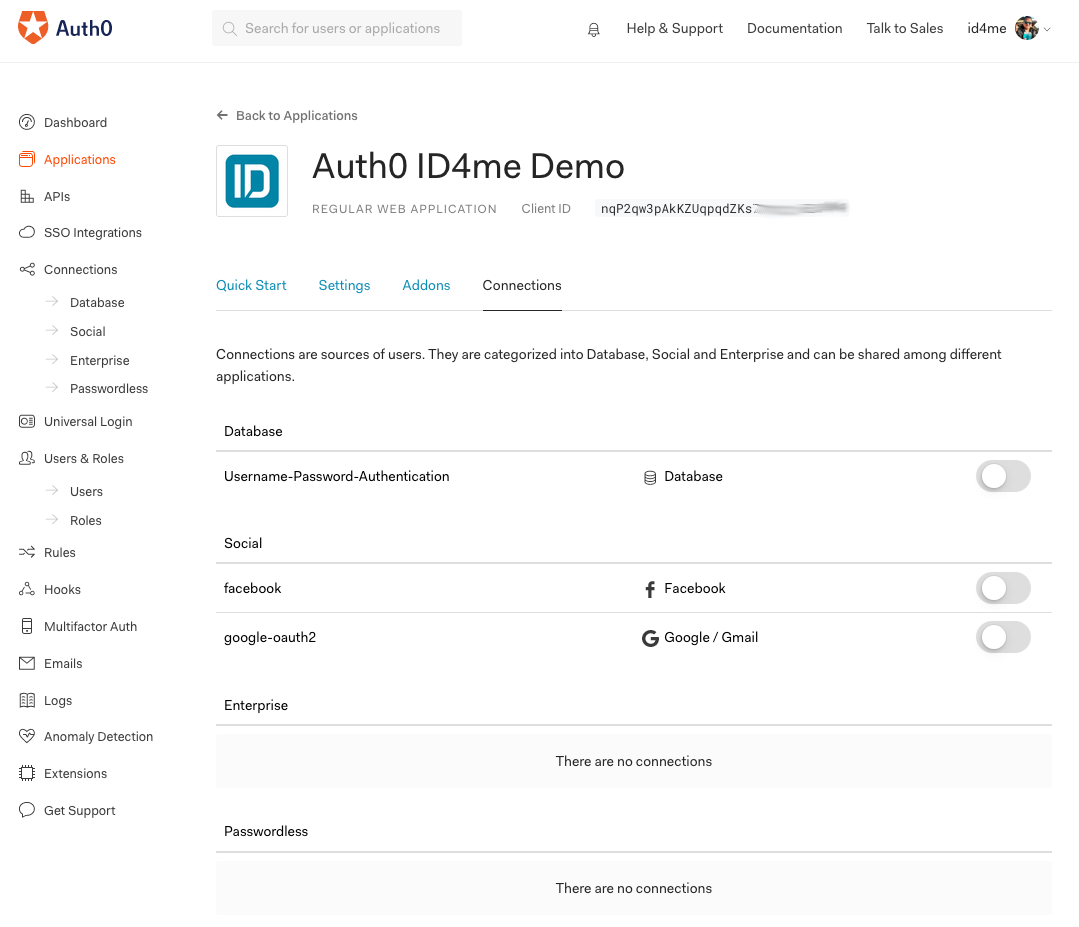
3. Client Application Connections
Click the Connections tab of the client application.
Make sure that no connection is enabled here, as we'll purely rely on ID4me for this example. The Username-Password-Authentication connection might already be enabled, so make sure you disable it.
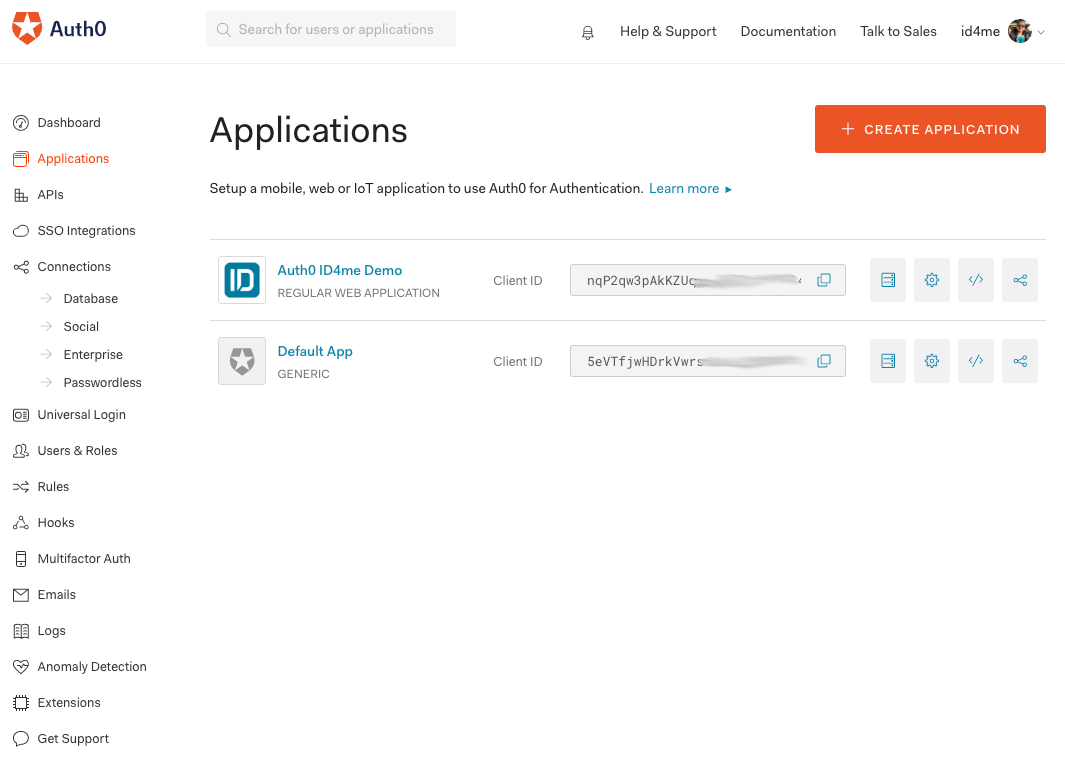
4. Client Application Done
When you go back to the Applications section, the application should now be listed in the Applications overview:
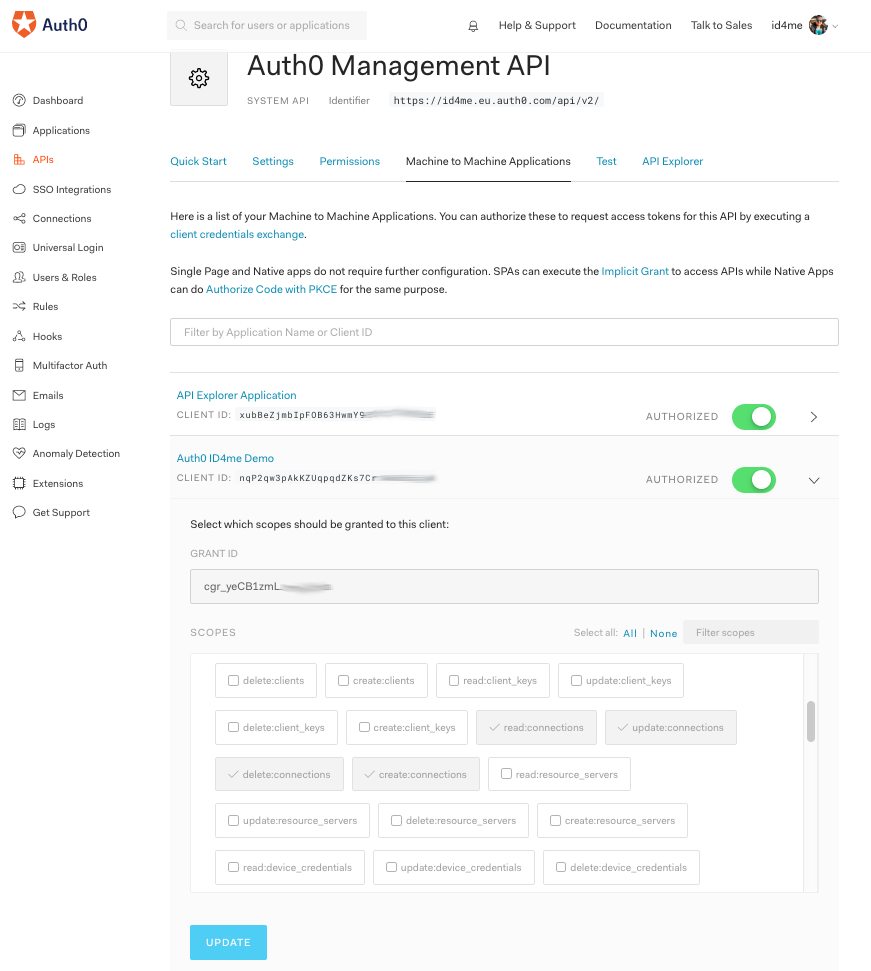
5. Auth0 Management API Configuration
We need to grant our Node.js client application access to the Auth0 Management API.
For this, go to the API section of the Dashboard, select the Auth0 Management API, and select the Machine to Machine Applications tab in there.
Enable the Authorized switch for the Auth0 ID4me Demo application (so that it's green) and click the arrow on the right, which toggles the Scopes view.
Select the scopes read:connections, update:connections, delete:connections, and create:connections from the scope list.
Then hit the Update button at the bottom.
6. Cloning the Node.js Client Application from Github
Clone the GitHub repository for the sample Node.js client application:
git clone https://github.com/auth0-blog/auth0-id4me-sample.git
On your computer, switch to the folder where you checked out the project.
cd auth0-id4me-sample-draft
Copy the .env.sample file to .env:
cp .env.sample .env
Open the .env file in a text editor and adjust the values in it:
AUTH0_DOMAIN: your Auth0 tenant domain (withouthttps://)AUTH0_CLIENT_ID: theclient_idfrom step 2 aboveAUTH0_CLIENT_SECRET: theclient_secretfrom step 2 above
When finished, build and run the app:
npm install
npm start
Now open the browser and go to http://localhost:3000.
The client application is now up and running and you can test it with your ID4me user.
ID4me Authentication
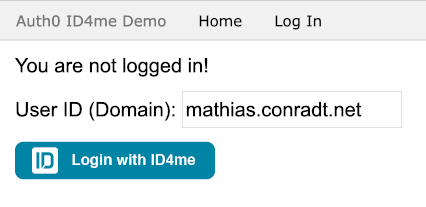
The user enters their user id in the client application, then presses the Login with ID4me button.
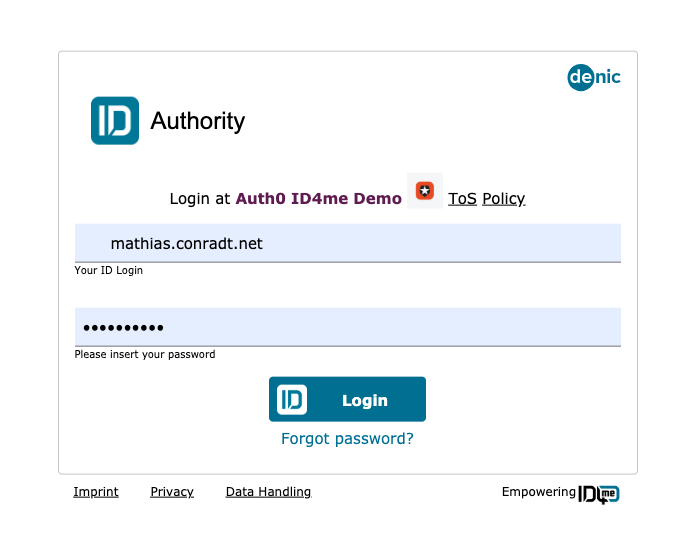
The client application will redirect the user to Auth0, who in turn transparently federates the request further to the user's chosen ID Authority, in our example, Denic ID.
Here, the user ID will also be filled in so that the user is only asked to provide the password.
If it's the first time that the user uses the app and authenticates with ID4me, they will be asked what information they consent to share (between the ID4me authority and Auth0).
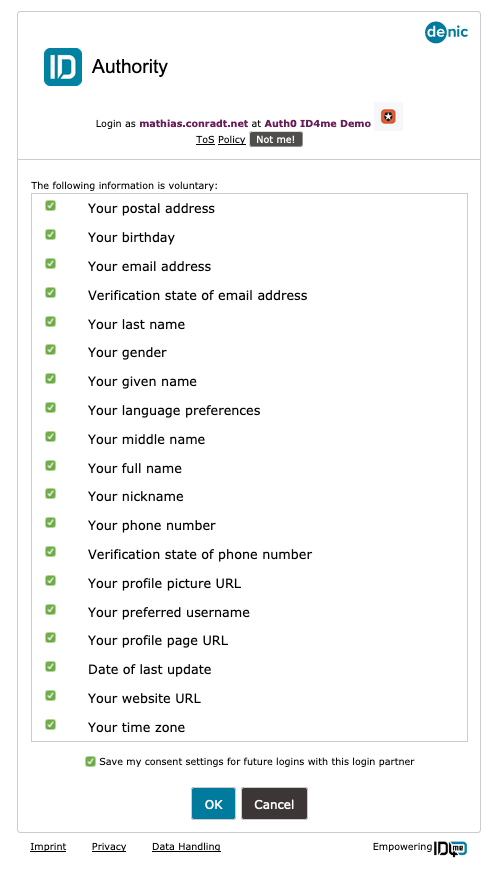
Next, consent is also given to the Auth0 client application (consent to share between Auth0 an the Node.js client application).
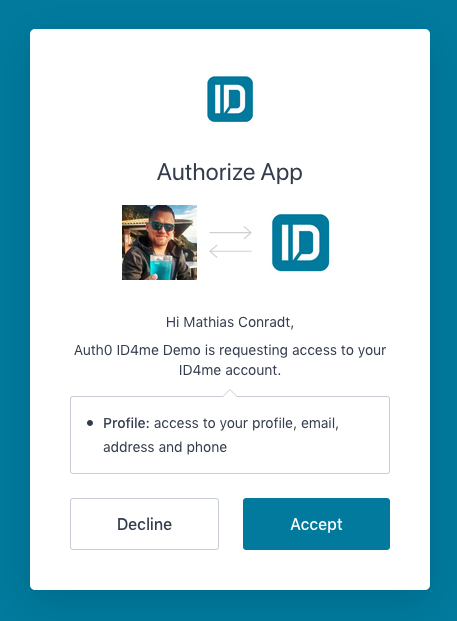
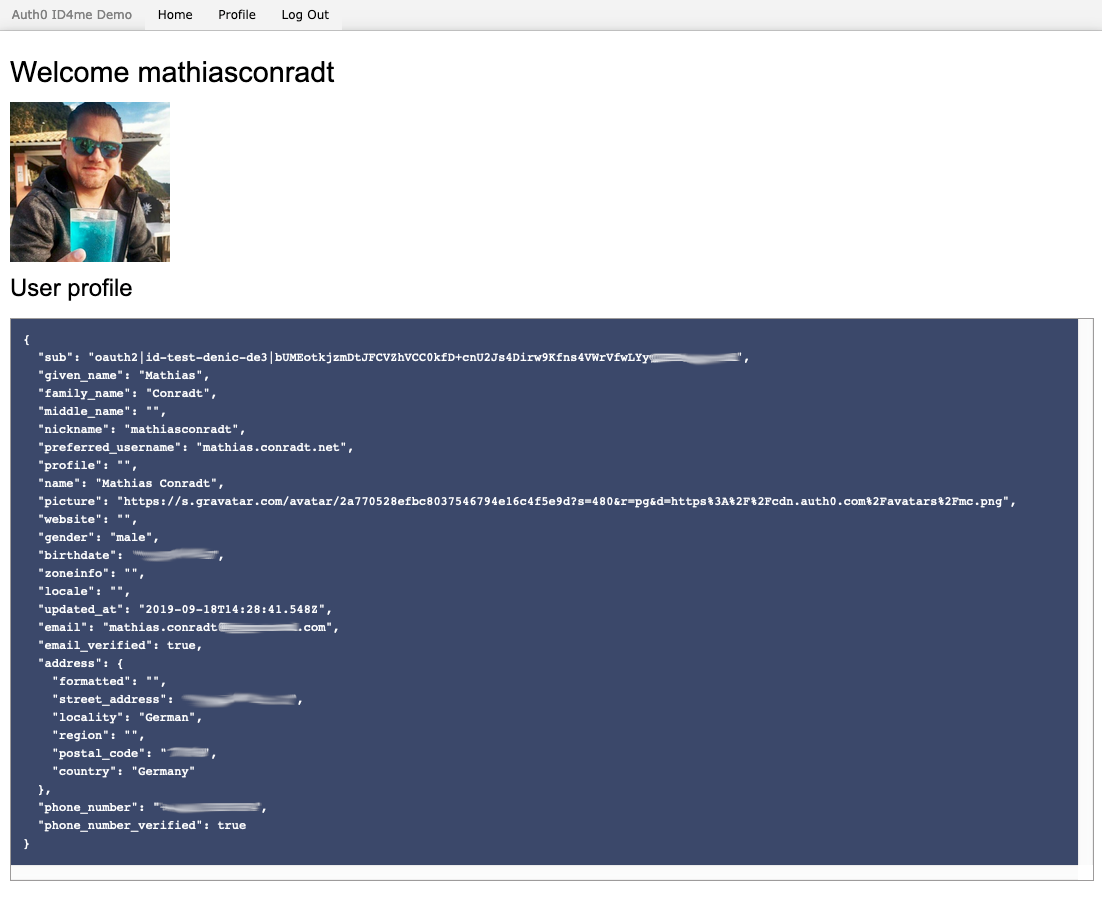
The browser redirects to the application, having received an ID token and information about the user:
Auth0 Backend
Auth0 Dashboard: Users
Let's look at the user list and into this specific user's detail after he authenticated:
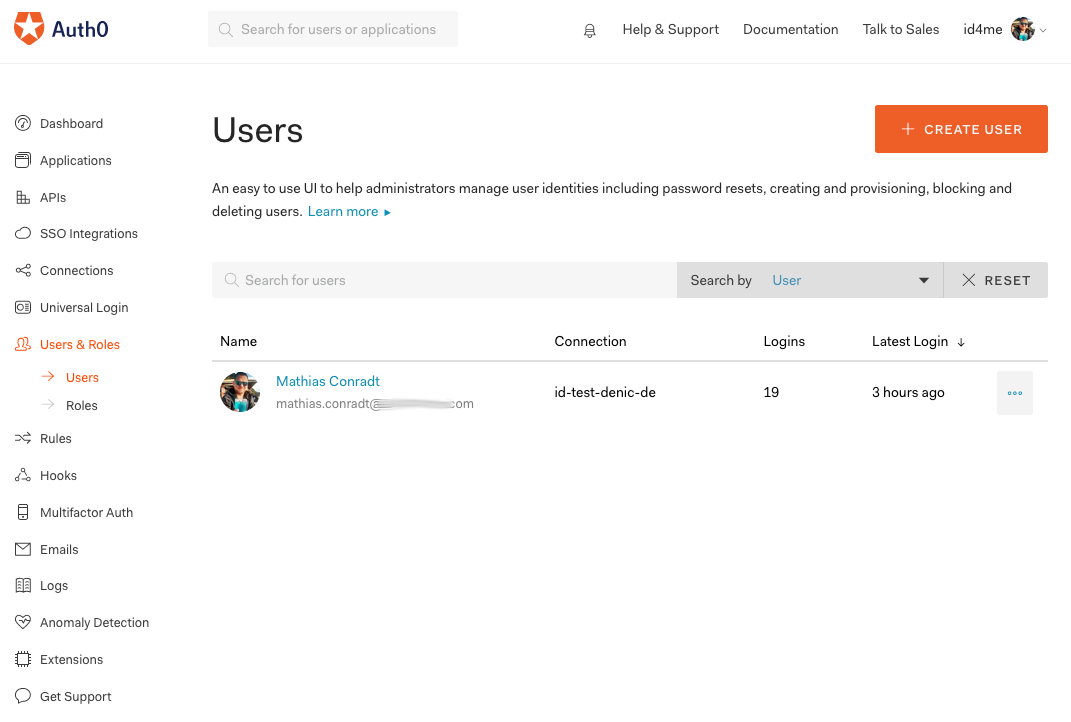
The user's primary identity provider is shown as oauth2.

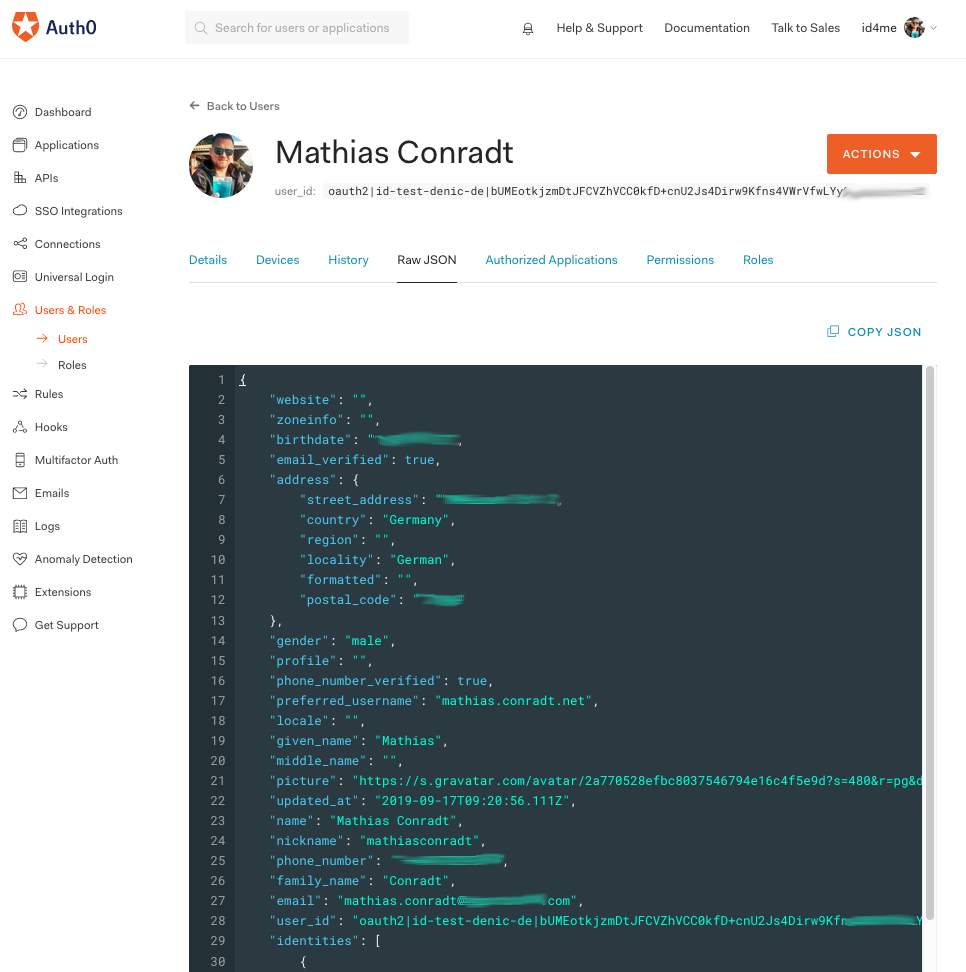
And the raw JSON of this user contains the ID4me identifier:
ID4me Provider Backend
The following image shows the screenshots of both the User Identity Authority and Identity Agent (or User Information Provider).
The General > Data section at the User Information Provider (identityagent.de in our example):
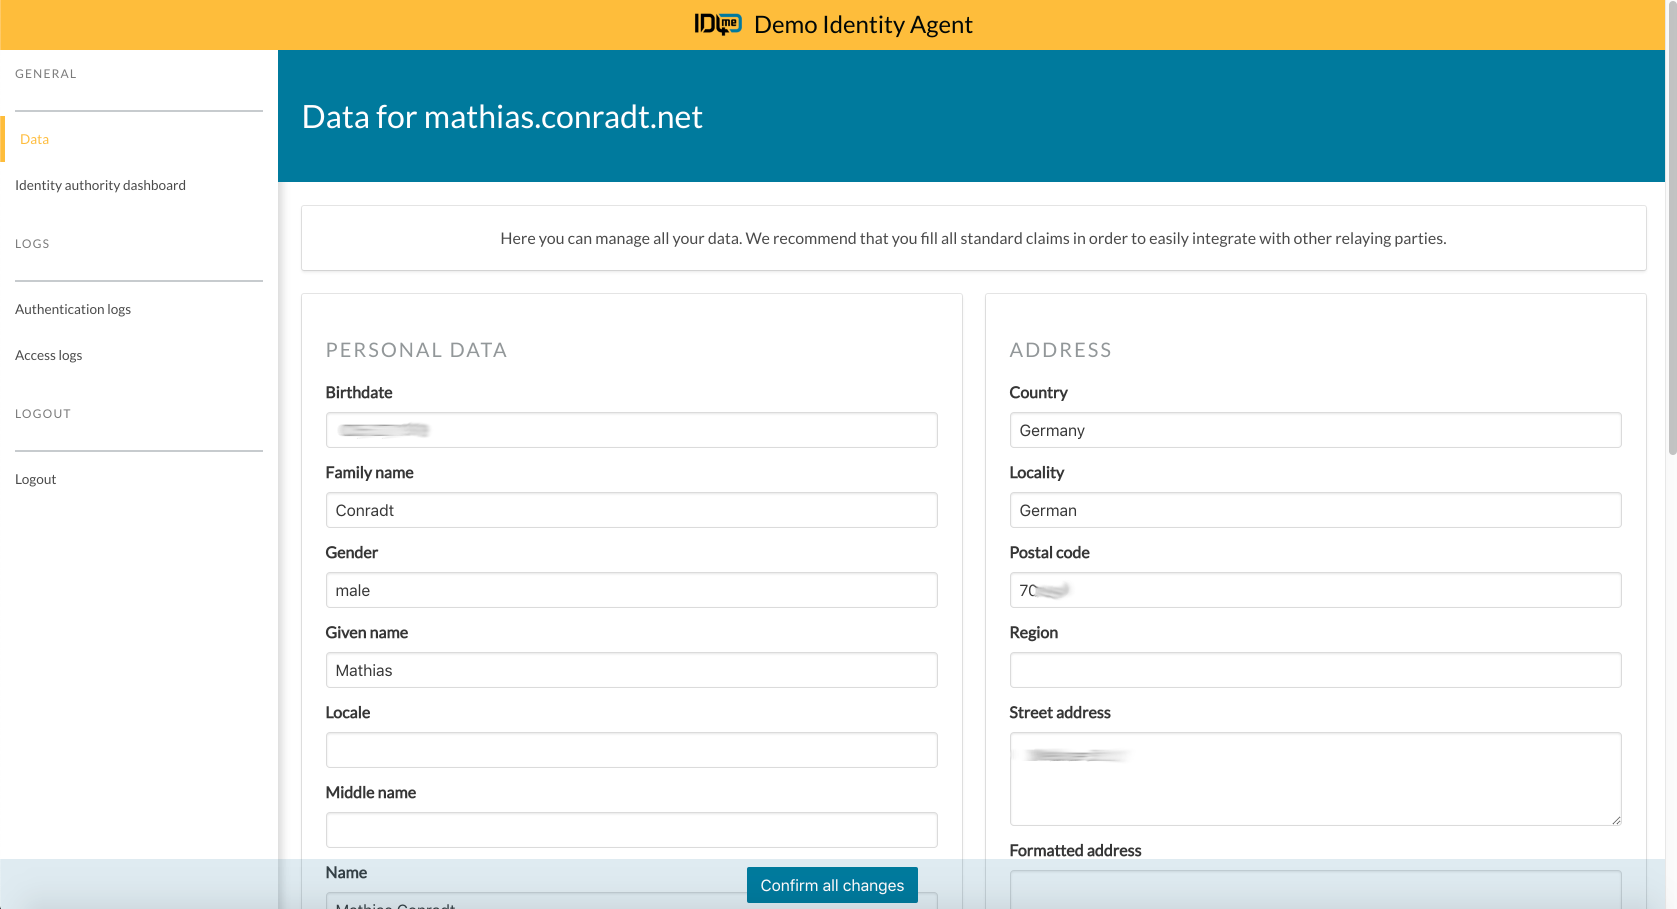
When the user clicks on the link Identity authority dashboard, they will get to the dashboard of DENIC-ID.
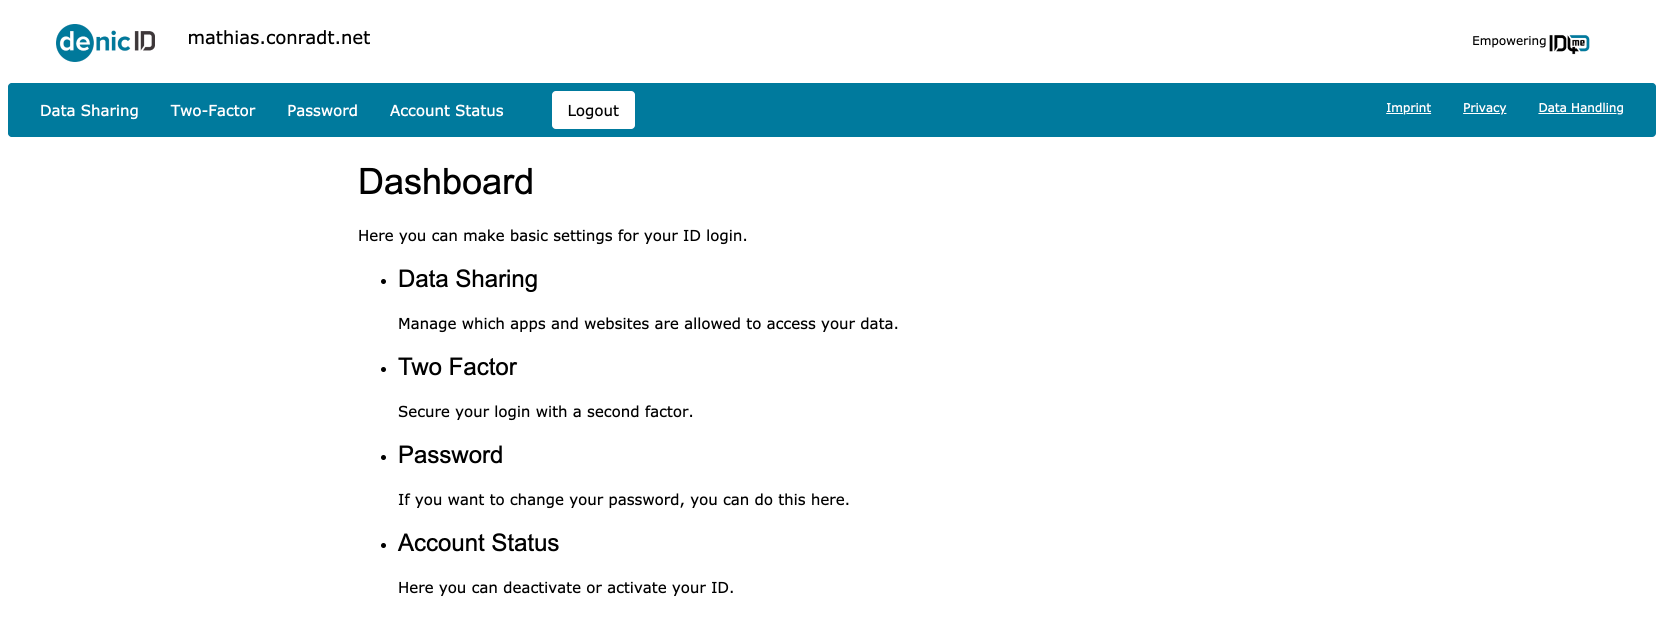
Once in the dashboard, you have various settings options to choose from, such as:
- Data Sharing
- Two-factor Authentication
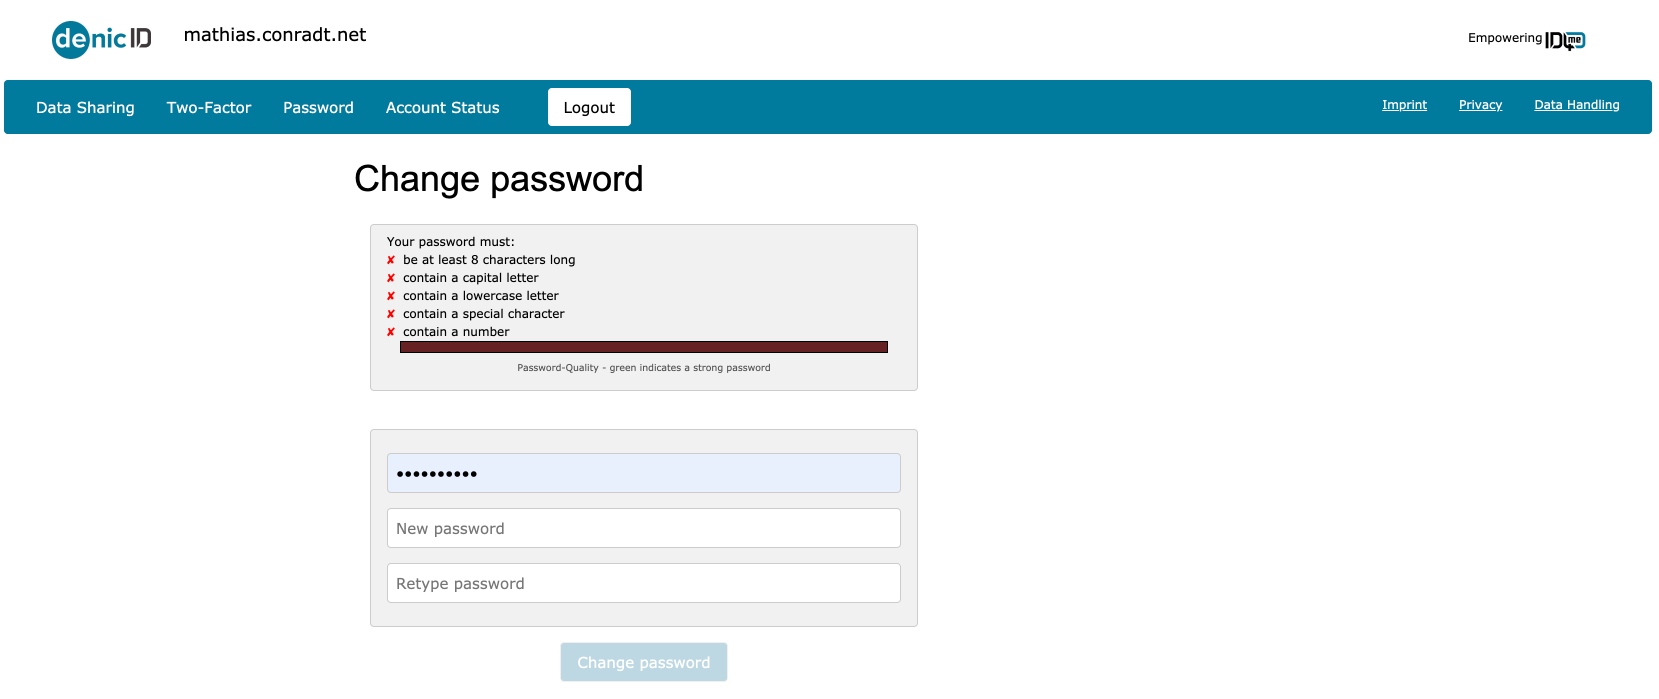
- Password settings
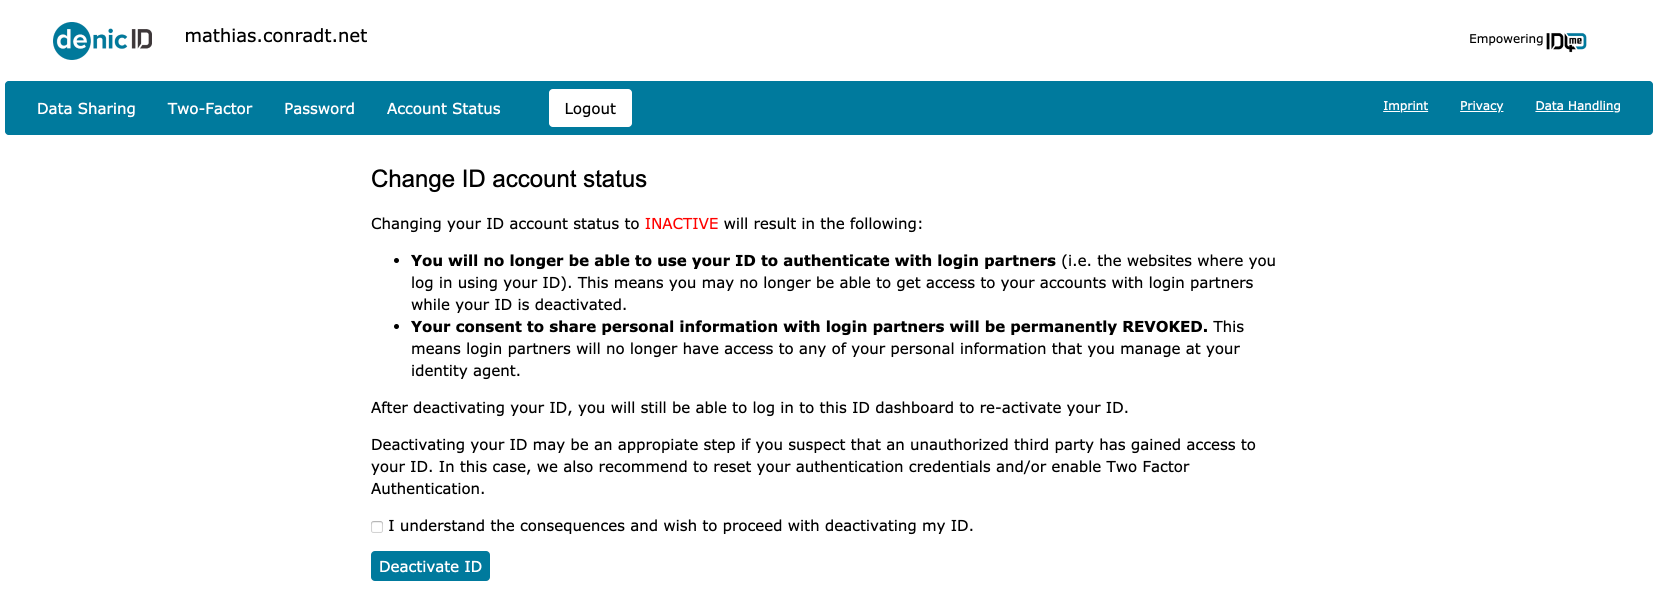
- Account Status


About the author

Mathias Conradt
Enterprise Solutions Engineer (Auth0 Alumni)