


TL:DR: This is the second of a two-articles series showing how to build client-server systems by actually applying the REST architecture principles. In the first part, you learned how to build a RESTful API that allows you to use a simplified version of the Auth0 Management API. In this article, you will learn how to implement a RESTful client that consumes that API.
You will use React to build the RESTful client, but the principles you are going to apply are valid for any programming language and platform. The complete code of the final project is on this GitHub repository.
"You've heard about RESTful APIs. What about RESTful clients? Learn what is a RESTful client and how to implement it."
Tweet This

API Consumers vs RESTful Clients
The typical approach to implement a client consuming RESTful or HTTP APIs consists of a combination of:
- querying an endpoint to get a resource and showing it in the UI
- gathering data from the UI and submitting it to an endpoint to create, modify, or delete a resource
This is a very common approach and there is nothing strange here. Developers usually build their client applications around sets of API endpoints that allow these clients to achieve their goals. However, this is not how RESTful clients should behave for a few reasons:
- the client is too coupled with the server's endpoints: a change to the API causes a change to the client. This violates the REST principle of loose coupling between the client and the server
- the client's application state and the transition between states are determined by the client's logic. This is not compatible with the REST principle saying that the client application state and its possible transitions are determined by the server.
What usually developers implement is not a true RESTful client, but a simple API consumer.
As Fielding says, "the model application is therefore an engine that moves from one state to the next by examining and choosing from among the alternative state transitions in the current set of representations. Not surprisingly, this exactly matches the user interface of a hypermedia browser."
So, a RESTful client should be able to emulate a common Web browser. It should be a specialized browser able to handle the resources sent by a RESTful API, including hypermedia, and possibly to show them in the UI. In other words, the RESTful client should be an interpreter of the language used by the API to describe the resources.
"A RESTful client is an interpreter of the language used by the API to describe the resources."
Tweet This
Throughout the article, you will learn how to build a simplified version of this kind of client by using React.
Setting up the Client Project
In the previous article of this series, you built a RESTful API providing access to a simplified version of data about your Auth0 clients. You will continue that project by building a Single Page Application (SPA) showing those data and allowing the user to interact with it.
To start your project, you are going to use create-react-app to get a basic React application. So, move in the auth0-restful-dashboard folder and type the following command in a window console:
npx create-react-app auth0-restful-dashboard-clientAfter a few moments, you will get in the auth0-restful-dashboard folder the source code of the application and its dependencies already installed. The main subfolder where you will work is src. In this folder, there are the source files of your basic React application. To ensure that all is working fine, move in the auth0-restful-dashboard folder and type the following command in a window console:
npm startAfter a few seconds you should get your browser open and looking like in the following picture:
Showing the Resource List
Now, start to build your RESTful client by implementing a React component that will show the list of Auth0 applications. So, move in the src folder and add a file named ClientList.js with the following content:
// src/ClientList.js

import React from 'react';
import './ClientList.css';

function ClientList(props) {
  const clients = props.clients.map( client =>
      <li key={client.id}
      className='clientItem'>
        <b>{client.name}</b><br/>
        <i>{client.description}</i>
      </li>
    );

  return (
    <div>
      <h2>Your applications</h2>
      <ul className='clientList'>
        {clients}
      </ul>
    </div>
  );
}

export default ClientList;
This module defines a React component showing a list of items whose values come from the clients array passed as a prop. As you can see, the second import statement refers to a CSS file applying some style rules. Add a ClientList.css file and put the following CSS code in it:
// src/ClientList.css

h2 {
  color: #EB5424;
}
.clientItem {
  display:inline-block;
  border: 1px solid #EB5424;
  width: 50%;
  color: white;
  background-color: #EB5424;
  list-style: none;
  margin: 20px;
  padding: 10px;
  font-size: 16px;
  cursor: pointer;
}
The Resource Rendering Engine
The ClassList component you've built so far is simply a viewer. To be effective, you need to get the Auth0 client representations from the server and pass them to it. As said above about the application model of a RESTful client, you need to implement a sort of interpreter of the language used by the API that provides the Auth0 client resources. This interpreter will be responsible for:
- getting resource representations from the server
- mapping these resources to UI elements
- managing the interaction with the related resources.
As a first step, you will implement the first two points. You will implement the third point later. So, add a new file named ResourceRenderer.js and put the following code in it:
// src/ResourceRenderer.js

import React, { useState, useEffect } from 'react';
import ClientList from './ClientList';

function handleResource(link){
  return fetch(link.uri, {
      method: "GET",
      headers: new Headers({"Accept": "application/json"})
    })
    .then(response => response.json())
}

function mapResourceToComponent(resource) {
  let currentComponent = null;

  if (resource.resourceType === "client-list") {
    currentComponent = <ClientList clients={resource.clients} />
  }

  return currentComponent;
}

function ResourceRenderer() {
  const [currentResource, setCurrentResource] = useState({});

  const stateTransitionManager = {
    handleStateTransition: (link) => {
      handleResource(link)
        .then(resource => {
          if (typeof resource === "object") {
            setCurrentResource(resource);
          }
        })
        .catch(error => console.log(error));
    }
  };

  useEffect(()=>{
    stateTransitionManager.handleStateTransition({uri: "/api"});
  }, []);

  return (
    <div>
      {mapResourceToComponent(currentResource)}
    </div>
  );
}

export default ResourceRenderer;
This code defines a stateful React component named ResourceRenderer. It keeps in its internal state the current resource (currentResource) received from the server. It also defines a stateTransitionManager object with just one method, handleStateTransition(), whose goal is to interact with the server in order to manipulate resources. Currently, the handleStateTransition() method loads resources, but it will also submit changes, as you will see later.
As you can see, when the component is loaded for the first time, the configured effect will trigger the handleStateTransistion() passing the root endpoint (/api) of the RESTful API providing data about the Auth0 clients. This forces the application to load the resource from the API and to set the loaded resource as the currentResource. When it happens, the component will render by executing the mapResourceToComponent() function. This function will check the resourceType property of the current resource and, in case it equals to client-list string, the ClientList component with the appropriate value for its props is returned.
Summing up, at this stage of the implementation, the ResourceRenderer component loads the resource provided by the root endpoint of the RESTful API and maps it to the UI element associated with the client-list resource type. In other words, it is interpreting the language used by the API to represent resources, similarly like a common Web browser interprets the HTML language to represent Web resources (pages, images, and so on).
Now you have the basic building blocks of your RESTful client. You need to put them at work by replacing the content of the App.js file with the following code:
// src/App.js

import React from 'react';
import './App.css';
import ResourceRenderer from './ResourceRenderer';

function App() {

  return (
    <div className="App">
      <ResourceRenderer/>
    </div>
  );
}

export default App;
Letting the RESTful Client and the API Communicate
So far, you have the API in the auth0-restful-management-api folder and it listens on port 3001 when running. On the other side, you have the client in the auth0-restful-dashboard-client folder and it listens on port 3000. In order to let the client call the API, you need to configure the React development environment to proxy requests to the RESTful API server.
To do this, edit the package.json file in the auth0-restful-dashboard-client folder and add a new proxy key with the value of http://localhost:3001, as shown in the following example:
// package.json

{
  "name": "auth0-restful-dashboard-client-functional",
  "version": "0.1.0",
  "private": true,
  "proxy": "http://localhost:3001",

  // other settings
  ...
}
You can test the client and the server communication by moving in the auth0-restful-management-api folder and typing the following command in a window console:
node index.jsNow that the server is running and up, open a new window console, move to the auth0-restful-dashboard-client folder and type the following command:
npm startAfter a while, you should get your browser open on a blank screen. If you open the browser's developer tools or inspect the network calls somehow, you should catch an unauthorized error message similar to the following:
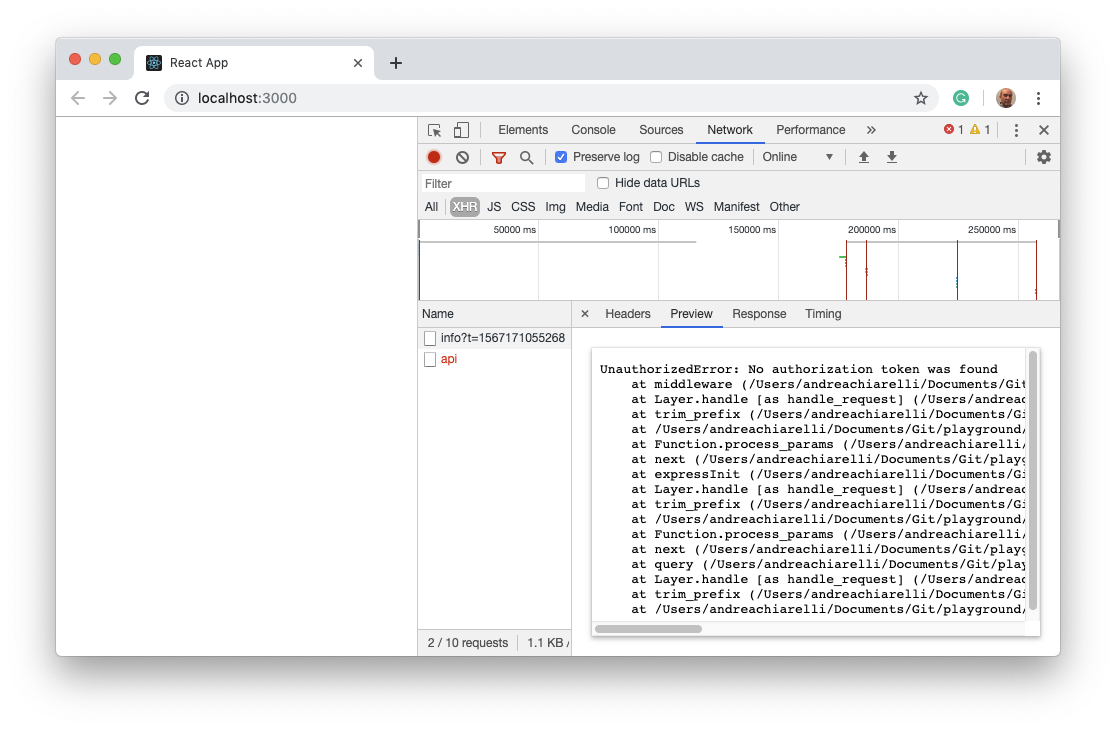
This happens because your RESTful API was secured by integrating Auth0 access management services.
Securing the Client
As a first step to integrating the RESTful client with Auth0, you need to create a new application in the Auth0 Dashboard. If you haven't one, you can sign up for a free Auth0 account here. In the dashboard, follow these steps:
- Click on
+ Create Application - Give a name to the application (for example, RESTful Dashboard Client)
- Choose
Single Page Web Applicationsas the application type - Click on
Create
Once the application has been created, continue with the following steps:
- Click the
Settingstab and take note of the domain and the client id, we will use these values later - Set the value of
Allowed Callback URLstohttp://localhost:3000/. This is a security measure that allows the users of your application to be redirected to this URL after they have authenticated. - Set the value of
Allowed Web Originstohttp://localhost:3000. This enables your application to send requests to Auth0 during a silent authentication process.
Note: Be sure to assign exactly the strings reported above for
Allowed Callback URLsandAllowed Web Origins, otherwise you could encounter some issues.
Click the Save Changes button
Integrating the Auth0 SPA SDK
Now, back to your console, stop the React application by pressing CTRL+C and install the auth0-spa-js library into your client project by typing the following command:
npm install @auth0/auth0-spa-jsWhen the library is installed, create a new file in the src folder and name it react-auth0-wrapper.js, then put this content in it:
// src/react-auth0-wrapper.js

import React, { useState, useEffect, useContext } from 'react';
import createAuth0Client from '@auth0/auth0-spa-js';

const DEFAULT_REDIRECT_CALLBACK = () =>
  window.history.replaceState({}, document.title, window.location.pathname);

export const Auth0Context = React.createContext();
export const useAuth0 = () => useContext(Auth0Context);
export const Auth0Provider = ({
  children,
  onRedirectCallback = DEFAULT_REDIRECT_CALLBACK,
  ...initOptions
}) => {
  const [isAuthenticated, setIsAuthenticated] = useState();
  const [user, setUser] = useState();
  const [auth0Client, setAuth0] = useState();
  const [loading, setLoading] = useState(true);
  const [popupOpen, setPopupOpen] = useState(false);

  useEffect(() => {
    const initAuth0 = async () => {
      const auth0FromHook = await createAuth0Client(initOptions);
      setAuth0(auth0FromHook);

      if (window.location.search.includes('code=')) {
        const { appState } = await auth0FromHook.handleRedirectCallback();
        onRedirectCallback(appState);
      }

      const isAuthenticated = await auth0FromHook.isAuthenticated();

      setIsAuthenticated(isAuthenticated);

      if (isAuthenticated) {
        const user = await auth0FromHook.getUser();
        setUser(user);
      }

      setLoading(false);
    };
    initAuth0();
  }, []);

  const loginWithPopup = async (params = {}) => {
    setPopupOpen(true);
    try {
      await auth0Client.loginWithPopup(params);
    } catch (error) {
      console.error(error);
    } finally {
      setPopupOpen(false);
    }
    const user = await auth0Client.getUser();
    setUser(user);
    setIsAuthenticated(true);
  };

  const handleRedirectCallback = async () => {
    setLoading(true);
    await auth0Client.handleRedirectCallback();
    const user = await auth0Client.getUser();
    setLoading(false);
    setIsAuthenticated(true);
    setUser(user);
  };

  const configObj = {
    isAuthenticated,
    user,
    loading,
    popupOpen,
    loginWithPopup,
    handleRedirectCallback,
    getIdTokenClaims: (...p) => auth0Client.getIdTokenClaims(...p),
    loginWithRedirect: (...p) => auth0Client.loginWithRedirect(...p),
    getTokenSilently: (...p) => auth0Client.getTokenSilently(...p),
    getTokenWithPopup: (...p) => auth0Client.getTokenWithPopup(...p),
    logout: (...p) => auth0Client.logout(...p)
  };

  return (
    <Auth0Context.Provider value={configObj}>
      {children}
    </Auth0Context.Provider>
  );
};
This file defines a set of custom React hooks that allow you to work with Auth0 SDK in an effective way, as you will see soon.
In the meanwhile, add another file named auth_config.json in the src folder with the following content:
{
  "domain": "YOUR_DOMAIN",
  "clientId": "YOUR_CLIENT_ID",
  "audience": "https://restful-dashboard-api"
}
Replace the placeholders with the values for your domain and the client id obtained above from the Auth0 Dashboard. The value for audience is the value of the unique identifier you assigned to the RESTful API in the first article of this series. If you've chosen a different value for the audience setting, replace it with the actual value. These settings will address the Auth0 SDK to authenticate users of your RESTful client and to authorize the client to access the API.
In order to integrate the Auth0 SDK into your React application, open the index.js file in the src folder and replace its content with the following code:
// src/index.js

import React from 'react';
import ReactDOM from 'react-dom';
import './index.css';
import App from './App';
import * as serviceWorker from './serviceWorker';
import { Auth0Provider } from './react-auth0-wrapper';
import config from './auth_config.json';

const onRedirectCallback = appState => {
  window.history.replaceState(
    {},
    document.title,
    appState && appState.targetUrl
      ? appState.targetUrl
      : window.location.pathname
  );
};

ReactDOM.render(
  <Auth0Provider
    domain={config.domain}
    client_id={config.clientId}
    redirect_uri={window.location.origin}
    audience={config.audience}
    onRedirectCallback={onRedirectCallback}
>
    <App />
  </Auth0Provider>,
  document.getElementById('root')
);

serviceWorker.unregister();
As you can see, the App component is wrapped in the Auth0Provider component. It takes care of the integration with Auth0 services by using the settings from auth_config.json. The onRedirectCallback function passed as a prop to the Auth0Provider component is responsible for redirecting the user to the right place once they have authenticated.
Requiring Authentication
After configuring the application to use the Auth0 SPA SDK, make it requiring authentication. So, open again the App.js file and replace its content as follows:
// src/App.js

import React from 'react';
import './App.css';
import ResourceRenderer from './ResourceRenderer';
import { useAuth0 } from './react-auth0-wrapper';

function App() {
  const { loading, isAuthenticated, loginWithRedirect } = useAuth0();

  if (loading) {
    return (
      <div>Loading...</div>
    );
  }

  if (!isAuthenticated) {
    loginWithRedirect({});
  }

  return (
    <div className='App'>
      {isAuthenticated && <ResourceRenderer/>}
    </div>
  );
}

export default App;
With respect to the previous version, now you imported the useAuth0 hook and used some of its features. In particular, you checked through loading if the user authentication is in progress and through isAuthenticated if the user is authenticated. If the user is not authenticated, they are redirected to the Auth0 login page by invoking loginWithRedirect(). The final result is that the ResourceRenderer component is loaded just when the user is authenticated.
Getting the Access Token
As you may remember from the first part of this series, you need an access token from Auth0 to call the API. To enable the client to get the access token and use it to call the API, you need to make a few changes to the ResourceRenderer.js file. So, open it and replace its content with the following code:
// src/ResourceRenderer.js

import React, { useState, useEffect } from 'react';
import ClientList from './ClientList';
import { useAuth0 } from './react-auth0-wrapper';

function handleResource(link, token){
  return fetch(link.uri, {
      method: "GET",
      headers: new Headers({"Accept": "application/json",
                            "Authorization": `Bearer ${token}`})
    })
    .then(response => response.json())
}

function mapResourceToComponent(resource) {
  let currentComponent = null;

  if (resource.resourceType === "client-list") {
    currentComponent = <ClientList clients={resource.clients} />
  }

  return currentComponent;
}

function ResourceRenderer() {
  const [currentResource, setCurrentResource] = useState({});
  const { getTokenSilently } = useAuth0();

  const stateTransitionManager = {
    handleStateTransition: (link) => {
      getTokenSilently()
          .then(token =>handleResource(link, token))
        .then(resource => {
          if (typeof resource === "object") {
            setCurrentResource(resource)};
          })
        .catch(error => console.log(error));
    }
  };

  useEffect(()=>{
    stateTransitionManager.handleStateTransition({uri: "/api"});
  }, []);

  return (
    <div>
      {mapResourceToComponent(currentResource)}
    </div>
  );
}

export default ResourceRenderer;
Also in this case you imported the useAuth0 hook in order to get the access token via the getTokenSilently() function. As you can see in the new definition of the handleStateTransition() method of the stateTransitionManager object, the token is asynchronously received and passed to the new version of the handleResource() function that uses it in the new Authorization header.
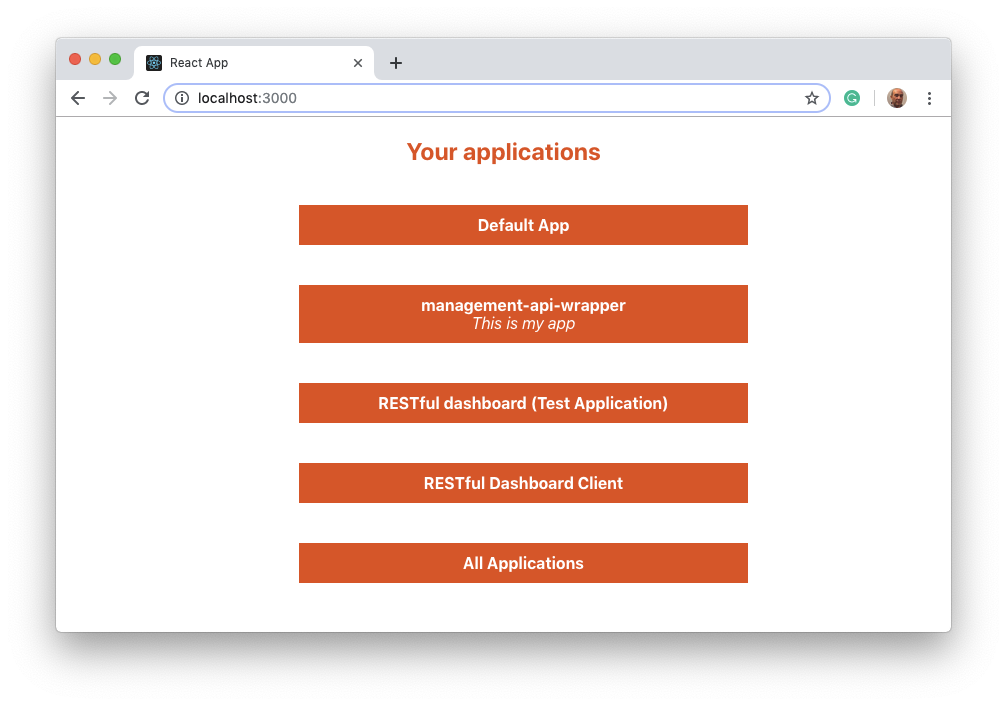
Now, your client should be able to access the API. So, in your window console start the React application by typing npm start and you should be prompted to authenticate in order to access the application. After you have been authenticated, you should be able to see a page similar to the following:
Note: If you are using Google, Facebook, or any other Social Identity Providers to log in your application, be sure to follow the instructions here. Otherwise, your application won't be able to silent authenticate your users. You can check if your Social Identity Providers are correctly configured from the Social Connections section of the Auth0 Dashboard.
Handling Hypermedia
The RESTful client you have built so far is actually not that RESTful. The resource sent by the server contains the links to related resources, but your client is ignoring them. Moreover, most likely the user expects to click on each Auth0 client shown in your customized dashboard to get the details. In a few words, your client needs some adjustments to take into account the hypermedia describing the resource relationships.
So, open the ResourceRenderer.js file and change the mapResourceToComponent() function as follows:
// src/ResourceRenderer.js

// ... leave the rest untouched ...
function mapResourceToComponent(resource, stateTransitionManager) {
  let currentComponent = null;

  if (resource.resourceType === "client-list") {
    currentComponent = <ClientList clients={resource.clients}
                         stateTransitionManager={stateTransitionManager}/>
  }

  return currentComponent;
}
// ... leave the rest untouched ...
You added the stateTransitionManager parameter to the function and passed it to the ClientList component as a prop with the same name.
Now, in the same file, change the invocation of the mapResourceToComponent() function as in the following:
// src/ResourceRenderer.js

// ... leave the rest untouched ...
function ResourceRenderer() {
  const [currentResource, setCurrentResource] = useState({});
  const { getTokenSilently } = useAuth0();

  const stateTransitionManager = {
    handleStateTransition: (link) => {
      getTokenSilently()
          .then(token =>handleResource(link, token))
        .then(resource => {
          if (typeof resource === "object") {
            setCurrentResource(resource)};
          })
        .catch(error => console.log(error));
    }
  };

  useEffect(()=>{
    stateTransitionManager.handleStateTransition({uri: "/api"});
  }, []);

  return (
    <div>
      {mapResourceToComponent(currentResource, stateTransitionManager)}
    </div>
  );
}

// ... leave the rest untouched ...
Finally, make the following changes to the ClientList component defined in the ClientList.js file:
// src/ClientList.js

import React from 'react';
import './ClientList.css';

function ClientList(props) {
  const stateTransitionManager = props.stateTransitionManager;
  const clients = props.clients.map( client =>
      <li key={client.id}
      className='clientItem'
      onClick={()=>stateTransitionManager.handleStateTransition(client.links[0])}>
        <b>{client.name}</b><br/>
        <i>{client.description}</i>
      </li>
    );

  return (
    <div>
      <h2>Your applications</h2>
      <ul className='clientList'>
        {clients}
      </ul>
    </div>
  );
}

export default ClientList;
Here you added the onClick prop to each Auth0 client item so that, when the item is clicked, the hadleStateTransition() function is called with the first link of the resource as an argument. This lets your component handle the link to the single Auth0 client without knowing the actual URL.
Showing the Single Resource
Since your application now links to a new resource, i.e. the single Auth0 client, you need a component to render it on the UI. Create a new file named Client.js in the src folder and put the following code:
// src/Client.js

import React, { useState} from 'react';
import './Client.css';

function Client(props) {
  const client = props.client;
  const [clientName, setClientName] = useState(client.name);
  const [clientDescription, setClientDescription] = useState(client.description);

  return (
    <div className="formContainer">
      <div className='formRow'>
        <label htmlFor="clientName">Client name: </label>
        <input name="clientName" id="clientName" value={clientName} onChange={event => setClientName(event.target.value)}/>
      </div>
      <div className='formRow'>
        <label htmlFor="clientDescription">Client description: </label>
        <input name="clientDescription" id="clientDescription" value={clientDescription} onChange={event => setClientDescription(event.target.value)}/>
      </div>
    </div>
  );
}

export default Client;
This Client component shows the details of the single Auth0 client in a form-like layout whose CSS rules are contained in the Client.css file. So, create a new file with that name and put the following in it:
// src/Client.css

.formContainer {
  padding: 20px;
}

.formRow {
  /* margin: 10px; */
  padding: 1px;
}

.formRow label {
  display: inline-block;
  font-size: 18px;
  width: 15%;
  text-align: left;
}

.formRow input {
  font-size: 18px;
  width: 30%;
  padding: 12px 20px;
  margin: 8px 0;
  display: inline-block;
  border: 1px solid #ccc;
  border-radius: 4px;
  box-sizing: border-box;
}

.formRow button {
  width: 10%;
  background-color: #EB5424;
  color: white;
  padding: 14px 20px;
  margin: 20px;
  border: 1px solid #EB5424;;
  border-radius: 4px;
  cursor: pointer;
  font-size: 18px;
}
Once you've defined the component for the single Auth0 client resource, you need to map it inside the ResourceRenderer component. Open the ResourceRenderer.js file and import the Client component at the top of the file, as in the following:
// src/ResourceRenderer.js

import React, { useState, useEffect } from 'react';
import ClientList from './ClientList';
import Client from './Client';
// ... leave the rest untouched ...
Then, change the code for the mapResourceToComponent() function as follows:
// src/ResourceRenderer.js

// ... leave the rest untouched ...
function mapResourceToComponent(resource, stateTransitionManager) {
  let currentComponent;

  switch(resource.resourceType) {
    case "client-list":
      currentComponent = <ClientList clients={resource.clients}
                           stateTransitionManager={stateTransitionManager}/>
      break;
    case "client":
      currentComponent = <Client client={resource}/>
      break;
    default:
      currentComponent = null;
    }

    return currentComponent;
}
// ... leave the rest untouched ...
Note that, now, the function is actually mapping the resourceType value to its corresponding component. Here a switch statement is used but, in a more complex situation, you might implement it in a more convenient way, for example by applying the factory pattern.
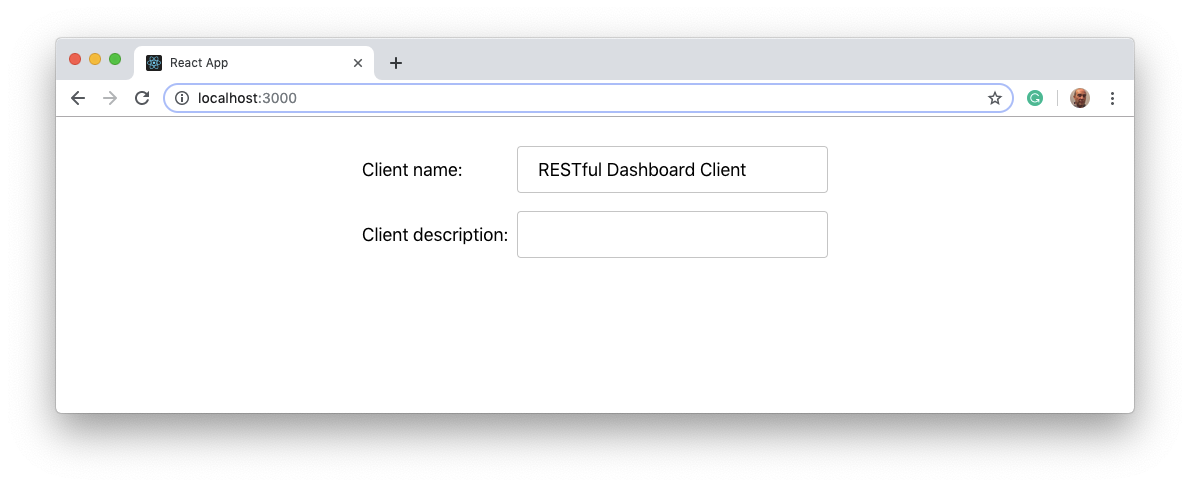
Now, use your browser to access your customized dashboard and click on one of the items of the list. You should be able to access the details of a single Auth0 client as shown by the following picture:
Handling Different Types of Hypermedia
Once again, the resource links have been left out. In fact, in the interpretation of the single Auth0 client resource, you haven't take into account the hypermedia included in the links property, as shown in the following example:
{
  "resourceType": "client",
  "id": "QY6jvk6ezagmbXMxCzJ4WbVSfgDNUlZf",
  "name": "My App",
  "description": "This is my app",
  "links": [
    {
      "uri": "/api/clients/QY6jvk6ezagmbXMxCzJ4WbVSfgDNUlZf",
      "rel": "self"
    },
    {
      "uri": "/api/clients/QY6jvk6ezagmbXMxCzJ4WbVSfgDNUlZf",
      "rel": "self",
      "type": "PUT"
    }
  ]
}
Here you have to deal with different types of links: one without an explicit type (which will be inferred as GET) and one with the PUT type. You need again a few adjustments to the ResourceRenderer component to correctly manage this. Open the ResourceRenderer.js file and change the definition of the handleResource() function as follows:
// src/ResourceRenderer.js

// ... leave the rest untouched ...
function handleResource(link, data, token){
  return fetch(link.uri, {
      method: link.type || "GET",
      headers: (link.type === "PUT"?
                new Headers({"Content-Type": "application/json",
                             "Authorization": `Bearer ${token}`})
                : new Headers({"Accept": "application/json",
                               "Authorization": `Bearer ${token}`})),
      body: (data? JSON.stringify(data) : null)
    })
    .then(response => {
      const contentType = response.headers.get("content-type");
      let parsedResponse;

      if (contentType && contentType.indexOf("application/json") !== -1) {
        parsedResponse = response.json();
      } else {
        parsedResponse = response.text();
      }
      return parsedResponse;
    })
}
// ... leave the rest untouched ...
The new definition of handleResource() function has a new parameter, data, that will be used to fill the HTTP request body, if necessary. Also, notice that the HTTP method used to fetch the resource from the server is retrieved from the type property of the link. If not specified, the default value for the HTTP method will be GET. The headers depend on the link.type as well. Finally, the response parsing changes slightly. In fact, since the response for a PUT request is not a JSON, you need to distinguish its content type to parse it correctly.
The handleStateTransition() function needs a simple adjustment too, as you can see in the following:
// src/ResourceRenderer.js

// ... leave the rest untouched ...
  const stateTransitionManager = {
    handleStateTransition: (link, data) => {
      getTokenSilently()
        .then(token =>handleResource(link, data, token))
        .then(resource => {
          if (typeof resource === "object") {
            setCurrentResource(resource)};
          })
        .catch(error => console.log(error));
    }
  };
// ... leave the rest untouched ...
It just needs to take into account the new data argument.
You also need to make a little change to the mapResourceToComponent() function as shown below:
// src/ResourceRenderer.js

// ... leave the rest untouched ...
function mapResourceToComponent(resource, stateTransitionManager) {
  let currentComponent;

  switch(resource.resourceType) {
    case "client-list":
      currentComponent = <ClientList clients={resource.clients} stateTransitionManager={stateTransitionManager}/>
      break;
    case "client":
      currentComponent = <Client client={resource} stateTransitionManager={stateTransitionManager}/>
      break;
    default:
      currentComponent = null;
    }

    return currentComponent;
}
// ... leave the rest untouched ...
Now the function passes the stateTransitionManager as a prop to the Client component. This enables the Client component to render hypermedia appropriately.
After all these changes, the final version of the ResourceRenderer.js file looks as follows:
// src/ResourceRenderer.js

import React, { useState, useEffect } from 'react';
import ClientList from './ClientList';
import Client from './Client';
import { useAuth0 } from './react-auth0-wrapper';

function handleResource(link, data, token){
  return fetch(link.uri, {
      method: link.type || "GET",
      headers: (link.type === "PUT"? new Headers({"Content-Type": "application/json", "Authorization": `Bearer ${token}`}) : new Headers({"Accept": "application/json", "Authorization": `Bearer ${token}`})),
      body: (data? JSON.stringify(data) : null)
    })
    .then(response => {
      const contentType = response.headers.get("content-type");
      let parsedResponse;

      if (contentType && contentType.indexOf("application/json") !== -1) {
        parsedResponse = response.json();
      } else {
        parsedResponse = response.text();
      }
      return parsedResponse;
    })
}

function mapResourceToComponent(resource, stateTransitionManager) {
  let currentComponent;

  switch(resource.resourceType) {
    case "client-list":
      currentComponent = <ClientList clients={resource.clients} stateTransitionManager={stateTransitionManager}/>
      break;
    case "client":
      currentComponent = <Client client={resource} stateTransitionManager={stateTransitionManager}/>
      break;
    default:
      currentComponent = null;
    }

    return currentComponent;
}

function ResourceRenderer() {
  const [currentResource, setCurrentResource] = useState({});
  const { getTokenSilently } = useAuth0();

  const stateTransitionManager = {
    handleStateTransition: (link, data) => {
      getTokenSilently()
        .then(token =>handleResource(link, data, token))
        .then(resource => {
          if (typeof resource === "object") {
            setCurrentResource(resource)};
          })
        .catch(error => console.log(error));
    }
  };

  useEffect(()=>{
    stateTransitionManager.handleStateTransition({uri: "/api"});
  }, []);

  return (
    <div>
      {mapResourceToComponent(currentResource, stateTransitionManager)}
    </div>
  );
}

export default ResourceRenderer;
Finally, in order to make the Client component handle hypermedia, replace its definition with the following code:
// src/Client.js
import React, { useState} from 'react';
import './Client.css';
function Client(props) {
const stateTransitionManager = props.stateTransitionManager;
const client = props.client;
const [clientName, setClientName] = useState(client.name);
const [clientDescription, setClientDescription] = useState(client.description);
const buttons = client.links.map((link, index) => {
let button;
switch (true) {
case (link.rel === "self" && (!link.type || link.type === "GET")):
button = <button key={index} onClick={() => stateTransitionManager.handleStateTransition(link)}>Reload</button>;
break;
case (link.rel === "self" && (link.type === "PUT")):
button = <button key={index} onClick={() => stateTransitionManager.handleStateTransition(link, {name: clientName, description: clientDescription})}>Save</button>;
break;
default:
button = null;
}
return button;
});
return (
<div className="formContainer">
<div className='formRow'>
<label htmlFor="clientName">Client name: </label>
<input name="clientName" id="clientName" value={clientName} onChange={event => setClientName(event.target.value)}/>
</div>
<div className='formRow'>
<label htmlFor="clientDescription">Client description: </label>
<input name="clientDescription" id="clientDescription" value={clientDescription} onChange={event => setClientDescription(event.target.value)}/>
</div>
<div className='formRow'>
{buttons}
</div>
</div>
);
}
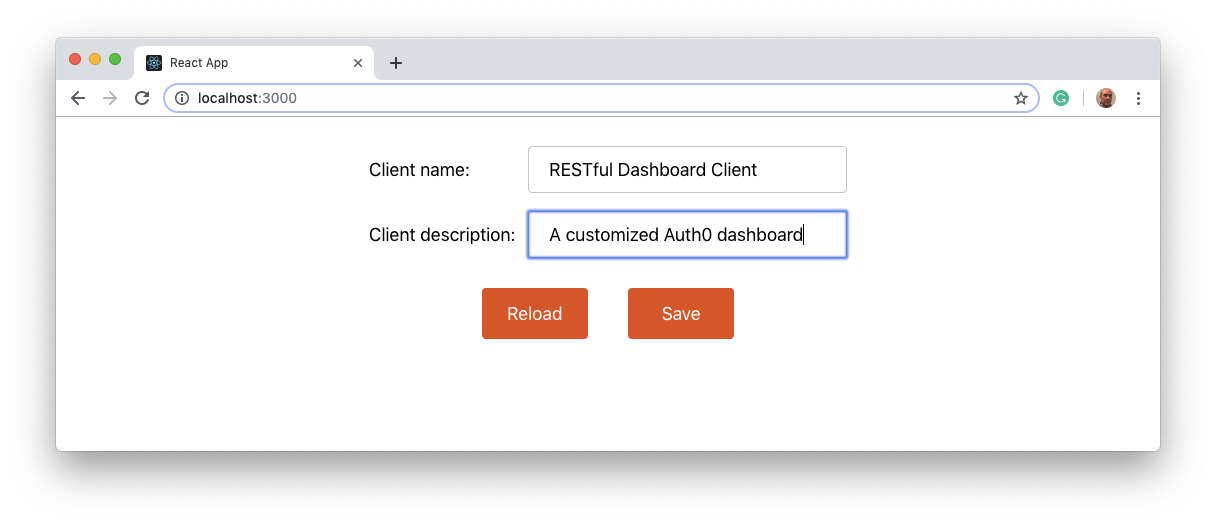
export default Client;This new version of the component generates a set of buttons based on the content of the links array. Each button has the onClick handler attached. This handler calls the handleStateTransition() method of the stateTransitionManager to allow the application to interact with the related resources. In particular, the generated buttons allow to reload the current Auth0 client and to update its name and description.
You should see a page like the following in your browser and you should be able to change the Auth0 client name and description:
Note: you may be tempted to add some other button to the Client component, for example, a button that brings you to the list of Auth0 clients. This would be a sort of violation of the REST guidelines. In fact, only the server should provide information about resource relationships. The client should only interpret such relationships in order to allow the user to follow one or another.
Benefits in Building RESTful Clients
As you learned so far, building a RESTful client may seem more complex than building a simple API consumer. You need to abstract resource and hypermedia management and you need to design your client more like an interpreter than like a UI wrapper around the API.
The RESTful client you built throughout the article is quite simple and its goal was to illustrate the design principles. However, despite its simplicity, you may notice a few benefits with respect to the more common API consumer approach:
- the client needs to know just the root endpoint: actually, the only endpoint stored into the application is the
/apiURL; the other links are dynamically discovered by interpreting the hypermedia received with each resource - loose coupling between client and server: if the server changes an endpoint, the clients discover it automatically without requiring any change. Of course, you need to change the client if a new type of resource is added or the language to describe the relationships is enriched, but this concerns the evolution of the language. If you design your client to be tolerant of new language items, your client doesn't break. Remember the relationship between a Web browser and the HTML language.
- no need to version API: as a consequence of the previous benefit, having different versions of an API makes no longer sense. If you change the endpoint of a resource or the relationships between resources, these changes are automatically discovered by the client. If you add a new resource type or change the structure of an existing type, you need to update your client to support the new language describing resources. This is a controversial point on which, however, Fielding was very clear about.
- the server drives the client's state transition: actually, this might not be considered a benefit. However, in the REST philosophy, the server decides what to send to the client, which relationships the client can handle, also according to the current user or the current application state. This frees the client from some business logic mostly regarding resource access.
"Having different versions of a RESTful API makes no sense for a RESTful client."
Tweet This
Conclusion
This second part of the series completed the RESTful approach in building applications.
In this series, you learned how to build true RESTful APIs and clients in practice. You also discovered how, despite its apparent diffusion, REST is still a quite misunderstood technology. Most developers just apply a few principles of the REST architectural guidelines and claim their application RESTful. Now, you know that it is not so, you know that REST relies on a more articulate approach.
Of course, there's nothing wrong with applying a subset of the REST principles in your application. You just have to be aware that what you are building is not actually RESTful.
Remember that you can download the full code of the project built in both the articles of this series from this GitHub repository.


