
The release of .NET 8 is just around the corner. Among the amazing features it brings to developers, it offers a minor revolution in support for authentication and authorization: moving ASP.NET Core Identity from a page-oriented approach to an API-oriented approach.
Let's explore what's going on.
ASP.NET Core Identity and Token-based Authentication
ASP.NET Core developers have the built-in ASP.NET Core Identity framework to add support for local authentication and authorization. The identity framework includes everything that developers typically need to authenticate and authorize users against a local user store. By default, a SQL Server database is created on Windows and a SQLite database is created on macOS, but you can change it to the DBMS of your choice.
The ASP.NET Core Identity framework is designed for server-rendered web applications, such as ASP.NET Core MVC or Razor Pages applications, and has challenges with SPAs, where token-based authentication seems more appropriate. To address this problem, Microsoft has provided built-in project templates for SPAs based on Angular and React with Identity Server support since .NET Core 3.1. However, the .NET community has not been totally happy with this approach. To meet the community's demands, Microsoft removed the default support for Identity Server in .NET 8 and redesigned the internal architecture of ASP.NET Core Identity to be more suitable for SPAs and native apps. .NET 8 introduces a new set of Identity API endpoints and support for token-based authentication. But let's go in order.
Bearer Token Authentication Handler
The first building block of this new infrastructure is the new bearer token authentication handler. This handler is similar to the classic cookie authentication handler that ASP.NET Core Identity uses by default. The cookie authentication handler is responsible for two things:
- Creating a new session cookie after the user authenticates.
- Building a
ClaimsPrincipaluser object based on a valid session cookie received in the incoming HTTP request.
Similarly, the bearer token authentication handler is responsible for:
- Creating a new token after the user authenticates.
- Building a
ClaimsPrincipaluser object based on a valid token received in the incoming HTTP request.
In other words, the bearer token handler mimics the behavior of the cookie handler to manage authenticated sessions based on a token instead of a cookie.
Note that the tokens generated by the bearer token handler are not in JWT format. Also, they don't follow any specific standard. While the documentation mentions access tokens and refresh tokens, they do not implement the OAuth 2.0 authorization framework.
How can this bearer token handler be used in practice?
Consider the following code:
// Program.cs

using Microsoft.AspNetCore.Authentication.BearerToken; //👈
using System.Security.Claims;

var builder = WebApplication.CreateBuilder(args);

builder.Services
    .AddAuthentication()
    .AddBearerToken();  //👈
builder.Services.AddAuthorization();

var app = builder.Build();

app.MapGet("/login", (string username) =>
    {
        var claimsPrincipal = new ClaimsPrincipal(
          new ClaimsIdentity(
            new[] { new Claim(ClaimTypes.Name, username)},
            BearerTokenDefaults.AuthenticationScheme  //👈
          )
        );

        return Results.SignIn(claimsPrincipal);
    });

app.MapGet("/user", (ClaimsPrincipal user) =>
    {
        return Results.Ok($"Welcome {user.Identity.Name}!");
    })
    .RequireAuthorization();

app.Run();
This application defines two API endpoints:
- The
/loginendpoint creates aClaimsPrincipaluser object based on the username sent in the HTTP request and returns the result of signing in. - The
/userendpoint returns the username of the authenticated user.
Note the highlighted lines in the code. You have a reference to the new Microsoft.AspNetCore.Authentication.BearerToken namespace, which gives you access to the BearerTokenDefaults.AuthenticationScheme value. You also configure the bearer token middleware by using the AddBearerToken() extension method.
Now, assume you call the login endpoint with curl, as shown below:
curl 'https://<YOUR_HOST>/login?username=joe'
You will see a result like the following:
{
  "token_type": "Bearer",
  "access_token": "CfDJ8Ha5YkqG...omitted content...",
  "expires_in": 3600,
  "refresh_token": "CfDJ8Ha5YkqG...omitted content..."
}
This JSON contains an access token and a refresh token that you can use to make your calls to the protected APIs exposed by your application. For example, you can now call the protected /user endpoint as follows:
curl -i https://<YOUR_HOST>/user \
-H 'Authorization: Bearer CfDJ8Ha5YkqG...omitted content...'
And you will get the following response:
Welcome joe!
In summary, the bearer token authentication handler makes it very easy to set up token-based authentication. This is the building block of the whole ASP.NET Core Identity transition to token-based authentication.
Identity API Endpoints
The second step in adding token-based authentication to ASP.NET Core Identity is to introduce the Identity API endpoints. Basically, this is an API version of the actions that you can perform with ASP.NET Core Identity through the classic web UI. Once you enable the Identity API endpoints, you will get endpoints like /register, /login, /forgotPassword, confirmEmail, etc.
The Identity API endpoints solve two of the most complained problems:
- You can build your own UI for user authentication and account management while maintaining the overall UI style of your application.
- After authentication, your app can get access tokens instead of cookies, so it's a more suitable approach for SPAs and native applications.
Keep in mind that the Identity API endpoints do not implement OpenID Connect (OIDC). They simply expose the standard functionality provided by the ASP.NET Core Identity UI through a custom API. They are intended for first-party authentication.
Adding the Identity API endpoints to an ASP.NET Core application relies on two new methods:
AddIdentityApiEndpoints(), which configures the token-based authentication using the bearer token handler in addition to the cookie authentication, and adds a set of identity services.MapIdentityApi(), which actually adds the Identity endpoints to your application.
The code in your Program.cs file will look like the following:
// Program.cs

using System.Security.Claims;
using Microsoft.AspNetCore.Identity;
using Microsoft.AspNetCore.Identity.EntityFrameworkCore;
using Microsoft.EntityFrameworkCore;

var builder = WebApplication.CreateBuilder(args);

builder.Services.AddAuthorization();

builder.Services.AddDbContext<ApplicationDbContext>(
    options => options.UseSqlite(builder.Configuration["ConnectionString"]));

builder.Services.AddIdentityApiEndpoints<IdentityUser>()
    .AddEntityFrameworkStores<ApplicationDbContext>();

var app = builder.Build();

app.MapIdentityApi<IdentityUser>();

app.MapGet("/user", (ClaimsPrincipal user) =>
    {
        return Results.Ok($"Welcome {user.Identity.Name}!");
    })
    .RequireAuthorization();

app.Run();
Your client will be able to register a user by calling the /register endpoint, authenticate the user through the /login endpoint, and so on.
While the Identity API endpoints seem to solve the two main complaints about the classic ASP.NET Core Identity, there are some concerns about using them in a production context, mainly on the security and scalability side.
Blazor Identity UI
In addition to the changes to ASP.NET Core Identity, .NET 8 integrates the authentication framework into the Blazor project template. You can create a new .NET 8 Blazor application with identity support by running the following command:
dotnet new blazor -au Individual
You will get a Blazor application with everything you need to manage users and authentication locally. You will get a SQLite database to store the user accounts. You will get a SQL Server database if you use Visual Studio to scaffold the application instead of the .NET CLI. You also will get all the pages that allow users to register, authenticate, and manage their account.
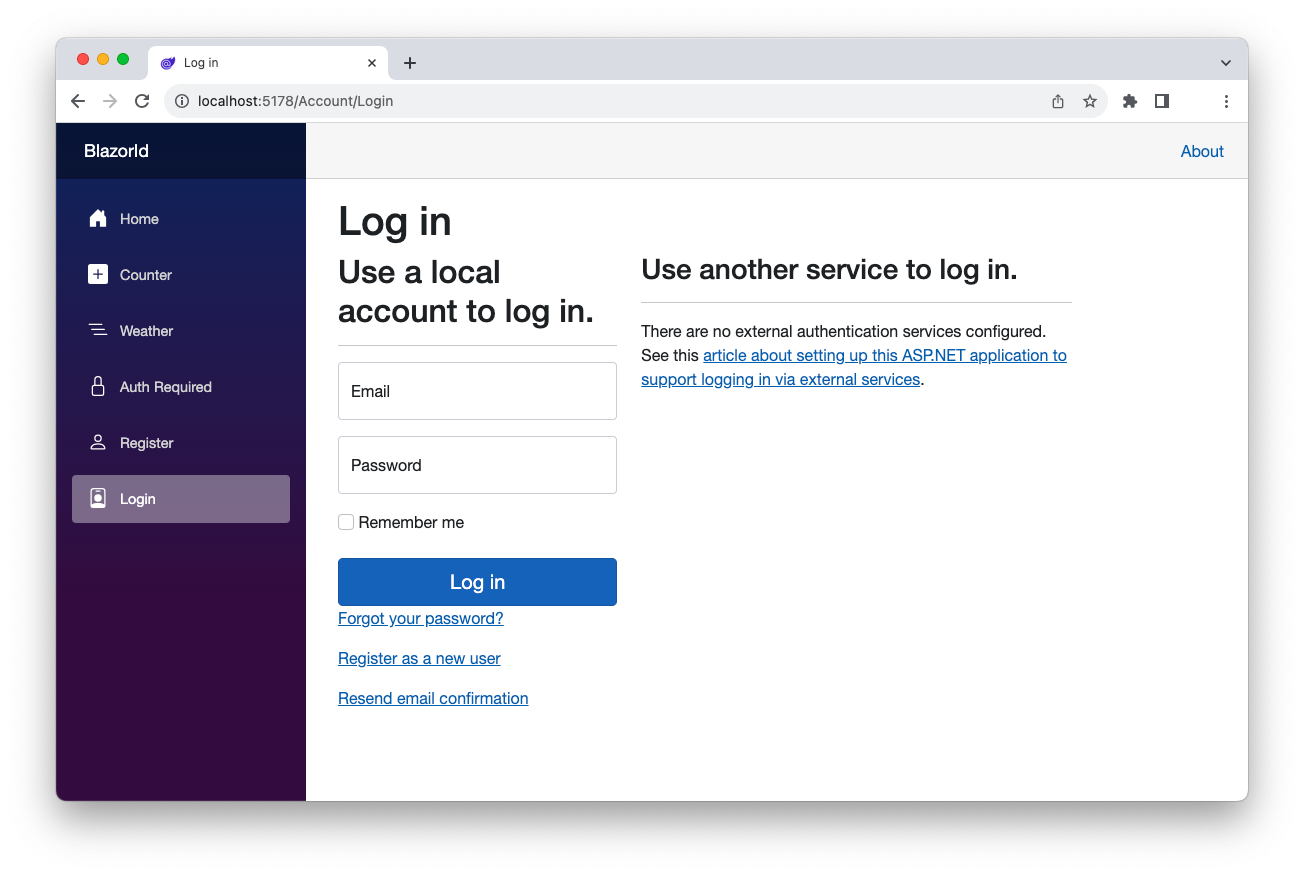
The following image shows the built-in login page of a Blazor app:
The user authentication and management pages that implement the Blazor Identity UI are not Razor pages as it happens with the classic ASP.NET Core Identity, but Razor components. The template provides you with the source code for all of the UI components in the Pages/Account folder of the project. This allows you to customize them according to your application design.
Leverage Auth0's authentication and authorization services in your .NET applications.
DOWNLOAD THE FREE EBOOK
Custom Authorization Policies Simplification
Apart from the new features related to ASP.NET Core Identity, .NET 8 introduces a simplification to the definition of custom authorization policies. Previously, you had to write a lot of code to define a parameterized authorization policy to apply to an API endpoint.
For example, suppose you want to define a policy for an endpoint that only authorizes users over the age of 18 and that can be used as shown below:
[ApiController]
[Route("api/[controller]")]
public class DrinkController : Controller
{
    [MinimumAgeAuthorize(18)]
    [HttpGet("beer")]
    public string BeerDispenser(ClaimsPrincipal user) => $"Here is your beer, {user.Identity?.Name}!";
}
With previous .NET versions, to implement your custom authorization policy, you must write the code outlined in the following code snippet:
class MinimumAgeAuthorizeAttribute : AuthorizeAttribute
{
  ...
}

class MinimumAgePolicyProvider : IAuthorizationPolicyProvider
{
  ...
}

class MinimumAgeRequirement : IAuthorizationRequirement
{
  ...
}

class MinimumAgeAuthorizationHandler : AuthorizationHandler<MinimumAgeRequirement>
{
  ...
}
You must define an AuthorizeAttribute. Then you need to implement an IAuthorizationPolicyProvider to handle your custom policy and an IAuthorizationRequirement to define the requirement. Finally, you have to implement the AuthorizationHandler.
The code snippet shown above outlines the classes you need to implement. To see an example of the actual implementation, take a look at this code sample.
Using the new IAuthorizationRequirementData interface, your implementation code becomes as follows:
class MinimumAgeAuthorizeAttribute : AuthorizeAttribute, IAuthorizationRequirement, IAuthorizationRequirementData
{
  public MinimumAgeAuthorizeAttribute(int age) => Age =age;
  public int Age { get; }

  public IEnumerable<IAuthorizationRequirement> GetRequirements()
  {
    yield return this;
  }
}

class MinimumAgeAuthorizationHandler : AuthorizationHandler<MinimumAgeAuthorizeAttribute>
{
  protected override Task HandleRequirementAsync(AuthorizationHandlerContext context, MinimumAgeAuthorizeAttribute requirement)
  {
    ...
  }
}
You only need to implement two classes instead of four as in the previous example. See here for the complete code.
Summary
Throughout this article, you have learned about the new features that .NET 8 brings to support authentication and authorization. Most of these features are related to the extension of the ASP.NET Core Identity framework to support token-based authentication, which paves the way for authentication in SPAs and native applications.
As a side effect, you get access to the bearer token authentication handler, which allows you to issue access tokens, and to the Identity API endpoints, which allow you to embed authentication support in your Web API.
In addition, the Blazor project template now supports authentication through the Identity API endpoints and a rich set of Razor components designed for user authentication and management.
Finally, the new IAuthorizationRequirementData interface allows you to create custom authorization policies with less code.
About the author

Andrea Chiarelli
Principal Developer Advocate
I have over 20 years of experience as a software engineer and technical author. Throughout my career, I've used several programming languages and technologies for the projects I was involved in, ranging from C# to JavaScript, ASP.NET to Node.js, Angular to React, SOAP to REST APIs, etc.
In the last few years, I've been focusing on simplifying the developer experience with Identity and related topics, especially in the .NET ecosystem.