

TL;DR: Swagger is the most used API specification framework. In this article we'll guide you in creating Swagger-documented APIs and automatically generated clients with Autorest. The full code is available at this GitHub repository.
Since the very beginning, there has always been a way of documenting or describing your web-exposed services. Whether it was SOAP on XML Web Services or Contracts for WCF-enabled Services, there has always been some way to ease the complicated task of service integration, but what about REST APIs?
Enter Swagger
Swagger is an open source API specification framework that enables interactive documentation, discoverability and SDK generation over your existing REST API. Consisting mainly of a Swagger.json file which describes your API, this means that you don’t actually have to change anything in your current REST API methods and calls to take advantage of Swagger. There are plenty of tools to generate and consume a Swagger definition.
By the end of this article, and using a subset of these tools, you will be able to document and consume your APIs entirely on ASP.NET Core, speeding up integrations with any possible authenticated client.
Tools of the trade
Since we will be working on ASP.NET Core (you can obtain the Runtime and Client tools here for any platform), everything I mention on this article will be open source, and at the end, you will have all the code available at the Github repository.
As a starting point we will be using Yeoman’s ASP.NET generator. We could use a Visual Studio template or even run a dotnet new, but Yeoman is probably the most widely used scaffolding tool nowadays.
To install Yeoman you need an environment that has npm (Node.js Package Manager) which comes with the Node.js runtime. Once that npm is available, installing Yeoman is simple as:
npm install -g yo
And installing ASP.NET generator with:
npm install --global generator-aspnet
For code editing, I’ll use Visual Studio Code, which can run on Windows, Mac or Linux.
We will also need Autorest, a tool to auto-generate clients for Swagger-documented APIs, which can be obtained by Nuget package, or Chocolatey by running:
choco install autorest
Or alternatively as a Docker image with:
docker pull azuresdk/autorest:latest
Gentlemen, start your engines
Creating our API
Let’s start by creating our simple ASPNET Core Web API. On your command line, run Yeoman’s generator:
yo aspnet

The Web API Application includes a project.json with all the required dependencies set, a Startup.cs file with the ASP.NET Core pipeline already configured for MVC routing and a sample Controller.
We can try restoring and running the API project to check if everything was created successfully with dotnet restore, dotnet run and opening a browser pointing to http://localhost:5000/values.

Once that’s done, we’ll proceed to edit our app’s dependencies in the project.json file and add Swashbuckle:
"dependencies": {
    "Microsoft.NETCore.App": {
      "version": "1.0.0",
      "type": "platform"
    },
    "Microsoft.AspNetCore.Mvc": "1.0.0",
    "Microsoft.AspNetCore.Server.IISIntegration": "1.0.0",
    "Microsoft.AspNetCore.Server.Kestrel": "1.0.0",
    "Microsoft.Extensions.Configuration.EnvironmentVariables": "1.0.0",
    "Microsoft.Extensions.Configuration.FileExtensions": "1.0.0",
    "Microsoft.Extensions.Configuration.Json": "1.0.0",
    "Microsoft.Extensions.Configuration.CommandLine": "1.0.0",
    "Microsoft.Extensions.Options.ConfigurationExtensions": "1.0.0",
    "Swashbuckle": "6.0.0-beta901"
  }
That will effectively extend our API to allow for automatic Swagger documentation generation, but first, we need to configure it in the ASP.NET Core pipeline.
To achieve this, we go to our Startup.cs file and in the ConfigureServices method call the AddSwaggerGen extension:
public void ConfigureServices(IServiceCollection services)
{
    services.AddMvc();
    /*Adding swagger generation with default settings*/
    services.AddSwaggerGen(options => {
        options.SingleApiVersion(new Info{
            Version="v1",
            Title="Auth0 Swagger Sample API",
            Description="API Sample made for Auth0",
            TermsOfService = "None"
        });
    });
}
Next, go to the Configure method (which is the one defining the pipeline) and call UseSwagger and UseSwaggerUi:
public void Configure(IApplicationBuilder app, IHostingEnvironment env, ILoggerFactory loggerFactory)
{
    /*Enabling swagger file*/
    app.UseSwagger();
    /*Enabling Swagger ui, consider doing it on Development env only*/
    app.UseSwaggerUi();
   /*Normal MVC mappings*/
    app.UseMvc();
}
The first one will make sure that the route to your Swagger.json file is handled correctly, the second one will handle routing to the Swagger UI, which will work, by default, on http://localhost:5000/swagger/ui (or http://yourapidomain/swagger/ui).

The Swagger UI is quite handy for testing your methods and checking their correct responses without needing tools like Postman.
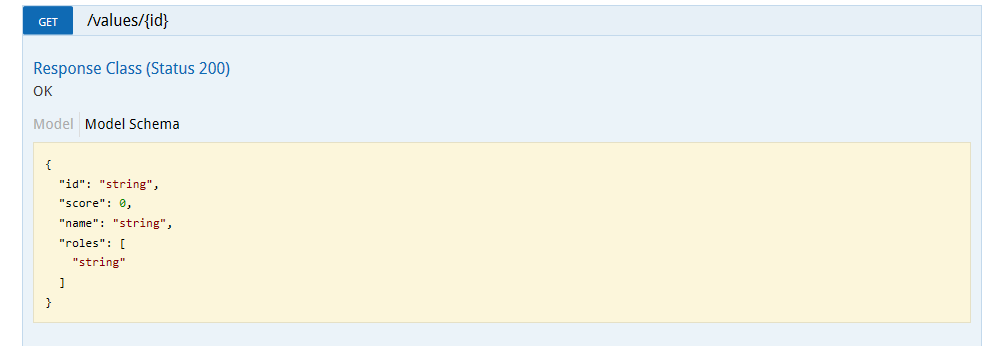
Our next step is to decorate our API methods so the Swagger documentation reflects the correct object definitions. This is quite easy since Swashbuckle automatically detects input objects. For output definition, just add the [Produces] and [SwaggerResponse] attributes describing the Type returned, like this:
[HttpGet("{id}", Name = "GetModel")]
[Produces(typeof(MyModel))]
[SwaggerResponse(System.Net.HttpStatusCode.OK, Type = typeof(MyModel))]
public IActionResult  Get(string id)
{
    return new ObjectResult(_repository.Get(id));
}
And make sure to return an ObjectResult.
On the Swagger UI we will see this reflected as a Model Schema:
Securing our endpoints
In a real-world scenario, you probably don’t want your API (or part of it) to be exposed publicly. We will now take advantage of Auth0’s authentication to secure our API with Jwt Tokens.
The first step is to add the JwtBearer Nuget package to our dependencies:
"dependencies": {
"Microsoft.NETCore.App": {
    "version": "1.0.0",
    "type": "platform"
},
"Microsoft.AspNetCore.Mvc": "1.0.0",
"Microsoft.AspNetCore.Server.IISIntegration": "1.0.0",
"Microsoft.AspNetCore.Server.Kestrel": "1.0.0",
"Microsoft.Extensions.Configuration.EnvironmentVariables": "1.0.0",
"Microsoft.Extensions.Configuration.FileExtensions": "1.0.0",
"Microsoft.Extensions.Configuration.Json": "1.0.0",
"Microsoft.Extensions.Configuration.CommandLine": "1.0.0",
"Microsoft.Extensions.Options.ConfigurationExtensions": "1.0.0",
"Swashbuckle": "6.0.0-beta901",
"Microsoft.AspNetCore.Authentication.JwtBearer": "1.0.0"
}
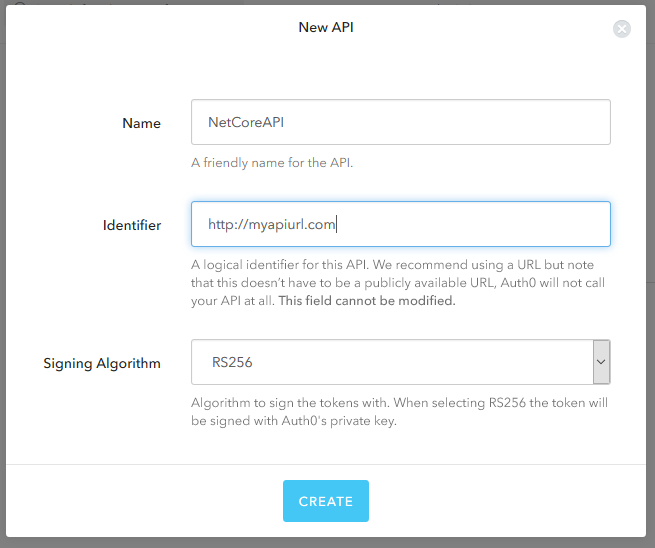
Next, we will create our API in Auth0 by enabling API Authorization in our account. To do this, go to your Account Settings, click on the Advanced tab and turn on the OAuth 2.0 API Authorization flag.

Now, go to the new API section on the left menu and click on Create API, remember to set a custom Identifier.
Then, let’s modify our ASP.NET Core pipeline to include the Jwt Token authentication in the Configure method in your Startup.cs file:
public void Configure(IApplicationBuilder app, IHostingEnvironment env, ILoggerFactory loggerFactory)
{
    /*Enabling swagger file*/
    app.UseSwagger();
    /*Enabling Swagger ui, consider doing it on Development env only*/
    app.UseSwaggerUi();
    /*It's important that this is AFTER app.UseSwagger or the swagger.json file would be innaccesible*/
    var options = new JwtBearerOptions
    {
        Audience = "Your_API_Identifier",
        Authority = "Your_Auth0_Domain"
    };
    app.UseJwtBearerAuthentication(options);
    /*Normal MVC mappings*/
    app.UseMvc();
}
Finally, securing a Controller or Action is as simple as adding the [Authorized] attribute to it:
[Authorize]
[HttpGet("")]
[Produces(typeof(IEnumerable<MyModel>))]
[SwaggerResponse(System.Net.HttpStatusCode.OK, Type = typeof(IEnumerable<MyModel>))]
public IActionResult GetAll()
{
    return new ObjectResult(_repository.GetAll());
}
And that’s it! Your API is secured and only clients authenticated by Auth0 can access it.
For more information on securing an ASP.NET Core Web API with Auth0, please refer to the Auth0 ASP.NET Core Web API Quickstart
Streamlining clients
Next, we’ll create an authenticated client that can access our API easily through an auto-generated proxy.
Using Yeoman one more time, we’ll create a Web Application Basic:
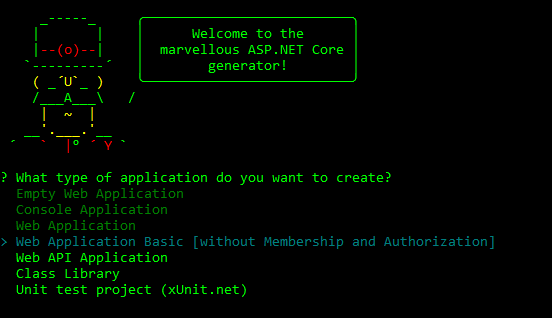
This creates a simple ASP.NET Core MVC Web application you can try by running dotnet restore and dotnet run on the created folder (you can also follow these steps with a pre-existing ASP.NET Core application).
We’ll open a Command Prompt on the application’s folder and use Autorest to create a client as easily as running:
autorest -Input http://your_api_domain/swagger/v1/swagger.json -OutputDirectory Api -AddCredentials true
The AddCredentials toggle will tell Autorest that our API needs to send authentication information on the requests, Input points to the running Api swagger file (it needs to be a running or deployed API) and OutputDirectory tells Autorest where to put the automatically created files.
If you browse that folder, you’ll find two important files, the wrapper API class, which has all the necessary methods to call all your API routes and actions, and an Interface:

The interface is useful if you want to use dependency injection in your ASP.NET Core client application.
After generating our client, Autorest will let you know that you will need the Microsoft.Rest.ClientRuntime Nuget package on our dependencies.
Locking it down with Auth0
We will start by creating a new Regular Web Application client on our Auth0 dashboard.
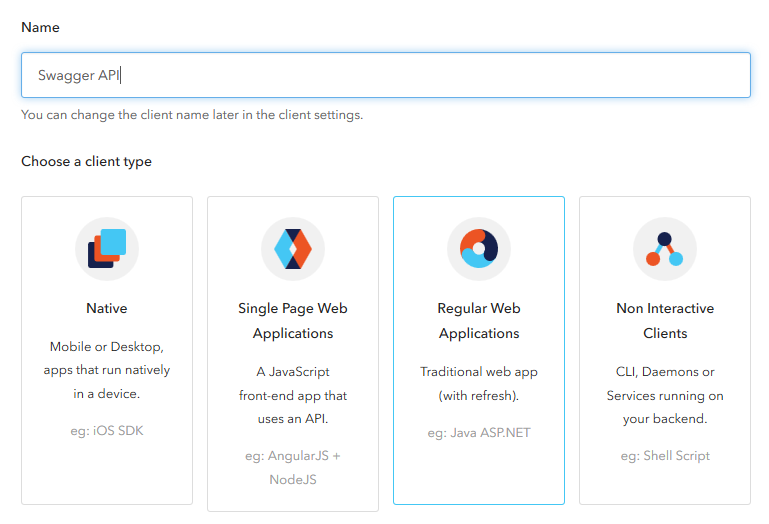
There is a complete client documentation available.
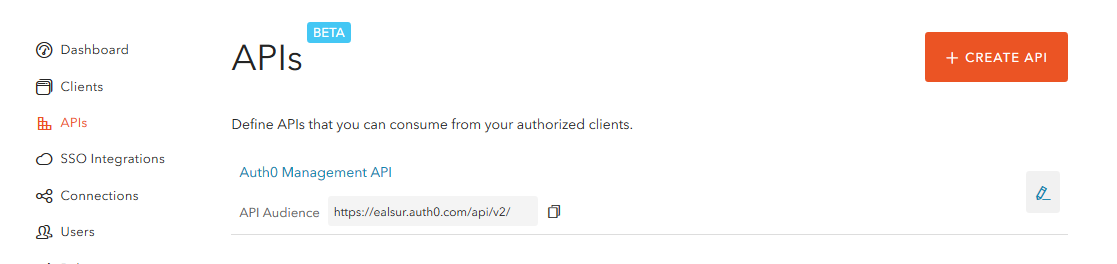
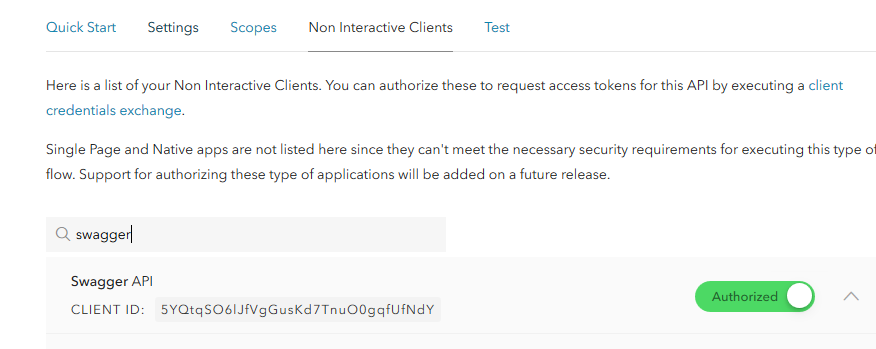
Once the client has been created, we need to authorize it on our API. To do this, we go to the APIs section, select our API and authorize the client:
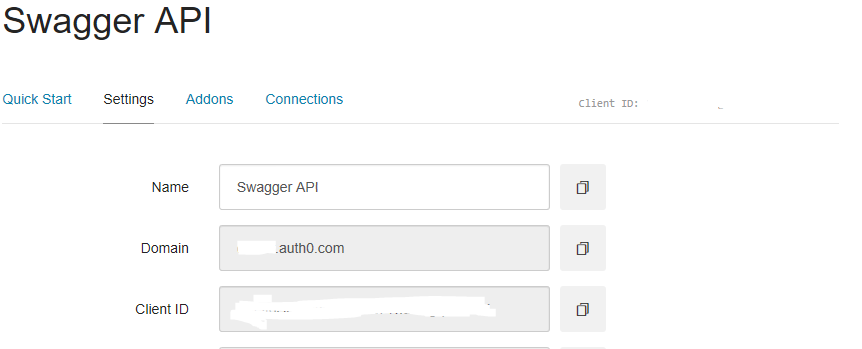
Finally, you will need your Auth0 ClientId and Domain, which you can obtain from your client:
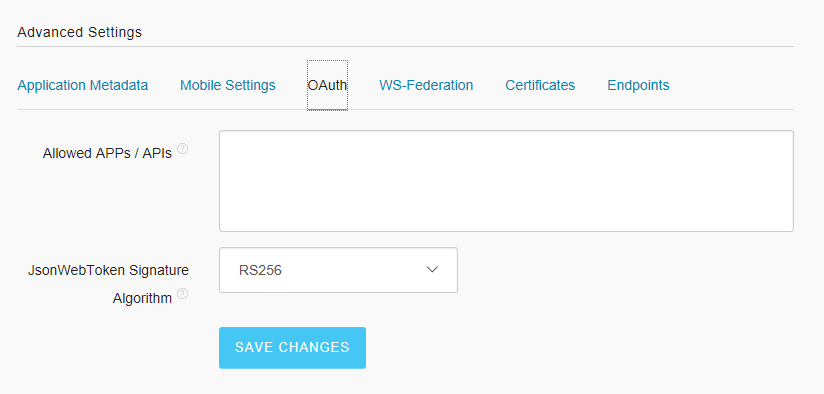
And on the same Settings pane, go to the Advanced Settings > OAuth and set the JWT Signature Algorithm to RS256:
Since our API is authenticating users from our Auth0 account, we’ll add Auth0’s Lock to our Web application to obtain credentials that can be passed on to the API.
First, let’s add the required Nuget packages, Microsoft.AspNetCore.Authentication.OpenIdConnect and Microsoft.AspNetCore.Authentication.Cookies, which results in a project.json file with the dependencies:
"dependencies": {
"Microsoft.NETCore.App": {
    "version": "1.0.0",
    "type": "platform"
},
"Microsoft.AspNetCore.StaticFiles": "1.0.0",
"Microsoft.AspNetCore.Mvc":"1.0.0",
"Microsoft.AspNetCore.Diagnostics": "1.0.0",
"Microsoft.AspNetCore.Server.IISIntegration": "1.0.0",
"Microsoft.AspNetCore.Server.Kestrel": "1.0.0",
"Microsoft.Extensions.Configuration.EnvironmentVariables": "1.0.0",
"Microsoft.Extensions.Configuration.FileExtensions": "1.0.0",
"Microsoft.Extensions.Configuration.Json": "1.0.0",
"Microsoft.Extensions.Options.ConfigurationExtensions": "1.0.0",
"Microsoft.Rest.ClientRuntime":"2.2.0",
"Microsoft.AspNetCore.Authentication.OpenIdConnect": "1.0.0",
"Microsoft.AspNetCore.Authentication.Cookies": "1.0.0"
}
Then, we’ll set up authentication on our Startup.cs file by adding the Cookie scheme to ConfigureServices:
public void ConfigureServices(IServiceCollection services)
{
    services.AddAuthentication(
        options => options.SignInScheme = CookieAuthenticationDefaults.AuthenticationScheme);
    services.AddMvc();
}
And setting up the pipeline in the Configure method:
public void Configure(IApplicationBuilder app, IHostingEnvironment env, IOptions<Auth0Settings> auth0Settings)
{
    app.UseStaticFiles();
    app.UseDeveloperExceptionPage();
    /*Adding cookie auth*/
    app.UseCookieAuthentication(new CookieAuthenticationOptions
    {
        AutomaticAuthenticate = true,
        AutomaticChallenge = true
    });
    /*This should be BEFORE app.UseMvc to have priority on the pipeline*/
    app.UseOpenIdConnectAuthentication(new OpenIdConnectOptions("Auth0")
    {
        // Set the authority to your Auth0 domain
        Authority = "https://YOUR_AUTH0_DOMAIN",

        // Configure the Auth0 Client ID and Client Secret
        ClientId = "YOUR_AUTH0_CLIENTID",
        ClientSecret = "YOUR_AUTH0_SECRET",

        // Do not automatically authenticate and challenge
        AutomaticAuthenticate = false,
        AutomaticChallenge = false,

        // Set response type to code
        ResponseType = "code",

        // Set the callback path, so Auth0 will call back to http://localhost:5000/signin-auth0
        // Also ensure that you have added the URL as an Allowed Callback URL in your Auth0 dashboard
        CallbackPath = new PathString("/signin-auth0"),

        // Configure the Claims Issuer to be Auth0
        ClaimsIssuer = "Auth0",

        // Saves tokens to the AuthenticationProperties
        SaveTokens = true,

        Events = new OpenIdConnectEvents()
        {
            OnTicketReceived = context =>
            {
                // Get the ClaimsIdentity
                var identity = context.Principal.Identity as ClaimsIdentity;
                if (identity != null)
                {
                    // Check if token names are stored in Properties
                    if (context.Properties.Items.ContainsKey(".TokenNames"))
                    {
                        // Token names a semicolon separated
                        string[] tokenNames = context.Properties.Items[".TokenNames"].Split(';');

                        // Add each token value as Claim
                        foreach (var tokenName in tokenNames)
                        {
                            // Tokens are stored in a Dictionary with the Key ".Token.<token name>"
                            string tokenValue = context.Properties.Items[$".Token.{tokenName}"];

                            identity.AddClaim(new Claim(tokenName, tokenValue));
                        }
                    }
                }

                return Task.FromResult(0);
            }
        }
    });
    app.UseMvcWithDefaultRoute();
}
The next step is to add a Login route; as an example, we could use an AccountController and Login method:
public IActionResult Login(string returnUrl = "/")
{
    return new ChallengeResult("Auth0", new AuthenticationProperties() { RedirectUri = returnUrl });
}
Finally, we need to set up in our Auth0 account the authorized callback URLs, this is found in your Dashboard > Settings section and should point to your Web applications running domain; if you are trying it locally, remember to add a line for http://localhost too along with your deployed domain:
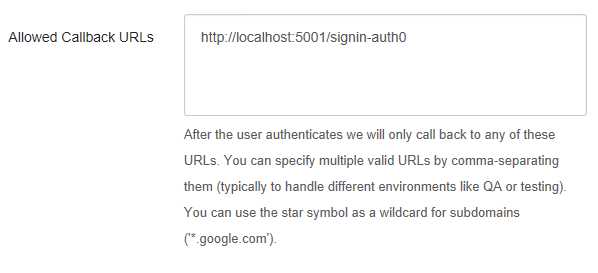
For a more detailed and in-depth guide on authentication for ASP.NET Core Web Apps, visit the ASP.NET Core Quickstart
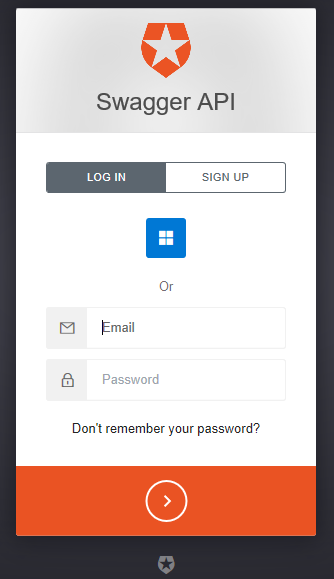
Now, going back to our App and browsing the Login url http://your_site/account/login or http://localhost:yourport/account/login, we should be redirected to the Auth0 Lock:
Passing up the credentials
Now that we have a running Web Application with an authenticated user that needs to call our secured Web API, passing up the credentials is extremely easy!
Let’s say we want to call our API from an MVC Action that would list all the values from the API. First, we obtain the token from the current logged-in user with:
User.Claims.First(x=>x.Type == "access_token").Value
And create credentials with it:
var auth = new Microsoft.Rest.TokenCredentials(User.Claims.First(x=>x.Type == "access_token").Value);
Finally, we use our Autorest generated client to easily obtain the information and pass the credentials:
[Authorize]
public async Task<IActionResult> List()
{
    var auth = new Microsoft.Rest.TokenCredentials(User.Claims.First(x=>x.Type == "access_token").Value);
    var api = new Auth0SwaggerSampleAPI(new Uri("http://localhost:5000"), auth);
    return View(await api.ValuesGetAsync());
}
And that’s it! We don’t need to mess with headers and serialization, the Autorest code will handle everything for you.
Conclusion
Documenting our Web APIs with Swagger enables rapid client generation with Autorest, which supports a wide variety of languages. Imagine how easy it would be to create a multi-client scenario by running Autorest to create a client for your Web App in C# and a client for your Android app in Java or by simply allowing any customer to create a client in its preferred language.
The entire code of this guide is available on Github, with a sample Web API and Web application you can use by just setting your Auth0 account information in the configuration files.