
TL;DR: In this tutorial, I'll introduce you to GulpJS and show you how to set it up in your application for task automation.
GulpJS is a JavaScript task runner that lets you automate several tasks during development. These tasks involve minifying JavaScript and CSS files, automatically refreshing the browser once a file has been edited, compiling CSS preprocessors, running tests, compressing images, and several others. GulpJS solves the problem of repetition.
“GulpJS solves the problem of repetition.”
Tweet This
GulpJS is a build tool that helps you as a developer get rid of manually running such tasks as mentioned above during development for every project. Once you set up GulpJS, it automates the most frustrating tasks, supercharges your performance, and lets you focus on building your app logic.
GulpJS Requirements
In order to use GulpJS, you need to have the following tools installed on your machine.
- Node.js: Navigate to the Node.js website and install the latest version on your machine.
- GulpJS: Install Gulp globally in your terminal so that the
gulpcommand can be run from any directory.
npm install gulp-cli -g
GulpJS Features
GulpJS provides a standardized API. The API methods allow you accomplish whatever work you want done with Gulp. See below a quick run down of the API methods:
gulp.task- Define a task.gulp.task('dosometask', () => { // Do some task });gulp.src- Read a file or set of files in.gulp.src('client/templates/*.jade') .pipe(jade()) .pipe(minify()) .pipe(gulp.dest('build/minified_templates'));gulp.dest- Write files out to a directory.gulp.src('./client/templates/*.jade') .pipe(jade()) .pipe(gulp.dest('./build/templates')) .pipe(minify()) .pipe(gulp.dest('./build/minified_templates'));gulp.src('client/js/**/*.js') // Matches 'client/js/somedir/somefile.js' and resolves `base` to `client/js/` .pipe(minify()) .pipe(gulp.dest('build')); // Writes 'build/somedir/somefile.js' gulp.src('client/js/**/*.js', { base: 'client' }) .pipe(minify()) .pipe(gulp.dest('build')); // Writes 'build/js/somedir/somefile.js'gulp.watch- Watch files and do something when a file changes.gulp.watch('js/**/*.js', function(event) { console.log('File ' + event.path + ' was ' + event.type + ', running tasks...'); });
Next, let's look at how we can actually use GulpJS in an application. We need to create a gulpfile.
Setting Up GulpFile in an Application
In a typical project, GulpJS needs some form of instructions to guide it in automating your tasks. These instructions are written in a file called the gulpfile. Let's go ahead and create this file.
Make sure you are in a new project directory. Inside the directory, create a gulpfile.js file.
In the gulpfile.js file, add this code to it like so:
var gulp = require('gulp');

gulp.task('run-this-common-task', function(){
    console.log('This is a simple task. Now, run it');
});
We just added a very simple task to the gulpfile. You need to always require the gulp node module before you can define and run tasks.
Before running the task, go ahead and install gulp locally in your project like so:
npm install --save-dev gulp
Now, run your task with gulp:
gulp run-this-common-task

The task had just one job - Log a sentence to the console. And it successfully executed this task.
Let's take a stab at something that gives us a better overview of the different kind of operations gulp can handle in your application.
GulpJS Use Case: Project Lingo
This is a practical use case. We are going to paint a scenario of the tasks we need to accomplish in Project Lingo. Before we define such tasks, what the heck is Project Lingo?
Lingo is a project that we have embarked upon in Company TechnoVille. Project Lingo is set to take over the world in ways you can't imagine. One of such ways is allowing a mere human click a button, input a destination and Lingo automatically teleports the human to their preferred destination in approximately 5 minutes.
In Project Lingo, we have a bunch of JavaScript, Less and Image files. We need to compress and optimize these files so that Lingo can be super-fast. I mean, you don't want Lingo taking 3 hours to teleport a human because of our in-efficient developer work-flow. We also don't want investors running way & Project Lingo dying when we could have done something about it.
This is what we need to do:
- Concatenate all our JavaScript files into just one file. This will make sure our app makes one HTTP request while serving JavaScript rather than multiple HTTP requests.
- Compile our Less files into CSS. The browser understands CSS, not LESS.
- Compress all our image files.
- Detect errors and potential problems in our JavaScript code. We need to make sure Lingo developers are writing quality JavaScript code.
We have these requirements listed above. How do we approach tackling these tasks with GulpJS?
Project Lingo - Install GulpJS Plugins
Yes, GulpJS has an amazing ecosystem of plugins. For every task a developer tries to accomplish, there is probably a GulpJS plugin out there for automating such task. Go ahead and install the following plugins via your terminal:
npm install gulp-imagemin gulp-less gulp-jshint gulp-concat gulp-uglify gulp-rename --save-dev
“GulpJS has an amazing ecosystem of plugins.”
Tweet This
A quick breakdown of what each of these plugins aim to accomplish.
- gulp-imagemin
- Minify PNG, JPEG, GIF and SVG images.
- gulp-less
- Compile Less files to CSS.
- gulp-jshint
- Automatically detect errors and problems in our JavaScript code. Lint it!
- gulp-uglify
- Minify JavaScript files.
- gulp-rename
- Rename a file.
- gulp-concat
- Concatenate all the JavaScript files into one file.
Project Lingo - Rewrite GulpFile
Open up the gulpfile.js file and modify it to this code below:
const gulp = require('gulp');

const imagemin = require('gulp-imagemin');
const jshint = require('gulp-jshint');
const concat = require('gulp-concat');
const less = require('gulp-less');
const uglify = require('gulp-uglify');
const rename = require('gulp-rename');

// Lint Task
gulp.task('lint', () => {
    return gulp.src('js/*.js')
        .pipe(jshint())
        .pipe(jshint.reporter('default'));
});

// Compile Project Lingo Less files
gulp.task('less', () => {
    return gulp.src('less/*.less')
        .pipe(less())
        .pipe(gulp.dest('dist/css'));
});

// Concatenate & Minify Project Lingo JS files
gulp.task('scripts', () => {
    return gulp.src('js/*.js')
        .pipe(concat('build.js'))
        .pipe(gulp.dest('dist'))
        .pipe(rename('build.min.js'))
        .pipe(uglify())
        .pipe(gulp.dest('dist/js'));
});

// Compress all Project Lingo image files
gulp.task('compress-images', () => {
     gulp.src('images/*')
        .pipe(imagemin())
        .pipe(gulp.dest('dist/images'))
});

// Watch Files For Changes
gulp.task('watch', () => {

    // JavaScript changes
    gulp.watch('js/*.js', ['lint', 'scripts']);

    // Less changes
    gulp.watch('less/*.less', ['less']);

    // Image changes
    gulp.watch('images/*', ['compress-images']);
});

// Run Project Lingo Task
gulp.task('lingo', ['less', 'scripts', 'compress-images', 'watch']);
In the code above, we have six tasks. Let's examine what each of these tasks do.
lint task
- This task checks all the JavaScript files in our
jsdirectory and runs them throughjshint. Jshint ensures that the JavaScript code is well-written and rid of errors. If there are any errors, it reports them to the console.
gulp.task('lint', () => { return gulp.src('js/*.js') .pipe(jshint()) .pipe(jshint.reporter('default')); });- This task checks all the JavaScript files in our
less task
- This task checks all the Less files in our
lessdirectory, compiles them to CSS and copies them to adist/cssdirectory. If you use sass more often, there is a gulp-sass plugin available to compile your sass files to CSS.
gulp.task('less', () => { return gulp.src('less/*.less') .pipe(less()) .pipe(gulp.dest('dist/css')); });- This task checks all the Less files in our
scripts task
- This task checks all the JavaScript files in our
jsdirectory, concatenates them into a single file,build.js, copies the file into adist/jsdirectory, renames the file tobuild.min.jsand uglifies it.
gulp.task('scripts', () => { return gulp.src('js/*.js') .pipe(concat('build.js')) .pipe(gulp.dest('dist')) .pipe(rename('build.min.js')) .pipe(uglify()) .pipe(gulp.dest('dist/js')); });- This task checks all the JavaScript files in our
compress-images task
- This task checks all the files in our
imagesdirectory, compresses them and copies them to adist/imagesdirectory.
gulp.task('compress-images', () => { gulp.src('images/*') .pipe(imagemin()) .pipe(gulp.dest('dist/images')) });- This task checks all the files in our
watch task
- This task listen for changes made in our files and automatically run all our tasks again.
  gulp.task('watch', () => {

      // JavaScript changes
      gulp.watch('js/*.js', ['lint', 'scripts']);

      // Less changes
      gulp.watch('less/*.less', ['less']);

      // Image changes
      gulp.watch('images/*, ['compress-images']);
  });
lingo task
- This task is the father of all tasks. At the terminal, all we need to do is run
gulp lingoand all the tasks defined in our gulfile will run in one command!
gulp.task('lingo', ['less', 'scripts', 'compress-images', 'watch']);- This task is the father of all tasks. At the terminal, all we need to do is run
So, head over to the terminal, and try gulp lingo and watch all the tasks run. It's that simple.
Note: Ensure you have a js, less and images folder with multiple JavaScript, Less and image files respectively.
Gulp Plugins
As demonstrated in Project Lingo, we took advantage of the Gulp Plugins ecosystem. Gulp Plugins are building blocks for your gulpfile.
There are several plugins available at https://gulpjs.com/plugins. Head over there, search for any plugin that might suit your use case and take advantage of it.
Check out other popular plugins that you might immediately find useful.
- gulp-util
- Contains all sorts of utility functions such as color-coding and logging.
- gulp-nodemon
- Automatically restarts your Node.js server using
nodemon.
- Automatically restarts your Node.js server using
- gulp-strip-debug
- Removes all
consoleanddebuggingstatements.
- Removes all
- gulp-htmlclean
- Minify HTML code.
Gulp Recipes
There are some tasks that you might want to implement, but not necessarily know the right way to go about it. Apart from the Gulp Plugins that exist, there are recipes that you can take advantage of. Some of the recipes you can use directly in your project include:
- Running tasks in series
- Browserify builds with Watchify
- Templating with Swig and YAML front-matter
- Deleting files and folders before running builds
- Run Grunt Tasks from Gulp
Check out a great list of Gulp Recipes.
Aside: Auth0 Authentication with JavaScript
At Auth0, we make heavy use of full-stack JavaScript to help our customers to manage user identities, including password resets, creating, provisioning, blocking, and deleting users. Therefore, it must come as no surprise that using our identity management platform on JavaScript web apps is a piece of cake.
Auth0 offers a free tier to get started with modern authentication. Check it out, or sign up for a free Auth0 account here!
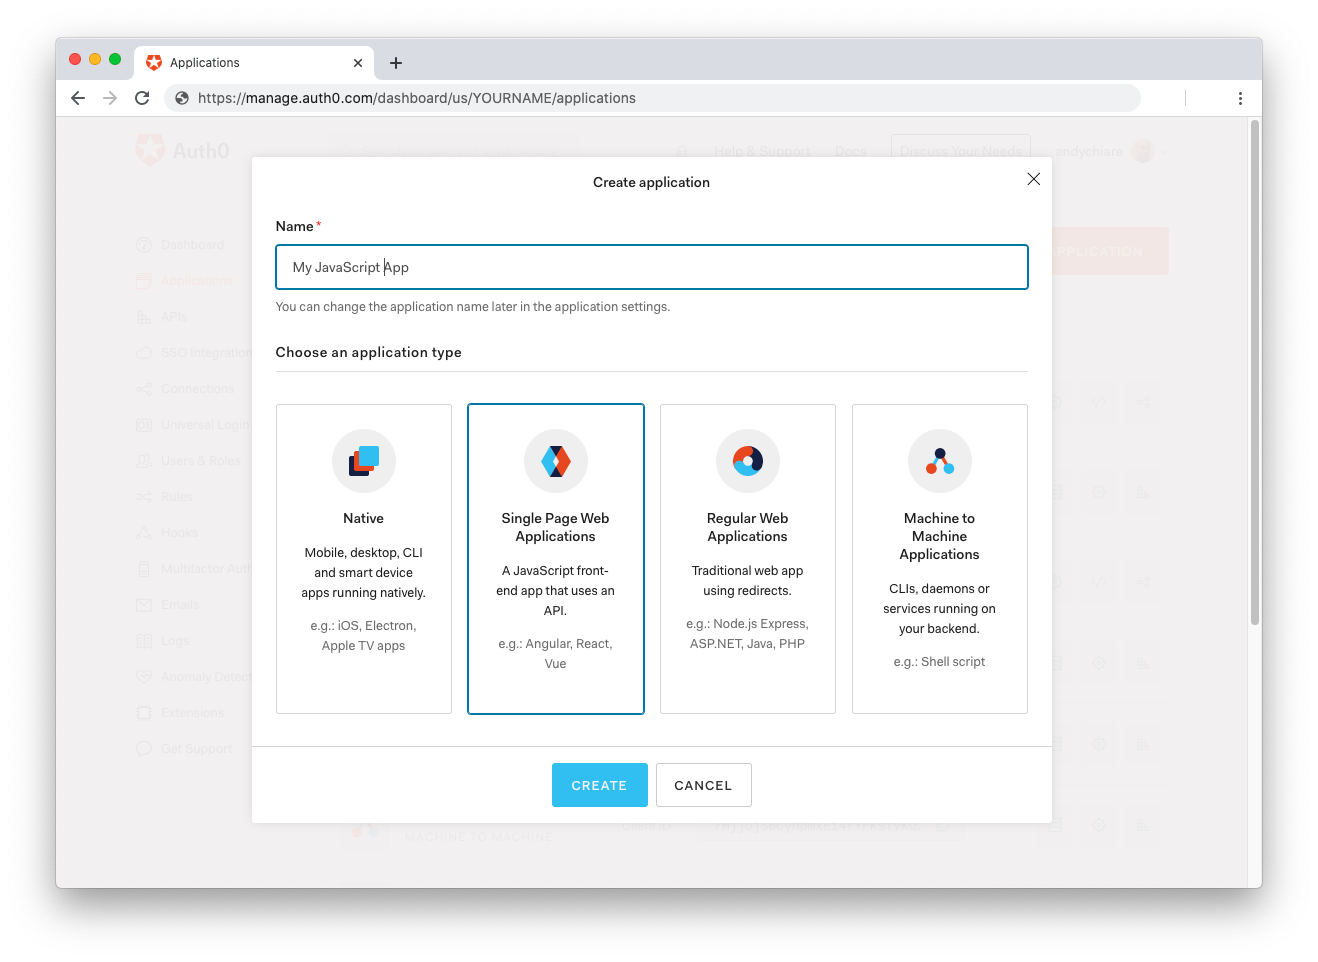
Then, go to the Applications section of the Auth0 Dashboard and click on "Create Application". On the dialog shown, set the name of your application and select Single Page Web Applications as the application type:
After the application has been created, click on "Settings" and take note of the domain and client id assigned to your application. In addition, set the Allowed Callback URLs and Allowed Logout URLs fields to the URL of the page that will handle login and logout responses from Auth0. In the current example, the URL of the page that will contain the code you are going to write (e.g. http://localhost:8080).
Now, in your JavaScript project, install the auth0-spa-js library like so:
npm install @auth0/auth0-spa-js
Then, implement the following in your JavaScript app:
import createAuth0Client from '@auth0/auth0-spa-js';

let auth0Client;

async function createClient() {
  return await createAuth0Client({
    domain: 'YOUR_DOMAIN',
    client_id: 'YOUR_CLIENT_ID',
  });
}

async function login() {
  await auth0Client.loginWithRedirect();
}

function logout() {
  auth0Client.logout();
}

async function handleRedirectCallback() {
  const isAuthenticated = await auth0Client.isAuthenticated();

  if (!isAuthenticated) {
    const query = window.location.search;
    if (query.includes('code=') && query.includes('state=')) {
      await auth0Client.handleRedirectCallback();
      window.history.replaceState({}, document.title, '/');
    }
  }

  await updateUI();
}

async function updateUI() {
  const isAuthenticated = await auth0Client.isAuthenticated();

  const btnLogin = document.getElementById('btn-login');
  const btnLogout = document.getElementById('btn-logout');

  btnLogin.addEventListener('click', login);
  btnLogout.addEventListener('click', logout);

  btnLogin.style.display = isAuthenticated ? 'none' : 'block';
  btnLogout.style.display = isAuthenticated ? 'block' : 'none';

  if (isAuthenticated) {
    const username = document.getElementById('username');
    const user = await auth0Client.getUser();

    username.innerText = user.name;
  }
}

window.addEventListener('load', async () => {
  auth0Client = await createClient();

  await handleRedirectCallback();
});
Replace the
YOUR_DOMAINandYOUR_CLIENT_IDplaceholders with the actual values for the domain and client id you found in your Auth0 Dashboard.
Then, create your UI with the following markup:
<p>Welcome <span id="username"></span></p>
<button type="submit" id="btn-login">Sign In</button>
<button type="submit" id="btn-logout" style="display:none;">Sign Out</button>
Your application is ready to authenticate with Auth0!
Check out the Auth0 SPA SDK documentation to learn more about authentication and authorization with JavaScript and Auth0.
Conclusion
You have now learned how to automate your development workflow with GulpJS. This GulpJS tutorial simply covers how Gulp - the task runner and automation tool works and how it can automate common tasks in your application. I am rest assured Project Lingo is now highly performant. All thanks to the optimization techniques we deployed using GulpJS.
There are other tasks runners and automation tools you should check out. Examples are Grunt, Broccoli, Brunch and Webpack. As at the time of this writing, Webpack is the most popular build tool/task runner amongst web developers.
Do you still use GulpJS? Are you now in the league of Webpackers? Are there specific reasons you would choose one over the other? Please let me know in the comment section. 😊
About the author

Prosper Otemuyiwa
Former Auth0 Employee (Auth0 Alumni)