
Auth0 brings you the new ASP.NET Core Authentication SDK, which improves your development experience and better integrates with Auth0 features! Let's take a tour through the main features of the SDK to see how easy it becomes to integrate your ASP.NET applications with Auth0.
The SDK Overview
So far, you were used to relying on the standard Microsoft.AspNetCore.Authentication.OpenIdConnect package to integrate your ASP.NET application with Auth0. That library does its job very well. However, when you move away from implementing the simple login and logout, your code starts becoming verbose until it gets messy.
You can mitigate this issue by implementing your authentication with C# extension methods. But why do it yourself when the experts at Auth0 can provide you with a ready-to-use SDK?
The ASP.NET Core Authentication SDK allows you to write less code to integrate Auth0 authentication and authorization into your ASP.NET applications. It simplifies configuration, supports additional query parameters and refresh tokens, natively supports Auth0 Organizations and user invitations. It is actually a wrapper around the Microsoft.AspNetCore.Authentication.OpenIdConnect library, but it brings you a standard and easy way to integrate Auth0 into your applications.
You can use the SDK for all your ASP.NET applications that require authentication, such as ASP.NET MVC apps, Razor web apps, and Blazor server apps.
Install the ASP.NET Core Authentication SDK
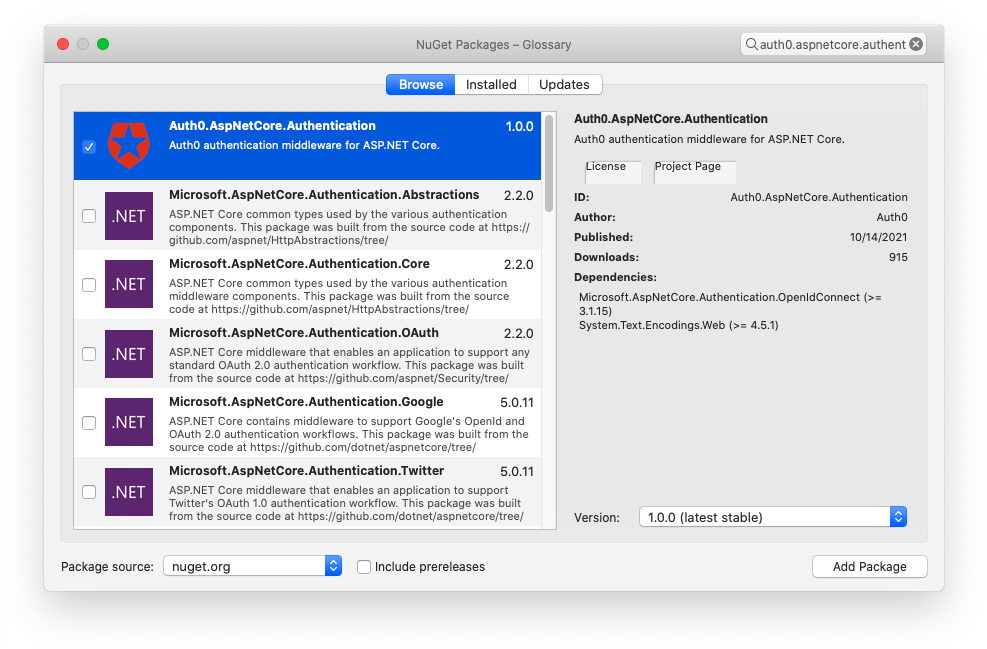
You can install the Auth0 ASP.NET Core SDK by using the NuGet Package Manager UI in Visual Studio, as shown below:
You can also install it by running the following command in the Package Manager Console:
Install-Package Auth0.AspNetCore.Authentication
Or you can use the following command in a terminal window:
dotnet add package Auth0.AspNetCore.Authentication
Independently of your preferred approach, you will get the Auth0.AspNetCore.Authentication dependency in your ASP.NET project.
The Basic Login Use Case
Let's start to take a look at the way the new SDK improves your developer experience. Of course, you need an Auth0 account to integrate your ASP.NET application with Auth0. If you haven't, you can sign up for a free one right now. Follow the Auth0 ASP.NET Core Authentication SDK quickstart to register your application and get your application keys.
The following is the typical code you write to enable authentication in your ASP.NET application when using Microsoft.AspNetCore.Authentication.OpenIdConnect:
public void ConfigureServices(IServiceCollection services)
{
  services.AddAuthentication(options => {
    options.DefaultAuthenticateScheme = CookieAuthenticationDefaults.AuthenticationScheme;
    options.DefaultSignInScheme = CookieAuthenticationDefaults.AuthenticationScheme;
    options.DefaultChallengeScheme = CookieAuthenticationDefaults.AuthenticationScheme;
  })
  .AddCookie()
  .AddOpenIdConnect("Auth0", options => {
    options.Authority = $"https://{Configuration["Auth0:Domain"]}";
    options.ClientId = Configuration["Auth0:ClientId"];
    options.CallbackPath = new PathString("/callback");
    options.TokenValidationParameters = new TokenValidationParameters
    {
      NameClaimType = "name"
    };
    options.Events = new OpenIdConnectEvents
    {
      OnRedirectToIdentityProviderForSignOut = (context) =>
      {
        var logoutUri = $"https://{Configuration["Auth0:Domain"]}/v2/logout?client_id={Configuration["Auth0:ClientId"]}";

        var postLogoutUri = context.Properties.RedirectUri;
        if (!string.IsNullOrEmpty(postLogoutUri))
        {
          if (postLogoutUri.StartsWith("/"))
          {
            // transform to absolute
            var request = context.Request;
            postLogoutUri = request.Scheme + "://" + request.Host + request.PathBase + postLogoutUri;
          }
          logoutUri += $"&returnTo={ Uri.EscapeDataString(postLogoutUri)}";
        }

        context.Response.Redirect(logoutUri);
        context.HandleResponse();

        return Task.CompletedTask;
      }
    };
  });
}
I will not go through that code to explain every single step. You just need to know it implements the login and logout features in your applications by relying on the Auth0 Universal Login page.
By using the Auth0 ASP.NET Core Authentication SDK, your code shortens as follows:
public void ConfigureServices(IServiceCollection services)
{
  services.AddAuth0WebAppAuthentication(options =>
  {
    options.Domain = Configuration["Auth0:Domain"];
    options.ClientId = Configuration["Auth0:ClientId"];
  });
}
Impressive, isn't it? 😲
The SDK takes care of all the configuration stuff you previously needed to do manually. And that's just the beginning! 🎉
Get an Access Token
What if you want to call an API from your ASP.NET application? In this case, you need to request an access token for a specific audience to Auth0.
Doing it without the SDK would require a code similar to the following:
public void ConfigureServices(IServiceCollection services)
{
  services.AddAuthentication(options => {
    options.DefaultAuthenticateScheme = CookieAuthenticationDefaults.AuthenticationScheme;
    options.DefaultSignInScheme = CookieAuthenticationDefaults.AuthenticationScheme;
    options.DefaultChallengeScheme = CookieAuthenticationDefaults.AuthenticationScheme;
  })
  .AddCookie()
  .AddOpenIdConnect("Auth0", options => {
    options.Authority = $"https://{Configuration["Auth0:Domain"]}";
    options.ClientId = Configuration["Auth0:ClientId"];
    //👇new code
    options.ClientSecret = Configuration["Auth0:ClientSecret"];
    options.SaveTokens = true;
    options.ResponseType = OpenIdConnectResponseType.Code;
    //👆new code
    options.CallbackPath = new PathString("/callback");
    options.TokenValidationParameters = new TokenValidationParameters
    {
      NameClaimType = "name"
    };
    options.Events = new OpenIdConnectEvents
    {
      OnRedirectToIdentityProviderForSignOut = (context) =>
      {
        var logoutUri = $"https://{Configuration["Auth0:Domain"]}/v2/logout?client_id={Configuration["Auth0:ClientId"]}";

        var postLogoutUri = context.Properties.RedirectUri;
        if (!string.IsNullOrEmpty(postLogoutUri))
        {
          if (postLogoutUri.StartsWith("/"))
          {
            // transform to absolute
            var request = context.Request;
            postLogoutUri = request.Scheme + "://" + request.Host + request.PathBase + postLogoutUri;
          }
          logoutUri += $"&returnTo={ Uri.EscapeDataString(postLogoutUri)}";
        }

        context.Response.Redirect(logoutUri);
        context.HandleResponse();

        return Task.CompletedTask;
      }
      //👇new code
      OnRedirectToIdentityProvider = context =>
      {
        context.ProtocolMessage.SetParameter("audience", Configuration["Auth0:Audience"]);
        return Task.FromResult(0);
      }
      //👆new code
    };
  });
}
Basically, you need to add a few more lines to the previous code in order to change the OAuth flow, provide the client secret, enable token saving, and attach the audience value to the authorization request.
The equivalent code to achieve the same result using the SDK is as follows:
public void ConfigureServices(IServiceCollection services)
{
  services.AddAuth0WebAppAuthentication(options =>
  {
    options.Domain = Configuration["Auth0:Domain"];
    options.ClientId = Configuration["Auth0:ClientId"];
    options.ClientSecret = Configuration["Auth0:ClientSecret"];
  })
  .WithAccessToken(options =>
  {
    options.Audience = Configuration["Auth0:Audience"];
  });
}
Aren't you excited about this? 💥 Your code will be more concise, clean, and clear!
Refresh Tokens As Magic
And in case you need a refresh token? 🤔 Nothing could be simpler. Just set a flag:
public void ConfigureServices(IServiceCollection services)
{
  services.AddAuth0WebAppAuthentication(options =>
  {
    options.Domain = Configuration["Auth0:Domain"];
    options.ClientId = Configuration["Auth0:ClientId"];
    options.ClientSecret = Configuration["Auth0:ClientSecret"];
  })
  .WithAccessToken(options =>
  {
    options.Audience = Configuration["Auth0:Audience"];
    options.UseRefreshTokens = true;   //👈 new code
  });
}
Compare it with the code you need to add to the SDK-less code:
public void ConfigureServices(IServiceCollection services)
{
  services.AddAuthentication(options => {
  //...the code to configure authentication...
  })
  .AddCookie(options => {
    options.Events.OnValidatePrincipal = (context) => {
    var options = context.HttpContext.RequestServices.GetRequiredService<Auth0Options>();

    string accessToken;
    if (context.Properties.Items.TryGetValue(".Token.access_token", out accessToken))
    {
      if (options.UseRefreshTokens)
      {
        string refreshToken;
        if (context.Properties.Items.TryGetValue(".Token.refresh_token", out refreshToken))
        {
          var now = DateTimeOffset.Now;
          var expiresAt = DateTimeOffset.Parse(context.Properties.Items[".Token.expires_at"]);
          var leeway = 60;
          var difference = DateTimeOffset.Compare(expiresAt, now.AddSeconds(leeway));
          var isExpired = difference <= 0;

          if (isExpired && !string.IsNullOrWhiteSpace(refreshToken))
          {
            var result = await RefreshTokens(options, refreshToken, auth0Options.Backchannel);

            if (result != null)
            {
              context.Properties.UpdateTokenValue("access_token", result.AccessToken);
              context.Properties.UpdateTokenValue("refresh_token", result.RefreshToken);
              context.Properties.UpdateTokenValue("id_token", result.IdToken);
              context.Properties.UpdateTokenValue("expires_at", DateTimeOffset.Now.AddSeconds(result.ExpiresIn).ToString("o"));
            }
            else
            {
              context.Properties.UpdateTokenValue("refresh_token", null);
            }

            context.ShouldRenew = true;
          }
        }
      }
    }
  })
  .AddOpenIdConnect("Auth0", options => {
    //...the code to configure OpenID Connect...
  });
}
You should take care of all the details about determining the token expiration and requesting a new access token. The Auth0 ASP.NET Core Authentication SDK does this on your behalf. Do you agree it's magic? ✨
Auth0 Organizations Support
Not only the ASP.NET Core Authentication SDK lets you deal with standard OpenID Connect and OAuth duties, but it also simplifies your life in using specific Auth0 features such as Auth0 Organizations. By using Organizations, you can represent logical groups of users such as teams, partners, business customers, and so on. They can have specific policies, branding, and other customizations. So, to enable a user to log in to an organization, you need to specify it in your ASP.NET application. The following is an example of how you can accomplish this by using the SDK:
public void ConfigureServices(IServiceCollection services)
{
  services.AddAuth0WebAppAuthentication(options =>
  {
    options.Domain = Configuration["Auth0:Domain"];
    options.ClientId = Configuration["Auth0:ClientId"];
    options.Organization = Configuration["Auth0:Organization"];
  });
}
Pretty straightforward, right? 🙌 Of course, you can do more with Organizations. Please, take a look at the ASP.NET Core Authentication SDK documentation to learn more.
Customization
At this point, you may think that having an SDK forces you to use its methods to work with OpenID Connect and OAuth. So you no longer have the freedom of adding extra parameters to the authorization request, for example. Or you may think you can't anymore apply your custom token validation or freely manage OpenID Connect events.
I have good news: you don't need to worry about this. The ASP.NET Core Authentication SDK leaves you the freedom to customize many things.
For example, you can add custom parameters to the authorization request. Look at the following example:
public void ConfigureServices(IServiceCollection services)
{
  services.AddAuth0WebAppAuthentication(options =>
  {
    options.Domain = Configuration["Auth0:Domain"];
    options.ClientId = Configuration["Auth0:ClientId"];
    options.LoginParameters = new Dictionary<string, string>() {
      { "screen_hint", "signup" }
    };
  });
}
Here you configured your ASP.NET application to attach the screen_hint parameter with the signup value to the authorization request. In this specific case, the user will see the signup window instead of the default login screen.
But you can also apply your custom validation, as in the following case:
public void ConfigureServices(IServiceCollection services)
{
  services.AddAuth0WebAppAuthentication(options =>
  {
    options.Domain = Configuration["Auth0:Domain"];
    options.ClientId = Configuration["Auth0:ClientId"];
    options.OpenIdConnectEvents = new OpenIdConnectEvents
    {
      OnTokenValidated = (context) =>
      {
        var birthDateClaim = context.SecurityToken.Claims.SingleOrDefault(claim => claim.Type == "birthdate")?.Value;

        if (string.IsNullOrWhiteSpace(birthDateClaim))
        {
          context.Fail("The 'birthdate' claim must be present in the ID token.");
        }

        return Task.CompletedTask;
      }
    };
  })
}
As you can see, the ASP.NET Core Authentication SDK exposes the OpenIdConnectEvents option to let you handle the standard events triggered by the Microsoft.AspNetCore.Authentication.OpenIdConnect library. This way, you can combine the SDK simplicity with the standard library behavior to get the maximum flexibility.
Summary
Now you should have a clearer idea about the benefits you have by using the ASP.NET Core Authentication SDK to integrate Auth0 into your ASP.NET applications: less code, more readability, flexibility, and best practices inside. So, give a try to the SDK and integrate your ASP.NET applications with Auth0 by following the QuickStart. Check out the SDK documentation to learn more.
You can also contribute to it: it's open-source!
About the author

Andrea Chiarelli
Principal Developer Advocate
I have over 20 years of experience as a software engineer and technical author. Throughout my career, I've used several programming languages and technologies for the projects I was involved in, ranging from C# to JavaScript, ASP.NET to Node.js, Angular to React, SOAP to REST APIs, etc.
In the last few years, I've been focusing on simplifying the developer experience with Identity and related topics, especially in the .NET ecosystem.