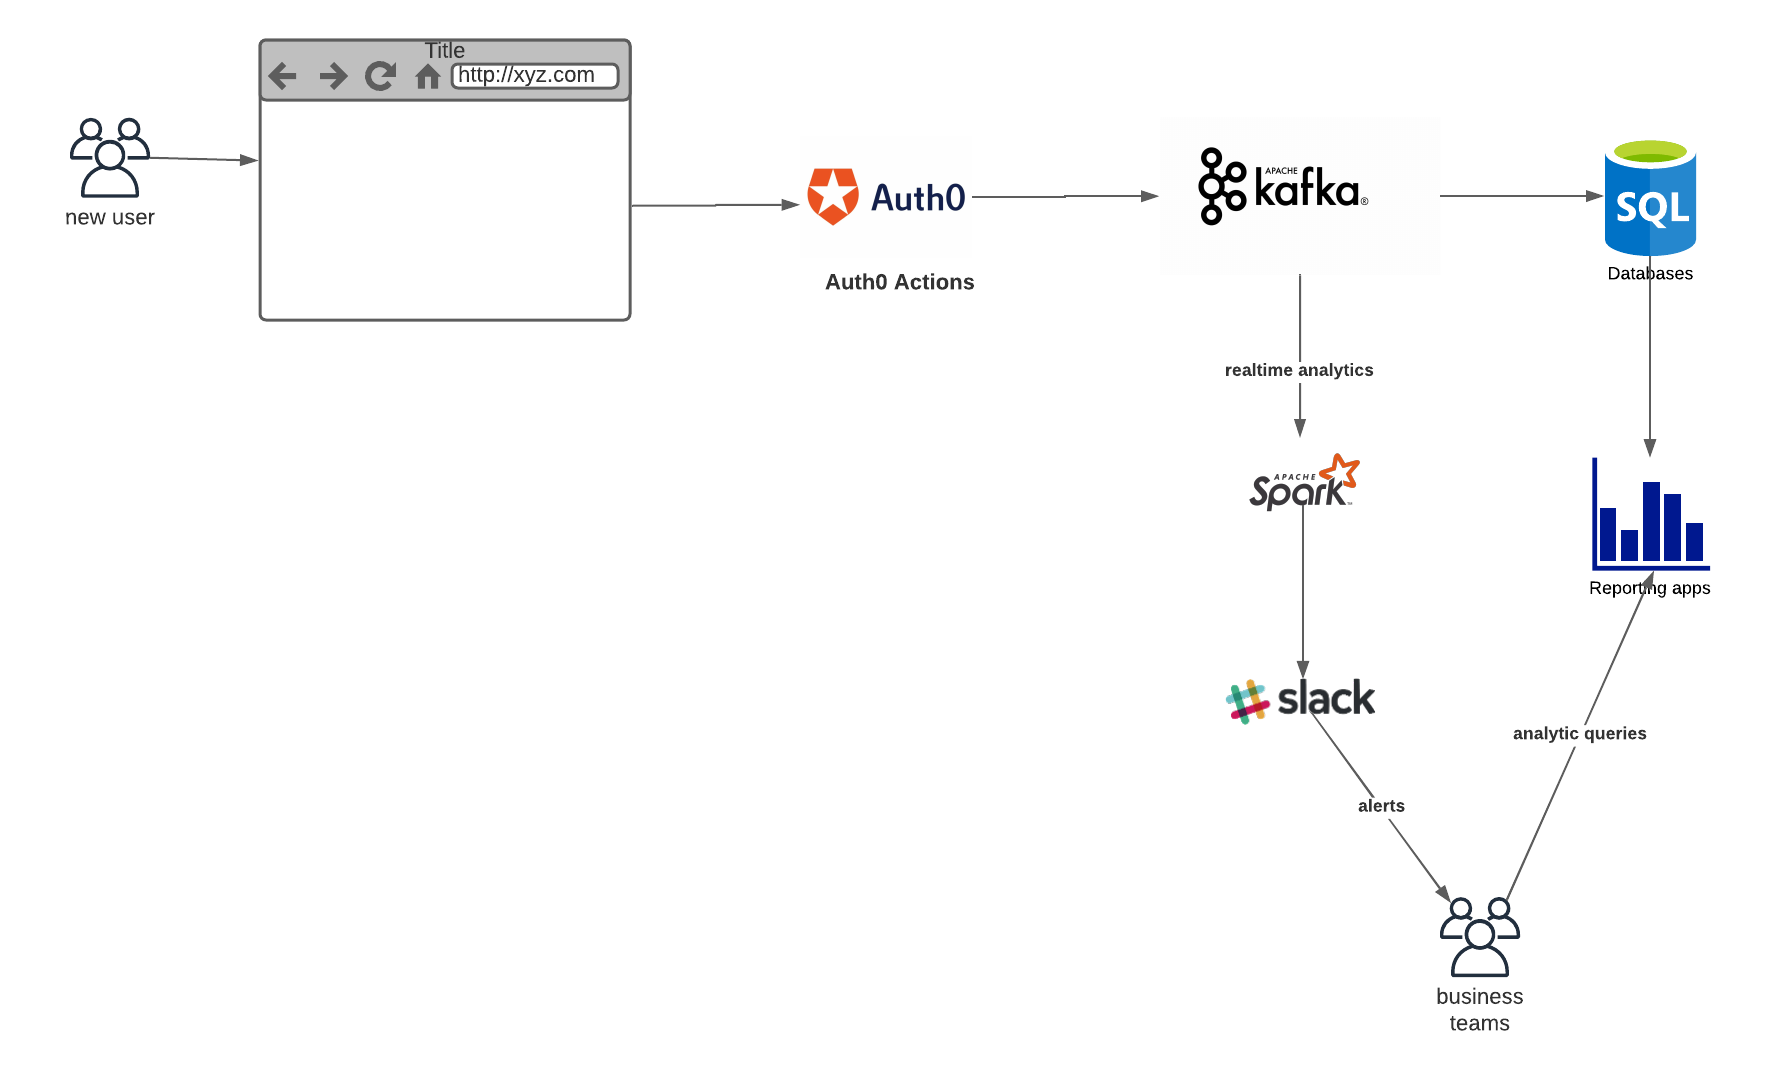
In this post, you’ll learn how to integrate Auth0 with Apache Kafka using Actions. You’ll do this by writing an Action that pushes information from new user registrations to a Kafka cluster. By doing this, you open a number of analytics and user experience possibilities, including:
- Processing sign-up events (with Apache Flink or Spark) to notify your business and sales team when a new user signs up for an account.
- Trigger processes such as sending a welcome email or Slack message in response to a user signing up.
- Using a Kafka connector to move the user data gathered from the sign-up process to a database or data warehouse to feed reporting and analytics applications.
- Feeding new user data to your CRM application.
Why Apache Kafka?
Apache Kafka is a distributed messaging platform that receives data as events in real-time from sources such as sensors, mobile devices, databases, applications, and services (including Auth0) and makes that data available to target systems. It supports both publish/subscribe and distributed queue scenarios. Kafka gives you the flexibility to perform both stream processing and batch processing with your data. Kafka’s replication feature and durability allow you to use it as a persistent hub for your data.
Auth0 Actions
Auth0 Actions are serverless Node.js functions that are triggered by certain events that take place when signing up for an Auth0 user account or authenticating with Auth0. Using Actions, you can customize and extend Auth0’s capabilities with your custom logic that you can add to events such as login, registration, changing passwords, and more. Auth0 Actions are stateless, so you’ll need an external store if you use them to collect data. Check this article to learn more about Actions.
In this post, we will write an Auth0 Action which will be triggered by the Post User Registration flow, which happens after a user has completed signing up for an account.
Create a Kafka Cluster
Because Auth0 Actions are stateless, we need a Kafka service that does not require stateful connections. We will use Upstash’s Kafka service, which has a REST API and is designed for serverless environments and a free plan suitable for this project.
If you don’t already have an Upstash account, sign up for one. The process is very quick, especially if you sign up using an Amazon, GitHub, or Google account. You’ll be taken to the Upstash console immediately afterward:
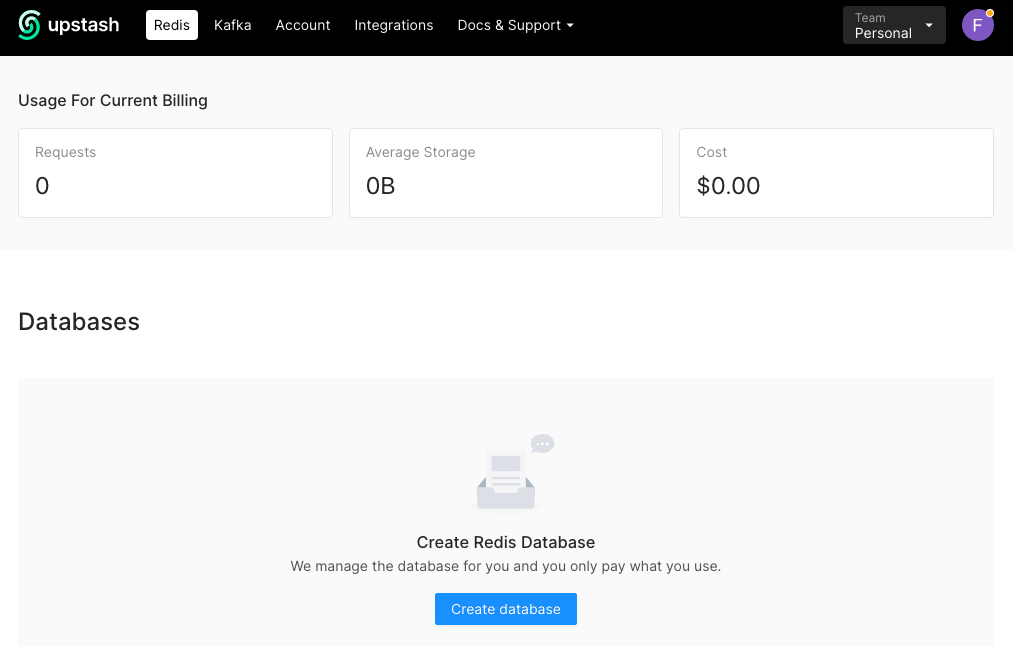
Select Kafka in the menu bar at the top of the page. You’ll be taken here:
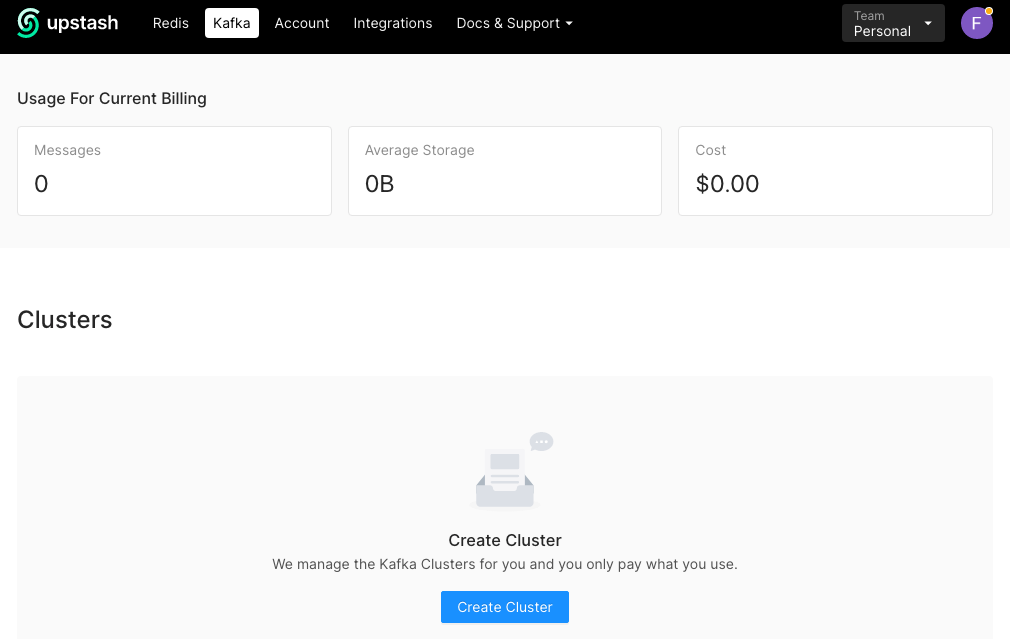
In order to use Kafka, you need a cluster, which is a set of one or more servers running Apache Kafka. Click the Create Cluster button. This form will appear:
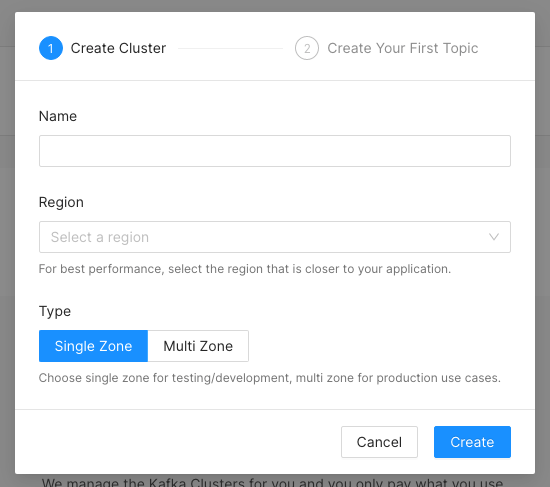
Provide the following information for each of its fields:
- Name: Pick a name that will make it easy to recognize, such as “Auth0 Actions Test.”
- Region: Select the region closest to you.
- Type: Select Single Zone
Click the Create button to continue. You’ll see the form’s second page:
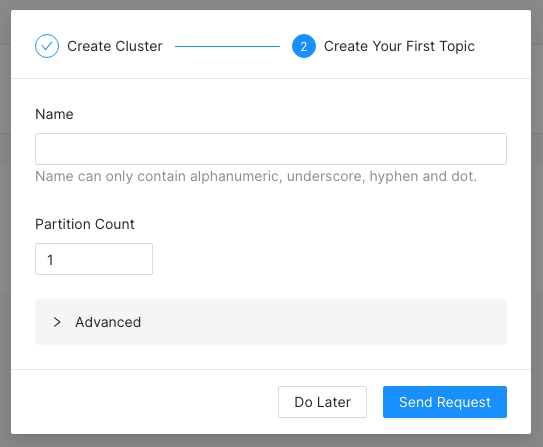
You need to provide a name for a topic, which is how Kafka organizes events. If you think of events as being like files, topics are like directories. Enter the topic name user-events-topic into the Name field and click the Send Request button.
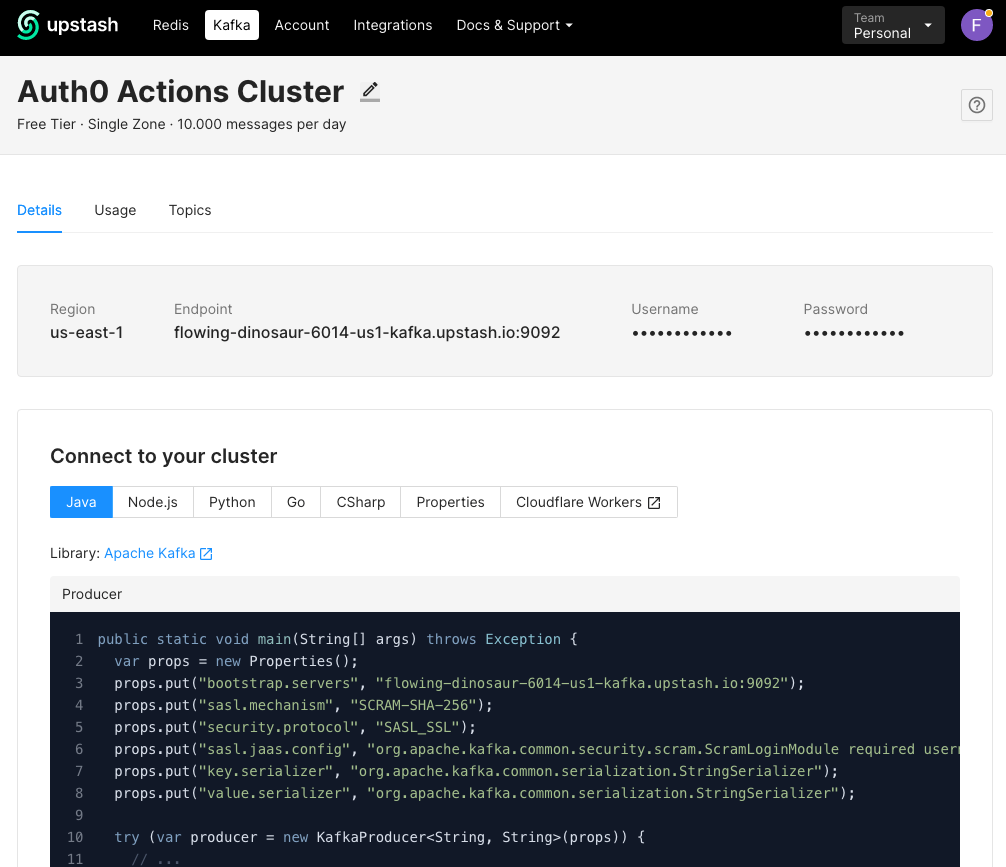
Upstash will create the cluster and immediately take you to its Details page:
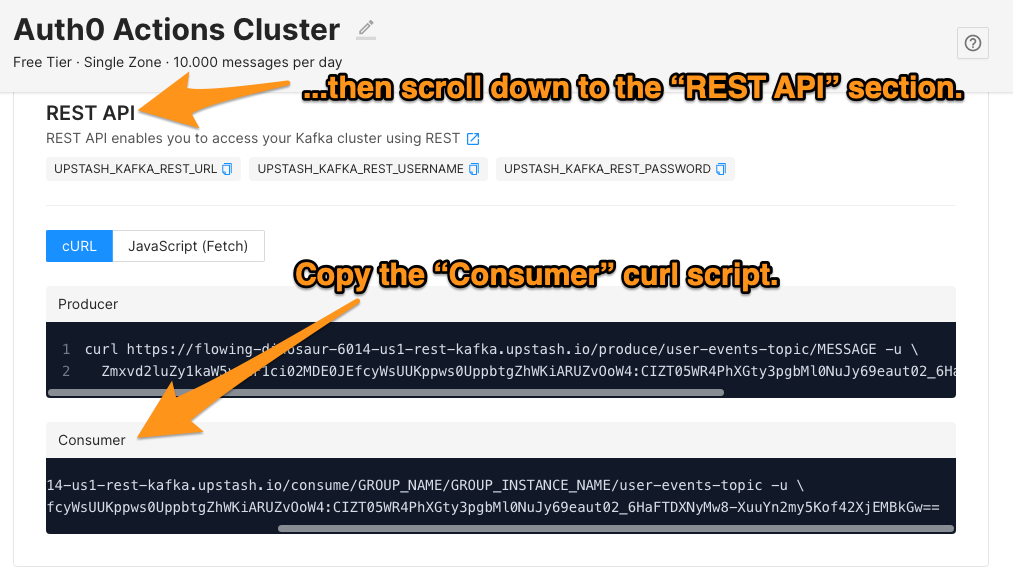
Scroll down to the REST API section, where you’ll see controls to copy the values for UPSTASH_KAFKA_REST_URL, UPSTASH_KAFKA_REST_USERNAME, and UPSTASH_KAFKA_REST_PASSWORD, which you will use in the next step.
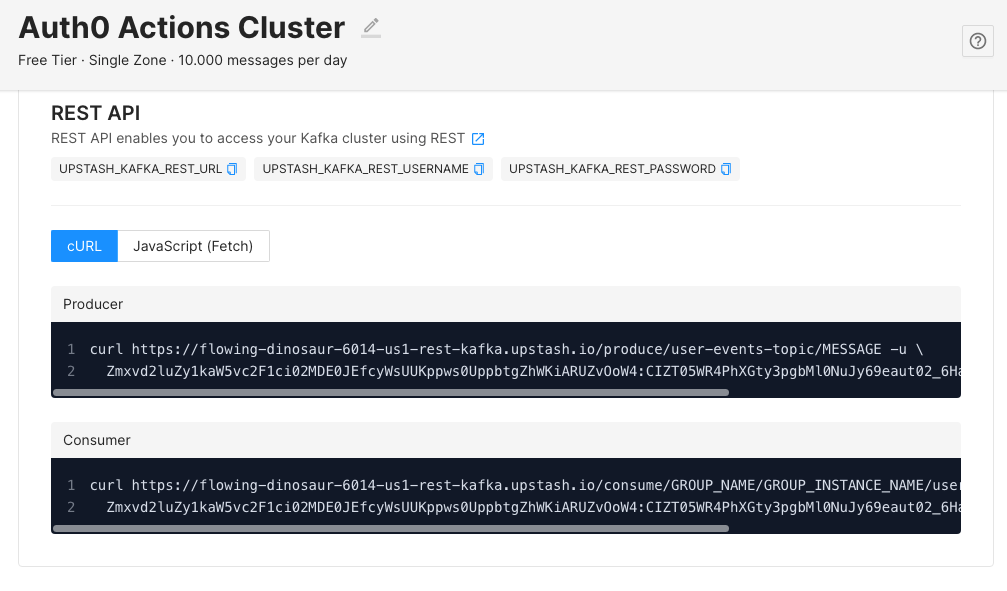
Keep this page open in a browser tab or window; you’ll need it shortly.
Implement the Action
You will need an Auth0 account for this step. If you don’t already have an account, you can sign up for one for free.
Create a new action
Log into the Auth0 dashboard. On the left menu, select Actions → Library, then click the Build Custom button. This will open the Create Action pop-up:
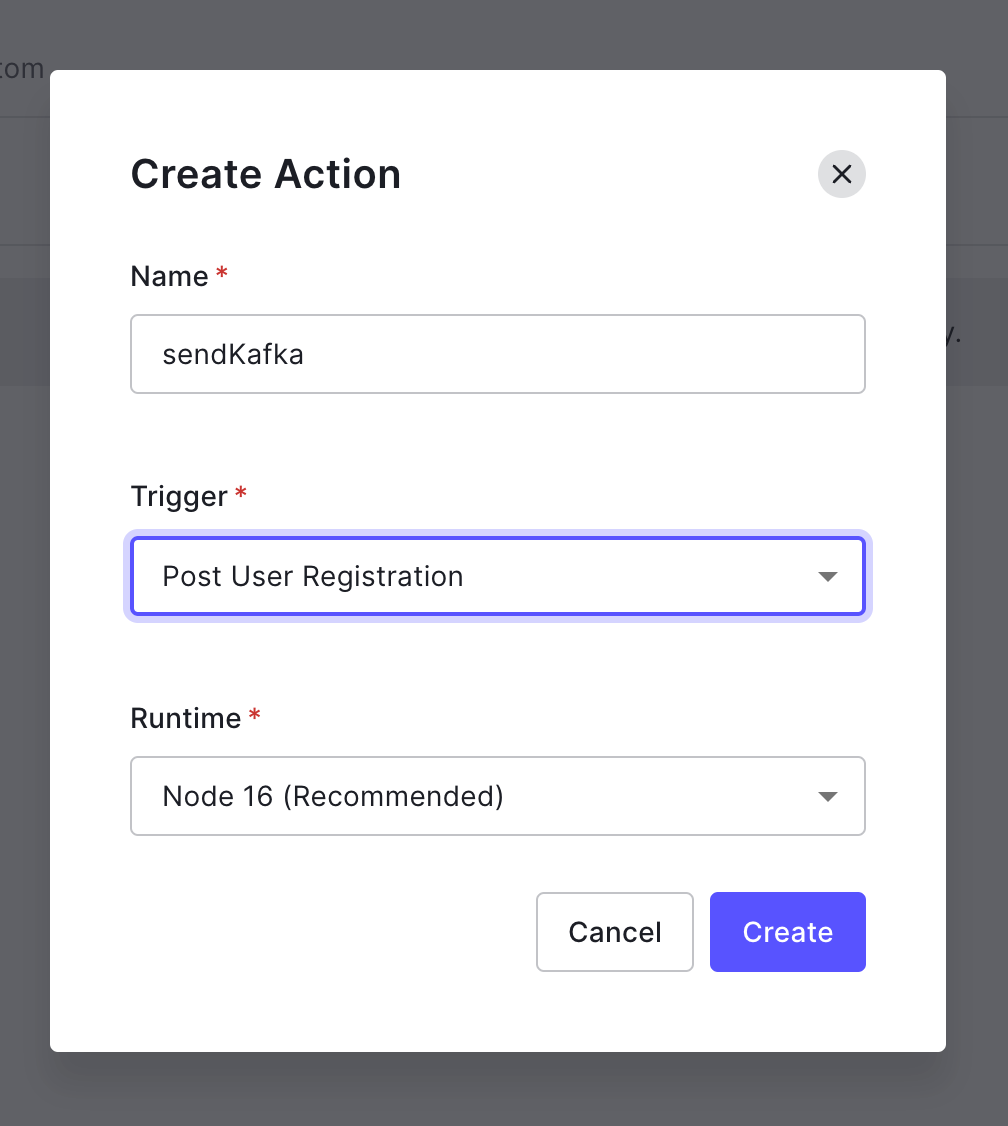
Provide a name for the Action (I used sendKafka).
Since the goal is to send a message to Kafka after a user has signed up for an account, the action should be triggered by the Post User Registration event. Select Post User Registration from the Trigger menu, then click the Create button.
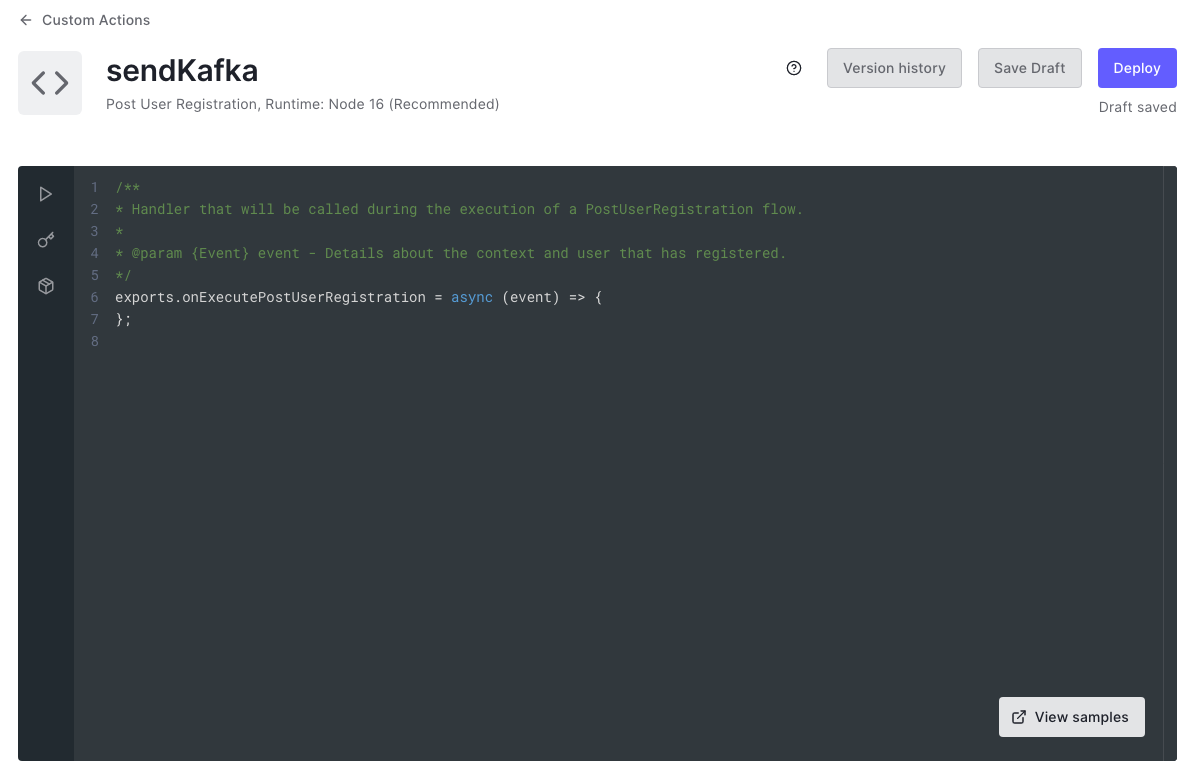
You should now see the code editor:
Define the Action’s secrets
To send messages to the Kafka cluster, the Action needs the UPSTASH_KAFKA_REST_URL, UPSTASH_KAFKA_REST_USERNAME and UPSTASH_KAFKA_REST_PASSWORD values for your Kafka cluster, which you can copy from the Upstash console. You could simply use these values to define constants, but it’s more secure to keep them hidden. You can do this with Actions’ Secrets feature, which lets you securely store sensitive values and access them as properties of the event.secrets object.
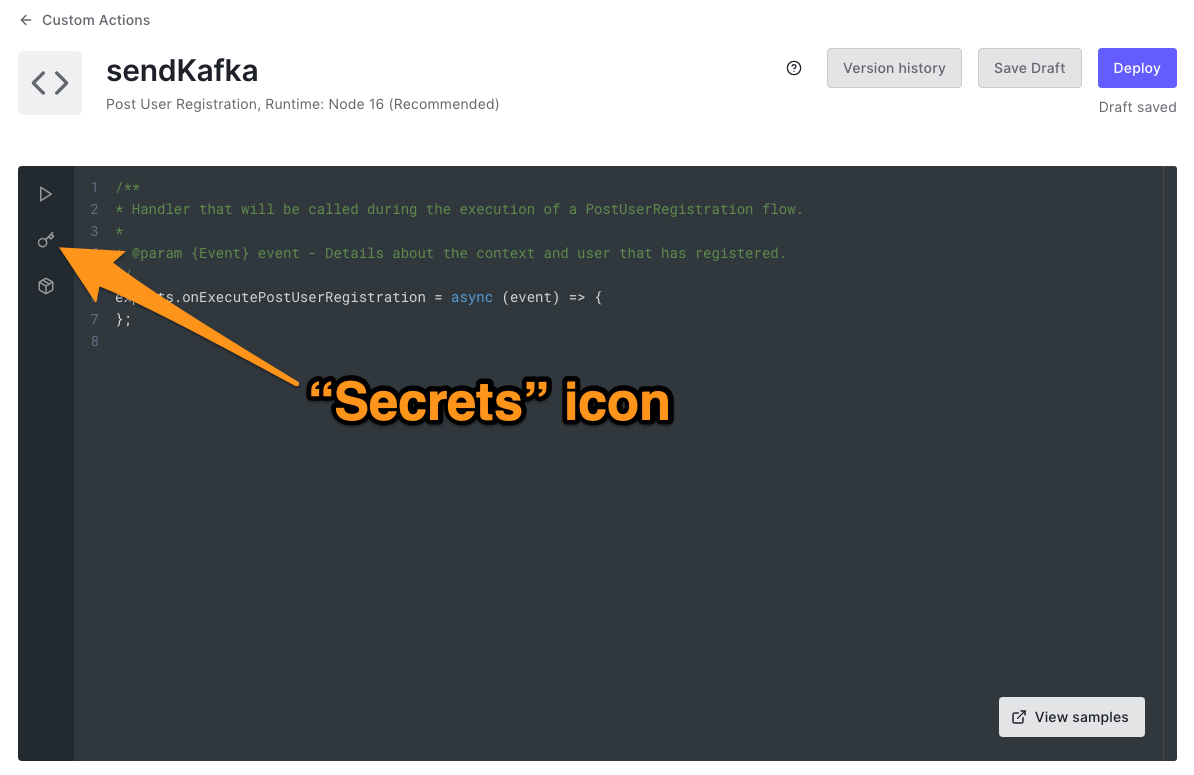
Let’s start with the first value, UPSTASH_KAFKA_REST_USERNAME. Switch to the browser tab or window with the Upstash console and click on the icon beside UPSTASH_KAFKA_REST_USERNAME to copy its value. Then switch back to the Action code editor and click the “Secrets” icon:
A new column with the title Secrets will appear in the code editor:
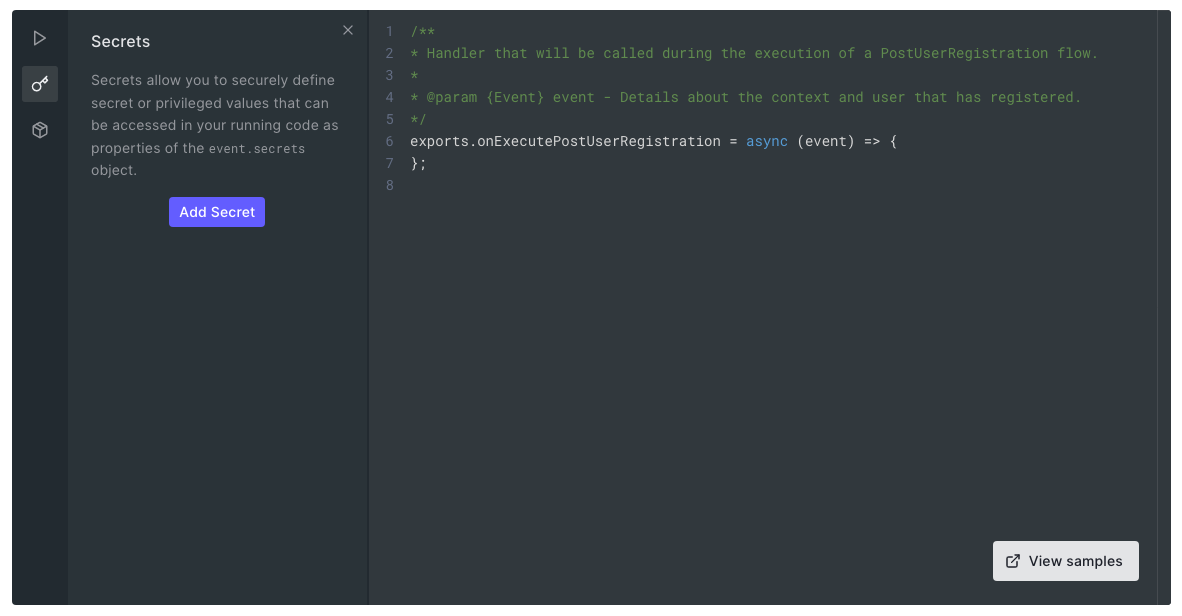
Click the Add Secret button. A pop-up will appear, and you will be able to define your first secret value:
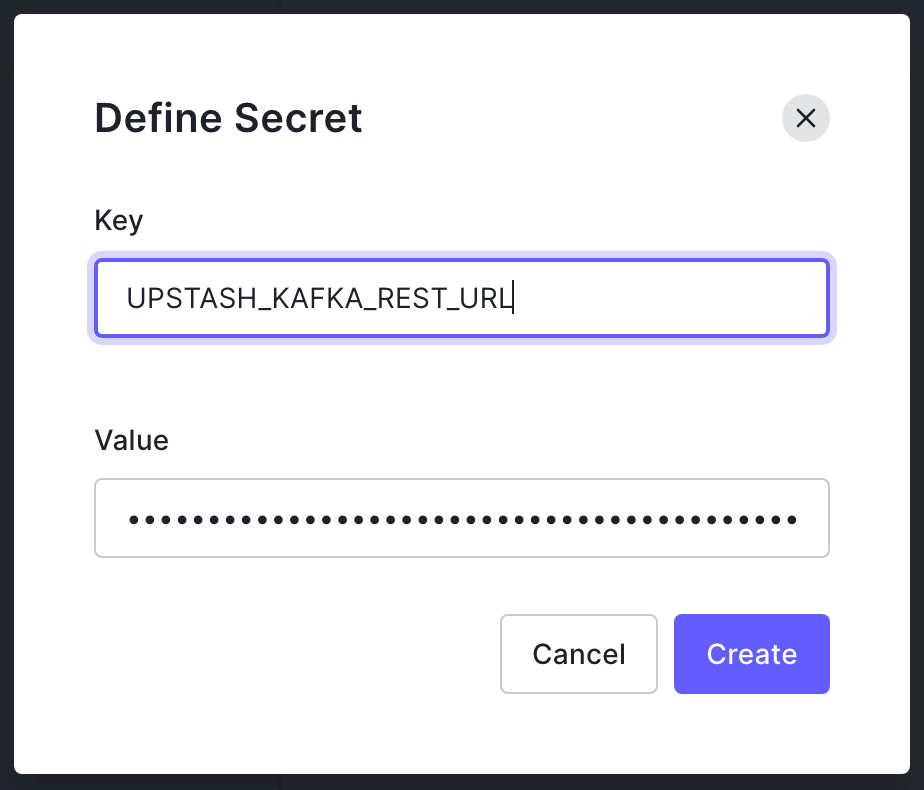
Enter UPSTASH_KAFKA_REST_URL into the Key field, paste the value you copied from the Upstash console into the Value field, and click the Create button. This will create a property named event.secrets.UPSTASH_KAFKA_REST_URL, which you will be able to use in your Action.
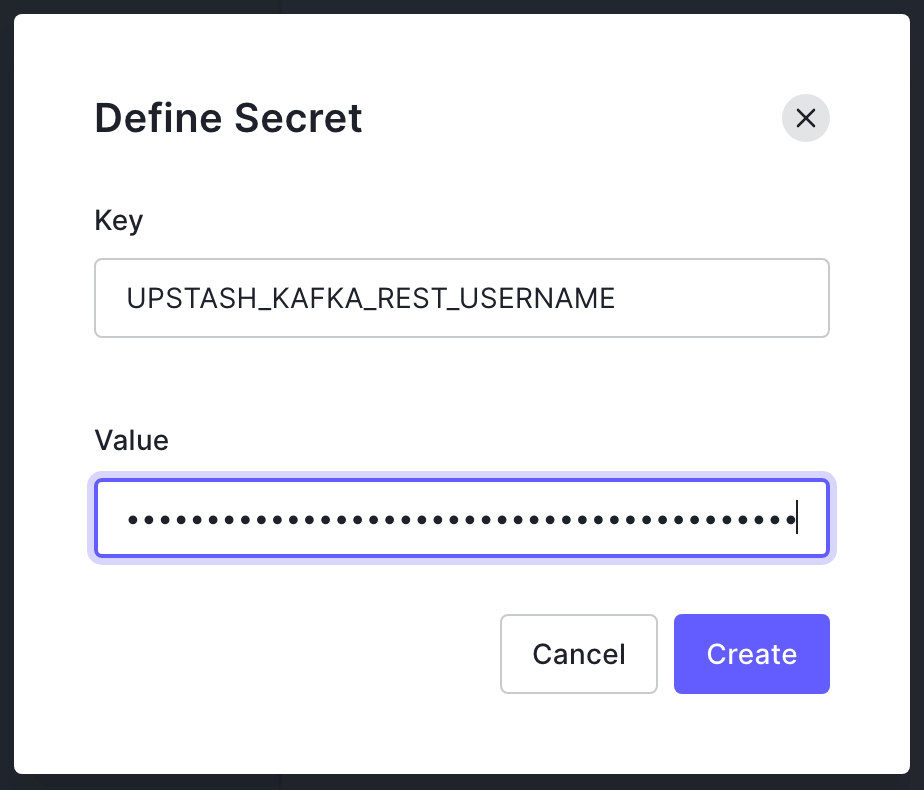
Click the Add Secret button again. This time, define the UPSTASH_KAFKA_REST_USERNAME secret by copying its value from Upstash and filling out the Define Secret form as shown below:
Click the Create button, then click the Add Secret button one more time. Define the UPSTASH_KAFKA_REST_PASSWORD secret by copying its value from Upstash and filling out the Define Secret form as shown below…

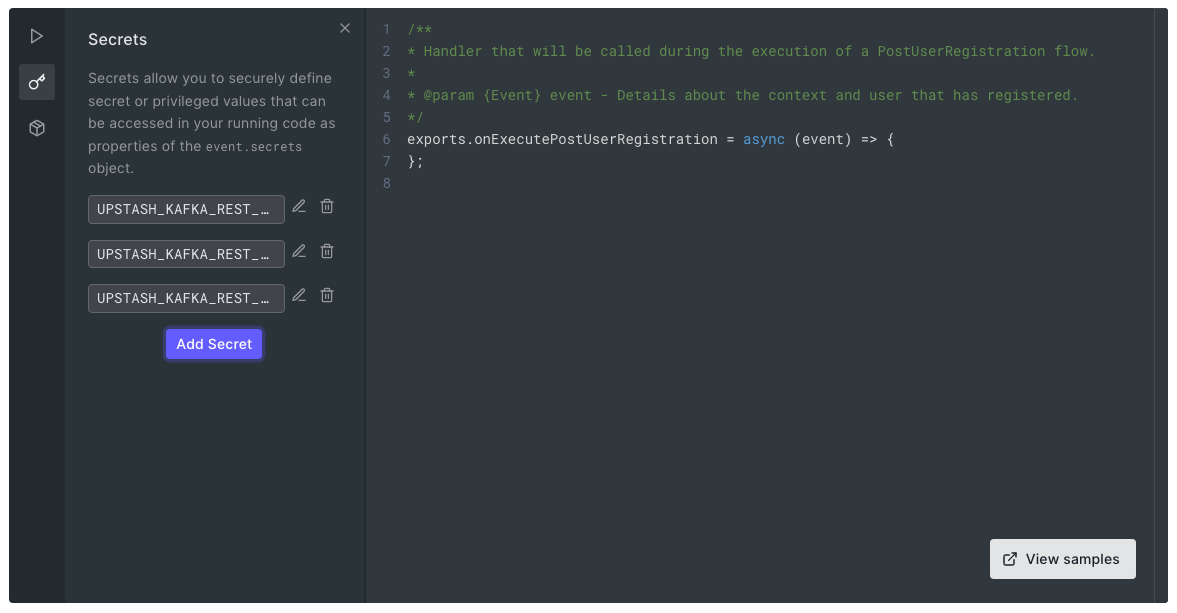
…then click the Create button. The Secrets column should now contain a list of three secrets:
Add the node-fetch module to the Action
You can import any npm module into an Action, which makes them very powerful. This action uses the node-fetch module to send events to the Kafka cluster, so you’ll need to add it as a dependency. You can do this with the Modules feature.
Click the “Modules” icon, which is just below the “Secrets” icon:
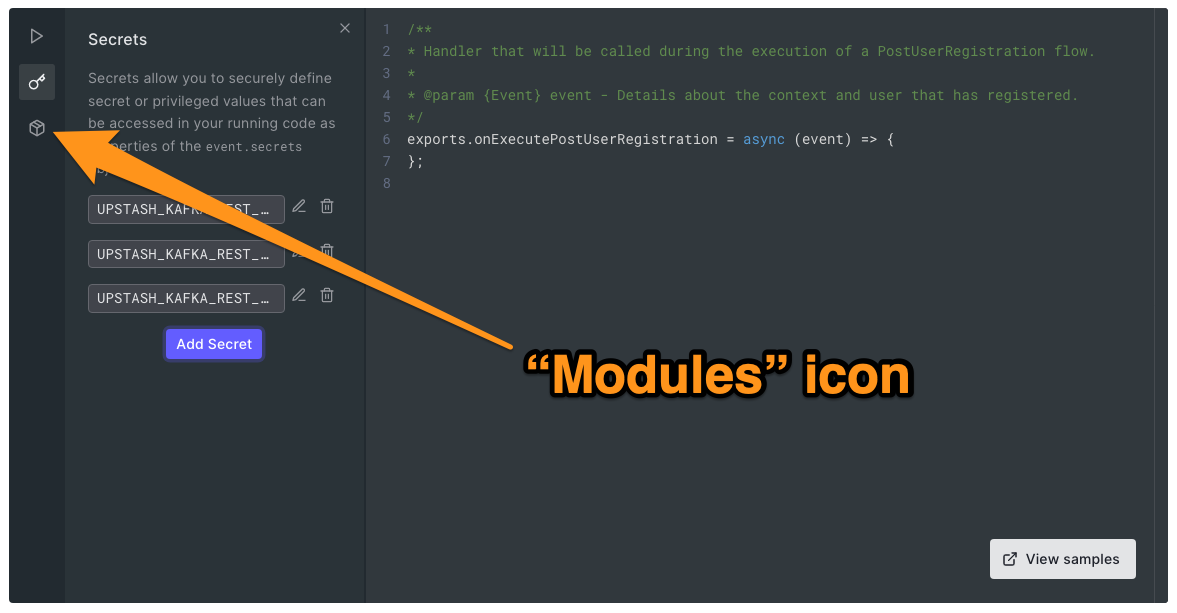
A new column with the title Modules will appear in the code editor:
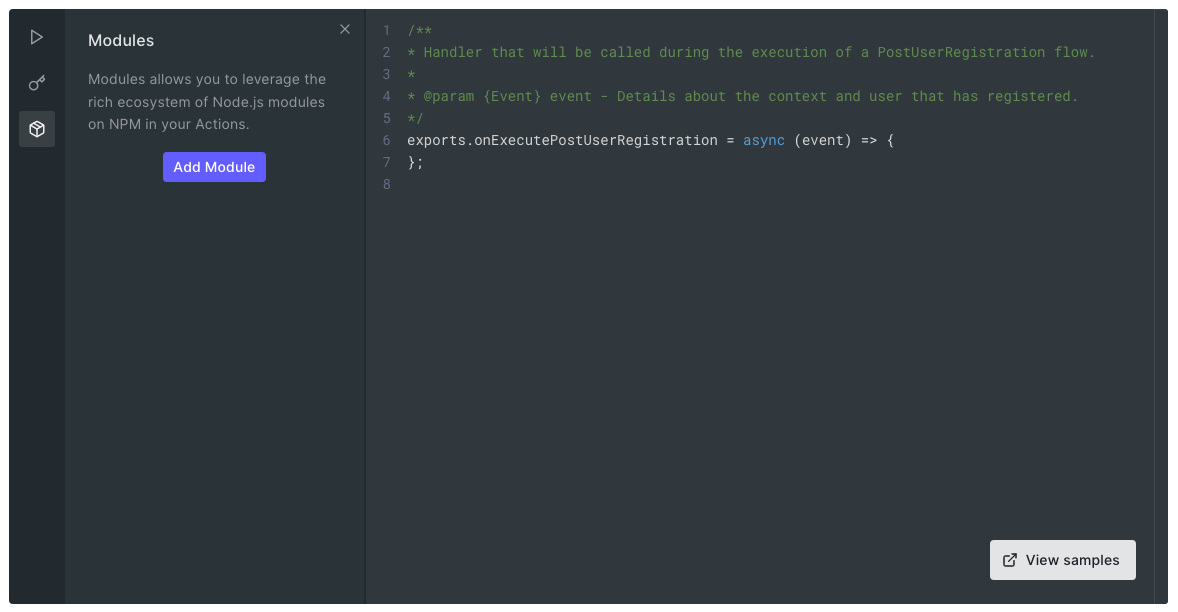
Click the Add Module button. A pop-up will appear:
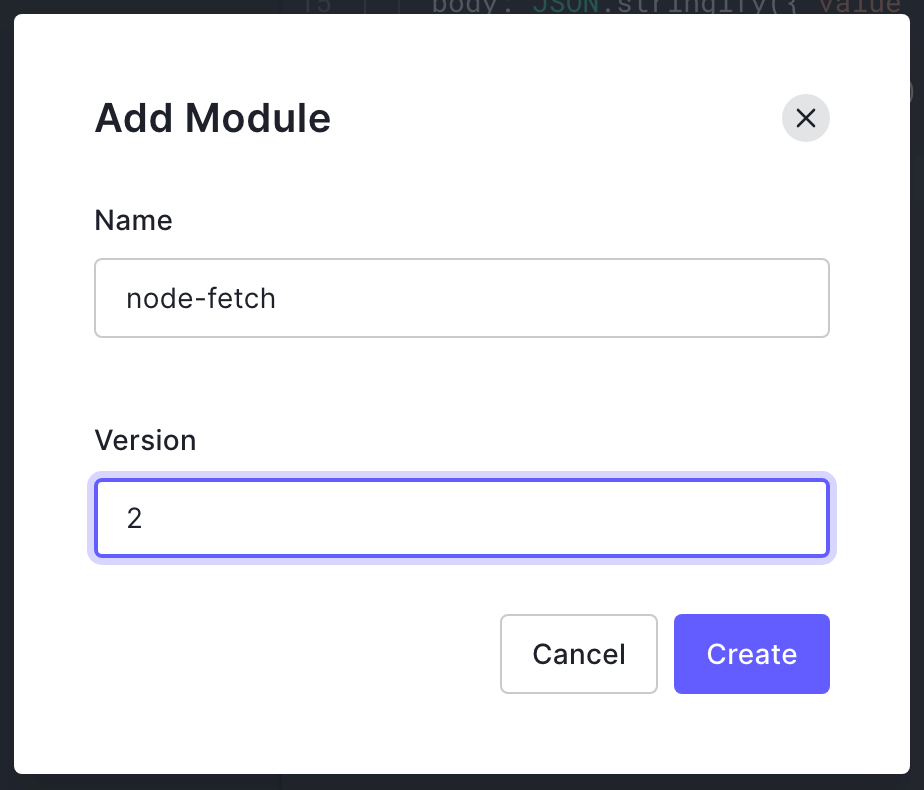
Enter node-fetch into the Name field and 2 into the Version field. Do not select the latest version (3 at the time of writing), as it does not allow require() to import it.
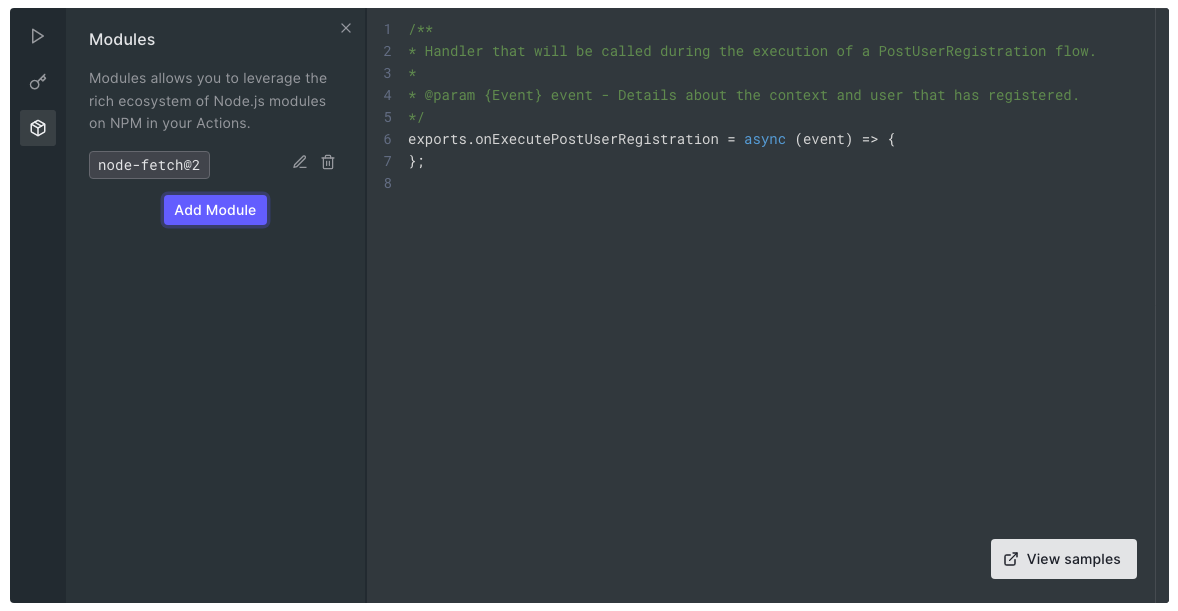
Click the Create button. The Modules column should now list the node-fetch module:
Write the Action
Now that you have provided the prerequisites, it’s time to write the Action!
Paste the code below into the editor:
const fetch = require('node-fetch');

exports.onExecutePostUserRegistration = async (event) => {
  const address = event.secrets.UPSTASH_KAFKA_REST_URL
  const user = event.secrets.UPSTASH_KAFKA_REST_USERNAME
  const pass = event.secrets.UPSTASH_KAFKA_REST_PASSWORD
  const auth = Buffer.from(`${user}:${pass}`).toString('base64')
  const topic = 'user-events-topic'

  const userData = JSON.stringify(event.user);
  const x = await fetch(`${address}/produce/${topic}`, {
    method: 'POST',
    headers: {'Authorization': `Basic ${auth}`},
    body: JSON.stringify({"value" : userData})
  })
  const response = await x.json();
  console.log(response)
};
This Action uses the onExecutePostUserRegistration() function provided by Auth0. The function is called when the user has finished signing up for an account. It takes a single parameter, event, whose user property is an object containing information about the newly-registered user, such as their email address and user ID.
This code retrieves the secret values stored in the Action’s Secrets and uses them to connect to the Kafka cluster. It takes the user object, converts it into a raw JSON string, and sends it to the topic named user-events-topic in the Kafka cluster. The user data to the Kafka topic using the Upstash REST API.
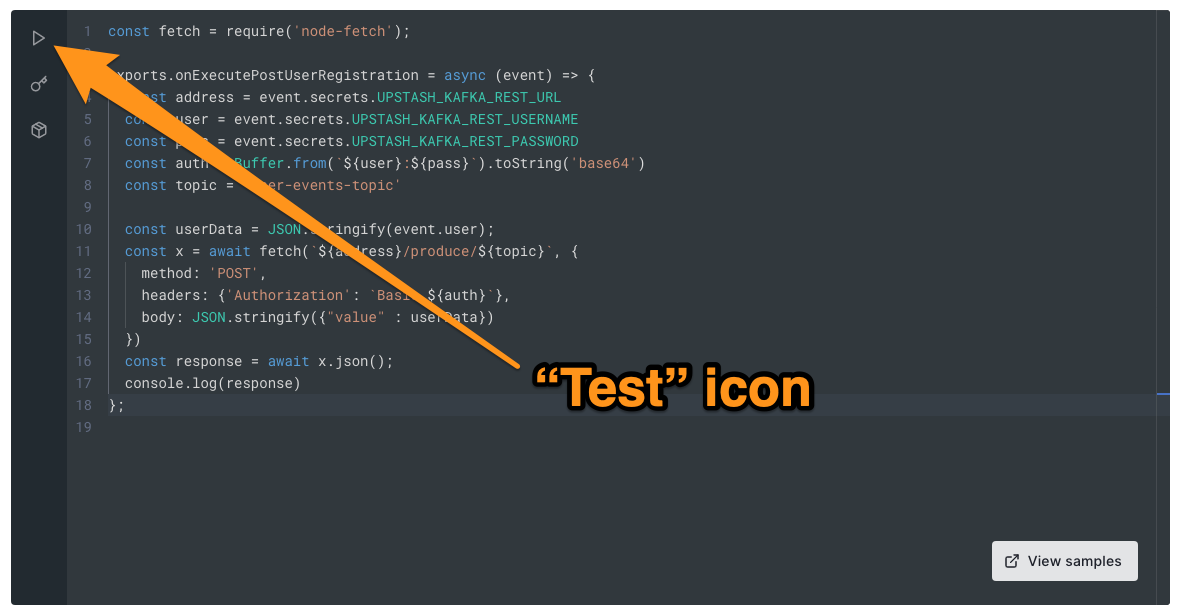
Test the Action
Now, we can run the function by clicking on the Test icon on the editor’s sidebar:
A new column with the title Test will appear in the code editor:
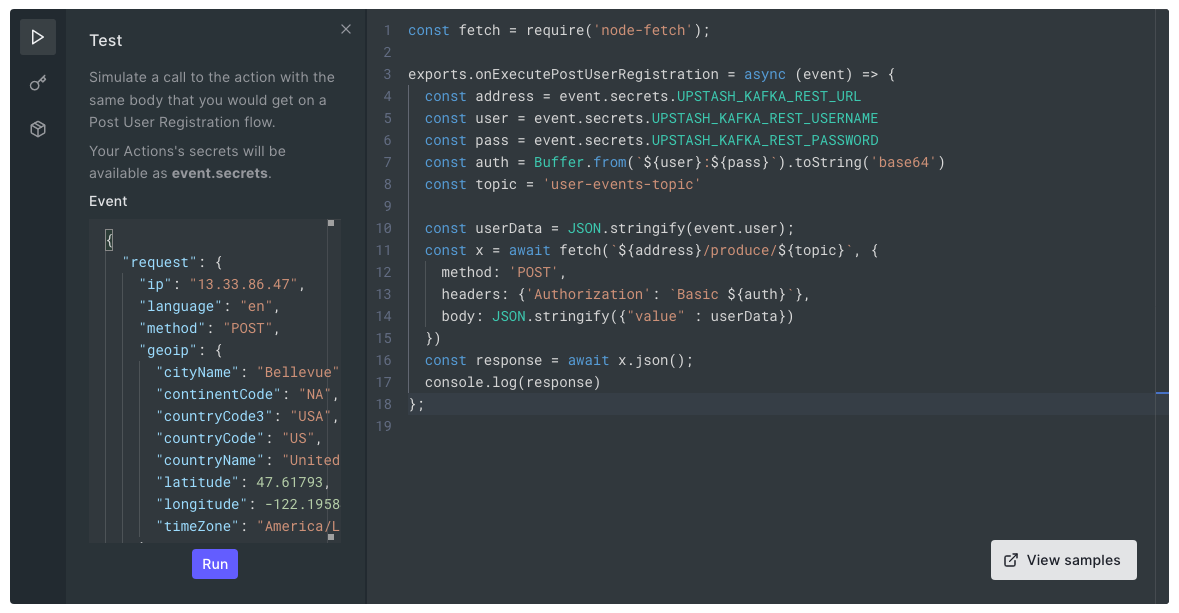
Click the Run button to run the test. A Test Results pane will appear in the lower section of the code editor:
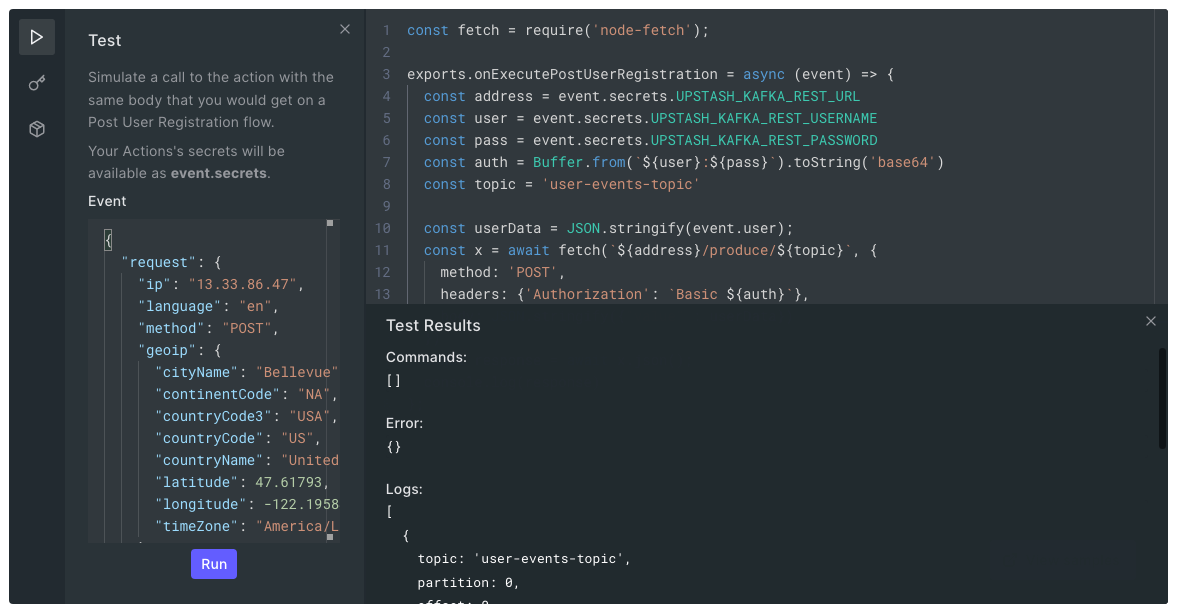
You should see something similar to the output below in the Logs section:
Logs:
[
  {
    topic: 'user-events-topic',
    partition: 0,
    offset: 317,
    timestamp: 1641950606804
  }
]
You now have a working Action. It’s time to deploy it!
Deploy the Action
Click the Deploy button located near the upper right corner of the page. This saves your Action and makes it the current version in your library,
Now that your Action is in the Library, you need to add it to the Post User Registration flow. Navigate to the flow by selecting Actions from the left side menu, then Flows →Post User Registration. You’ll see this:
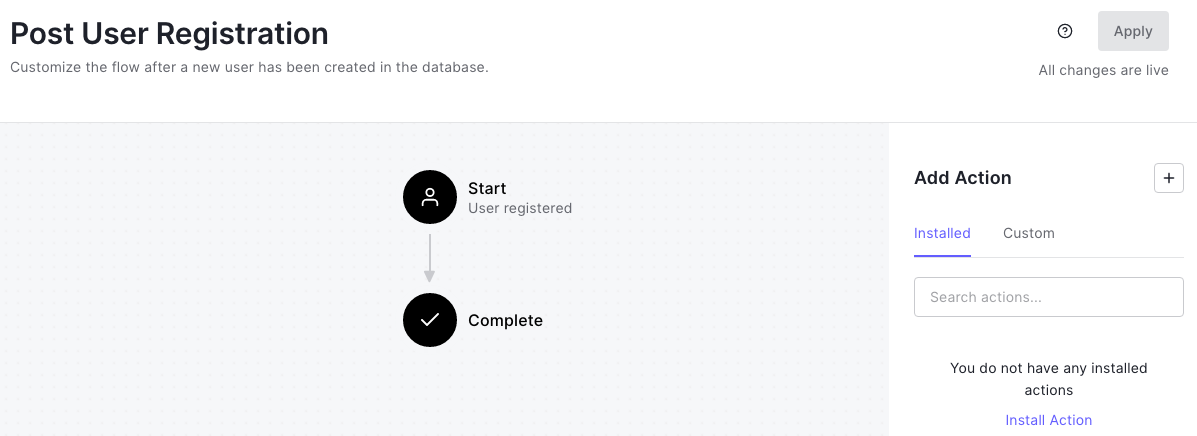
In the Add Action section on the right side of the page, select the Custom tab to see the Actions you have created:
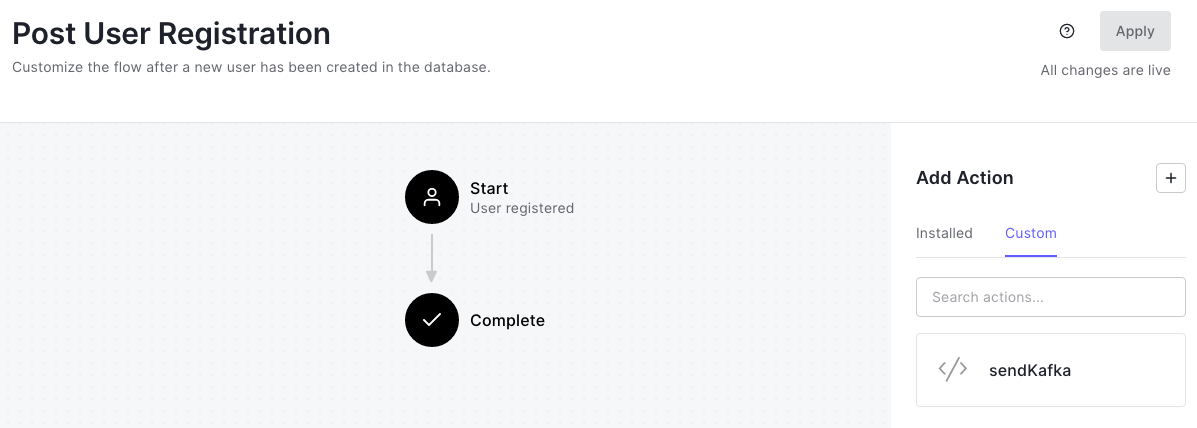
You should see the sendKafka action. Drag and drop it to the area between the Start and Complete nodes in the flow as shown below:

Now that you have added your Action to the flow apply the change by clicking the Apply button near the upper right corner of the page.
Test the Action
Now that the Action is deployed, it’s time to test it!
Create a new user
The Action you just created runs whenever a new user signs up, so one way to test it is to create a new user using the Auth0 dashboard.
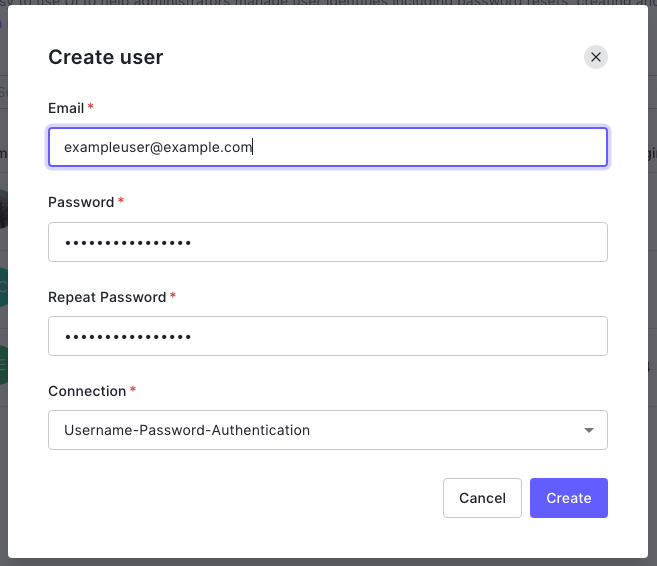
In the Auth0 dashboard’s left menu, select User Management → Users → Create User and create a new user:
After creating the user, switch to the Upstash browser tab or window, select the Topics tab, and then select the user-events-topic topic:
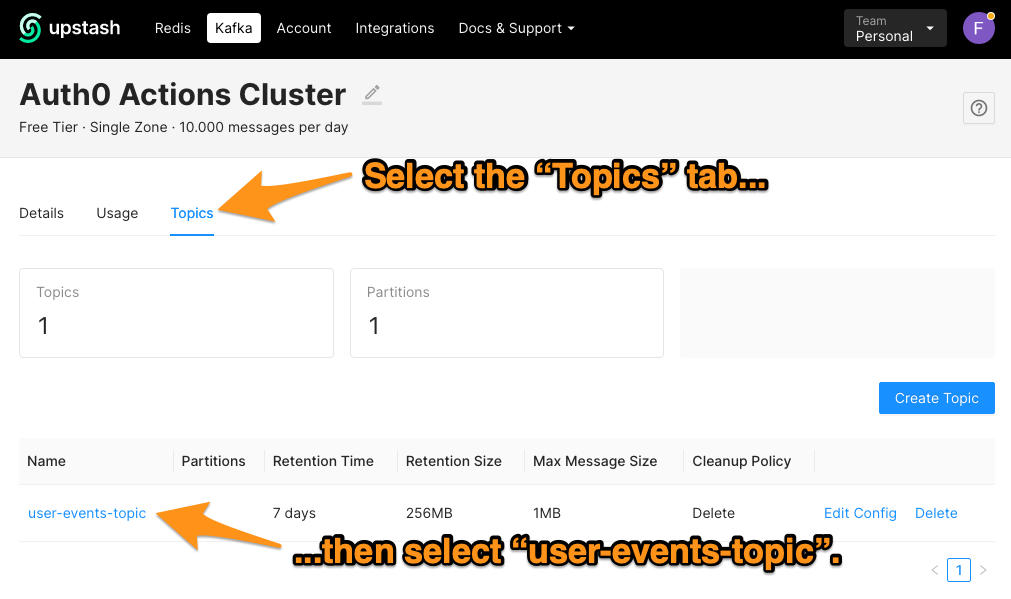
This will display the statistics for your Kafka topic:
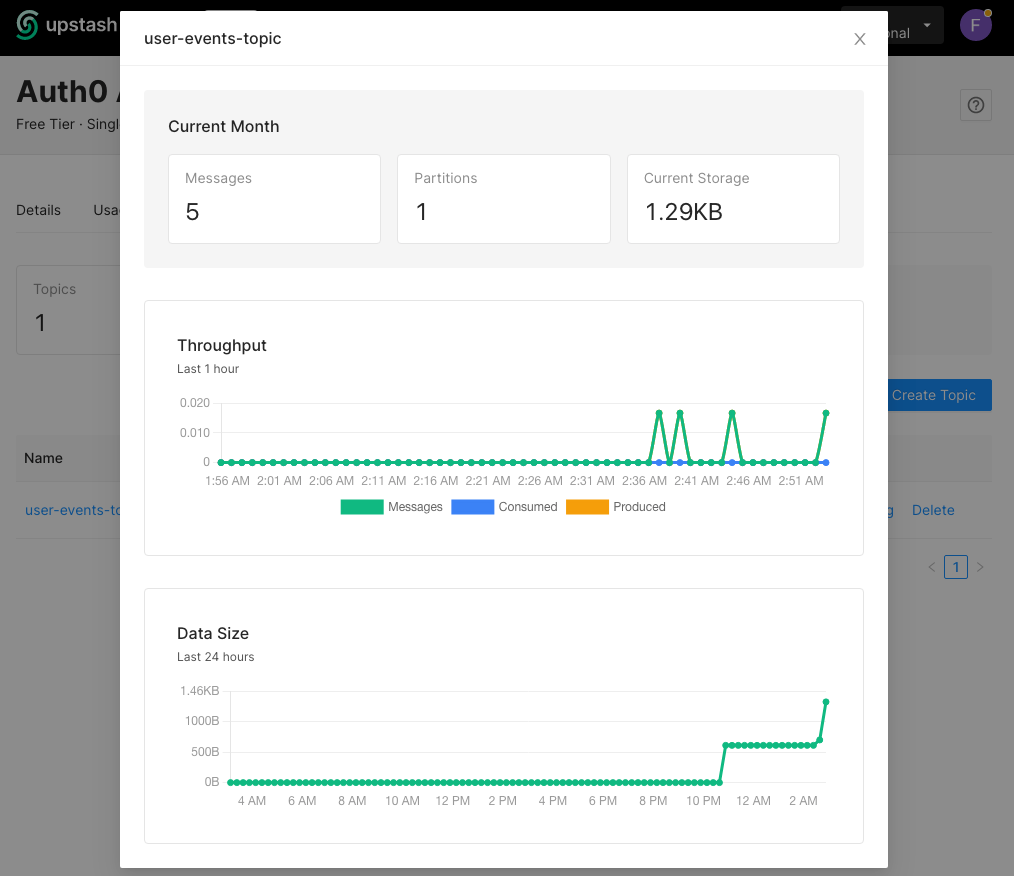
Each time you create a new user, a new message is pushed to the Kafka topic, increasing its count —which appears under Messages —by one.
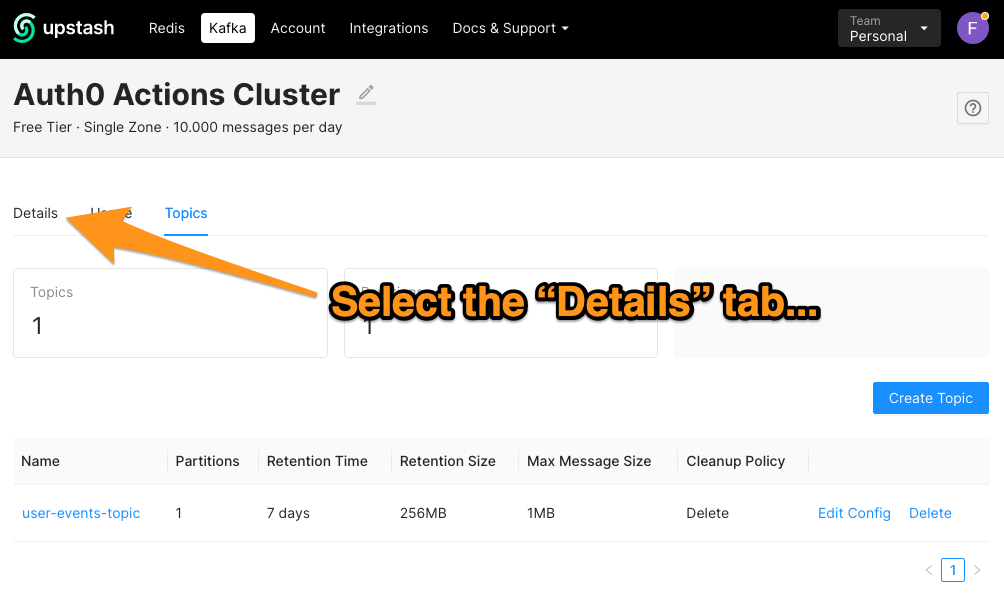
You can check the Kafka topic by using the Consumer curl script in the REST API section under the Details tab:
Run the curl script in your command line console. The result should look something like this:
[ {
  "topic" : "user-events-topic",
  "partition" : 0,
  "offset" : 316,
  "timestamp" : 1641948554609,
  "key" : "",
  "value" : "{"email":"exampleuser@example.com","tenant":"test-upstash","user_id":"auth0|61de2511fd334200aq221d","app_metadata":{},"user_metadata":{},"email_verified":false,"phone_verified":false}",
  "headers" : [ ]
} ]%
Conclusion
Auth0 Actions enable developers to inject custom logic into the user lifecycle, adding additional behavior and features to the login process. In this article, we used Auth0 Actions to produce events for Kafka triggered by new user registrations. Once stored in Kafka, there are endless possibilities for how you can leverage the data.
About the author

Enes Akar
CEO at Upstash