
TL;DR: In this article, we are going to learn what tools we should take advantage of when developing NPM packages. We will start from scratch and create a GitHub Repository to host our package, then we will look into interesting and important topics. For example, we will talk about IDEs, we will configure ESLint in our project, we will publish the package on NPM and into the registry, and we will even integrate a continuous integration tool. The code that gave life to this article can be found in this GitHub repository.
What NPM Package Will We Build
After following all the steps shown in this article, we will have our own package published in the NPM package registry. The features that this package will support (and how to build them) are not the focus of this article. There are plenty of great tutorials out there that can teach us how to develop in Node.js. The focus here are the processes and the tools that we can use to build great NPM packages.
Nevertheless, to give a heads up, we are going to build and publish an NPM package that masks raw digits into US phones. For example, if we pass 1234567890 to the package, it will return (543) 126-0987.
The following list gives an overview of the topics that we are going to cover in this article:
Git and GitHub
  > Creating the GitHub Repository
  > Cloning the GitHub Repository
  > Ignoring Files with Git

IDEs (Integrated Development Environments)

NPM Package Development
  > NPM Init
  > Semantic Versioning
  > EditorConfig
  > ES6+: Developing with Modern JavaScript
  > Linting NPM Packages
  > Automated Tests
  > Coding the NPM Package
  > Test Coverage
  > Publishing the NPM Package
  > Continuous Integration

Conclusion
Installing Node.js
The first two prerequisites are Node.js and NPM (but that comes with Node.js). We could use the official Node.js download webpage to install these dependencies. However, the best way to install Node.js in a development machine is not through the official URL. There is a package called NVM (Node Version Manager) that provides a simple bash script to manage multiple active node.js versions. It's the best option because, with just one command, we can switch Node.js and NPM versions.
Git and GitHub
Besides Node.js and NPM, we also need Git and GitHub. Why are we going to use them? Because Git is the best, most advanced, and most used version control system and GitHub is the most used Git platform. The best open source projects in the world are hosted in this platform. For example, Node.js source code is versioned with Git on GitHub.
Note that this article won't lecture about Git. If you are not familiar with Git, you will still be able to follow this article. However, every developer should learn how to properly use Git and GitHub. So, if needed, stop reading and go learn Git (and install it too, of course :D). You can come back later.
Creating the GitHub Repository
Great, we already decided where we will keep our source code safe. It's time to create the repository to start working on it. If we head to the Create a new repository web page on GitHub, we will see a form that asks for three things: repository name, description, and visibility. As we are building a module that handles masks, let's answer these questions as follows:
- Repository name: masks-js
- Description: A NPM package that exports functions to mask values.
- Visibility: Public
After that, GitHub gives us options to initialize the repository with a README file, to add a .gitignore file, and to add a license to our module. We will use all three options as follows:
- Create README: Yes, let's check this box.
- Add .gitignore: Why not? Less typing later. Let's choose
Nodein this combo. - Add a license: Again, less work later. Let's set this combo to
MIT License.
Done! We can hit the Create repository button to finish the process.
Cloning the GitHub Repository
After creating the repository (which should be instantaneous), GitHub will redirect us to our repository's webpage. There, we can find a button called Clone or download that gives a shortcut to the URL that we will need. Let's copy this URL and open a terminal. On this terminal, let's choose an appropriate directory to host the root directory of our project (e.g. ~/git), and then let's clone the repository.
The code snippet below shows the commands that have to be used to clone the repository:
# choosing a directory to clone our repo
cd ~/git

# using git to clone
git clone git@github.com:brunokrebs/masks-js.git

# moving cursor to project root
cd masks-js
The last command will put our terminal in the project root. There, if we list the existing content, we will see four items:
- A directory called
.gitthat is used by Git to control the version of our code locally. Most probably, we will never touch this directory and its content manually. - A file called
.gitignorewhere we keep entries that identify items that we do not want Git to version. For example, in the near future, we will make Git ignore files generated by our IDE. - A file called
LICENSE. We don't have to touch this file, it contains a predefined content granting the MIT License to our code/package. - A file called
README.mdthat contains just the name of our package (masks-js) and its description.
Ignoring Files on Git and NPM
During the next sections, we will create some artifacts that we don't want to send to GitHub or to NPM. For example, our IDE will add some configuration files to our project root that we want to Git to ignore. Another thing that we want Git to ignore is the ./lib directory that we will create when publishing our package. This directory will only be shared on the NPM package itself (i.e. for developers downloading the package through NPM). Therefore, let's update .gitignore as follows:
# leave everything else untouched
.idea/
.vscode/
lib/
As we don't want NPM to ignore ./lib, let's create the .npmignore file. In this file we will add the following configuration:
.nyc_output/
coverage/
node_modules/
.idea/
.vscode/
This will make NPM ignore these five folders, but not ./lib.
Note that we are just removing folders that are not important to developers that want to use our package.
Let's commit and push these changes to GitHub:
git add .gitignore .npmignore
git commit -m 'making Git and NPM ignore some files'
git push origin master
IDEs (Integrated Development Environments)
Developing good software, arguably, passes through a good IDE. Among other things, IDEs can help us refactor our code, be more productive (mainly if we know their shortcuts), and debug our code. They usually help us by pointing out possible problems before compiling and/or running our code either. Therefore, this is a topic that cannot be put aside.
On the Node.js/NPM environment, there is a good number of IDEs available. A few of them are paid and lot are free. However, in this author's opinion, there are only two IDEs that are really relevant: WebStorm and Visual Studio Code.
WebStorm: This is a full-fledged IDE that provides great tools and has great support to everything related to JavaScript (e.g. TypeScript, HTML, CSS, SCSS, Angular, Git, etc). If it does not support some feature by default, it probably does so through plugins. The biggest disadvantage of this IDE is that it's paid. However, WebStorm is so good at what it does that it's worth the price.
Visual Studio Code: This is another full-fledged IDE. It also comes with great support for Node.js and related technologies, just like WebStorm does. This IDE, in contrast to WebStorm, is free and open source. If you are wondering the difference between them, there are a few resources out there that compare both. For example, there is this article on Medium and this discussing on Reddit.
Other options, although famous, cannot be really considered IDEs. That is, they can be considered IDEs if they are correctly configured with a bunch of plugins. However, why waste time on these kind of configuration when we can choose a good IDE that is ready to help us? If you are still interested on seeing what other "IDEs" are available, there are resources out there that show more options and their differences.
What is important in this section is that we understand that we do need an IDE and choose one. This will help us a lot during the development lifecycle of our package.
NPM Package Development
Now that we have chosen our IDE, let's open our project and start configuring it. Throughout the next sections, we are going to create our project structure and configure tools that will help us produce high-quality code.
NPM Init
First things first. As our goal is to create and publish a NPM package, we need to initialize our project as one. Luckily, this process is straightforward. NPM, through its CLI (Command Line Interface), provides two great ways to configure a project as a NPM package. The first one, triggered by npm init, will ask a bunch of questions and produce the package.json file for us. The second one, triggered by npm init -y, will not ask any question and produce the package.json file with default values.
We will stick with the second option, npm init -y, to get our file as fast as possible. Then, we will edit the package.json content manually to look like this:
{
  "name": "masks-js",
  "version": "0.0.1",
  "description": "A NPM package that exports functions to mask values.",
  "main": "build/index.js",
  "scripts": {
    "test": "echo "Error: no test specified" && exit 1"
  },
  "repository": {
    "type": "git",
    "url": "git+https://github.com/brunokrebs/masks-js.git"
  },
  "keywords": [
    "npm",
    "node",
    "masks",
    "javascript"
  ],
  "author": "Bruno Krebs",
  "license": "MIT",
  "bugs": {
    "url": "https://github.com/brunokrebs/masks-js/issues"
  },
  "homepage": "https://github.com/brunokrebs/masks-js#readme"
}
Important: the JSON snippet above contains three URLs that point to
https://github.com/brunokrebs/masks-js. We need to replace them with the URL of our repository on GitHub.
Two properties in the file above may bring our attention. The main property now points to build/index.js and the version property labels our code as being on version 0.0.1. Let's not worry about them now, we will discuss about these properties in the following sections.
Let's commit and push these changes to GitHub:
git add package.json
git commit -m 'initializing project as a NPM package'
git push origin master
Semantic Versioning
In this section, we are not going to change anything in our project. The focus here is to talk about how to label new releases of our package. In the NPM and Node.js landscape, the most used strategy is by far Semantic Versioning. What makes this strategy so special is that it has a well-defined schema that makes it easy to identify what versions are interoperable.
Semantic Versioning, also known as SemVer, uses the following schema: MAJOR.MINOR.PATCH. As we can see, any version is divided into three parts:
MAJOR: A number that we increment when we make incompatible API changes.MINOR: A number that we increment when we add features in a backwards-compatible manner.PATCH: A number that we increment when we make small bug fixes.
That is, if we have a problem with our code and fix it simply by changing an if statement, we have to increment the PATCH part: 1.0.0 => 1.0.1. However, if we need to add a new function (without changing anything else) to handle this new scenario, then we increment the MINOR part: 1.0.0 => 1.1.0. Lastly, if this bug is so big that requires a whole lot of refactoring and API changes, then we increment the MAJOR part: 1.0.0 => 2.0.0.
EditorConfig
EditorConfig is a small configuration file that we put in the project root to define how IDEs and text editors must format our files. Many IDEs support EditorConfig out of the box (including WebStorm and Visual Studio Code). The ones that don't, usually have a plugin that can be installed.
At the time of writing, EditorConfig contains only a small (but useful) set of properties. We will use most of them, but two are worth mentioning:
indent_style: Through this property, we define if we want our code to be indented with tabs or spaces.charset: We use this property to state what charset (e.g. UTF-8) we want our files encoded into.
To set up EditorConfig in our project, we need to create a file called .editorconfig in the project root. On it, we define how we want IDEs to handle our files:
# Editor configuration, see http://editorconfig.org
root = true

[*]
charset = utf-8
indent_style = space
indent_size = 2
insert_final_newline = true
trim_trailing_whitespace = true
Note: EditorConfig can handle multiple configuration blocks. In the example above, we added a single block defining that all files ([*]) must be encoded in UTF-8, indented with spaces, and so on. However, we could have defined that we wanted XML files ([*.xml]) to be indented with tabs, for example.
Although subtle, EditorConfig is an important step into producing high quality code. More often than not, more than one developer will work on a software, be it a NPM package or anything else. Having EditorConfig in place will minimize the chances of a developer messing with our code style and the encoding of our files.
Let's commit and push .editorconfig to GitHub:
git add .editorconfig
git commit -m 'adding .editorconfig'
git push origin master
ES6+: Developing with Modern JavaScript
JavaScript, as everybody knows, has gained mass adoption as the primary programming language over the last few years. Node.js was primarily responsible for this adoption, and brought with it many backend developers. This triggered a huge evolution of the language. These evolutions, although great, are not fully supported by every platform. There are many JavaScript engines (and many different versions of these engines) in the market ready to run code, but most of them do not support the latest JavaScript features.
This rich environment created one big challenge for the community. How do we support different engines and their versions while using JavaScript most recent features? One possible answer to this question is Babel. Babel, as stated by their official website, is a JavaScript compiler that allows developers to use next generation JavaScript today.
Note that Babel is one alternative. There are others, like TypeScript, for example.
Using Babel is straightforward. We just have to install this library as a development dependency and create a file called .babelrc to hold its configuration:
npm install --save-dev babel-cli babel-preset-env

echo '{
  "presets": ["env"]
}' >> .babelrc
With this file in place, we can configure a NPM script to make Babel convert modern JavaScript in code supported by most environments. To do that, let's open the ./package.json file and add to it a script called build:
{
  ...
  "scripts": {
    "build": "babel ./src -d ./lib",
    ...
  }
  ...
}
When we issue npm run build, Babel will take the source code found in the ./src directory (which can be written in modern JavaScript) and transform it to ECMAScript 5 (the most supported version of JavaScript). To see this in action, let's create the aforementioned ./src directory in the project root and add a script called index.js into it. To this script, let's add the following code:
function sayHiTo(name) {
  return `Hi, ${name}`;
}

const message = sayHiTo('Bruno');

console.log(message);
Although short, this script contains code that is not supported by ECMAScript 5. For example, there is no const in this version, nor it accepts Hi, ${name} as a string. Trying to run this code into an old engine would result in error. Therefore, let's use Babel to compile it:
npm run build
After asking NPM to run the build script, we will be able to see that Babel created the ./lib directory with index.js in it. This script, instead of our code above, contains the following:
'use strict';

function sayHiTo(name) {
  return 'Hi, ' + name;
}

var message = sayHiTo('Bruno');

console.log(message);
Now we do have a code that ECMAScript 5 engines can read and run. Now we can take advantage of the latest JavaScript features.
Before continuing, let's commit and push the changes to GitHub:
git add .babelrc package-lock.json package.json src/index.js
git commit -m 'supporting ES6+ syntax'
git push origin master
Linting NPM Packages
Another important tool to have around when developing software is a linting tool. Lint is the process of statically analyzing code for common errors. Linting tools, therefore, are libraries (tools) that are specialized in this task. In the JavaScript world, there are at least three popular choices: ESLint, JSHint, and JSLint. We can use any of these three libraries to lint our JavaScript code, but we have to choose one.
There are many strategies that we can follow to decide which tool we should use: from a simple random decision to a decision based on a thorough analysis. Though, to speed things up, let's take advantage of a fast (but still good) strategy: let's base our decision into data. The following list shows how many times each package was downloaded from NPM on Nov/2017, how many stars they have on GitHub, and what are their search volume in the US:
- ESLint was downloaded 10 million times from NPM, has 9.6 thousand stars on GitHub, and is searched around 1300 times per month in the US.
- JSLint was downloaded 94 thousand times from NPM, has 7.5 thousand stars on GitHub, and is searched around 750 times per month in the US.
- JSHint was downloaded 2 million times from NPM, has 3 thousand stars on GitHub, and is searched around 750 times per month in the US.
Following the strategy to base our decision on data results, without doubt, into choosing ESLint as the winner. The numbers don't lie, ESLint is the most popular tool in the JavaScript landscape. So let's configure it in our project.
Installing and configuring ESLint is easy. We have to instruct NPM to install it for us, then we can use the --init option provided by ESLint to generate a configuration file:
# saving ESLint as a development dependency
npm i -D eslint

# initializing the configuration file
./node_modules/.bin/eslint --init
The last command will trigger a series of questions. Let's answer them as follows:
- How would you like to configure ESLint? Use a popular style guide
- Which style guide do you want to follow? Airbnb
- Do you use React? No
- What format do you want your config file to be in? JSON
This will generate a small file called .eslintrc.json with the following content:
{
    "extends": "airbnb-base"
}
What is nice about ESLint is that it also enables us to adhere to popular style guides (in this case the Airbnb JavaScript Style Guide). There are other popular styles available to JavaScript developers and we could even create our own. However, to play safe, we will stick to an existing and popular choice.
Great, sounds good to have a tool that help us avoid common mistakes and keep our code style consistent, but how do we use it? It's simple, we configure it in our build process and we make our IDE aware of it. This way we get alerts while using the IDE to develop and we guarantee that no developer, unaware of ESLint, generates a new release with inconsistencies.
To add ESLint to our build process, we can create a new script that executes ESLint and make it run in the build script:
{
  ...
  "scripts": {
    "build": "npm run lint && babel ./src -d ./lib",
    "lint": "eslint ./src",
    ...
  },
  ...
}
This way, when we execute the build script, the process will abort before starting Babel if ESLint finds issues in our code or code style.
Now, the steps to integrate ESLint in our IDE will depend on which one we are using. Both WebStorm and Visual Studio Code have special sections on their documentation to cover ESLint.
Note: other IDEs and text editors probably provide support to ESLint as well.
“Linting tools can help us identify potential errors in our code.”
Tweet This
To wrap this section, let's commit and push changes to GitHub:
git add .eslintrc.json package*.json
git commit -m 'configuring ESLint'
git push origin master
Automated Tests
One of the most important topics in software development is tests. Developing high quality code without automated tests is impossible. That is, we could write code that executes flawlessly without writing a single line of automated tests. However, this code would still not be considered as having high standards.
Why? Simple. Imagine a situation where we wrote a code that contains no bugs. One day, another developer decide that it's time to increment this code by adding some nice new feature. This feature, however, needs to reuse some pre-existing code and change it a little. How, without automated tests, is this developer supposed to test the new version? Manually testing is an alternative, but an arduous and error-prone one. That's why we invented automated tests.
As everything in JavaScript, there are many tools that can help us automate our tests. Besides that, there are also different types of automated tests. For example, we could write end-to-end tests, integration tests, and we could write unit tests.
The goal of our NPM package is to, based on an inputted string, return a masked value. This kind of package does not have external dependencies (like a RESTful API) nor it will be rendered in an interface (like a web browser). Therefore, writing only unit tests to guarantee that our functions do what they are supposed to do will be enough.
Cool, we now know what type of tests we will write. What is still uncovered is what library will we use to write these tests. Since the data strategy is doing well, let's use it again. After a small research on Google, we find out that there are three great candidates:
- Mocha: a test framework that supports both Node.js & the browser, has 14.1 thousand stars on GitHub, and was downloaded 64 million times during 2017;
- Jasmine: a platform-agnostic test framework that has 13.1 thousand stars on GitHub and was downloaded 22 million times during 2017;
- and Jest: a test utility developed by Facebook with 14 thousand stars on GitHub and that was downloaded 21 million times during 2017.
In this case, the numbers were pretty similar. But Mocha, with more stars on GitHub and around three times more downloads on NPM during 2017, looks like the winner. We will probably be supported by a great community and have access to a lot of resources if we choose Mocha. So let's configure it in our project.
First, we need to install Mocha as a development dependency:
npm i -D mocha
Then, we need to replace the test script in our package.json file by the following one:
{
  ...
  "scripts": {
    ...
    "test": "mocha --require babel-core/register"
  },
  ...
}
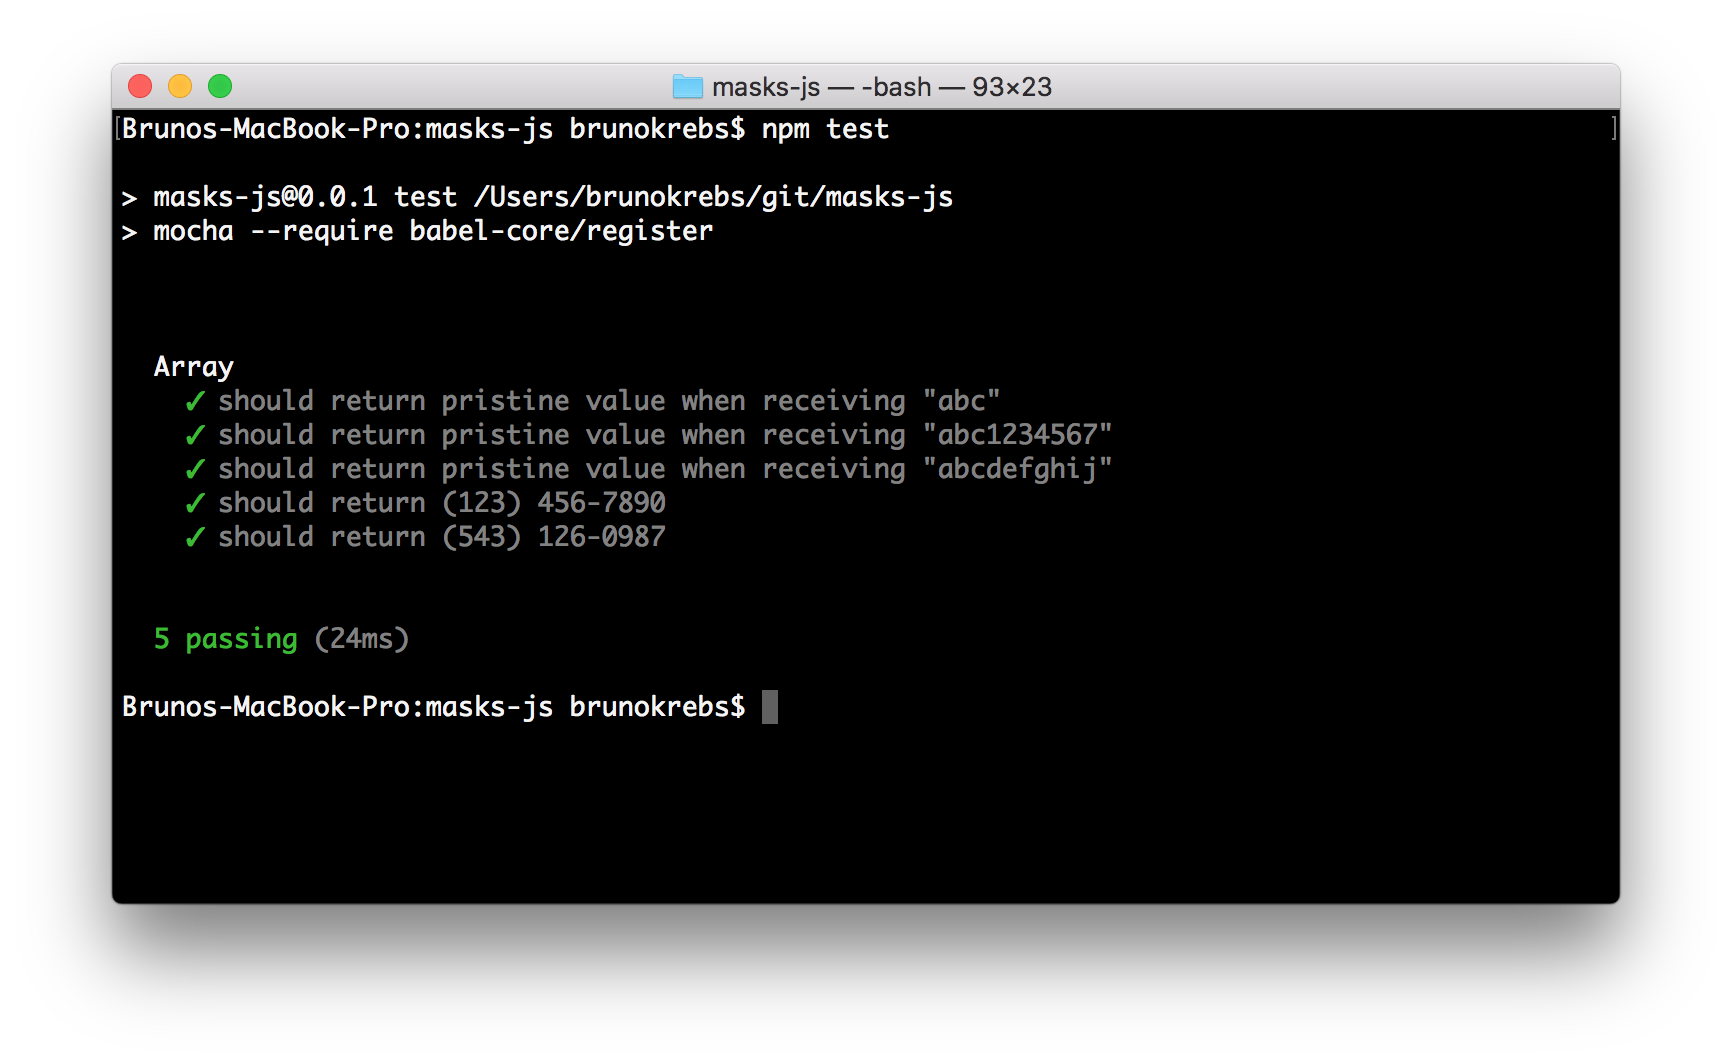
That's it! We can now write our tests. To see Mocha in action, let's create a directory called ./test and add an index.js file to it with the following code:
import assert from 'assert';

describe('Array', () => {
  describe('#indexOf()', () => {
    it('should return -1 when the value is not present', () => {
      assert.equal([1, 2, 3].indexOf(4), -1);
    });
  });
});
If we issue npm test in the project root, we will see that Mocha manages to run our test properly. Even though we used modern syntax like import and arrow functions (() => {}).
If we are using a good IDE, we will probably be warned that there are no describe nor it functions available in the ./test/index.js file. This happens because ESLint is not aware of these functions. To make ESLint recognize Mocha's functions, we need to make a small change into the .eslintrc.json file. We need to add a new property called env and add mocha into it:
{
  "extends": "airbnb-base",
  "env": {
    "mocha": true
  }
}
As usually, let's commit and push changes to GitHub:
git add .eslintrc.json test/index.js package*.json
git commit -m 'adding Mocha'
git push origin master
Coding the NPM Package
Hurray! We finally got into what matters, the code. We can create NPM packages without most of the tools shown in this article, but code is just necessary. No code, no NPM package. Although code is so important, it's not the focus of this article. So, to keep things short and easy to grasp, let's create just a very small prototype.
We will create and export only one function that returns a masked US phone. Even for a specific and precise functionality like this, there are many scenarios to cover. But again, we will keep our focus on the tools and techniques we can use to produce high-quality code, not in the coding and testing tasks themselves.
Enough said, let's work. First, let's replace the content of the ./src/index.js file with the following:
// regex that checks if value contains digits only
const digitsOnly = /^\d+$/;

// function to mask digits into US phone format
function maskUSPhone(phone) {
  // returning null when getting null, undefined, or an object that is no string as a parameter
  if (!phone || typeof phone !== 'string') {
    return null;
  }

  // returning the untouched value when it contains non-digit chars or when it has a length != 10
  if (digitsOnly.test(phone) === false || phone.length !== 10) {
    return phone;
  }

  // returning the masked value
  const codeArea = phone.substring(0, 3);
  const prefix = phone.substring(3, 6);
  const sufix = phone.substring(6, 10);
  return `(${codeArea}) ${prefix}-${sufix}`;
}

export default maskUSPhone;
Then, let's replace ./test/index.js content with this:
import * as assert from 'assert';
import maskUSPhone from '../src/index';

const testSamples = [
  { input: 'abc', expectedResult: 'abc', description: 'should return pristine value when receiving "abc"' },
  { input: 'abc1234567', expectedResult: 'abc1234567', description: 'should return pristine value when receiving "abc1234567"' },
  { input: 'abcdefghij', expectedResult: 'abcdefghij', description: 'should return pristine value when receiving "abcdefghij"' },
  { input: '1234567890', expectedResult: '(123) 456-7890', description: 'should return (123) 456-7890' },
  { input: '5431260987', expectedResult: '(543) 126-0987', description: 'should return (543) 126-0987' },
];

describe('Array', () => {
  testSamples.forEach((sample) => {
    it(sample.description, () => {
      assert.equal(maskUSPhone(sample.input), sample.expectedResult);
    });
  });
});
Good. This creates a function to support the functionality mentioned, and probably covers enough tests. Issuing npm test in the project root will make Mocha execute our tests.
Let's commit and push our new code to GitHub:
git add src/index.js test/index.js
git commit -m 'developing the maskUSPhone feature and adding unit tests'
git push origin master
Test Coverage
Feels good to have our code in place with some tests to prove its functionality, but how confident are we of our code and our tests? Are we sure that our tests are covering all the scenarios that we thought about? It's hard to affirm that even in a small package like ours. So, what can we do? The answer is simple, we can use a test coverage tool to see how much of our code we are covering with tests.
Test samples, like those showed in the previous section, exist to help us prove that our code handles all the scenarios that we thought about. Test coverage tools help the other way around. They show if we have enough test samples to cover all the scenarios that came to our mind when typing the code. Ok, we are convinced that we can take advantage of a test coverage tool, but which one?
After searching for "javascript test coverage tools" on Google, we find out that Istanbul webpage appears in first place, it's NPM page appears in second, and Karma (the test runner) appears in third place saying that it can generate test coverage using the awesome Istanbul. Probably enough proof that we can trust this tool. So let's use it.
Instructions to use Istanbul are simple. First, we install Istanbul as a development dependency:
npm i -D nyc
After that, we just update the test script (in package.json) to make nyc (Istanbul's CLI) run Mocha for us:
{
  ...
  "scripts": {
    ...
    "test": "nyc mocha --require babel-core/register"
  }
  ...
}
Running npm test now will make Istanbul analyze how our tests are covering our source code.
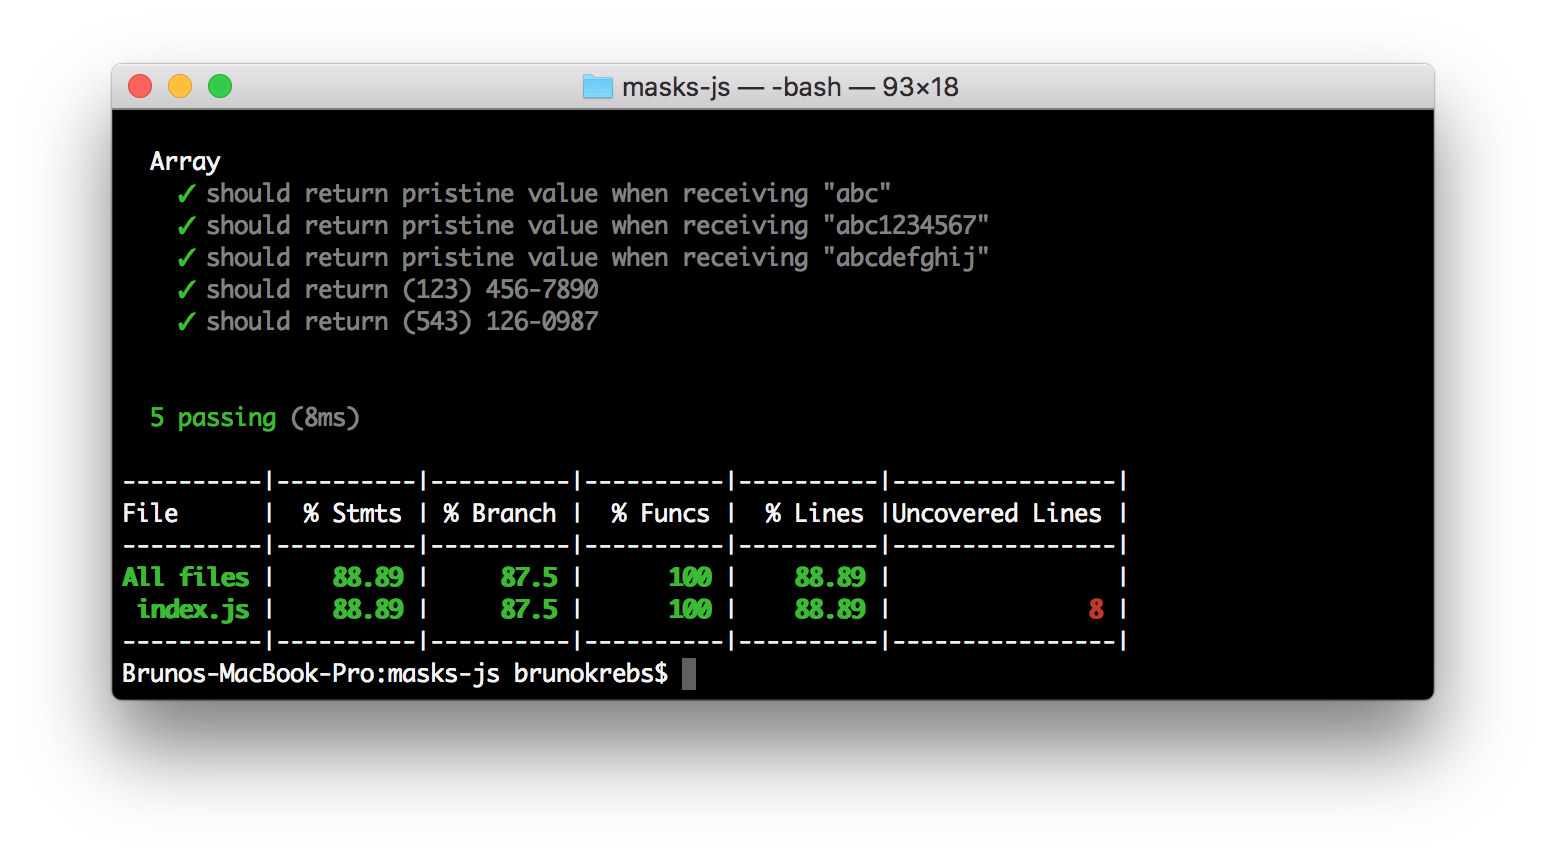
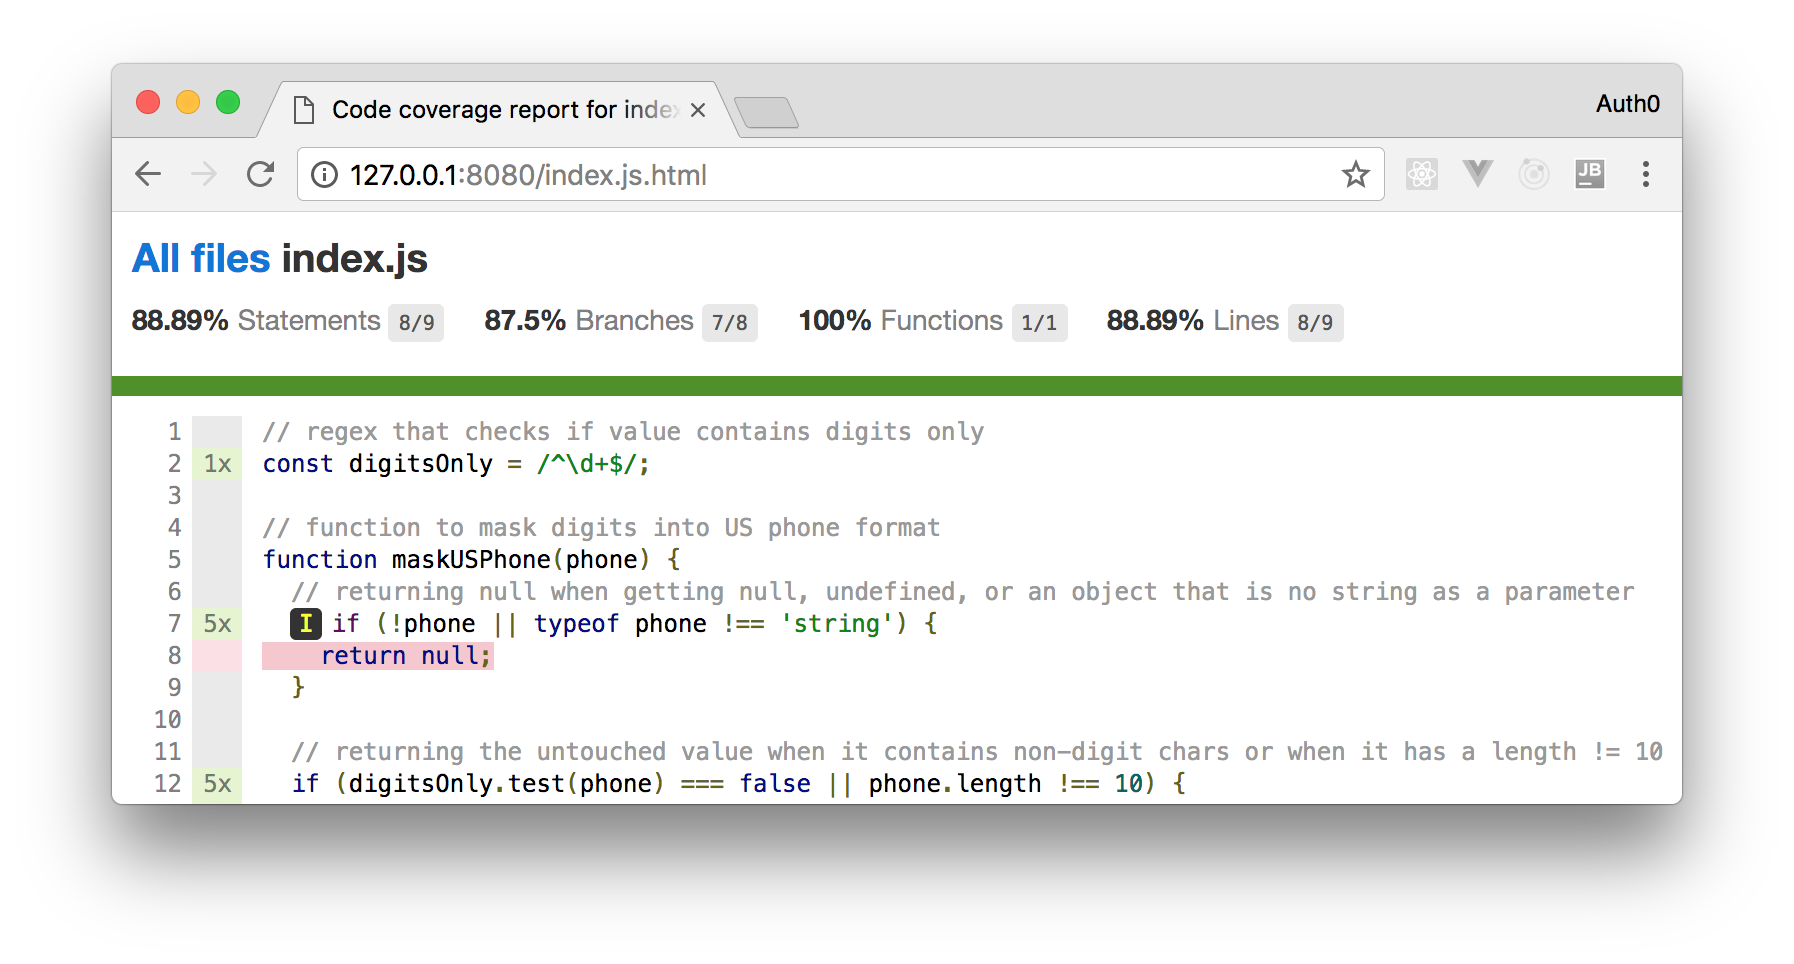
Cool, integrating Istanbul on our project was easy. But can Istanbul do more than just saying that we are covering X percent of our code? Sure! Istanbul can show what lines are covered, what lines are not. To get this information, we are going to configure on Istanbul a reporter called lcov. This reporter will generate test data in two formats: one that is machine readable (lcov format), and one that is human readable (HTML in this case).
To configure lcov on Istanbul, we can simply add the following property to our package.json file:
{
  ...
  "nyc": {
    "reporter": [
      "lcov",
      "text"
    ]
  }
}
Note that we configured both
lcovandtextbecause we still want Istanbul to keep showing that nice summary that we saw before.
Running npm test now will generate, besides that colorful summary on the terminal, a directory called coverage in the project root. If we inspect this directory, we will see that it contains two things: a lcov.info file with some characters inside that look meaningless (they actually show what lines were executed and how many times); and another directory called lcov-report with an index.html file inside. This is where we will get more data about what lines our tests are covering and what lines are being ignored.
To see the report contained by the lcov-report directory in a browser, let's use a tool like http-server. In our project root, we can use it as follows:
# install (globally) http-server if needed
npm i -g http-server

http-server ./coverage/lcov-report/
Now we can browse to http://127.0.0.1:8080/ and analyze what lines are being covered by our tests.
“Integrating test coverage tools on NPM packages is easy.”
Tweet This
With Istanbul in place, let's commit and push it to GitHub:
git add package*.json
git commit -m 'test coverage with Istanbul'
git push origin master
Publishing the NPM Package
After installing and checking our code coverage with Istanbul, we figure that we forgot to cover cases where no value (null or undefined) are passed into our function. Let's fix this by adding new test samples in the ./test/index.js file:
// ... imports stay untouched

const testSamples = [
  { input: null, expectedResult: null, description: 'should return null when null is passed' },
  { input: undefined, expectedResult: null, description: 'should return null when undefined is passed' },
  // ... the initial samples stay untouched
];

// ... describe method stays untouched
If we ask Istanbul now (npm test), we will see that we managed to add enough scenarios to cover all our source lines of code. This is not a proof that our package contains no bug, but enough to make us confident to publish its initial version. So let's do it.
Publishing NPM packages looks like a very simple process. As described in the official documentation, all we need is to create a user (if we still don't have one) and then issue npm publish in the project root, right? Well, not so fast. Indeed, is not hard to publish a NPM package, but we always want to distribute an ES5 version of our package for maximum compatibility. We could leave this as a manual process (that is, expect the developer to run npm run build before publishing a new version), but this is too error-prone.
What we want instead is to automatically tie the build script to publish. Luckily for us, when NPM is publishing a new version of a package, it checks the package.json file to see if there is a script called prepublishOnly. If NPM finds this script, it runs whatever command is inside it. Therefore, what we have to do is to configure prepublishOnly in our package.json file as follows:
{
  ...
  "scripts": {
    ...
    "prepublishOnly": "npm run build"
  },
  ...
}
Hurray! Looks like we are ready to publish our package. Let's run npm publish and make it available to the world. Note that, before publishing, we might need to create a NPM user and to login to our NPM CLI (npm login).
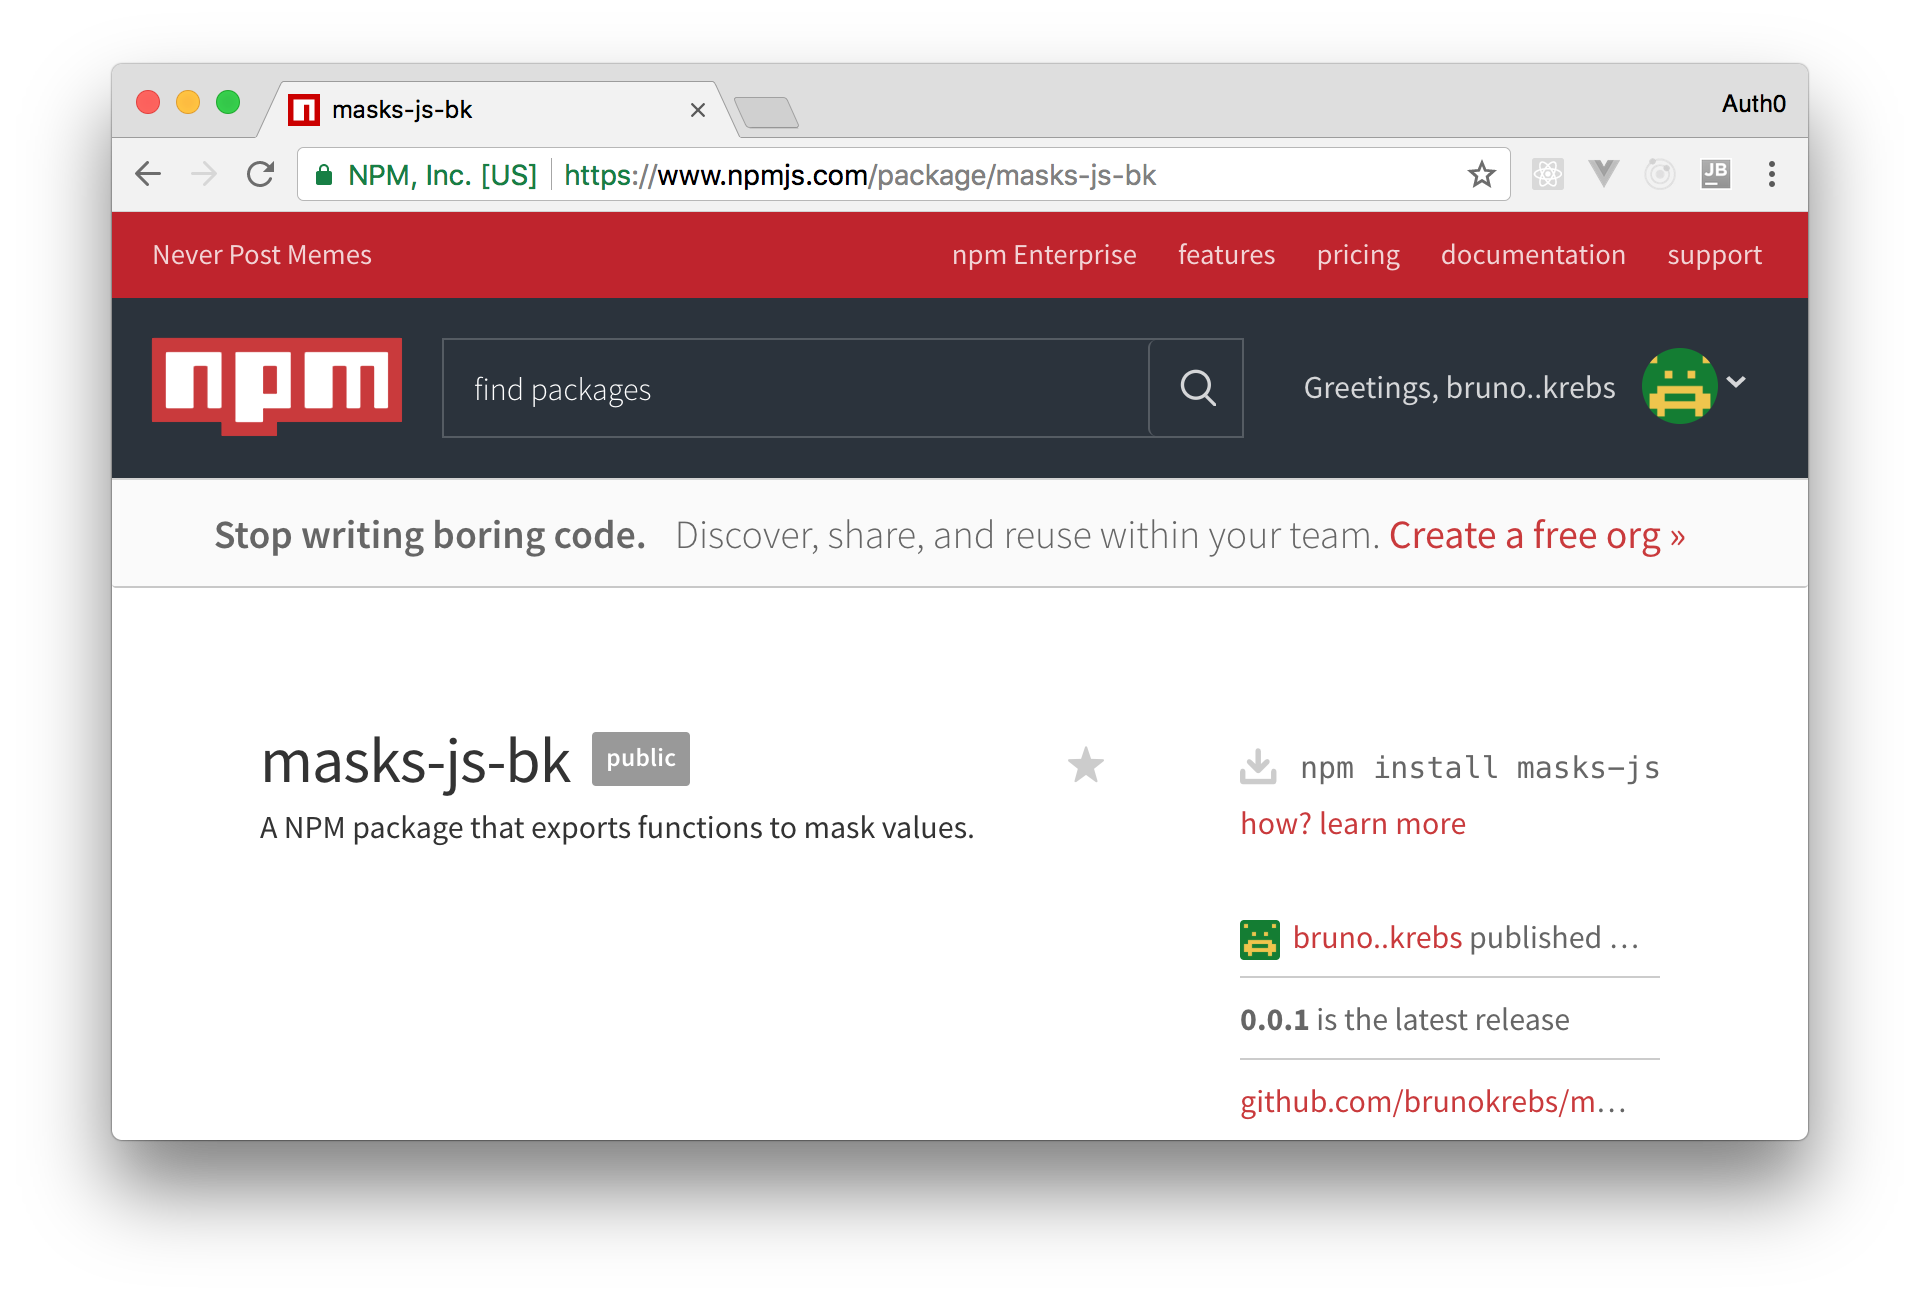
It's important to note that the
nameproperty onpackage.jsonis the name that our package will get after we publish it. If someone else tries to publish a package with the same name as ours, they will get an error and will have to choose another name. (Hint: I left themasks-jsnamespace available on NPM to see who will be the first one to finish this tutorial)
Let's commit and push changes to GitHub:
git add package.json test/index.js
git commit -m 'covering 100%'
git push origin master
Continuous Integration
Well, well. We have published the first version of our NPM package. This is amazing. Looks like all we need to do to publish a new version is to write some code, cover it with tests, and issue npm publish. But, can we do better? Of course! We can use a continuous integration tool to automate the NPM publishing process.
In this case, we will use Travis CI, one of the most popular and OSS-friendly (Open Source Software friendly) continuous integration tools around. This tool is totally integrated with GitHub and, as such, configuring it in our project is straightforward.
First, we need to head to our profile on Travis CI and turn on the switch shown in the left of our project's name.
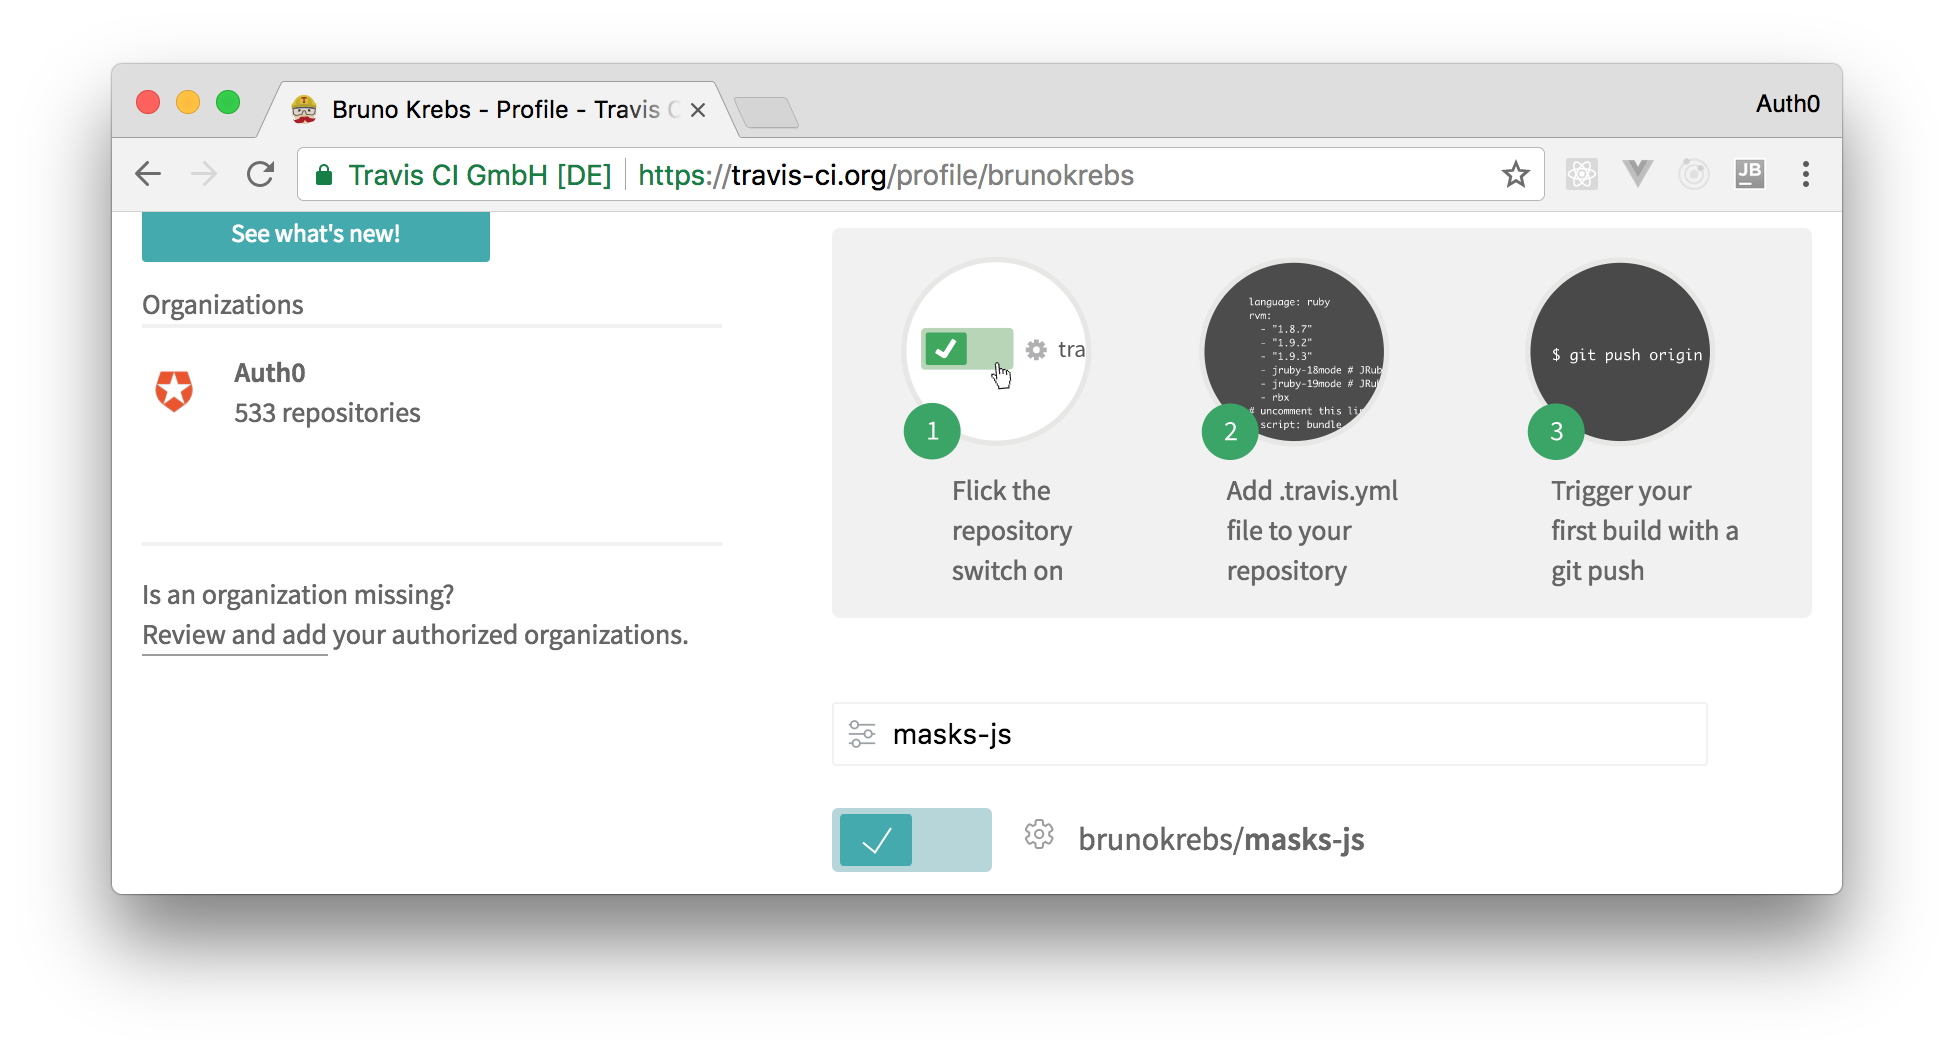
Then, back into our project root, we need to create a file called .travis.yml with the following properties:
language: node_js
node_js:
- node
before_deploy:
- npm run build
Note that, from now on, we will count on Travis to generate builds for us. This means that we have to remove the
prepublishOnlyscript from thepackage.jsonfile.
The properties in the .travis.yml file will tell Travis that our repository contains a node_js project. Besides that, Travis will also use this file to identify which Node.js versions it should use to build our package. In our case, we tell Travis to use only the latest version (node_js: node). We could also add other Node.js versions in there, but as we are using Babel to generate ES5 compatible JavaScript, this is not necessary.
Having this file in place, we can install Travis CLI to help us with the last step. After installing it, let's open a file called .npmrc from our user's home directory (~/.npmrc) and copy the token from it (if needed, keep in mind that there are other ways to get a token). This file will probably have a content similar to:
//registry.npmjs.org/:_authToken=1a14bf9b-7c33-303c-b2f8-38e15c31dfee
In this case, we are interested in copying the 1a14bf9b-7c33-303c-b2f8-38e15c31dfee value. After that, we have to issue travis setup npm --org back on our project root. This will make NPM ask six questions. The following code snippet shows these questions and possible answers:
Detected repository as brunokrebs/masks-js, is this correct? |yes|
# use your own email address, of course
NPM email address: bruno.krebs@auth0.com
NPM api key: ************************************
release only tagged commits? |yes|
Release only from brunokrebs/masks-js? |yes|
Encrypt API key? |yes|
We also have to prevent Travis CI from deleting the ./lib directory created during the build process, otherwise it wouldn't be uploaded to NPM when publishing. In the end, our .travis.yml file will look similar to this:
language: node_js
node_js:
- node
- '6'
deploy:
  # add this line after travis setup
  skip_cleanup: true
  provider: npm
  email: bruno.krebs@auth0.com
  api_key:
    secure: PjDqlAfbsL5i8...
  on:
    tags: true
    repo: brunokrebs/masks-js
That's it, we can now count on Travis CI to release new versions of our package. So, let's test this integration.
Travis will also execute
npm testwhenever we push a new commit to GitHub and it won't release new versions if our tests fail.
To simulate a real-world scenario, let's make a small patch to our code. Let's make it support one more fictitious digit on US phones. To do that, we will update the ./src/index.js as follows:
// regex that checks if value contains digits only
const digitsOnly = /^\d+$/;

// function to mask digits into US phone format
function maskUSPhone(phone) {
  // returning null when getting null, undefined, or an object that is no string as a parameter
  if (!phone || typeof phone !== 'string') {
    return null;
  }

  // returning the untouched value when it contains non-digit chars
  // or when it has a length lower than 10 or greater than 11
  if (digitsOnly.test(phone) === false || phone.length < 10 || phone.length > 11) {
    return phone;
  }

  // returning the masked value
  const codeArea = phone.substring(0, 3);
  const prefix = phone.substring(3, 6);
  const sufix = phone.substring(6, phone.length);
  return `(${codeArea}) ${prefix}-${sufix}`;
}

export default maskUSPhone;
And we will also add one more test sample to ./test/index.js to cover the new scenario:
// .. imports

const testSamples = [
  // ... other scenarios
  { input: '54312609876', expectedResult: '(543) 126-09876', description: 'should return (543) 126-09876' },
];

// ... describe and it
Now we just need to commit the new code, use npm to bump our package version, and push these changes to GitHub.
# add and commit new code
git add package.json src/ test/ .travis.yml
git commit -m 'supporting one more digit and adding Travis'

# bump patch to 0.0.2 (this also generates a tag called v0.0.2)
npm version patch

# push code and tag to GitHub
git push --follow-tags origin
This will make Travis CI build our project and release its second version.
Aside: Securing Node.js Applications with Auth0
Securing Node.js applications with Auth0 is easy and brings a lot of great features to the table. With Auth0, we only have to write a few lines of code to get solid identity management solution, single sign-on, support for social identity providers (like Facebook, GitHub, Twitter, etc.), and support for enterprise identity providers (like Active Directory, LDAP, SAML, custom, etc.).
In the following sections, we are going to learn how to use Auth0 to secure Node.js APIs written with Express.
Creating the Express API
Let's start by defining our Node.js API. With Express and Node.js, we can do this in two simple steps. The first one is to use NPM to install three dependencies: npm i express body-parser cors.
Note: If we are starting from scratch, we will have to initialize an NPM project first:
npm init -y. This will make NPM create a new project in the current directory. As such, before running this command, we have to create a new directory for our new project and move into it.
The second one is to create a Node.js script with the following code (we can call it index.js):
// importing dependencies
const express = require('express');
const bodyParser = require('body-parser');
const cors = require('cors');

// configuring Express
const app = express();
app.use(bodyParser.json());
app.use(cors());

// defining contacts array
const contacts = [
  { name: 'Bruno Krebs', phone: '+555133334444' },
  { name: 'John Doe', phone: '+191843243223' },
];

// defining endpoints to manipulate the array of contacts
app.get('/contacts', (req, res) => res.send(contacts));
app.post('/contacts', (req, res) => {
  contacts.push(req.body);
  res.send();
});

// starting Express
app.listen(3000, () => console.log('Example app listening on port 3000!'));
The code above creates the Express application and adds two middleware to it: body-parser to parse JSON requests, and cors to signal that the app accepts requests from any origin. The app also registers two endpoints on Express to deal with POST and GET requests. Both endpoints use the contacts array as some sort of in-memory database.
Now, we can run and test our application by issuing node index in the project root and then by submitting requests to it. For example, with cURL, we can send a GET request by issuing curl localhost:3000/contacts. This command will output the items in the contacts array.
Registering the API at Auth0
After creating our application, we can focus on securing it. Let's start by registering an API on Auth0 to represent our app. To do this, let's head to the API section of our management dashboard (we can create a free account) if needed) and click on "Create API". On the dialog that appears, we can name our API as "Contacts API" (the name isn't really important) and identify it as https://contacts.blog-samples.com/ (we will use this value later).
Securing Express with Auth0
Now that we have registered the API in our Auth0 account, let's secure the Express API with Auth0. Let's start by installing three dependencies with NPM: npm i express-jwt jwks-rsa. Then, let's create a file called auth0.js and use these dependencies:
const jwt = require('express-jwt');
const jwksRsa = require('jwks-rsa');

module.exports = jwt({
  // Fetch the signing key based on the KID in the header and
  // the singing keys provided by the JWKS endpoint.
  secret: jwksRsa.expressJwtSecret({
    cache: true,
    rateLimit: true,
    jwksUri: `https://${process.env.AUTH0_DOMAIN}/.well-known/jwks.json`,
  }),

  // Validate the audience and the issuer.
  audience: process.env.AUTH0_AUDIENCE,
  issuer: `https://${process.env.AUTH0_DOMAIN}/`,
  algorithms: ['RS256'],
});
The goal of this script is to export an Express middleware that guarantees that requests have an access_token issued by a trust-worthy party, in this case Auth0. Note that this script expects to find two environment variables:
AUTH0_AUDIENCE: the identifier of our API (https://contacts.mycompany.com/)AUTH0_DOMAIN: our domain at Auth0 (in my casebk-samples.auth0.com)
We will set these variable soons, but it is important to understand that the domain variable defines how the middleware finds the signing keys.
After creating this middleware, we can update our index.js file to import and use it:
// ... other require statements ...
const auth0 = require('./auth0');

// ... app definition and contacts array ...

// redefining both endpoints
app.get('/contacts', auth0(), (req, res) => res.send(contacts));
app.post('/contacts', auth0(), (req, res) => {
  contacts.push(req.body);
  res.send();
});

// ... app.listen ...
In this case, we have replaced the previous definition of our endpoints to use the new middleware that enforces requests to be sent with valid access tokens.
Running the application now is slightly different, as we need to set the environment variables:
export AUTH0_DOMAIN=blog-samples.auth0.com
export AUTH0_AUDIENCE="https://contacts.blog-samples.com/"
node index
After running the API, we can test it to see if it is properly secured. So, let's open a terminal and issue the following command:
curl localhost:3000/contacts
If we set up everything together, we will get a response from the server saying that "no authorization token was found".
Now, to be able to interact with our endpoints again, we will have to obtain an access token from Auth0. There are multiple ways to do this and the strategy that we will use depends on the type of the client application we are developing. For example, if we are developing a Single Page Application (SPA), we will use what is called the Implicit Grant. If we are developing a mobile application, we will use the Authorization Code Grant Flow with PKCE. There are other flows available at Auth0. However, for a simple test like this one, we can use our Auth0 dashboard to get one.
Therefore, we can head back to the APIs section in our Auth0 dashboard, click on the API we created before, and then click on the Test section of this API. There, we will find a button called Copy Token. Let's click on this button to copy an access token to our clipboard.
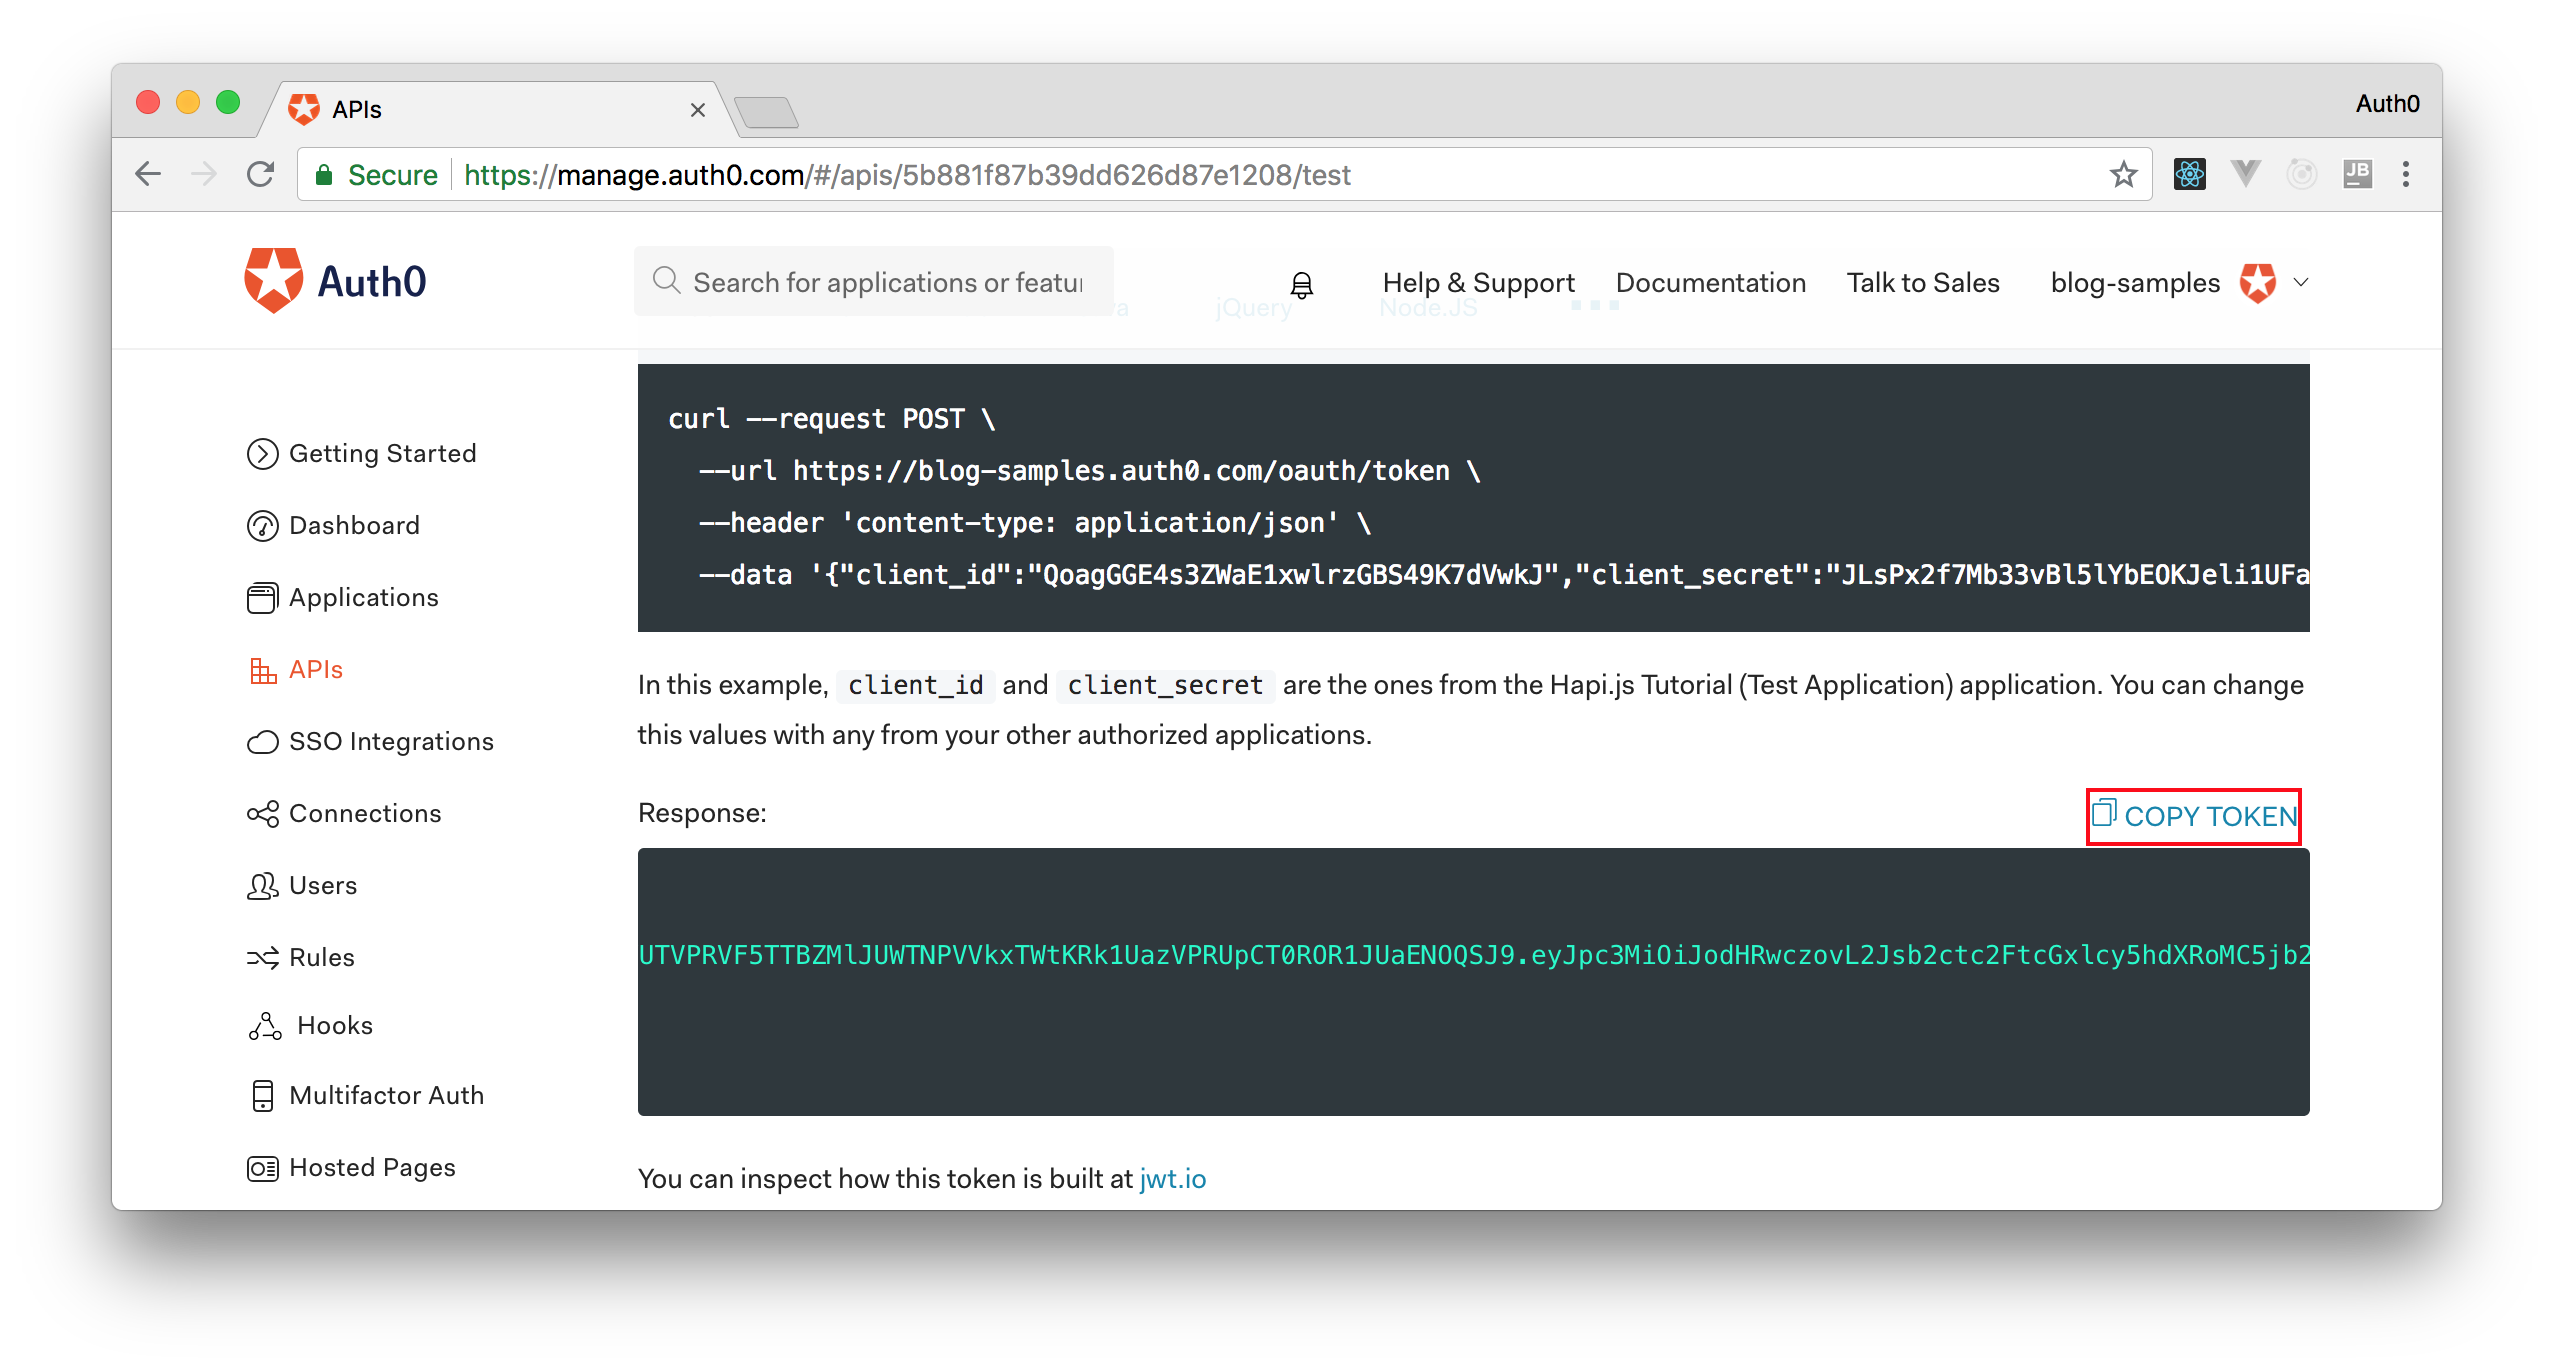
After copying this token, we can open a terminal and issue the following commands:
# create a variable with our token
ACCESS_TOKEN=<OUR_ACCESS_TOKEN>

# use this variable to fetch contacts
curl -H 'Authorization: Bearer '$ACCESS_TOKEN http://localhost:3000/contacts/
Note: We will have to replace
<OUR_ACCESS_TOKEN>with the token we copied from our dashboard.
As we are now using our access token on the requests we are sending to our API, we will manage to get the list of contacts again.
That's how we secure our Node.js backend API. Easy, right?
Conclusion
In this article we have covered a good amount of topics and tools that will help us develop NPM packages. We have talked about Semantic Versioning, configured EditorConfig, set up Babel to use ES6+ syntax, used Automated Tests, and so on. Setting up these tools, and being mindful while developing code, will make us better developers. With these tools to hold our back, we will even feel more confident to release new versions of our packages. So, now that we learned about these topics, it's time to get our hands dirty and contribute back to the OSS (Open Source Software) world. Have fun!
About the author

Bruno Krebs
R&D Content Architect (Auth0 Alumni)