
After learning how to add authentication to your UIKit- or SwiftUI-based iOS apps, you might want to store additional information about your users. You can do this by accessing the metadata in Auth0’s user profiles, which you’ll learn how to do in this tutorial.
If you’re not familiar with integrating Auth0 authentication with iOS apps, we strongly recommend that you first go through the exercises in Get Started with iOS Authentication using Swift and UIKit or Get Started with iOS Authentication using SwiftUI.
Look for the 🛠 emoji if you’d like to skim through the content while focusing on the build and execution steps. Harness the power of control-F/command-F to build the app in this tutorial quickly!
User Metadata and App Metadata
Auth0’s user profiles store basic information about each user: a unique identifier, the names they use, their contact details, and other identifying information such as their picture. These are useful to know during the authentication process, but you may often need other information as the user logs in, such as:
- The user’s status: Is the user using the app on a trial basis, or are they a paying customer? Does the user have access to the app’s basic features, or did they purchase the deluxe package with all the features?
- User preferences, such as a preferred color scheme, light mode vs. dark mode, font size, and so on.
- Flags that track actions that the user has taken. Has the user accepted the app’s terms and conditions? Have they completed the tutorial?
- Other information about the user’s account: Is it time to show the user an alert, announcement, or notice? Is there an available upgrade for the app?
Auth0’s user profiles can store this kind of information as metadata, which your app can access once the user has logged in. This is information that your app could keep in its storage system, but Auth0’s user profile metadata has the advantage of being available immediately after and during the login process.
One particular advantage that metadata has is that it’s stored with the user’s account rather than on the device. If the user switches from the mobile version of an app to its web version (or vice versa), their metadata-based settings and preferences will be the same in both versions.
Better still, Auth0’s Actions — custom Node-based code that you can add to your tenant — can use your users’ metadata to perform tasks during many Auth0 workflows, such as when they log in, register for an account, or change their password.
To give you a better idea of what your apps can do with metadata, this app you’ll make in this article’s exercise uses two kinds of metadata:
- User metadata, which the user can see and update. It’s meant to store user preferences, settings, and other data that do not impact the core functionality available to the user.
- App metadata, which the user cannot see but is accessible by the application. It’s for storing settings and other data that do impact the application’s core functionality, such as tracking user activity and determining what features or activities should be available to the user.
In this tutorial, you’ll add metadata features to a “starter” app that lets a user view and update their user metadata and displays an announcement if the user’s app metadata contains a specific value.
The Metadata Demo App
Let’s tour the app you’ll work on in this exercise!
When you launch the app, the initial screen greets you with the app’s title, Metadata demo, and a Log in button:
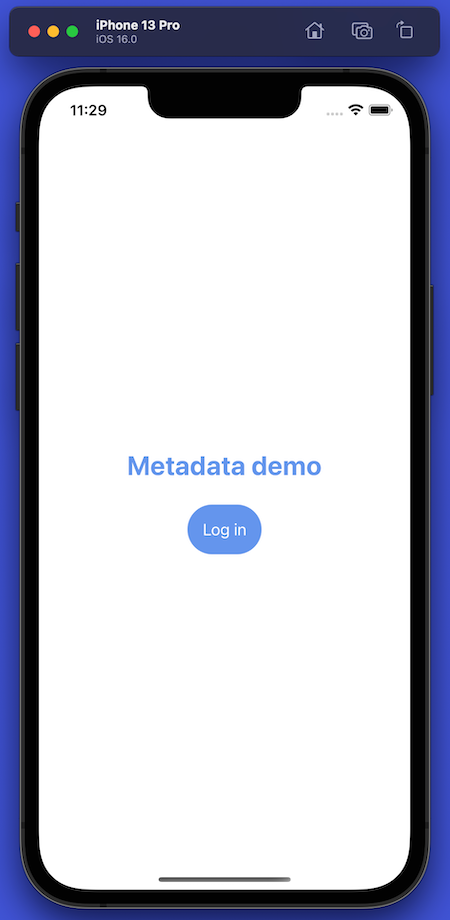
Note that the Log in button looks like a button instead of blue text. iOS 15 introduced four pre-defined button styles, three of which provide a background that lets the user know it is indeed a button. The buttons in the app use the Filled button style.
Press the Log in button to log into the app. The first thing you’ll see is this alert box:

This alert box is a privacy feature built into iOS. You’re seeing it because the app is about to receive information about the user — you — from Auth0 as part of the login process. This information will include identifying information about you, such as your name, email address, and the URL for your photo. It will also include additional metadata about you that Auth0 has stored.
iOS’ privacy policy requires it to inform the user when an app is sending or receiving personal information about them from a third party (Auth0 in this case), which it does with the alert box.
There is a way to disable the login alert box, but it’s beyond the scope of this article. For more details, see How can I disable the login alert box? in the FAQ for the Auth0.swift library.
Press the Continue button. This will take you to the Auth0 Universal Login screen, which appears in a web browser view embedded in the app:
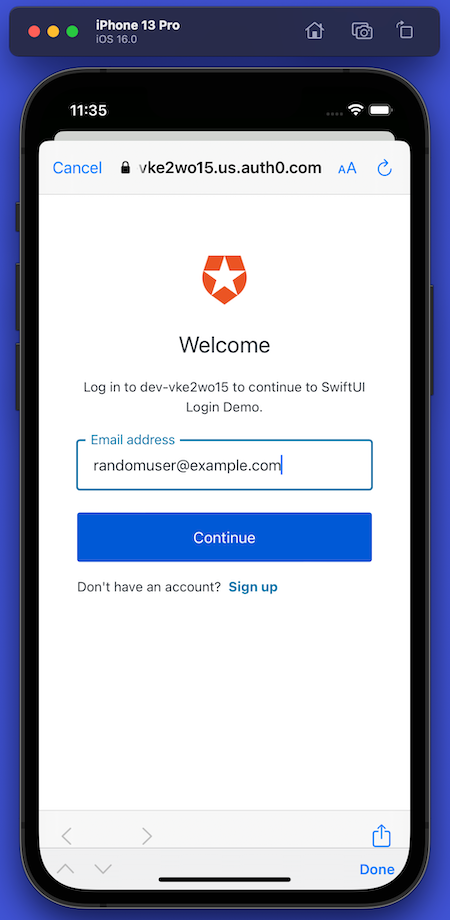
When you use Auth0 to add login/logout capability to your apps, you delegate authentication to an Auth0-hosted login page. You've seen this in action if you use Google web applications such as Gmail and YouTube. These services redirect you to log in using accounts.google.com. After logging in, Google returns you to the web application as a logged-in user.
If you’re worried that using Auth0’s Universal Login means that your app’s login screen will be stuck with the default Auth0 “look and feel,” I have good news for you: you can customize it to match your app or organization’s brand identity.
The Universal Login page saves you from having to code your own authentication system. It gives your applications a self-contained login box with several features to provide a great user experience.
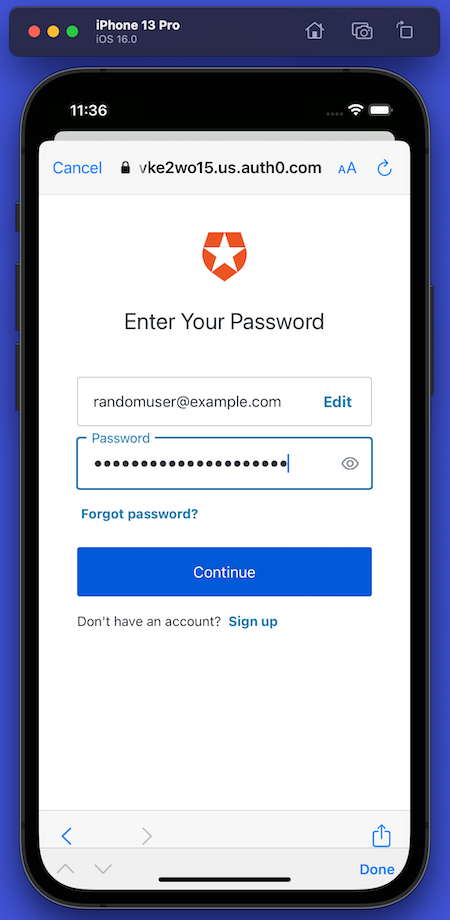
Once you’ve entered your name, you’ll proceed to the second part of the Universal Login screen, where you’ll enter your password:
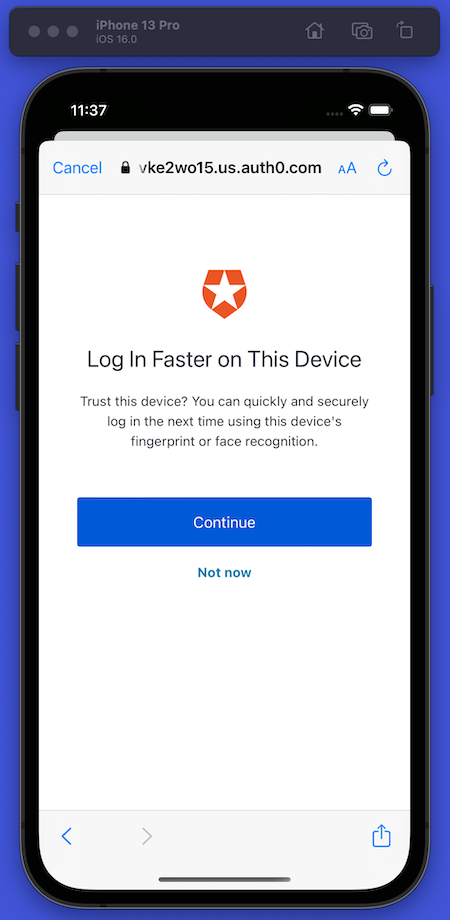
You’ll go to this screen, which gives you the option to log in faster by using biometrics — either your face or your fingerprint — instead of entering a password. For the time being, select Not now:
Whenever a user uses Universal Login to authenticate into an app for the first time, they see this screen, which asks for permission to use information from their user account:
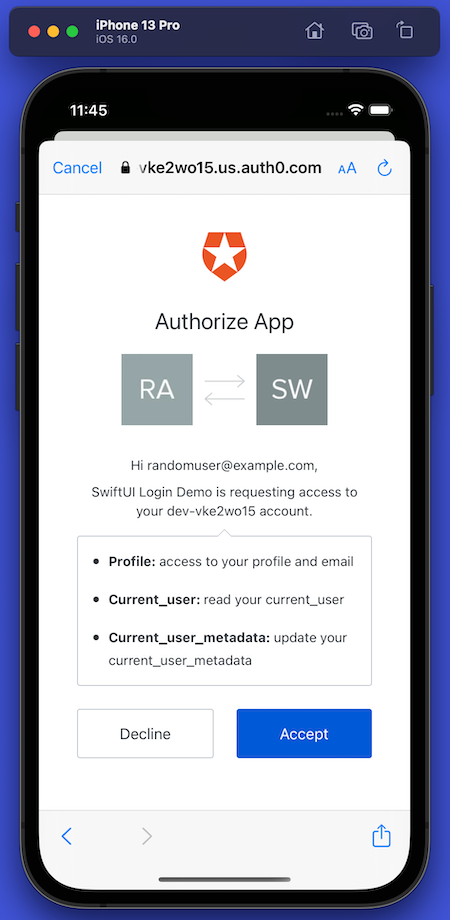
Here’s what the app is asking for permission to access:
- Profile: Basic information about the user:
- The user’s full name, email address, and photo, which the app will display while the user is logged in.
- The user’s unique identifier. The app will use this to request the items below.
- Current_user: Additional information about the user, including additional names (first name, last name, nickname, etc.), additional contact information (phone number), and if their email address was verified. The app won’t use this information but needs the authorization to access this data in order to access the user metadata.
- Currentusermetadata: These are the user metadata and app metadata attached to the user’s account. The app will use the user metadata to store a user preference that the user can edit and use the app metadata to determine the content and URL for a link and if it should display that link.
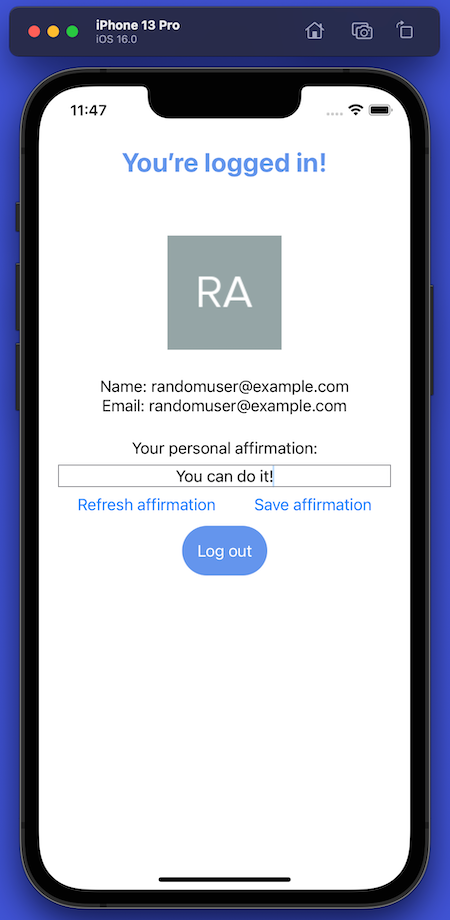
Press the Accept button to continue. This completes the login process, taking you to the app’s main screen, which displays the information from your user account:

As you can see, the app displays your name, email address, and the photo automatically generated for your account when you created it.
It also displays your personal affirmation — user metadata — that you can edit. The text field will be empty if you haven’t entered an affirmation yet. If you have, it will appear in the text field when the app starts up and whenever you press the Refresh affirmation button:
The app also uses app metadata to determine if it should show an “announcement” web link. The app metadata also determines the text and URL for the link:
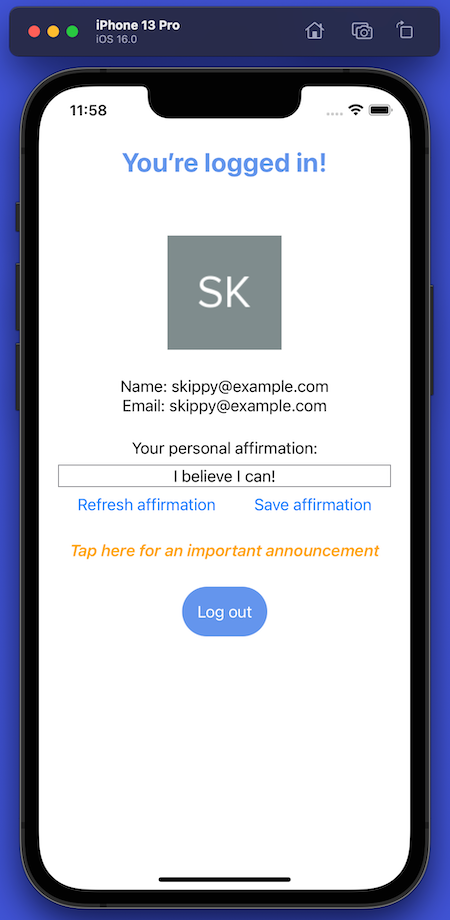
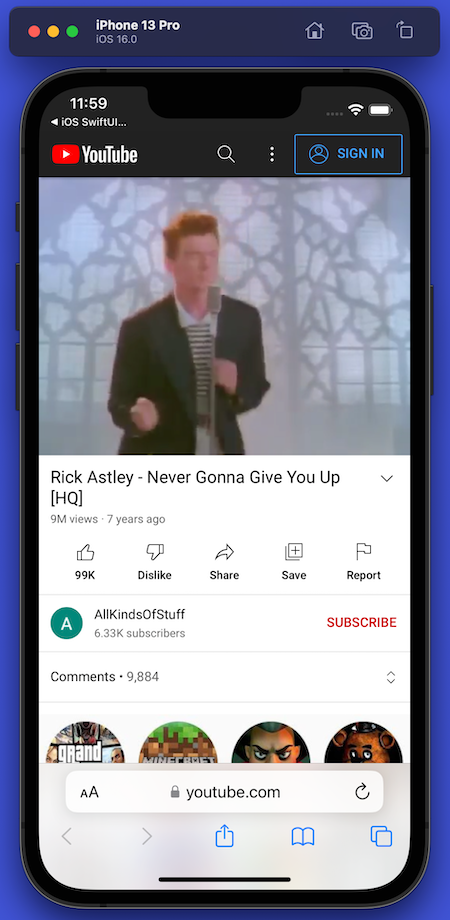
If you tap the Tap here for an important announcement link, the app opens a YouTube video containing that announcement, delivered by 1980s pop star Rick Astley:
If you instead choose to press the Log out button, the app starts the logout process, which begins with iOS’ alert box telling you once again that the app is using Auth0 to sign you in, even though you’re signing out. That’s because iOS is displaying the same alert box whether you log in or out; we hope that Apple will someday correct this:

There’s also a way to disable the logout alert box. As with the login alert box, disabling it is beyond the scope of this article. For more details, see How can I disable the logout alert box? in the FAQ for the Auth0.swift library.
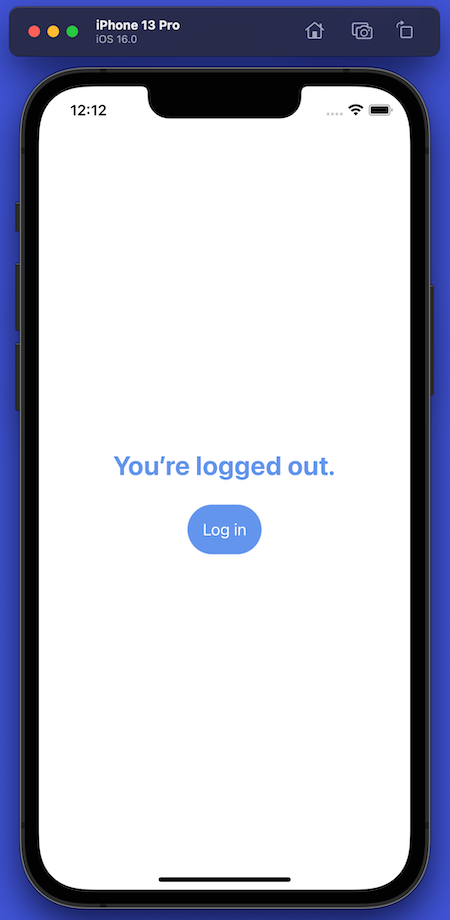
After you press the Continue button on the alert box, you go back to the app’s initial screen, which now displays “You’re logged out” as the title text:
Prerequisites
You’ll need the following to build the app:
1. An Auth0 account
The app uses Auth0 to authenticate users, which means that you need an Auth0 account. You can sign up for a free account, which lets you add login/logout to 10 applications, with support for 7,000 users and unlimited logins. This should suit your prototyping, development, and testing needs.
2. An iOS/iPadOS development setup
- Any Mac computer from 2013 or later — MacBook, MacBook Air, MacBook Pro, iMac, iMac Pro, Mac Mini, Mac Pro, or Mac Studio — with at least 8 GB RAM. When it comes to RAM, more is generally better.
- Apple’s developer tool, Xcode version 11.0 (September 2019) or later. When writing this article, I used the current version at the time: 13.4.1 (build 13F100), released on June 2, 2022.
3. An iOS device, virtual or real
Xcode comes with the Simulator application, which simulates recent iPhone, iPad, and iPod Touch models. Xcode 13.4’s virtual devices run iOS 15.5 by default.
To install earlier versions of iOS for the Simulator, select Preferences… from the Xcode menu, followed by the Components tab. You’ll see a list of older versions of not just iOS but watchOS and tvOS.
One of the benefits of using the Simulator is that you don’t need a free or paid Apple Developer account to use it.
While the Simulator is convenient, there’s no substitute for an actual physical device. It provides a more realistic testing experience, and there are certain things you can’t do on the Simulator (such as motion/tilt sensing and augmented reality).
You need a free Apple Developer account to deploy an app directly to a device for testing (you need the paid one to deploy an app to the App Store), and you need to register the device in your developer account to deploy apps to it. For more details, see Apple’s article, Distributing Your App to Registered Devices.
To find out more about running apps on virtual and real iOS devices, start with Apple’s Running Your App in the Simulator or on a Device.
First Steps
Download the starter project
To keep this tutorial focused on adding user and app metadata support to Auth0-based authentication in a SwiftUI-based iOS app, I created a starter project that you can download. This app allows the user to log in, see their name, email address, and picture, then log out. Using the starter project, you’ll be able to focus on adding user and app metadata-based features to the app without the distraction of building it from scratch.
🛠 Download the .zip file containing the starter and completed projects for the app (36 KB) and uncompress it. This will create a ios-swiftui-metadata-main folder on your local drive.
🛠 Open the ios-swiftui-metadata-main folder and look for the iOS SwiftUI Metadata (starter) folder. Open that folder, then open the starter project file, iOS SwiftUI Metadata.xcodeproj. Xcode will spend a little time (depending on your internet connection speed) downloading the Auth0 package dependencies for the project.
Don’t run the project yet! It won’t work until you’ve registered the app in Auth0, which you’ll do shortly.
Explore the starter project
The starter project already contains the Auth0 package dependencies: Auth0, JWTDecode, and SimpleKeychain. You don’t have to install any packages.
If you’re building an iOS project from scratch and want to incorporate Auth0, you’ll need to add the Auth0.swift package to the project. You can do this by selecting Add Packages... and entering
Auth0.swiftinto the “search” text field of the window that appears. Select Up to Next Minor Version from the Dependency Rule menu and click the Auth0.swift icon in the list of packages to install it.
While the starter project is like any iOS project and has many files, you’ll edit only two of them:
ContentView.swift: The app’s one and only view, which displays its one and only screen in both “logged out” and “logged in” modes.Auth0.plist: A property list specifically designated for holding Auth0-related information, namely your tenant’s domain, and the app’s client ID.
You might want to explore these files, which contain “helper” and utility objects and functions:
Profile.swift: A struct for extracting and storing the user information from an ID Token.UserImage.swift: A view that downloads and displays images from a specified URL. It displays a placeholder image during the downloading process.Utilities.swift: A place for miscellaneous utility functions. It contains theauth0Plist()function, which returns the contents of theAuth0.plistfile as aDictionaryobject.
Register the Starter App in the Auth0 dashboard
Now that you have the Starter project, it’s time to register its app with Auth0.
🚨 Note: You’ll need an Auth0 account to proceed past this point. 🚨 Once again, you can sign up for an account free of charge.
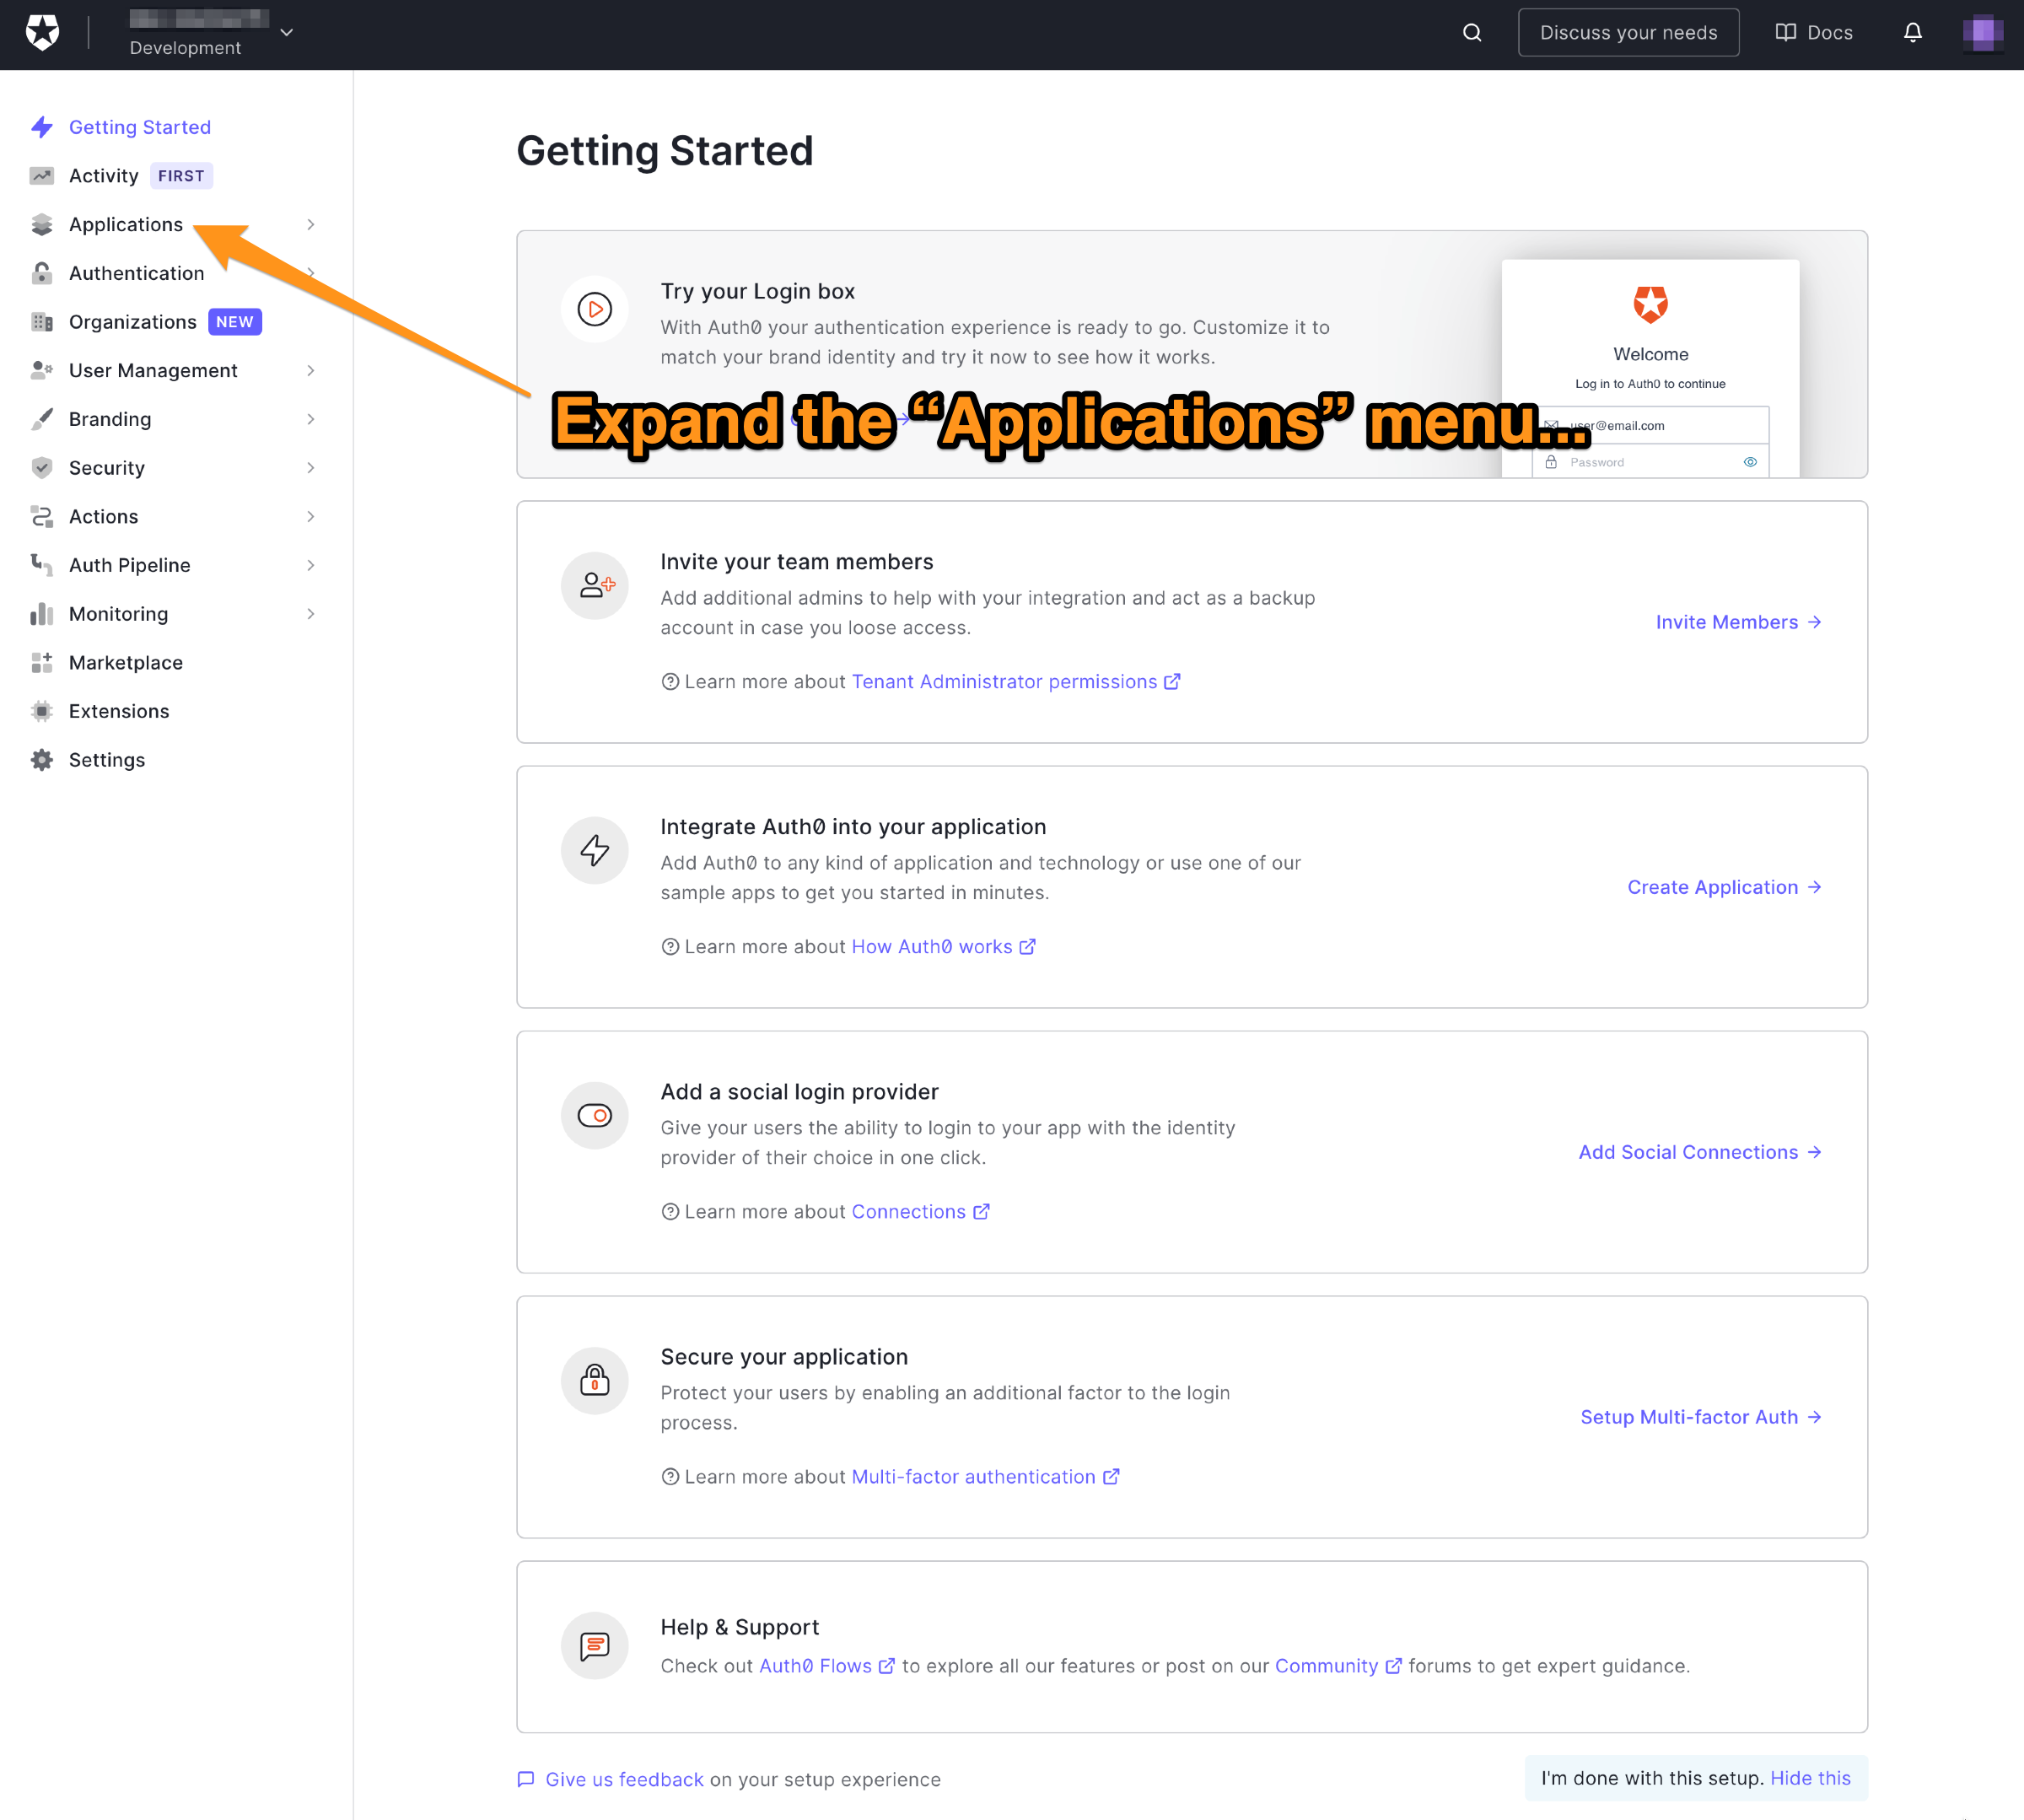
🛠 In the Auth0 dashboard, click on Applications in the left side menu:
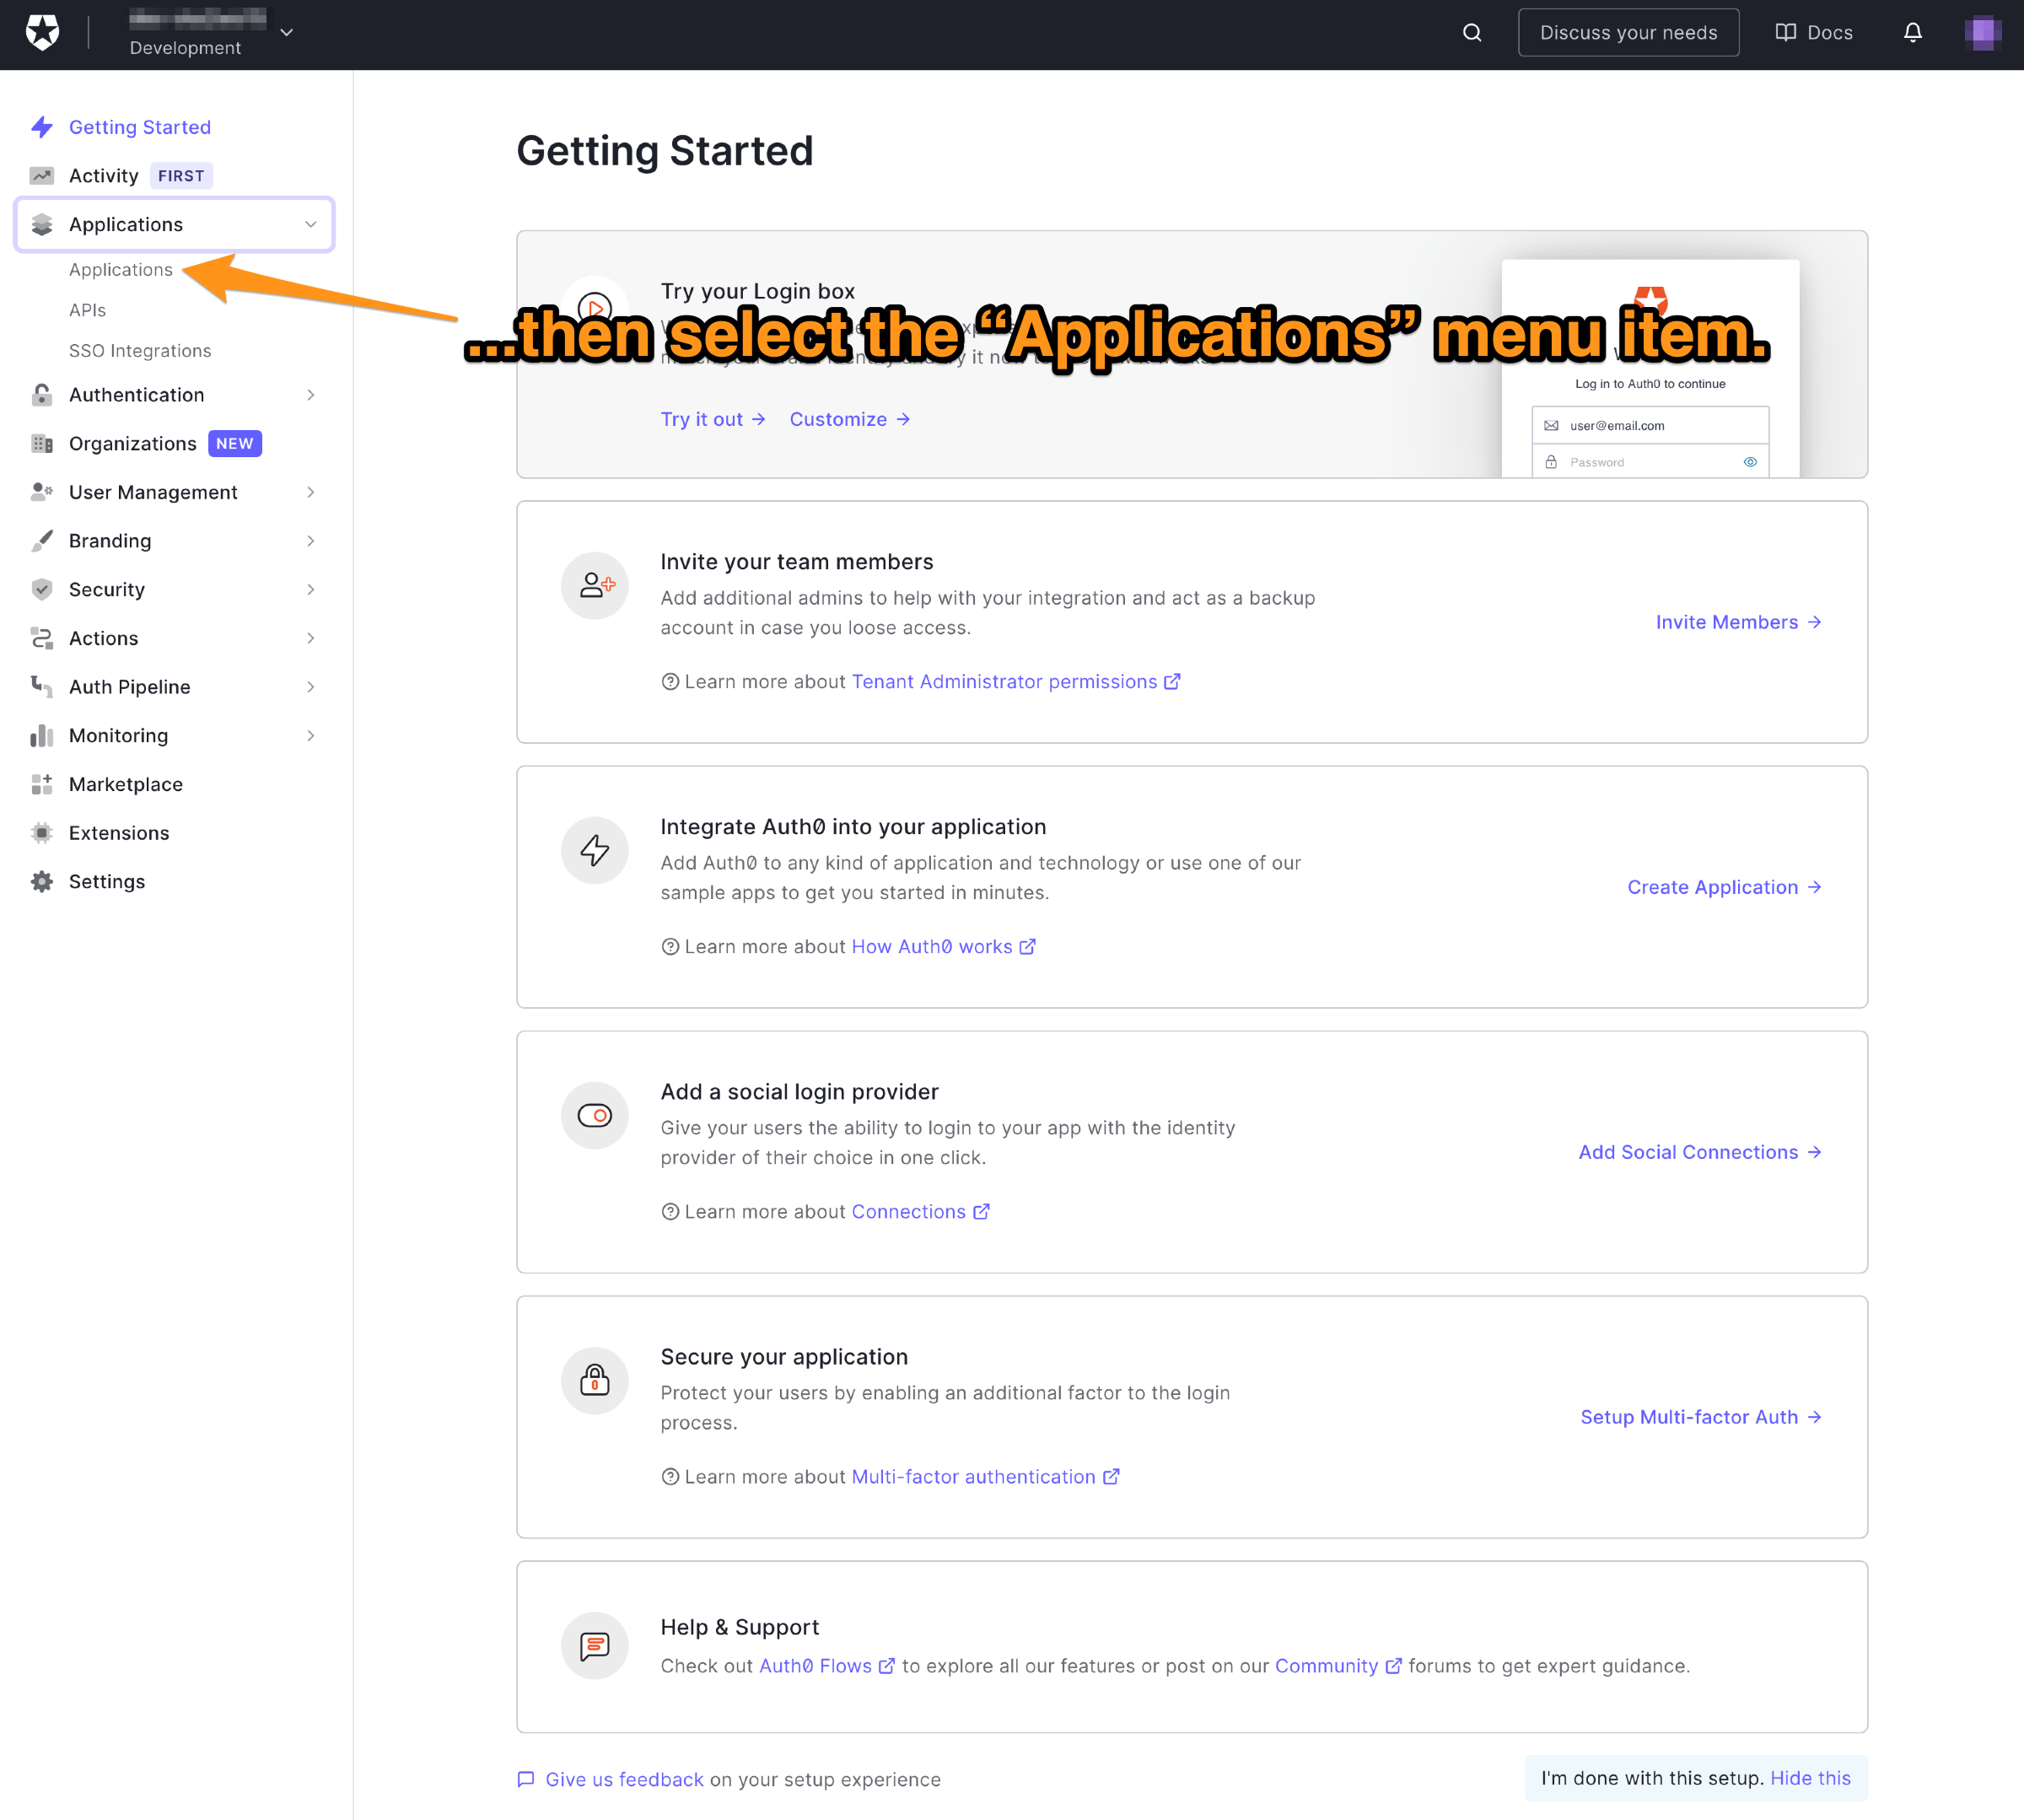
🛠 This will expand the Applications menu. Select the first item in that menu, which also has the name Applications:
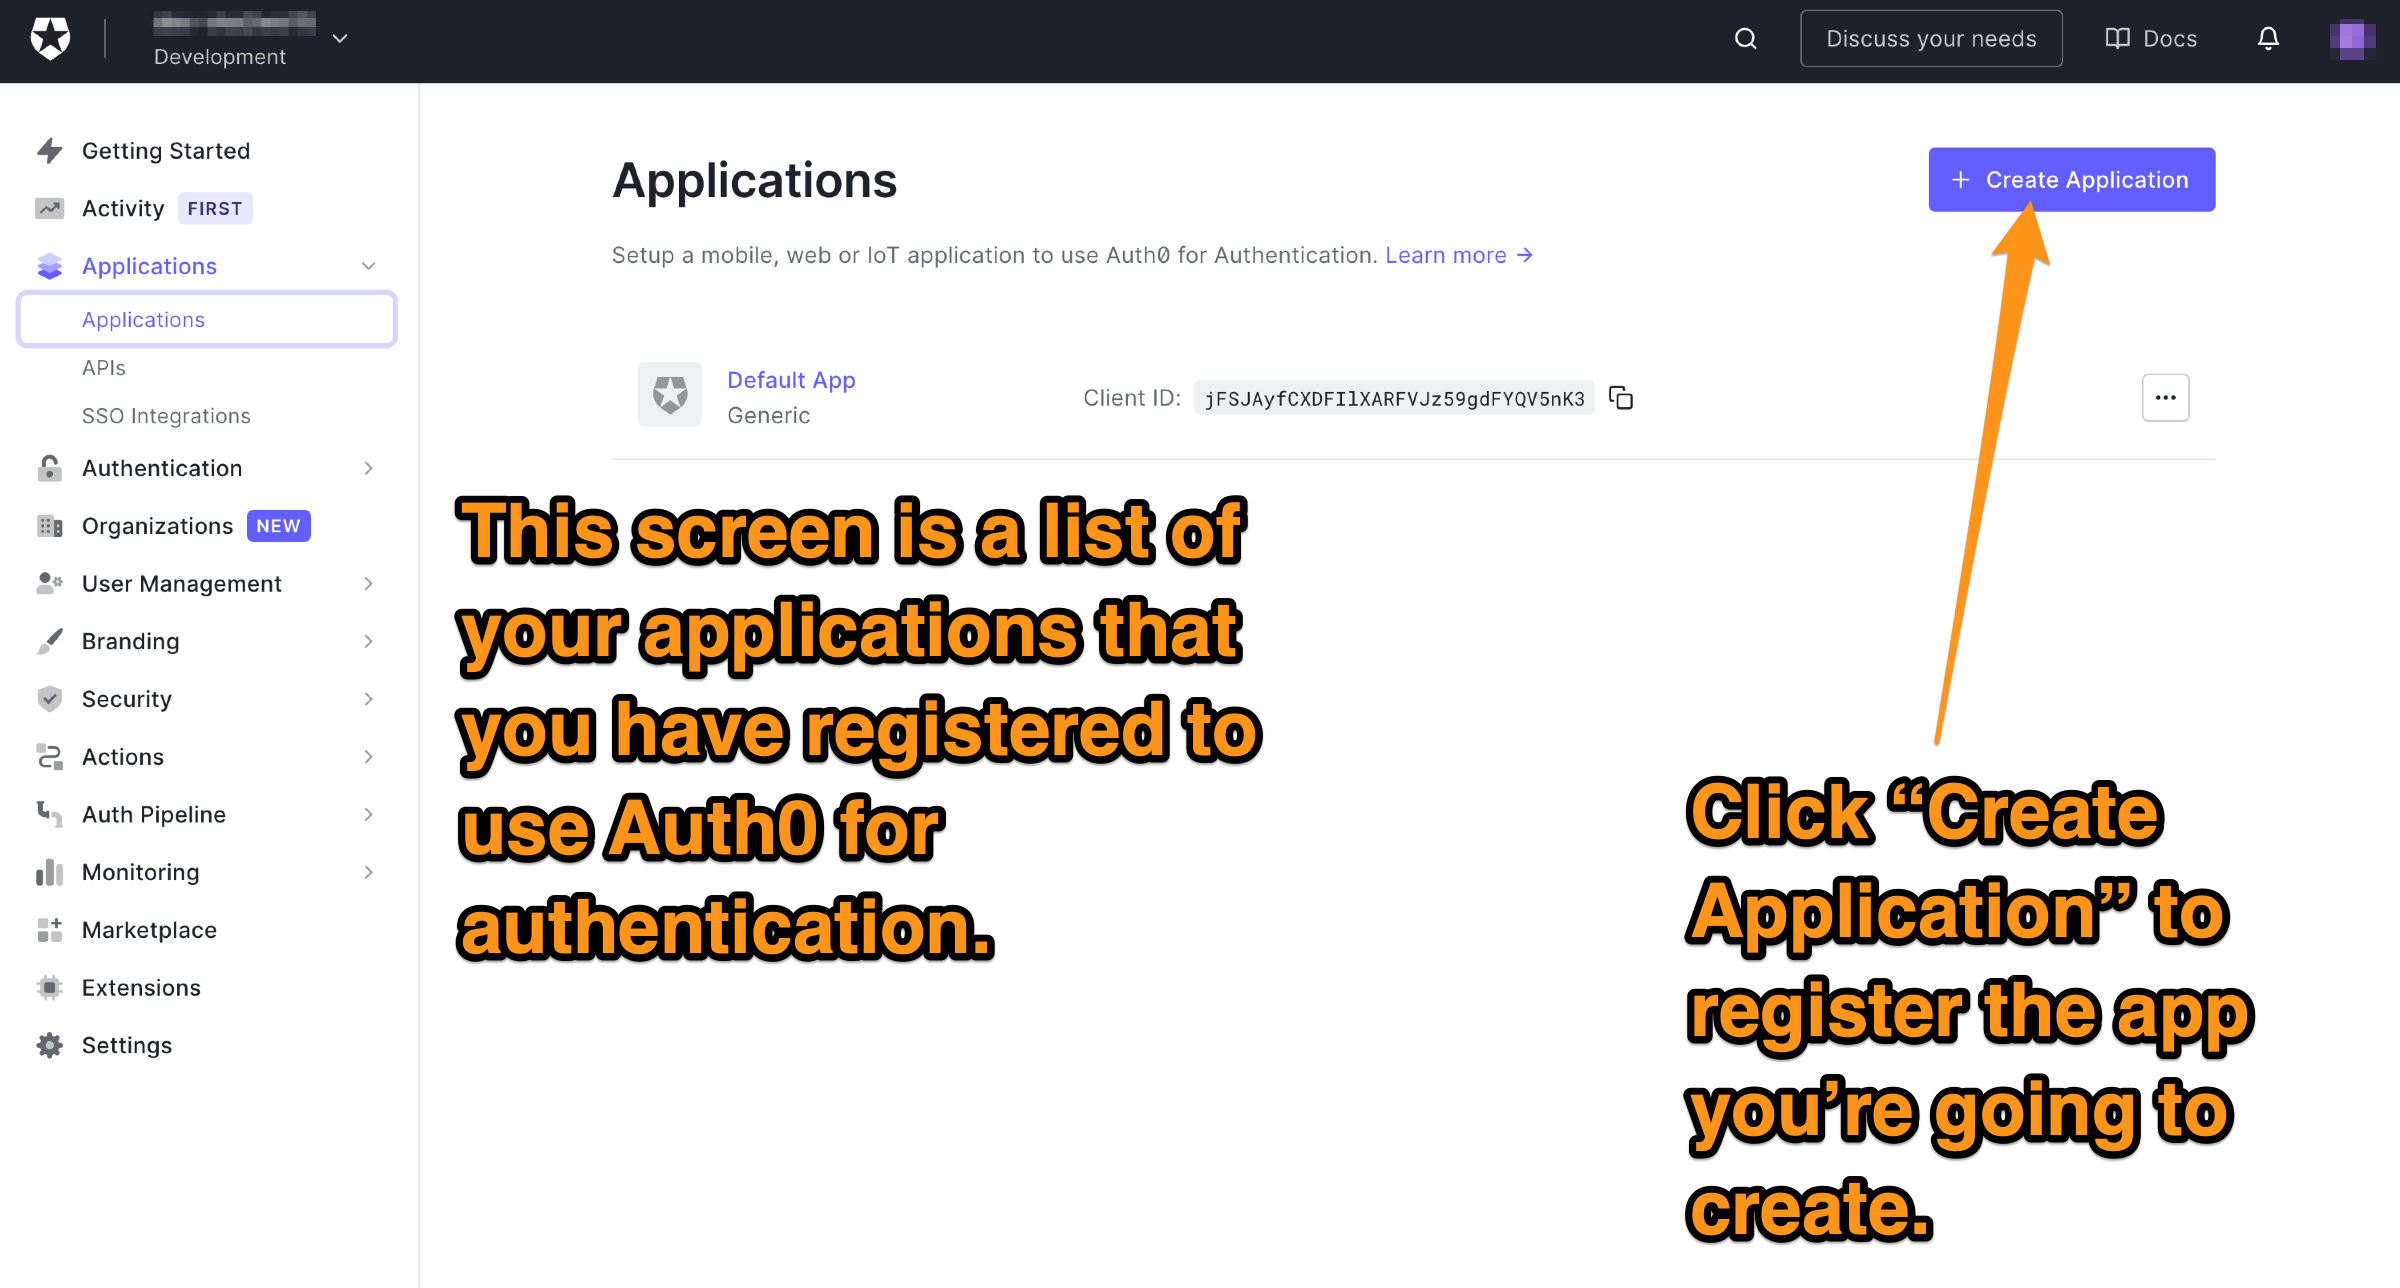
You will now be on the Applications page. It lists all the applications you have registered to use Auth0 for authentication and authorization.
🛠 Register the app. Do this by clicking the Create application button near the top right of the page:
This dialog will appear:
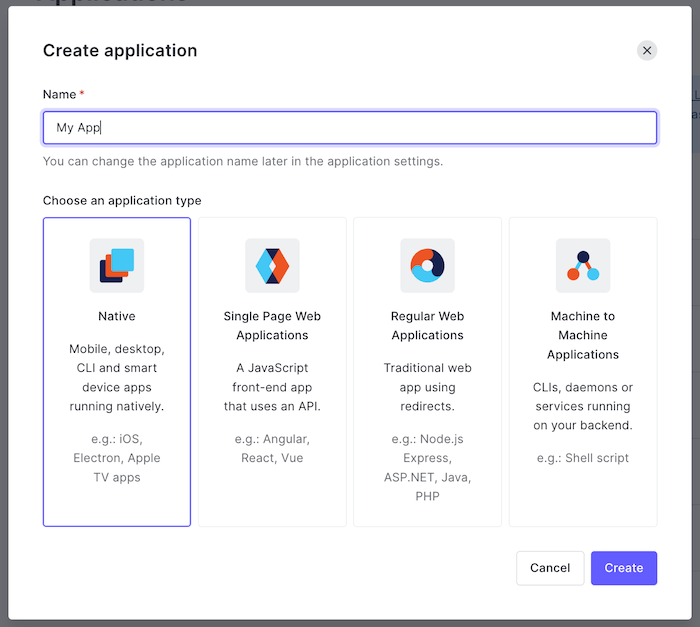
🛠 Do the following to continue:
- Enter a name for the app in the Name field. It might be simplest to use the same name as your Xcode project, iOS SwiftUI Metadata.
- Specify the application type, which in this case is Native.
🛠 Click Create. The Quick Start page for the app will appear. Click the Settings tab:
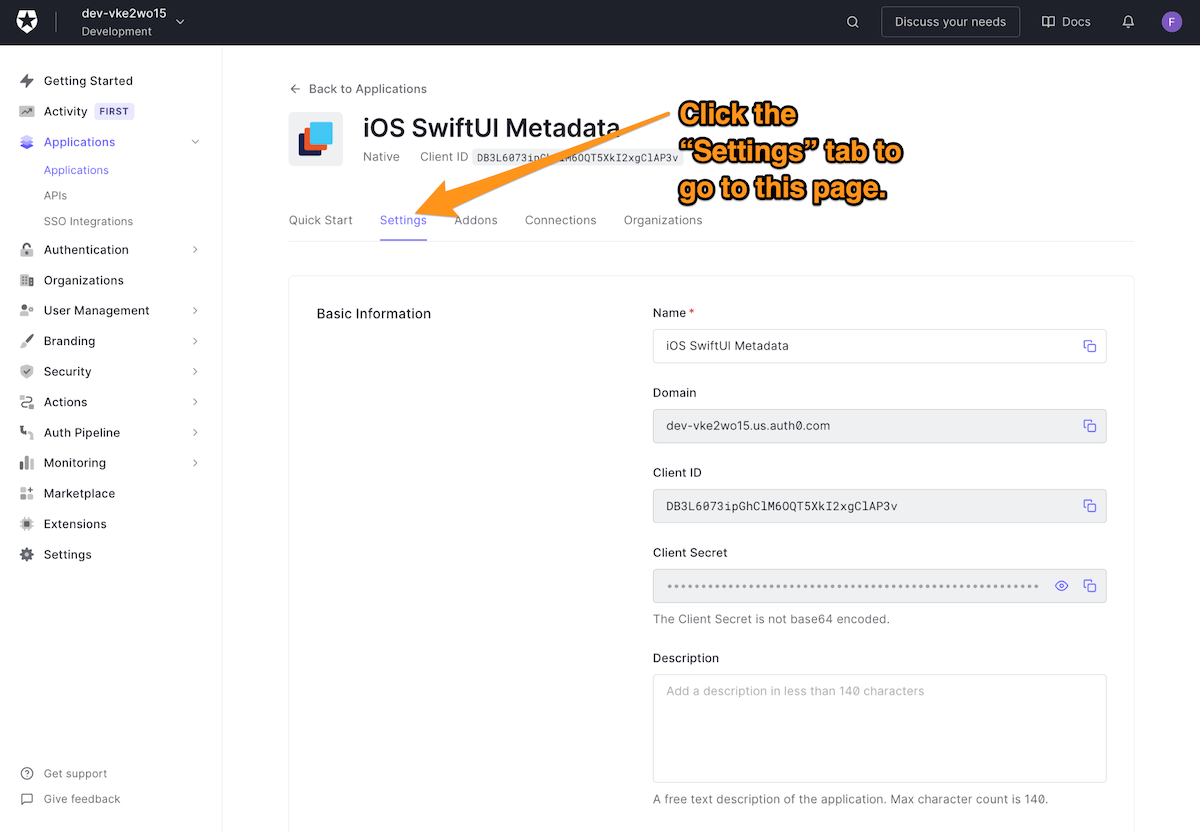
While you’re at the top of the Settings page, do the following:
🛠 Copy the contents of the Domain field.
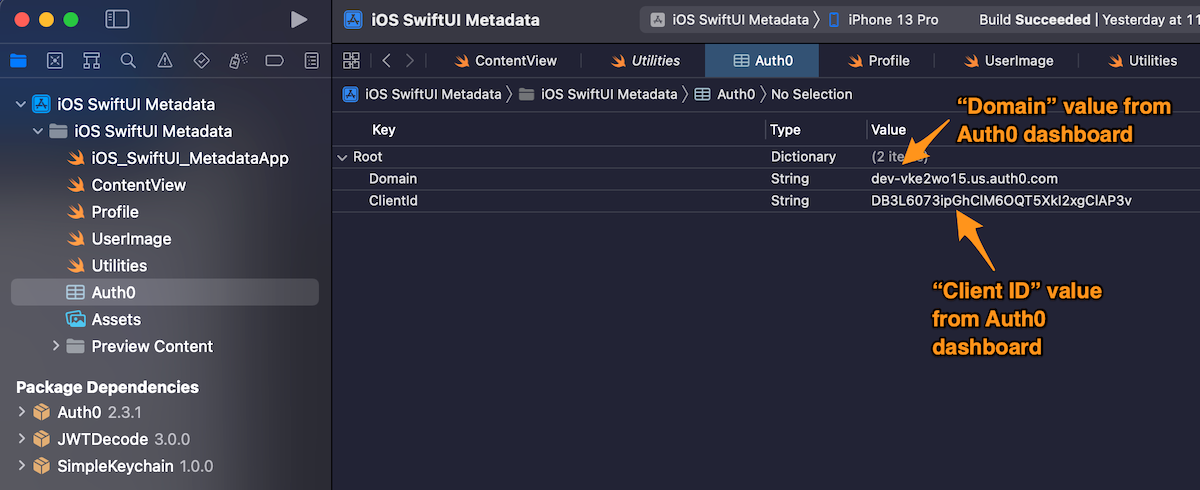
🛠 Switch to Xcode, open the Auth0 property list, and paste the value you just copied into the Value column for the Domain row.
🛠 Switch back to the Settings page and copy the contents of the Client ID field.
🛠 Switch to the Auth0 property list in Xcode and paste the value you just copied into the Value column for the ClientId row.
🛠 Switch back to the Settings page and scroll down to the Application URIs section. You’ll need to construct a URL to paste into the Allowed Callback URLs and Allowed Logout URLs fields.
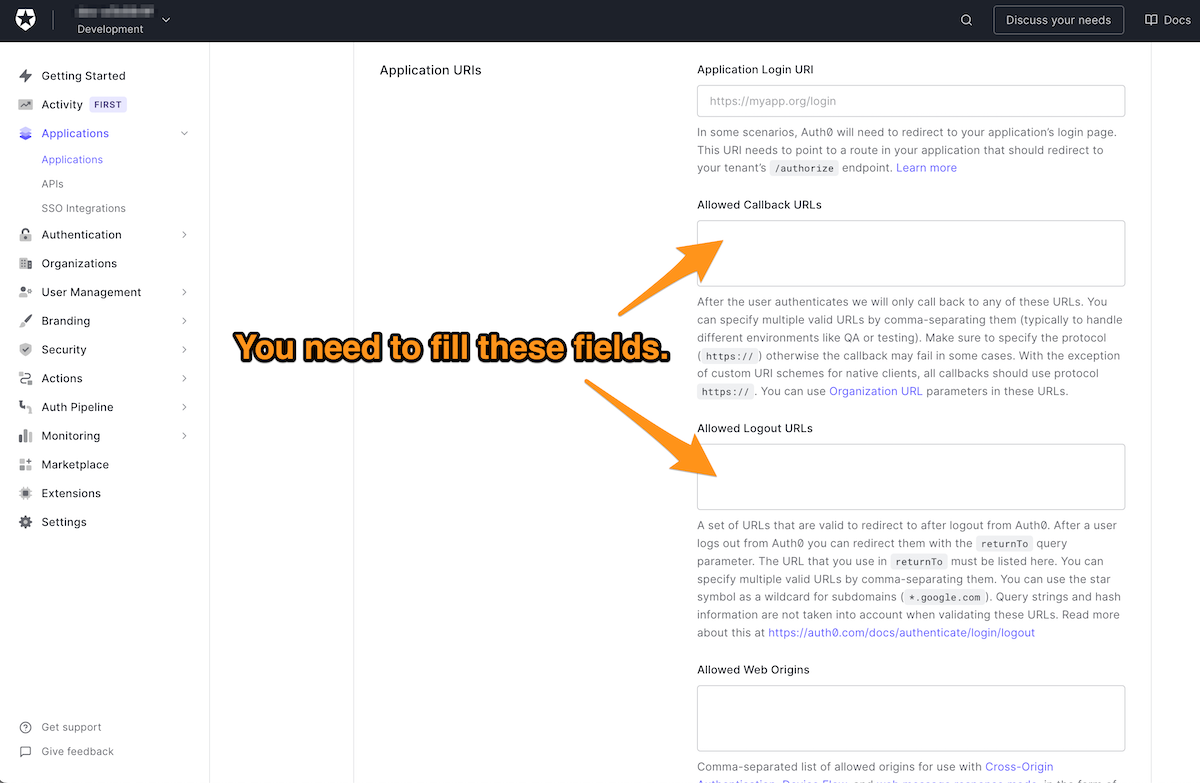
🛠 Start constructing the URL by pasting the following into both the Allowed Callback URLs and Allowed Logout URLs fields:
{BUNDLE_IDENTIFIER}://{YOUR_DOMAIN}/ios/{BUNDLE_IDENTIFIER}/callback
🛠 Replace {BUNDLE_IDENTIFIER} with the app’s bundle identifier in both the Allowed Callback URLs and Allowed Logout URLs fields. If you didn’t change the bundle identifier in the starter project, this value is com.auth0.iOS-SwiftUI-Metadata. Note that {BUNDLE_IDENTIFIER} appears twice in the URL; you’ll need to replace it twice.
🛠 In both the Allowed Callback URLs and Allowed Logout URLs fields, replace {YOUR_DOMAIN} with the value from the Domain field you saw earlier on this page.
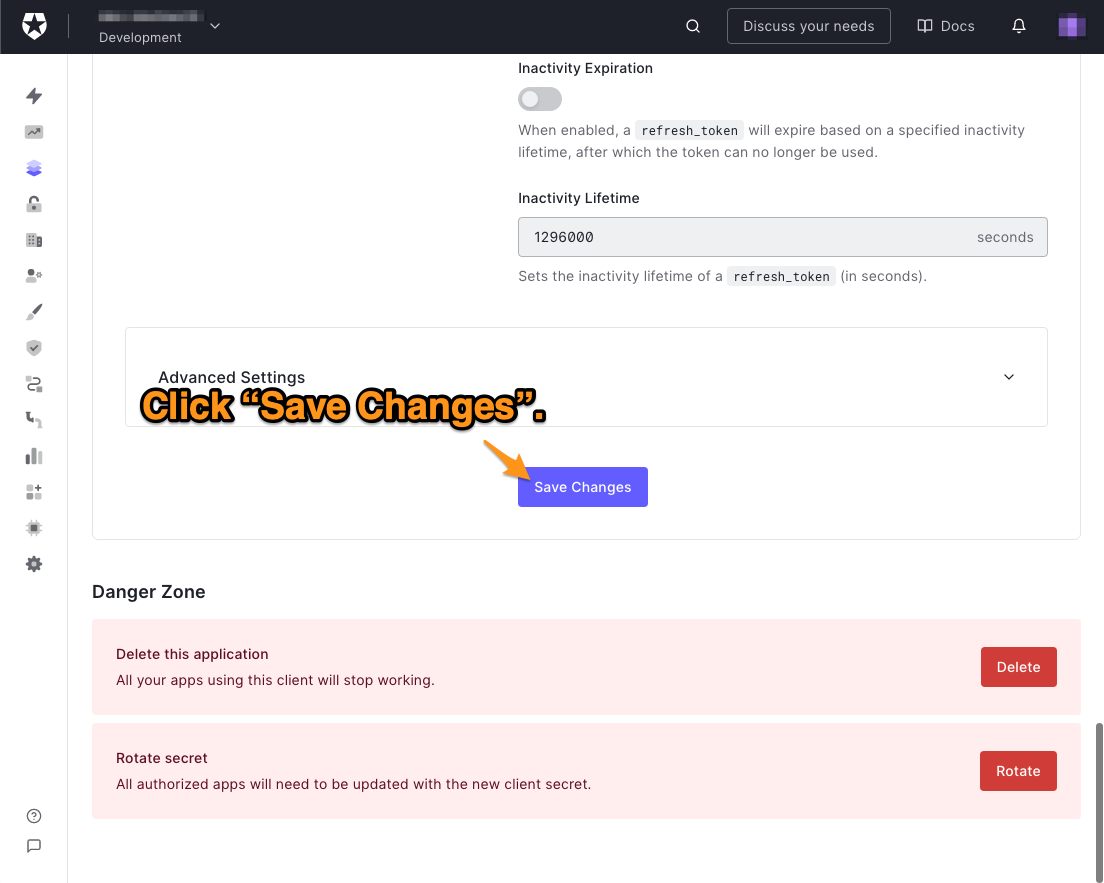
🛠 Scroll down to the bottom of the page and click the Save Changes button:
Create a new user
This exercise works best with a user with specific user and app metadata, so let’s create one.
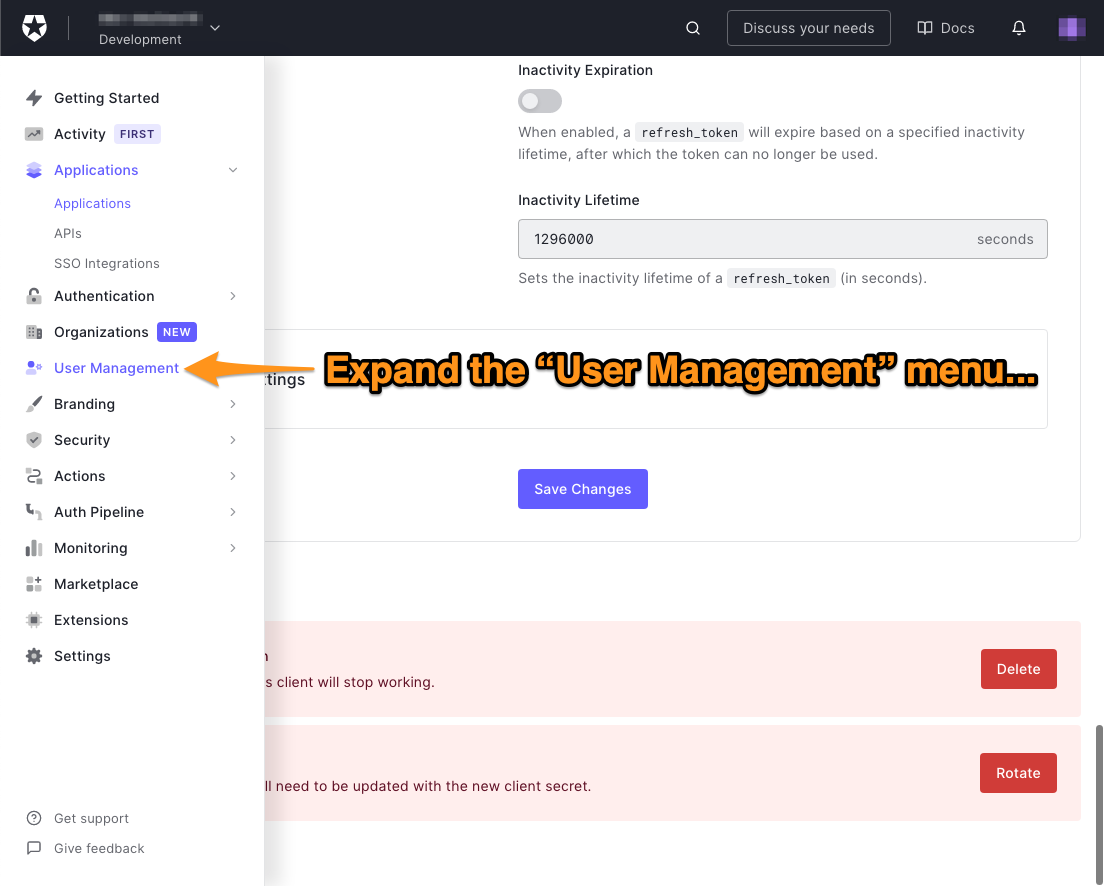
🛠 In the menu on the left side of the Auth0 dashboard, click on User Management:
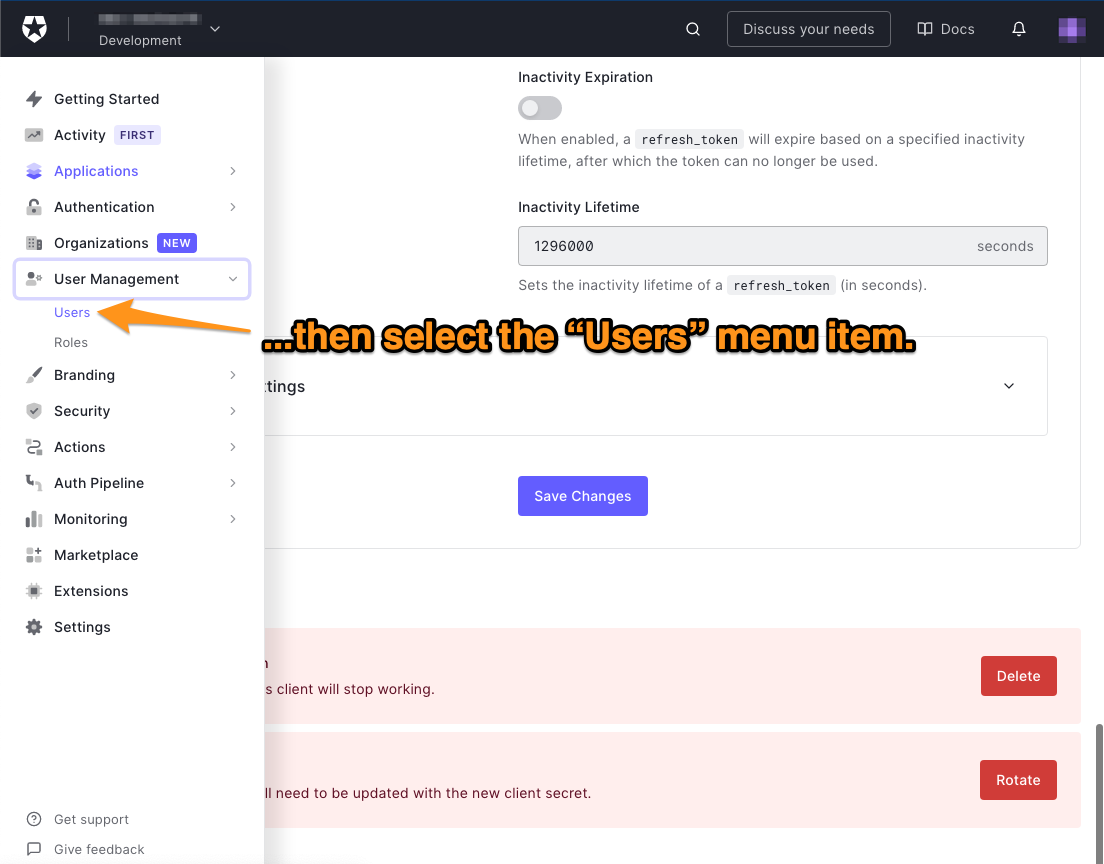
🛠 This will expand the User Management menu. Select the Users item in that menu:
The Users page will appear. It lists all the users registered to your tenant. You’ll see the “You don’t have any users yet” message if there are no users.
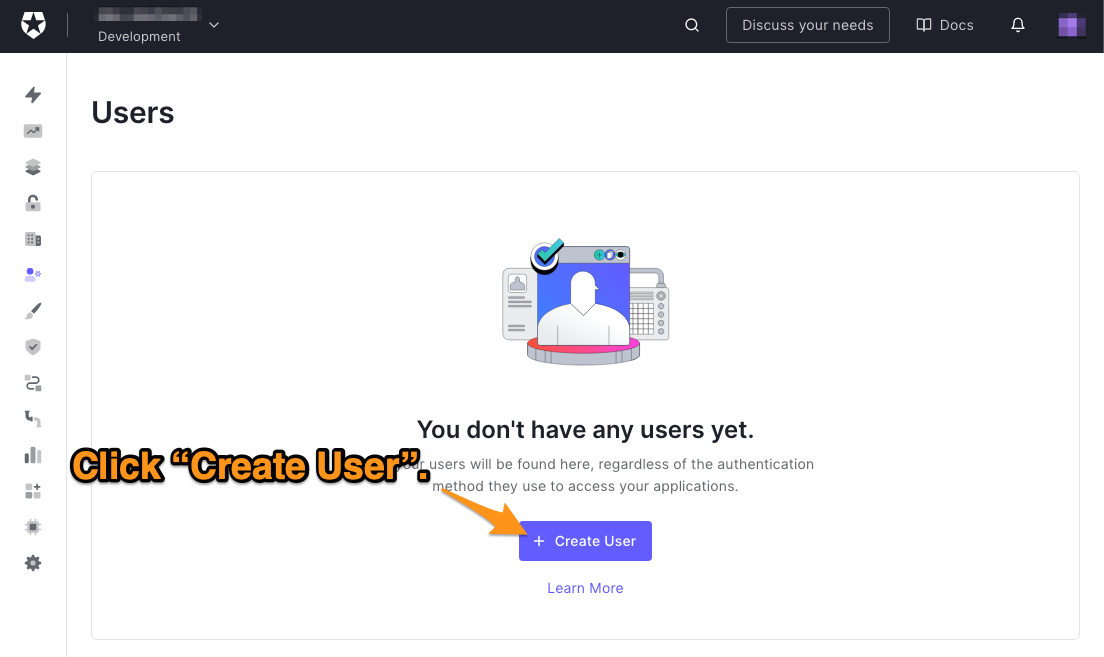
🛠 Click the Create User button to create a new user, which will make this dialog box appear:
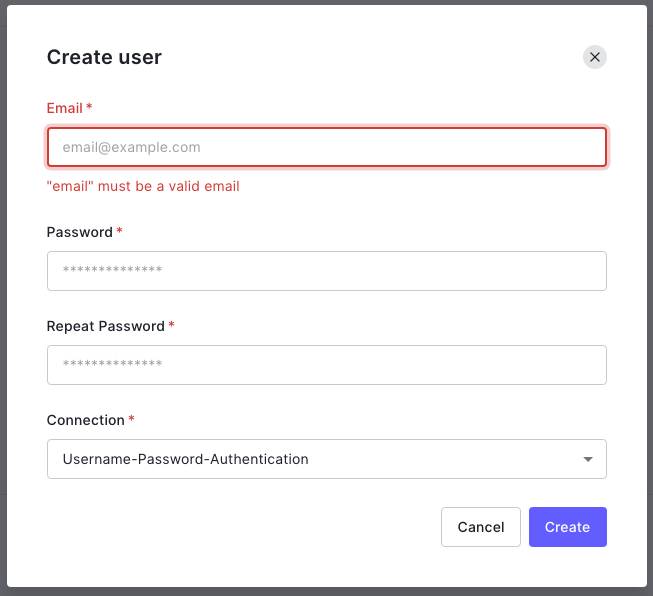
🛠 Enter an email address and password for the user. The only option for the Connection will be Username-Password-Authentication, so leave it as it is. Make a note of that email address and password — you’ll be using them to log in to the app.
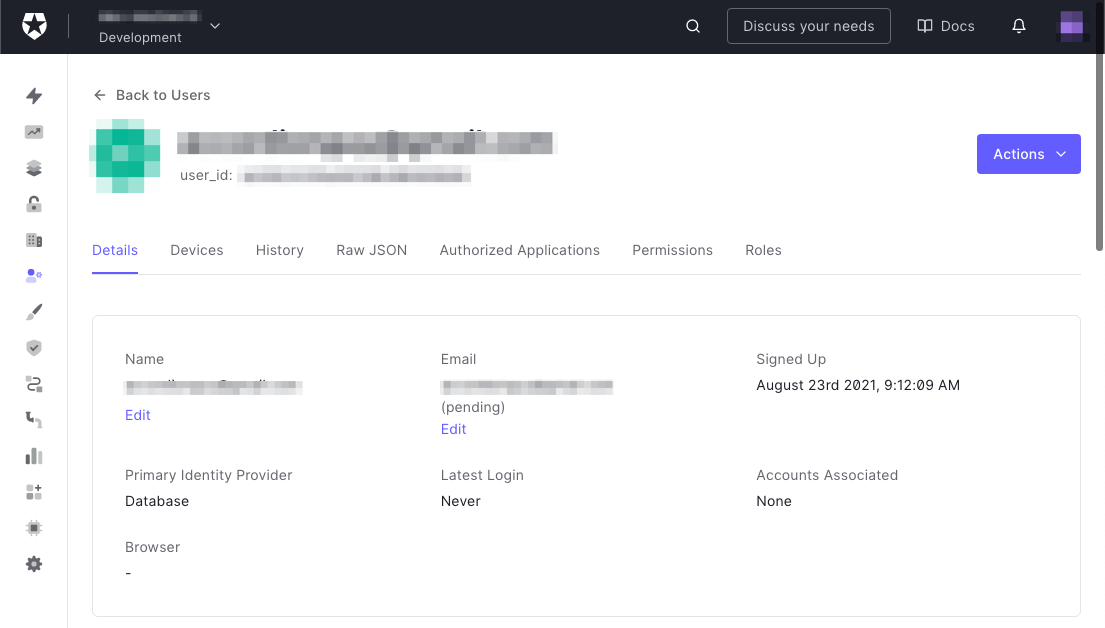
🛠 Click the Create button to create the user. The user’s Details page will appear:
🛠 Scroll down to the Metadata section:
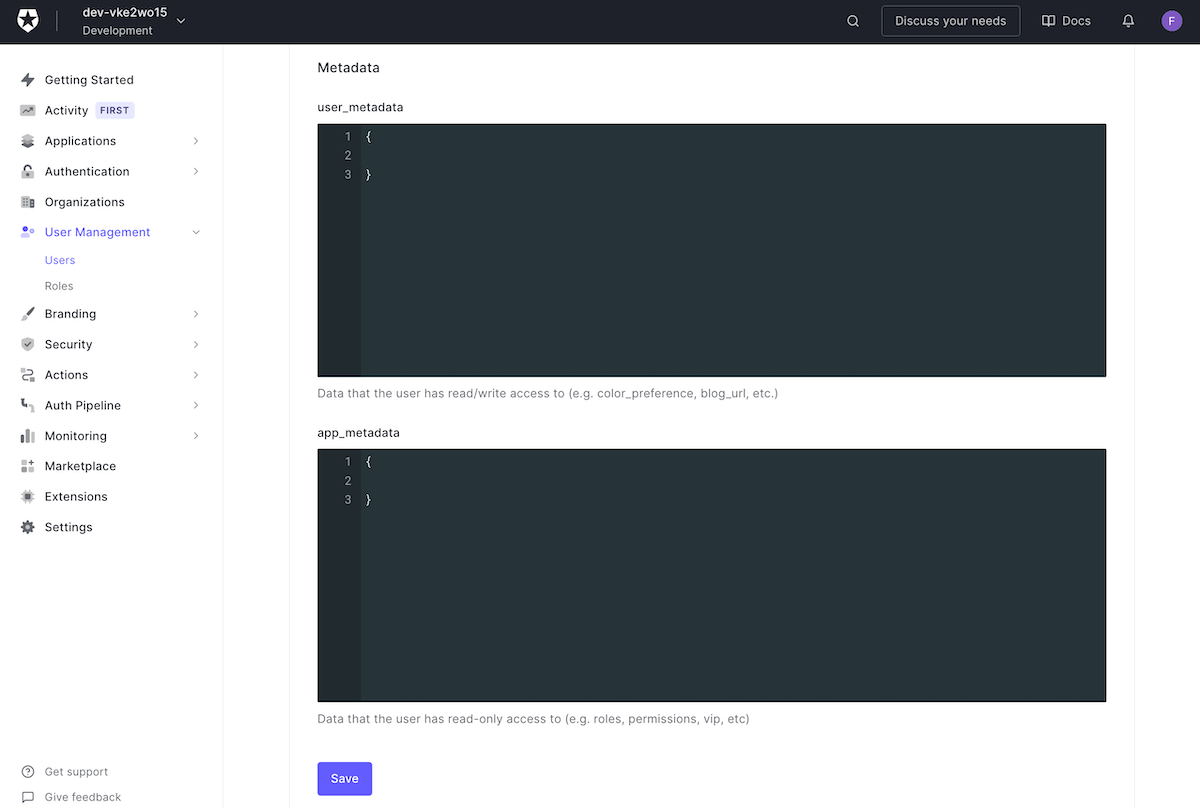
🛠 Paste this JSON into the user_metadata text area:
{
  "personal_affirmation": "Believe in yourself!"
}
You’ll update the app to receive this JSON, extract the personal_affirmation value, and display it in a text field. You’ll also give the app the ability to update this value, and you’ll be able to confirm that the update was successful by checking its value here.
🛠 Paste this JSON into the app_metadata text area:
{
  "display_announcement": true,
  "announcement_text": "Tap here for an important announcement",
  "announcement_url": "https://www.youtube.com/watch?v=DLzxrzFCyOs"
}
You’ll update the app to receive this JSON, extract the display_announcement, announcement_text, and announcement_url values, and use them to display a link with the given text and URL if display_announcement’s value is true. You’ll be able to change the link and whether it appears by altering these values.
🛠 Click the Save button below the appmetadata_ text area to save the metadata you just entered.
Keep the dashboard window or tab open in your browser; you’ll use it to check the user metadata values later.
Run the starter project
🛠 Confirm that the starter project works. Select a simulator or device from the device menu, run the app, and log in.
When logged in, the app should display the following:
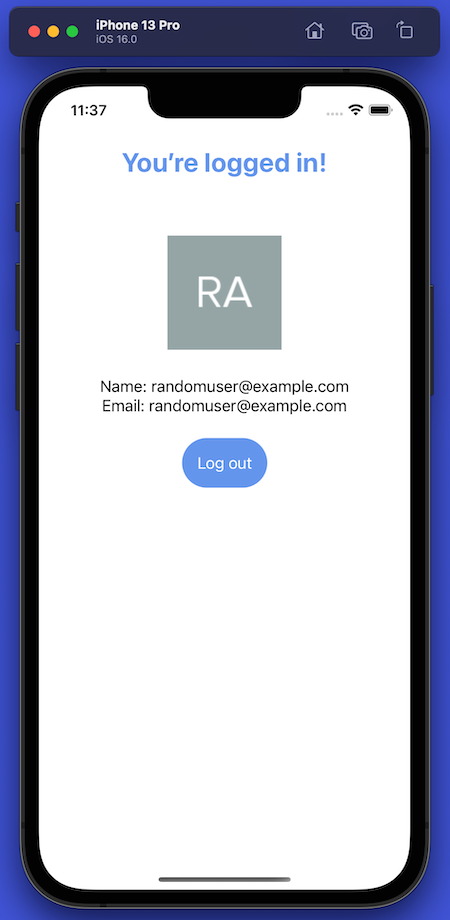
The starter project app simply displays the user’s name, email address, and picture.
Look at the ID Token, Access Token, and scopes
Before you begin updating the starter app to use the user’s metadata, let’s take a quick look at a couple of things you’ll need to access that metadata.
🛠 Update the login() method as shown below:
  private func login() {
    Auth0
      .webAuth()
      .start { result in

        switch result {

          case .failure(let error):
          print("Failed to log in: (error)")

          case .success(let credentials):
            self.isAuthenticated = true
            self.isJustLaunched = false
            self.userProfile = Profile.from(credentials.idToken)
            // New code 👇🏽
            print("ID Token: (credentials.idToken)")
            print("Access Token: (credentials.accessToken)")
            print("Scopes: (credentials.scope!)")
            // New code 👆🏽

        } // switch

      } // start()
  }
🛠 Run the app, log in, and look at Xcode’s output console. The most recent lines will include the following:
ID Token: {a big string of 1000+ characters}
Access Token: {a big string of 400+ characters}
Scopes: openid profile email
When the user successfully logs in, Auth0 returns a Credentials instance containing a number of properties. The print() statements you just added to login() are displaying the values of the three properties that you’ll need to use to access the user’s metadata:
ID Token: This is proof that the user is authenticated. It looks like a string of over a thousand random characters, but it’s really a JSON web token (or JWT for short) that’s been base 64 encoded.
The ID Token has information that identifies the user encoded within it. This includes the user’s name, email address, and the URL for their picture; the starter app displays this information when the user is logged in.
The ID Token also contains a unique identifier for the user, which you’ll use in combination with the Access Token to request the user’s metadata from Auth0.
Access Token: This contains the authorizations for the app to perform specific actions on behalf of the user. These authorizations are in the scope property (see Scopes, below). Like the ID Token, the Access Token looks like a string of random characters but isn’t as long (400+ characters, as opposed to the ID Token’s 1000+).
You’ll use the Access Token with the user’s unique identifier from the ID Token to get the metadata.
You can find out more about ID and Access Tokens in our article, ID Token and Access Token: What's the Difference?
Scopes: These are authorizations specified in the Access Token are defined by the scopes, which define the specific actions that the app can perform on the user’s behalf. The scope property contains scopes granted to the app as a set of space-delimited strings. The scopes currently granted to the app are:
openid: Authorization to use OpenID connect to verify the user’s identity. This scope is required; without it, you can’t use Auth0 to authenticate users.profile: Authorization to access the basic information in the user’s profile. This is most often used to get access to the user’s name.email: Authorization to access the user’s email address.
These are the default scopes granted to the app if it does not explicitly request scopes. To access the metadata from the user’s profile, the app needs to request some additional scopes.
Since scopes are authorizations for the app to do things on the user’s behalf, the app must announce that the user is doing so and ask for the user’s approval. That’s why the Universal Login shows the Authorize App screen when a user is logging into an app for the first time.
If you’re new to authentication (or just need a refresher), scopes and their cousins — permissions and privileges — can be confusing. Luckily, our regular series, The Confused Developer, makes them easy to understand in this article: Permissions, Privileges, and Scopes.
The “Personal Affirmation” Section
It’s time to make the first change to the app and implement the app’s “personal affirmation” section. Since users should be able to access their personal affirmation, it will be stored as user metadata, which the Auth0.swift library can read from and write to.
Update ContentView’s properties
🛠 Update ContentView’s properties, located near its start, as shown below:
// [ 📄 ContentView.swift ]

// [ More code here ]

struct ContentView: View {

  @State private var userProfile = Profile.empty
  // New code 👇🏽👇🏽👇🏽
  @State private var accessToken: String = ""
  @State private var cachedUserMetadata: [String : Any]? = nil
  // New code 👆🏽👆🏽👆🏽

  @State private var isAuthenticated = false
  @State private var isJustLaunched = true
  // New code 👇🏽👇🏽👇🏽
  @State private var personalAffirmation = ""
  // New code 👆🏽👆🏽👆🏽

  var body: some View {

// [ More code here ]
You just added three properties to ContentView:
accessToken: A string containing the user’s Access Token. The app must provide the Access Token and the user’s ID to retrieve or update the user’s metadata,cachedUserMetadata: A dictionary containing the user’s user metadata. You’ll write methods to retrieve and update this metadata shortly.personalAffirmation: The user’s personal affirmation, extracted fromcachedUserMetadata. We’re giving it its own@Statevariable so that its value can be bound to a text field.
Add the “Personal Affirmation” section’s onscreen controls
🛠 Add the code that draws the “personal affirmation” section of the user interface. Do this by updating ContentView’s body property to the following:
// [ 📄 ContentView.swift ]

// [ More code here ]

  var body: some View {

    if isAuthenticated {

      // “Logged in” screen
      // ------------------

      ScrollView {

        VStack {

          Text("You’re logged in!")
            .modifier(TitleStyle())

          VStack {
            UserImage(urlString: userProfile.picture)
            Text("Name: (userProfile.name)")
            Text("Email: (userProfile.email)")
          }
          .padding()

          // New code 👇🏽👇🏽👇🏽
          VStack { // Affirmation section

            // Affirmation label and text field
            Text("Your personal affirmation:")
            TextField("Your affirmation here", text: $personalAffirmation)
              .modifier(TextFieldStyle())

            HStack { // Affirmation button row
              Spacer()
              Button("Refresh affirmation") {
                getMetadata()
              }
              Spacer()
              Button("Save affirmation") {
                updateUserMetadata()
              }
              Spacer()
            } // HStack - Affirmation button row

          } // VStack - Affirmation section
          // New code 👆🏽👆🏽👆🏽

          Button("Log out") {
            logout()
          }
          .buttonStyle(BigButtonStyle())

        } // VStack

      } // ScrollView

    } else {

// [ More code here ]
The code you just entered adds a VStack to the app’s view containing the following:
- A text field that displays the user’s personal affirmation and a label for the text field
- A Refresh affirmation button that gets the latest version of the user’s user metadata when pressed
- A Save affirmation button that writes the text in the text field as the value for the user’s personal affirmation to their user metadata
Update the login() method
🛠 Make updates to ContentView’s login() method as shown below:
// [ 📄 ContentView.swift ]

// [ More code here ]

  private func login() {
    // New code 1 👇🏽👇🏽👇🏽
    guard let domain = auth0Plist()?["Domain"]
    else {
      return
    }
    // New code 1 👆🏽👆🏽👆🏽

    Auth0
      .webAuth()
      // New code 2 👇🏽👇🏽👇🏽
      .audience("https://(domain)/api/v2/")
      .scope("openid profile email read:current_user update:current_user_metadata")
      // New code 2 👆🏽👆🏽👆🏽
      .start { result in

        switch result {

          case .failure(let error):
          print("Failed to log in: (error)")

          case .success(let credentials):
            self.isAuthenticated = true
            self.isJustLaunched = false
            self.userProfile = Profile.from(credentials.idToken)
            // New code 3 👇🏽👇🏽👇🏽
            self.accessToken = credentials.accessToken
            self.getMetadata()
            // New code 3 👆🏽👆🏽👆🏽

            print("ID Token: (credentials.idToken)")
            print("Access Token: (credentials.accessToken)")
            print("Scopes: (credentials.scope!)")

        } // switch

      } // start()
  }

// [ More code here ]
You’ve added new code to the login() method in three different places. Let’s look at them in order:
- New code 1: This attempts to retrieve your tenant’s domain from the
Auth0property list. If successful, thelogin()method will continue to execute; otherwise, the app exits thelogin()method. We need the domain to specify the URL for the Auth0 Management API, which we use to access the user’s metadata. - New code 2: To work with the user’s user metadata, the app needs the authorization to access the Auth0 Management API. The two method calls that you added to the
WebAuthprotocol’s authorization chain do this:- The
audience()method call specifies the API that the app will call using the Access Token. Its argument is the URL for the Auth0 Management API for your app’s tenant. - The
scope()method call specifies the scopes that the app is requesting. In addition to the three default scopes, it has added these two:read:current_user: Authorization to read the user’s user and app metadataupdate:current_user_metadata: Authorization to update the user’s user metadata
- The
- New code 3: This code copies
credentials’accessTokenproperty toContentView’saccessTokenproperty, making it accessible throughoutContentView. It then calls thegetMetadata()method, which you’ll add in the next step.
Add a method to get the user’s metadata
🛠 Add a new method — getMetadata() — to ContentView just after the login() method and before the logout() method:
// [ 📄 ContentView.swift ]

// [ More code here ]

  func getMetadata() {
    // 1
    if accessToken == "" {
      return
    }

    // 2
    Auth0
      .users(token: accessToken)
      .get(userProfile.id, fields: ["user_metadata", "app_metadata"])
      .start { result in

        switch result {

          // 3
          case .failure(let error):
            print("Error: Couldn’t retrieve metadata.\n(error.localizedDescription)")

          // 4
          case .success(let metadata):
            // Get user metadata
            let userMetadata = metadata["user_metadata"] as? [String: Any]
            self.cachedUserMetadata = userMetadata
            self.personalAffirmation = cachedUserMetadata?["personal_affirmation"] as? String ?? ""

        } // switch

      } // start()
  }

// [ More code here ]
The annotations below correspond to the numbered comments in the code above:
getMetadata()confirms that there is an Access Token inContentView’saccessTokenproperty before continuing.- This code initiates the request to read the user’s metadata by calling the following methods in a chain:
users()calls the Auth0 Management API using the Access Token.get()provides the user’s unique identifier and specifies the user information we want to access: the user’s user metadata and app metadata.start()initiates the process of retrieving the metadata. As its final argument, it takes a closure that handles the success and failure cases for the metadata retrieval.
- The app simply prints an error message to the debug console if it cannot retrieve the metadata.
- If the app successfully retrieves the user metadata, it assigns the complete set of user metadata to
ContentView’scachedUserMetadataproperty. It also assigns the value for thepersonal_affirmationkey toContentView’spersonalAffirmationproperty. This updates the contents of the “personal affirmation” text field since it’s bound to that property.
Add a method to update the user’s metadata
When the user presses the Save affirmation button, the app should update the user’s user metadata with the contents of the “personal affirmation” text field. This method will do that.
🛠 Add another method — updateUserMetadata() — to ContentView just after the getMetadata() method and before the logout() method:
// [ 📄 ContentView.swift ]

// [ More code here ]

  func updateUserMetadata() {
    // 1
    if accessToken == "" {
      return
    }

    // 2
    let updatedPersonalAffirmation = personalAffirmation.trimmingCharacters(in: .whitespacesAndNewlines)

    // 3
    Auth0
      .users(token: accessToken)
      .patch(userProfile.id, userMetadata: ["personal_affirmation": updatedPersonalAffirmation])
      .start { result in

        switch result {

          // 4
          case .failure(let error):
            print("Error: Couldn’t update 'personal_affirmation' in the user metadata.\n(error.localizedDescription)")

          // 5
          case .success(let updatedUserMetadata):
            self.cachedUserMetadata = updatedUserMetadata

          } // switch

        } // start()
  }

// [ More code here ]
The annotations below correspond to the numbered comments in the code above:
updateUserMetadata()confirms that there is an Access Token inContentView’saccessTokenproperty before continuing.- Before updating the user’s user metadata with the contents of the “personal affirmation” text field, we create a copy of those contents, stripped of any leading and trailing whitespace.
- This code initiates the request to update the user’s user metadata by calling the following methods in a chain:
users()calls the Auth0 Management API using the Access Token.patch()provides the user’s unique identifier and specifies the keys and values of the user’s user metadata to be updated.start()initiates the process of updating the metadata. As its final argument, it takes a closure that handles the success and failure cases for the user metadata update.
- If the app can’t update the metadata, it simply prints an error message to the debug console.
- If the app successfully updates the user metadata, it receives the updated user metadata from Auth0, which it then copies to
ContentView’scachedUserMetadataproperty.
Try the “personal affirmation” section
🛠 Run the app and log in as the user you created earlier in this exercise.
You’ll see that the app now has a “personal affirmation” section, and the text field contains the value corresponding to the personal_affirmation key that you entered into the user’s user metadata for the user.
🛠 Change the personal affirmation to something different (e.g. “BELIEVE” or “You’ve got this!!!”) and press the Save affirmation button.
🛠 Confirm that the app saved the new affirmation in two different ways:
- Clear the text field and press the Refresh affirmation button. Your newly-entered affirmation should reappear.
- Switch to the Auth0 dashboard and look at the user’s user_metadata section. You should see your newly-entered affirmation in the user metadata JSON.
The “Announcement” Link
Now that you’ve implemented the app’s “personal affirmation” section, it’s time to add the “announcement” link. The app only shows announcements when necessary, and the app vendors determine this. This decision is based on user information that the user should not be able to see or change, and therefore that information will be stored as app metadata. The Auth0.swift library can read from the user’s app metadata but can’t write to it.
Update ContentView’s properties
🛠 Update ContentView’s properties, located near its start, as shown below:
// [ 📄 ContentView.swift ]

// [ More code here ]

  @State private var userProfile = Profile.empty
  @State private var accessToken: String = ""
  @State private var cachedUserMetadata: [String : Any]? = nil

  @State private var isAuthenticated = false
  @State private var isJustLaunched = true
  @State private var personalAffirmation = ""
  // New code 👇🏽👇🏽👇🏽
  @State private var shouldDisplayAnnouncement = false
  @State private var announcement = ""
  @State private var announcementUrl = URL(string: "about:blank")
  // New code 👆🏽👆🏽👆🏽

// [ More code here ]
You just added three more properties to ContentView. They’re all for the “announcement” link, and they’re all extracted from the user’s app metadata:
shouldDisplayAnnouncement: A boolean that determines if the “announcement” link should be displayed.announcement: The text of the link.announcementUrl: The URL for the link.
Add the “Announcement” link’s onscreen controls
🛠 Add the code that draws the “announcement” link by updating ContentView’s body property to the following:
// [ 📄 ContentView.swift ]

// [ More code here ]

         VStack { // Affirmation section

            // Affirmation label and text field
            Text("Your personal affirmation:")
            TextField("Your affirmation here", text: $personalAffirmation)
              .modifier(TextFieldStyle())

            HStack { // Affirmation button row
              Spacer()
              Button("Refresh affirmation") {
                getMetadata()
              }
              Spacer()
              Button("Save affirmation") {
                updateUserMetadata()
              }
              Spacer()
            } // HStack - Affirmation button row

          } // VStack - Affirmation section

          // New code 👇🏽👇🏽👇🏽
          // Announcement
          if shouldDisplayAnnouncement {
            VStack {
              Spacer()
              Link(
                announcement,
                destination: announcementUrl!)
              .modifier(AnnouncementStyle())
            }
          }
          // New code 👆🏽👆🏽👆🏽

          Button("Log out") {
            logout()
          }
          .buttonStyle(BigButtonStyle())

        } // VStack

      } // ScrollView

    } else {

// [ More code here ]
The code you just entered adds an if to the app’s view containing the following:
- A
VStackthat is displayed only if theshouldDisplayAnnouncementproperty’s value istrue. - A link whose text is determined by the
announcementproperty that links to the URL whose value is contained in theannouncementUrlproperty.
Update the getMetadata() method
🛠 Add a section to ContentView’s getMetadata() method as shown below:
// [ 📄 ContentView.swift ]

// [ More code here ]

  func getMetadata() {
    if accessToken == "" {
      return
    }

    Auth0
      .users(token: accessToken)
      .get(userProfile.id, fields: ["user_metadata", "app_metadata"])
      .start { result in

        switch result {

          case .failure(let error):
            print("Error: Couldn’t retrieve metadata.\n(error.localizedDescription)")

          case .success(let metadata):
            // Get user metadata
            let userMetadata = metadata["user_metadata"] as? [String: Any]
            self.cachedUserMetadata = userMetadata
            self.personalAffirmation = cachedUserMetadata?["personal_affirmation"] as? String ?? ""

            // New code 👇🏽👇🏽👇🏽
            // Get app metadata
            let appMetadata = metadata["app_metadata"] as? [String: Any]

            let announcementFlag = appMetadata?["display_announcement"] as? Bool ?? false
            self.announcement = appMetadata?["announcement_text"] as? String ?? ""
            let announcementUrlString = appMetadata?["announcement_url"] as? String ?? ""
            self.announcementUrl = URL(string: announcementUrlString)

            self.shouldDisplayAnnouncement = announcementFlag &&
                                             announcement != "" &&
                                             announcementUrlString != ""
            // New code 👆🏽👆🏽👆🏽

        } // switch

      } // start()
  }

// [ More code here ]
The newly-added code converts the app metadata received from Auth0 into a dictionary, just as the preceding line did to the user metadata. It then uses the contents of that dictionary to set the values of ContentView’s shouldDisplayAnnouncement, announcement, and announcementUrl properties.
Try the “announcement” link
🛠 Run the app and log in as the user you created earlier in this exercise.
You’ll see that the app now has a Tap here for an important announcement link.
🛠 Tap the link to confirm that it takes you to a special YouTube announcement by one Mr. Rick Astley. I’ll leave determining the importance of the message as an exercise for the reader.
🛠 Switch to the user’s User page on the Auth0 dashboard. Scroll to the app_metadata section and change the value of display_announcement to false. Log out, log in again, then confirm that the “announcement” link no longer appears.
Conclusion
Congratulations! You’ve completed the exercise, taking a basic SwiftUI-based iOS app that uses Auth0 authentication and added support for user metadata.
What you did
You used two WebAuth protocol methods: the audience() method to specify that you wanted to use the Auth0 Management API, and the scope() method to request not just the default authorizations for logging in, but also the authorizations to read the user’s user metadata and app metadata and to update the user’s user metadata.
You extracted the Access Token from the credentials that Auth0 returns when the user successfully logs in. With the user’s unique ID, you used that token to gain the authorization to access the metadata associated with the user’s profile.
You used the user’s user metadata to give them the ability to set and update a user preference: their personal affirmation, which is displayed whenever they’re logged in. You also used the user’s app metadata to determine if the user should see an “announcement” link, as well as what that link says, and where it should point.
Get the starter and complete projects
You can find the starter and completed projects in the ios-swiftui-metadata repository on the Auth0 Blog Samples GitHub account.
Experiment!
- Go to the user’s profile page in the Auth0 dashboard and change the values of
announcement_textandannouncement_urlin the app_metadata section. - Play with the scopes provided to the
scope()method call in thelogin()method. What functionality goes missing when you change the argument to"openid profile email read:current_user", or the default value of"openid profile email"? - Think of other ways to use metadata: to allow the user to choose the app’s color scheme, typeface or font size? To determine if this is the first time the user has run the app since installing it? To determine if this is a free or paid user?
Do some additional reading
For more about metadata, see Understand How Metadata Works in User Profiles in the Auth0 documentation.
About the author

Joey deVilla
Senior Developer Advocate (Auth0 Alumni)