
Look for the 🛠️️ emoji if you'd like to skim through the content while focusing on the build steps.
This tutorial demonstrates how to secure a Node.js web application built with the Express framework by implementing user authentication. You'll enhance a starter Node.js project to practice the following security concepts:
- Add user login and logout.
- Retrieve user information.
- Protect application routes.
- Call protected endpoints from an API.
This guide uses the Auth0 Express OpenID Connect library to secure Express web applications. This library provides Node.js developers with an alternative to Passport.js. Express OpenID Connect lets you add user authentication to Express applications using security best practices while writing less code.
⚠️ If you still need to use Passport.js to secure your Express application, please refer to the Node.js and Express Authentication Using Passport tutorial.
How does Auth0 work?
With the help of Auth0, you don't need to be an expert on identity protocols, such as OAuth 2.0 or OpenID Connect, to understand how to secure your web application stack. You first integrate your application with Auth0. Your application will then redirect users to an Auth0 customizable login page when they need to log in. Once your users log in successfully, Auth0 takes them back to your app, returning JSON Web Tokens (JWTs) with their authentication and user information.
⏰⚡️ If you are short of time, check out the Auth0 Express Quickstart to get up and running with user authentication for Express in just a few minutes.
Get the Starter Application
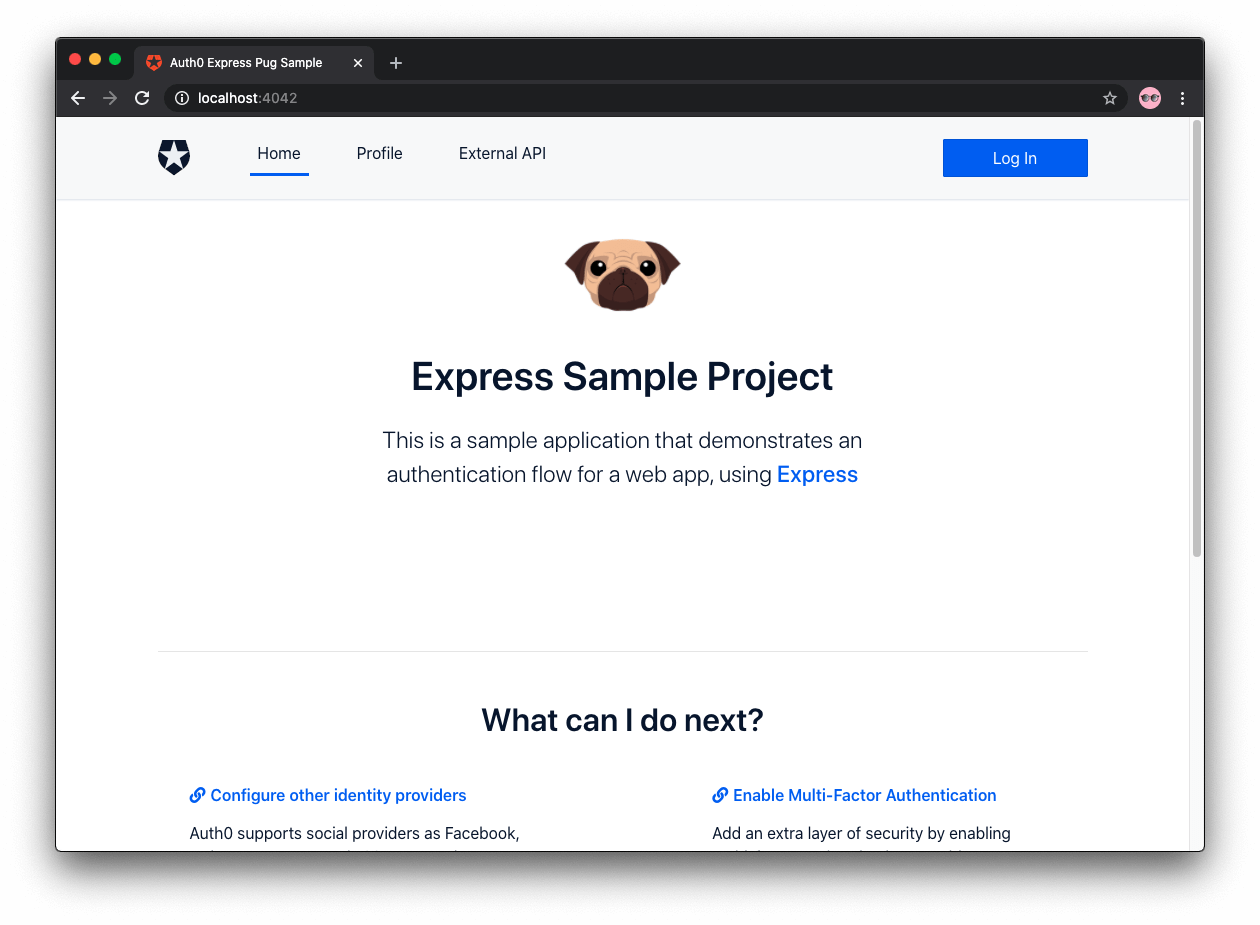
We have created a starter project to help you learn Node.js security concepts through hands-on practice. The starter application uses Bootstrap with a custom theme to take care of the styling and layout of your application. You can focus on building Express components to secure your application.
🛠 As such, clone the auth0-express-pug-sample repository on its starter branch to get started:
git clone -b starter git@github.com:auth0-blog/auth0-express-pug-sample.git
🛠 Once you clone the repo, make auth0-express-pug-sample your current directory:
cd auth0-express-pug-sample
🛠 Install the Node.js project dependencies:
npm install
🛠 Create a .env file under the project directory:
touch .env
🛠 Populate .env as follows:
DEV_PORT=4041
PROD_PORT=4040
To streamline your Node.js development workflow, this project uses nodemon to restart the server and browser-sync to reload the browser whenever relevant source files change.
🛠 Execute the following command to run the Node.js server:
npm run dev
You can emulate the live reload behavior of front-end frameworks such as React and Angular in Express templates using Browsersync. The browser will refresh automatically whenever the source code changes: for example, when you modify a CSS rule or change the return value of a function.
🛠 Open a separate terminal window and execute the following command to serve the user interface of your Express app:
npm run ui
Browsersync automatically opens a new window presenting your application user interface. If it didn't, open http://localhost:4040/.
Connect Express with Auth0
The best part of the Auth0 platform is how streamlined it is to get started by following these steps:
Sign up and create an Auth0 Application
If you haven't already,
sign up for a free Auth0 account →A free account offers you:
- 7,000 free active users and unlimited logins.
- Auth0 Universal Login for Web, iOS & Android.
- Up to 2 social identity providers like Google, GitHub, and Twitter.
- Unlimited Serverless Rules to customize and extend Auth0's capabilities.
During the sign-up process, you create something called an Auth0 Tenant, representing the product or service to which you are adding authentication.
🛠 Once you sign in, Auth0 takes you to the Dashboard. In the left sidebar menu, click on "Applications".
🛠 Then, click the "Create Application" button. A modal opens up with a form to provide a name for the application and choose its type.
- Name:
Auth0 Express Sample
- Application Type: Regular Web Applications
🛠 Click the "Create" button to complete the process. Your Auth0 application page loads up.
In the next step, you'll learn how to help Express and Auth0 communicate.
What's the relationship between Auth0 Tenants and Auth0 Applications?
Let's say that you have a photo-sharing Express app called "Noddit". You then would create an Auth0 tenant called noddit.
Now, say that Noddit is available on three platforms: web as a single-page application and a native mobile app for Android and iOS. If each platform needs authentication, you need to create three Auth0 applications to provide the product with everything it needs to authenticate users through that platform.
Create a communication bridge between Express and Auth0
When you use Auth0, you don't have to build login forms. Auth0 offers a Universal Login page to reduce the overhead of adding and managing authentication.
How does Universal Login work?
Your Express application will redirect users to Auth0 whenever they trigger an authentication request. Auth0 will present them with a login page. Once they log in, Auth0 will redirect them back to your Express application. For that redirecting to happen securely, you must specify in your Auth0 Application Settings the URLs to which Auth0 can redirect users once it authenticates them.
🛠 As such, click on the "Settings" tab of your Auth0 Application page and fill in the following values:
🛠 Allowed Callback URLs
http://localhost:4040/callback
The above value is the URL that Auth0 can use to redirect your users after they successfully log in.
🛠 Allowed Logout URLs
http://localhost:4040
The above value is the URL that Auth0 can use to redirect your users after they log out.
🛠 Scroll down and click the "Save Changes" button.
🛠 Do not close this page yet. You'll need some of its information in the next section.
Add the Auth0 configuration variables to Express
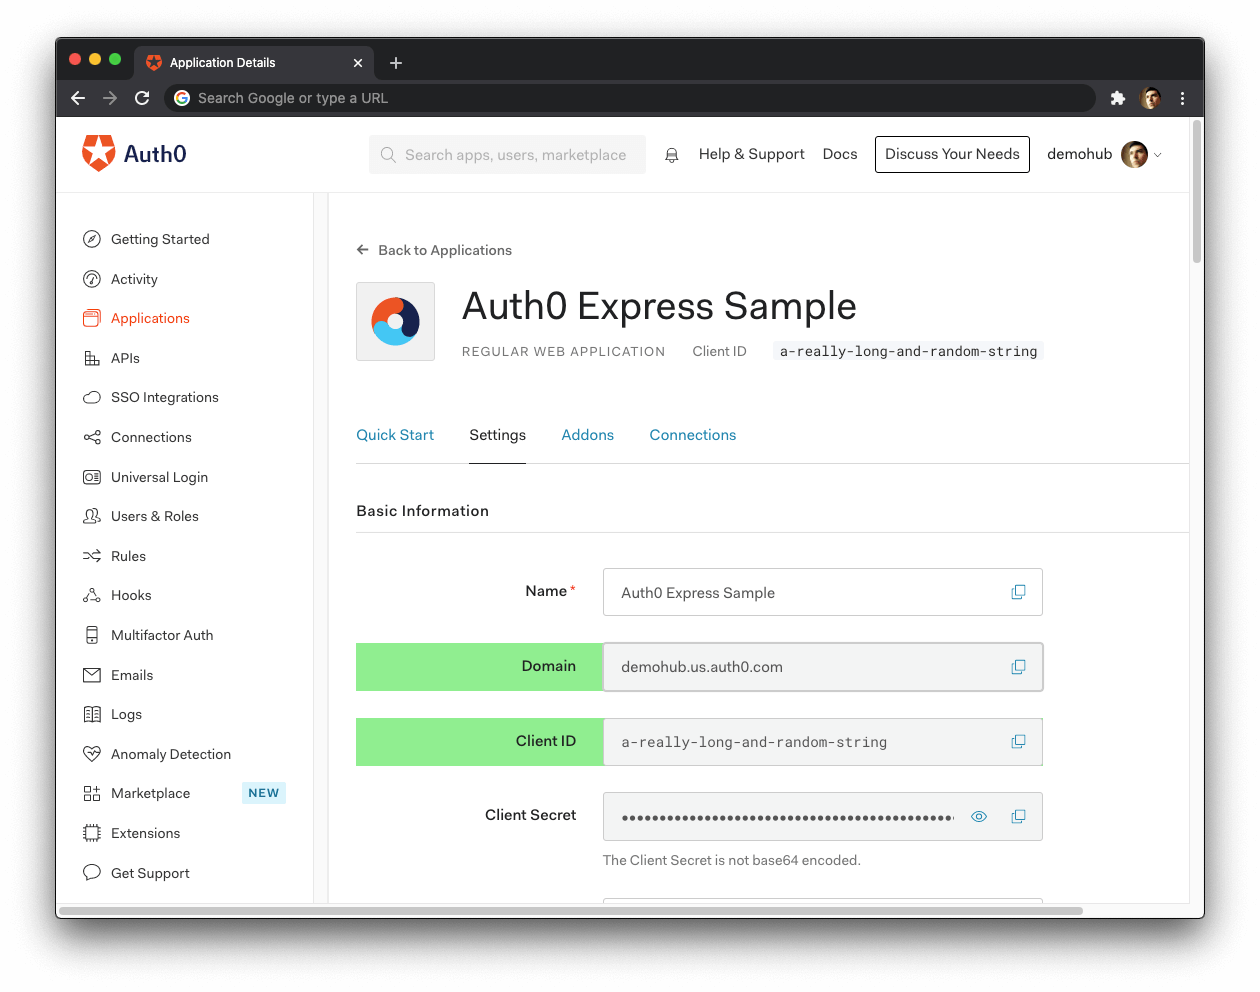
From the Auth0 Application Settings page, you need the Auth0 Domain and Client ID values to allow your Express application to use the communication bridge you created.
What exactly is an Auth0 Domain and an Auth0 Client ID?
Domain
When you created a new Auth0 account, Auth0 asked to pick a name for your Tenant. This name, appended with auth0.com, is your Auth0 Domain. It's the base URL that you will use to access the Auth0 APIs and the URL where you'll redirect users to log in.
You can also use custom domains to allow Auth0 to do the authentication heavy lifting for you without compromising your branding experience.
Client ID
Each application is assigned a Client ID upon creation, which is an alphanumeric string, and it's the unique identifier for your application (such as q8fij2iug0CmgPLfTfG1tZGdTQyGaTUA). You cannot modify the Client ID. You will use the Client ID to identify the Auth0 Application to which the Auth0 Express SDK needs to connect.
Warning: Another critical piece of information present in the "Settings" is the Client Secret. This secret protects your resources by only granting tokens to requestors if they're authorized. Think of it as your application's password, which must be kept confidential at all times. If anyone gains access to your Client Secret, they can impersonate your application and access protected resources.
🛠 Open the .env file from your auth0-express-pug-sample project directory and update it as follows:
DEV_PORT=4041
PROD_PORT=4040
AUTH0_ISSUER_BASE_URL=https://<AUTH0_DOMAIN>/
AUTH0_CLIENT_ID=
🛠 For the AUTH0_ISSUER_BASE_URL value, <AUTH0_DOMAIN> is your Domain value from the "Settings". Ensure that you keep the trailing slash for this value.
🛠 AUTH0_CLIENT_ID is your Client ID from the "Settings".
These variables let your Express application identify itself as an authorized party to interact with the Auth0 authentication server.
Auth0 and Express connection set
You have completed setting up an authentication service that your Express application can consume. All that is left is for you to continue building up the starter project throughout this guide by implementing components to trigger and manage the authentication flow.
Feel free to dive deeper into the Auth0 Documentation to learn more about how Auth0 helps you save time on implementing and managing identity.
Set Up Express OpenID Connect
🛠 You need to follow these steps to integrate the Express OpenID Connect library with your Express application.
Install Express OpenID Connect
🛠 Execute the following command:
npm install express-openid-connect
Configure Express OpenID Connect
🛠 Open the .env file once again and add a BASE_URL and SESSION_SECRET value to it:
DEV_PORT=4041
PROD_PORT=4040
AUTH0_ISSUER_BASE_URL=<...>
AUTH0_CLIENT_ID=<...>
BASE_URL=http://localhost:4040
SESSION_SECRET=
The BASE_URL value is the URL where your application is served.
The SESSION_SECRET value is the secret used to sign the session ID cookie, which can be either a string for a single secret or an array of multiple secrets.
🛠️ Execute the following command to generate a suitable string for the session secret:
node -e "console.log(crypto.randomBytes(32).toString('hex'))"
🛠️ Copy and paste the output of the command above as the value for SESSION_SECRET in .env.
🛠️ For your application to recognize these new environment variables, you need to restart the Node.js server. Locate the terminal window where you executed npm run dev earlier, stop it, and run it again.
User authentication is a mechanism to monitor who is accessing your application and control what they can do. For example, you can prevent users who have not logged in from accessing parts of your application. In that scenario, Auth0 can act as your application bouncer.
A bouncer is a person employed by a nightclub or similar establishment to prevent troublemakers from entering or to eject them from the premises. Express security is not too different from nightclub security.
If users want to enter a protected route from your application, Auth0 will stop them and ask them to present their credentials. If Auth0 can verify who they are and that they are supposed to go in there, Auth0 will let them in. Otherwise, Auth0 will take them back to a public application route.
Now, it's important to reiterate that the authentication process won't happen within your application layer. Your Express application will redirect your users to the Auth0 Universal Login page, where Auth0 asks for credentials and redirects the user back to your application with the result of the authentication process.
The Express OpenID Connect library provides the auth router to attach authentication routes to your application. You won't have to implement /login or /logout controllers, Express OpenID Connect takes does that for you.
You now need to initialize, configure, and integrate express-openid-connect with your Express application.
🛠 Open src/index.js and update the Required External Modules section to import auth:
// src/index.js

/**
 * Required External Modules
 */

const express = require('express');
const path = require('path');
const { auth } = require('express-openid-connect');
🛠 Then, update the App Configuration section to initialize and use auth as an Express middleware function:
// src/index.js

/**
 *  App Configuration
 */

app.set('views', path.join(__dirname, 'views'));
app.set('view engine', 'pug');
app.use(express.static(path.join(__dirname, '..', 'public')));
app.use(
  auth({
    issuerBaseURL: process.env.AUTH0_ISSUER_BASE_URL,
    baseURL: process.env.BASE_URL,
    clientID: process.env.AUTH0_CLIENT_ID,
    secret: process.env.SESSION_SECRET,
    authRequired: false,
    auth0Logout: true,
  }),
);
You are adding two additional properties, authRequired and auth0Logout. What are these properties doing?
authRequired is a boolean property that configures Express OpenID Connect to require authentication for all routes when you set it to true. For this project, you'll have a mix of public and protected routes. As such, you set this property to false.
auth0Logout is another boolean value that enables the Auth0 logout feature, which lets you log out a user of the Auth0 session. When implementing logout functionality in an application, there are typically three sessions layers you need to consider:
- Application Session Layer
- Auth0 Session Layer
- Identity Provider Session Layer
For example, if one of your users logged in using Google, you can configure your Auth0 authentication service to log out the user from the application, from the Auth0 session, or from Google itself. Check out the "Logout" document to learn more details about the architecture of user logout.
For this application, you'll log out users from the Auth0 session layer.
The Express OpenID Connect library is all set up. You are ready to implement user authentication in the next section.
Add User Authentication
Throughout this guide, you'll use Pug mixins to implement the application's user interface (UI) following a component-based architecture. Each mixin will act as a UI component, becoming a reusable piece that you can create and maintain in isolation.
You need to create UI components for your users to trigger authentication events: login, logout, and sign up.
Express OpenID Connect creates an oidc namespace in your application's req object. In this namespace, the library stores authentication methods and data, such as a user object to hold user profile information and a login method to customize the user login experience. You'll explore the oidc object in the next sections.
Create a login button
🛠 Create a login-button.pug file under the src/components/ directory:
touch src/components/login-button.pug
🛠 Create a mixin to represent a login button component in src/components/login-button.pug like so:
mixin login-button()
  button(
    class="btn btn-primary btn-block",
    onclick="window.location='/login'"
  ) Log In
Under the hood, Express OpenID Connect created a /login route for your Express application. When the user clicks on this button, your Express application will prompt the user to authenticate and provide consent for your Express application to access certain data on behalf of that user. In your current architecture, this means that your Express application redirects the user to the Auth0 Universal Login page to carry out the authentication process. You'll see this in action in the next sections.
You can customize the login experience further by using the req.oidc.login() method in an Express controller. For example, you can pass that method options to redirect users to an Auth0 Universal Login page optimized for signing up for your Express application.
Create a sign-up button
You can make users land directly on a sign-up page instead of a login page by creating a /sign-up route controller.
🛠 To start, open the src/index.js file. Locate the Routes Definitions section. Under this section, there are different subsections that define routes for each feature of your Expres web application. Locate the > Authentication subsection, and update it as follows:
// src/index.js

/**
 * Routes Definitions
 */

// > Other route subsections...

// > Authentication

app.get('/sign-up', (req, res) => {
  res.oidc.login({
    authorizationParams: {
      screen_hint: 'signup',
    },
  });
});
You create a /sign-up route controller, where you access the res.oidc.login() method. This method takes some LoginOptions to customize the behavior of the user login experience.
Here, you override the default authorizationParams, which are URL parameters that Express OpenID Connect uses when redirecting users to Auth0 to log in.
You can pass new values to change what the Auth0 authorization server returns depending on your use case. In your /sign-up controller, you specify the screen_hint=signup property as an authorization parameter to take the users to a sign-up form.
{
  authorizationParams: {
    screen_hint: "signup",
  },
}
Now, create a sign-up button to trigger this event by requesting the /sign-up route.
🛠 Create a signup-button.pug file under the src/components/ directory:
touch src/components/signup-button.pug
🛠 Populate src/components/signup-button.pug like so to define a signup-button mixin:
mixin signup-button()
  button(
    class="btn btn-primary btn-block",
    onclick="window.location='/sign-up'"
  ) Sign Up
Using the Signup feature requires you to enable the Auth0 New Universal Login Experience in your tenant.
🛠 Open the Universal Login section of the Auth0 Dashboard and choose the "New" option under the "Experience" subsection.
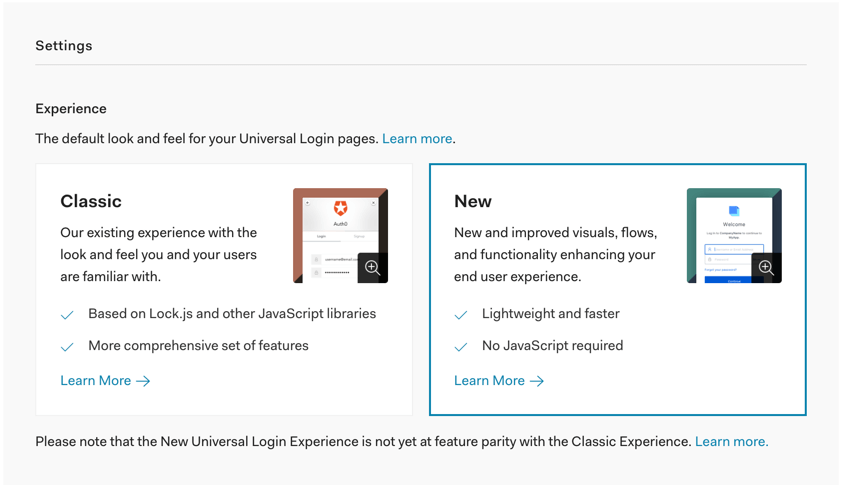
🛠 Scroll down and click on the "Save Changes" button.
The difference between the log-in and sign-up user experience will be more evident once you integrate those components with your Express application and see them in action. You'll do that in the next sections.
Create a logout button
🛠 Create a logout-button.pug file under the src/components/ directory:
touch src/components/logout-button.pug
🛠 Populate src/components/logout-button.pug like so:
mixin logout-button()
  button(
    class="btn btn-danger btn-block",
    onclick="window.location='/logout'"
  ) Log Out
The /logout route created by Express OpenID Connect calls the req.oidc.logout() method under the hood. This method clears the application session and redirects to the Auth0 /v2/logout endpoint to clear the Auth0 session. As with the login method, you can pass LogoutOptions to req.oidc.logout() to customize its behavior.
Here, you pass the returnTo option to specify the URL where Auth0 should redirect your users after they logout. Right now, you are working locally, and your Auth0 application's "Allowed Logout URLs" point to http://localhost:4040.
However, if you were to deploy your Express application to production, you need to add the production logout URL to the "Allowed Logout URLs" list and ensure that Auth0 redirects your users to that production URL and not localhost.
Integrate the login and logout buttons
Let's wrap the login-button and logout-button mixins into a mixin called authentication-button.
🛠 Create an authentication-button.pug file under the src/components/ directory:
touch src/components/authentication-button.pug
🛠 Populate src/components/authentication-button.pug with the following code:
include ./login-button
include ./logout-button

mixin authentication-button(isAuthenticated)
  if isAuthenticated
    +logout-button
  else
    +login-button
isAuthenticated is a boolean value exposed by the req.oidc object. Its value is true when Auth0 has authenticated the user and false when it hasn't.
There are some advantages to using this authentication-button mixin wrapper:
You can build flexible interfaces. authentication-button serves as a "log in/log out" switch that you can put anywhere you need that switch functionality. However, you still have separate login-button and logout-button mixins for cases when you need their functionality in isolation. For example, you may have a logout button on a page that only authenticated users can see.
You can build extensible interfaces. You can easily swap the login-button mixin with the signup-button mixin in authentication-button to create a "sign up/log out" switch. You could also wrap the "sign up/log out" switch in a new-authentication-button mixin.
You can build declarative interfaces. Using authentication-button, you can add login and logout functionality to a navigation bar component, for example, without thinking about the implementation details of how the authentication switch works.
🛠 With that in mind, create an auth-nav.pug file under the src/components/ directory:
touch src/components/auth-nav.pug
🛠 Populate src/components/auth-nav.pug like so:
include ./authentication-button

mixin auth-nav(isAuthenticated)
  div(class="navbar-nav ml-auto")
    +authentication-button(isAuthenticated)
isAuthenticated makes another appearance. Where is that value coming from? You'll find out soon!
🛠 Finally, open nav-bar.pug under the src/components/ directory and update it like so:
include ./main-nav
include ./auth-nav

mixin nav-bar(activeRoute)
  div(class="nav-container mb-3")
    nav(class="navbar navbar-expand-md navbar-light bg-light")
      div(class="container")
        div(class="navbar-brand logo")
        +main-nav(activeRoute)
        +auth-nav(isAuthenticated)
By having different types of navigation bar subcomponents, you can extend each as you need without reopening and modifying the main nav-bar component.
Once again, isAuthenticated shows up. The Express OpenID Connect library defines this value in the req.oidc.isAuthenticated() method. Its return value is essential for authentication to work correctly in your Express app.
How do you pass data from a controller to a template in Express?
In Express web applications, you have access to a one-way data flow from route controller to template. As such, each route controller that renders a template that depends on isAuthenticated must pass down this value.
However, passing a value manually to a template on each route controller is not only tedious but error-prone. What you can do instead is to make the value available as a local value to all Pug templates.
🛠 Update the App Configuration section in src/index.js as follows:
// src/index.js

/**
 *  App Configuration
 */

app.set('views', path.join(__dirname, 'views'));
app.set('view engine', 'pug');

app.use(express.static(path.join(__dirname, '..', 'public')));

app.use(
  auth({
    issuerBaseURL: process.env.AUTH0_ISSUER_BASE_URL,
    baseURL: process.env.BASE_URL,
    clientID: process.env.AUTH0_CLIENT_ID,
    secret: process.env.SESSION_SECRET,
    authRequired: false,
    auth0Logout: true,
  }),
);

app.use((req, res, next) => {
  res.locals.isAuthenticated = req.oidc.isAuthenticated();
  next();
});
You define res.locals within a middleware function handler. This object lets you pass data around your Express application. All of your Pug templates can access its properties (such as isAuthenticated) directly. Since req.oidc.isAuthenticated() is a method, you have to execute it to get its value.
There is one caveat about using res.locals: these values only live within an individual request. As soon as the request-response cycle is complete, the values are gone. This isn't a problem for your application since each time a user requests a route from the browser, the request-response cycle starts all over again.
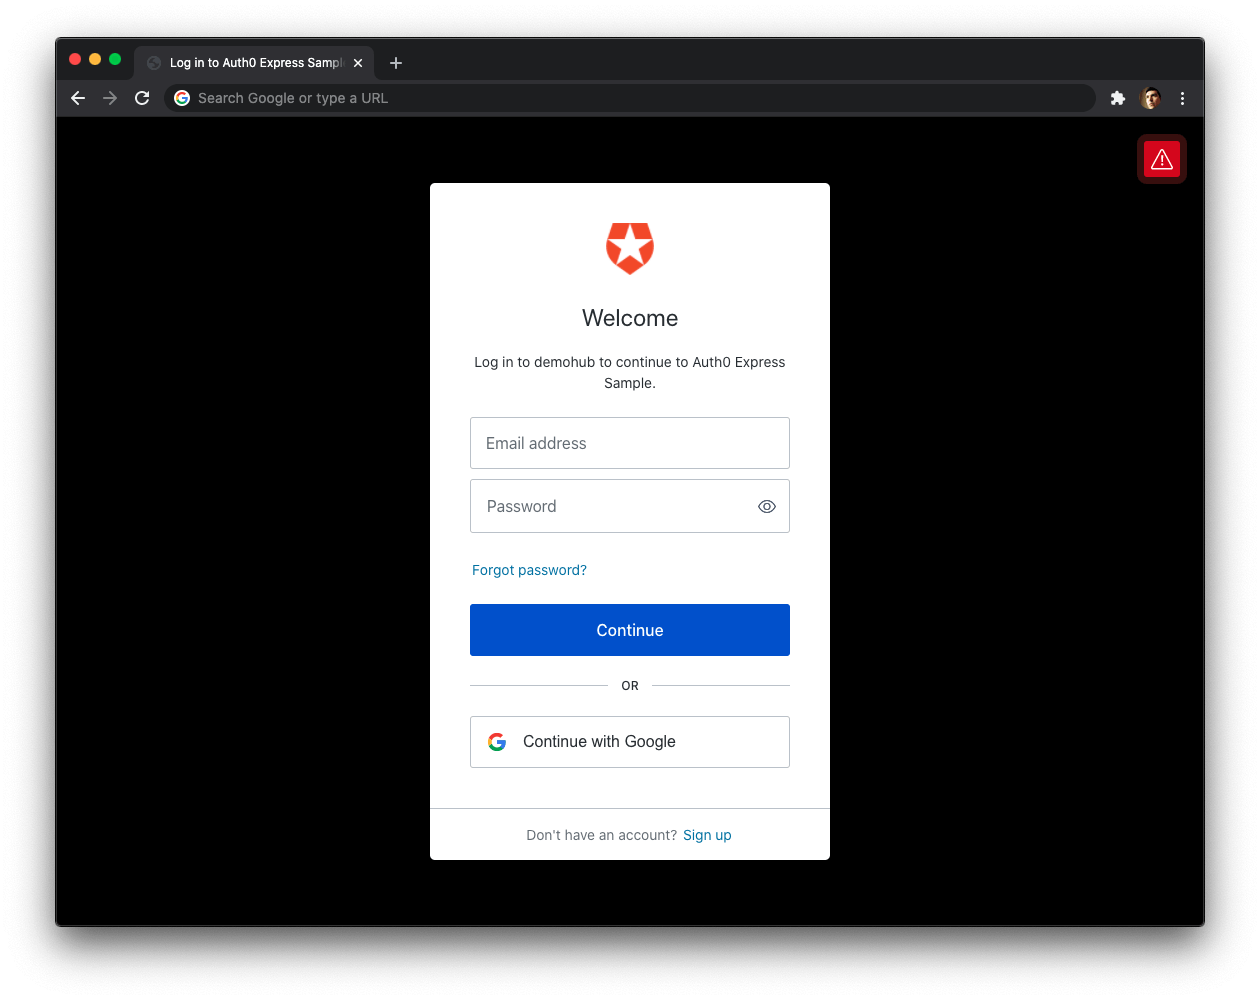
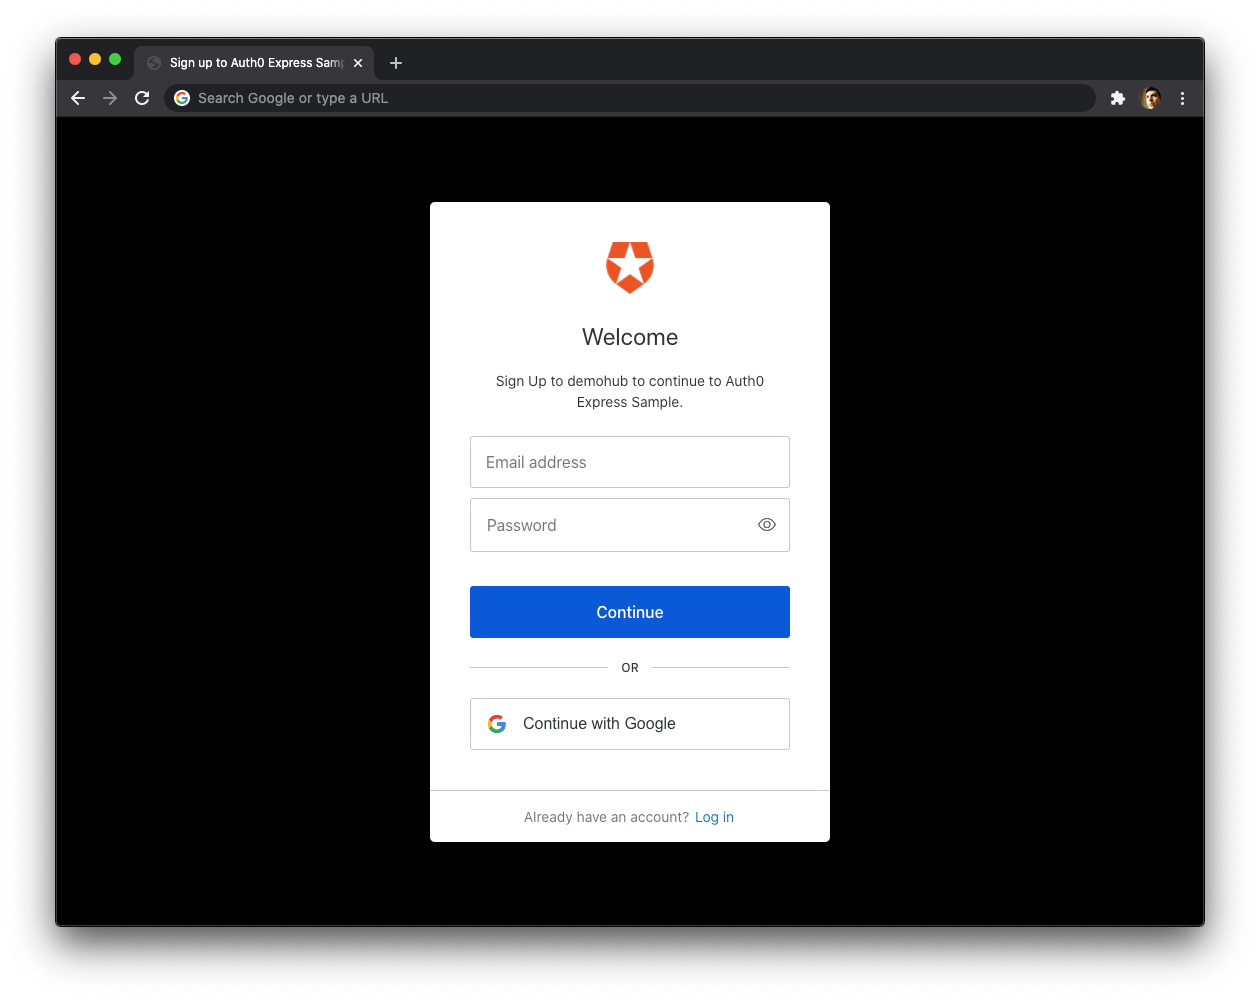
🛠 Go ahead and try to log in. Your Express application redirects you to the Auth0 Universal Login page. You can use a form to log in with a username and password or a social identity provider like Google. Notice that this login page also gives you the option to sign up.
Experiment: Use the signup-button mixin
Swap the login-button mixin with the signup-button mixin in the conditional defined in the authentication-button mixin:
include ./signup-button
include ./logout-button

mixin authentication-button(isAuthenticated)
  if isAuthenticated
    +logout-button
  else
    +signup-button
When you click the "Sign Up" button, you'll land on a page with language optimized to encourage you to sign up for your Express application.
Try this out!
Once you complete this experiment, swap back signup-button with login-button to continue with the rest of this guide:
include ./login-button
include ./logout-button

mixin authentication-button(isAuthenticated)
  if isAuthenticated
    +logout-button
  else
    +login-button
You can customize the appearance of New Universal Login pages. You can also override any text in the New Experience using the Text Customization API.
🛠 Click on the Profile tab and then click on the "Log Out" button.
Notice that Express logged you out, but instead of taking you back to the /profile route, it took you back to the / route, the home page.
🛠 Click on the Profile tab and now click on the "Log In" button.
This time, Express takes you again back to the home page, / after you log in. As a user, you would expect to access the /profile page after you log in, right? After all, your authentication system is acting like a bouncer. The bouncer doesn't take people back to the nightclub entrance after they present their ID. The bouncer lets them pass through and access the VIP lounge or whatever room the bouncer is protecting.
Why is this home page redirect happening?
This Express web app is using static routes to render its user interface. You map a user interface action with a server endpoint or controller. This mapping is hard-coded so far.
The /login route controller that the Express OpenID Connect library created for you has a hard-coded value for the path to which Auth0 should return users after they log in. That default value is the root of your server URL, /.
However, what if the /profile page had both public and protected resources? In a scenario like that, anyone can visit the /profile page to read its public information. Then, users can log in to read protected information. The best user experience is for the users to return to the /profile page after they log in, not the home page.
One way to fix this home-page redirect is to create a dedicated route for each type of login and logout:
GET /sign-up-profile

GET /sign-up-external-api

GET /login-profile

GET /login-external-api

GET /logout-profile

GET /logout-external-api
However, this method won't scale well at all. Imagine if you had more than 10 different pages that require that smooth login experience.
It would be better to create a single dynamic route that can handle different "types" of login and logout actions:
GET /sign-up/:page

GET /login/:page

GET /logout/:page
Since the
/sign-uproute behaves very much like the/loginroute, you are enhancing that route too — in case that you want to use the "Sign Up" button in your application.
Then you could take that :page parameter and use it to tell Auth0 to return users to serverUrl/page after they log in or log out.
To implement these new authentication route controllers easily, you can leverage the activeRoute property that you are passing from your route controllers to your templates. Take a look at the /profile route controller, for example:
app.get('/profile', (req, res) => {
  res.render('profile', { activeRoute: req.originalUrl });
});
You pass down this { activeRoute: req.originalUrl } object in all route controllers. You recently learned how to leverage res.locals to make the authentication status of the user available to your whole Express application. You can do the same for the activeRoute property.
🛠 The steps that follow will show you how to create dynamic authentication routes. However, if you want Express to redirect all users who log out to the home page, you can leave your application as it is.
🛠 Update the App Configuration section in src/index.js as follows:
// src/index.js

/**
 *  App Configuration
 */

app.set("views", path.join(__dirname, "views"));
app.set("view engine", "pug");

app.use(express.static(...));

app.use(
  auth({...})
);

app.use((req, res, next) => {
  res.locals.isAuthenticated = req.oidc.isAuthenticated();
  res.locals.activeRoute = req.originalUrl;
  next();
});
You now define another local variable that all Pug templates can access: res.locals.activeRoute. You no longer need to pass activeRoute down to your templates from each controller.
🛠 Locate the Routes Definitions section in src/index.js. Update the > Home, > Profile, and > External API subsections as follows:
// src/index.js

/**
 * Routes Definitions
 */

// > Home

app.get('/', (req, res) => {
  res.render('home');
});

// > Profile

app.get('/profile', (req, res) => {
  res.render('profile');
});

// > External API

app.get('/external-api', (req, res) => {
  res.render('external-api');
});
🛠 Now, you need to create the sign-up/:page, login/:page and logout/:page route controllers. Head back to the Routes Definitions section in src/index.js. Update the > Authentication subsection as follows:
// src/index.js

/**
 * Routes Definitions
 */

// > Authentication

app.get('/sign-up/:page', (req, res) => {
  const { page } = req.params;

  res.oidc.login({
    returnTo: page,
    authorizationParams: {
      screen_hint: 'signup',
    },
  });
});

app.get('/login/:page', (req, res) => {
  const { page } = req.params;

  res.oidc.login({
    returnTo: page,
  });
});

app.get('/logout/:page', (req, res) => {
  const { page } = req.params;

  res.oidc.logout({
    returnTo: page,
  });
});
Now, you need to update your login and logout buttons to use these custom route controllers instead of the default ones created by Express OpenID Connect.
🛠 Update src/components/signup-button.pug as follows:
mixin signup-button()
  button(
    class="btn btn-primary btn-block",
    onclick=`window.location='/sign-up/${activeRoute}'`
  ) Sign Up
🛠 Update src/components/login-button.pug as follows:
mixin login-button()
  button(
    class="btn btn-primary btn-block",
    onclick=`window.location='/login/${activeRoute}'`
  ) Log In
🛠 Update src/components/logout-button.pug as follows:
mixin logout-button()
  button(
    class="btn btn-danger btn-block",
    onclick=`window.location='/logout/${activeRoute}'`
  ) Log Out
activeRouteis available in any template without the need to pass it down from mixin to mixin.
🛠 Visit the "Profile" page and try to log in or log out.
If you log in, notice that you come back to the "Profile" page after you log in using the Auth0 Universal Login Page.
If you log out, you get an error!
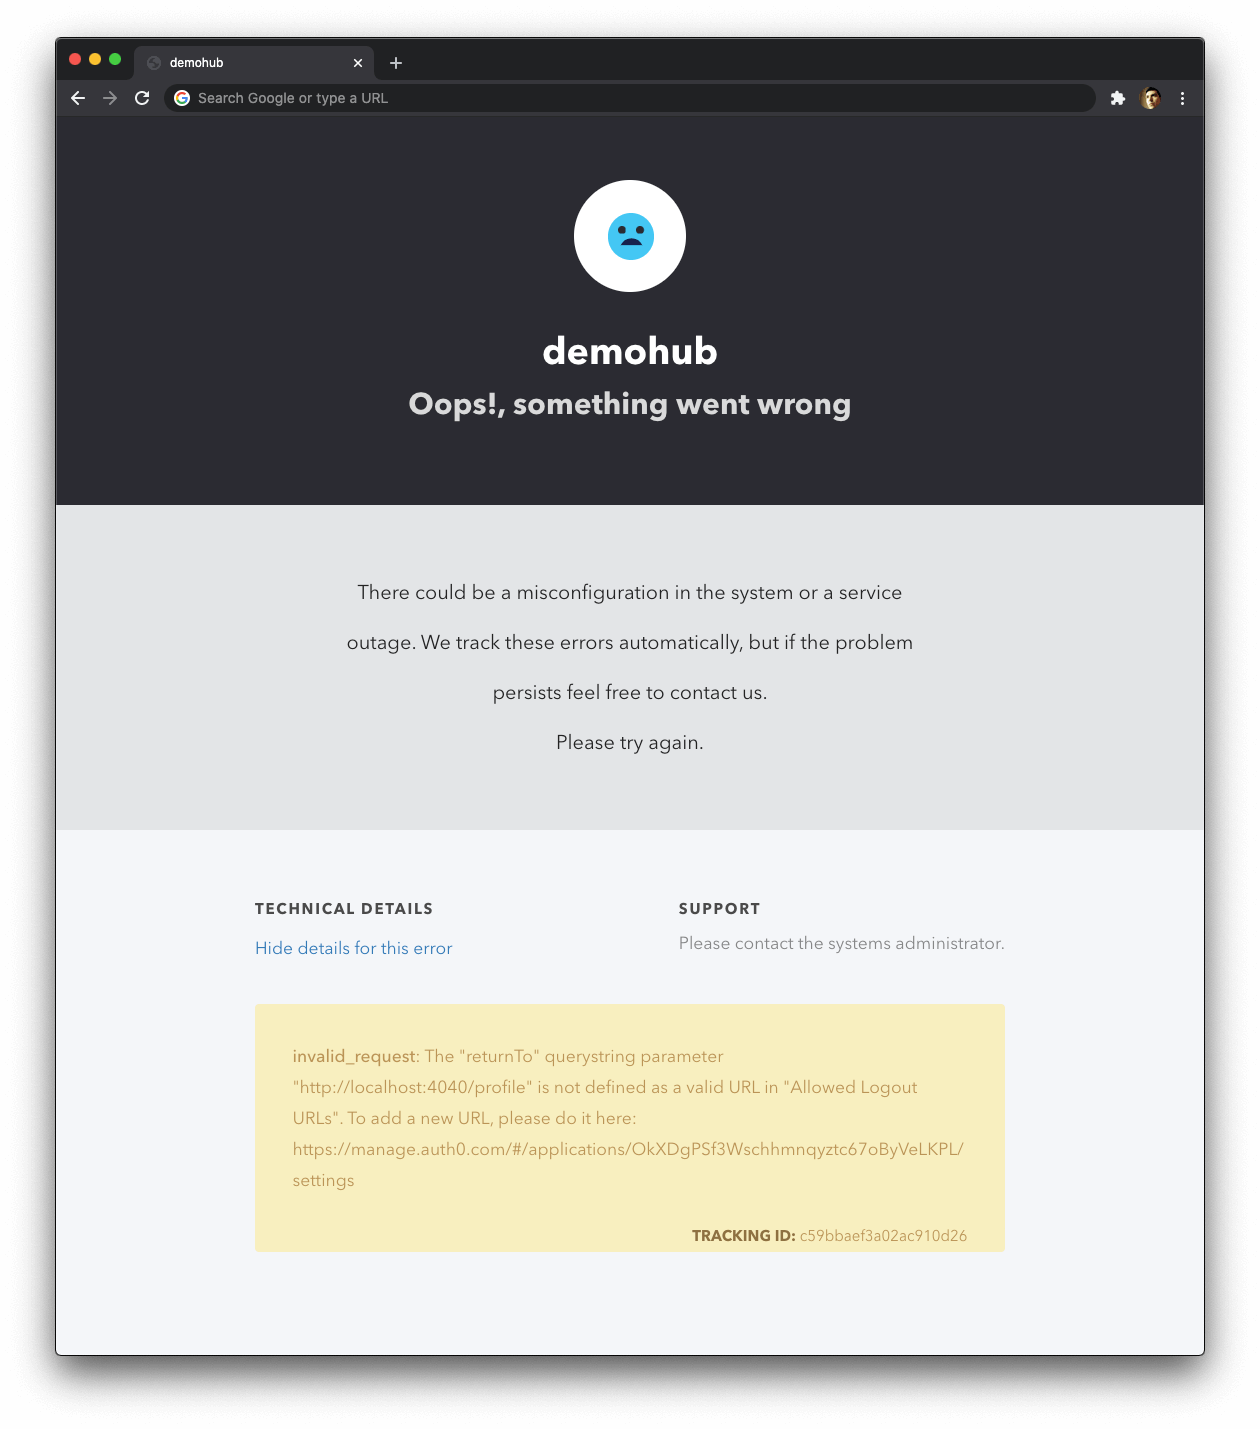
Why are you getting an error when logging out from the /profile page?
If you click on the "See details for this error" link from the error page, you'll learn that the error relates to an invalid_request: The "returnTo" querystring parameter "http://localhost:4040/profile" is not defined as a valid URL in "Allowed Logout URLs".
During the Auth0 setup section of this guide, you defined "Allowed Logout URLs" for the Auth0 application that represents your Express web application in the Auth0 platform:
Allowed Logout URLs
http://localhost:4040
Auth0 can only redirect your users after they log out to the URLs listed in that field. As such, you need to add the /profile and /external-api paths to it.
🛠 Head back to the "Applications" section from the Auth0 Dashboard. Select your "Auth0 Express Sample" application and then click on the "Settings" tab.
🛠 Locate Allowed Logout URLs and update like so:
http://localhost:4040,
http://localhost:4040/profile,
http://localhost:4040/external-api
🛠 Scroll down and click on "Save Changes".
🛠 Head back to your application user interface in the browser. Visit either the "Profile" or "External API" page. Refresh the page and try to log in and log out. You should now stay in the same page after either action completes without any errors.
In this section, you have learned how to use the built-in /login and /logout route controllers exposed by the Express OpenID Connect library. You also learned how to create custom authentication controllers to improve the user experience of your application and to accommodate to different use cases.
In the next section, you'll learn how to retrieve and display user profile information in your user interface.
Retrieving User Information
You can use profile data stored in your Auth0 user database to personalize the user interface of your Express application. The Express OpenID Connect library exposes that profile data in the req.oidc.user object. Some of the user information available includes the name, nickname, picture, and email of the logged-in user.
How can you use req.oidc.user to create a profile page for your users?
🛠 Update the /profile route controller under the Routes Definitions > Profile section in src/index.js as follows:
// src/index.js

/**
 * Routes Definitions
 */

// > Profile

app.get('/profile', (req, res) => {
  res.render('profile', {
    user: req.oidc.user,
  });
});
🛠 Next, update the /profile template defined in src/views/profile.pug as follows:
extends ../components/layout

block content
  if user
    div
      div(class="row align-items-center profile-header")
        div(class="col-md-2 mb-3")
          img(
            class="rounded-circle img-fluid profile-picture mb-3 mb-md-0"
            src=user.picture
            alt="Profile"
          )
        div(class="col-md text-center text-md-left")
          h2 #{user.name}
          p(class="lead text-muted") #{user.email}
      div(class="row")
        pre(class="col-12 text-light bg-dark p-4")
          | #{JSON.stringify(user, null, 2)}
What's happening within the profile template?
You obtain the user
name,picture, andemailfrom theuserobject that you passed to the template from the/profileroute controller.You then display these three properties in the user interface. You only render the content of the
profiletemplate if theuserobject is defined.Finally, you display the full content of the decoded ID token within a code box. You can now see all the other properties available for you to use.
What is an ID token?
After a user successfully logs in, Auth0 sends an ID token to your application. Authentication systems, such as Auth0, use ID Tokens in token-based authentication to cache user profile information and provide it to an application. The caching of ID tokens can contribute to improvements in performance and responsiveness for your application.
You can use the data from the ID token to personalize the user interface of your application. The Express OpenID Connect library decodes the ID token and attaches its information to the user property of the req.oidc namespace. Some of the ID token information includes the name, nickname, picture, and email of the logged-in user.
The profile template renders user information that you could consider protected. Additionally, the user property is null if there is no logged-in user. So either way, this component should only render if Auth0 has authenticated the user.
As such, you should protect the route that renders this template, http://localhost:4040/profile. You'll learn how to do just that in the next section.
Protecting Routes
The Express OpenID Connect library exposes a requiresAuth() middleware function that you can use to require users to login in order to access a specific route. Express will redirect to the Auth0 Universal Login page any users who have not logged in and try to access the route.
As a reminder: for
requiresAuth()to work, you must setauthRequiredtofalsewhen you initialize Express OpenID Connect using theauthmiddleware function.
🛠 Open src/index.js and update the Required External Modules section as follows:
// src/index.js

/**
 * Required External Modules
 */

const express = require('express');
const path = require('path');
const { auth, requiresAuth } = require('express-openid-connect');
You can add the requiresAuth() middleware function on as part of the request-response cycle of each controller that you want to protect — in this case, /profile and /external-api.
🛠 Update the Routes Definitions > Profile subsection of src/index.js as follows:
/**
 * Routes Definitions
 */

// > Profile

app.get('/profile', requiresAuth(), (req, res) => {
  res.render('profile', {
    user: req.oidc.user,
  });
});
Now, when users who have not logged in visit a protected route, your Express application will redirect that user to the login page. After the user logs in, Auth0 will redirect the user to the page they intended to access before login.
🛠 You can now test that /profile requires users to log in before they can access it. Log out and try to access the Profile page again. If it works, Express redirects you to log in with Auth0.
Calling an API
This section focuses on showing you how to get an access token in your Express application and how to use it to make API calls to protected API endpoints.
When you use Auth0, you delegate the authentication process to a centralized service. Auth0 provides you with functionality to log in and log out users from your Express application. However, your application may need to access protected resources from an external API, such as contacts, pictures, or purchase history.
You can also protect an API with Auth0. There are multiple API quickstarts to help you integrate Auth0 with your backend platform.
When you use Auth0 to protect your API, you also delegate the authorization process to a centralized service that ensures only approved client applications can access protected resources on behalf of a user.
How can you make secure calls to an external API from Express?
Your Express application authenticates the user and receives an access token from Auth0. The application can then pass that access token to your external API as a credential. In turn, your external API can use Auth0 libraries to verify the access token it receives from the calling application and issue a response with the desired data.
Instead of creating an API from scratch to test the authentication and authorization flows between the client and the server, you'll use a demo Express API that I've prepared for you.
Get the Express API demo
🛠 Open a new terminal window and clone the auth0-express-js-sample repo somewhere in your system. Ensure that you clone it outside your Express project directory.
git clone git@github.com:auth0-blog/auth0-express-js-sample.git
🛠 Once you clone this repo, make the auth0-express-js-sample directory your current directory:
cd auth0-express-js-sample
🛠 Install the Node.js project dependencies:
npm install
Connect the Express API with Auth0
Create a communication bridge between Express and Auth0
This process is similar to how you connected Express with Auth0.
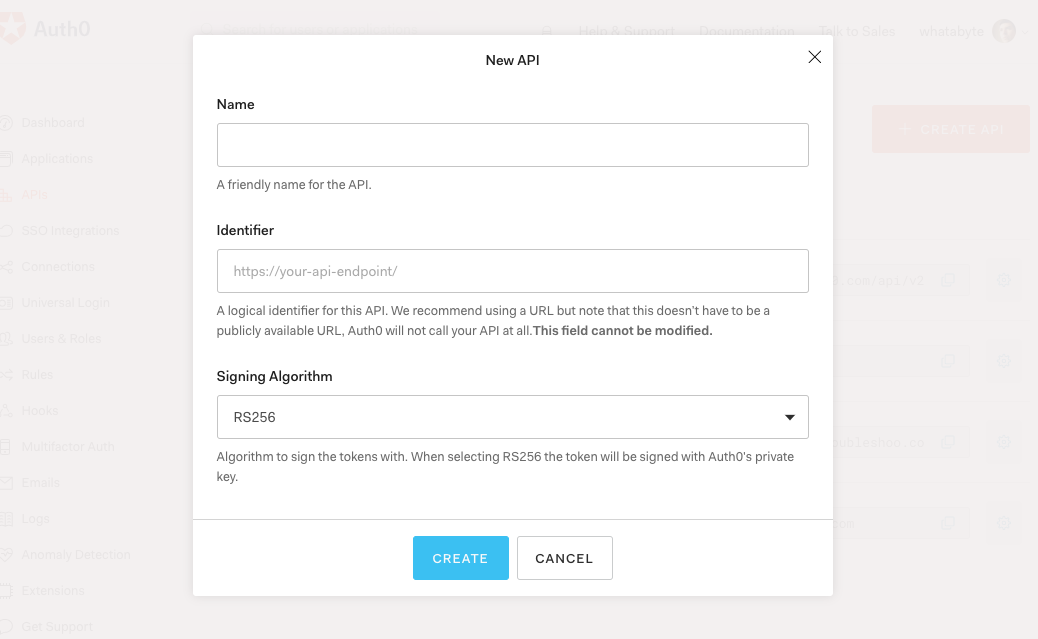
🛠 Head to the APIs section in the Auth0 Dashboard, and click the "Create API" button.
🛠 Then, in the form that Auth0 shows:
- Add a Name to your API:
Auth0 Express Sample
- Set its Identifier value:
https://express.sample
- Leave the signing algorithm as
RS256as it's the best option from a security standpoint.
Identifiers are unique strings that help Auth0 differentiate between your different APIs. We recommend using URLs to facilitate creating unique identifiers predictably; however, Auth0 never calls these URLs.
🛠 With these values in place, hit the "Create" button. Keep this page open as you'll need some of its values in the next section.
Add the Auth0 configuration variables to Express
🛠 Create a .env file for the API Server under the auth0-express-js-sample directory:
touch .env
🛠 Populate this auth0-express-js-sample/.env file as follows:
SERVER_PORT=6060
CLIENT_ORIGIN_URL=http://localhost:4040
AUTH0_AUDIENCE=
AUTH0_DOMAIN=
🛠 Head back to your Auth0 API page, and follow these steps to get the Auth0 Audience:
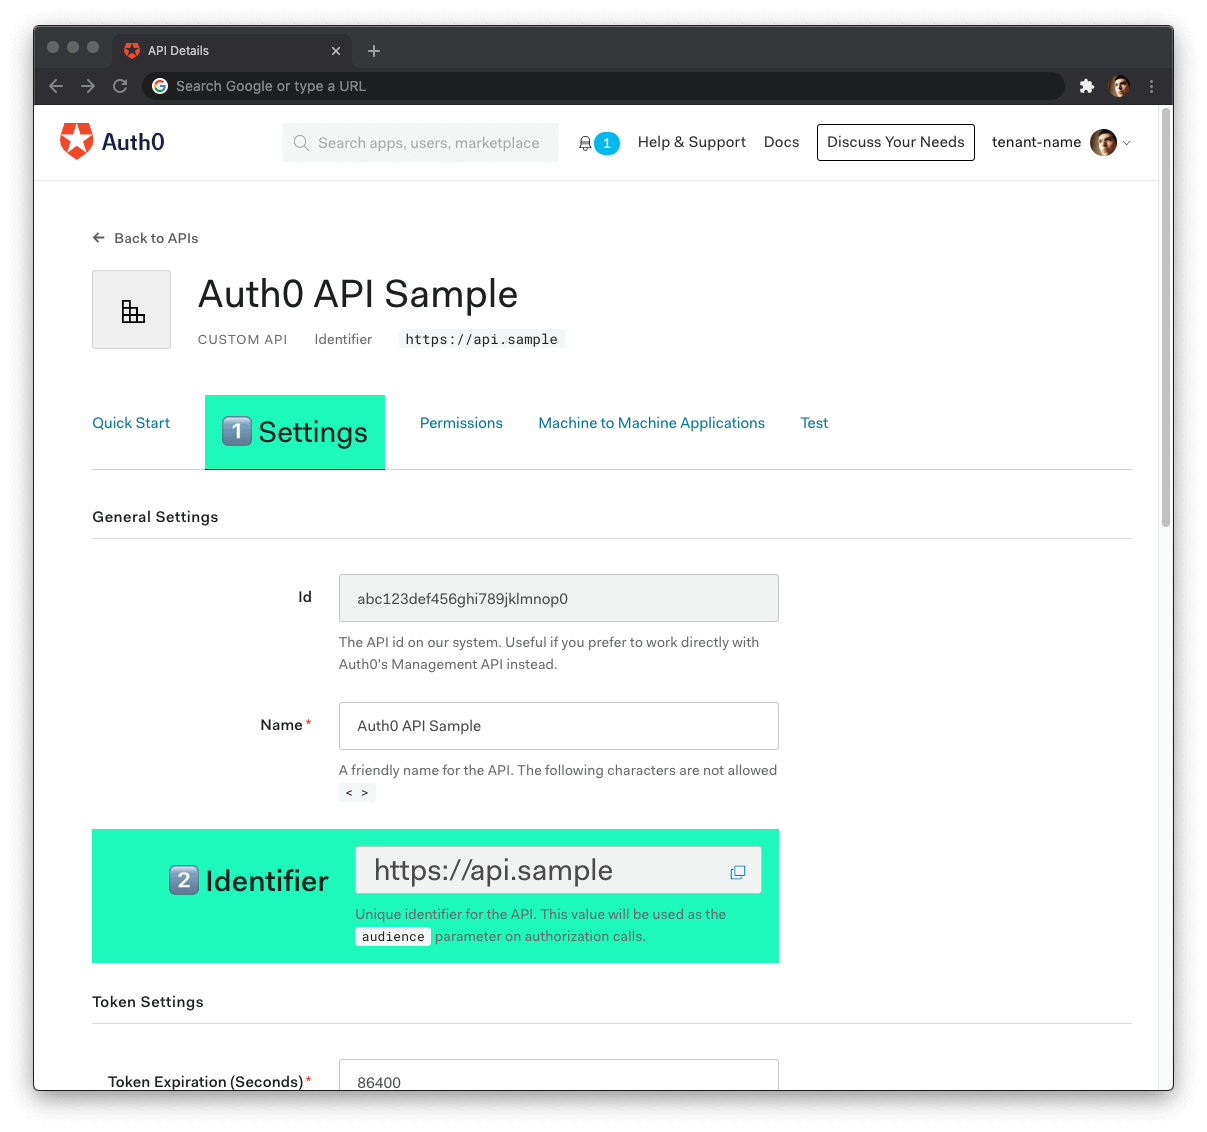
🛠 Click on the "Settings" tab.
🛠 Locate the "Identifier" field and copy its value.
🛠 Paste the "Identifier" value as the value of
AUTH0_AUDIENCEin.env.
Now, follow these steps to get the Auth0 Domain value:
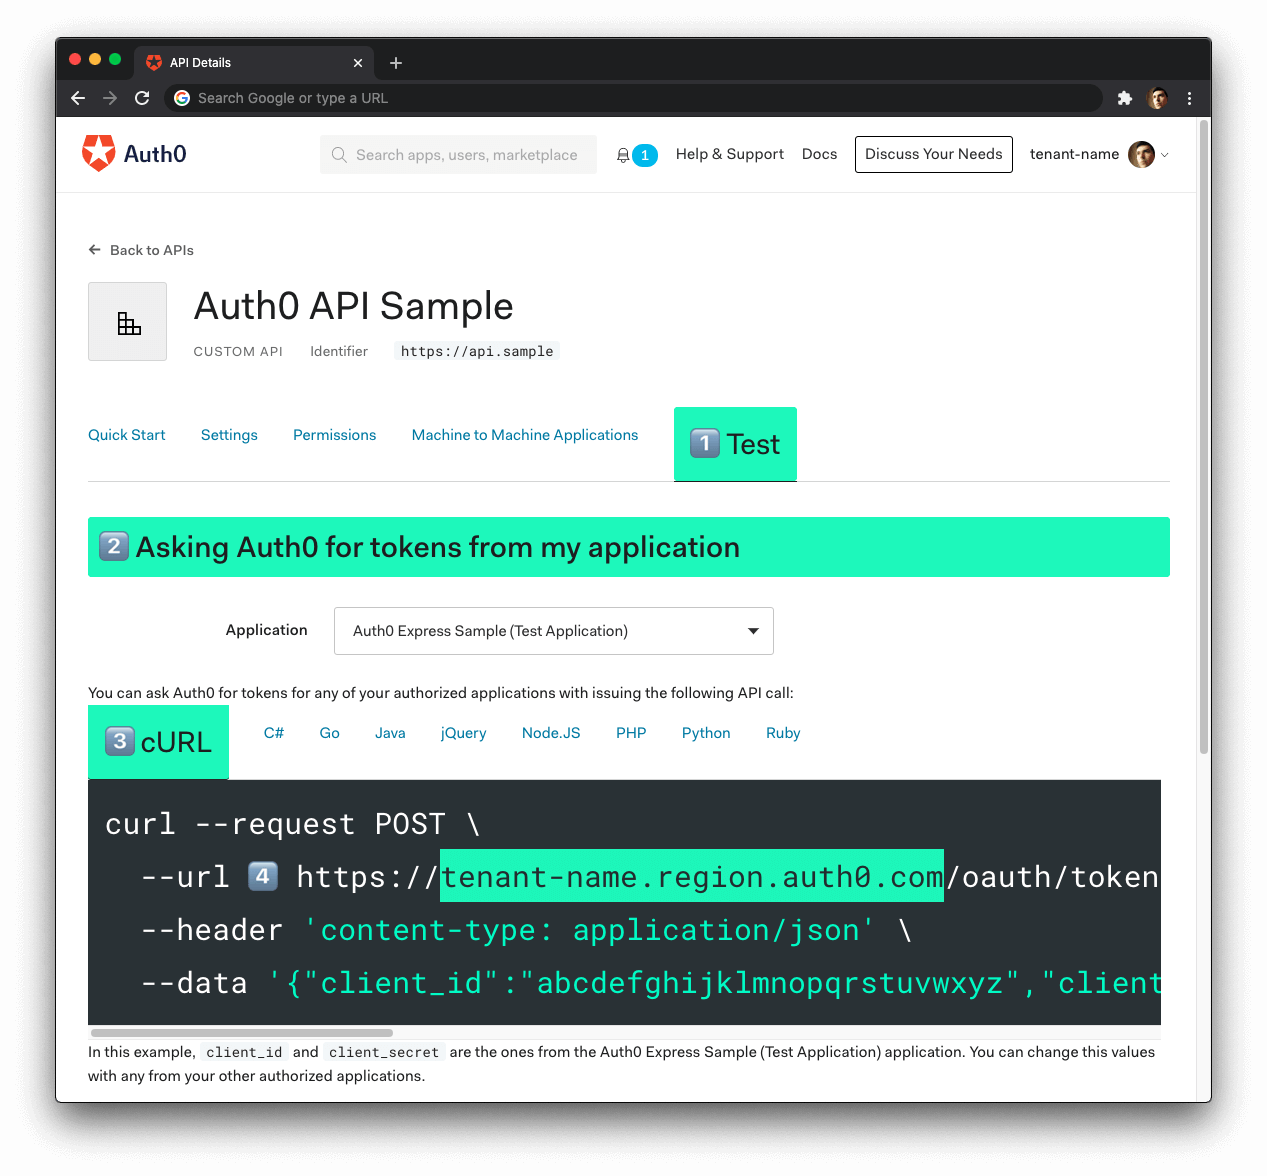
- 🛠 Click on the "Test" tab.
- 🛠 Locate the section called "Asking Auth0 for tokens from my application".
- 🛠 Click on the cURL tab to show a mock
POSTrequest. - 🛠 Copy your Auth0 domain, which is part of the
--urlparameter value:tenant-name.region.auth0.com. - 🛠 Paste the Auth0 domain value as the value of
AUTH0_DOMAINin.env.
Tips to get the Auth0 Domain
The Auth0 Domain is the substring between the protocol,
https://and the path/oauth/token.The Auth0 Domain follows this pattern:
tenant-name.region.auth0.com.The
regionsubdomain (au,us, oreu) is optional. Some Auth0 Domains don't have it.Click on the image above, please, if you have any doubt on how to get the Auth0 Domain value.
🛠 With the .env configuration values set, run the API server by issuing the following command:
npm start
Configure your Express app to consume the Express Demo API
Your Express application needs to pass an access token when it calls a target API to access protected resources. You can request an access token from the Auth0 authorization server by configuring your auth() middleware to include the API audience and a code response type. Take this auth() configuration as example:
app.use(
  auth({
    authorizationParams: {
      response_type: 'code',
      audience: 'https://api.example.com/products',
    },
  }),
);
Now, whenever you configure auth() to get a code as your response_type, you need to include the Client Secret of your Auth0 application.
🛠 Head back to the "Applications" section from the Auth0 Dashboard. Select your "Auth0 Express Sample" application and click on its "Settings" tab. Locate the "Client Secret" field.
🛠 Head back to the auth0-express-pug-sample project directory that stores your Express application.
🛠 Locate the auth0-express-pug-sample/.env file and add your AUTH0_AUDIENCE, SERVER_URL, and CLIENT_SECRET values to it:
DEV_PORT=4041
PROD_PORT=4040
AUTH0_ISSUER_BASE_URL=https://<AUTH0-DOMAIN>/
AUTH0_CLIENT_ID=<...>
BASE_URL=http://localhost:4040
SESSION_SECRET=<...>
AUTH0_AUDIENCE=https://express.sample
SERVER_URL=http://localhost:6060
CLIENT_SECRET=
🛠 The value of AUTH0_AUDIENCE is the same for both the Express web app and the Express API.
SERVER_URL is the URL where the Express API server is running.
🛠 Use the value of Client Secret from the Auth0 application settings as the value of CLIENT_SECRET.
The Auth0 Client Secret is a critical value as it protects your resources by only granting authentication-related credentials in the form of tokens to requestors if they're authorized. Think of it as your application's password, which must be kept confidential at all times. If anyone gains access to your Client Secret, they can impersonate your application and access protected resources.
Together, these variables let your application identify itself as an authorized party to interact with the Auth0 authentication server.
🛠️ You need to restart the Node.js server for your application to recognize these new environment variables. Locate the terminal window where you executed npm run dev earlier, stop it, and run it again.
You can request an access token in a format that the API can verify by passing an audience and response_type props to the auth() initializer.
🛠 Open src/index.js, locate the App Configuration section, and update the initialization of auth() as follows:
// src/index.js

/**
 *  App Configuration
 */

app.set("views", path.join(__dirname, "views"));
app.set("view engine", "pug");

app.use(express.static(path.join(__dirname, "..", "public")));

// 👇 Update the mounting and initialization of auth()
app.use(
  auth({
    issuerBaseURL: process.env.AUTH0_ISSUER_BASE_URL,
    baseURL: process.env.BASE_URL,
    clientID: process.env.AUTH0_CLIENT_ID,
    secret: process.env.SESSION_SECRET,
    authRequired: false,
    auth0Logout: true,
    clientSecret: process.env.CLIENT_SECRET,
    authorizationParams: {
      response_type: "code",
      audience: process.env.AUTH0_AUDIENCE,
    },
  })
);

app.use((req, res, next) => {...});
clientSecret goes at the same level as the other properties. However, when Express OpenID Connect makes requests to the Auth0 authorization server, it uses response_type and audience as request parameters. As such, you need to specify these two values as properties of the authorizationParams object.
Why is the Auth0 Audience value the same for both apps? Auth0 uses the value of the audience prop to determine which resource server (API) the user is authorizing your Express application to access. It's like a phone number. You want to ensure that your Express application "texts the right API".
The actions that your Express application can perform on the API depend on the scopes that your access token contains.
Remember that screen you saw when you first logged in with Auth0 asking you for permission to access your profile information? Your Express application will request authorization from the user to access the requested scopes, and the user will approve or deny the request. You may have seen something similar when sharing your contacts or photos from a social media platform with a third-party application.
When you don't add a scope property to the authorizationParams object used to configure auth(), the Express OpenID Connect library defaults to the OpenID Connect Scopes: openid profile email.
openid: This scope informs the Auth0 authorization server that the client is making an OpenID Connect (OIDC) request to verify the user's identity. OpenID Connect is an authentication protocol.profile: This scope value requests access to the user's default profile information, such asname,nickname, andpicture.email: This scope value requests access to theemailandemail_verifiedinformation.
The details of the OpenID Connect Scopes go into the ID Token. However, you can define custom API scopes to implement access control. You'll identify those custom scopes in the calls that your client applications make to that API. Auth0 includes API scopes in the access token as the scope claim value.
The concepts about API scopes or permissions are better covered in an Auth0 API tutorial such as "Use TypeScript to Create a Secure API with Node.js and Express: Role-Based Access Control".
🛠 Visit the "External API" page and notice that it has two buttons for you to request resources from the Express Demo API:
"Get Public Message" =>
GET /messages/public-message"Get Protected Message" =>
GET /messages/protected-message
What's the plan to implement these API calls in your Express web application? Create two more routes.
First, you'll need a package to make HTTP requests from your Express route controllers. Don't worry... I got you.
🛠 Install got in your auth0-express-pug-sample project:
npm install got
got labels itself as a human-friendly and powerful HTTP request library for Node.js applications.
🛠 Open src/index.js and update the Required External Modules section as follows:
// src/index.js

/**
 * Required External Modules
 */

const express = require('express');
const path = require('path');
const { auth, requiresAuth } = require('express-openid-connect');
const got = require('got');
🛠 Next, update the Routes Definitions > External API subsection in src/index.js to add two routes to handle retrieving messages from the Express API:
// src/index.js

/**
 * Routes Definitions
 */

// > External API

app.get('/external-api', (req, res) => {
  res.render('external-api');
});

app.get('/external-api/public-message', async (req, res) => {
  let message;

  try {
    const body = await got(
      `${process.env.SERVER_URL}/api/messages/public-message`,
    ).json();

    message = body.message;
  } catch (e) {
    message = 'Unable to retrieve message.';
  }

  res.render('external-api', { message });
});

app.get('/external-api/protected-message', requiresAuth(), async (req, res) => {
  const { token_type, access_token } = req.oidc.accessToken;
  let message;

  try {
    const body = await got(
      `${process.env.SERVER_URL}/api/messages/protected-message`,
      {
        headers: {
          Authorization: `${token_type} ${access_token}`,
        },
      },
    ).json();

    message = body.message;
  } catch (e) {
    message = 'Unable to retrieve message.';
  }

  res.render('external-api', { message });
});
What's happening in the External API route controllers?
Nothing changes for
/external-api. It remains the landing page for that path./external-api/public-messagerequests message data from a public API endpoint,/api/messages/public-message.It stores the response from that request in the
messagevariable, which it passes down to theexternal-apitemplate.This route doesn't require user login to access the page or make the API call.
/external-api/protected-messagerequests message data from a protected API endpoint,/api/messages/protected-message.It obtains the access token and its type from
req.oidc.accessToken.It uses the access token in the authorization header of the protected API call.
It stores the response from that request in the
messagevariable, which it passes down to theexternal-apitemplate.Since this route requires a valid access token to make the protected API request, it uses
requiresAuth()to request the user to log in.
The
.json()chain method fromgotlets you obtain the server responses in JSON format.
🛠 Now, update src/views/external-api.pug as follows:
extends ../components/layout

block content
  div
    h1 External API
    p
      | Use these buttons to call an external API. The protected API call has an access token in its authorization header. The API server will validate the access token using the Auth0 Audience value.
    div(
      class="btn-group mt-5",
      role="group",
      aria-label="External API Requests Examples"
    )
      button(
        type="button",
        class="btn btn-primary"
        onclick="window.location='/external-api/public-message'"
      ) Get Public Message
      button(
        type="button",
        class="btn btn-primary"
        onclick="window.location='/external-api/protected-message'"
      ) Get Protected Message

    if message
      div(class="mt-5")
        h6(class="muted") Result
        div(class="container-fluid")
          div(class="row")
            code(class="col-12 text-light bg-dark p-4")
              | #{JSON.stringify(message, null, 2)}
What is happening now within the external-api template?
You trigger calls to the /external-api/public-message and /external-api/protected-message route controllers from the button group. If message is defined, you render the server response.
🛠 Log out and log back in to get a new access token from Auth0 that includes the audience information.
🛠 Visit http://localhost:4040/external-api and click any of the buttons on the External API page to test the responses. You may be prompted to log in depending on the action you choose to execute.
Get Public Message:
The API doesn't require an access token to share this message.
Get Protected Message:
The API successfully validated your access token.
There's a problem now... Visit http://localhost:4040/external-api/protected-message. After you log in, you'll see the result box. Now try to log out...
You get an error message:
Cannot GET /logout/external-api/protected-message.
If you were to try to login from http://localhost:4040/external-api/public-message, you'll get a similar error:
Cannot GET /login/external-api/public-message
There is no route controller to handle the following requests:
GET /sign-up/:page/:section

GET /login/:page/:section

GET /logout/:page/:section
You could create a route controller to handle those specific paths, but there's no need. You can add section as an optional parameter for the existing authentication route controllers.
🛠 Open src/index.js and locate the Routes Definitions > Authentication subsection. Update this section as follows:
// src/index.js

/**
 * Routes Definitions
 */

// > Authentication

app.get('/sign-up/:page/:section?', (req, res) => {
  const { page, section } = req.params;

  res.oidc.login({
    returnTo: section ? `${page}/${section}` : page,
    authorizationParams: {
      screen_hint: 'signup',
    },
  });
});

app.get('/login/:page/:section?', (req, res) => {
  const { page, section } = req.params;

  res.oidc.login({
    returnTo: section ? `${page}/${section}` : page,
  });
});

app.get('/logout/:page/:section?', (req, res) => {
  const { page } = req.params;

  res.oidc.logout({
    returnTo: page,
  });
});
Let's test this fix.
🛠 Visit http://localhost:4040/external-api/protected-message and log out from there. You should be taken to the "External API" page.
🛠 Visit http://localhost:4040/external-api/public-message and log in from there. You should have remained in that same page.
Conclusion
You have implemented user authentication in Express to identify your users, get user profile information, and control the content that your users can access by protecting routes and API resources.
This tutorial covered the most common authentication use case for an Express web application: simple sign-up, login and logout and calling protected APIs.
However, Auth0 is an extensible and flexible platform that can help you achieve even more. If you have a more complex use case, check out the Auth0 Architecture Scenarios to learn more about the typical architecture scenarios we have identified when working with customers on implementing Auth0.
In a follow-up guide, we'll cover advanced authentication patterns and tooling, such as using a pop-up instead of a redirect to log in users, adding permission information to the oidc namespace, using metadata to enhance user profiles, and much more.
Let me know in the comments below what you thought of this tutorial. Thank you for reading and stay tuned, please.
About the author

Dan Arias
Software Engineer (Auth0 Alumni)