- Complete the prerequisites
- Enable Custom Token Exchange for your application
- Configure and manage a Custom Token Exchange Profile
Prerequisites
Before configuring the Custom Token Exchange, make sure your application meets the following prerequisites:- Is a first-party client
- Is OIDC-conformant
Enable Custom Token Exchange for your application
To enable the Custom Token Exchange, create a new application or update an existing one with the Auth0 Dashboard or the Management API. You can create multiple applications to use Custom Token Exchange. When you create a new application:- By default, Custom Token Exchange is disabled. To enable Custom Token Exchange, use the Management API to make a
POSTcall to Create a Client or aPATCHcall to Update a Client. Set theallow_any_profile_of_typeattribute undertoken_exchangeto["custom_authentication"]:
- Enable the connection you want to use with Custom Token Exchange for the application.
- Make sure your application is flagged as First-Party and it is configured as OIDC Conformant in Dashboard > Applications > Advanced Settings > OAuth.
Custom DBs with import mode
ON are only supported for setUserById() operations.client_id and client_secret for later use when calling the /oauth/token endpoint.
Configure Custom Token Exchange Profile
Each Custom Token Exchange Profile establishes a one-to-one mapping between asubject_token_type and an Action, which contains the code logic for a specific use case.
Custom Token Exchange requests sent to the /oauth/token endpoint with a specific subject_token_type value will map to the corresponding Custom Token Profile and route to the associated Action for processing.
To create a Custom Token Exchange Profile, you need to:
- Create an Action for the profile
- Create the Custom Token Exchange Profile
- Manage the Custom Token Exchange Profile
Create Action for the profile
Use the Custom Token Exchange Event and API objects to write an Action that:- Decodes and validates the
subject_tokenbased on thesubject_token_type. This will provide you with information about the user for the transaction. - Enforce any authorization policy you may need to apply for the transaction.
- Navigate to Actions > Library.
- Select Create Action > Build from Scratch.
- In the Create Action dialog, enter a name and select the Custom Token Exchange trigger from the drop-down.
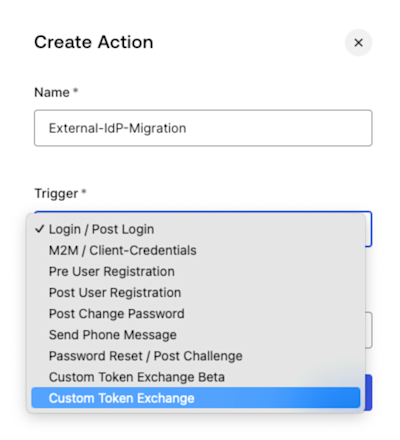
- Select Create.
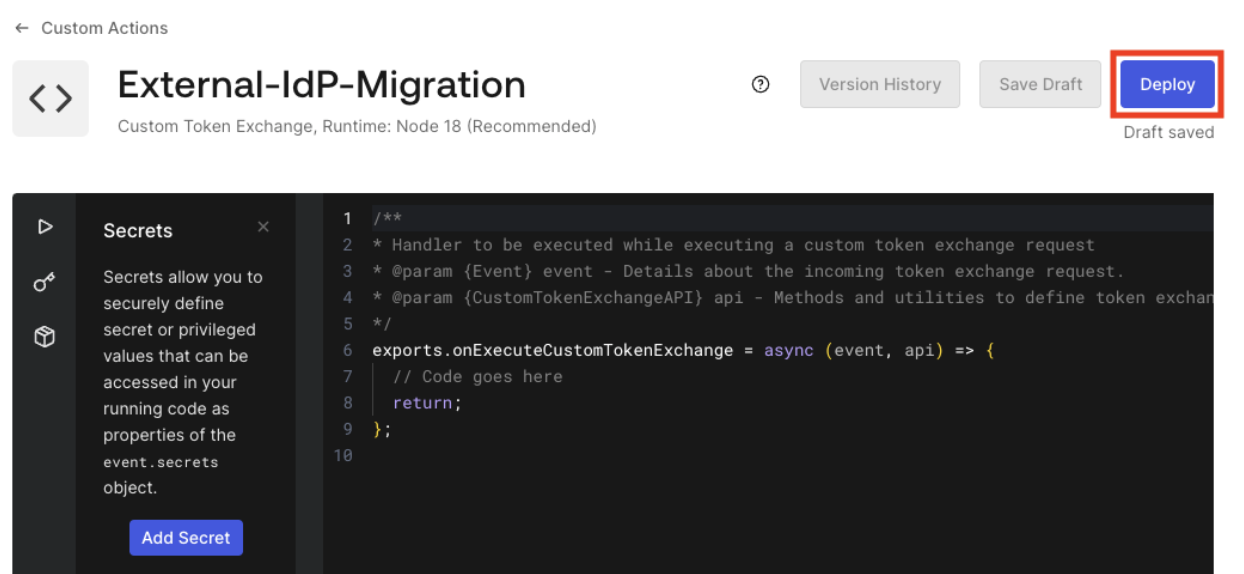
- Deploy the Action.
- To get the Action ID in the Auth0 Dashboard, navigate to the URL of the browser window. The Action ID should be the last part of the URL, as shown in the following image:
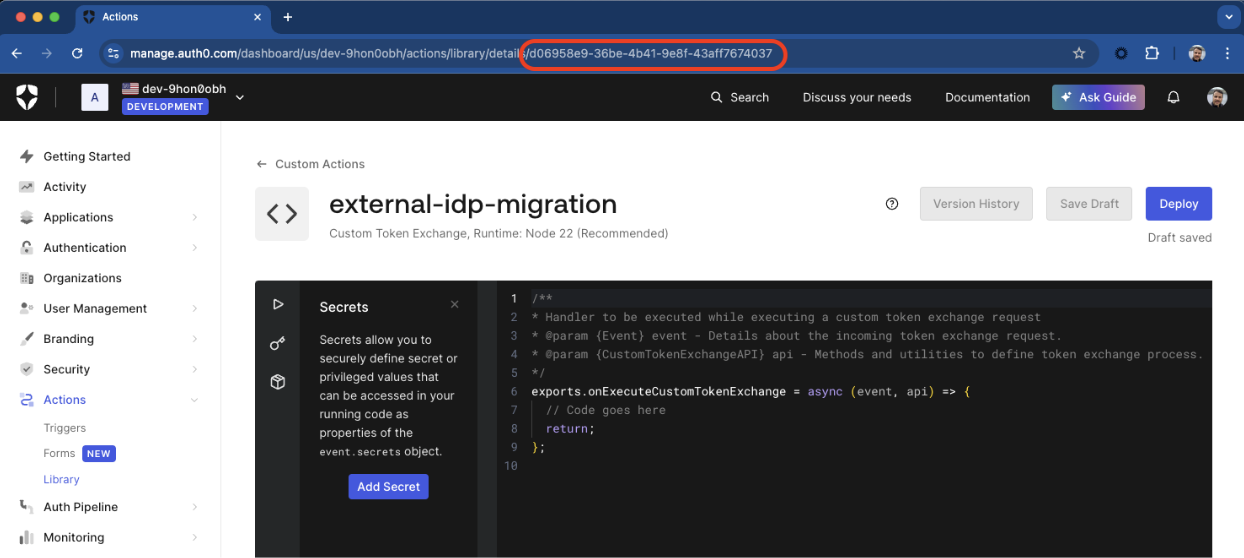
GET request to the /actions endpoint:
actions[0].id. You need the Action ID to create the Custom Token Exchange Profile.
Create Custom Token Exchange Profile
To create the Custom Token Exchange Profile, use the Management API to make aPOST request with the following parameters to the /token-exchange-profiles endpoint:
| Parameter | Description |
|---|---|
subject_token_type | Unique profile token type URI starting with https:// or urnThe following namespaces are reserved and you can’t use them:
|
action_id | Action ID of Action associated with the Custom Token Profile. |
type | Should be set to custom_authentication. |
Manage Custom Token Exchange Profile
To manage your Custom Token Exchange Profile, use the Management API to make requests to the/token-exchange-profiles endpoint.
To get all your Custom Token Exchange Profiles, make the following GET request to the /token-exchange-profiles endpoint. The /token-exchange-profiles endpoint supports checkpoint pagination if you have several profiles.
subject_token_type of an existing profile, make the following PATCH request to the /token-exchange-profiles endpoint.
Once the Action is created, you cannot modify the Action ID.
DELETE request to the /token-exchange-profiles endpoint: