デバイス認可フロー

このチュートリアルでは、デバイス認可フローを使用して、入力に制約のあるデバイスからAPIを呼び出す方法について説明します。 ログインして、アカウント用に構成された例を参考にこのクイックタートに従うことをお勧めします。

対話型のエクスペリエンスには、Device Flow Playgroundを使用することができます。

1

前提条件

2

デバイスコードを要求する

ユーザーがデバイスアプリケーションを起動して、それを認可したい場合には、アプリケーションがAuth0 Authentication APIからのデバイスコードを要求して、ユーザーのセッションに関連付けなければなりません。

デバイスコードを取得するには、アプリケーションがAuthentication APIのデバイス認可フローで認証エンドポイントを呼び出す必要があります:

curl --request post \
--url 'https://{yourDomain}/oauth/device/code' \
--header 'content-type: application/x-www-form-urlencoded'

Was this helpful?

/
var client = new RestClient("https://{yourDomain}/oauth/device/code");
var request = new RestRequest(Method.POST);
request.AddHeader("content-type", "application/x-www-form-urlencoded");
IRestResponse response = client.Execute(request);

Was this helpful?

/
package main
import (
"fmt"
"net/http"
"io/ioutil"
)
func main() {
url := "https://{yourDomain}/oauth/device/code"
req, _ := http.NewRequest("post", url, nil)
req.Header.Add("content-type", "application/x-www-form-urlencoded")
res, _ := http.DefaultClient.Do(req)
defer res.Body.Close()
body, _ := ioutil.ReadAll(res.Body)
fmt.Println(res)
fmt.Println(string(body))
}

Was this helpful?

/
HttpResponse<String> response = Unirest.post("https://{yourDomain}/oauth/device/code")
.header("content-type", "application/x-www-form-urlencoded")
.asString();

Was this helpful?

/
var axios = require("axios").default;
var options = {
method: 'post',
url: 'https://{yourDomain}/oauth/device/code',
headers: {'content-type': 'application/x-www-form-urlencoded'}
};
axios.request(options).then(function (response) {
console.log(response.data);
}).catch(function (error) {
console.error(error);
});

Was this helpful?

/
#import <Foundation/Foundation.h>
NSDictionary *headers = @{ @"content-type": @"application/x-www-form-urlencoded" };
NSMutableURLRequest *request = [NSMutableURLRequest requestWithURL:[NSURL URLWithString:@"https://{yourDomain}/oauth/device/code"]
                                                   cachePolicy:NSURLRequestUseProtocolCachePolicy

                                               timeoutInterval:10.0];

[request setHTTPMethod:@"post"];
[request setAllHTTPHeaderFields:headers];
NSURLSession *session = [NSURLSession sharedSession];
NSURLSessionDataTask *dataTask = [session dataTaskWithRequest:request
                                        completionHandler:^(NSData *data, NSURLResponse *response, NSError *error) {

                                            if (error) {

                                                NSLog(@&quot;%@&quot;, error);

                                            } else {

                                                NSHTTPURLResponse *httpResponse = (NSHTTPURLResponse *) response;

                                                NSLog(@&quot;%@&quot;, httpResponse);

                                            }

                                        }];

[dataTask resume];

Was this helpful?

/
$curl = curl_init();
curl_setopt_array($curl, [
CURLOPT_URL => "https://{yourDomain}/oauth/device/code",
CURLOPT_RETURNTRANSFER => true,
CURLOPT_ENCODING => "",
CURLOPT_MAXREDIRS => 10,
CURLOPT_TIMEOUT => 30,
CURLOPT_HTTP_VERSION => CURL_HTTP_VERSION_1_1,
CURLOPT_CUSTOMREQUEST => "post",
CURLOPT_HTTPHEADER => [
&quot;content-type: application/x-www-form-urlencoded&quot;

],
]);
$response = curl_exec($curl);
$err = curl_error($curl);
curl_close($curl);
if ($err) {
echo "cURL Error #:" . $err;
} else {
echo $response;
}

Was this helpful?

/
import http.client
conn = http.client.HTTPSConnection("")
headers = { 'content-type': "application/x-www-form-urlencoded" }
conn.request("post", "/{yourDomain}/oauth/device/code", headers=headers)
res = conn.getresponse()
data = res.read()
print(data.decode("utf-8"))

Was this helpful?

/
require 'uri'
require 'net/http'
require 'openssl'
url = URI("https://{yourDomain}/oauth/device/code")
http = Net::HTTP.new(url.host, url.port)
http.use_ssl = true
http.verify_mode = OpenSSL::SSL::VERIFY_NONE
request = Net::HTTP::Post.new(url)
request["content-type"] = 'application/x-www-form-urlencoded'
response = http.request(request)
puts response.read_body

Was this helpful?

/
import Foundation
let headers = ["content-type": "application/x-www-form-urlencoded"]
let request = NSMutableURLRequest(url: NSURL(string: "https://{yourDomain}/oauth/device/code")! as URL,
                                    cachePolicy: .useProtocolCachePolicy,

                                timeoutInterval: 10.0)

request.httpMethod = "post"
request.allHTTPHeaderFields = headers
let session = URLSession.shared
let dataTask = session.dataTask(with: request as URLRequest, completionHandler: { (data, response, error) -> Void in
if (error != nil) {
print(error)

} else {
let httpResponse = response as? HTTPURLResponse

print(httpResponse)

}
})
dataTask.resume()

Was this helpful?

/

3

デバイスコードを受け取る

デバイスアプリケーションはHTTP 200応答と次のようなペイロードを受け取るはずです:

{
"device_code": "GmRh...k9eS",
"user_code": "WDJB-MJHT",
"verification_uri": "https://my-tenant.auth0.com/device",
"verification_uri_complete": "https://my-tenant.auth0.com/device?user_code=WDJB-MJHT",
"expires_in": 900,
"interval": 5
}

Was this helpful?

/

4

デバイスのアクティベーションを要求する

デバイスアプリケーションは、device_codeuser_codeの受信後に、ユーザーにverification_uriuser_codeを入力するよう指示する必要があります。

null

5

トークンエンドポイントをポーリングする

ユーザーによるアクティベーションを待っている間、デバイスアプリケーションはAuthentication API POST /oauth/tokenエンドポイントを断続的に呼び出して、応答を適切に処理する必要があります。

curl --request POST \ 
--url 'https://{yourDomain}/oauth/token' \
--header 'content-type: application/x-www-form-urlencoded' \
--data grant_type=urn:ietf:params:oauth:grant-type:device_code \
--data device_code=AUTH0_SCOPES \
--data 'client_id={yourClientId}'

Was this helpful?

/

6

ユーザーの認可

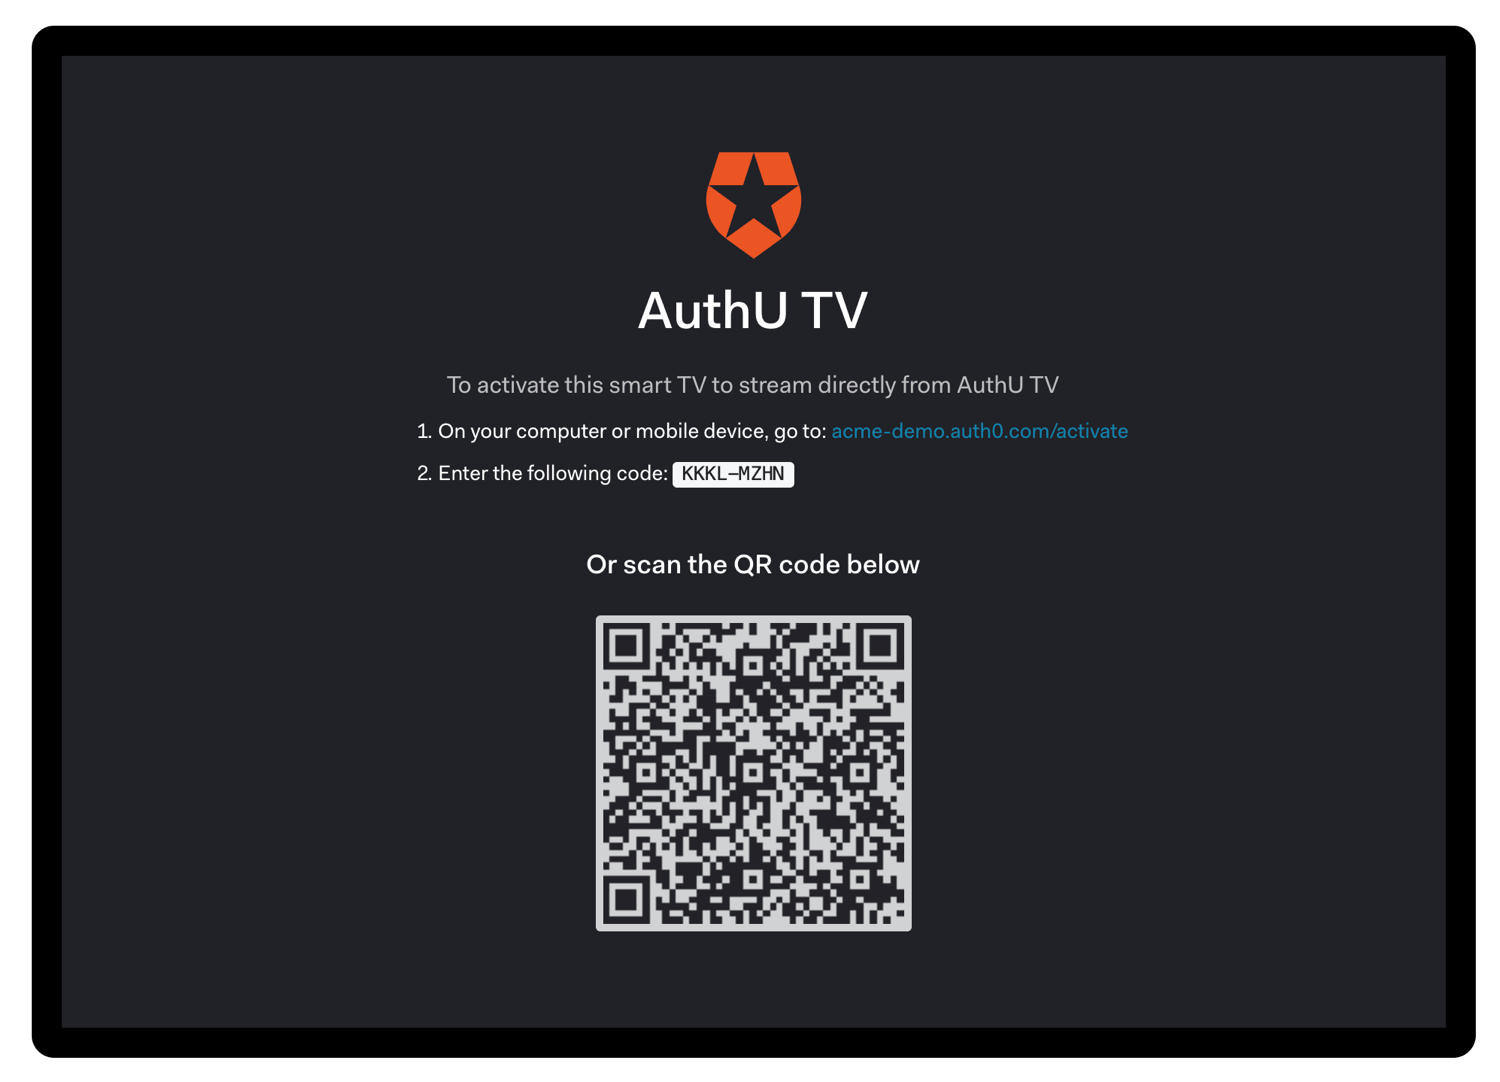
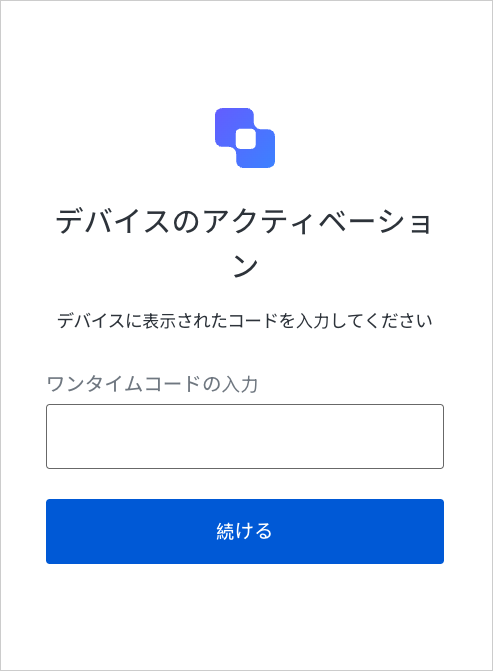
ユーザーはQRコードをスキャンするか、アクティベーションページを開いてユーザーコードを入力します:

null

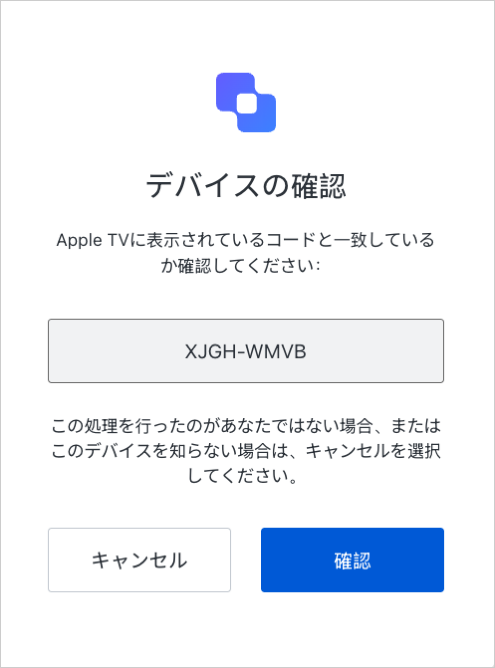
確認ページが表示され、ユーザーが正しいデバイスであることを確認します:

null

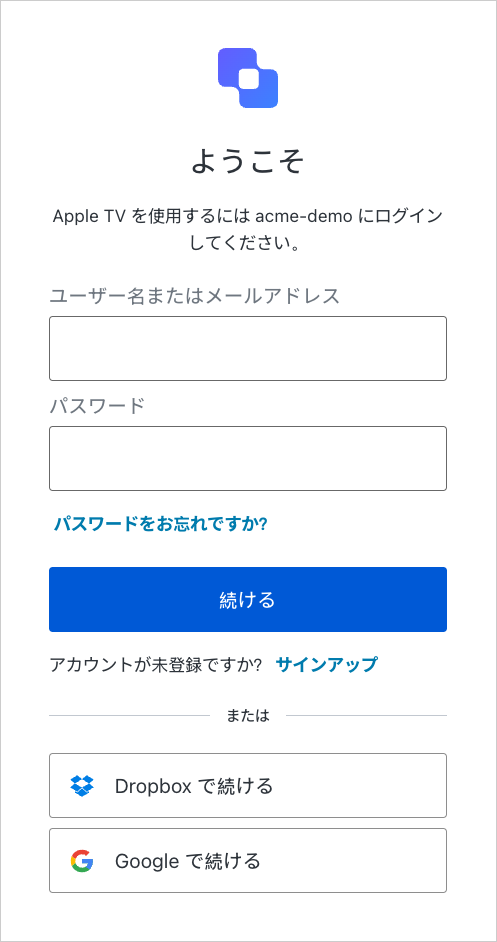
ユーザーがサインインして、トランザクションが完了します。この手順には、以下の1つ以上のプロセスが含まれます。

  • ユーザーを認証する

  • 認証を行うために、ユーザーをIDプロバイダーへリダイレクトする

  • アクティブなSSOセッションを確認する

  • デバイスに関してユーザーの同意がまだ得られていない場合には、同意を得る

null

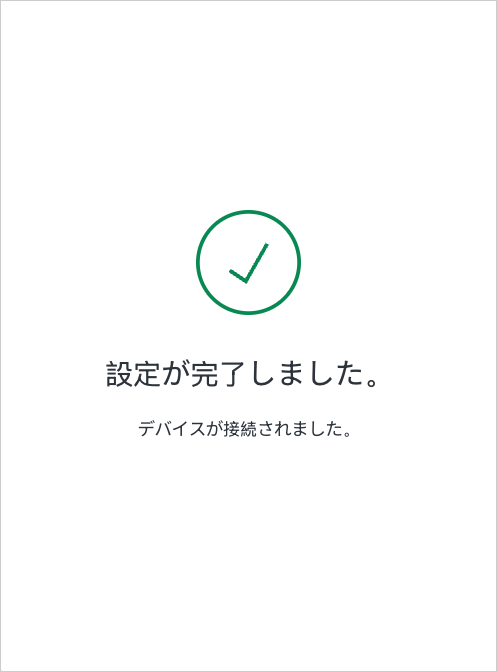
認証と同意が成功すると、確認のプロンプトが表示されます:

null

この時点で、ユーザーの認証とデバイスの認可は完了しています。

7

トークンを受け取る

ユーザーがデバイスアプリケーションを認可すると、HTTP 200応答と次のペイロードを受け取ります:

{
"access_token": "eyJz93a...k4laUWw",
"refresh_token": "GEbRxBN...edjnXbL",
"id_token": "eyJ0XAi...4faeEoQ",
"token_type": "Bearer",
"expires_in": 86400
}

Was this helpful?

/

アクセストークンは、Authentication APIのユーザー情報取得エンドポイント(デバイスアプリケーションがopenidスコープを要求した場合)、またはaudienceパラメーターが指定したAPIを呼び出すために使用されます。独自のAPIを呼び出す場合には、デバイスアプリケーションは使用する前にアクセストークンを検証しなければなりません。

IDトークンには、デコードと抽出が必要なユーザー情報が含まれています。デバイスアプリケーションがopenidスコープを要求した場合には、Authentication APIはid_tokenのみを返します。

リフレッシュトークンは、アクセストークンまたはIDトークンの期限が切れたときに、新しいトークンの取得に使用されます。audienceパラメーターが指定するAPIに[Allow Offline Access(オフラインアクセスの許可)]設定が有効化されていて、デバイスアプリケーションがoffline_accessスコープを要求した場合には、Authentication APIはrefresh_tokenのみを返します。

8

APIを呼び出す

APIを呼び出すには、デバイスアプリケーションはアクセストークンをベアラートークンとしてHTTP要求のAuthorizationヘッダーで渡さなければなりません。

curl --request GET \
--url https://myapi.com/api \
--header 'authorization: Bearer AUTH0_API_ACCESS_TOKEN' \
--header 'content-type: application/json'

Was this helpful?

/

9

リフレッシュトークン

ユーザーに新しいアクセストークンを取得するために、デバイスアプリケーションは、refresh_tokenパラメーターを指定してAuthentication API POST /oauth/tokenエンドポイントを呼び出すことができます。

curl --request POST \
--url 'https://{yourDomain}/oauth/token' \
--header 'content-type: application/x-www-form-urlencoded' \
--data grant_type=refresh_token \
--data 'client_id={yourClientId}' \
--data 'client_secret={yourClientSecret}' \
--data refresh_token=AUTH0_REFRESH_TOKEN

Was this helpful?

/

要求が成功すると、デバイスアプリケーションはHTTP 200応答で次のペイロードを受け取ります:

{
"access_token": "eyJ...MoQ",
"expires_in": 86400,
"scope": "openid offline_access",
"id_token": "eyJ...0NE",
"token_type": "Bearer"
}

Was this helpful?

/

リフレッシュトークンの詳細については、「リフレッシュトークン」をお読みください。

10

トラブルシューティング

テナントログは実行されるあらゆるやり取りを記録し、問題の解決に利用することができます。

**コード** **名前** **説明**
fdeaz デバイス認可要求の失敗
fdeac デバイスのアクティベーションに失敗
fdecc ユーザーがデバイス確認をキャンセル
fede 交換の失敗 アクセストークンのデバイスコード
sede 交換の成功 アクセストークンのデバイスコード

トークンの応答

ユーザーによるデバイスの認可を待っている間には、さまざまなHTTP 4xx応答を受け取ります。

認可待ち

このエラーは、ユーザーの操作を待っている間に表示されます。このチュートリアルの前の手順で推奨されているintervalを使ってポーリングを継続してください。

`HTTP 403`
{
"error": "authorization_pending",
"error_description": "..."
}

Was this helpful?

/

減速

ポーリングが速すぎます。このチュートリアルの前の手順で推奨されている間隔を使ってポーリングしてください。ネットワーク遅延が原因でこのエラーを受け取ることを避けるには、ポーリング要求の応答を受け取ってから間隔をカウントし始めるようにします。

`HTTP 429`
{
"error": "slow_down",
"error_description": "..."
}

Was this helpful?

/

有効期限切れのトークン

ユーザーによるデバイスの認可が遅かったため、device_codeの期限が切れました。アプリケーションはユーザーにフローの失効を通知して、フローをもう一度始めるように促す必要があります。

`HTTP 403`
{
"error": "expired_token",
"error_description": "..."
}

Was this helpful?

/

アクセス拒否

アクセスが拒否された場合には、次を受け取ります:

`HTTP 403`
{
"error": "access_denied",
"error_description": "..."
}

Was this helpful?

/

これは、以下を含むさまざまな原因で発生します。

  • ユーザーがデバイスの認可を拒否した。

  • 認可サーバーがトランザクションを拒否した。

  • 構成済みのアクションがアクセスを拒否した。

11

実装例

以下の例を参考に、このフローを実際のアプリケーションに実装する方法を確認してください。

  • Device Authorization Playground

  • AppleTV(Swift):AppleTVからのデバイス認可フローにAuth0を使用する方法を示す簡素なアプリケーションです。

  • CLI(Node.js):認可コードフローではなく、デバイス認可フローを使用するCLIの実装例です。大きな違いは、CLIがWebサーバーのホスティングやポートの待ち受けを必要としないことです。

12

制限事項

デバイス認可フローを使用するには、デバイスアプリケーションに以下が必要です。

また、デバイス認可フローには以下を使用できません:

Next Steps

Excellent work! If you made it this far, you should now have login, logout, and user profile information running in your application.

This concludes our quickstart tutorial, but there is so much more to explore. To learn more about what you can do with Auth0, check out:

  • Auth0 Dashboard - Learn how to configure and manage your Auth0 tenant and applications
  • Auth0 Marketplace - Discover integrations you can enable to extend Auth0’s functionality

Did it work?

Any suggestion or typo?

Edit on GitHub
Sign Up

Sign up for an or to your existing account to integrate directly with your own tenant.