Start the migration
1
Prerequisites
To configure automatic migration, you need:
- A custom database connection using your external user store.
2
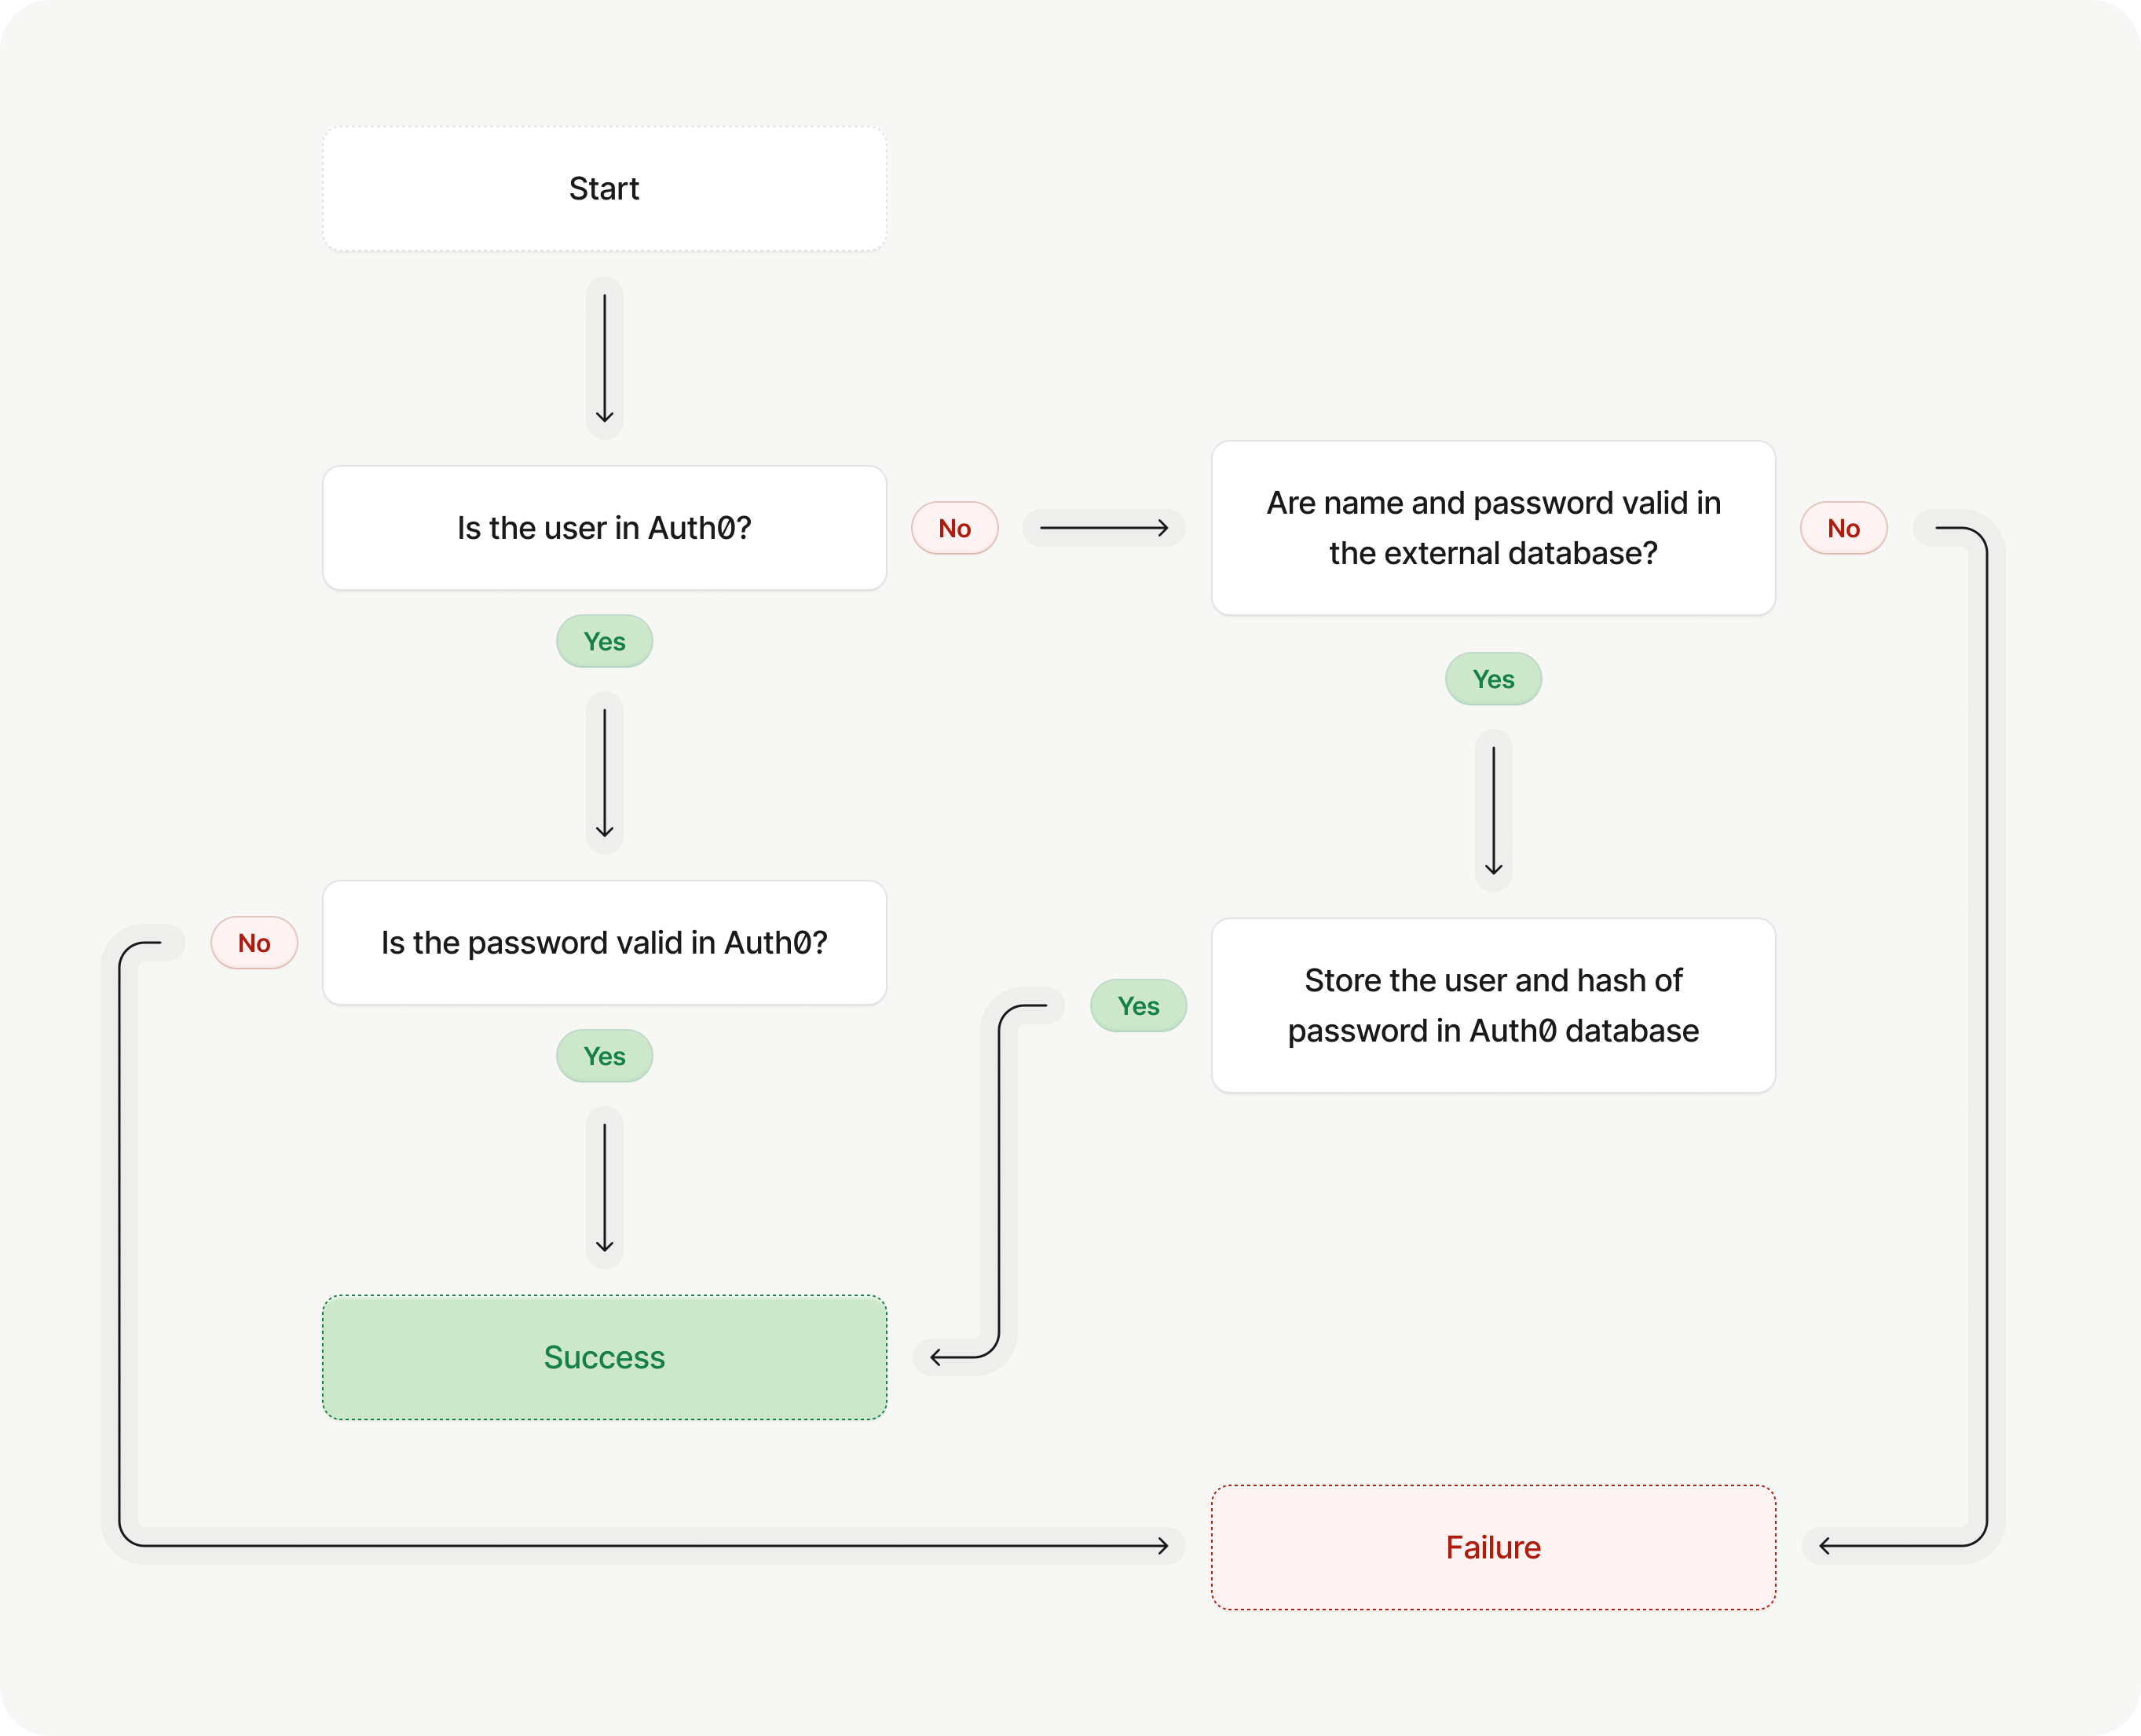
Enable migration
From Auth0 Dashboard > Authentication > Database, select the custom database connection.In the Settings tab, toggle Import Users to Auth0 and select **Save.
3
Configure database action scripts
Database action scripts are code you write that Auth0 executes when interacting with your external user store, like when a user logs in or signs up.Next, in the Custom Database tab, find the Database Action Scripts section. When you enable automatic migration, you must implement two scripts:
-
The
login()script, which executes when a user who is not in the Auth0 database tries to log in. -
The
getUser()script, which executes in scenarios like sign-ups and password changes. The data returned from thegetUser()script is migrated into the new Auth0 user profile.
Complete the migration
1
Verify migration completion
Verify that the migration is complete by checking that all users in your external user store are in the Auth0 user store.You can view all users in the Auth0 user store in two ways:
- On Auth0 Dashboard > User Management > Users.
-
With the Management API’s List or Search users endpoint (
GET /users).
2
Disconnect external user store
Once you confirm that all users are migrated, you can disconnect your external user store by updating your database action scripts to no operation functions. This prevents Auth0 from connecting to your external user store to authenticate users.From Auth0 Dashboard > Authentication > Database, select your database connection. On the Custom Database tab, find the Database Action Scripts sectionUpdate the Login script:Update the Get User script:
Troubleshoot user migration issues
If you encounter any issues with automatic migration, first read Custom Database Connection and Action Script Best Practices.Duplicated user or user already exists
During the user migration process, Auth0 first creates a partial user profile in an internal user store, and then creates a full user profile in your database connection. If an issue occurs that prevents this full user profile from being created, you may encounter a “The user already exists” error. ADUPLICATED_USER error indicates that the user exists in Auth0’s internal user store but not in your tenant. You may encounter this error if:
- You try to use more than one migration method (for example, automatic migration then bulk user import).
- You delete a user from your database connection and then try to recreate the user.
- You attempt to create a new user in your database connection when the user already exists in your external user store.
DUPLICATED_USER or “The user already exists” errors:
-
Check the
console.log()statements with the Actions Real-time Logs. - Delete the user with the Management API Delete a User endpoint.
- Delete the user with the Management API Delete a Connection User endpoint.
- Instruct the user to log in or change their password to reattempt migration.
Missing metadata
If a user is interrupted during the login or change password flow that initiates the migration process, Auth0 may not be able to transfer their metadata (user_metadata or app_metadata) along with their other profile data.
You can mitigate this scenario by creating an Action that verifies the user’s profile is missing metadata, retrieves it from the external use store, and then stores it in Auth0.