
TL;DR: In this article, we will learn how a B2C company easily implemented Single Sign-On to provide seamless integration between different e-commerce portals. The first thing we will do is to bootstrap two instances of an application to simulate these portals. Then, we will secure these instances with Auth0 and will add Single Sign-On to show that it takes only a few minutes to achieve our goal. You can find the final code in the sso branch of this GitHub repository.
Single Sign-On Advantages
Single Sign-On refers to when a user logs in to an application with a single set of credentials and is then automatically signed into other applications. With Single Sign-On, a user gains access to multiple software systems without maintaining different login credentials such as usernames and passwords. Among the advantages of implementing Single Sign-On on our applications, we can find that it:
- eliminates time spent to re-enter user credentials, which increases conversion rates for B2C portals;
- eliminates password fatigue from having to store or remember different usernames and passwords;
- reduces complaints about password problems, thus reducing the costs associated with setting up several help desk systems for password-reset issues, invalid credentials, etc;
- and minimizes phishing, thus improving security;
Let's learn how easy it is to implement Single Sign-On capabilities with Auth0.
“Increase conversion rates by implementing Single Sign-On on B2C applications.”
Tweet This
Simulating B2C Portals
To simulate the B2C portals and to focus on the Single Sign-On integration process, we are going to clone a GitHub repository that contains two applications: one simple backend API written in JavaScript that runs on Node.js; and one client-side application written with React.
In the following sections, we are going to use these applications to simulate two portals. These portals will be pretty similar. The difference between them is that one will simulate a portal that sells products to be used at home, and the other one will simulate a portal that sells products to be used by kids (toys).
To clone the GitHub repository, we can issue the following command:
# clone the repository in the current directory
git clone https://github.com/auth0-blog/react-b2c-sso.git
Running the Backend Instances
After cloning this repository, we are going to install the dependencies of the backend and then we are going to bootstrap two instances to support our portals:
# change working directory
cd react-b2c-sso/server/

# install backend dependencies
npm i

# define port to run the first backend
export PORT=3000

# define the backend that will handle requests
export REACT_APP_REST_PORT=3001

# run the first backend instance
npm start &

# define port to run the second backend
export PORT=4000

# define the backend that will handle requests
export REACT_APP_REST_PORT=4001

# run the second backend instance
npm start &
Note that we are using an environment variable called REACT_APP_REST_PORT to define on what port our backend instances will run. Besides defining on what port they run, this variable also sets the type of the backend. The backend instance running on port 3001 will return products to be used at home. The backend running on port 4001 will return products to be used by kids.
Let's check if both backend instances are running properly:
# retrieve products used at home
curl localhost:3001/products

# retrieve products used by kids
curl localhost:4001
Running the Client-Side Applications
Now that we have both backend APIs ready to handle requests, let's take care of the client-side applications. The process, as we will see, will be easy as before. The following commands will install the dependencies of the client-side application and will run two different instances. The purpose of these instances, exactly like the backend instances, will be to simulate two different portals. One that exposes products to use at home and one to expose products to be used by kids.
# change working directory to client-side app root
cd ..

# install client-side dependencies
npm i

# run the first client-side application
export PORT=3000
export REACT_APP_REST_PORT=3001
npm start &

# run the second client-side application
export PORT=4000
export REACT_APP_REST_PORT=4001
npm start &
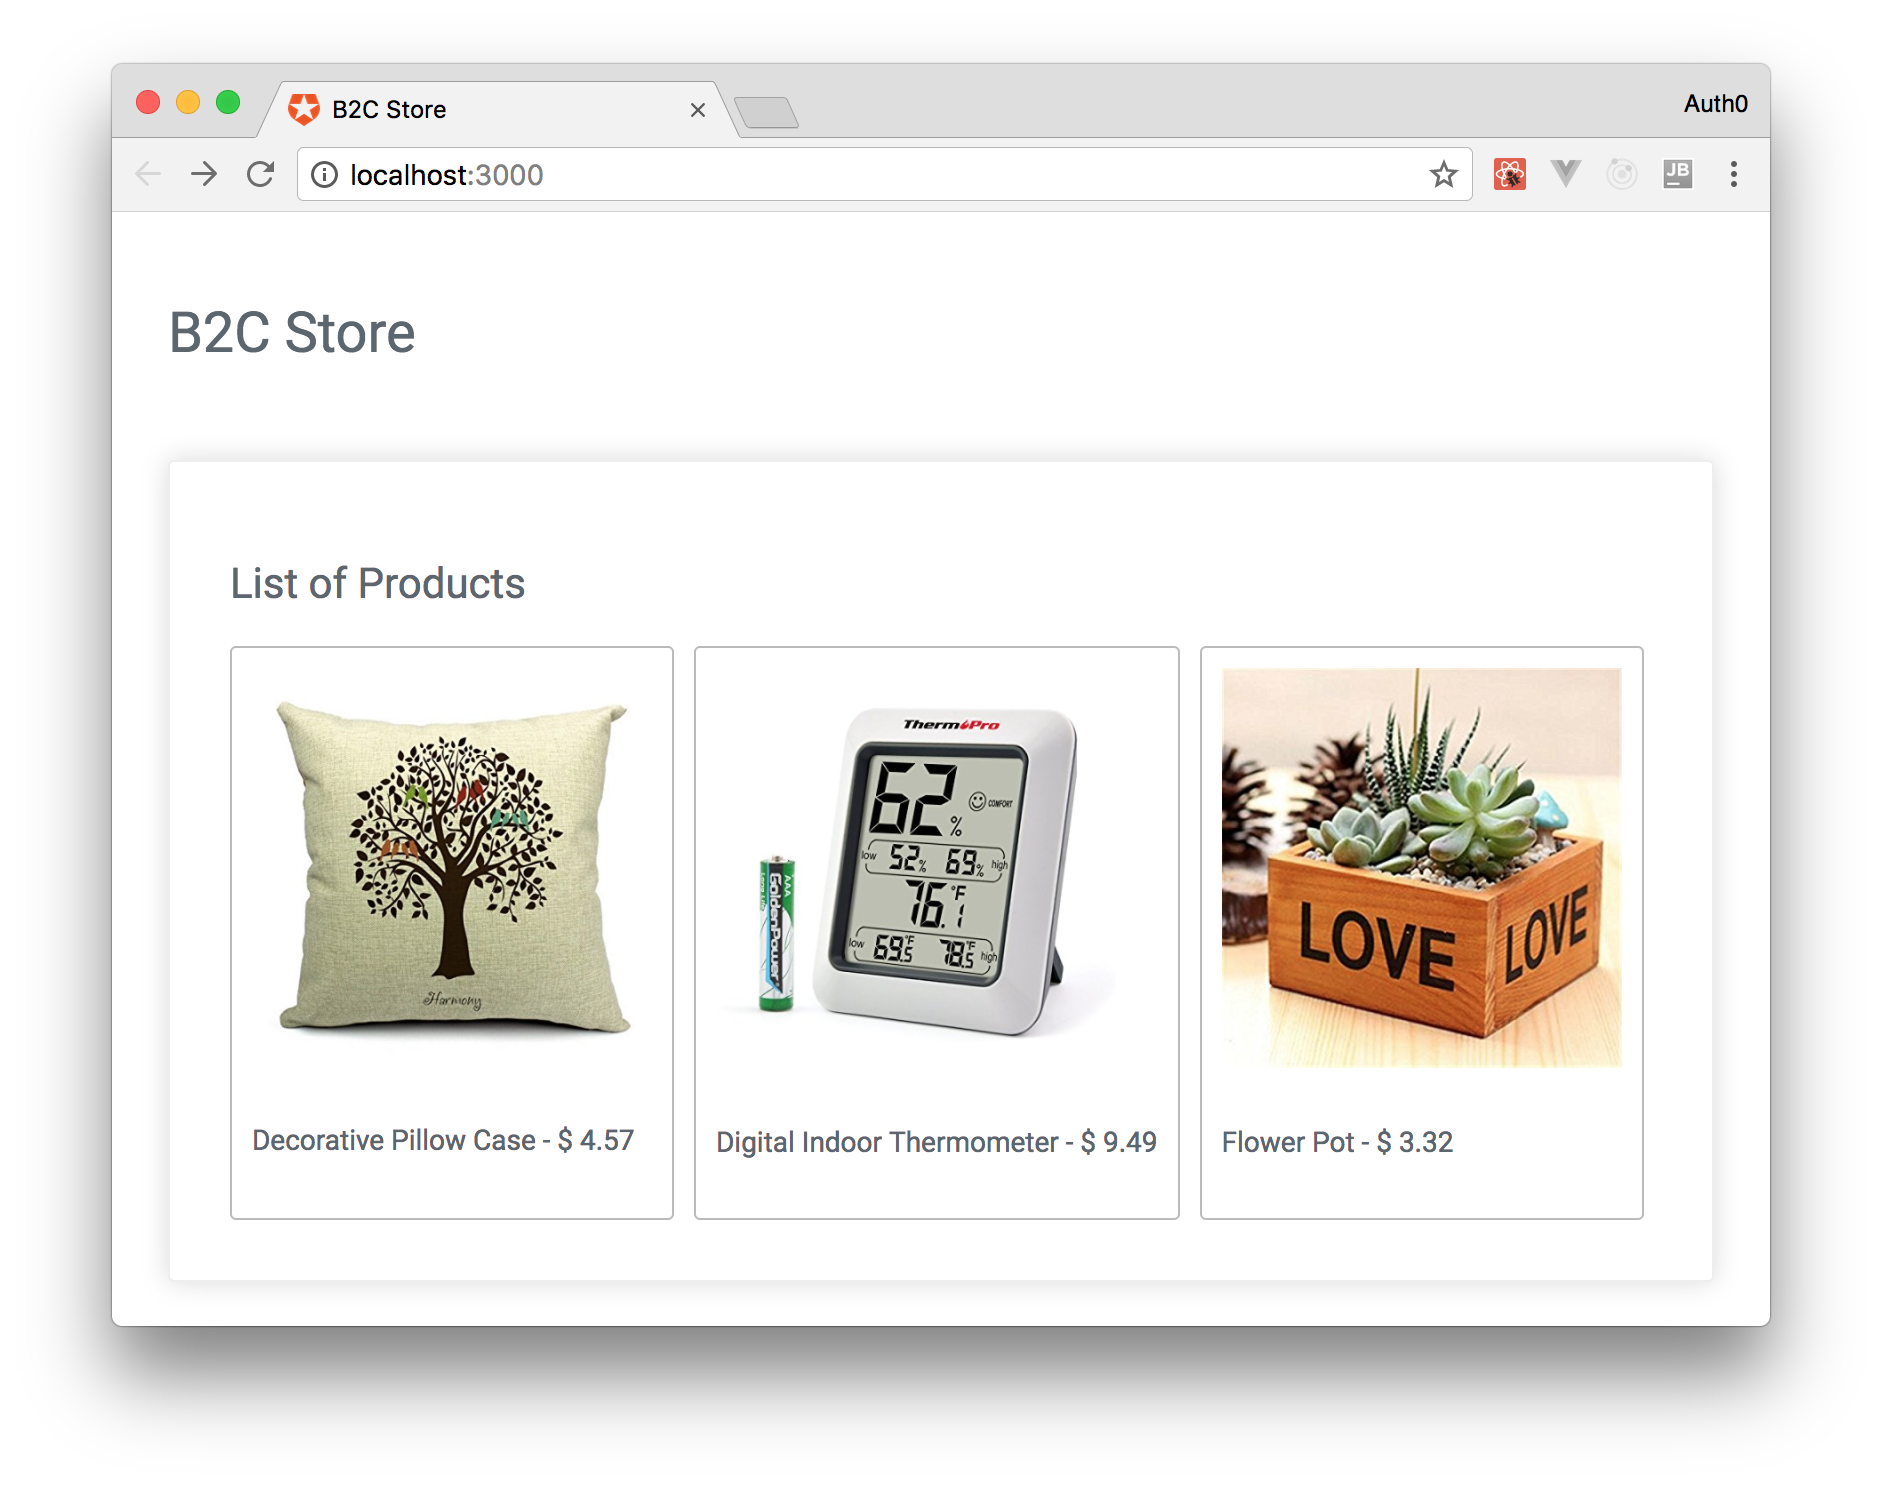
As we can see, the first portal (the one that will show products to be used at home) will run on port 3000 and the second portal (the one that will show products to be used by kids) will run on port 4000.
We can see both portals running by opening http://localhost:3000 and http://localhost:4000 on a web browser.
Securing the Portals with Auth0
After bootstrapping both portals, it's time to secure them and add Single Sign-On to provide a seamless user experience to our customers. As we will see, with Auth0, we will be able to achieve our goal in minutes. For starters, if we haven't done so yet, this is a good time to sign up for a free Auth0 account.
Creating Auth0 APIs
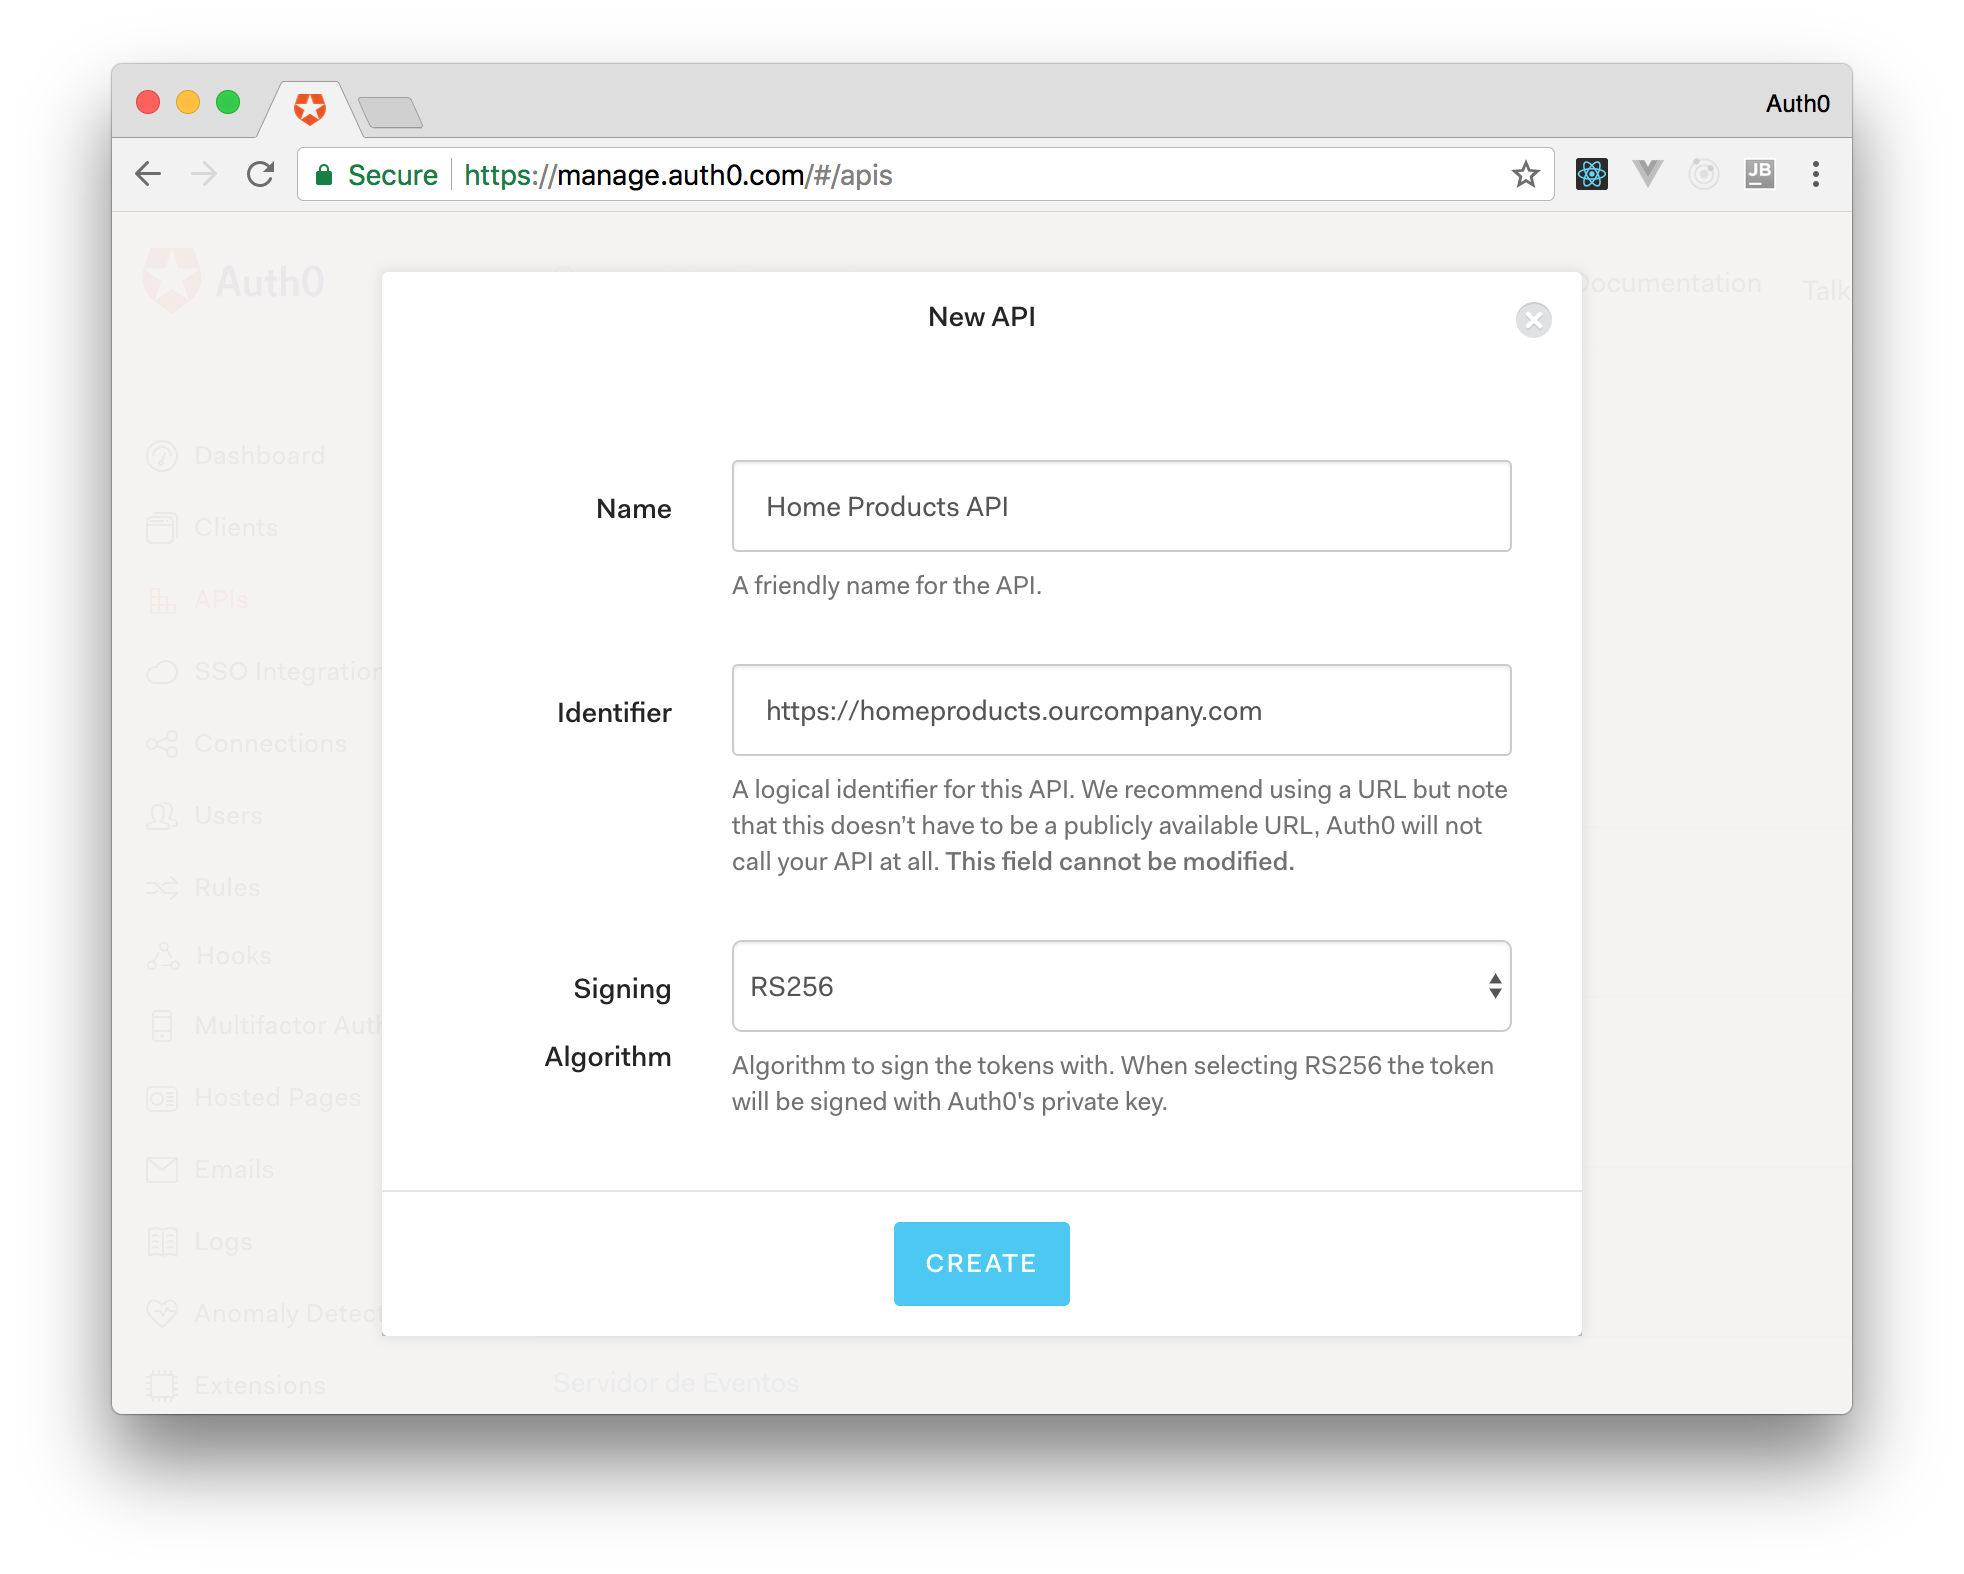
Having our free account, the first thing we will do is to create two Auth0 APIs to represent our backend instances. To do that, let's open the APIs webpage in a web browser and click on "Create API". In the form that is shown, let's fill the "Name" input with "Products API" and "Identifier" with "https://homeproducts.ourcompany.com". This "Identifier" doesn’t have to be a publicly available URL, as Auth0 will not call our API at all. The last field in this form, "Signing Algorithm", can be left with the "RS256" value.
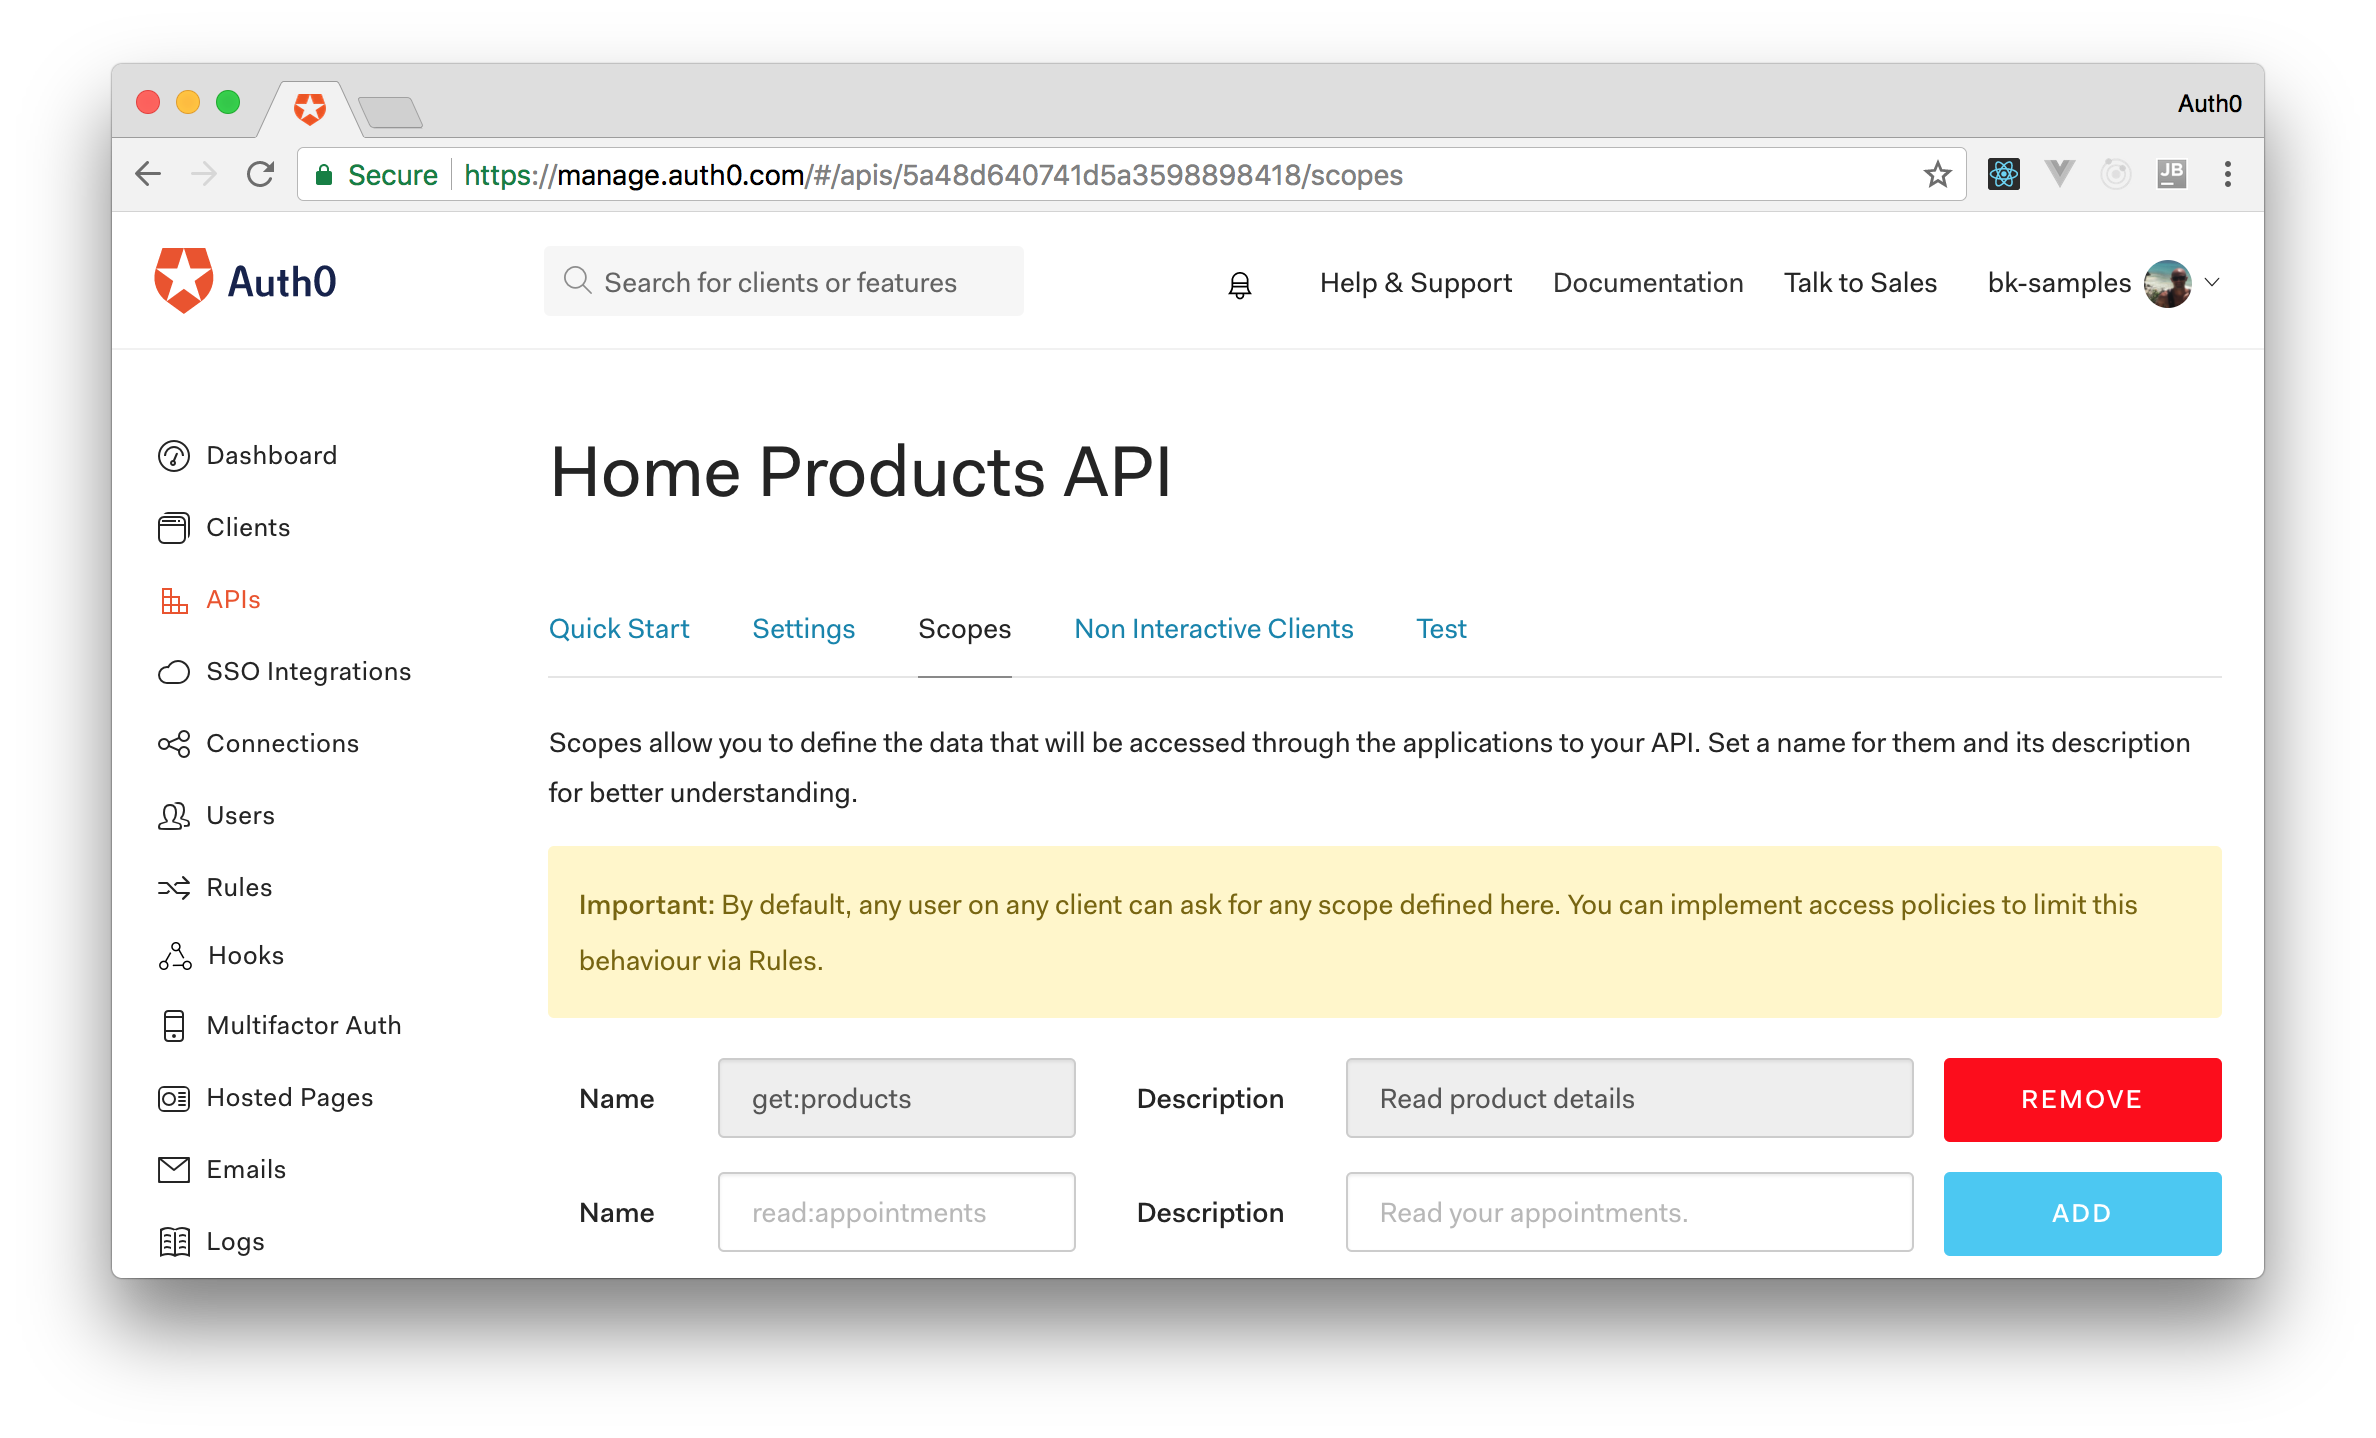
Now that we have our first API registered on Auth0, let's add a scope to it. Scopes allow us to define the API data accessible to our client applications. In our case, as we want our clients to get products, we will create one scope: get:products. To create this scope, we have to head to the "Scopes" tab of our recently created API, fill the form, and click "Add".
Now it's time to do the same process for our second API, the one that will show products to be used by kids. Therefore, let's head to the APIs page again, click on "Create API", and fill the form with:
- "Name": "Kids Products API"
- "Identifier": "https://kidsproducts.ourcompany.com"
- "Signing Algorithm": "RS256"
After that, we have to add the same scope to this new API. As such, let's click on the "Scopes" tab and add the get:products scope.
Securing the Backend Application with Auth0
With both APIs correctly configured on our Auth0 account, it's time to secure the backend application. To understand how this is done, we will add a new endpoint to accept purchases from authenticated customers only. Unauthenticated visitors won't be able to use this endpoint.
As our backend is a Node.js API written with Express, we will install and configure three NPM packages:
express-jwt, an Express middleware that validates JWTs;express-jwt-authz, an Express middleware that validates JWT scopes;- and
jwks-rsa, a library to retrieve RSA public keys from a JWKS (JSON Web Key Set) endpoint.
Let's start by installing these dependencies:
# change working directory to server
cd server

# install NPM dependencies
npm i express-jwt express-jwt-authz jwks-rsa
After that, we will refactor the server.js file in the server directory to use these packages:
// ... other imports
const jwt = require('express-jwt');
const jwtAuthz = require('express-jwt-authz');
const jwksRsa = require('jwks-rsa');

// ... express app and products endpoint definition

const checkJwt = jwt({
  // dynamically provide a signing key based on the kid in the header
  // and the singing keys provided by the JWKS endpoint.
  secret: jwksRsa.expressJwtSecret({
    cache: true,
    rateLimit: true,
    jwksRequestsPerMinute: 5,
    jwksUri: `https://${process.env.REACT_APP_AUTH0_DOMAIN}/.well-known/jwks.json`
  }),
  // Validate the audience and the issuer.
  audience: process.env.REACT_APP_AUTH0_AUDIENCE,
  issuer: `https://${process.env.REACT_APP_AUTH0_DOMAIN}/`,
  algorithms: ['RS256']
});

// new endpoint to accept purchases from authenticated customers
app.post('/buy', checkJwt, jwtAuthz([ 'get:products' ]), (req, res) => {
  res.status(201).send({message: 'Thank you for buying. You make me happy!'});
});

// ... call to app.listen
As we can see, securing backend applications with Auth0 is really easy. In the case of a Node.js and Express combo, we just imported the three packages that we installed and configured two middleware to validate JWTs and their scopes.
With these changes in place, we can run secured instances of our backend:
# configure env variable to point to our Auth0 domain
export REACT_APP_AUTH0_DOMAIN=bk-samples.auth0.com

# define the audience and port of the first backend application
export REACT_APP_AUTH0_AUDIENCE=https://homeproducts.ourcompany.com
export REACT_APP_REST_PORT=3001
npm start &

# define the audience and port of the second backend application
export REACT_APP_AUTH0_AUDIENCE=https://kidsproducts.ourcompany.com
export REACT_APP_REST_PORT=4001
npm start &
What is important to note here is that now we use three environment variables in our backend applications:
REACT_APP_AUTH0_DOMAIN, an env variable that points to our Auth0 domain;REACT_APP_AUTH0_AUDIENCE, an env variable that points to the identifier of one of the Auth0 APIs that we created in the previous section;- and
REACT_APP_REST_PORT, an env variable that defines on what port our backend will listen for requests.
Now, our backend contains a new endpoint that accepts purchases from authenticated users. As such, we can focus on the client-side application and the Single Sign-On integration.
Creating Auth0 Applications
To configure Auth0 in our front-end applications, we first need to create Auth0 Applications to represent them. To do this, we need to head to the Applications webpage in the management dashboard and click "Create Application". We will create two applications, one for the portal that shows products to be used at home and one for the portal that shows products to be used by kids. Therefore, after clicking on the "Create Application" button, we can enter "Home Products Portal" as the name of the application and select "Single Page Web Applications" as its type.
The management dashboard will redirect us to a tab called "Quick Start" inside our new application. Let's switch to the "Settings" tab and configure three properties of this application:
- Allowed Callback URLs: Let's add
http://app.local:3000/callbackin this field to tell Auth0 that this is a valid URL to call back after the authentication process. - Allowed Web Origins: Let's add
http://app.local:3000in this field to tell Auth0 that requests can originate from this URL. - Allowed Logout URLs: Let's add
http://app.local:3000in this field to tell Auth0 that it can redirect the user to this URL after the logout process.
Note that, instead of using http://localhost:3000, we used http://app.local:3000 while configuring this application. We've done that because, for security reasons, Auth0 will always ask for explicit user consent when the Callback URL is set to localhost or 127.0.0.1. We want to avoid that in Single Sign-On process to make it smooth. Therefore, one important step before proceeding with the rest of the tutorial is to configure app.local to resolve to localhost on our development machine. This reference shows how to do this in different environments, but if we are using Linux or Mac, we can achieve that by issuing the following command:
echo '127.0.0.1 app.local' | sudo tee -a /etc/hosts
Now that we have configured our development machine to point app.local to localhost, let's head back to the management dashboard and save the new properties. While we are still on this application, let's take note of the "Client ID" property. We will use it later when configuring Auth0 in our code.
We have finished creating the first Auth0 Application. Now, to create the second one, let's head back to the Applications webpage and create it with the following properties:
- Application Name: "Kids Products Portal"
- Application Type: "Single Page Web Applications"
- Allowed Callback URLs:
http://app.local:4000/callback - Allowed Web Origins:
http://app.local:4000 - Allowed Logout URLs:
http://app.local:4000
After saving the second application, let's take note of the "Client ID" property as well.
Securing the Client-Side Applications with Auth0
To secure the client applications with Auth0, we will need only one external dependency: auth0-web. This library is a wrapper around auth0.js that favors convention over configuration. To install it, let's issue the following command in the project root:
npm i auth0-web
When users successful login with Auth0, they are redirected to our application with their JWTs included as hashes in the URL. To handle these hashes and to show a nice message while we process them, let's create a component called Callback. To do that, let's add a new directory inside src called Callback and create a file on it called Callback.js. In this file, we will add:
import React, {Component} from 'react';
import * as Auth0 from "auth0-web";

class Callback extends Component {
  componentWillMount() {
    Auth0.handleAuthCallback();
  }

  render() {
    return (
      <div>Loading profile...</div>
    );
  }
}

export default Callback;
The magic here will happen in the Auth0.handleAuthCallback function call. This function will parse hashes and, if it finds tokens, load users profiles.
After creating this component, let's refactor the App.js file to use it and also to bootstrap auth0-web with the correct properties:
import React, {Component} from 'react';
import {Route, withRouter, Redirect} from 'react-router-dom';
import Header from './Header/Header.js';
import Home from './Home/Home.js';
import * as Auth0 from 'auth0-web';
import Callback from "./Callback/Callback";

Auth0.configure({
  domain: process.env.REACT_APP_AUTH0_DOMAIN,
  audience: process.env.REACT_APP_AUTH0_AUDIENCE,
  clientID: process.env.REACT_APP_AUTH0_CLIENT_ID,
  redirectUri: process.env.REACT_APP_AUTH0_REDIRECT_URI,
  responseType: 'token id_token',
  scope: 'openid get:products'
});

class App extends Component {

  componentWillMount() {
    const self = this;

    Auth0.subscribe(async (signedIn) => {
      if (signedIn) {
        return self.setState({signedIn});
      }

      const ssoStatus = await Auth0.silentAuth('b2c-sso', process.env.REACT_APP_AUTH0_AUDIENCE, 'openid get:products');

      self.setState({
        signedIn: ssoStatus
      });
    });
  }

  render() {
    const {pathname} = this.props.location;
    if (Auth0.isAuthenticated() && pathname === '/callback') {
      return <Redirect to="/"/>
    }
    return (
      <div className="app">
        <Route path="/" component={Header}/>
        <Route exact path="/" component={Home}/>
        <Route path="/callback" component={Callback}/>
      </div>
    );
  }
}

// withRouter makes component route-aware so we can check `this.props.location`
export default withRouter(props => <App {...props}/>);
There are only a few differences between this version and the previous, unsecured one:
- Now we are bootstrapping the
auth0-weblibrary with four environment variables (REACT_APP_AUTH0_DOMAIN,REACT_APP_AUTH0_AUDIENCE,REACT_APP_AUTH0_CLIENT_ID,REACT_APP_AUTH0_REDIRECT_URI) and with theget:productsscope that we configured on our Auth0 APIs. - We have configured the
componentWillMountlifecycle method to subscribe toauth0-webevents. Now, if our users are not authenticated, we use thesilentAuthmethod ofauth0-webto Single Sign-On them. Of course, if they are not yet authenticated with Auth0,ssoStatuswill be set to false (unauthenticated) and vice versa. - We have configured our app to redirect users to the home page when they reach
/callback.
Right now, we are not providing means to users manually initiate the authentication process, nor to allow them to sign out. To do that, let's add two buttons into the Header component (Header.js file) and make them trigger these processes:
import React, {Component} from 'react';
import './Header.css';
import * as Auth0 from 'auth0-web';
import Button from '../DOMElements/Button/Button';

class Header extends Component {
  render() {
    const authenticated = Auth0.isAuthenticated();
    return (
      <div className="app-header">
        <h1>B2C Store</h1>
        <div className="app-header-links">
          {!authenticated && <Button text="Sign In with Auth0" onClick={Auth0.signIn}/>}
          {authenticated && <Button text="Sign Out" onClick={this.logout}/>}
        </div>
      </div>
    );
  }

  logout() {
    Auth0.signOut({
      returnTo: process.env.REACT_APP_AUTH0_SIGN_OUT_REDIRECT_URI,
      clientID: process.env.REACT_APP_AUTH0_CLIENT_ID
    });
  }
}

export default Header;
In this new version, we are now showing a button called "Sign In with Auth0" that, when clicked, triggers the signIn method of auth0-web. We are also showing a button (for authenticated users only) called "Sign Out" that calls the logout method defined above. Lastly, we are making the logout method call signOut with two environment variables: REACT_APP_AUTH0_SIGN_OUT_REDIRECT_URI and REACT_APP_AUTH0_CLIENT_ID. We will define all these variables later, when running the applications.
The last thing we need to do is to change the Home component to show a button called "Buy" to authenticated users. This button, when clicked, will make a POST HTTP request to the secured /products endpoint that we created before. This request will include the access_token retrieved from Auth0 in the Authorization header. This is the new code of the Home.js file:
import React, {Component} from 'react';
import Panel from '../DOMElements/Panel/Panel';
import {withRouter} from 'react-router-dom';
import axios from "axios";
import './Home.css';
import Button from "../DOMElements/Button/Button";
import * as Auth0 from 'auth0-web';

class Home extends Component {
  constructor(props) {
    super(props);
    this.state = {products: []};
    this.componentDidMount = loadProducts.bind(this);
  }

  render() {
    const rows = this.state.products;
    const authenticated = Auth0.isAuthenticated();
    return (
      <Panel>
        <h2>List of Products</h2>
        <div className='productsList'>
          {rows.map((product, index) => {
            const productImage = `http://localhost:${process.env.REACT_APP_REST_PORT}/images/${product.image}`;
            const imageStyle = {
              maxWidth: '200px'
            };
            return (
              <div className='product' key={index}>
                <img style={imageStyle} src={productImage} alt="The nice product illustration" />
                <p>{product.title} - $ {product.price}</p>
                {authenticated && <Button text='Buy' onClick={buy} />}
              </div>
            );
          })}
        </div>
      </Panel>
    );
  }
}

export default withRouter(props => <Home {...props} />);

async function loadProducts() {
  const config = {
    url: `http://localhost:${process.env.REACT_APP_REST_PORT}/products`,
  };

  const products = (await axios(config)).data;
  this.setState({ products });
}

async function buy() {
  const config = {
    method: 'POST',
    url: `http://localhost:${process.env.REACT_APP_REST_PORT}/buy`,
    headers: {
      'Authorization': `Bearer ${localStorage.getItem(Auth0.ACCESS_TOKEN)}`
    }
  };

  const response = (await axios(config)).data;
  alert(response.message);
}
That's it. Our front-end application is ready to run. Let's issue the following commands to bootstrap the two applications (home and kids portals) and test the Single Sign-On integration:
# set env variables and bootstrap Home Products portal
export PORT=3000
export REACT_APP_AUTH0_DOMAIN=bk-samples.auth0.com
export REACT_APP_AUTH0_AUDIENCE=https://homeproducts.ourcompany.com
export REACT_APP_AUTH0_CLIENT_ID=sOmEcLiEnTID
export REACT_APP_AUTH0_REDIRECT_URI=http://app.local:3000/callback
export REACT_APP_AUTH0_SIGN_OUT_REDIRECT_URI=http://app.local:3000/
export REACT_APP_REST_PORT=3001

npm start &

# set env variables and bootstrap Kids Products portal
export PORT=4000
export REACT_APP_AUTH0_DOMAIN=bk-samples.auth0.com
export REACT_APP_AUTH0_AUDIENCE=https://kidsproducts.ourcompany.com
export REACT_APP_AUTH0_CLIENT_ID=sOmEoThErClIeNtID
export REACT_APP_AUTH0_REDIRECT_URI=http://app.local:4000/callback
export REACT_APP_AUTH0_SIGN_OUT_REDIRECT_URI=http://app.local:4000/
export REACT_APP_REST_PORT=4001

npm start &
Note that we have to set both
REACT_APP_AUTH0_CLIENT_IDabove to the client IDs that we have copied in the last section.
After starting both portals, let's open the first one (http://app.local:3000/) on a web browser and click on the "Sign In with Auth0" button. After authenticating and being redirected as an authenticated user to our portal, let's open the second portal (http://app.local:4000/). Voilà! We are automatically authenticated in the second portal as well.
“Implementing Single Sign-On on B2C applications with Auth0 is really easy!”
Tweet This
Using Single Sign-On and Social Connections
To use Single Sign-On and Social Connections ("Login with Google", "Login with Facebook", and so on) we need to configure them with official keys fetched from the providers. For example, to enable users to sign in with Google, we can follow the steps shown in this documentation.
Note that, Auth0 accounts come preconfigured with Auth0 development keys for Google Social Connection. If we don't configure it with our own keys (following the documentation mentioned), the Single Sign-On process won't work. Auth0 does not allow silent authentication with its own development keys.
Conclusion
As we can see, adding Single Sign-On capabilities to our applications is pretty easy with Auth0. No matter what technologies we are using in the backend and in the front-end, Auth0 got us covered.
After configuring this feature, we make the process so smooth that we can even start thinking about adding small steps to progressively enrich our users' profiles. What do you think? Can the process be easier than that?
About the author

Bruno Krebs
R&D Content Architect (Auth0 Alumni)