
TL;DR: In this article, we’ll get a quick refresher on NgRx basics and get up to speed on more features of the NgRx ecosystem. We'll then walk through how to add Auth0 authentication to an NgRx app. You can access the finished code for this tutorial on the ngrx-auth GitHub repository.
Adding Authentication with Auth0
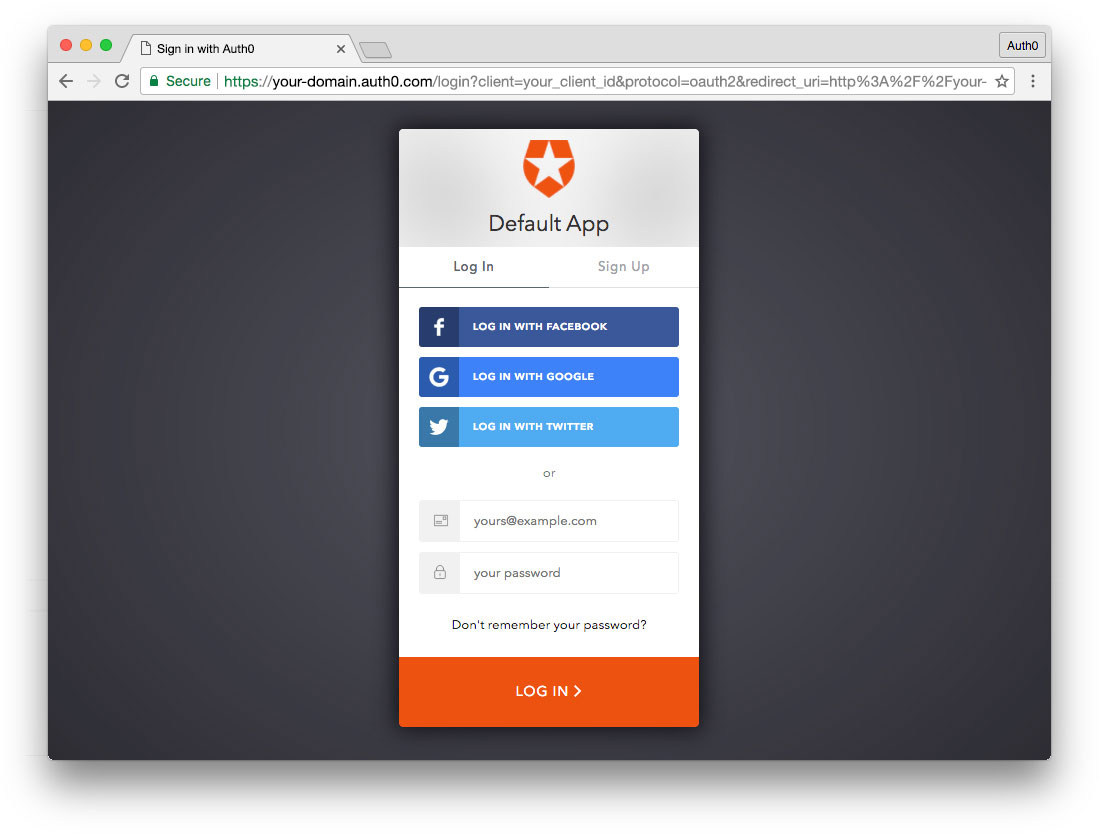
In this section, we're going to set up Auth0, create an Angular authentication service, and wire everything up using NgRx Effects. The Auth0 log in screen will look like this:
Sign Up for Auth0
The first thing you'll need to do is sign up for an Auth0 account to manage authentication. You can sign up for a free Auth0 account here. (If you've already got an account, great! You can simply log in to Auth0.)
Set Up an Application
Once you've got your account, you can set up an application to use with our NgRx project. We'll only be setting up a Single Page Application (SPA) in Auth0 since we're using the Google Books API as our back end.
Here's how to set that up:
- Go to your Auth0 Applications and click the "Create Application" button.
- Name your new app, select "Single Page Web Applications," and click the "Create" button. You can skip the Quick Start and click on Settings.
- In the Settings for your new Auth0 app, add
http://localhost:4200/callbackto the Allowed Callback URLs. (We're usinglocalhost:4200since it's the default port for the Angular CLIservecommand.) - Add
http://localhost:4200to both Allowed Web Origins and Allowed Logout URLs. - Click the "Save Changes" button.
- Copy down your Domain and Client ID. We'll use them in just a minute.
- If you'd like, you can set up some social connections. You can then enable them for your app in the Application options under the Connections tab. The example shown in the screenshot above utilizes username/password database, Facebook, Google, and Twitter.
Note: Under the OAuth tab of Advanced Settings (at the bottom of the Settings section) you should see that the JsonWebToken Signature Algorithm is set to
RS256. This is the default for new applications. If it is set toHS256, please change it toRS256. You can read more about RS256 vs. HS256 JWT signing algorithms here.
Install auth0.js and Set Up Environment Config
Now that we've got the SPA authentication set up, we need to add the JavaScript SDK that allows us to easily interact with Auth0. We can install that with this command:
npm install auth0-js --save
We'll use this library in just a bit when we create our authentication service. We can now set up our environment variables using the client ID and domain we copied from our Auth0 application settings. The Angular CLI makes this very easy. Open up /src/environments/environment.ts and add the auth section below:
// src/environments/environment.ts
export const environment = {
  production: false,
  auth: {
    clientID: 'YOUR-AUTH0-CLIENT-ID',
    domain: 'YOUR-AUTH0-DOMAIN', // e.g., you.auth0.com
    redirect: 'http://localhost:4200/callback',
    scope: 'openid profile email'
  }
};
Note: if we were using an API identifier, we would add an
audienceproperty to this configuration. We're leaving it out here since we're using the Google Books API.
This file stores the authentication configuration variables so we can re-use them throughout our application by importing them. Be sure to update the YOUR-AUTH0-CLIENT-ID and YOUR-AUTH0-DOMAIN to your own information from your Auth0 application settings.
Add Authentication Service
We're now ready to set up the main engine of authentication for our application: the authentication service. The authentication service is where we’ll handle interaction with the Auth0 library. It will be responsible for anything related to getting the token from Auth0, but won’t dispatch any actions to the store.
To generate the service using the CLI, run:
ng g service auth/services/auth --no-spec
We first need to import the auth0-js library, our environment configuration, and bindNodeCallback from RxJS:
// src/app/auth/services/auth.service.ts
// Add these to the imports
import { Injectable } from '@angular/core';
import { bindNodeCallback } from 'rxjs';
import * as auth0 from 'auth0-js';
import { environment } from '../../../environments/environment';

// ...below code remains the same
Next, we need to set some properties on our class. We'll need an Auth0 configuration property, a flag we'll use for setting a property in local storage to persist our authentication on refresh, and some URLs for navigation. We'll also add a property for setting the token expiration date. Add these before the class constructor:
// src/app/auth/services/auth.service.ts
// ...previous code remains the same

// Add properties above the constructor
private _Auth0 = new auth0.WebAuth({
    clientID: environment.auth.clientID,
    domain: environment.auth.domain,
    responseType: 'token',
    redirectUri: environment.auth.redirect,
    scope: environment.auth.scope
  });
// Track whether or not to renew token
private _authFlag = 'isLoggedIn';
// Authentication navigation
private _onAuthSuccessUrl = '/home';
private _onAuthFailureUrl = '/login';
private _logoutUrl = 'http://localhost:4200';
private _expiresAt: number;

// ...below code remains the same
We're setting the different URLs here in the service in case multiple places in the application need to perform this redirection.
Next, we'll need to set up two observables using the Auth0 library that we can access with our NgRx effects later on. The Auth0 library uses Node-style callback functions. Luckily, we can use bindNodeCallback, built into RxJS, to transform these functions into observables. Add these lines after the properties we just created but before the constructor:
// src/app/auth/services/auth.service.ts
// ...above code unchanged
// Create observable of Auth0 parseHash method to gather auth results
parseHash$ = bindNodeCallback(this._Auth0.parseHash.bind(this._Auth0));

// Create observable of Auth0 checkSession method to
// verify authorization server session and renew tokens
checkSession$ = bindNodeCallback(this._Auth0.checkSession.bind(this._Auth0));
// ...below code unchanged
The first observable we've created is using Auth0's parseHash function, which will parse the access token from the window hash fragment. We'll use this during LoginComplete. The second observable is for the checkSession function, which we'll use when the app refreshes during CheckLogin. You'll notice that both of these have a little bit of JavaScript magic tacked onto them. We need to bind the Auth0 object to both of these functions for them to work correctly. This is pretty common when using bindNodeCallback.
We'll now need functions to handle logging in, setting the authentication, and logging out, as well as a public getters for our URLs and whether we're logged in. We'll use a flag in local storage to track that the application is authenticated. That way we can check for that flag and call checkSession to update our state.
Update the service like so after the constructor:
// src/app/auth/services/auth.service.ts
// ...previous code remains the same
// Add these functions after the constructor
get authSuccessUrl(): string {
  return this._onAuthSuccessUrl;
}

get authFailureUrl(): string {
  return this._onAuthFailureUrl;
}

get authenticated(): boolean {
  return JSON.parse(localStorage.getItem(this._authFlag));
}

resetAuthFlag() {
  localStorage.removeItem(this._authFlag);
}

login() {
  this._Auth0.authorize();
}

setAuth(authResult) {
  this._expiresAt = authResult.expiresIn * 1000 + Date.now();
  // Set flag in local storage stating this app is logged in
  localStorage.setItem(this._authFlag, JSON.stringify(true));
}

logout() {
  // Set authentication status flag in local storage to false
  localStorage.setItem(this._authFlag, JSON.stringify(false));
  // This does a refresh and redirects back to homepage
  // Make sure you have the logout URL in your Auth0
  // Dashboard Application settings in Allowed Logout URLs
  this._Auth0.logout({
    returnTo: this._logoutUrl,
    clientID: environment.auth.clientID
  });
}

// ...below code remains the same
Auth0 is handling logging in and logging out, and we have a setAuth method to set the local storage flag. If we needed to return the token for use in the store, we'd do that here. We're going to handle much of the flow of our authentication using effects. Before we set those up, though, we're going to need some components.
Build Out the Authentication UI
We've got the authentication service set up, but now we need to build out our UI. We'll need components for logging in, a callback component for Auth0 to redirect to, a logout dialog, and a logout button on our user home screen. We'll also need to add some routing, and we'll want to add a route guard to lock down our home route and redirect users back to the login route if no token is found.
Log In Components
We need to create a login route with a simple form that contains a button to log in. This button will dispatch the Login action. We'll set up an effect in just a bit that will call the authentication service.
First, create a container component called login-page:
ng g c auth/components/login-page -m auth --no-spec
Replace the boilerplate with this:
// src/app/auth/components/login-page.component.ts
import { Component, OnInit } from '@angular/core';
import { Store } from '@ngrx/store';
import * as fromStore from '@app/state';
import { Login } from '@app/auth/actions/auth.actions';

@Component({
  selector: 'abl-login-page',
  template: `
    <abl-login-form
      (submitted)="onLogin($event)">
    </abl-login-form>
  `,
  styles: [
    `
      :host {
        display: flex;
        flex-direction: column;
        align-items: center;
        padding: 128px 12px 12px 12px;
      }

      abl-login-form {
        width: 100%;
        min-width: 250px;
        max-width: 300px;
      }
    `
  ]
})
export class LoginPageComponent implements OnInit {
  constructor(private store: Store<fromStore.State>) {}

  ngOnInit() {}

  onLogin() {
    this.store.dispatch(new Login());
  }
}
Notice that we'll be passing the onLogin function into our form, which will dispatch our action.
If you see an error when running the application right now, it's because we haven't yet created abl-login-form referenced in the template. Let's create that component now:
ng g c auth/components/login-form -m auth --no-spec
Now replace the contents of that file with this:
// src/app/auth/components/login-form.component.ts
import { Component, OnInit, EventEmitter, Output } from '@angular/core';
import { FormGroup } from '@angular/forms';

@Component({
  selector: 'abl-login-form',
  template: `
    <mat-card>
      <mat-card-title>
        Welcome
      </mat-card-title>
      <mat-card-content>
        <form [formGroup]="loginForm" (ngSubmit)="submit()">
          <div class="loginButtons">
            <button type="submit" mat-button>Log In</button>
          </div>
        </form>
      </mat-card-content>
    </mat-card>
  `,
  styles: [
    `
      :host {
        width: 100%;
      }

      form {
        display: flex;
        flex-direction: column;
        width: 100%;
      }

      mat-card-title,
      mat-card-content {
        display: flex;
        justify-content: center;
      }

      mat-form-field {
        width: 100%;
        margin-bottom: 8px;
      }

      .loginButtons {
        display: flex;
        flex-direction: row;
        justify-content: flex-end;
      }
    `
  ]
})
export class LoginFormComponent implements OnInit {
  @Output() submitted = new EventEmitter<any>();

  loginForm = new FormGroup({});

  ngOnInit() {}

  submit() {
    this.submitted.emit();
  }
}
Finally, in our AuthRoutingModule (auth/auth-routing.module.ts), import LoginPageComponent at the top of the file and add a new route to the routes array, above the home route:
// src/app/auth/auth-routing.module.ts
// Add to imports at the top
import { LoginPageComponent } from '@app/auth/components/login-page.component';
// ...
// Add to routes array above the home route
{ path: 'login', component: LoginPageComponent },
// ...below code remains the same
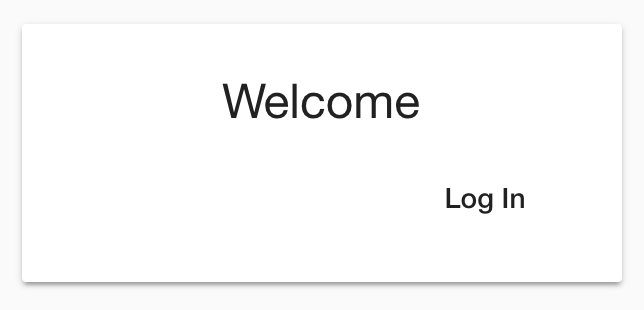
We should be able to build the application, navigate to http://localhost:4200/login, and see the new form.
Of course, nothing will happen when we click the button, because we don't have any effects listening for the Login action yet. Let's finish building our UI and then come back to that.
Add Callback Component
Once Auth0 successfully logs us in, it will redirect back to our application callback route, which we'll add in this section. First, let's build the CallbackComponent and have it dispatch a LoginComplete action.
First, generate the component:
ng g c auth/components/callback -m auth --nospec
This component will just display a loading screen and dispatch LoginComplete using ngOnInit. Replace the contents of the generated file with this code:
// src/app/auth/components/callback.component.ts
import { Component, OnInit } from '@angular/core';
import { Store } from '@ngrx/store';
import * as fromStore from '@app/state';
import { LoginComplete } from '@app/auth/actions/auth.actions';

@Component({
  selector: 'abl-callback',
  template: `
    <p>
      Loading...
    </p>
  `,
  styles: []
})
export class CallbackComponent implements OnInit {
  constructor(private store: Store<fromStore.State>) {}

  ngOnInit() {
    this.store.dispatch(new LoginComplete());
  }
}
And, finally, import the new CallbackComponent into auth/auth-routing.module.ts and add a new route after the login route:
// src/app/auth/auth-routing.module.ts
// Add to imports at the top
import { CallbackComponent } from '@app/auth/components/callback.component';
// ...
// Add to routes array after the login route
{ path: 'callback', component: CallbackComponent },
// ...below code remains the same
Once again, if we build the application and run it, we're now able to navigate to http://localhost:4200/callback and see the new component (which, once again, will do nothing yet).
Log Out Buttons
For logging out of the application, we'll need a confirmation dialog, as well as log out buttons on the user home and books page components.
Let's add the buttons first. In auth/user-home.component.ts, add a button in the template under the book collection button. The completed template will look like this:
// src/app/auth/components/user-home.component.ts
<div>
    <h3>Welcome Home!</h3>
       <button mat-button raised color="accent" (click)="goToBooks()">See my book collection</button>
    <button mat-button raised color="accent" (click)="logout()">Log Out</button>
</div>
Then, add these imports at the top of the file:
// src/app/auth/components/user-home.component.ts
import { Store } from '@ngrx/store';
import * as fromStore from '@app/state';
import { Logout } from '@app/auth/actions/auth.actions';
// ...below code remains the same
This will let us add the store to our constructor:
// src/app/auth/components/user-home.component.ts
// ...above code unchanged
constructor(private store: Store<fromStore.State>, private router: Router) {}
// ...below code unchanged
With that done, we can now add a logout function to the component that will dispatch the Logout action:
// src/app/auth/components/user-home.component.ts
// add anywhere after the constructor
logout() {
    this.store.dispatch(new Logout());
  }
// ...other code unchanged
We can do something similar with the BooksPageComponent so the user can log out from their book collection. In books/components/books-page-component.ts, add the following block underneath the mat-card-title tag:
// src/app/books/components/books-page.component.ts
<mat-card-actions>
  <button mat-button raised color="accent" (click)="logout()">Logout</button>
</mat-card-actions>
Here's what the completed template for the BooksPageComponent will look like:
// src/app/books/components/books-page.component.ts
<mat-card>
  <mat-card-title>My Collection</mat-card-title>
  <mat-card-actions>
    <button mat-button raised color="accent" (click)="logout()">Logout</button>
  </mat-card-actions>
</mat-card>
<abl-book-preview-list [books]="books$ | async"></abl-book-preview-list>
Next, add the Logout action to the imports:
// src/app/books/components/books-page.component.ts
import { Logout } from '@app/auth/actions/auth.actions';
// ...remaining code unchanged
And, finally, add a logout function to dispatch the Logout action from the button:
// src/app/books/components/books-page.component.ts
// add anywhere after the constructor
logout() {
  this.store.dispatch(new Logout());
}
// ...remaining code unchanged
And that's it! Now we just need to add the logout confirmation.
Log Out Prompt
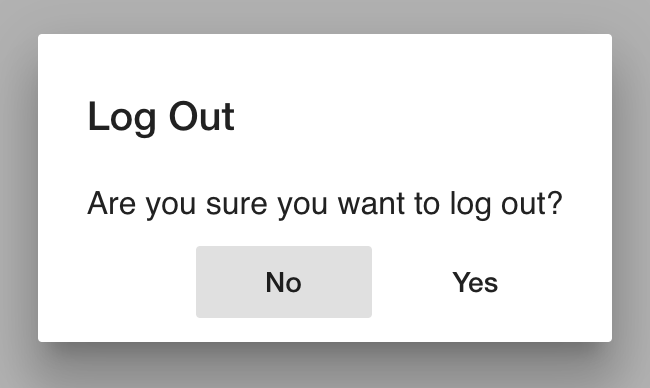
We're going to use Angular Material to pop up a confirmation when the user clicks log out.
To generate the component, run:
ng g c auth/components/logout-prompt -m auth --no-spec
Then, replace the contents of the file with this:
// src/app/auth/components/logout-prompt.component.ts
import { Component } from '@angular/core';
import { MatDialogRef } from '@angular/material';

@Component({
  selector: 'abl-logout-prompt',
  template: `
    <h3 mat-dialog-title>Log Out</h3>

    <mat-dialog-content>
      Are you sure you want to log out?
    </mat-dialog-content>

    <mat-dialog-actions>
      <button mat-button (click)="cancel()">
        No
      </button>
      <button mat-button (click)="confirm()">
        Yes
      </button>
    </mat-dialog-actions>
  `,
  styles: [
    `
      :host {
        display: block;
        width: 100%;
        max-width: 300px;
      }

      mat-dialog-actions {
        display: flex;
        justify-content: flex-end;
      }

      [mat-button] {
        padding: 0;
      }
    `
  ]
})
export class LogoutPromptComponent {
  constructor(private ref: MatDialogRef<LogoutPromptComponent>) {}

  cancel() {
    this.ref.close(false);
  }

  confirm() {
    this.ref.close(true);
  }
}
You're probably seeing an error in the console at this point. That's because there is one thing that the CLI didn't do for us. We need to create an entryComponents array in the NgModule decorator of AuthModule and add the LogoutPromptComponent to it.
Entry components are components loaded imperatively through code instead of declaratively through a template. The LogoutPromptComponent doesn't get called through a template, it gets loaded by Angular Material when the user clicks the Log Out button.
Just add this after the declarations array in auth/auth.module.ts (don't forget a comma!):
// src/app/auth/auth.module.ts
// ... imports

@NgModule({
  imports: [ ... ],
  declarations: [ ... ],
  entryComponents: [LogoutPromptComponent]
})

// ...other code unchanged
We'll create an effect for Logout to open the prompt, listen for the response, and dispatch either LogoutCancelled or LogoutConfirmed when we wire everything up in just a bit.
Add Route Guard
We've added our login and logout components, but we want to ensure that a visitor to our site can only access the home route if they are logged in. Otherwise, we want to redirect them to our new login route. We can accomplish this with a CanActivate route guard.
To create the route guard, run this command:
ng g guard auth/services/auth --no-spec
This will create /auth/services/auth.guard.ts. Replace the contents of this file with the following:
// src/app/auth/services/auth.guard.ts
import { Injectable } from '@angular/core';
import { CanActivate, Router } from '@angular/router';
import { of } from 'rxjs';
import { mergeMap, map, take } from 'rxjs/operators';
import { Store } from '@ngrx/store';

import { AuthService } from '@app/auth/services/auth.service';
import * as fromStore from '@app/state';

@Injectable({
  providedIn: 'root'
})
export class AuthGuard implements CanActivate {
  constructor(
    private authService: AuthService,
    private store: Store<fromStore.State>,
    private router: Router
  ) {}

  canActivate() {
    return this.checkStoreAuthentication().pipe(
      mergeMap(storeAuth => {
        if (storeAuth) {
          return of(true);
        }

        return this.checkApiAuthentication();
      }),
      map(storeOrApiAuth => {
        if (!storeOrApiAuth) {
          this.router.navigate(['/login']);
          return false;
        }

        return true;
      })
    );
  }

  checkStoreAuthentication() {
    return this.store.select(fromStore.selectIsLoggedIn).pipe(take(1));
  }

  checkApiAuthentication() {
    return of(this.authService.authenticated);
  }
}
Let's break down what's happening here. When this guard runs, we first call the function checkStoreAuthentication, which uses the selector we created to get isLoggedIn from our global state. We also call checkApiAuthentication, which checks if the state matches authenticated on our AuthService (which we get from local storage). If these are true, we return true and allow the route to load. Otherwise, we redirect the user to the login route.
We'll want to add this route guard to both the home route (in our AuthModule) and our books route (specifically, the forChild in BooksModule).
In auth/auth-routing.module.ts, add the guard to the imports:
// src/app/auth/auth-routing.module.ts
import { AuthGuard } from './services/auth.guard';
Then, modify the home route to the following:
{
    path: 'home',
    component: UserHomeComponent,
    canActivate: [AuthGuard]
}
Similarly, import the AuthGuard at the top of books/books.module.ts:
// src/app/books/books.module.ts
import { AuthGuard } from '@app/auth/services/auth.guard';
// ...all other code unchanged
Then, modify RouterModule.forChild to this:
// src/app/books/books.module.ts
// ...above code unchanged
RouterModule.forChild([
  { path: '', component: BooksPageComponent, canActivate: [AuthGuard] },
]),
// ...below code unchanged
We did it! If we run ng serve, we should no longer be able to access the home or books route. Instead, we should be redirected to login.
Note that we haven't added any sort of 404 redirecting here. To do that, we'd want to add a wildcard route and a
PageNotFoundComponentto redirect to. You can read more about wildcard routes in the Angular docs.
Checking Authentication on App Load
We just have one last UI piece to add. We need to dispatch the CheckLogin action when the application loads so that we can retrieve the token from the server if the user is logged in. The best place to do this is in the AppComponent (src/app/app.component.ts).
Our steps in AppComponent will be identical to what we did in the CallbackComponent — the only difference is the action we will dispatch. In app.component.ts, we'll first need to add OnInit to our @angular/core imports. We'll also need to import the Store from ngrx, our app State, and our CheckLogin action. Our complete imports in the file will look like this:
// src/app/app.component.ts
import { Component, OnInit } from '@angular/core';
import { Store } from '@ngrx/store';
import * as fromStore from '@app/state';
import { CheckLogin } from '@app/auth/actions/auth.actions';
// below code unchnaged.
Then, in the component class, implement the OnInit interface and create the OnInit function:
// src/app/app.component.ts
// ...imports and template defined above (unchaged)
// The class definition should look like this:
export class AppComponent implements OnInit {
  constructor() { }

  ngOnInit() {}
}
Lastly, we'll need to inject the Store into the constructor and dispatch the CheckLogin action inside of ngOnInit. The finished class definition should look like this:
// src/app/app.component.ts
// ...imports and template defined above (unchaged)
// The class definition should look like this:
export class AppComponent implements OnInit {
  constructor(private store: Store<fromStore.State>) { }

  ngOnInit() {
    this.store.dispatch(new CheckLogin());
  }
}
You won't notice anything different when you run the application, because we'll be calling checkSession on the AuthService from an effect. So, let's put it all together by creating effects that will control logging in and out in addition to checking for persisted authentication.
Controlling the Authentication Flow with Effects
Alright, friends, we're ready for the final piece of this puzzle. We're going to add effects to handle our authentication flow. Effects allow us to initiate side effects as a result of actions dispatched in a central and predictable location. This way, if we ever need to universally change the behavior of an action's side effect, we can do so quickly without repeating ourselves.
Add Imports and Update Constructor
All of our effects will go in auth/effects/auth.effects.ts, and the CLI has already connected them to our application through the AuthModule. All we need to do is fill in our effects.
Before we do that, be sure that all of these imports are at the top of the file:
// auth/effects/auth.effects.ts
import { Injectable } from '@angular/core';
import { Router } from '@angular/router';
import { Actions, Effect } from '@ngrx/effects';
import { tap, exhaustMap, map, catchError } from 'rxjs/operators';
import { MatDialog } from '@angular/material';
import * as fromAuth from '../actions/auth.actions';
import { LogoutPromptComponent } from '@app/auth/components/logout-prompt.component';
import { AuthService } from '@app/auth/services/auth.service';
import { of, empty } from 'rxjs';
If you commented out the boilerplate loadFoos$ effect that the CLI generated earlier, go ahead and delete it:
// src/app/auth/auth.effects.ts
// ...
// Delete both of these lines.
// @Effect()
// loadFoos$ = this.actions$.pipe(ofType(AuthActionTypes.LoadAuths));
// ...
Next, update the constructor so that we're injecting the router, the AuthService, and MatDialog (from Angular Material):
// auth/effects/auth.effects.ts
constructor(
    private actions$: Actions,
    private authService: AuthService,
    private router: Router,
    private dialogService: MatDialog
  ) { }
We'll use all of these in our effects.
Add Log In Effects
Let's add our log in effects first.
Add the following to our class before the constructor (this is a convention with effects):
// auth/effects/auth.effects.ts
// Add before the constructor
@Effect({ dispatch: false })
login$ = this.actions$.ofType<fromAuth.Login>(fromAuth.AuthActionTypes.Login).pipe(
  tap(() => {
    return this.authService.login();
  })
);

@Effect()
loginComplete$ = this.actions$
  .ofType<fromAuth.Login>(fromAuth.AuthActionTypes.LoginComplete)
  .pipe(
    exhaustMap(() => {
      return this.authService.parseHash$().pipe(
        map((authResult: any) => {
          if (authResult && authResult.accessToken) {
            this.authService.setAuth(authResult);
            window.location.hash = '';
            return new fromAuth.LoginSuccess();
          }
        }),
        catchError(error => of(new fromAuth.LoginFailure(error)))
      );
    })
  );

@Effect({ dispatch: false })
loginRedirect$ = this.actions$
  .ofType<fromAuth.LoginSuccess>(fromAuth.AuthActionTypes.LoginSuccess)
  .pipe(
    tap(() => {
      this.router.navigate([this.authService.authSuccessUrl]);
    })
  );

@Effect({ dispatch: false })
loginErrorRedirect$ = this.actions$
  .ofType<fromAuth.LoginFailure>(fromAuth.AuthActionTypes.LoginFailure)
  .pipe(
    map(action => action.payload),
    tap((err: any) => {
      if (err.error_description) {
        console.error(`Error: ${err.error_description}`);
      } else {
        console.error(`Error: ${JSON.stringify(err)}`);
      }
      this.router.navigate([this.authService.authFailureUrl]);
    })
  );
// ...below code unchanged
Let's break down what's happening in each of these.
- Login — calls the
loginmethod onAuthService, which triggers Auth0. Does not dispatch an action. - Login Complete — calls
parseHash$onAuthService, which returns an observable of the parsed hash. If there's a token, this effect callssetAuth, clears the hash from the window location, and then dispatches theLoginSuccessaction. If there's not a token, the effect dispatches theLoginFailureaction with the error as its payload. - Login Redirect — This effect happens when
LoginSuccessis dispatched. It redirects the user tohome(using theauthSuccessUrlproperty on theAuthService) and does not dispatch a new action. - Login Error Redirect — This effect happens when
LoginFailureis dispatched. It redirects the user back tologin(using theauthFailureUrlproperty on theAuthService) and does not dispatch a new action.
If we run the application with ng serve, we should now be able to successfully log in to our application using Auth0! We'll see a login screen similar to this:
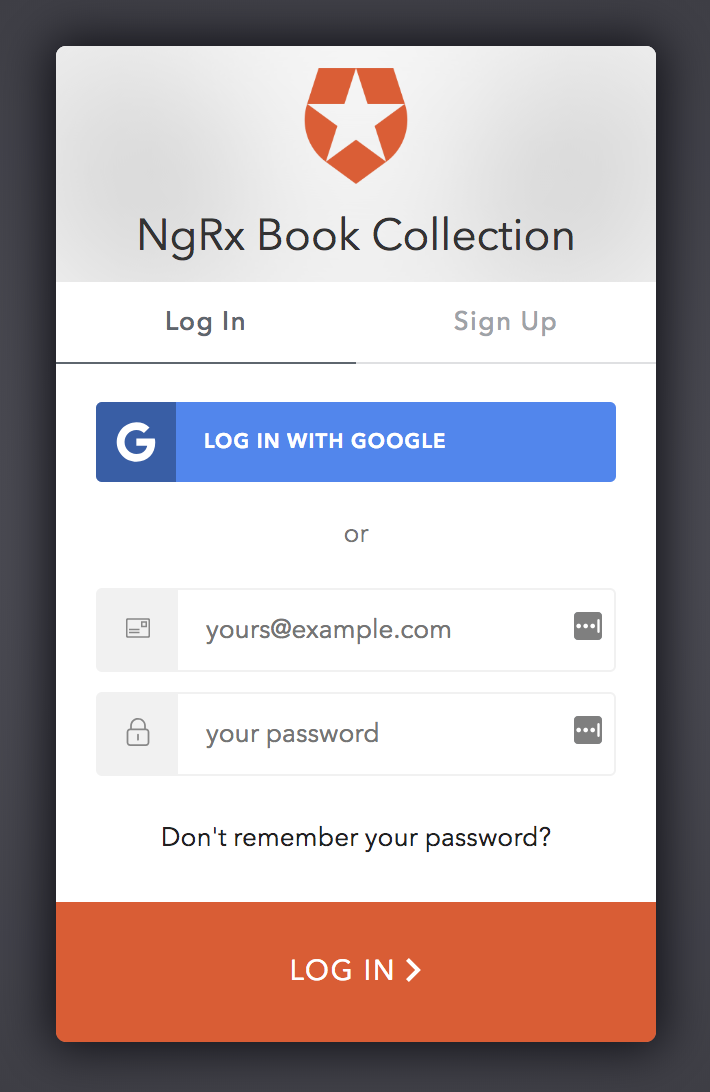
On your first login, you'll need to click the "Sign Up" button to create a user. Alternatively, you can manually create users from the Auth0 dashboard. In either case, you'll receive an email asking you to verify your email address. Your first login to the application will also trigger an "Authorize App" screen requesting permission. Just click the green button to continue. Once you're all signed up and logged in, you'll be redirected to the home route, where you can click the button to view the book collection. Of course, we can't log out yet, so let's add the effects for that now.
Note: You can also use Google to sign up and log in. However, be aware that you will need to generate a Google Client ID and Client Secret in order to complete this tutorial.
Persist Authentication on Refresh
This is great, but if we refresh the application, we'll lose the access token. Because we already set up the flag in local storage and the route guard is checking for that flag, our application will appear to be logged in on refresh. However, we haven't called checkSession yet through Auth0, so we'll no longer have the token. Let's add the effect for CheckLogin to fix that.
// auth/effects/auth.effects.ts
// add below login effects:
// ...above code unchanged
@Effect()
checkLogin$ = this.actions$.ofType<fromAuth.CheckLogin>(fromAuth.AuthActionTypes.CheckLogin).pipe(
  exhaustMap(() => {
    if (this.authService.authenticated) {
      return this.authService.checkSession$({}).pipe(
        map((authResult: any) => {
          if (authResult && authResult.accessToken) {
            this.authService.setAuth(authResult);
            return new fromAuth.LoginSuccess();
          }
        }),
        catchError(error => {
          this.authService.resetAuthFlag();
          return of(new fromAuth.LoginFailure({ error }));
        })
      );
    } else {
      return empty();
    }
  })
);
// ...below code unchanged
When CheckLogin is dispatched, this effect will call checkSession on the AuthService, which, like parseHash, returns token data. If there's token data, the effect will call the setAuth method and dispatch the LoginSuccess action. If there's an error, the effect will dispatch LoginFailure. Those actions will work the same way as with logging in - navigating to home on success or login on failure.
Let's check if it works. Run ng serve, navigate to http://localhost:4200, and log in. Once we're back at the home route, refresh the page with our browser. We should not be redirected back to the login route, but remain on the home route. Awesome!
Here's a challenge for you: how might you update this feature so that you can persist the previous route, too? That way a user would land back on books when refreshing.
Add Log Out Effects
Let's add our final two effects to finish off this application.
// auth/effects/auth.effects.ts
// Add under the login effects
// ...above code unchanged
@Effect()
logoutConfirmation$ = this.actions$.ofType<fromAuth.Logout>(fromAuth.AuthActionTypes.Logout).pipe(
    exhaustMap(() =>
      this.dialogService
        .open(LogoutPromptComponent)
        .afterClosed()
        .pipe(
          map(confirmed => {
            if (confirmed) {
              return new fromAuth.LogoutConfirmed();
            } else {
              return new fromAuth.LogoutCancelled();
            }
          })
        )
    )
);

@Effect({ dispatch: false })
logout$ = this.actions$
    .ofType<fromAuth.LogoutConfirmed>(fromAuth.AuthActionTypes.LogoutConfirmed)
    .pipe(tap(() => this.authService.logout()));
// ...below code unchanged
Here's what's happening here:
- Logout Confirmation — This effect will display the log out confirmation dialog. It will then process the result by dispatching either the
LogoutConfirmedorLogoutCancelledactions. - Logout — This effect happens after
LogoutConfirmedhas been dispatched. It will call thelogoutfunction on theAuthService, which tells Auth0 to log us out and redirect back home. This effect does not dispatch another action.
Running ng serve again should now allow us to log in, view the book collection, and log out. Be sure to check if we can also log out from the home route!
Remember, you can access the finished code for this tutorial here.
Review and Where to Go From Here
Congratulations on making it to the end! We've covered a lot of ground here, like:
- Using @ngrx/schematics to quickly generate new code
- Defining global authentication state
- Using selectors to access authentication state
- Setting up Auth0 to handle your authentication
- Using effects to handle the login and logout flows
- Persisting authentication on refresh
We've spent time laying the foundation of a basic authentication flow in a very simple application. However, we could easily apply this same setup to a much more complex application. Scaling the setup is very minor, and adding new pieces of state, new actions, or new side effects would be relatively easy. We've got all the building blocks in place.
For example, let's say you needed to add the access token to outgoing HTTP requests as an Authorization header. You've already got what you need to get this working quickly. You could add tokenData to the authentication state and create a selector for it. Then, add the token data as the payload of the LoginSuccess action and update the effects that use it. Once that's all set up, you could then create an HTTP interceptor to select the token data from the store and add it to outgoing requests.
Now that the foundation of the authentication flow has been built, the sky is the limit for how you want to extend it. My goal for this tutorial was to keep it simple while helping you understand some new, fairly complex concepts. I hope you can take this knowledge and use it in the real world — let me know how it goes!
About the author

Sam Julien
Director of Developer Relations