If you want Auth0 to manage the certificates for your , you only need to add a CNAME record on the domain. Auth0 validates the record and then generates the certificate on Auth0 servers. These certificates are renewed automatically every three months. You can configure this easily, and you won’t have to maintain the certificates yourself. To set up your custom domain using Auth0-managed certificates, you must provide your domain name to Auth0 and verify that you own that domain. Once verified, you will need to configure your Auth0 features to start using your custom domain.Documentation Index
Fetch the complete documentation index at: https://auth0.com/llms.txt
Use this file to discover all available pages before exploring further.
Provide your domain name to Auth0
- Go to Dashboard > Settings > Custom Domains or Dashboard > Branding > Custom Domains. Enter your custom domain in the provided box, and select Auth0-managed certificates.
- Click Add Domain.You can only add one domain per tenant even though the Add Domain button still appears after you add a domain.
Verify ownership
Before you can use the domain with Auth0, you’ll need to verify that you own it.-
Go to Dashboard > Branding > Custom Domains and add the CNAME verification record listed in the Dashboard to your domain’s DNS record.
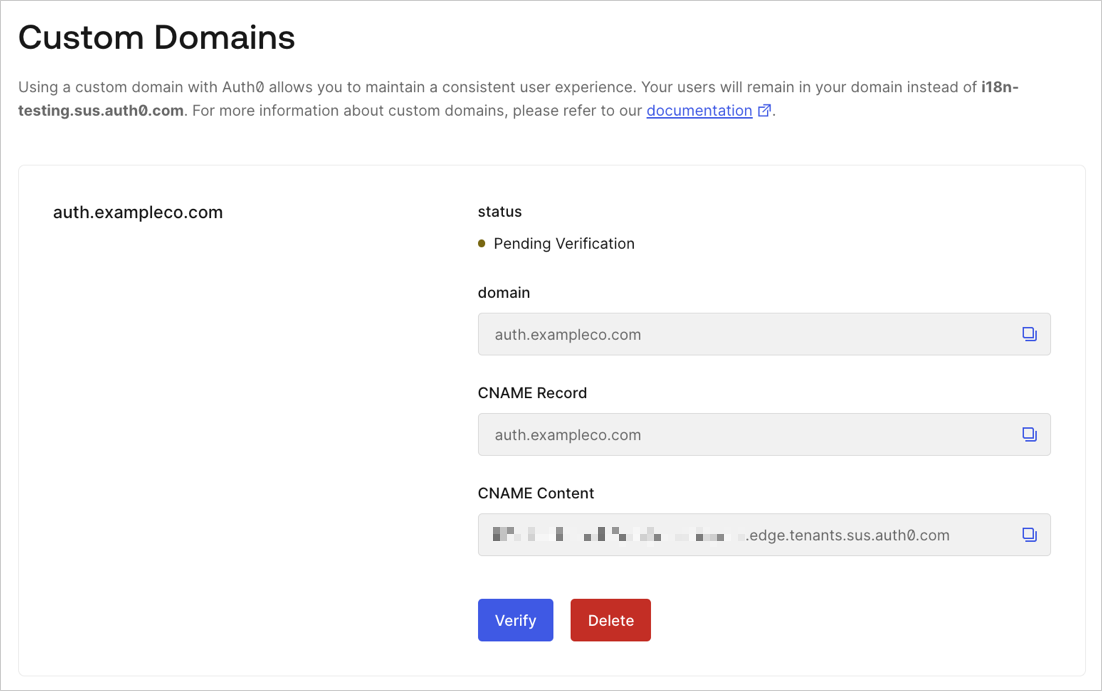
- Click Verify to proceed. It may take a few minutes before Auth0 is able to verify your CNAME record, depending on your DNS settings. If Auth0 was able to verify your domain name, you’ll see a confirmation window. This means the verification process is complete. Within 1 to 2 minutes, your custom domain should be ready to use.
Add CNAME verification record to DNS record
Once added, the CNAME record must be present at all times to avoid issues during certificate renewal.Auth0 recommends turning off CNAME flattening unless it’s strictly necessary because CNAME flattening for Auth0 managed certificates is an unsupported configuration and may cause the custom domain to break without notice.
- Log in to your domain management service.
-
Create a new record.
Parameter Value Record type CNAME Name Enter your custom domain name (such as login.northwind.com). Time to Live (TTL) Use default value. Value Paste in the CNAME value provided by the Auth0 Dashboard for your domain’s DNS record. - When done, save your record.
If your DNS provider enables a proxy on the CNAME record by default, it will leave the custom domain in a pending state indefinitely. You may need to check your DNS provider settings and disable the proxy.