- Go to Dashboard > Applications > Applications and either create a new application or click the name of an application to update.
- Go to the Addons tab and enable the SAML2 Web App toggle.
-
On the Settings tab, set the Application Callback URL. Note that Webex has an option to automatically provision new users. You will need to send that information as claims (
lastname, and so on). If you integrate Auth0 with Cisco Spark services, read Single Sign-On with Cisco Spark Services.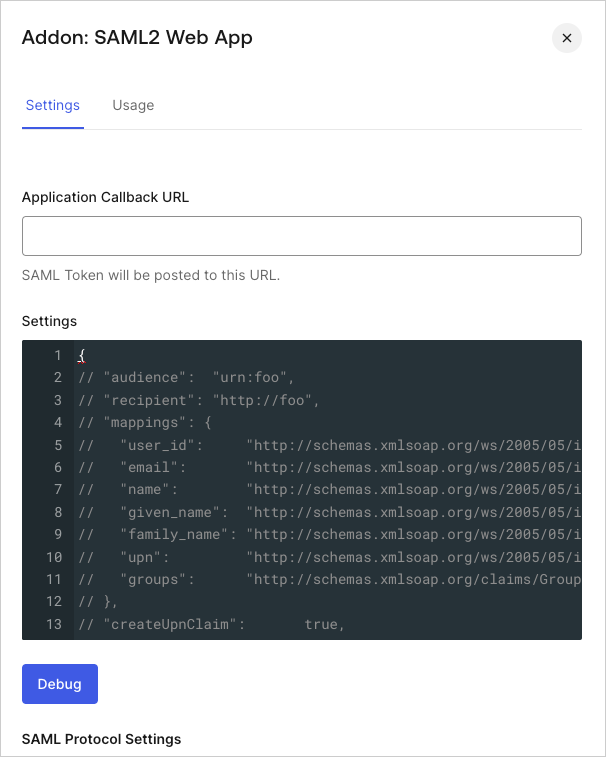
-
Paste the following code into the Settings text box and click Debug.
- Scroll to the bottom of the tab and click Enable.
-
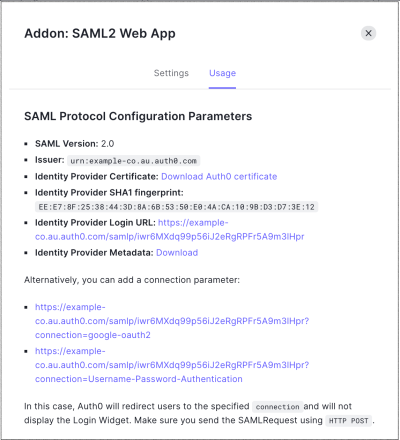
On the Usage tab, locate Identity Provider Metadata, and click Download to download the metadata file. You’ll need this when you configure Auth0 as the identity provider in Cisco WebEx.
Configure Cisco WebEx as SAML Service Provider
Learn how to configure Auth0 as an identity provider using the SAML2 Web App addon for Cisco WebEx.
Use the following configuration for Cisco WebEx.