Documentation Index
Fetch the complete documentation index at: https://auth0.com/llms.txt
Use this file to discover all available pages before exploring further.
New to Auth0? Learn how Auth0 works and read about implementing API authentication and authorization using the OAuth 2.0 framework.
Get Started
Auth0 allows you to add authorization to any kind of application. This guide demonstrates how to integrate Auth0 with any new or existing ASP.NET OWIN Web API application using theMicrosoft.Owin.Security.Jwt package. Each Auth0 API uses the API Identifier, which your application needs to validate the access token.
This example demonstrates:
- How to check for a JSON Web Token (JWT) in the
Authorizationheader of an incoming HTTP request. - How to check if the token is valid, using the JSON Web Key Set (JWKS) for your Auth0 account. To learn more about validating Access Tokens, see Validate Access Tokens.
Create an API
In the APIs section of the Auth0 dashboard, click Create API. Provide a name and an identifier for your API, for example, 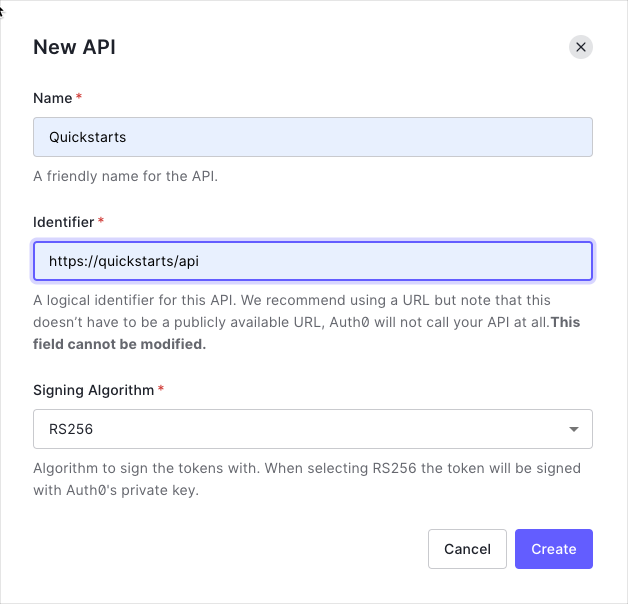 By default, your API uses RS256 as the algorithm for signing tokens. Since RS256 uses a private/public keypair, it verifies the tokens against the public key for your Auth0 account. The public key is in the JSON Web Key Set (JWKS) format, and can be accessed here.
https://quickstarts/api. You will use the identifier as an audience later, when you are configuring the Access Token verification. Leave the Signing Algorithm as RS256.Define permissions
Permissions let you define how resources can be accessed on behalf of the user with a given access token. For example, you might choose to grant read access to the 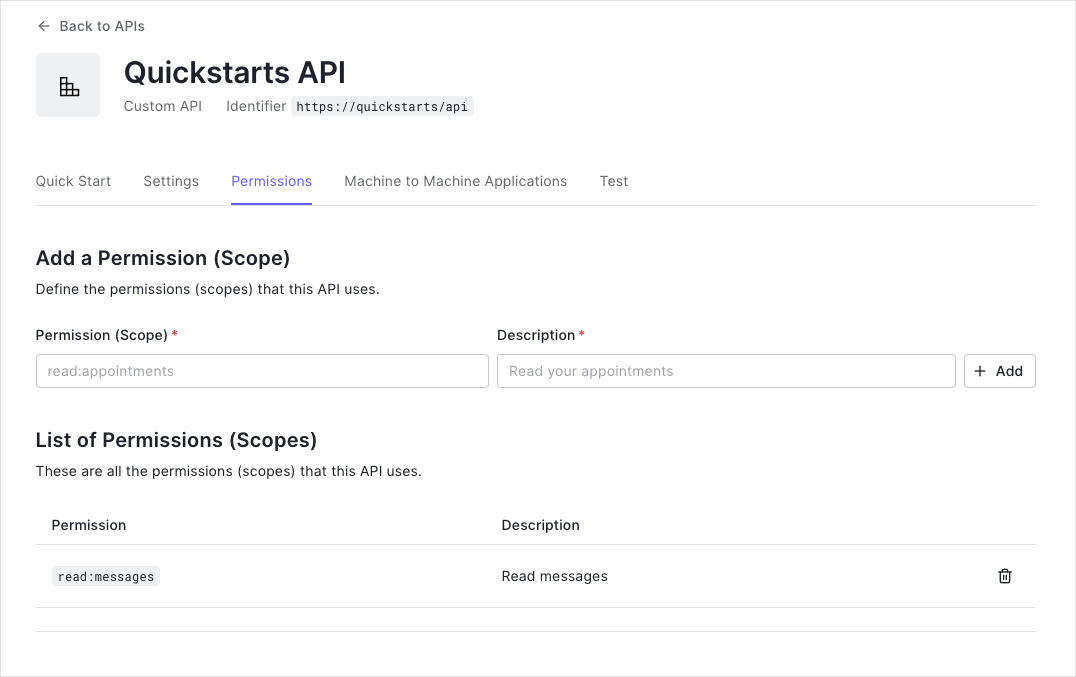
messages resource if users have the manager access level, and a write access to that resource if they have the administrator access level.You can define allowed permissions in the Permissions view of the Auth0 Dashboard’s APIs section.This example uses the
read:messages scope.Configure the sample project
The sample code has an
appsettings section in Web.config which configures it to use the correct Auth0 Domain and API Identifier for your API. If you download the code from this page it will be automatically filled. If you use the example from Github, you will need to fill it yourself.web.config
Install dependencies
To use Auth0 Access Tokens with ASP.NET you will use the OWIN JWT Middleware which is available in the
Microsoft.Owin.Security.Jwt NuGet package.Verify the token signature
As the OWIN JWT middleware doesn’t use Open ID Connect Discovery by default, you will need to provide a custom The
IssuerSigningKeyResolver. To do this, add the following to the Support/OpenIdConnectSigningKeyResolver.cs file:Such a custom resolver was previously published as part of the
Auth0.OpenIdConnectSigningKeyResolver package through Nuget. As this package is not available anymore, you will need to provide this yourself.OpenIdConnectSigningKeyResolver.cs
OpenIdConnectSigningKeyResolver will automatically download the JSON Web Key Set used to sign the RS256 tokens from the OpenID Connect Configuration endpoint (at /.well-known/openid-configuration). You can then use it subsequently to resolve the Issuer Signing Key, as will be demonstrated in the JWT registration code below.Configure JWT authentication
Go to the
Configuration method of your Startup class and add a call to UseJwtBearerAuthentication passing in the configured JwtBearerAuthenticationOptions.The JwtBearerAuthenticationOptions needs to specify your Auth0 API Identifier in the ValidAudience property, and the full path to your Auth0 domain as the ValidIssuer. You will need to configure the IssuerSigningKeyResolver to use the instance of OpenIdConnectSigningKeyResolver to resolve the signing key:Startup.cs
Validate scopes
The JWT middleware above verifies that the Access Token included in the request is valid; however, it doesn’t yet include any mechanism for checking that the token has the sufficient scope to access the requested resources.Create a class called
ScopeAuthorizeAttribute which inherits from System.Web.Http.AuthorizeAttribute. This Authorization Attribute will check that the scope claim issued by your Auth0 tenant is present, and if so it will ensure that the scope claim contains the requested scope.ScopeAuthorizeAttribute.cs
Protect API endpoints
The routes shown below are available for the following requests:
GET /api/public: available for non-authenticated requestsGET /api/private: available for authenticated requests containing an access token with no additional scopesGET /api/private-scoped: available for authenticated requests containing an access token with theread:messagesscope granted
[Authorize] attribute to secure an endpoint. To ensure that a scope is present in order to call a particular API endpoint, decorate the action with the ScopeAuthorize attribute and pass the name of the required scope in the scope parameter.ApiController.cs
CheckpointNow that you have configured your application, run your application and verify that:
GET /api/publicis available for non-authenticated requests.GET /api/privateis available for authenticated requests.GET /api/private-scopedis available for authenticated requests containing an access token with theread:messagesscope.
Additional Resources
Sample Application
Complete sample application for this quickstart
Identity Providers
Configure other identity providers
Multifactor Authentication
Enable multifactor authentication
Attack Protection
Learn about attack protection
Rules
Extend Auth0 with custom logic
Community Forum
Get help from the Auth0 community