Prerequisites
- A Flutter application configured for web. If you don’t have one, follow the Flutter installation guide and run
flutter create --platforms=web my_app. - Familiarity with the Flutter CLI.
Get Your Application Keys
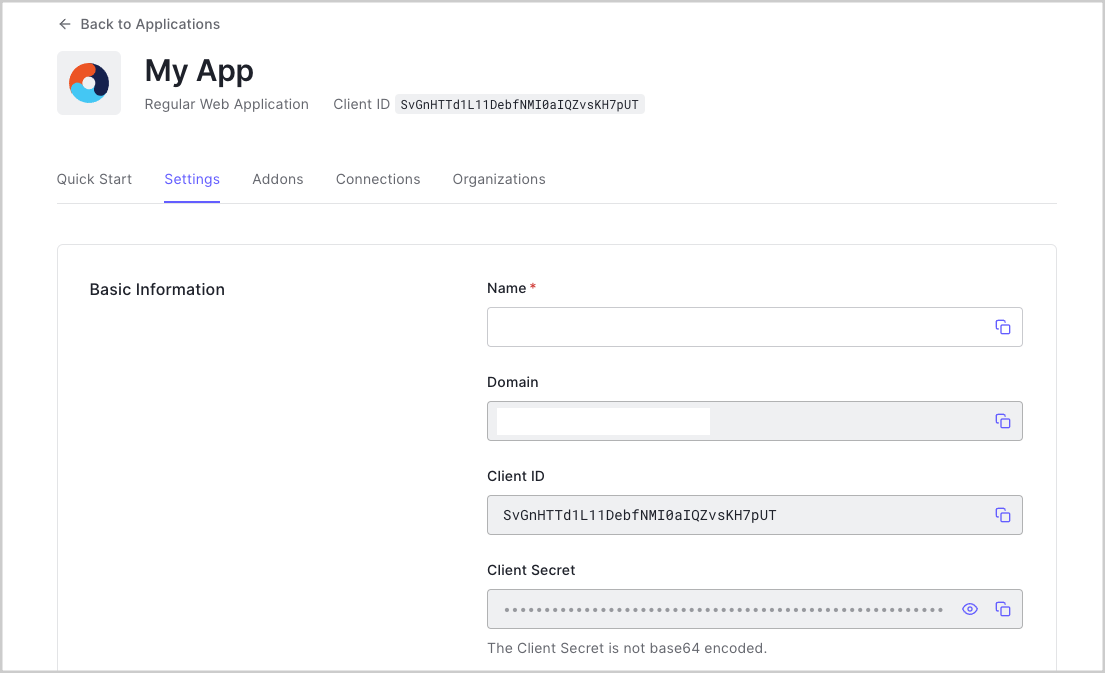
When you signed up for Auth0, a new application was created for you, or you can create a new one. You will need some details about that application to communicate with Auth0. You can get these details from the Application Settings section in the Auth0 dashboard.
- Domain
- Client ID
When using the Default App with a Single Page Application, ensure the Application Type is set to
SPA and Token Endpoint Authentication Method is set to None.Configure Callback URLs
A callback URL is the URL in your application where Auth0 redirects the user after they have authenticated. The callback URL for your app must be added to the Allowed Callback URLs field in your Application Settings. If this field is not set, users will be unable to log in to the application and will get an error.For Flutter Web running locally, set the Allowed Callback URLs to:Configure Logout URLs
A logout URL is the URL in your application that Auth0 can return to after the user has been logged out of the authorization server. This is specified in thereturnToUrl parameter. The logout URL for your app must be added to the Allowed Logout URLs field in your Application Settings. If this field is not set, users will be unable to log out from the application and will get an error.For Flutter Web running locally, set the Allowed Logout URLs to:Configure Allowed Web Origins
To enable silent authentication and session refresh, add your application URL to the Allowed Web Origins field in your Application Settings. Without this, your users will be logged out when they refresh the page or return to the application.For Flutter Web running locally, set the Allowed Web Origins to:Universal Login is the easiest way to set up authentication in your application. We recommend using it for the best experience, security, and the fullest array of features.
Handle the Authentication Callback
When your application loads, callonLoad() to handle the redirect callback from Auth0 and restore the user’s session. This should be done in your widget’s initState() method:Trigger Login
Redirect users to the Auth0 Universal Login page usingloginWithRedirect(). You must specify the redirectUrl parameter:Checkpoint
Add a login button to your app that callsloginWithRedirect(). Verify that:- You are redirected to Auth0’s Universal Login page
- After logging in, you are redirected back to your application
- The
onLoad()method returnsCredentialscontaining the user’s tokens
To log users out, call the
logout() method which redirects users to the Auth0 logout endpoint to clear their session:Checkpoint
Add a logout button to your app that callslogout(). Verify that:- You are redirected to the Auth0 logout endpoint
- You are redirected back to your application
- You are no longer logged in (credentials are cleared)
The Display the user profile in your UI:
Credentials object returned by onLoad() contains a user property with the user’s profile information, decoded from the ID token.Access user information like this:Checkpoint
Verify that after logging in:- You can access the user’s profile information via
credentials.user - Properties like
name,email, andpictureUrlare available
Troubleshooting
Troubleshooting
“Callback URL mismatch” error
Ensure the callback URL in your code matches exactly what’s configured in the Auth0 Dashboard. For local development, usehttp://localhost:3000.Authentication not working
Verify that the Auth0 SPA JS script is loaded in yourweb/index.html:User logged out after page refresh
Ensure you’ve addedhttp://localhost:3000 to Allowed Web Origins in your Auth0 Application Settings. This enables silent authentication to restore sessions.Session not persisting
By default, credentials are stored in memory. For persistent sessions across page reloads, consider passingcacheLocation: CacheLocation.localStorage when creating the Auth0Web instance:Next Steps
Excellent work! If you made it this far, you should now have login, logout, and user profile information running in your application.This concludes our quickstart tutorial, but there is so much more to explore. To learn more about what you can do with Auth0, check out:- Auth0 Dashboard - Learn how to configure and manage your Auth0 tenant and applications
- Auth0 Flutter SDK - Explore the SDK used in this tutorial more fully
- Auth0 Marketplace - Discover integrations you can enable to extend Auth0’s functionality

