

By David Patrick
This tutorial demonstrates how to add user login to a Ruby on Rails application.We recommend that you log in to follow this quickstart with examples configured for your account.New to Auth? Learn How Auth0 works, how it integrates with Regular Web Applications and which protocol it uses.
Configure Auth0
Get Your Application Keys
When you signed up for Auth0, a new application was created for you, or you could have created a new one. You will need some details about that application to communicate with Auth0. You can get these details from the Application Settings section in the Auth0 dashboard.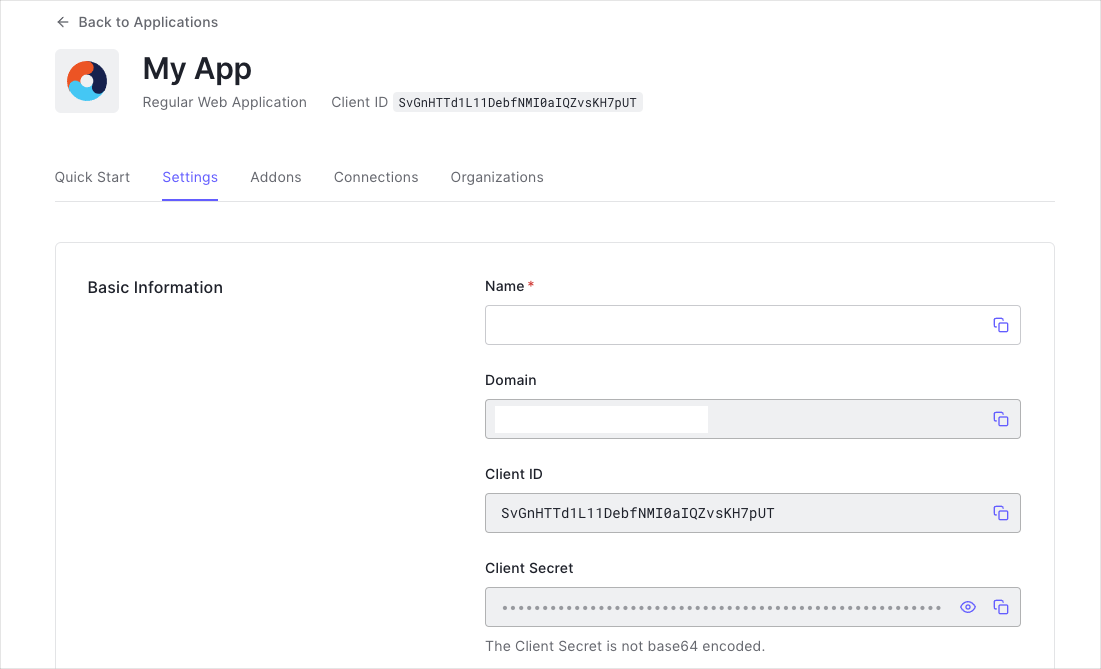
- Domain
- Client ID
- Client Secret
If you download the sample from the top of this page, these details are filled out for you.
Configure Callback URLs
A callback URL is a URL in your application where Auth0 redirects the user after they have authenticated. The callback URL for your app must be added to the Allowed Callback URLs field in your Application Settings. If this field is not set, users will be unable to log in to the application and will get an error.If you are following along with the sample project you downloaded from the top of this page, the callback URL you need to add to the Allowed Callback URLs field is
http://localhost:3000/auth/auth0/callback.Configure Logout URLs
A logout URL is a URL in your application that Auth0 can return to after the user has been logged out of the authorization server. This is specified in thereturnTo query parameter. The logout URL for your app must be added to the Allowed Logout URLs field in your Application Settings. If this field is not set, users will be unable to log out from the application and will get an error.
If you are following along with the sample project you downloaded from the top of this page, the logout URL you need to add to the Allowed Logout URLs field is
http://localhost:3000.Install the Auth0 SDK
Install Dependencies
This tutorial usesomniauth-auth0, a custom OmniAuth strategy, to handle the authentication flow. Add the following dependencies to your Gemfile:
bundle install:
Initialize Auth0 Configuration
Create an Auth0 config file./config/auth0.yml
Create the following initializer file ./config/initializers/auth0.rb and configure the OmniAuth middleware.
Add an Auth0 controller
Create an Auth0 controller for handling the authentication callback. Run the commandrails generate controller auth0 callback failure logout --skip-assets --skip-helper --skip-routes --skip-template-engine.
Inside of the callback method assign the hash of user information, returned as request.env['omniauth.auth'], to the active session.
./config/routes.rb file:
Add Login to Your Application
A user can now log into your application by visiting the/auth/auth0 endpoint.
Add Logout to Your Application
Now that you can log in to your Rails application, you need a way to log out. Revisit the Auth0Controller you created earlier, and finish up the logout method added there. You will need to clear out your session and then redirect the user to the Auth0 logout endpoint. To clear out all the objects stored within the session, call thereset_session method within the auth0_controller/logout method. Learn more about reset_session here. Add the following code to ./app/controllers/auth0_controller.rb:
The final destination URL (the
returnTo value) needs to be in the list of Allowed Logout URLs . See the logout documentation for more./auth/logout endpoint.
Show User Profile Information
To display the user’s profile, your application should provide a protected route. You can use a controllerconcern to control access to routes. Create the following file ./app/controllers/concerns/secured.rb
session[:userinfo].